How to set up iCloud Mail on your Mac
79.0K views
7 min read
Nowadays, cloud services have become indispensable and, let’s face it, there’s no turning back. If you have any Apple device, it means you’re likely to almost inadvertently be using iCloud — Apple’s solution for you to securely store, sync, and access all of your digital stuff online. Right from the get-go, iCloud comes with 5 GB of free storage for your photos, videos, documents, music, and apps.
If you’re not sure how to access iCloud on Mac, it’s quite easy:
- Go to System Settings ➙ Apple ID ➙ select iCloud.
- Sign in with your Apple ID and password.
- Check all of the items you would like to sync across your devices.
Once you give iCloud a try you’d agree that the most incredible thing about it is how quietly it does its thing most of the time — you’ll simply find that documents you created on one device are available on another, calendar and contact details sync seamlessly, and so on. An additional perk of having iCloud is that it comes with a free email account. So if you have an Apple ID, you by default have an iCloud email account.
How to create iCloud email
As it’s usually the case with Apple, iCloud email settings are quite straightforward and you can setup iCloud email on Mac in a few quick steps. After that your free email iCloud will be all ready to go. Let’s dive deeper.
How to setup iCloud mail on Mac?
Since iCloud is built into every Apple device, there’s no need for you to download anything extra, and you can start the process right away. Here’s what you need to do:
- Go to System Settings (select from the Apple menu) ➙ Apple ID ➙ iCloud.
- If you haven’t enabled your iCloud account yet, sign in with your Apple ID and password.
- Once in the iCloud panel, make sure the boxes next to Mail, Contacts, Calendars, Reminders, Notes, and Safari options are turned on.

There are a few slight variations in how you setup iCloud email on Mac with OS X versions earlier than 10.7.5. After you click on iCloud in System Preferences, typically you’ll have to follow these steps:
- Check the box next to Mail & Notes.
- If this is your first time using iCloud Mail & Notes you will be asked to create an iCloud email account. Just follow the instructions to create your unique iCloud email address.
- Once you’re done creating your iCloud email, exit iCloud by clicking the Back button near the top left of the pane
Read more about how to use iCloud
How to change iCloud email address on Mac?
Sometimes, for whatever reason, you might be looking to change iCloud email on Mac — but it’s important to know that it will essentially mean changing the associated Apple ID. This will impact your logins to iTunes, App Store, FaceTime, Contacts, and other iCloud data. And though it’s technically possible to have a separate iCloud account and Apple ID, it’s not recommended, as it can cause a variety of unexpected issues.
So as long as you’re ready to face the consequences of changing your Apple ID, the process of how to change iCloud email is not difficult. All it will take is logging out of the existing Apple account and then logging into the new one.
Here’s how to change iCloud email on Mac:
- Go to System Settings ➙ Apple ID ➙ iCloud.
- Click Sign Out to log out of the existing Apple ID (note the message that logging out of the existing Apple ID may impact iCloud Drive documents and data).
- When iCloud finishes logging out of the Apple ID, the iCloud preference pane will change to a simple login screen.
- Now you can provide data for the new iCloud registration and log in (as long as the email you provide while setting up a new Apple ID does not end in @mac.com or @me.com, iCloud will ask you to set up a new iCloud email address).
How to check iCloud email?
Once you’ve set up your iCloud email, the easiest way to check it is going to icloud.com in your web browser:
- Simply enter your Apple ID and password as your iCloud email login.
- Click the mail icon.
- Check your iCloud mail.
But you could also use iCloud email via the Apple Mail app you can find in the Applications folder — whichever way proves more convenient for you.

How to add iCloud mail account to the Apple Mail app?
Apple Mail comes as the default email client with every Mac using OS X 10.0 or later. It’s a basic, straightforward app and using it to add your iCloud email to the list of accounts is pretty intuitive. Here’s what you do:
- Go to System Settings ➙ Internet Accounts.
- You’ll see the current list of mailboxes, messages, and other internet accounts in use on your Mac.
- Click Add Account at the bottom of the list and select iCloud from the email accounts.
- Enter your Apple ID and password used at your iCloud email sign in and your iCloud email account will be added to the active list.

If you’re looking for more functionality and features on your email, you might want to look broader than your standard Apple Mail app — towards more advanced ones out there.
More robust and full-featured Mail app alternatives
When you’re looking to upgrade from the regular Apple Mail app, take a look at Spark Mail. The app has all the features you could ever want in an email client. From smart inbox organization to email scheduling and snoozing. On top of that, Spark allows you to connect multiple accounts into one inbox and write emails quicker and better using AI email assistant.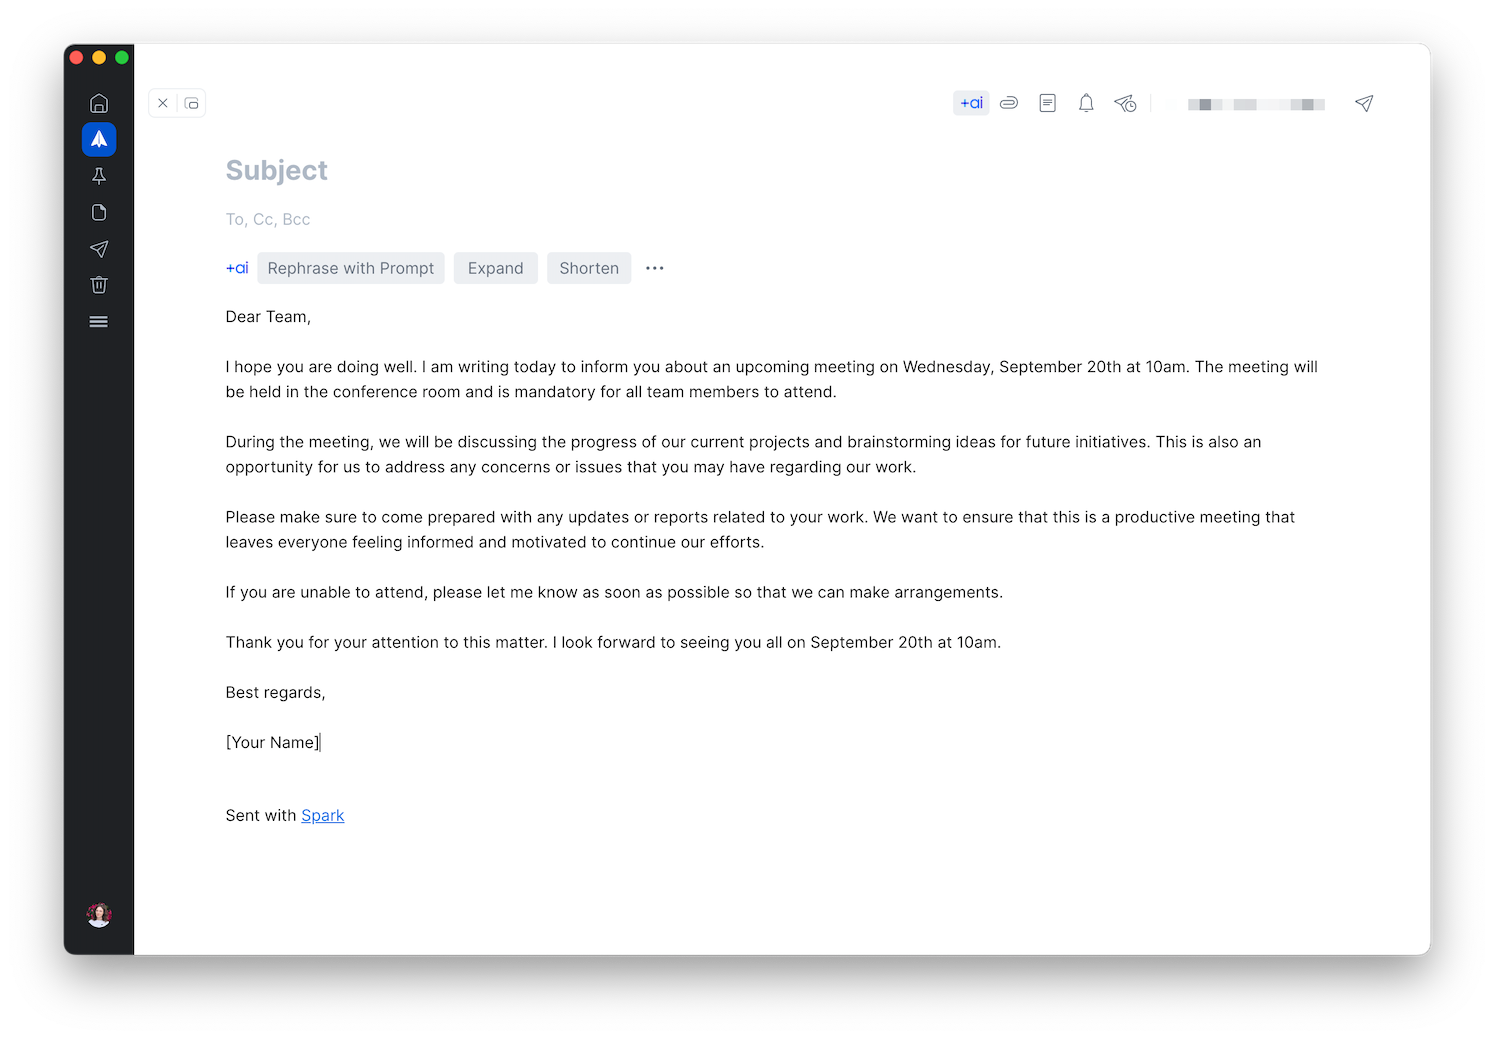
If security is your number one email concern, a great option to try out is Canary Mail. Its end-to-end encryption ensures that what is sent is read only by you and the person you are communicating with — not anyone else, not even your provider.
Additionally, this email app offers powerful productivity features: natural language search that instantly understands what you are looking for, smart filters that quickly sort through emails and attachments, personalized email templates and read notifications. Canary Mail integrates seamlessly with your favorite apps for files, events, and tasks, and works with your existing accounts on Gmail, Yahoo, Exchange, and iCloud.

Advanced email clients often boast built-in algorithms that learn to tell which emails are likely to be important or unimportant to you, and further highlight or select them for bulk cleaning. Amazingly enough you can set up some of this functionality for your iCloud mail too — by simply fine-tuning inbox rules.
How to set up iCloud mail rules for emails?
Establishing your own rules for email will save you time and help keep your inbox organized and uncluttered. Without so much as touching your mail, you’ll see messages automatically moved to designated folders, marked a certain way, or forwarded to other people.
After you log in to your iCloud account and click Mail, set up rules by simply following these steps:
- Click the Show Actions menu button on the bottom left ➙ Rules.
- On the top right of the panel, click Add a Rule.
- Now begin putting a rule together, starting at the top of a pop-up window with the If message. From a dropdown box choose conditions like “if a message is from a certain sender has a particular word in the subject.”
- In the text box below provide information necessary for the application to fulfill your condition: for example, if you choose “has subject containing,” you would enter a word or phrase in the box that the program needs to look for.
- Now move to the Then section in the same pop-up window. First select what you want to do with the message, choosing from the options in the first dropdown box. Then complete the process by picking from the next dropdown menu.
- Click Done when finished and you’ll see your rule displayed in the list. Follow the same process to set more rules for your inbox.
Now that you’ve setup iCloud email on your Mac, you’ve got yourself a free email accessible from anywhere through icloud.com or email apps that make emailing a breeze. However, sometimes iCloud and the default Mac Mail app might seem to be lacking in power. That’s when you should switch to more professional counterparts.
Best of all, you can find both Spark Mail and Canary Mail mentioned above on a free trial through Setapp, a platform of more than 240 useful Mac, iOS, and web apps and tools that could improve nearly every interaction you have with your Apple devices. Time to rule your inbox, no?