Here’s how to reduce photo file size on iPhone
With almost 19 gigabytes of storage taken up by my Photos app, there’s no better person to talk about overstuffed storage and reducing photo sizes. While we might cherish every single image, including the thousands of our pets, the truth is that those lifelike, ultra-high-resolution images can eat up the space you need for other apps to function properly and your operating system entirely.
If you don’t necessarily want to offload those memories onto another device or hard drive, a solid temporary solution is to adjust the file size of photos on your iPhone. I’ll walk you through a couple of easy ways to reduce photo sizes right on your iPhone, using both built-in tools and third-party apps.
Why reduce photo size on iPhone?
Photos taken on your iPhone are naturally large, thanks to the increasing quality of the cameras and the high-tech image processing technology Apple uses. With so many million megapixels used and features like Live Photo and other advanced formats to take advantage of, these file sizes only get bigger.
A typical image usually takes up around 2-8 MB, while those taken in Apple ProRAW can go as high as 25 MB and even 75 MB. That’s why taking the time to decrease photo sizes on iPhone can be really helpful if you’re running into issues.
Here are a couple of reasons why you might want to reduce the size of your images:
- Free up storage space. Any sort of media will likely be the culprit for the biggest storage space hogs, particularly if they are extremely high in resolution.
- Make it easier to share photos via email or messaging apps. Email and messaging apps usually have a cap on how large a file can be to send. You’ll have a much easier time sending photos with smaller file sizes without having to use special tools.
- Faster uploads to cloud storage. Small photo file sizes mean you don’t have to consume as much bandwidth or deal with as much data when you need to upload photos to the cloud. Whether you have to deal with a large number of photos or a slow internet connection, you’ll make life easier even with these obstacles in place.
Although you might be here because you want to learn how to compress a photo on iPhone and avoid having to store them elsewhere, it’s still a smart idea to clear out photos you don’t need anymore once in a while. Personally, I frequently neglected this task because of how tedious it is, up until I found CleanMy®Phone.
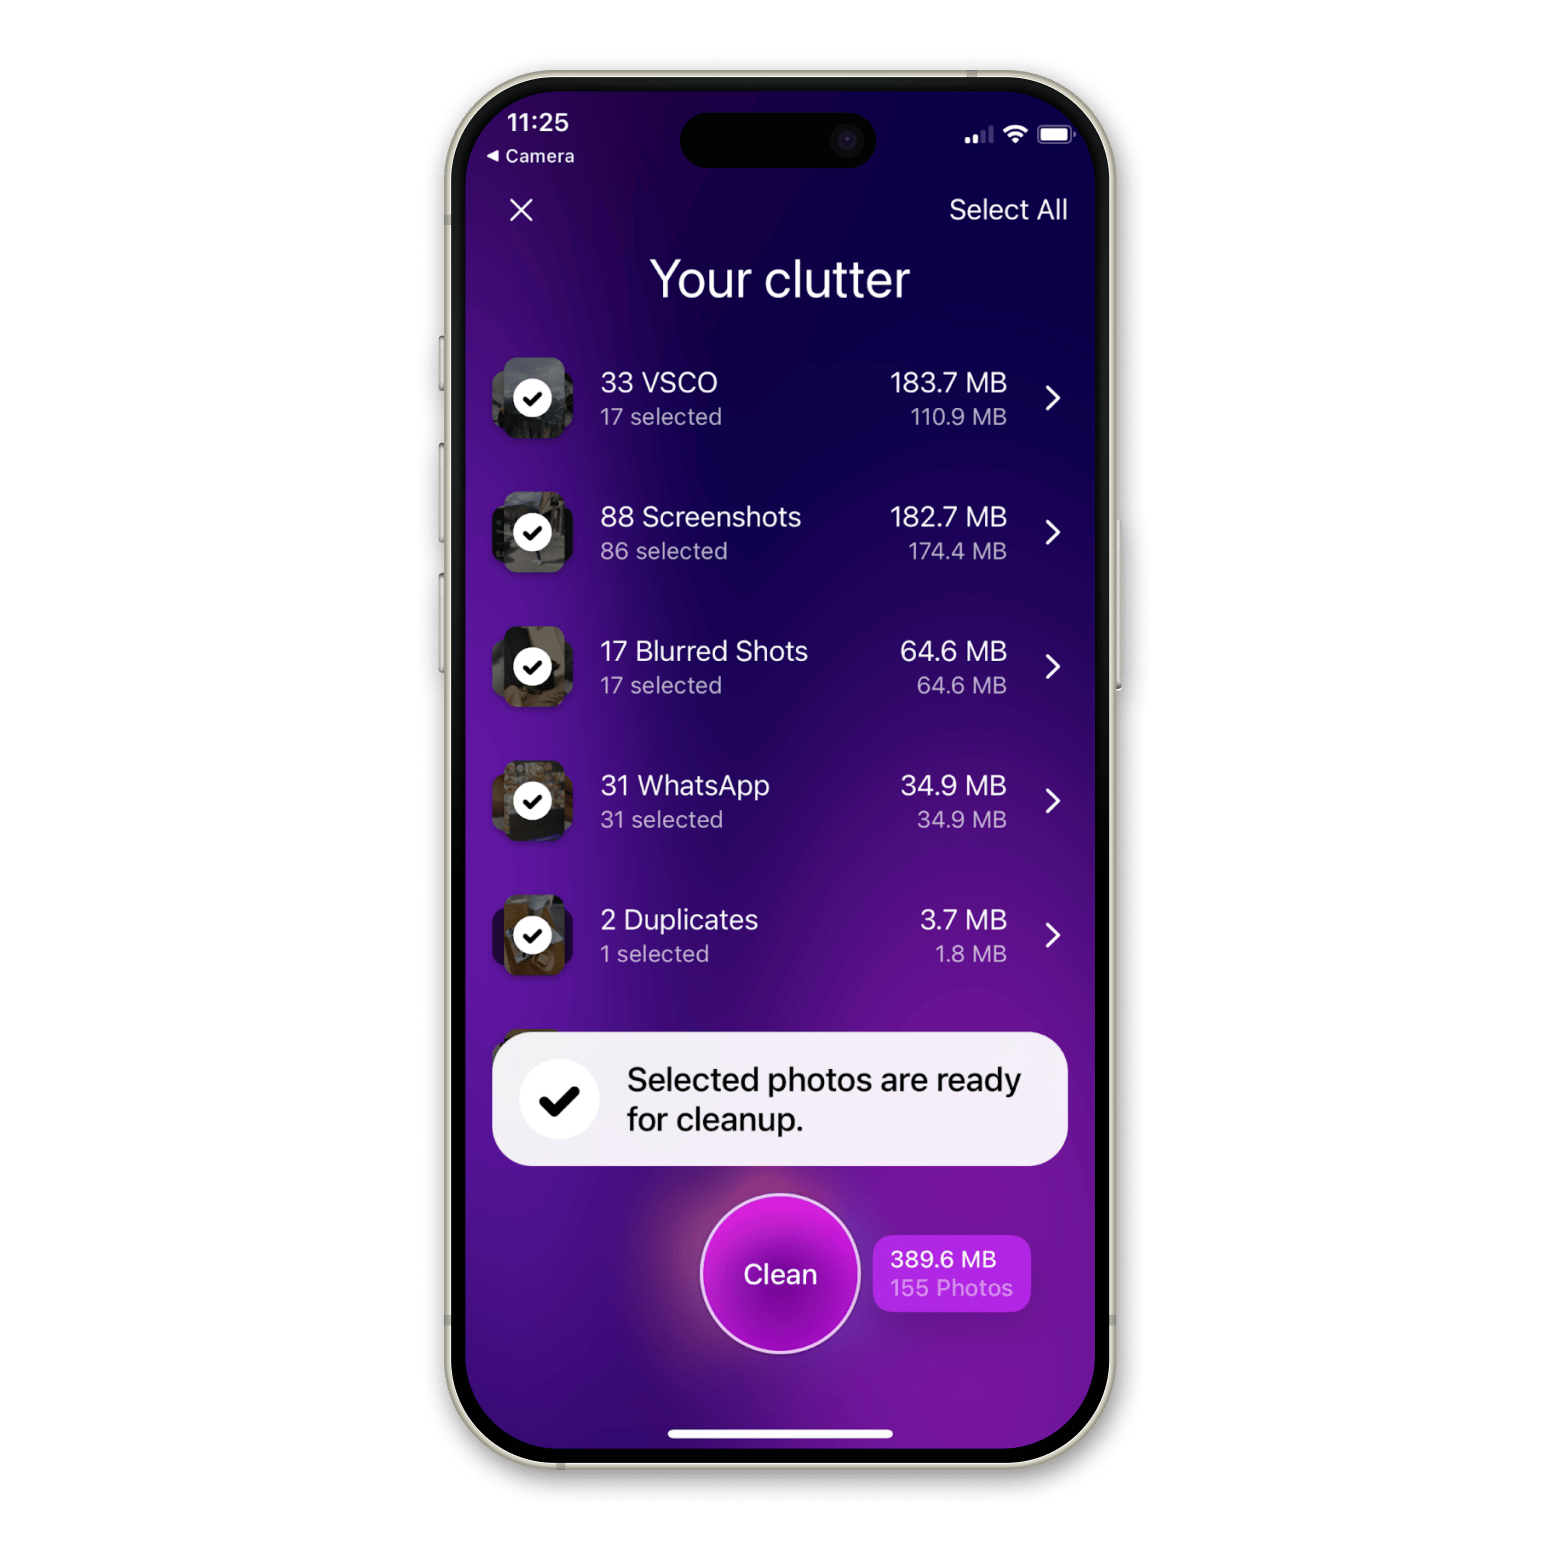
CleanMyPhone is an app that makes detecting and deleting old screenshots, blurry images, and duplicates a breeze. Just one tap of the scan button, and you’ll be presented with all the potential photos you could remove. From there, you can select the ones you want to get rid of and those you want to keep. Once the process is done, the app will show you exactly how much storage space you’ve freed up.
How to reduce photo size in iPhone Settings
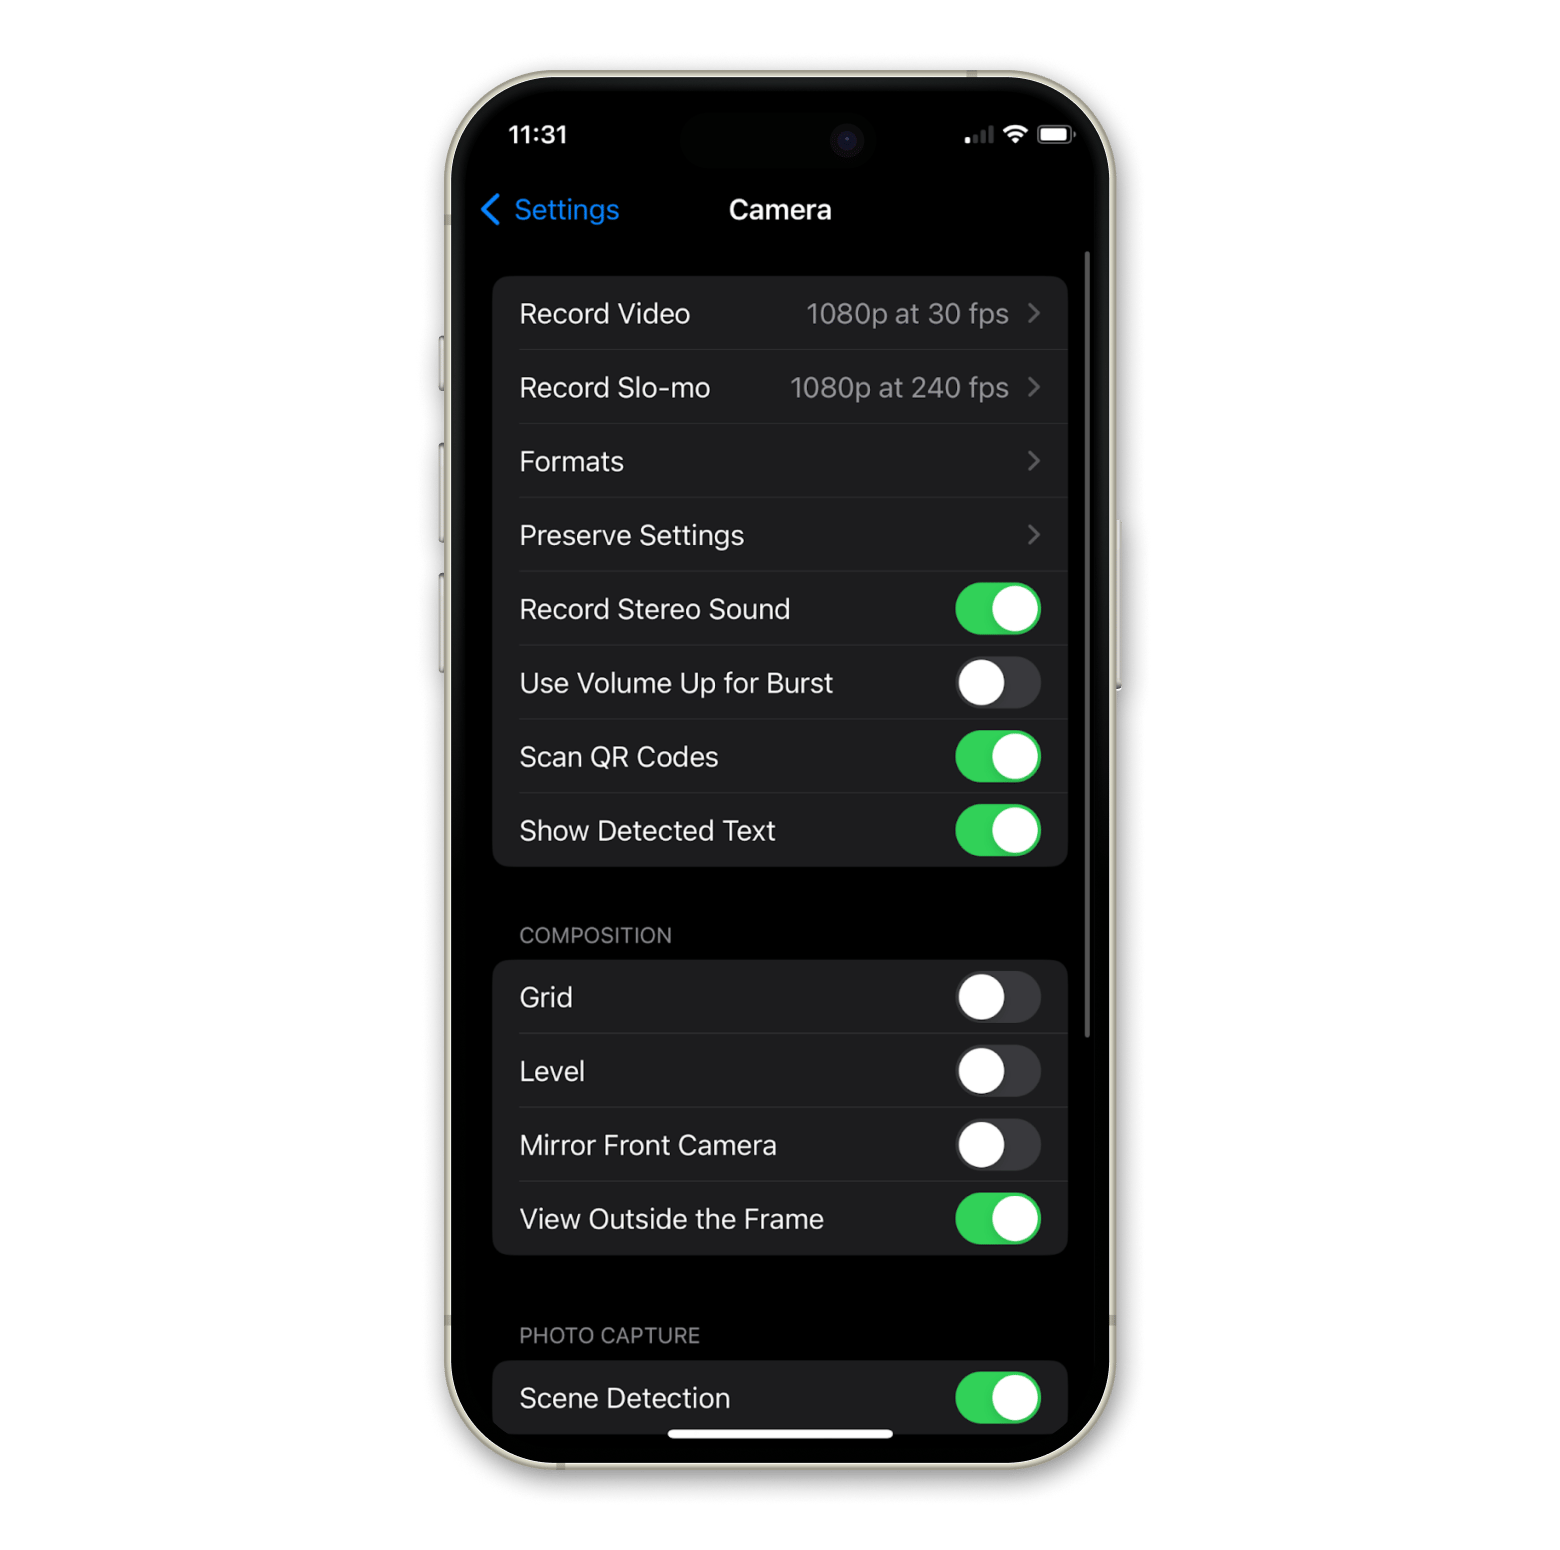
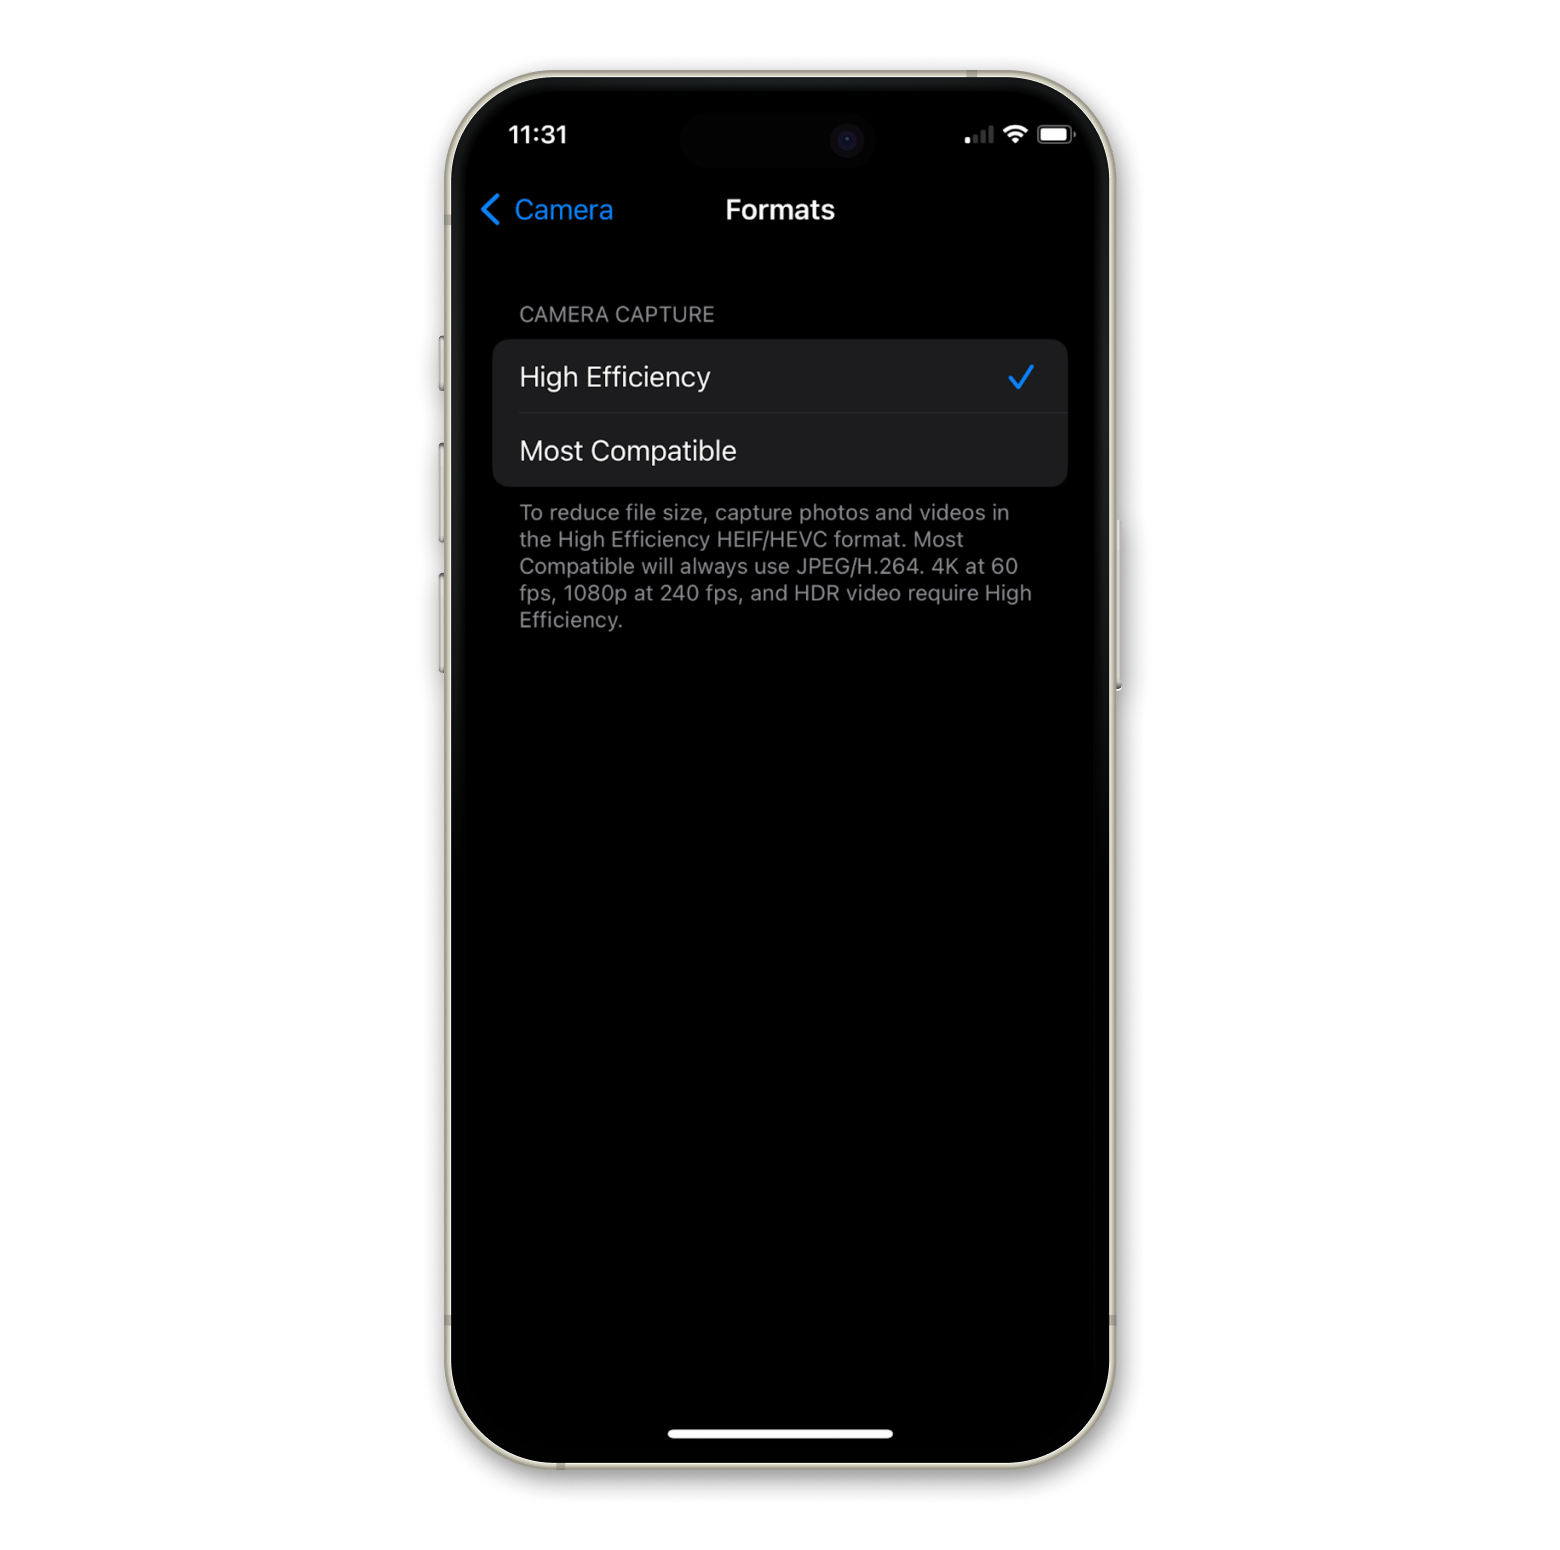
The iPhone has many built-in settings for the Camera, some of which can be used to change the file size of photos on the iPhone. Changing the photo format itself can reduce photo sizes whenever you snap a picture, and here’s how:
- Go to Settings on your iPhone.
- Scroll down and tap Camera.
- Tap Formats.
Choose High Efficiency for a happy medium between smaller file sizes and maintaining quality.
How to reduce photo size on iPhone using Mail
Need to send out an image or two? Mail automatically provides file size options when you’ve got images in your message once you tap the Send button.
Here’s how to make a photo less MB on an iPhone in the Mail app.
- Open the Mail app.
- Tap the compose button in the bottom right-hand corner.
- Click into the body of the message and tap the images icon to insert images into the email.
- Select the image(s) you want to include.
- Tap the Send button.
- Choose from the size and scale options in the pop-up menu.
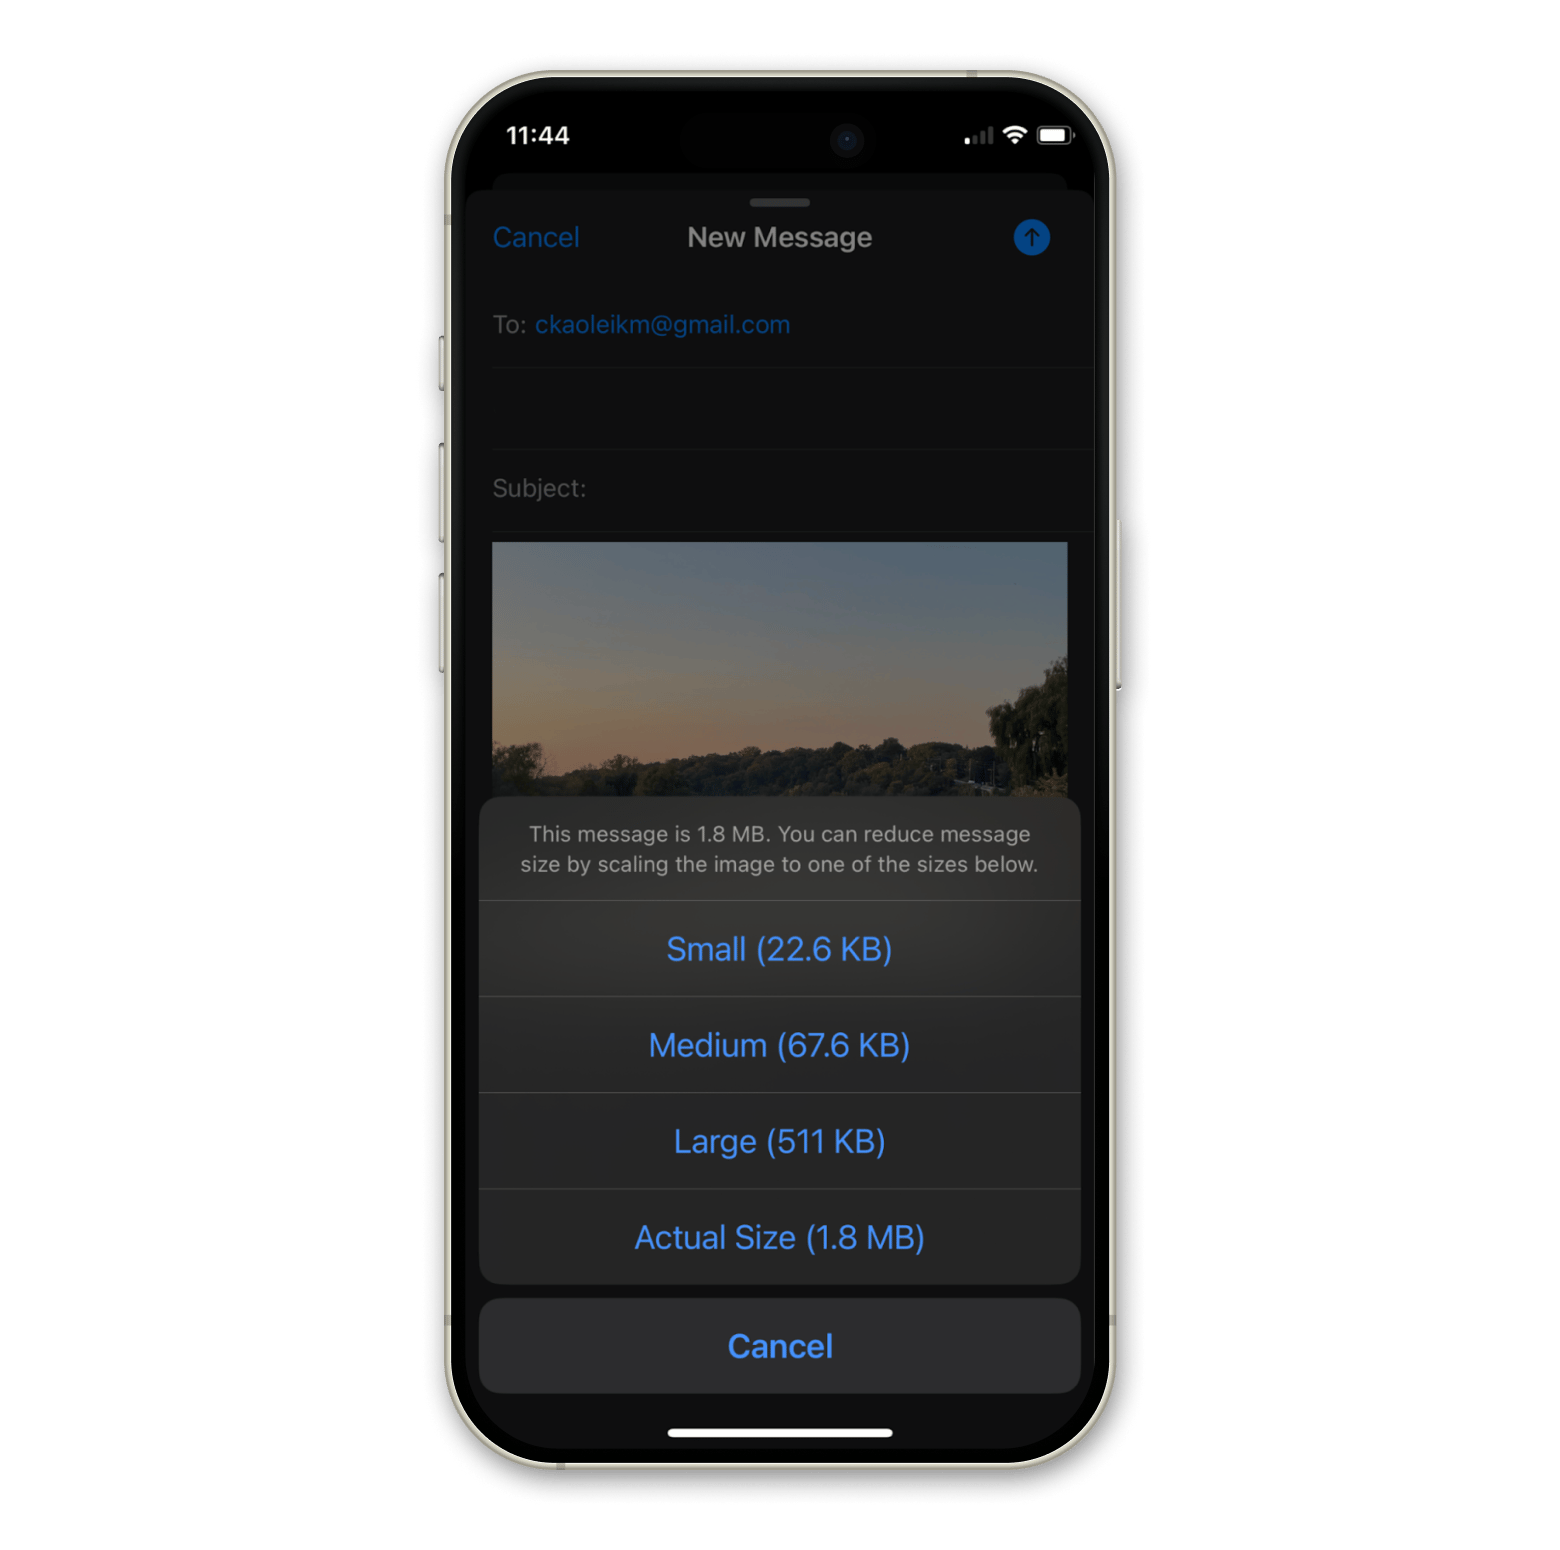
As you can see from the screenshot, the differences between file sizes are quite large. The actual size of the image is actually around 79 times larger than the small size!
How to reduce photo size on iPhone with Shortcuts app
The Shortcuts app is my personal favorite for streamlining tasks on my devices, and it can even help create a custom shortcut to resize photos. Follow these instructions to automate the resizing process:
- Open the Shortcuts app.
- Tap the add “+” button to create a new shortcut.
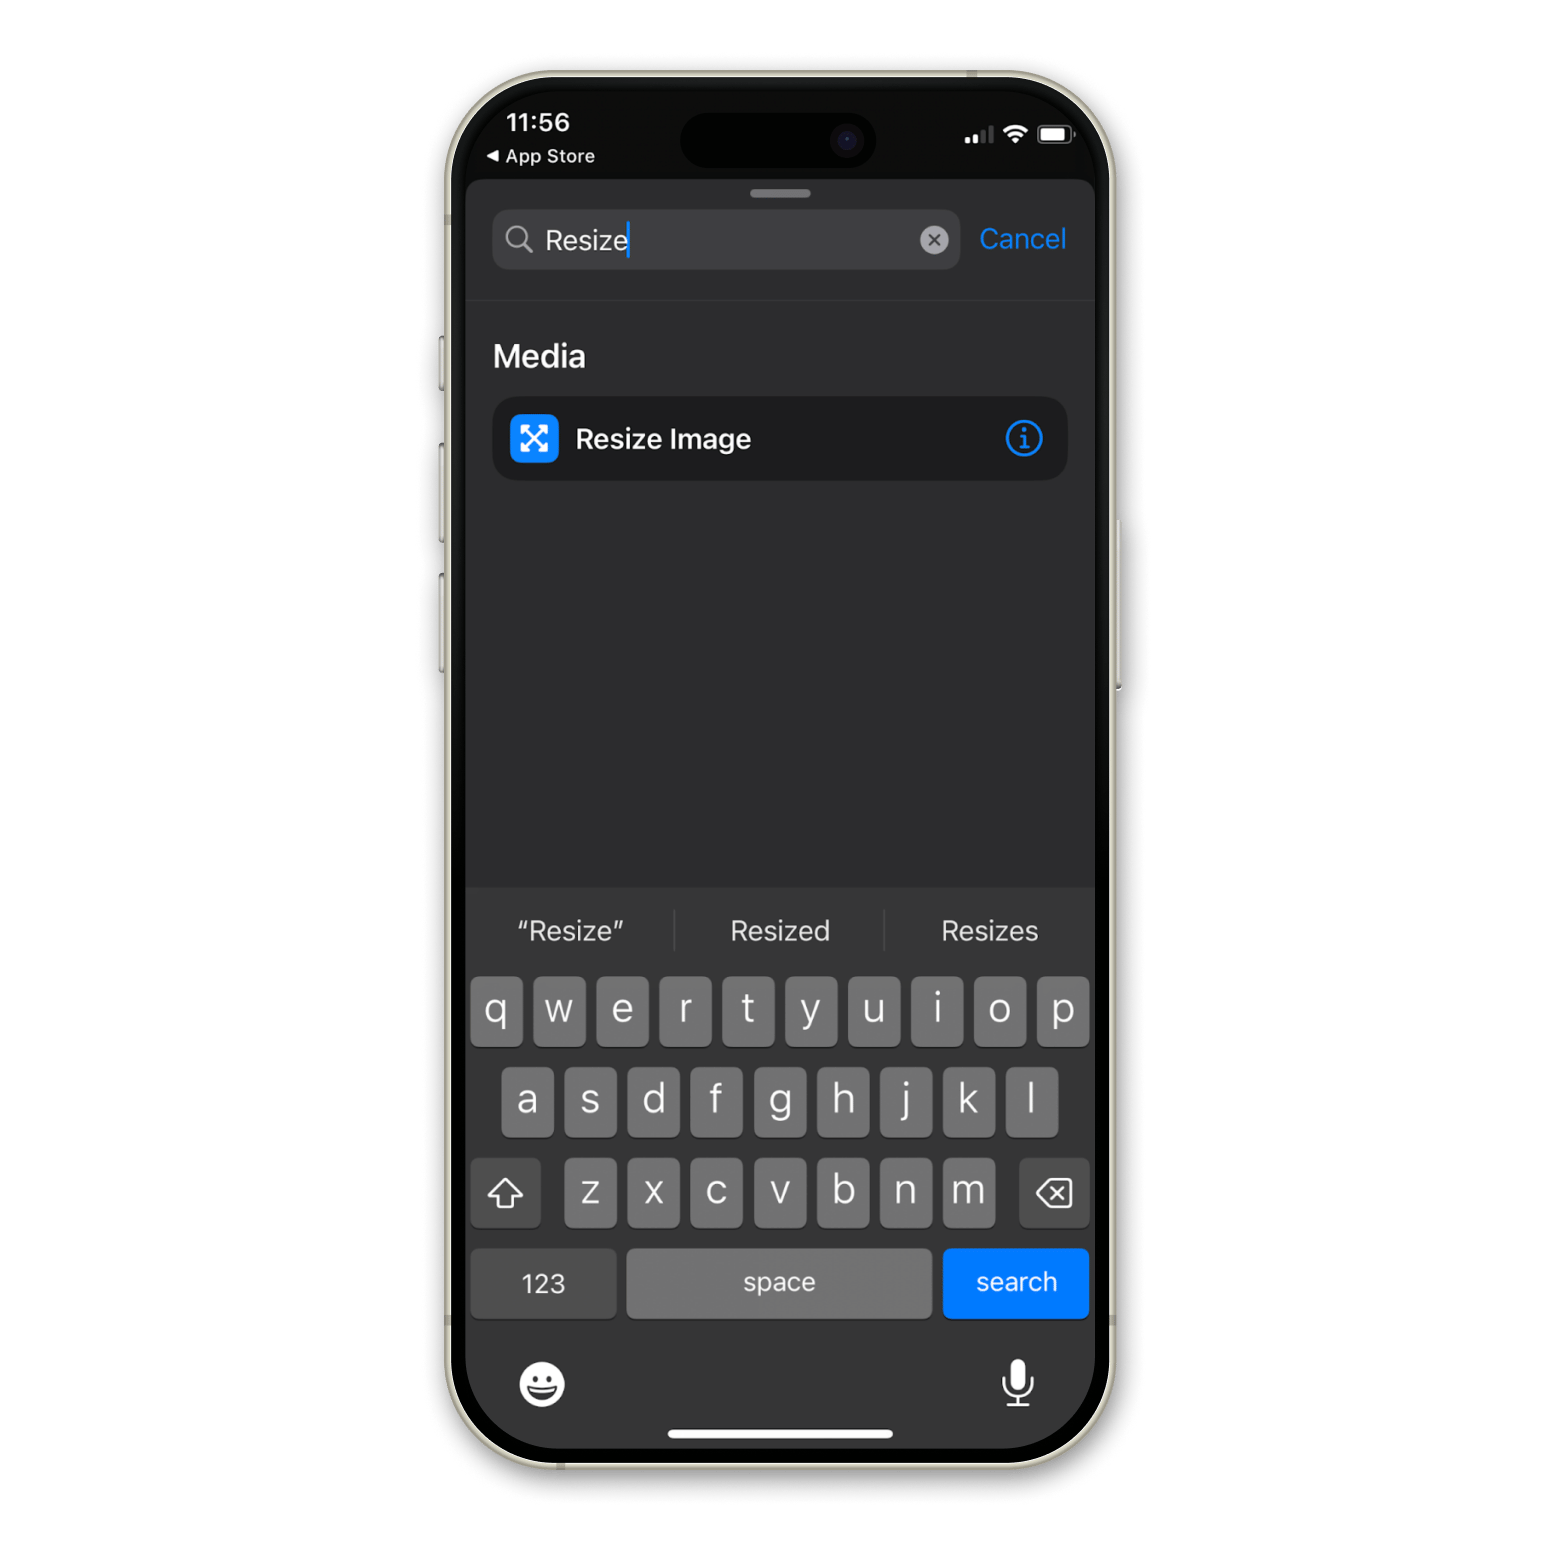
- Search for the Resize Image option and tap it.
Enter the width you’d like to use and keep the aspect ratio by leaving the Auto Height option on. You can even choose Ask Each Time for the width for more flexibility.
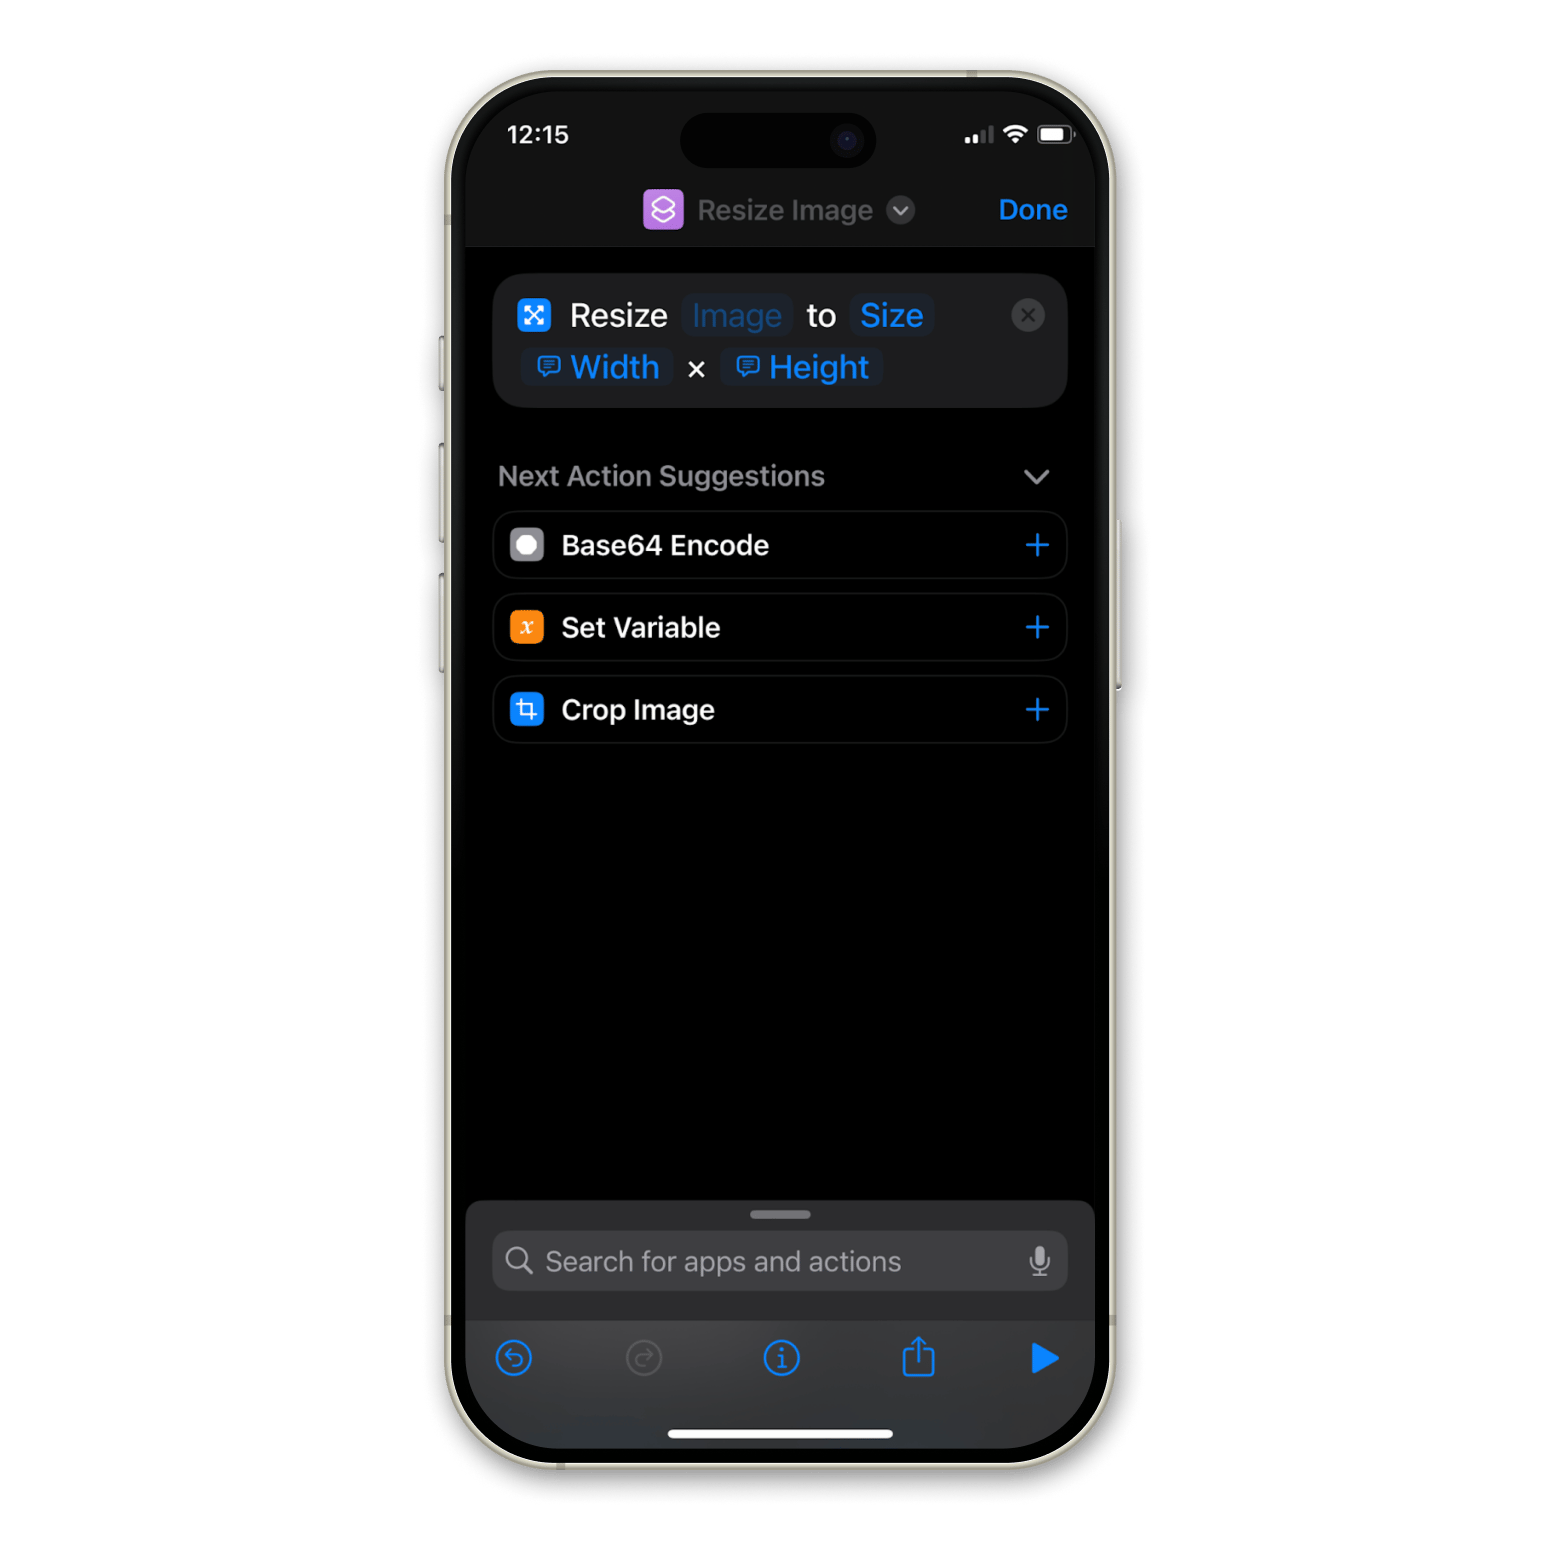
- Add another action to Save to Photo Album by searching for the action in the search bar.
- Tap Done.
- Tap where it says Image (Resize Image) and choose Shortcut Input.
Tap Nowhere and turn on Show in Share Sheet > Done.
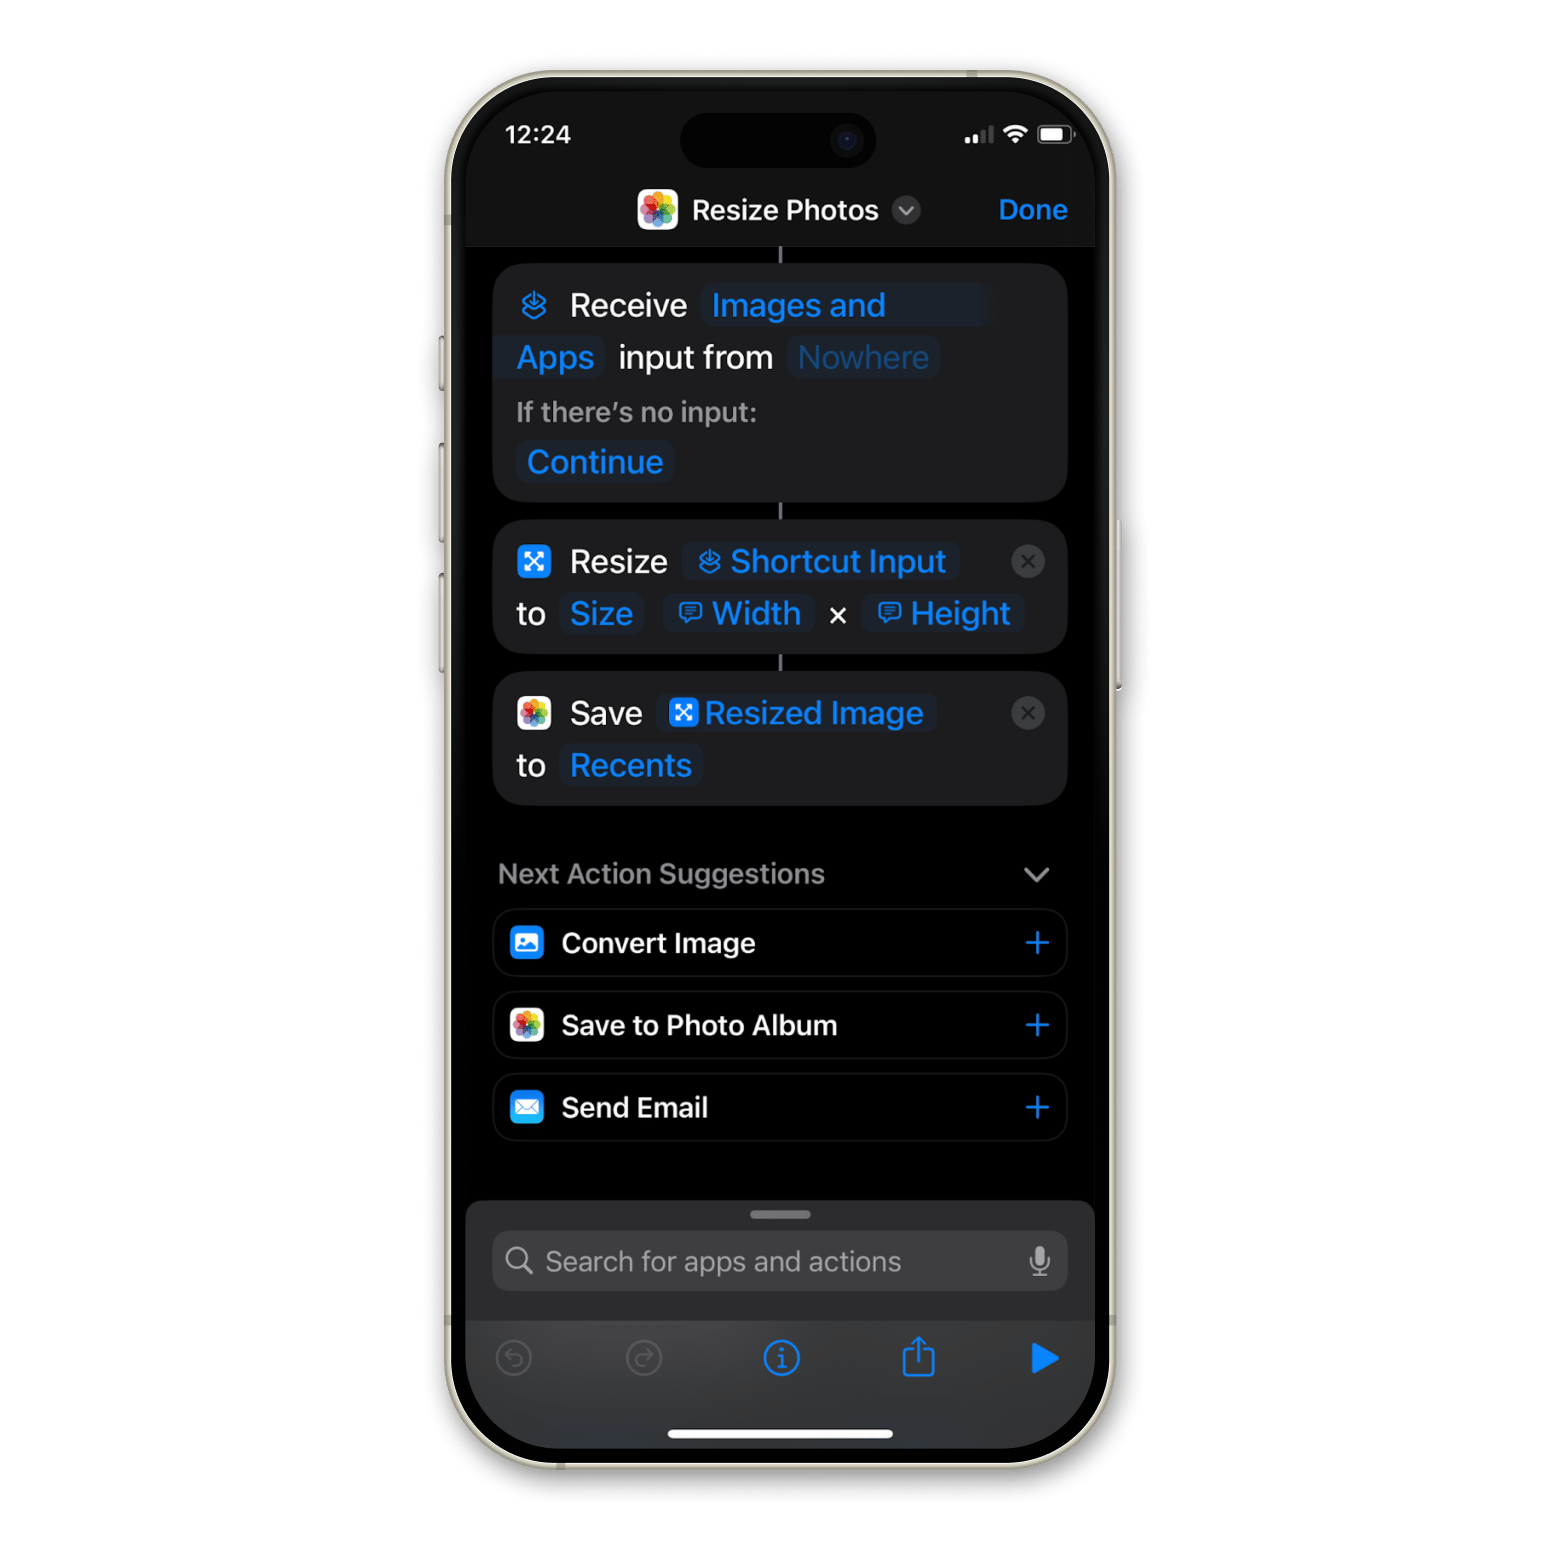
To use the shortcut you just created, open your Photos app, tap the photo you want to reduce the size of, and scroll down to find the shortcut.
Best apps for reducing photo size on iPhone
Sometimes, when built-in methods aren’t doing the trick, third-party apps can come in to save the day. They often come with features that fill in the missing pieces or advanced tools that make it much easier to do the job. I’ll be introducing two top apps to you if you’re wondering how to make iPhone pictures a smaller file size, that you’ll want to try out.
The Shortcuts app harnesses automation to let us save time, while the new iOS 18 has given us the deep customization that we’ve been craving, but the iPhone still isn’t perfect. When it comes to efficiency, we sometimes have to take matters into our own hands. Launcher has helped me do that but has also provided me with a new level of customization and convenience that I never knew I could get on an iPhone. Once you download these resizing apps, you can use the Shortcuts app in tandem and access their functions in a flash.
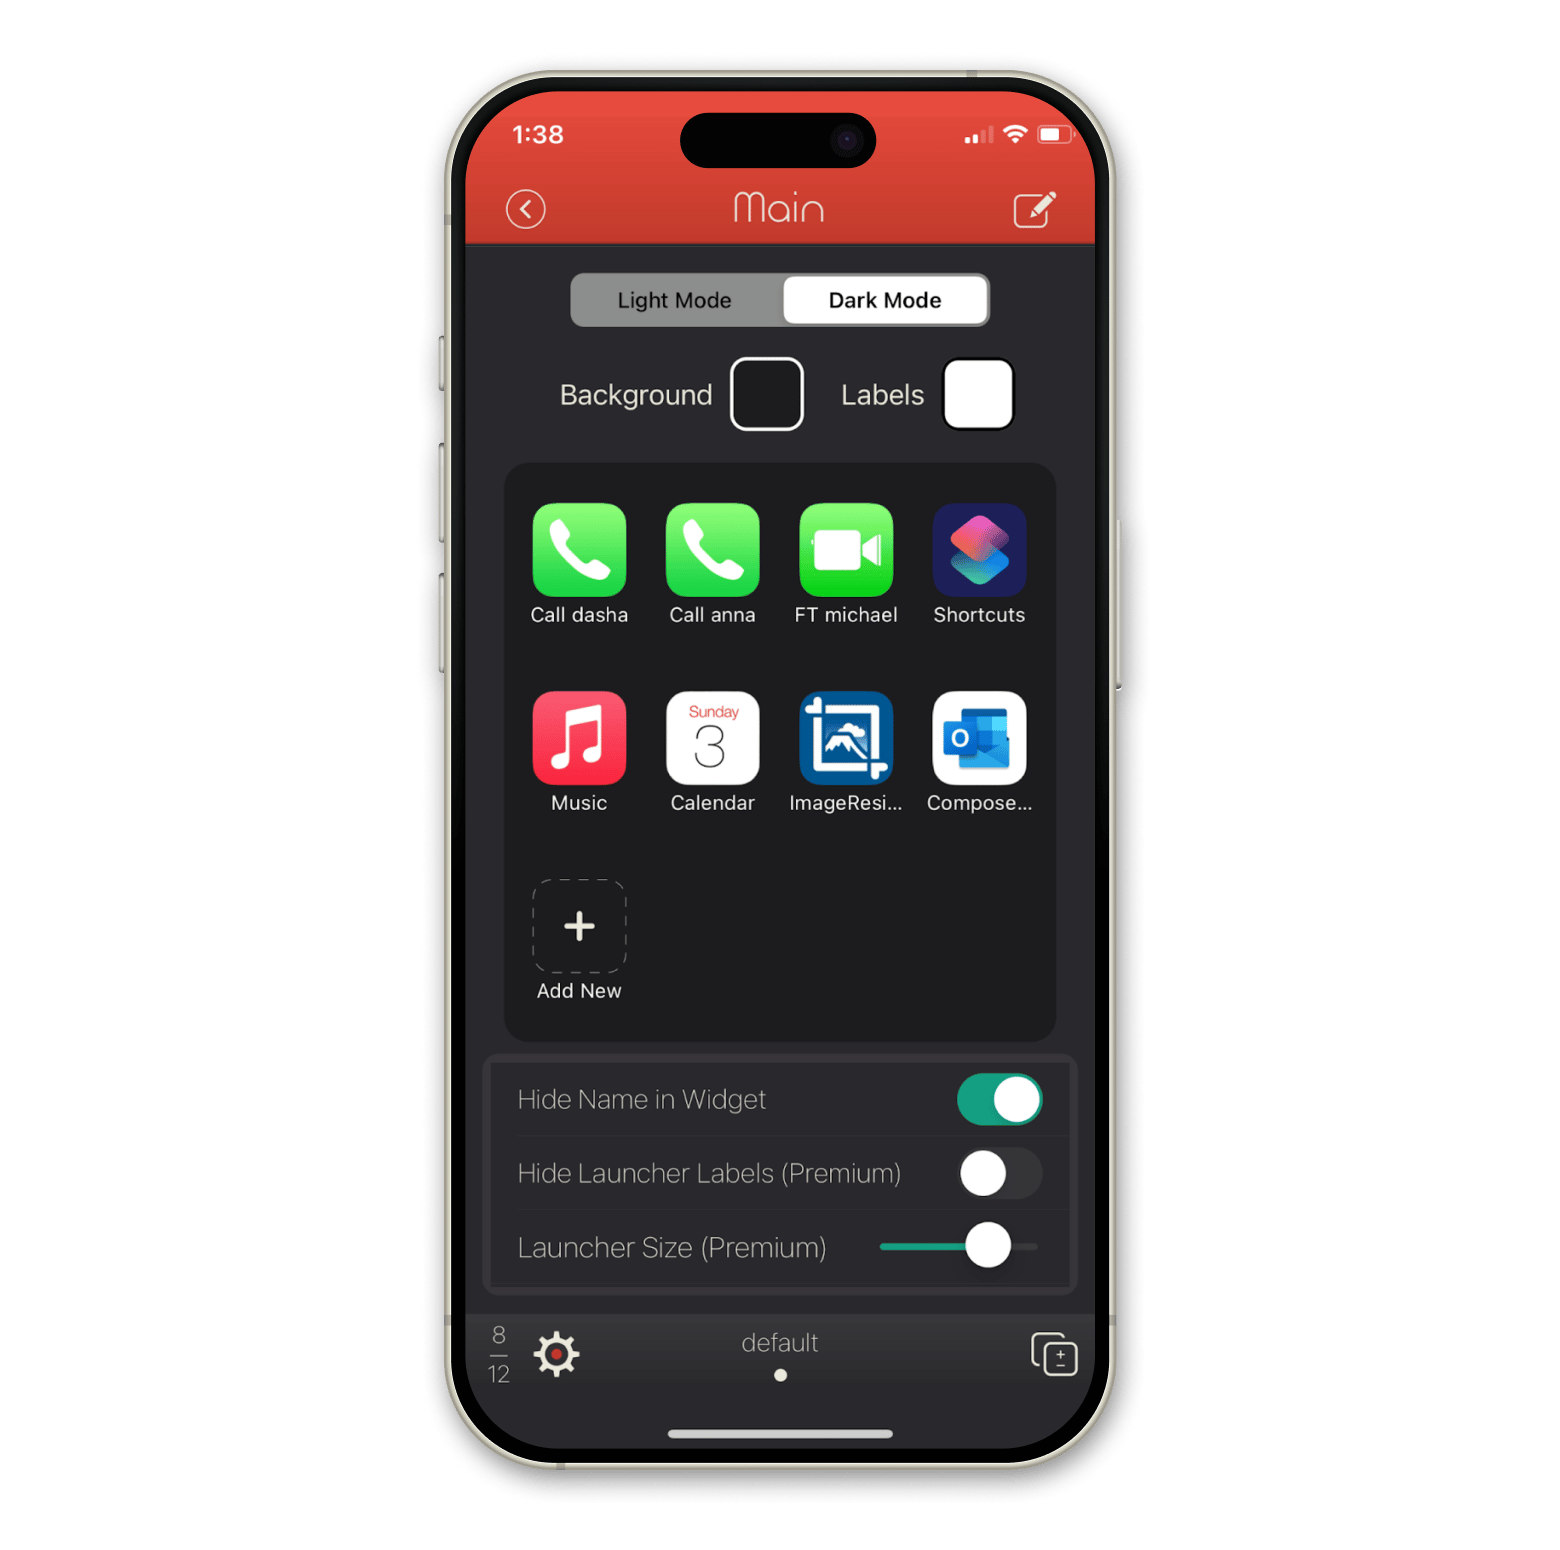
With Launcher, you can create all sorts of lock screen and home screen widgets to make tasks like communicating, banking, and performing tasks seamless.
ImageResize
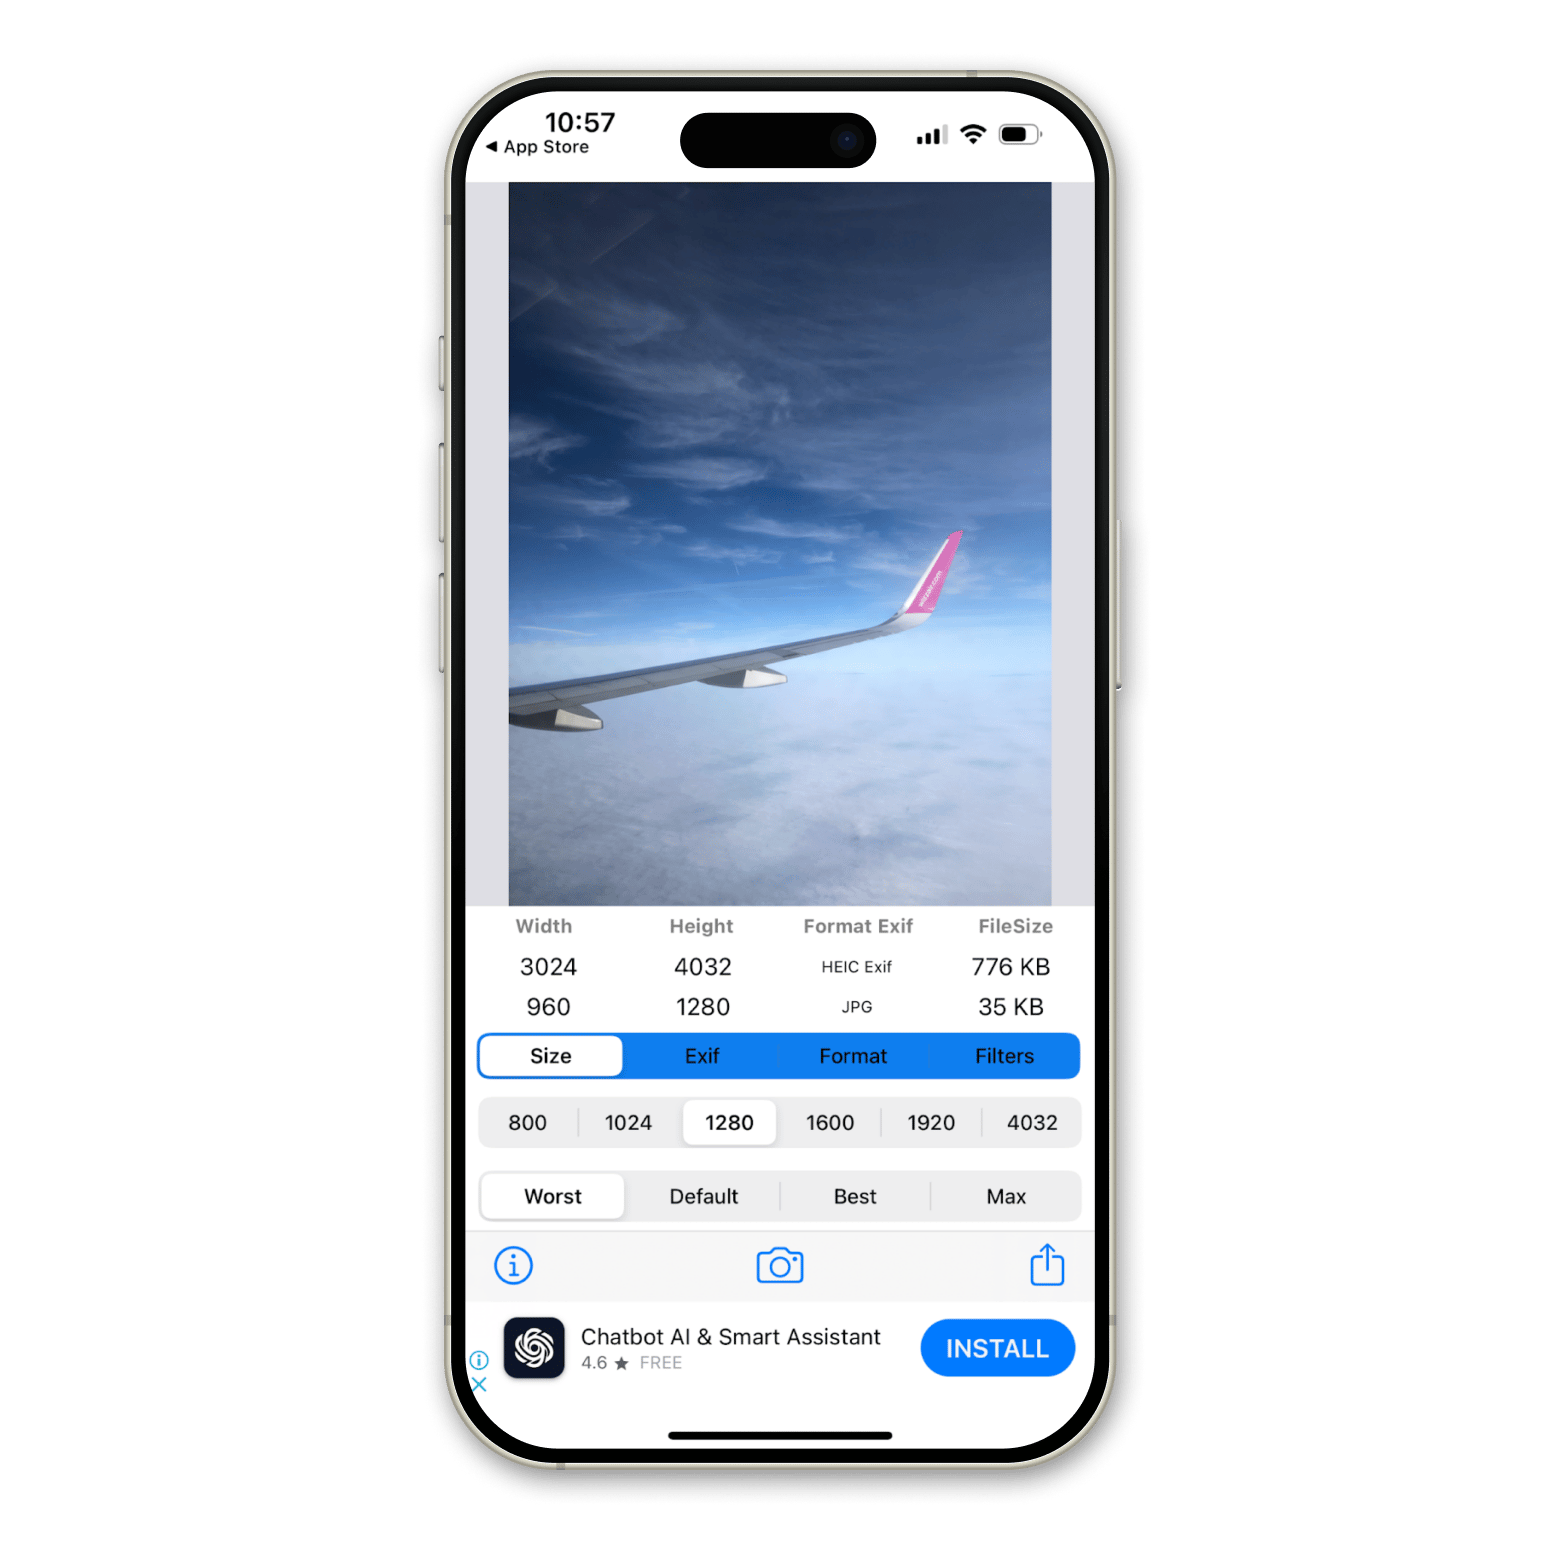
ImageResize is a go-to tool for resizing and reformatting an image, with a simple set of buttons that lets you compress any image. While there are a variety of filter options and ways to export your photo as several popular file formats, the most used aspect of the app is its resizing feature. All you have to do is simply choose an image to edit and click on one of the size options. You can choose the quality you want, whether better or worse, to adjust the final file size.
Compress Photos & Pictures
Compress Photos & Pictures app also lets you reduce photo file sizes without sacrificing image quality — but this time using sliders. It’s a basic, straightforward app that lets you compress large files and save space on your device.
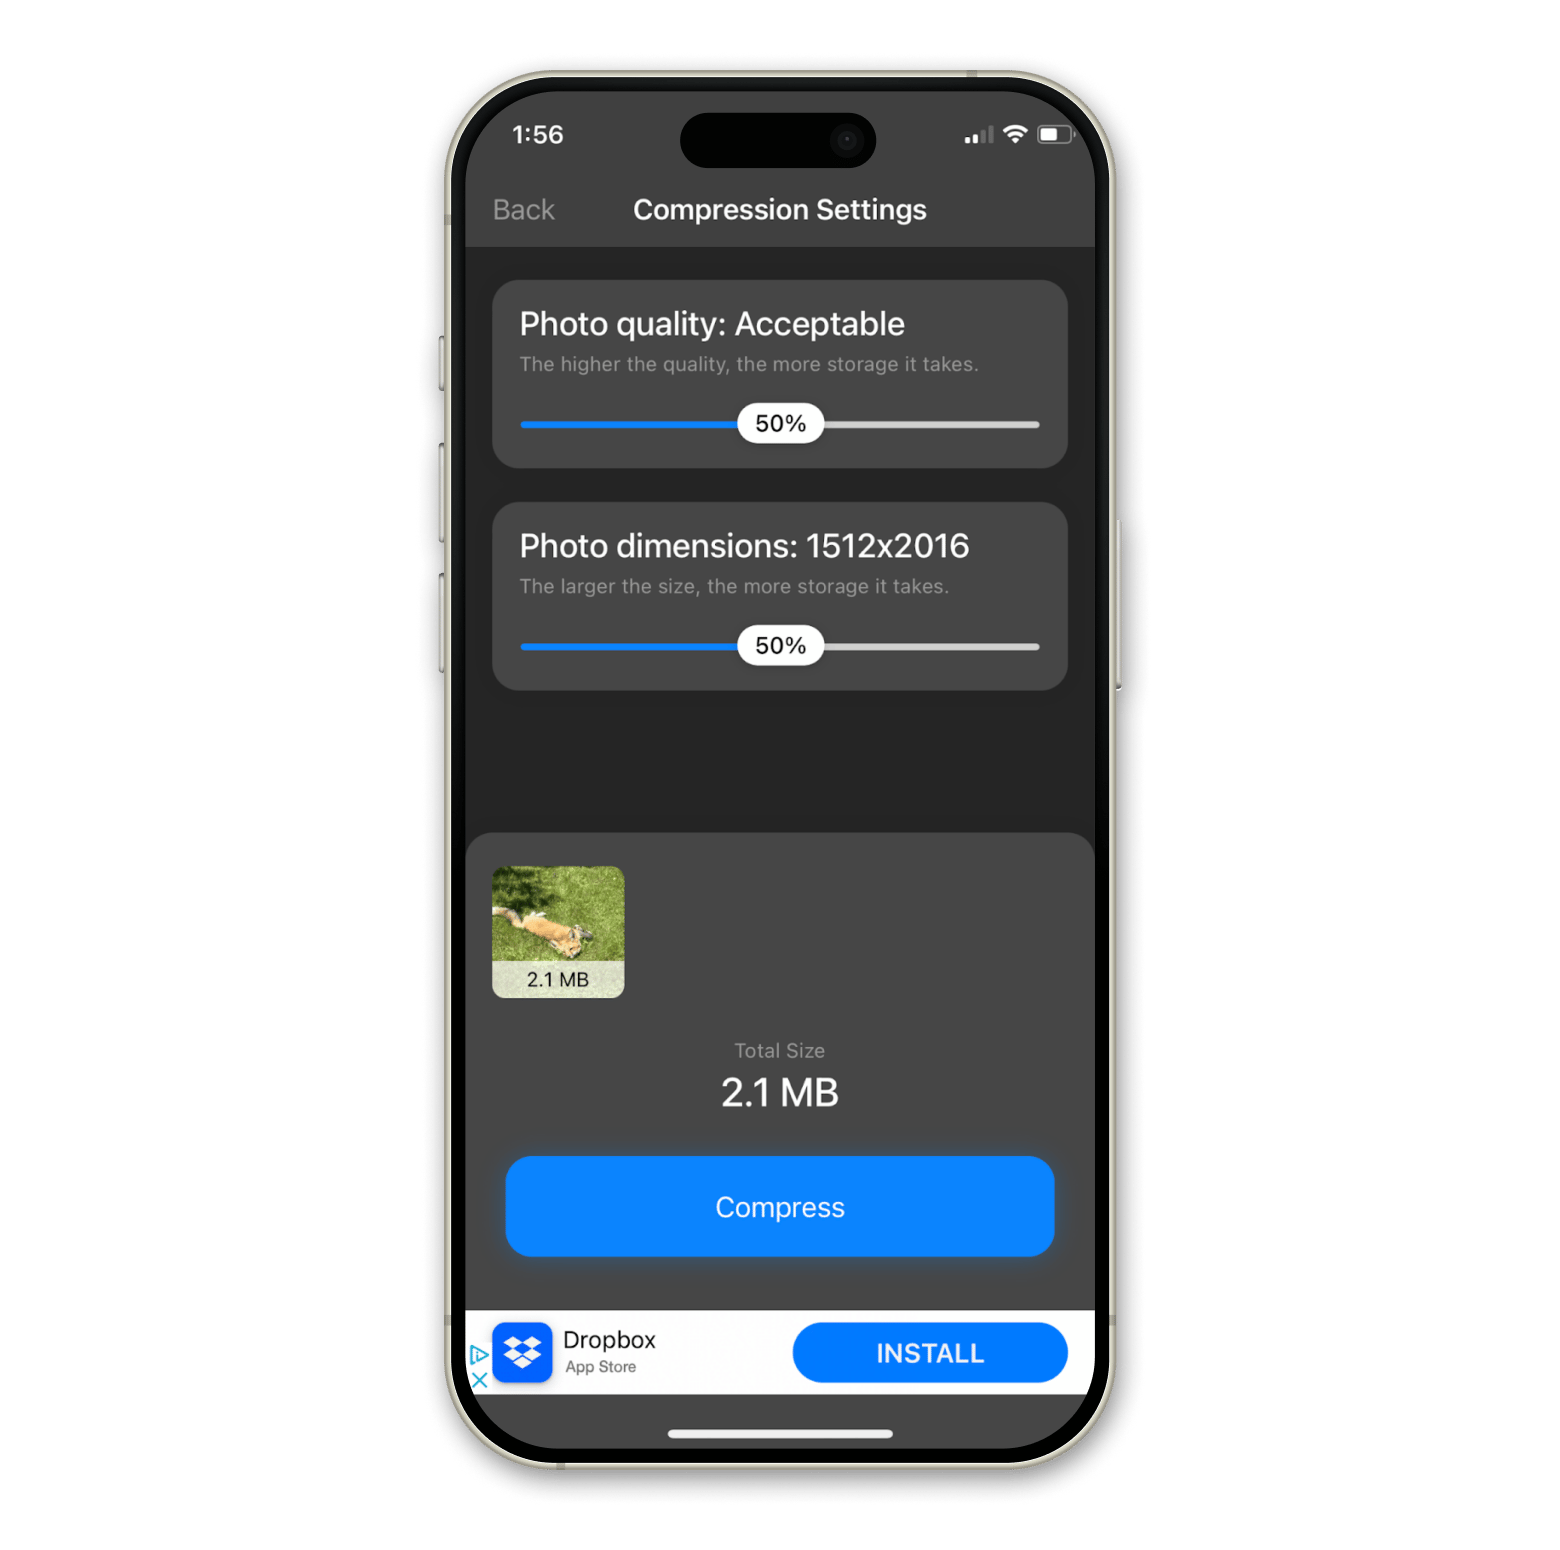
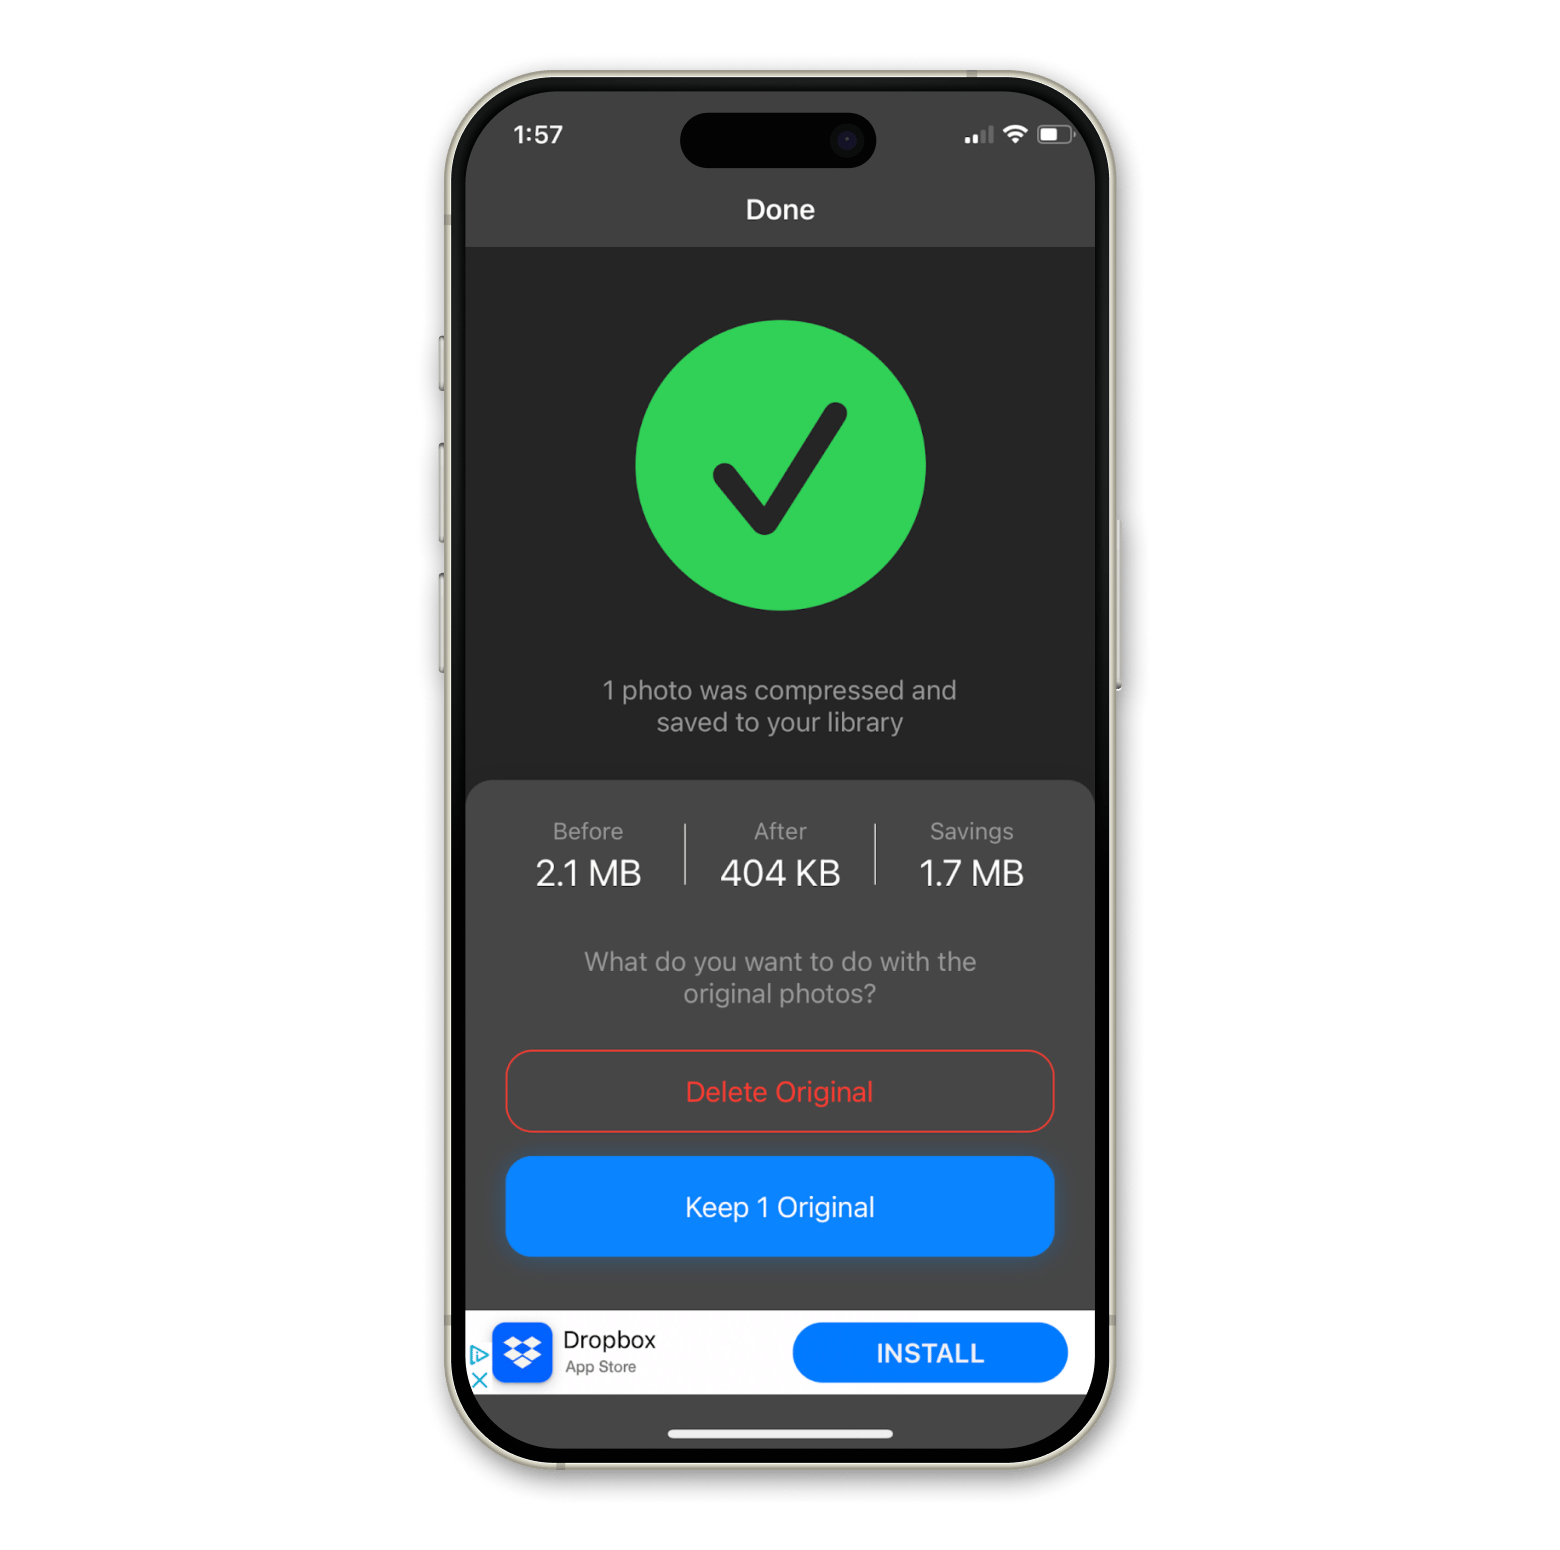
You can even compress multiple photos at once to save time, and after you hit compress, it’ll give you a look into the before and after. In this case, my photo of a fox went from 2.1 MB to 404 KB.
Now you know how to compress a photo on iPhone!
Reducing photo sizes straight from your iPhone isn’t as complicated as you might’ve once thought. Especially with so many different ways to do so natively and handy third-party apps to help, you can bring the size of even the most data-hungry photos down to a comfortable number.
If you’re looking for other ways to manage your iPhone storage or your precious images, Setapp is the subscription service for you. From cleanup and optimizer apps like CleanMy®Phone and organizing tools like Launcher, a 7-day free trial of Setapp has 250+ of the apps you need to change your digital experience.


