Wi-Fi site survey: Complete 2026 guide to optimizing your Wi-Fi network
- Know what “good” Wi-Fi looks like in 2026
Signal strength: –65 dBm or stronger in most areas. SNR: 20 dB or higher. Noise level: around –90 dBm or lower. These metrics help you objectively assess network quality. - DIY Wi-Fi surveys are viable with the right tools
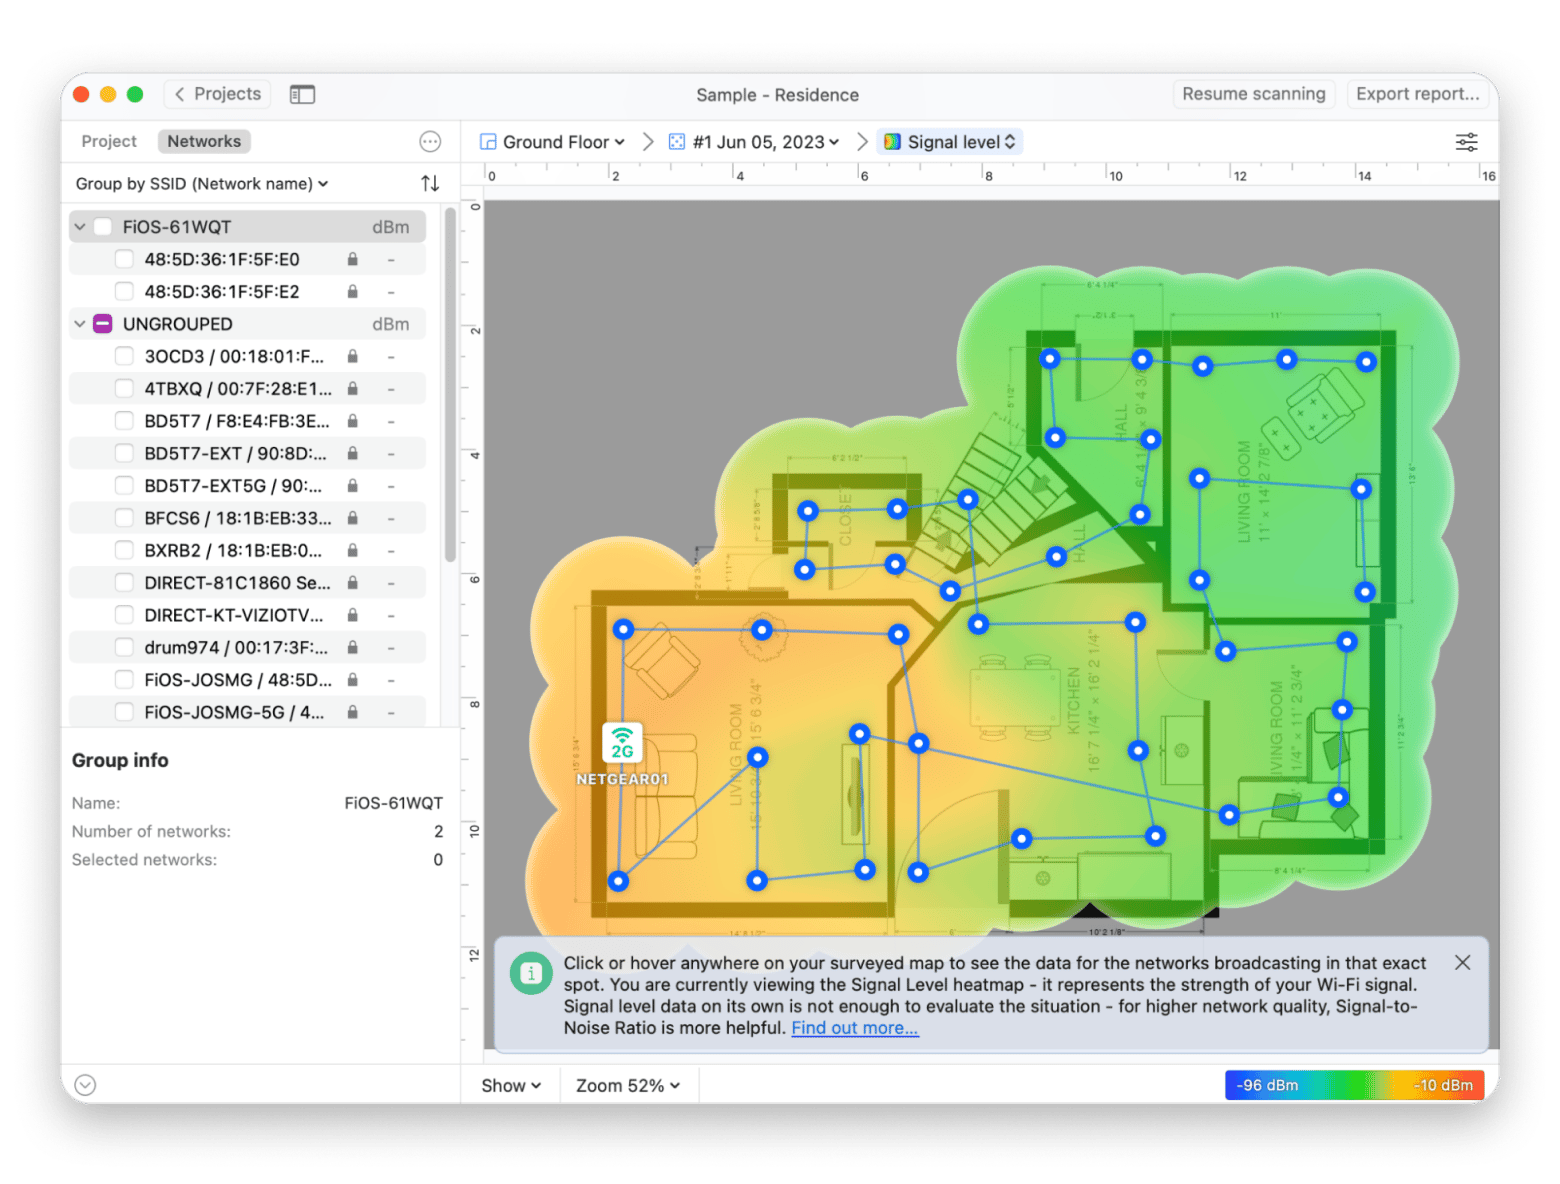
NetSpot for heatmaps, coverage visualization, and access point planning
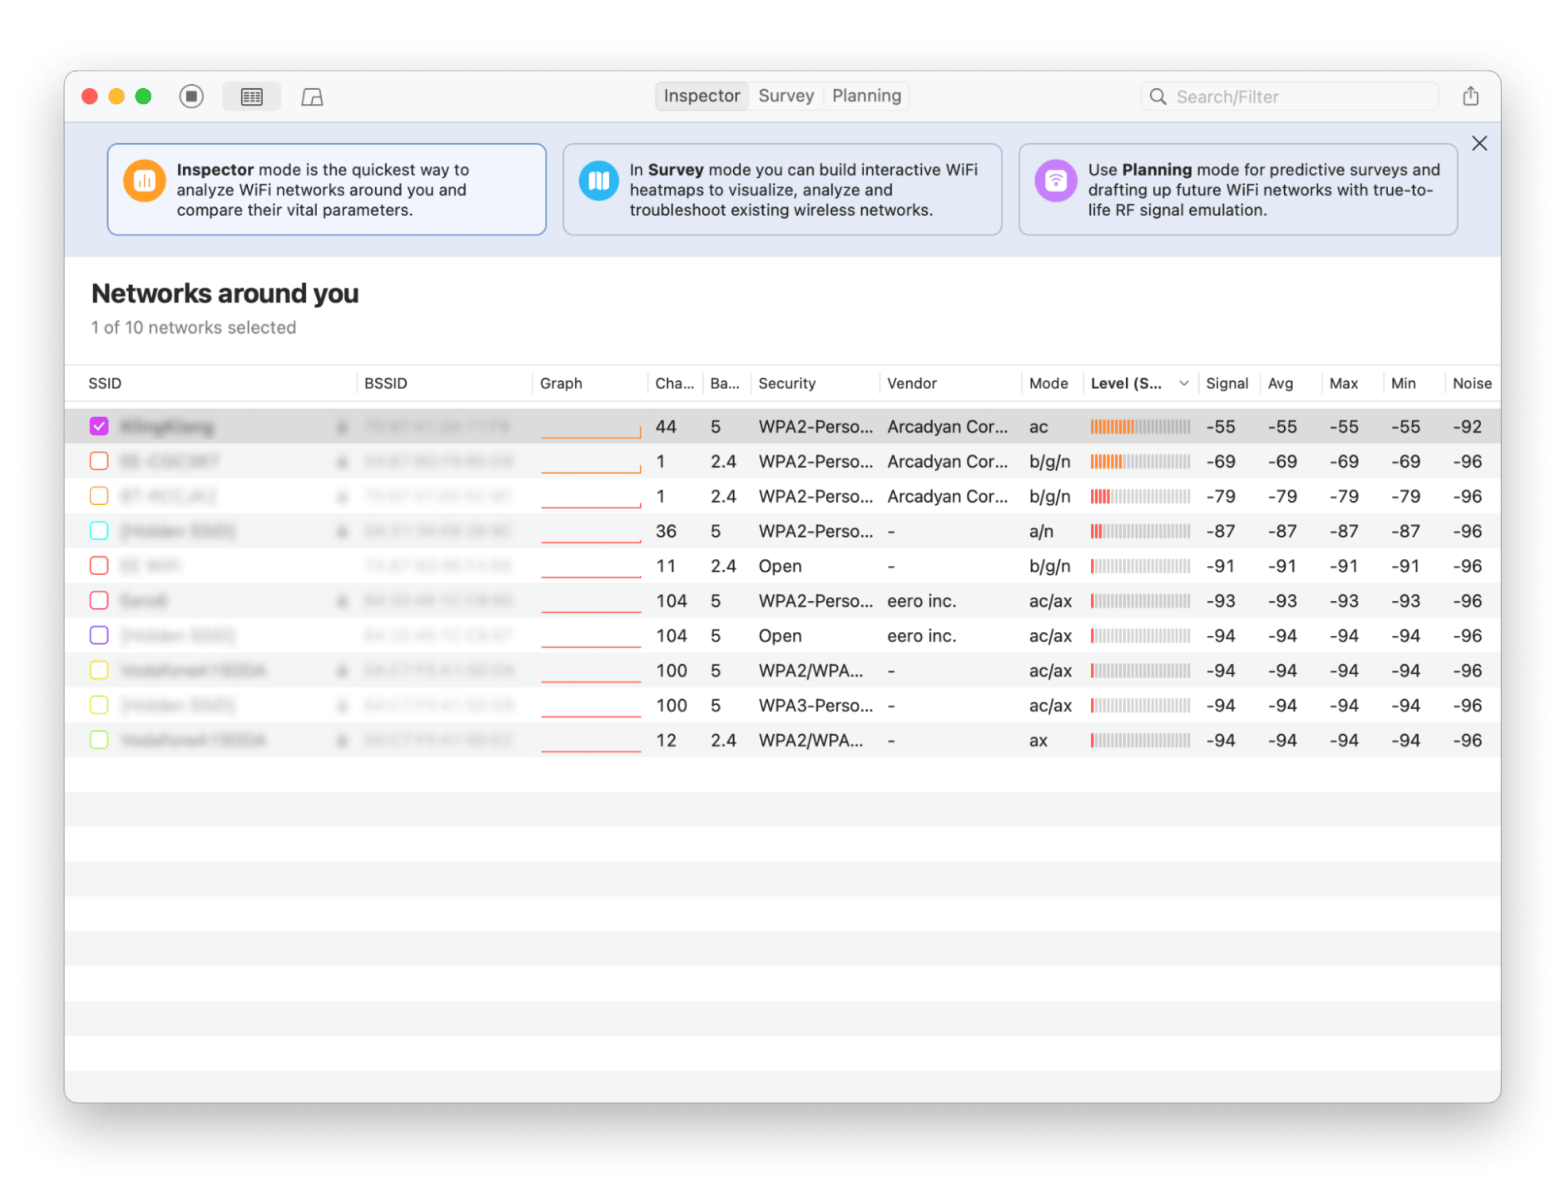
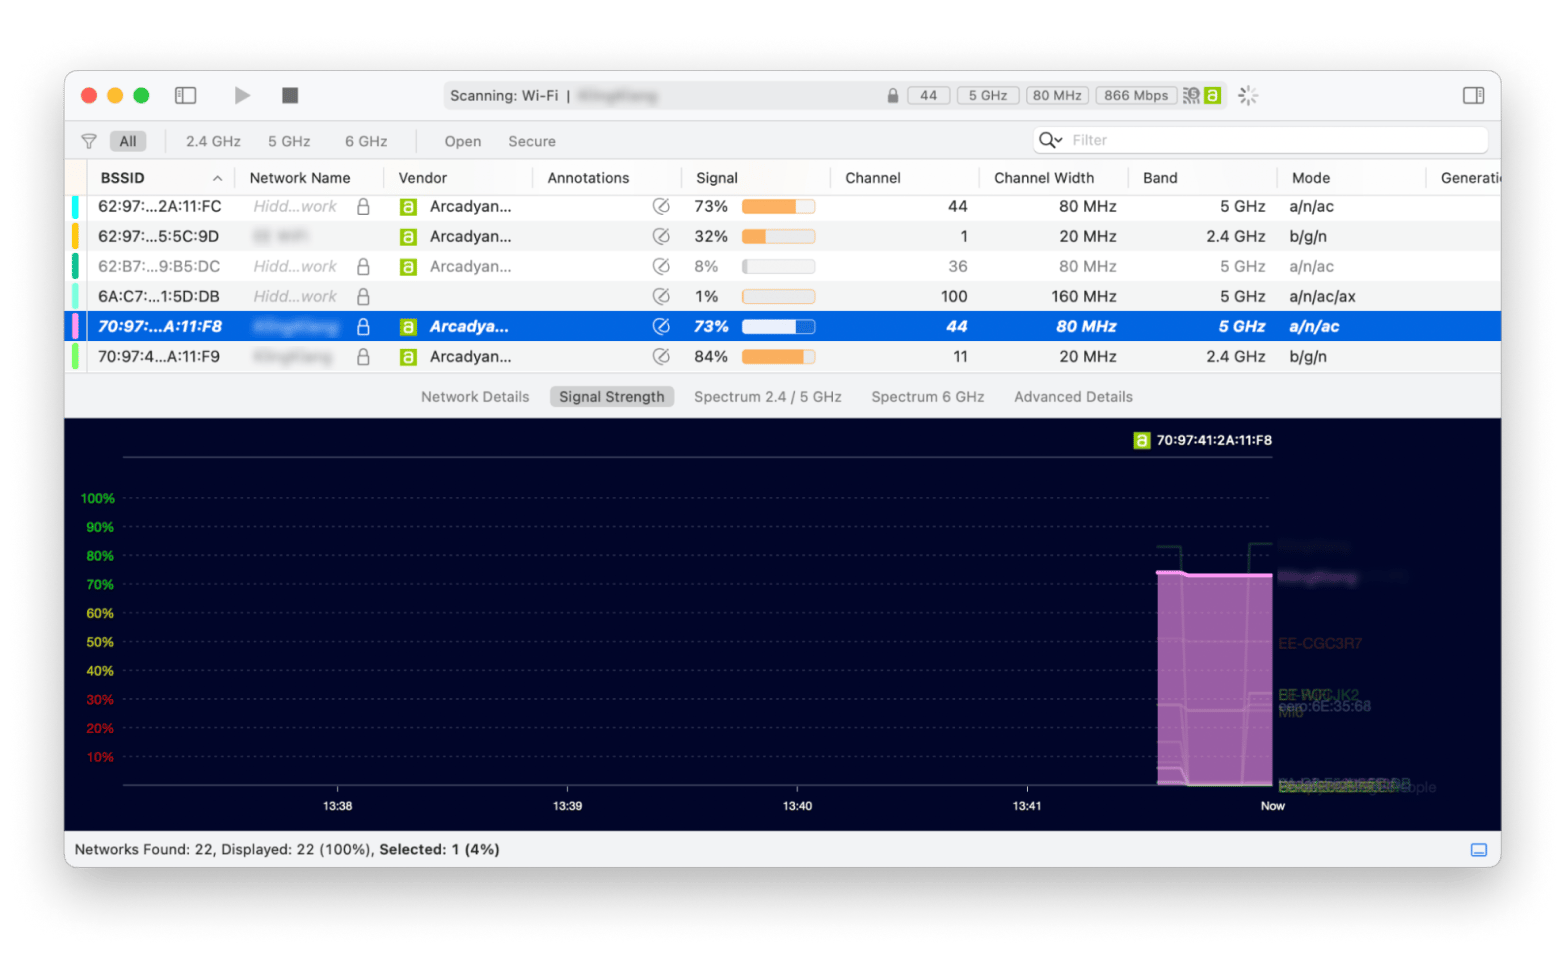
WiFi Explorer for channel and interference analysis
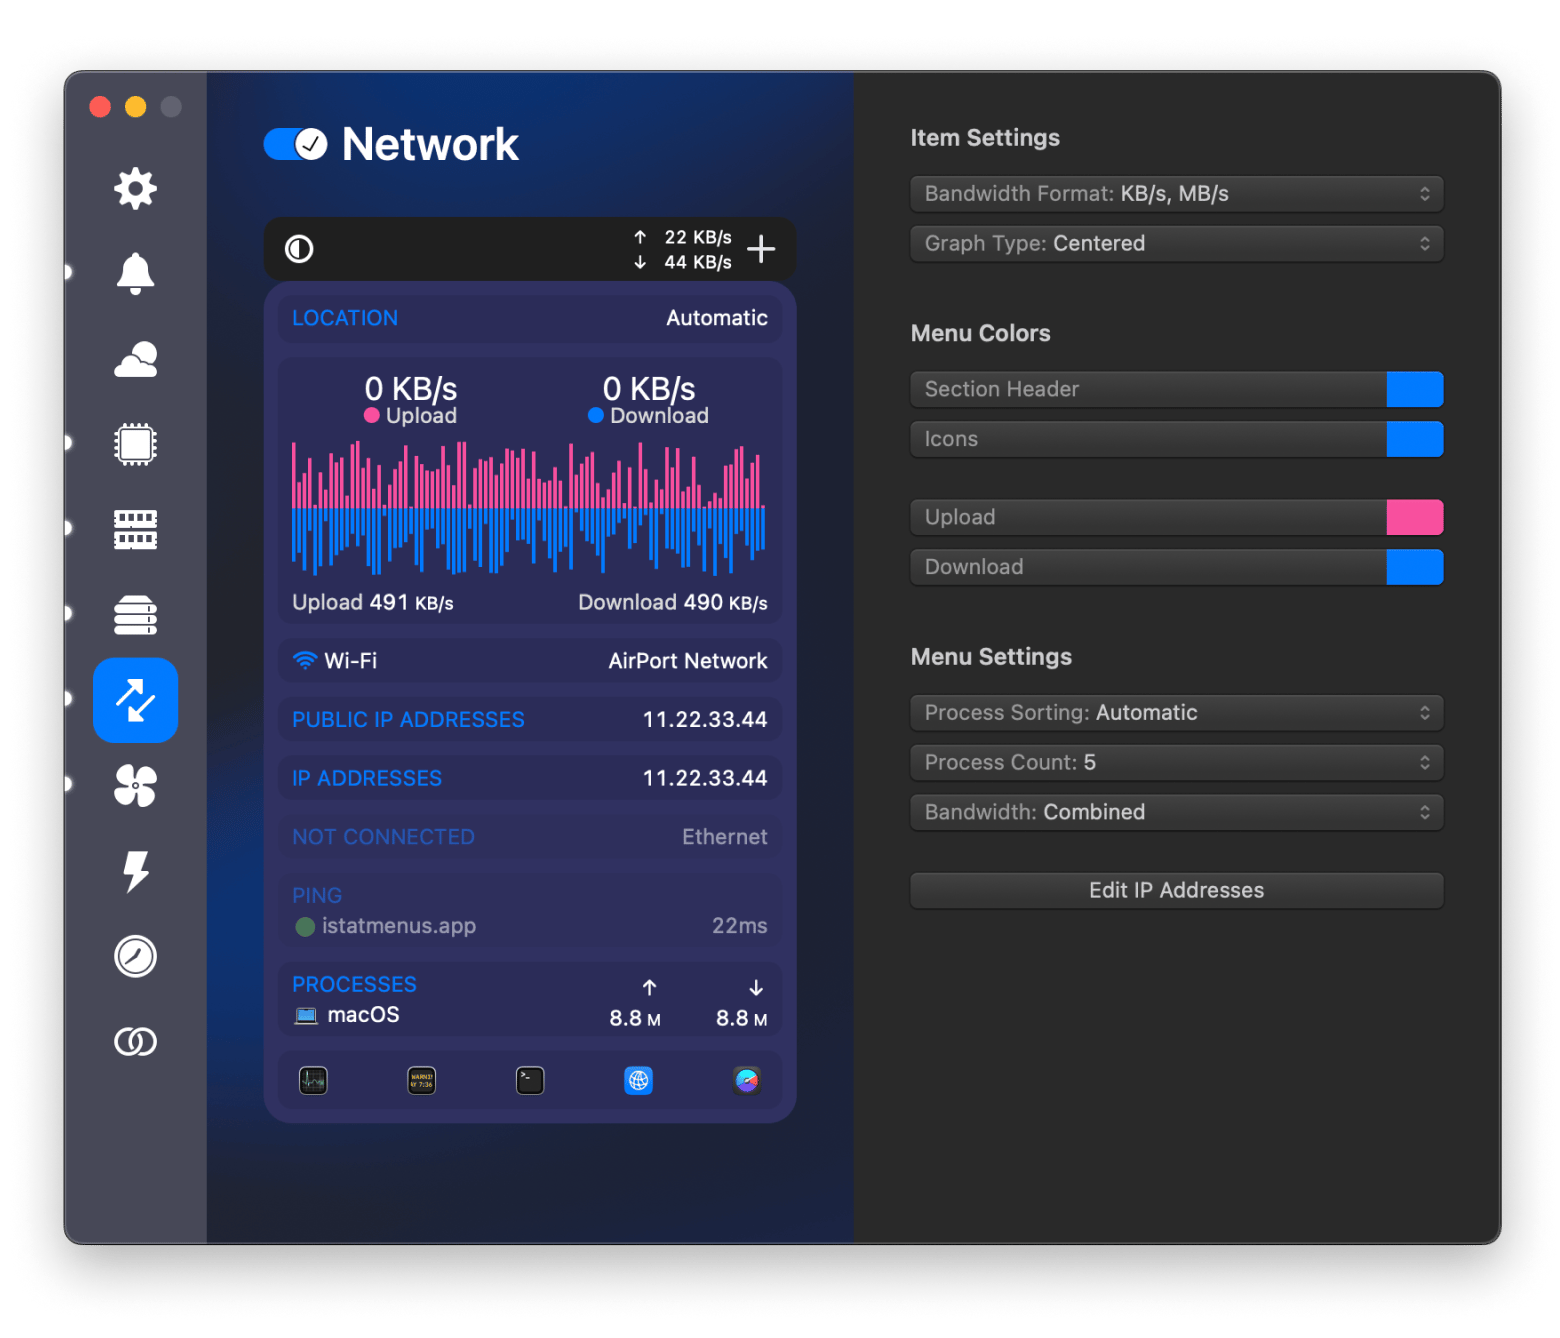
iStat Menus for real-time bandwidth and connection monitoring
Combining these tools gives you full visibility into performance and interference.
- The right toolkit makes ongoing optimization simple
A survey delivers heatmaps, access point recommendations, interference insights, and capacity analysis. To continuously monitor and optimize your network, you can use tools like NetSpot, WiFi Explorer, and iStat Menus through Setapp. Try all these apps and 260+ more with Setapp’s free 7-day trial.
Poor Wi-Fi connectivity costs businesses and individuals significant time and money. Industry reports show network issues can cause hours of lost productivity weekly for small and medium-sized enterprises. A wireless site survey can prevent these issues before they disrupt your operations.
This guide covers everything you need to know — from understanding what a wireless site survey is to performing one effectively and choosing the best tools to optimize your network.
Wireless site survey: Key facts and tools
If you’re here just to find the right site survey tools, check out the table below. If you need more detailed information, insights, instructions, or troubleshooting tips, scroll down.
| Element | Core details | 2026 Recommendation |
| Purpose | Measure signal strength, map coverage, identify interference, plan optimal access point locations | Conduct before new installs, after renovations, or when complaints arise |
| DIY tools | ● NetSpot: heatmaps & full surveys. ● WiFi Explorer: channel / interference analysis. ● iStat Menus real-time bandwidth & connectivity. | Use NetSpot as primary for coverage mapping, network planning, AP placement; complement with others for monitoring |
| DIY feasibility | Fully viable for homes, small offices and home offices with the right apps | Switch to certified pros for mission-critical or multi-building deployments |
| Key parameters | Signal strength (RSSI): ● Excellent: –50 dBm or stronger ● Good: –65 dBm or stronger ● Poor: weaker than –75 dBm Signal-to-noise ratio (SNR): ● Excellent: 25 dB or higher ● Good: 20 dB or higher Noise levels: Ideal: –90 dBm or lower. | Signal strength is measured in dBm (decibels per milliwatt). The closer the number is to zero, the stronger your signal (just like –50 is much better than –80). |
What is a wireless site survey?
A wireless site survey (also called a Wi-Fi site survey) is a comprehensive process of evaluating, analyzing, and optimizing your Wi-Fi network's performance. This process identifies the best placement for access points (APs), uncovers sources of interference, and ensures strong, consistent signal coverage throughout your space.
What we mean by the term “wireless site survey”
Key aspects of a wireless site survey include:
- Signal strength assessment: Measure Wi-Fi signal levels in all areas.
- Interference analysis: Identify and mitigate sources of wireless interference (e.g., neighboring networks, microwaves) using spectrum analysis and dedicated spectrum analyzers that scan noise levels across 2.4/5/6 GHz bands at up to 50 sweeps per second.
- Access point (AP) placement: Determine optimal locations for APs to maximize coverage and performance.
- Capacity planning: Ensure the network can handle the expected number of devices and bandwidth needs.
How to perform a wireless site survey
Professional agencies and IT teams typically follow these steps during a wireless site survey:
- Review floor plans and layouts: Analyze building blueprints to understand physical obstacles and coverage areas.
- Assess current infrastructure: Identify existing access points, cabling, and power sources.
- Plan access point placement: Use survey data and modeling tools to determine the optimal number and locations for APs.
- Conduct on-site measurements: Use specialized software to collect signal strength, interference, and coverage data throughout the premises.
Professional installation ensures optimal results, just like any critical infrastructure project requires specialized expertise. However, with the right tools, ongoing monitoring and optimization can often be managed in-house.
Meanwhile, check out 5 easy methods for resetting network settings on a Mac to fix connectivity and security issues.
Recommended tools for Wi-Fi surveys
Selecting the right tools is crucial for a successful Wi-Fi site survey. Here are top options to address common needs:
Need real-time network monitoring of Wi-Fi network?
Use iStat Menus. iStat Menus provides real-time monitoring of network usage, bandwidth, signal strength, and connection stability directly from your menu bar. Quickly spot and address connectivity issues as they arise.

Visualize Wi-Fi coverage and spot weak areas
Use NetSpot. NetSpot offers interactive, color-coded heatmaps to visualize Wi-Fi signal strength and identify coverage gaps. It also optimizes access point placement for maximum performance and helps with network planning.

Troubleshoot Wi-Fi interference and channel conflicts
Use WiFi Explorer. WiFi Explorer scans and analyzes wireless networks to detect interference, overlapping channels, and configuration problems. Delivers detailed insights for effective troubleshooting.

Map Wi-Fi dead zones before they cause issues
Use NetSpot. It helps you map out areas with poor or no signal using real-time Wi-Fi heatmaps, so you can resolve dead zones before they impact productivity. It’s also irreplaceable for wireless network design for your home office.

Also, check out the full list of best network monitoring tools.
What wireless surveys reveal
A wireless site survey provides actionable data to optimize your network. Typical deliverables include:
- Wi-Fi coverage heatmaps: Visual representations of signal strength across your space.
- AP location recommendations: Optimal placement for access points to maximize coverage and minimize interference.
- Interference sources: Identification of devices or networks causing signal disruption.
- Capacity analysis: Recommendations for additional equipment (e.g., antennas, extra APs) if needed.
- Coverage area assessment: Defines the size and boundaries of reliable network access.
This comprehensive data enables you to create an effective IT plan tailored to your organization’s needs.
2026 Wi-Fi performance benchmarks: What “good” actually looks like
A wireless site survey isn’t just about pretty maps — it’s about knowing your network is actually working well. Here’s what strong, reliable Wi-Fi should look like in 2026. These simple targets come from trusted experts and are easy to check with any survey tool.
Signal strength (RSSI):
- Excellent: –50 dBm or stronger
- Good (what you want in most areas): –65 dBm or stronger
- Minimum for reliable use: –67 dBm
- Poor (feels slow): weaker than –75 dBm
Signal-to-noise ratio (SNR):
- Excellent: 25 dB or higher
- Good: 20 dB or higher
Noise levels:
- Ideal: –90 dBm or lower (lower numbers mean less interference)
Why is a wireless site survey important?
A wireless site survey ensures your Wi-Fi network meets the demands of your space and users. Conducting a survey delivers:
- Improved connectivity: Consistent, high-speed access in every area.
- Reduced interference: Minimized signal overlap and external disruptions.
- Enhanced security: Helps identify coverage gaps and rogue access points that could expose the network to unauthorized access.
- Cost efficiency: Avoids unnecessary hardware purchases and future troubleshooting.
These benefits make wireless site surveys essential for reliable network performance in both business and home environments.
Types of wireless site surveys
There are four main types of wireless site surveys: passive, active, predictive, and hybrid. Each serves a specific purpose and is suited to different scenarios.
- Predictive site survey: Uses building blueprints and RF (radio frequency) propagation modeling software to simulate wireless coverage before installation. Ideal for new construction or large-scale deployments.
- Passive survey: Scans the environment to detect all wireless signals, SSIDs (Service Set Identifiers), channels, and interference without connecting to the network. Useful for diagnosing existing issues.
- Active survey: Connects to the Wi-Fi network to measure real-time metrics like throughput, latency, and packet loss. Validates performance and helps troubleshoot problems.
- Hybrid site survey: Combines passive and active methods for a comprehensive view, often used for ongoing maintenance in enterprise networks.
- Validation (post-deployment) site survey: Performed after installation to confirm the network meets design goals, measure real-world signal-to-noise ratios, and identify any new interference. Essential for ongoing optimization in 2026 Wi-Fi 6E/7 environments.
Optimize your Wi-Fi like a pro
A wireless site survey is a must for any business or home that relies on fast, stable internet. It saves time, reduces costs, and ensures your network operates at peak performance.
For self-managed networks, tools like NetSpot, iStat Menus, and WiFi Explorer empower you to monitor and troubleshoot your Wi-Fi with confidence. If persistent issues arise, consulting a certified wireless professional is always recommended.
You can explore all the apps mentioned in this guide with Setapp’s free 7-day trial. With over 260 curated apps, Setapp offers solutions for everything from productivity to advanced tech support.
FAQ
What is the difference between a Wi-Fi site survey and a network audit?
A Wi-Fi site survey focuses specifically on wireless network coverage, signal strength, and interference. A network audit reviews the entire IT infrastructure, including hardware, software, security, and both wired and wireless network performance.
How often should I conduct a wireless site survey?
It’s best to conduct a wireless site survey every 12–24 months, or whenever you experience network issues, install new equipment, or change your space’s layout. Regular surveys help maintain optimal performance and adapt to changing needs.
How much does a professional Wi-Fi site survey cost?
The cost varies by survey type and project size. Basic surveys typically start at $500–$2,000, while large-scale enterprise surveys can exceed $10,000, especially for complex environments with extensive infrastructure.
Can I do a wireless site survey myself?
Yes, you can perform a basic wireless site survey for home or small office networks. Here’s how:
- Install a WiFi analyzer tool (like NetSpot).
- Walk through your space, recording signal strength and noting dead zones.
- Adjust access point placement based on the results.
For large or mission-critical networks, professional expertise is recommended.
What is a Wi-Fi site survey?
A Wi-Fi site survey is a process that evaluates, analyzes, and optimizes the performance of a wireless network. It involves measuring signal strength, identifying sources of interference, and recommending access point placement to ensure reliable coverage and connectivity. To perform a Wi-Fi survey, you’ll need a tool like iStatMenus, WiFi Explorer, or NetSpot.
How do I perform a basic Wi-Fi site survey?
To perform a basic Wi-Fi site survey:
- Download a Wi-Fi survey tool (e.g., NetSpot).
- Walk through your space, logging signal strength at various points.
- Identify coverage gaps or interference sources.
- Adjust your access point locations as needed and retest.
What tools can help me run a Wi-Fi site survey?
NetSpot: For visual heatmaps and coverage analysis.
iStatMenus: For real-time network performance monitoring.
WiFi Explorer: For troubleshooting interference and channel conflicts.


