How to fix Mac not connecting to Wi-Fi issues: 7 quick solutions
Wi-Fi feels so natural that we don’t even tend to think about it unless it breaks. But when you see your Mac not connecting to Wi-Fi, your day might quickly take a turn for the worse. Follow my simple checklist to learn how to fix Wi-Fi connection and get back online in no time.
What are the reasons for Mac not connecting to Wi-Fi?
If your Wi-Fi icon in the menu bar has turned gray or shows an exclamation mark, it means your network is down. However, sometimes the icon is bright blue, and it may appear that MacBook is connected to Wi-Fi, but the internet is not available.
There are three top reasons why the Wi-Fi is not working:
- Mac software problems. From macOS to settings to conflicting apps, software might be the reason for Mac Wi-Fi not working.
- Router problems. Your router might be the issue if it hasn’t been updated for a while.
- Internet service provider (ISP) problems. Your ISP might have an outage or another temporary network issue. Also, make sure you’ve paid your internet bill!
If you have trouble with your internet, it’s likely because one (or more) of these three reasons isn’t working properly. For example, you might see your Wi-Fi icon as bright blue but not be able to connect because you need to authenticate yourself on the network internally (as you’d do at an airport).
How to force my Mac to connect to Wi-Fi
Let me start with a quick overview of the solutions. If you need more detailed instructions for each, scroll down.
| How to fix Wi-Fi issues? | Instructions |
|---|---|
| Check your Wi-Fi signal | Use WiFi Signal app for detailed info or Activity Monitor for a general overview. |
| Restart your Mac | Apple icon > Restart. |
| Restart your Wi-Fi router | Press the button on the router, wait 10 seconds, then press the button again. |
| Forget and reconnect to the network | Go to System Settings > Network > Wi-Fi. Click Details next to your network > Forget This Network. Then, reconnect. |
| Renew DHCP lease | Go to System Settings > Network > Wi-Fi. Click Details next to your network > TCP/IP > Renew DHCP Lease. |
| Update macOS | Go to System Settings > General > Software Update. |
| Update Wi-Fi drivers | Use a tool like CleanMyMac X to ensure all drivers on your Mac are up to date. |
If you follow the steps below, you should be able to resolve your network issues within a few minutes in 99% of cases. Most issues are simple glitches or software update bugs.
1. Check your Wi-Fi signal
When your Wi-Fi is not working as it should, it’s a good idea to check the strength of your Wi-Fi signal. The best way to do that is to use the WiFi Signal app for Mac.
WiFi Signal is a lightweight utility that works out of your menu bar and monitors your network to give you real-time updates. At any time, you can click on the WiFi Signal icon, and it’ll show you the current Wi-Fi speed, band, signal quality, noise level, and more. The app lets you set up notifications and label networks, which is great for troubleshooting.
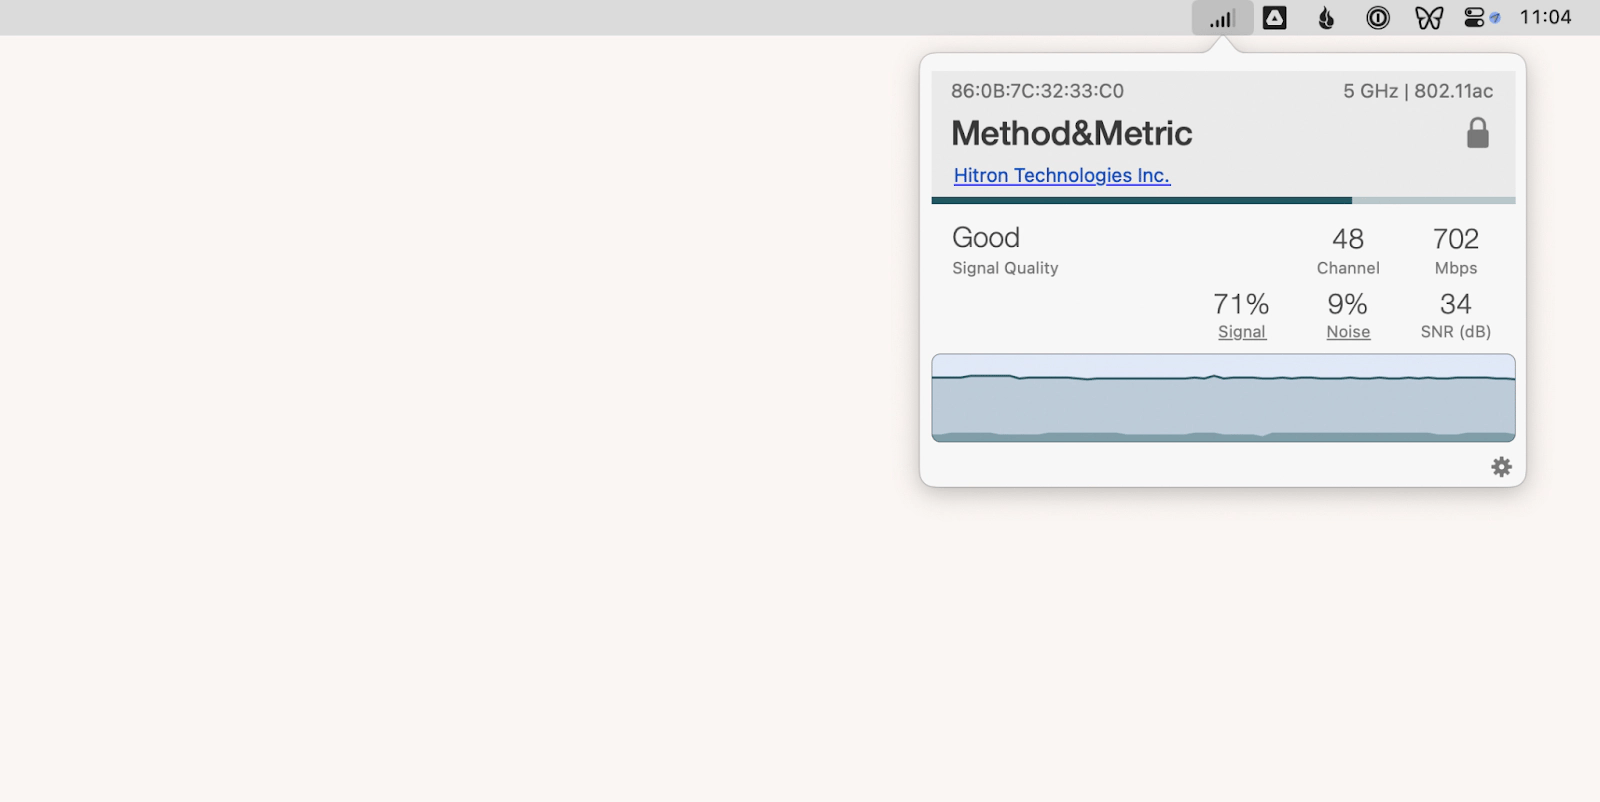
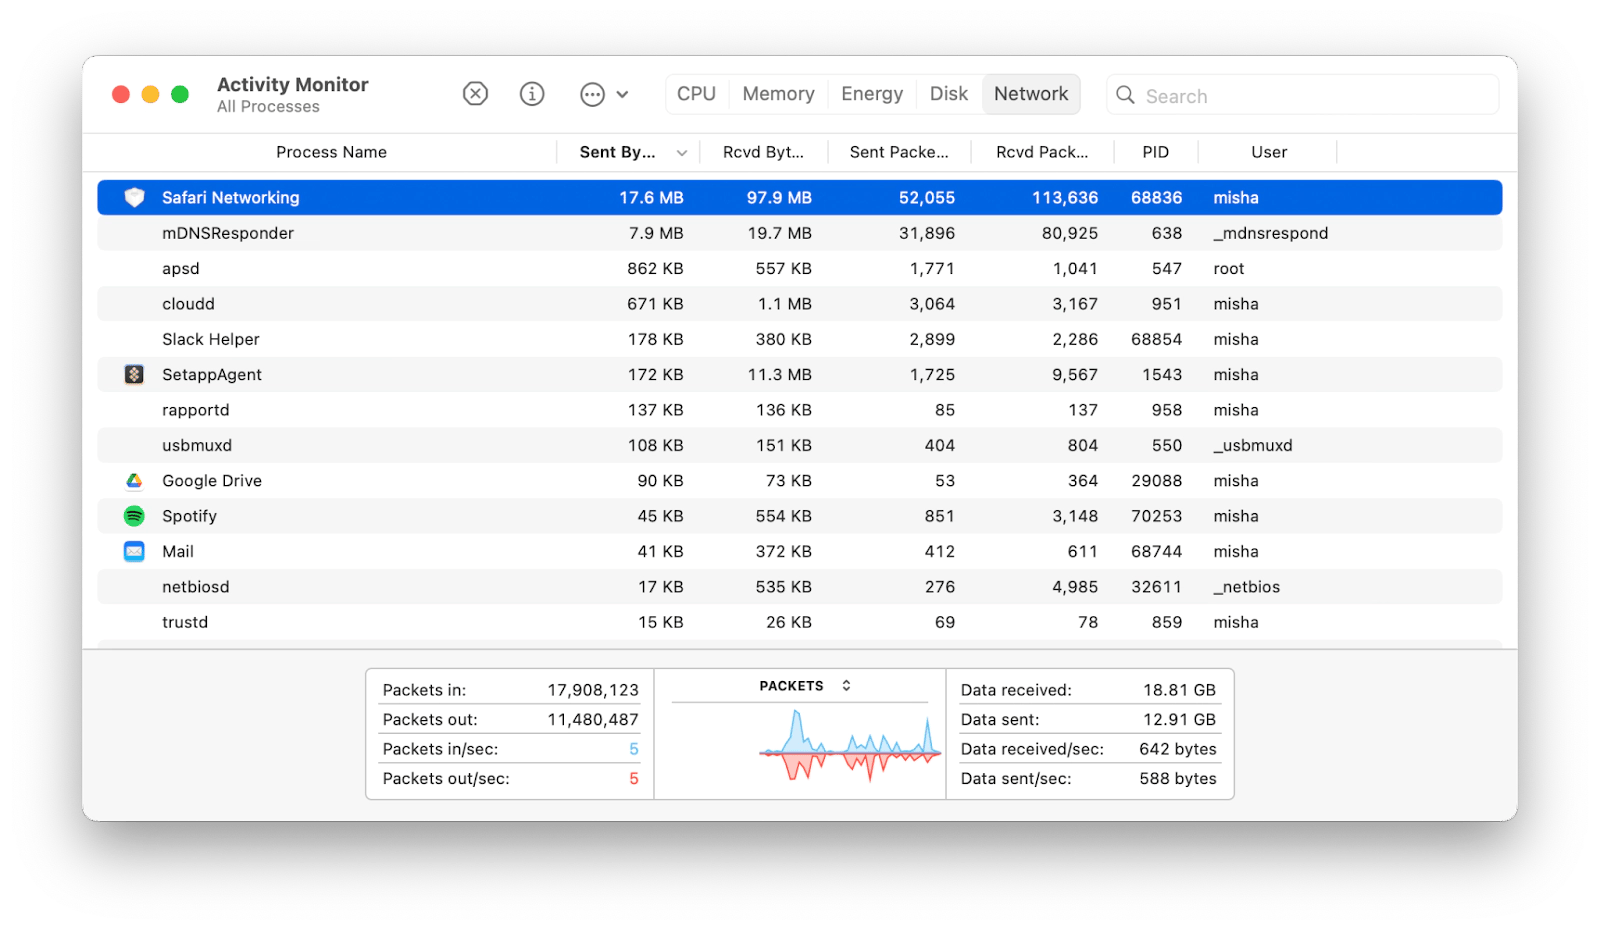
Alternatively, there isn’t a good way to measure your precise Wi-Fi signal with default Mac utilities. The best you can do without installing extra apps is to look at the Wi-Fi icon in the menu bar to see the signal strength based on the amount of full bars. Besides that, try launching Activity Monitor from the Utilities folder and navigating to the Network tab. If you see packets being transferred in and out in real time, your connection is working.
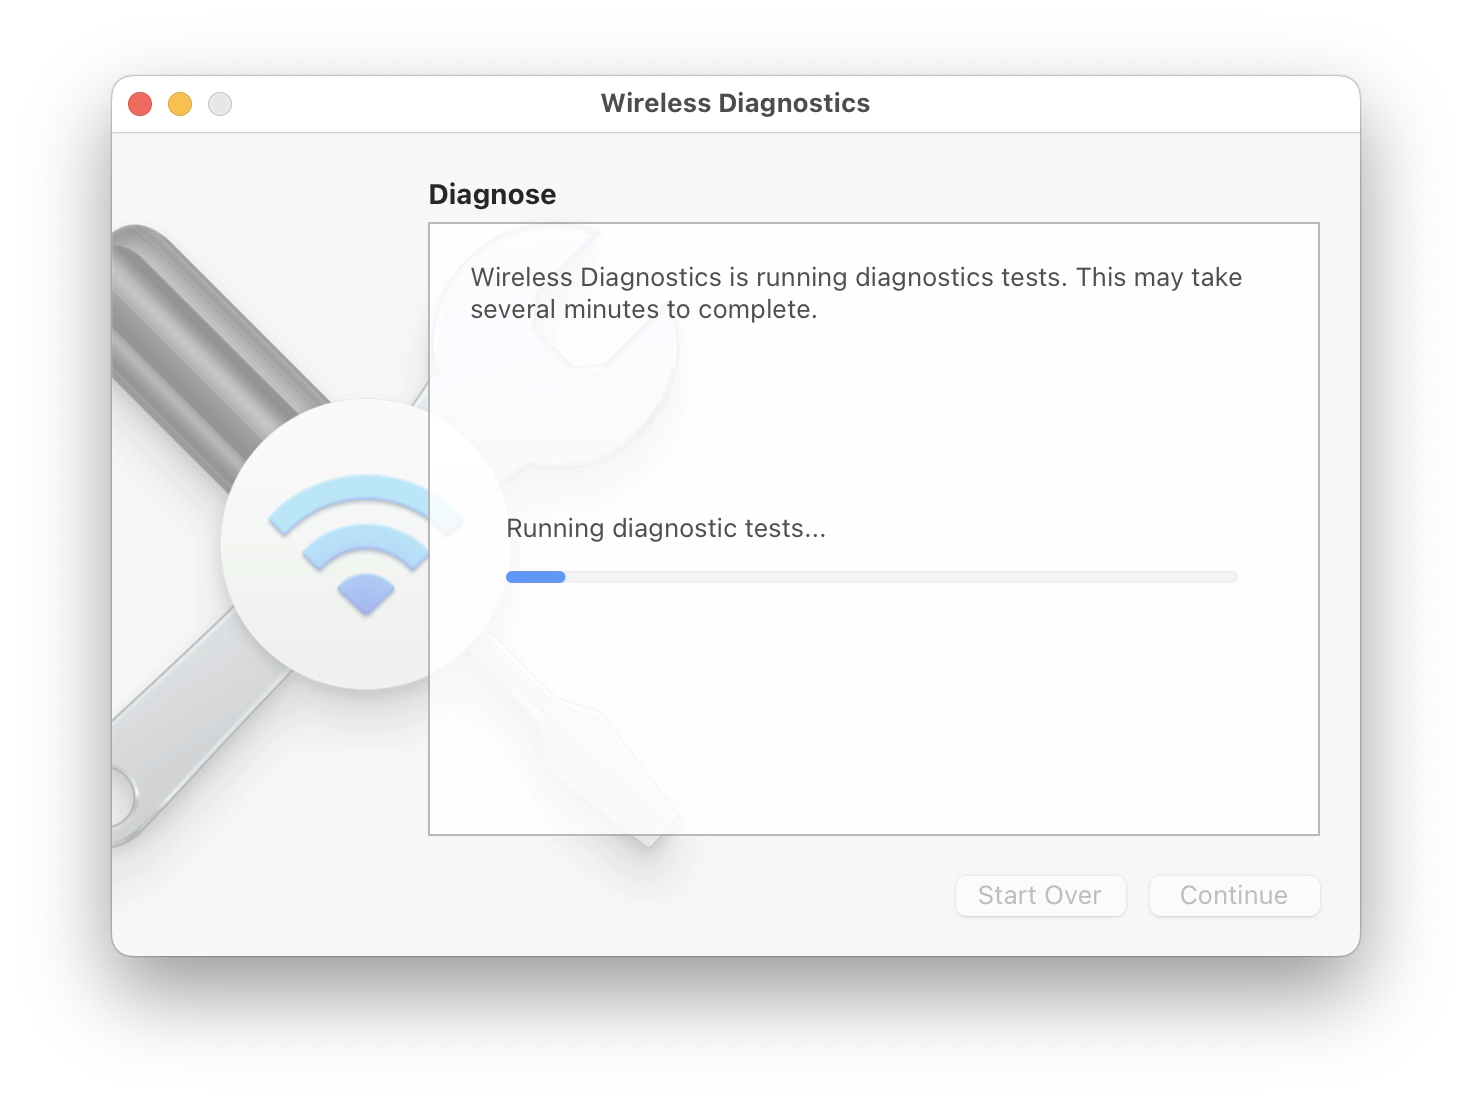
Lastly, you can launch a Wi-Fi diagnostics test from the Mac's Wireless Diagnostics tool, which you can find in the Utilities folder. This tool can generate technical reports that might be useful if you need to call up a technician to fix your Wi-Fi after all.
2. Restart Wi-Fi router and Mac
If you’ve identified a network issue, the first step to fixing it is always restarting your devices.
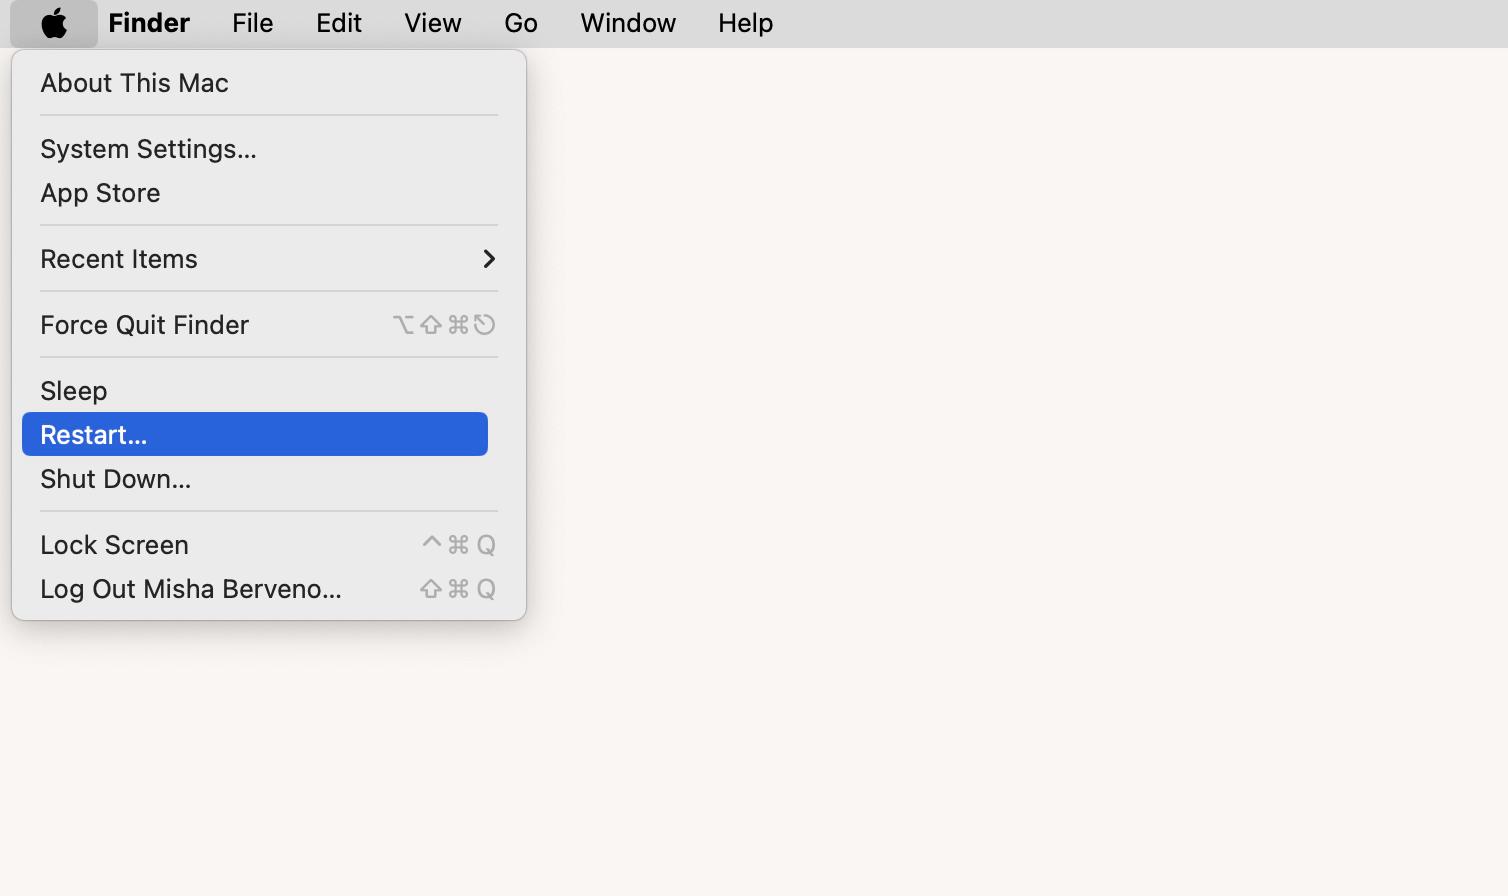
To restart your Mac:
- Click the Apple icon in the menu bar.
- Click Restart.
- Click Restart again.
If, after restarting, your Mac won’t connect to Wi-Fi, you need to restart your router. Find a router in your space and press the restart button twice (usually located on the back). Wait for a few minutes.
3. Forget Wi-Fi and reconnect your Mac to the network
Another common glitch is in how your Mac connects to the network on the software level. In these cases, forgetting the network and reconnecting to it from scratch might help.
To forget a Wi-Fi network:
- Open System Settings.
- Select Network > Wi-Fi.
- Next to your network, click Details.
- Click Forget This Network.
- Click Remove.
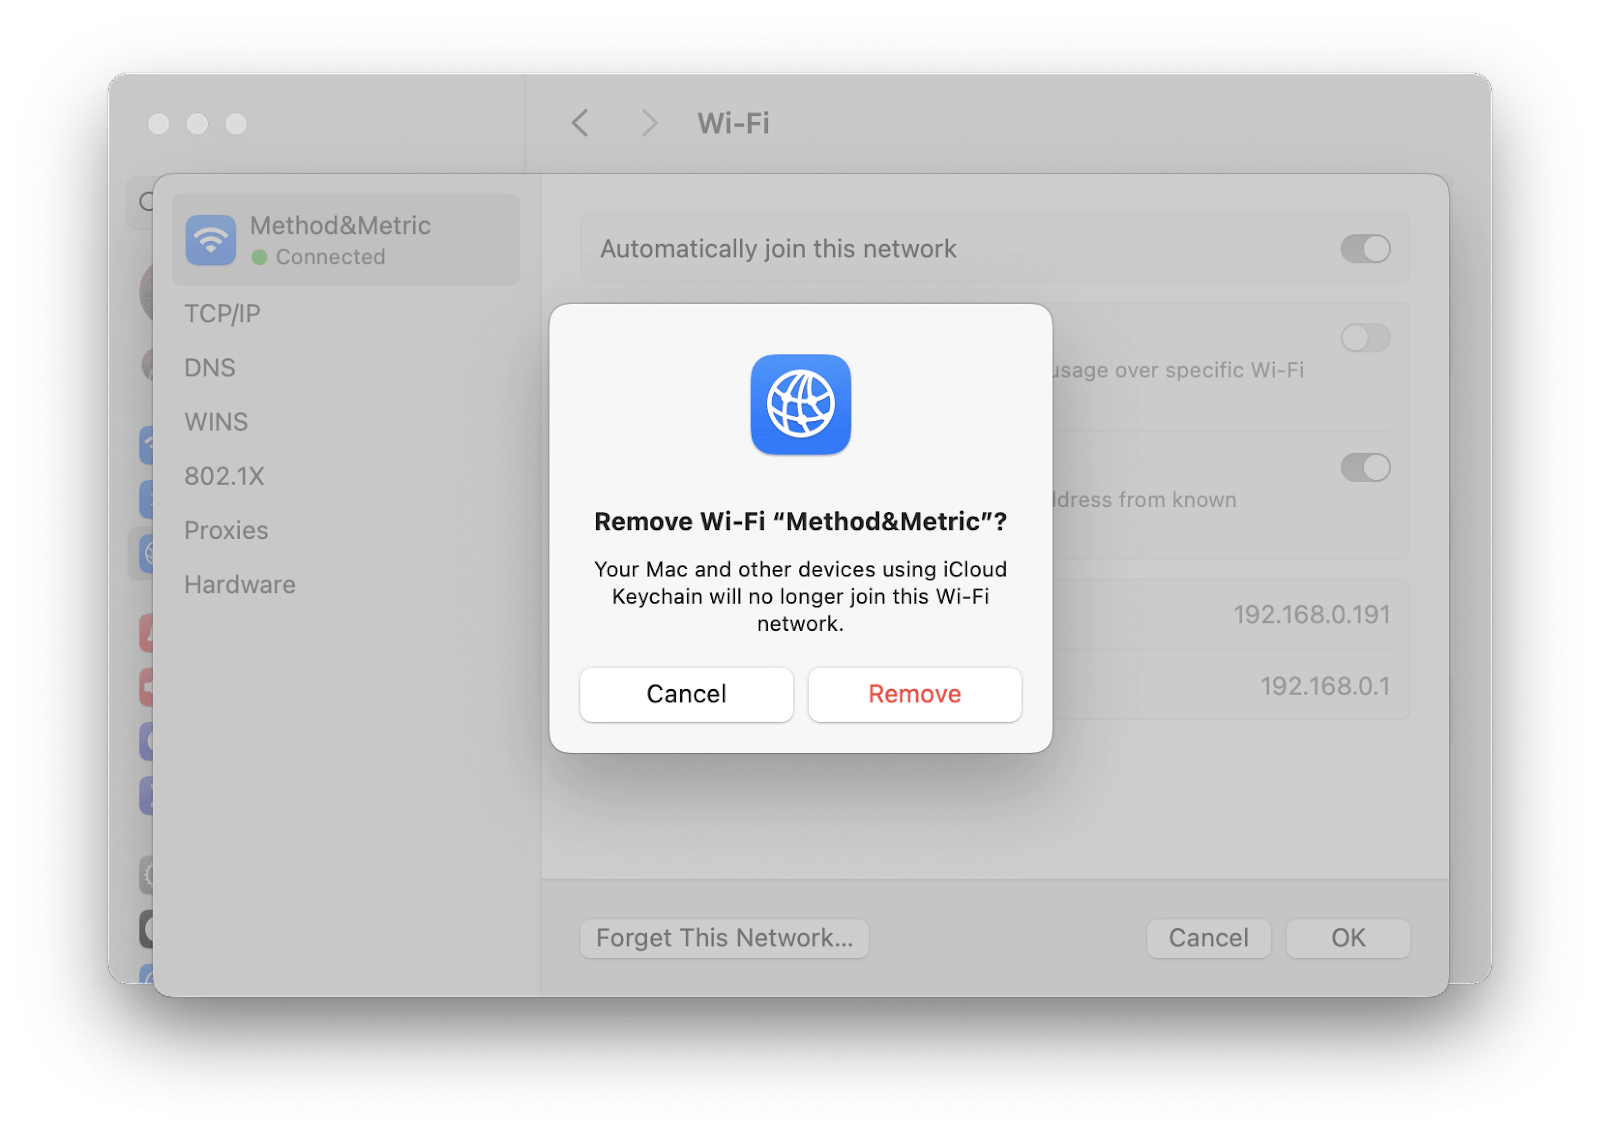
Once done, reconnect to your Wi-Fi network via the menu bar (you’ll have to enter the router/network password again).
4. Check Wi-Fi network configuration
The way your Wi-Fi network is physically configured makes a big difference when it comes to performance. The further away you’re from the router or, the more walls there are to separate you, the weaker your Wi-Fi signal becomes. That’s why Wi-Fi router extensions are often used.
In practice, it’s hard to know how many Wi-Fi extensions you need without looking at some sort of map. But there’s NetSpot.
NetSpot is one of the best apps for analyzing, managing, and fixing your network connection issues. Besides detailed stats on all the Wi-Fi networks around you, NetSpot allows you to upload or draw a map of your space and test the signal throughout, so you can identify weak spots and extend your Wi-Fi coverage accordingly.
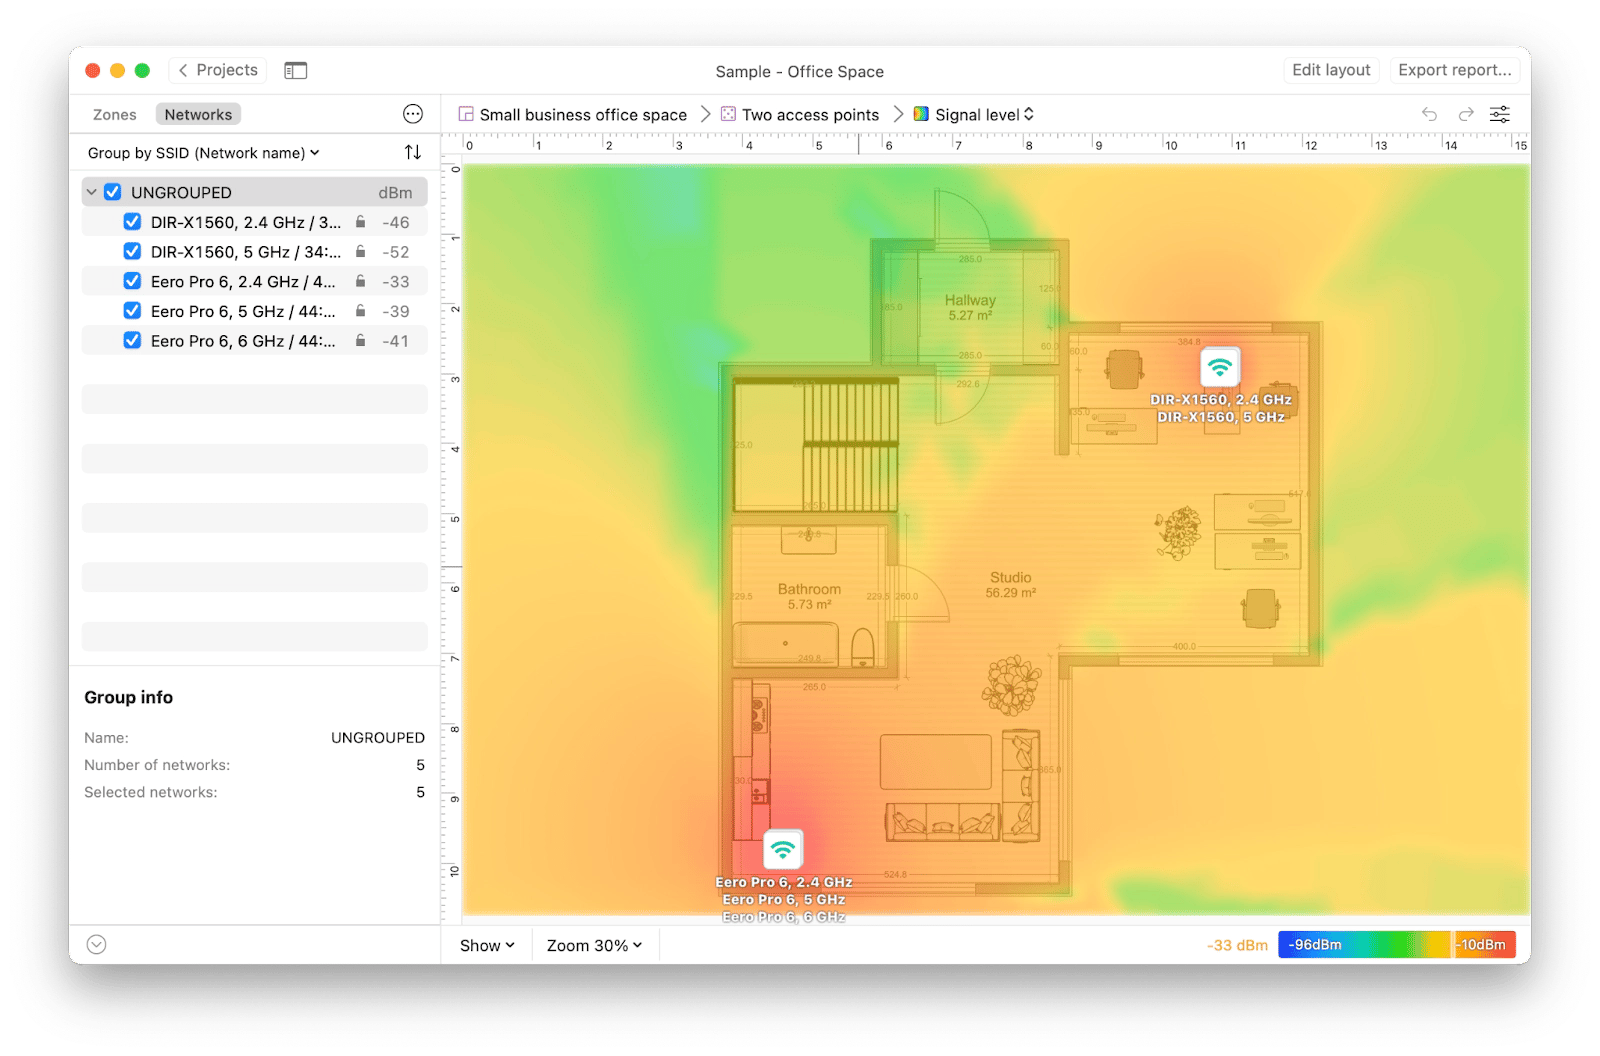
Another quick tip is to make sure your Wi-Fi allows for a 5 GHz band frequency, which is generally faster and less susceptible to interference. If you don’t have two networks (2.4 GHz and 5 GHz) enabled by default, you can change that by logging into your router settings. Check on the back of the router for more information. However, if you only have one Wi-Fi router and it’s far away, switching to the 2.4 GHz band might improve your signal since this band has a better range.
5. Renew DHCP lease
One of the more technical solutions to the “why my MacBook is not connecting to Wi-Fi” problem is renewing a DHCP (dynamic host configuration protocol) lease. DHCP is a network management protocol that assigns IP addresses to your devices.
When you renew your DHCP lease, your Mac will be forced to get a new IP address, which can resolve a lot of the glitches at the network level.
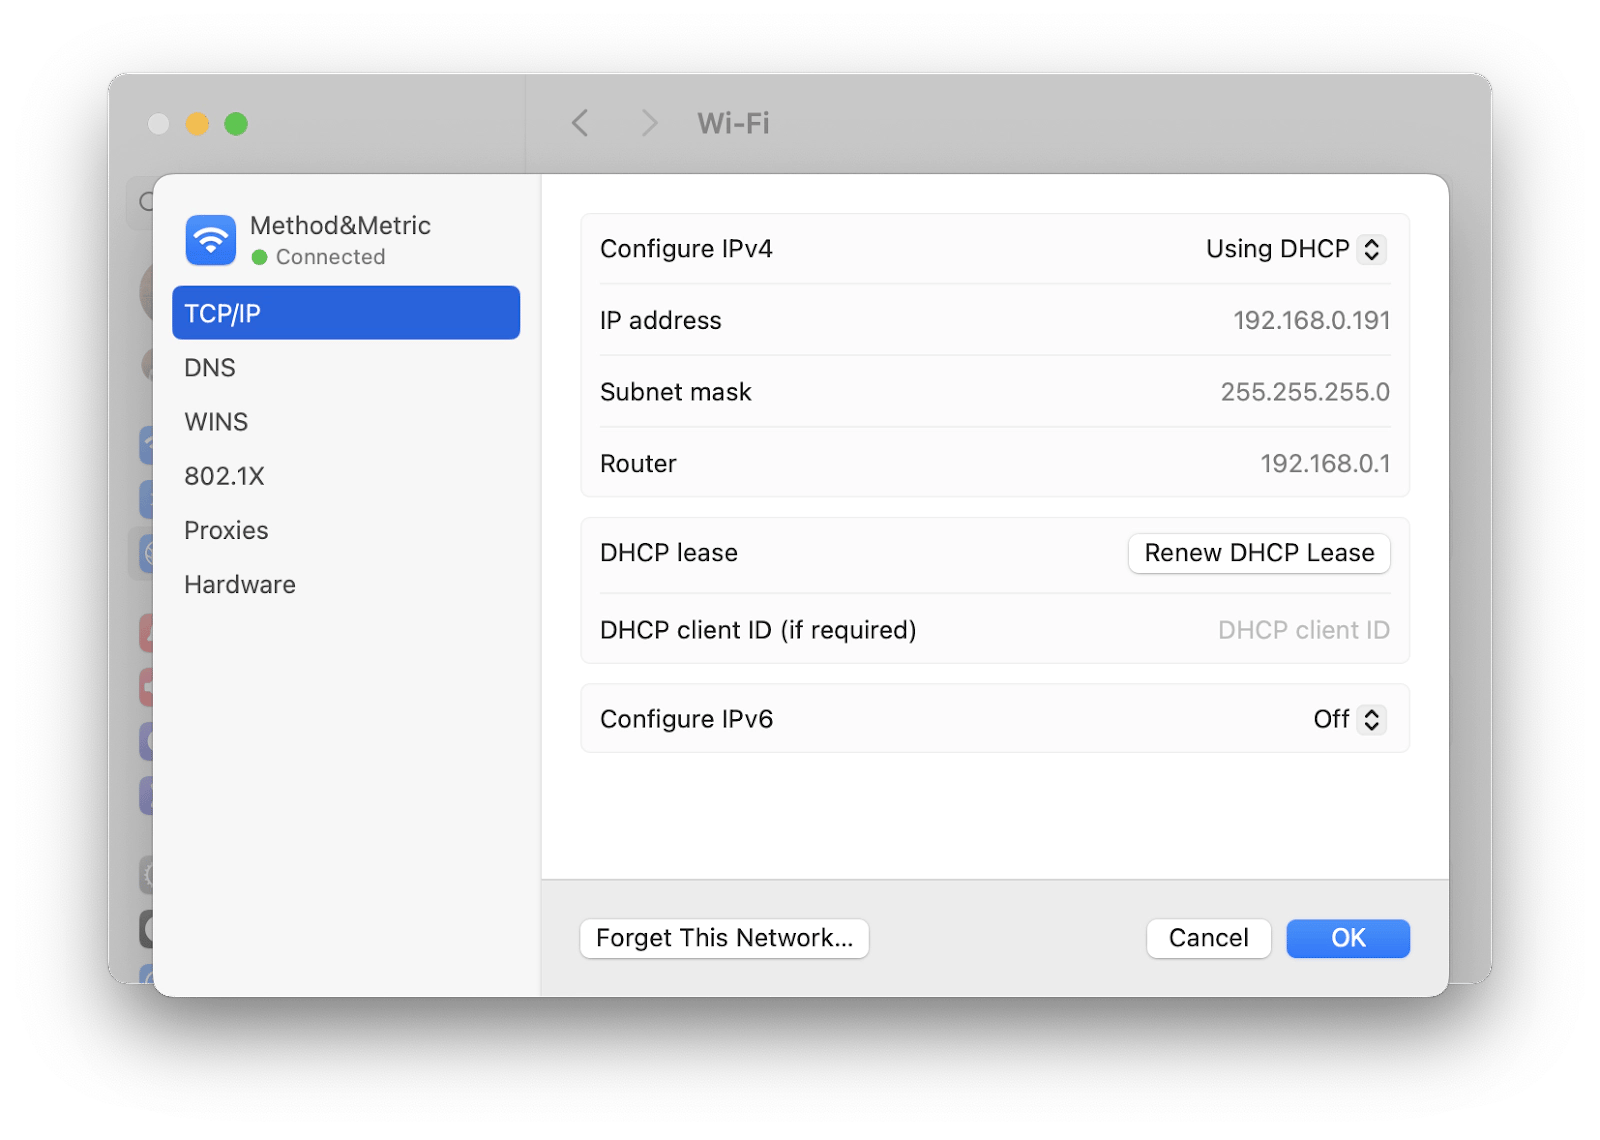
Renewing DHCP lease is easy:
- Open System Settings.
- Select Network > Wi-Fi.
- Next to your Wi-Fi network, click Details.
- Go to TCP/IP.
- Click Renew DHCP Lease.
6. Update Mac software
The majority of bugs and security issues with your Mac come from not running the latest stable version of macOS. That’s why it’s important to keep your Mac up to date.
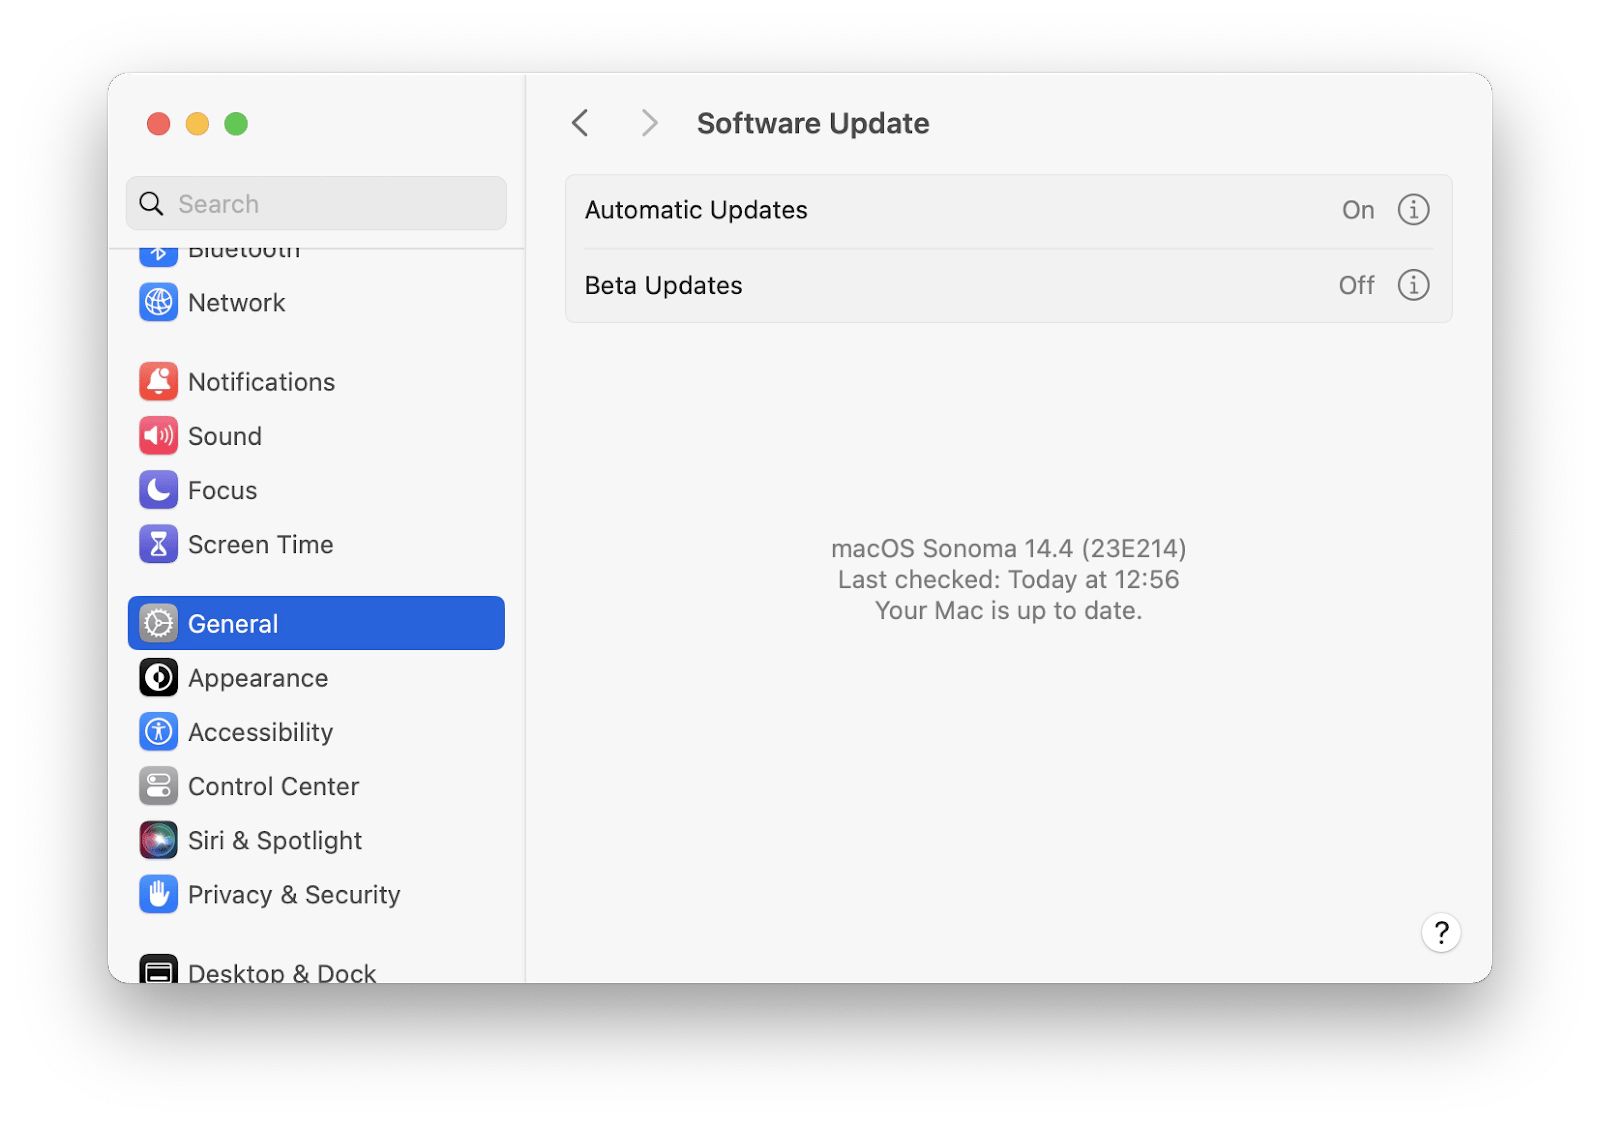
Here’s how to update your macOS:
- Open System Settings.
- Go to General > Software Update.
- Turn on automatic updates.
- If there’s a new macOS version available, click Update.
7. Update Wi-Fi drivers
Those who have experience using Windows remember that it’s necessary to install drivers for everything. But it’s usually not so on the Mac. You should get everything you need to run your apps by keeping them updated.
Check whether your router or modem has its own software and find out how to update it regularly. Besides, look up how to upgrade the software on the router itself, if possible.
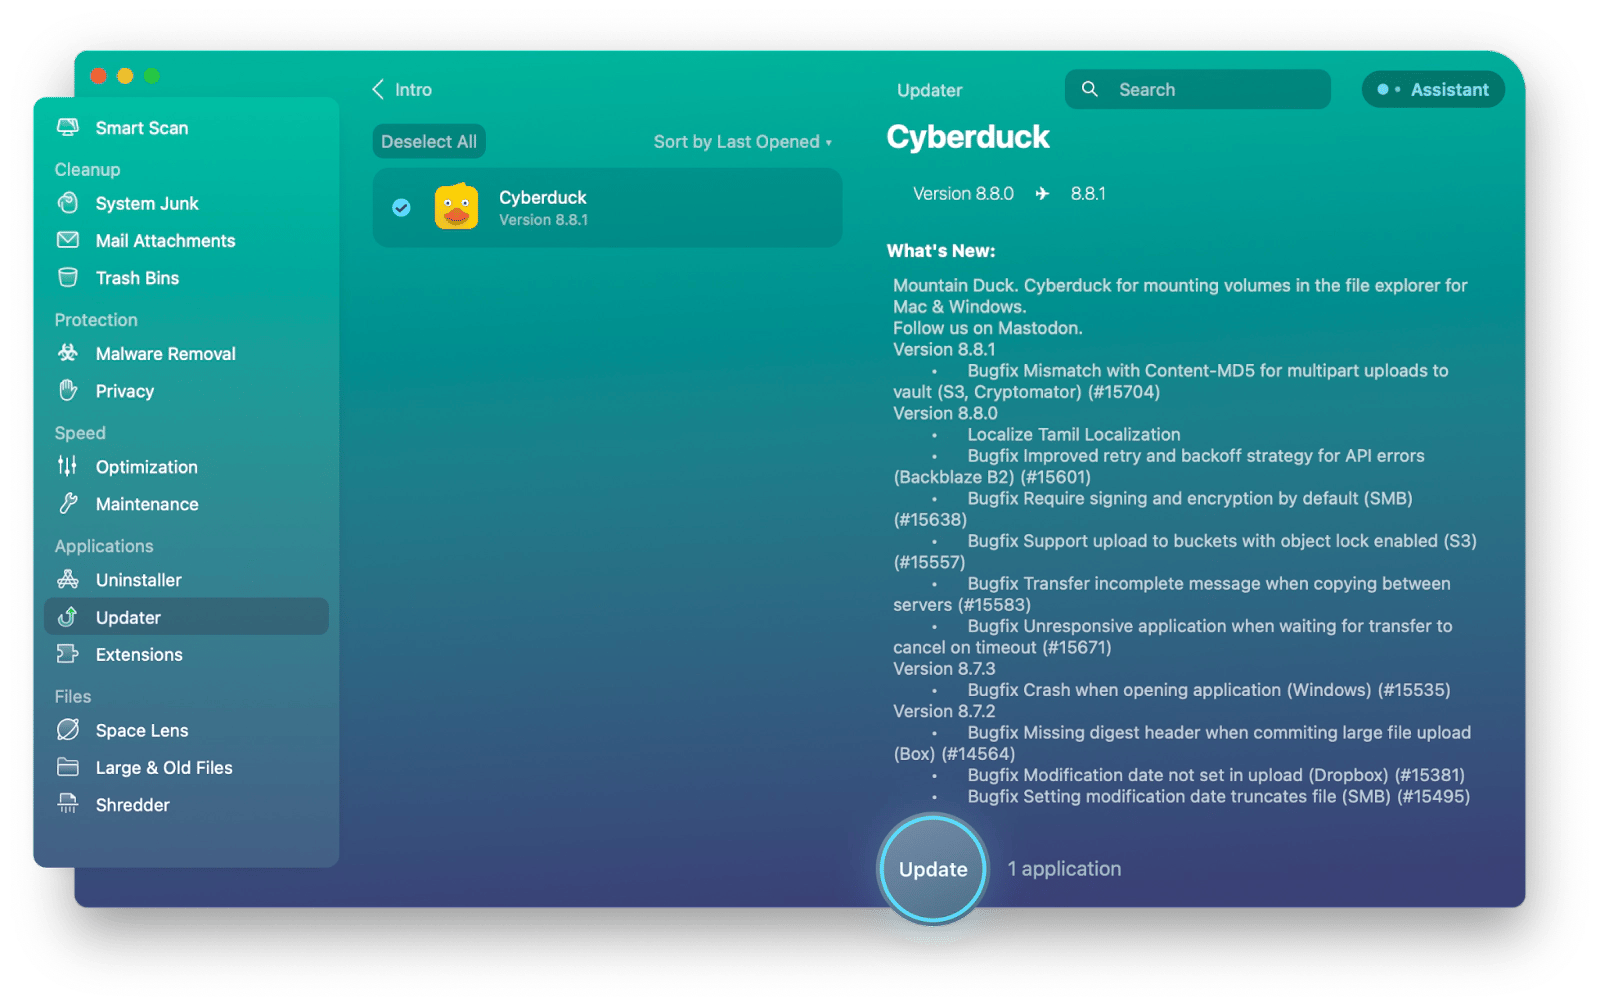
The easiest way to do software updates is to have a Mac optimization app like CleanMyMac X.
CleanMyMac X can improve every aspect of your Mac, from getting rid of junk to removing malware, to protecting your privacy, to uninstalling apps, to updating them — all in a few clicks.
Here’s how to update all software with CleanMyMac X:
- Open CleanMyMac X.
- Click Updater in the sidebar.
- Select the apps you want to update.
- Click Update.
Summing up: Best solutions when Mac Wi-Fi is not working
Following the steps above should quickly resolve your “my Wi-Fi is not working” questions. As you can see, you just need to have a few apps in your toolkit, such as Wi-Fi Signal for real-time connection details, NetSpot for visual network signal representation, and CleanMyMac X for updating and resolving software issues.
When you find a MacBook not connecting to Wi-Fi, try Wi-Fi Signal, NetSpot, and CleanMyMac X for free during the seven-day trial of Setapp. Setapp is a platform with more than 240 Mac and iOS apps across all categories you can think of, from writing prose to editing photos. Download any app from Setapp today at no cost and find useful tools that you’ve been missing.
FAQs
How do I force my Mac to connect to Wi-Fi?
Go to the WiFi icon in the menu bar and choose the network you want to join. If prompted, enter the password for the network, and your Mac should go online.
Why does my Mac Wi-Fi have an exclamation point?
The Wi-Fi icon with an exclamation point indicates that a router and IP address can’t be assigned to the Wi-Fi interface, so your Mac won’t connect to the internet.
How do I fix the exclamation mark on my Wi-Fi?
The exclamation mark on the Mac Wi-Fi icon indicates trouble with the internet connection. To fix it, try the following:
- Troubleshoot it with WiFi Signal.
- Restart the Wi-Fi router and your Mac.
- Forget the Wi-Fi network and reconnect your Mac to it.
- Check the Wi-Fi network configuration.
- Renew the DHCP lease.
- Update Wi-Fi drivers with CleanMyMac X.
What does it mean when the Wi-Fi menu is dimmed on the menu bar of a Mac?
Typically, there are two reasons for this: either your Wi-Fi is turned off, or it is not working properly.
Why does my Mac keep disconnecting from Wi-Fi?
The most common reasons why your Mac keeps disconnecting from Wi-Fi are:
- A weak signal.
- Router problems.
- Network configuration issues.
- Outdated macOS or drivers.
- Interference from other networks.
- Faulty Wi-Fi hardware.
To start troubleshooting, try Wi-Fi Signal.


