How to find the best WiFi channel for your home or office
They say choosing Wi-Fi channel is all about better coverage, network connection stability, and reduced network. I faced a similar problem when I noticed that the speed and stability of my internet in most cases got lower. Initially, I had no freaking idea as to why it was happening. After spending some time troubleshooting and trying out different strategies, I was able to identify the right Wi-Fi channel. Consequently, I had to adjust my Wi-Fi channel scanning procedures. I will explain how to find and scan WiFi channels for both your Mac and iPhone.
What are the best Wi-Fi channels?
When I finally got around to sharing Wi-Fi in my apartment, my first attempt was to select the most efficient channel possible. That was a smart move, as channel selection is crucial if better performance is to be achieved. Experiment is my second name, so I tested a few channels, including 2.4, 5, and 6 GHz frequency bands. Want to know the outcome? Read on.
Big question: Difference between 2.4 GHz vs. 5 GHz vs. 6 GHz
| Let’s compare! | 2.4 GHz | 5 GHz | 6 GHz |
|---|---|---|---|
| Device compatibility | Works with most older devices | Works with newer dual-band devices | Works with Wi-Fi 6E devices |
| Wi-Fi coverage | Better for larger areas (through walls, etc.) | Best for small to medium-sized open spaces | Limited range, ideal for closer proximity |
| Speed | Up to 600 Mbps, typically 150 Mbps | Up to 1300 Mbps | Up to 9.6 Gbps |
| Interference | More susceptible to interference | Less interference, more channels | Least interference (less congestion) |
| Best for | Multiple rooms, general use, moderate speeds | High-speed activities (gaming, streaming, etc.) | Very high-speed applications (4K/8K streaming, AR/VR) |
| Non-overlapping channels | 3 (1, 6, 11) | 24 channels | Multiple non-overlapping channels |
Which Wi-Fi channel is less crowded
Having tested different channels, I discovered that:
- 2.4 GHz networks are the most crowded ones, as many default routers are set to channel 6. To avoid congestion, make sure you switch to channel 1 or 11.
- The 5 GHz band is less congested when compared to the 2.4 GHz as it has many overlapping channels, but channels like 36, 40, 44, and 48 are often the go-to options for better connections and suitable network performance.
- The 6 GHz band is the least crowded of the lot, as it has some 59 channels, which essentially makes it impenetrable to interference. Though it’s meant for short spaces, it should be an option, provided you possess a Wi-Fi 6E router.
How to pick the best Wi-Fi channel
Don’t pick the best Wi-Fi channel manually (trust me, I’ve been there). Kidding, of course. If you’re planning to do so, first check out what I learned testing different brands:
| Frequency band | Why choosing? | Downsides | ||
|---|---|---|---|---|
| 2.4 GHz | Great for covering larger areas since it has a better range. | It’s slower, usually around 150 Mbps, and tends to get a lot of interference. | ||
| 5 GHz | Gives you a performance boost, with speeds hitting up to 1300 Mbps;Has more channels, and there’s less interference. | Doesn’t cover as large of an area as 2.4 GHz. | ||
| 6 GHz | Get impressive speeds — up to 9.6 Gbps;Perfect for intense activities like gaming or streaming in 4K. | Works best in smaller spaces only. | ||
How to scan your Wi-Fi channels
The first and foremost step is to scan your Wi-Fi channels to see how they perform. Overcrowded channels can cause slower speeds and unstable connections.
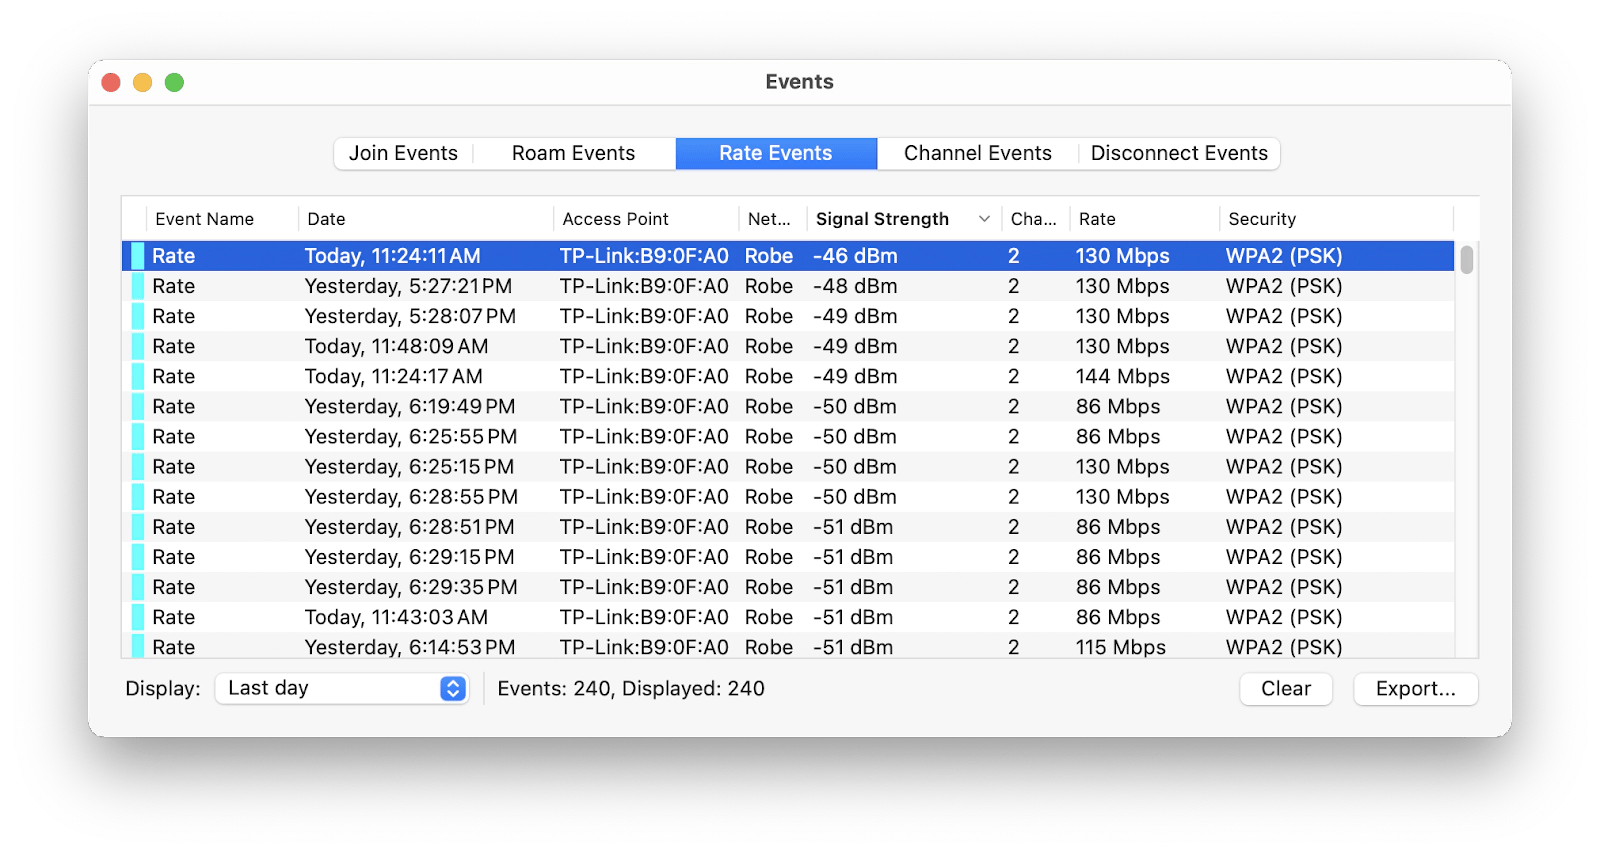
The simplest and fairly easiest way to check is to use Wi-Fi Signal. The app gives a clear picture of your Wi-Fi health. You can see your current signal strength, speed, and all the data you need to know about your network connection.
Plus, if your signal drops, you’ll receive a notification — for me, it’s a must-have during video calls so I can switch to another network quickly.
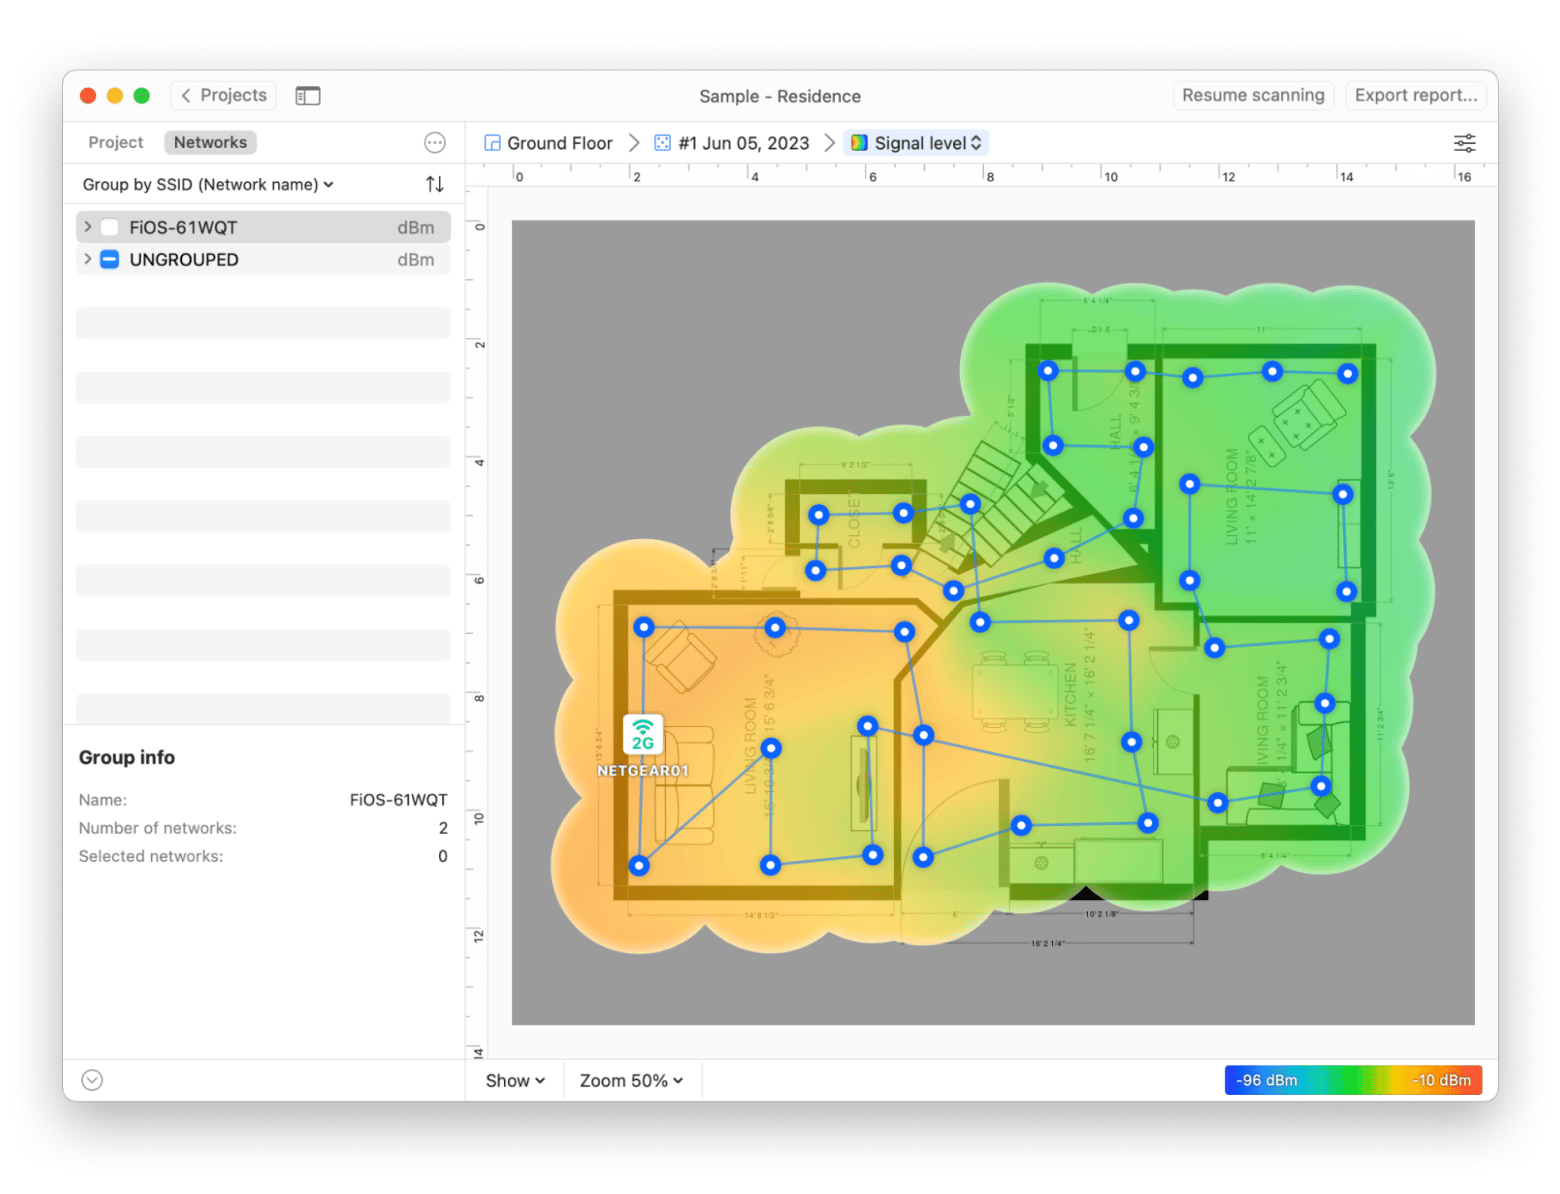
For more in-depth analysis, I turned to NetSpot. This tool is ideal for detailed Wi-Fi scanning. It scans networks, detects Wi-Fi overlapping channels, and generates automated reports that can help users look for congestion around their area. What I liked the most was that NetSpot even provided a heat map, which is really good for visualizing Wi-Fi coverage around your apartment or any other area.
How to change Wi-Fi channel
You can change your Wi-Fi channel using the following steps:
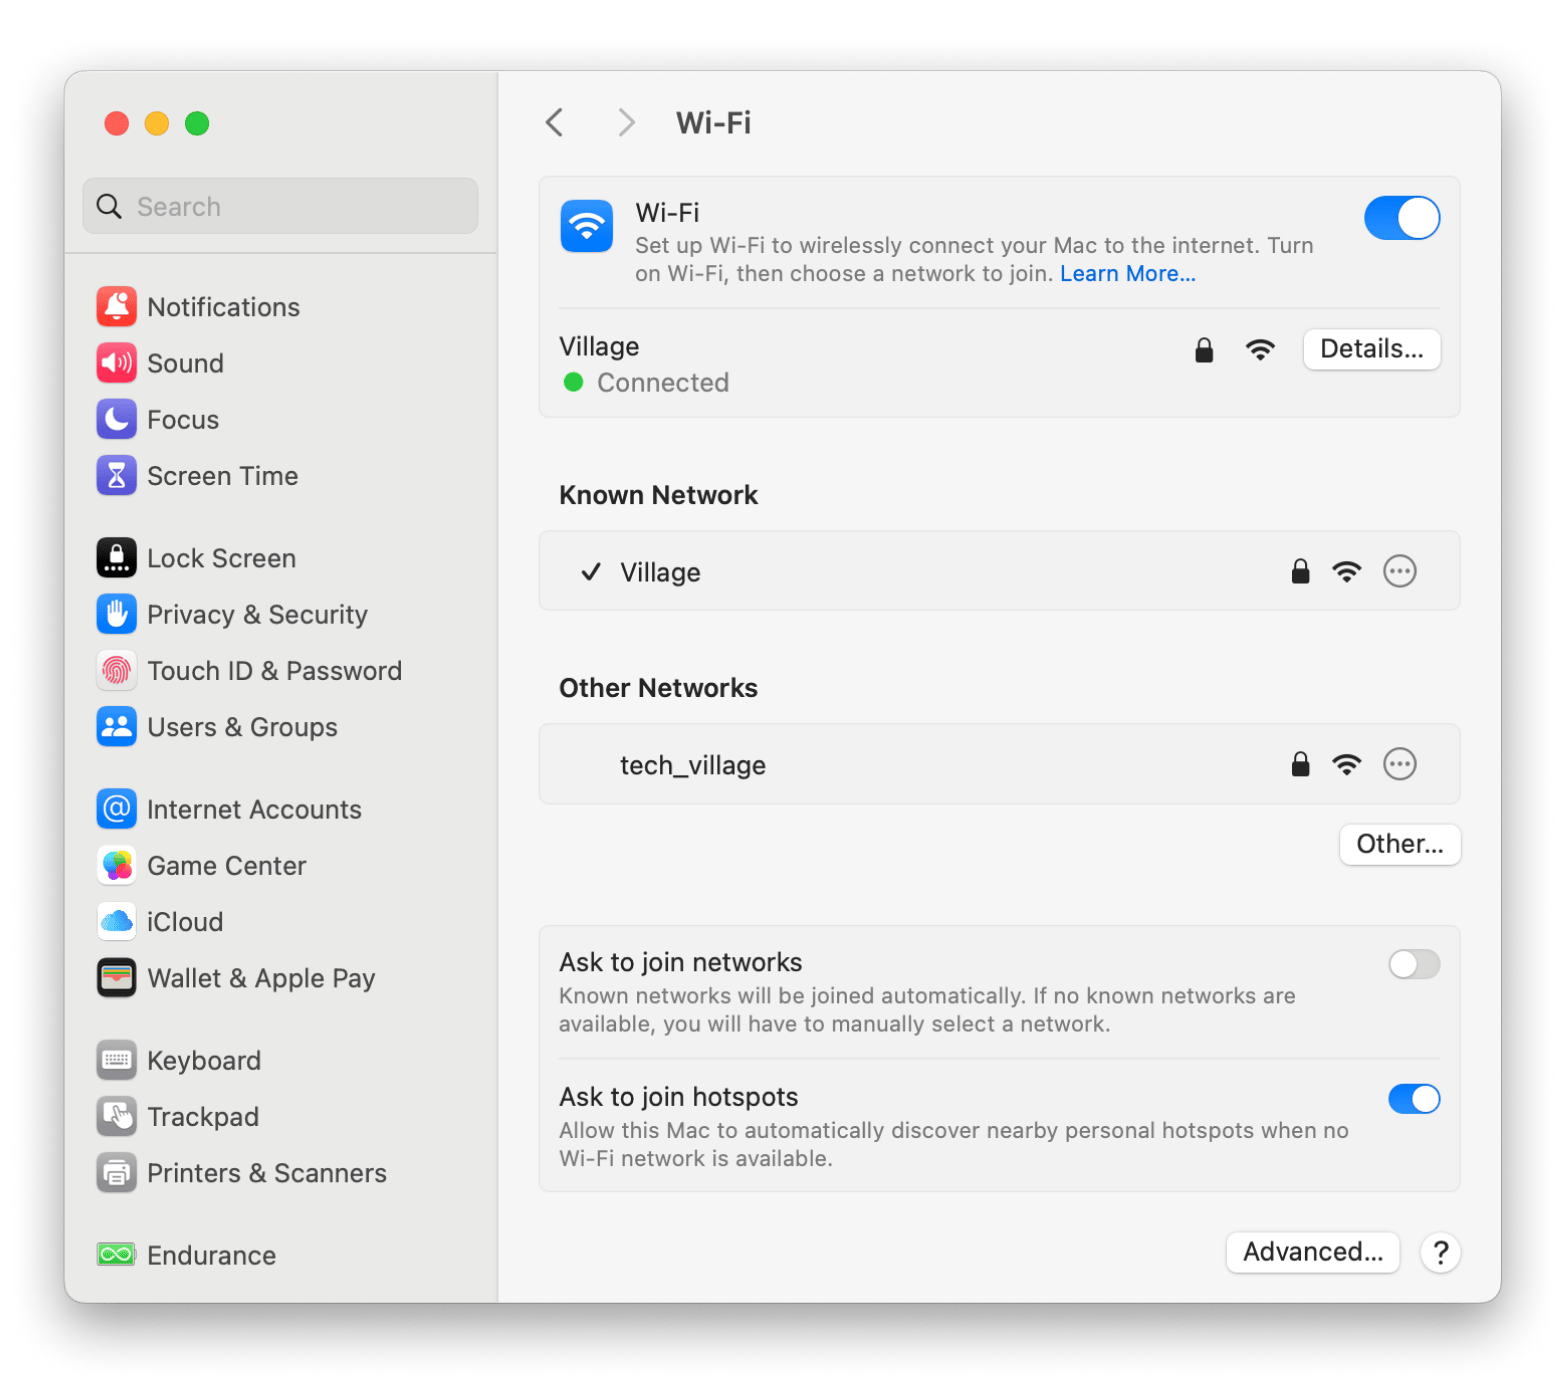
- Go to the Aplle menu > System Settings > Network.
- Click Wi-Fi > Details.
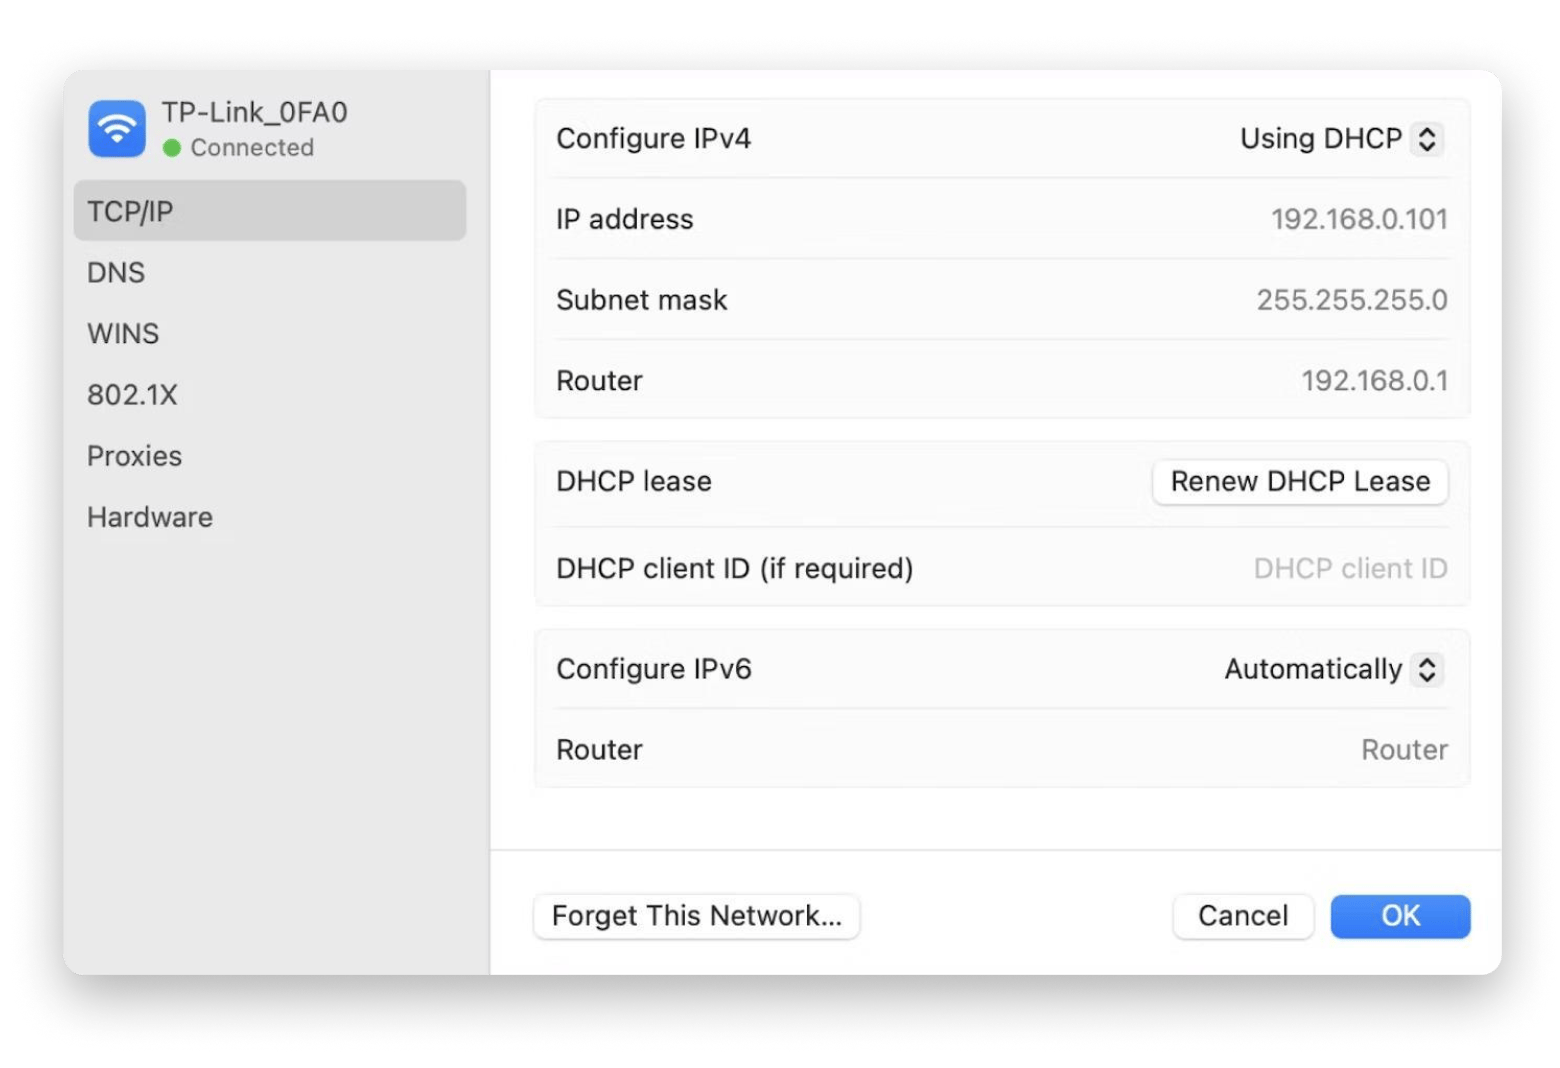
- Click the TCP/IP tab, and copy the Router address.
- Open a browser > Paste the Router’s IP address > Press Return.
- Log in to the router's admin page. If you're not sure about the login info, it might be on the router's label, or you might need to reset it.
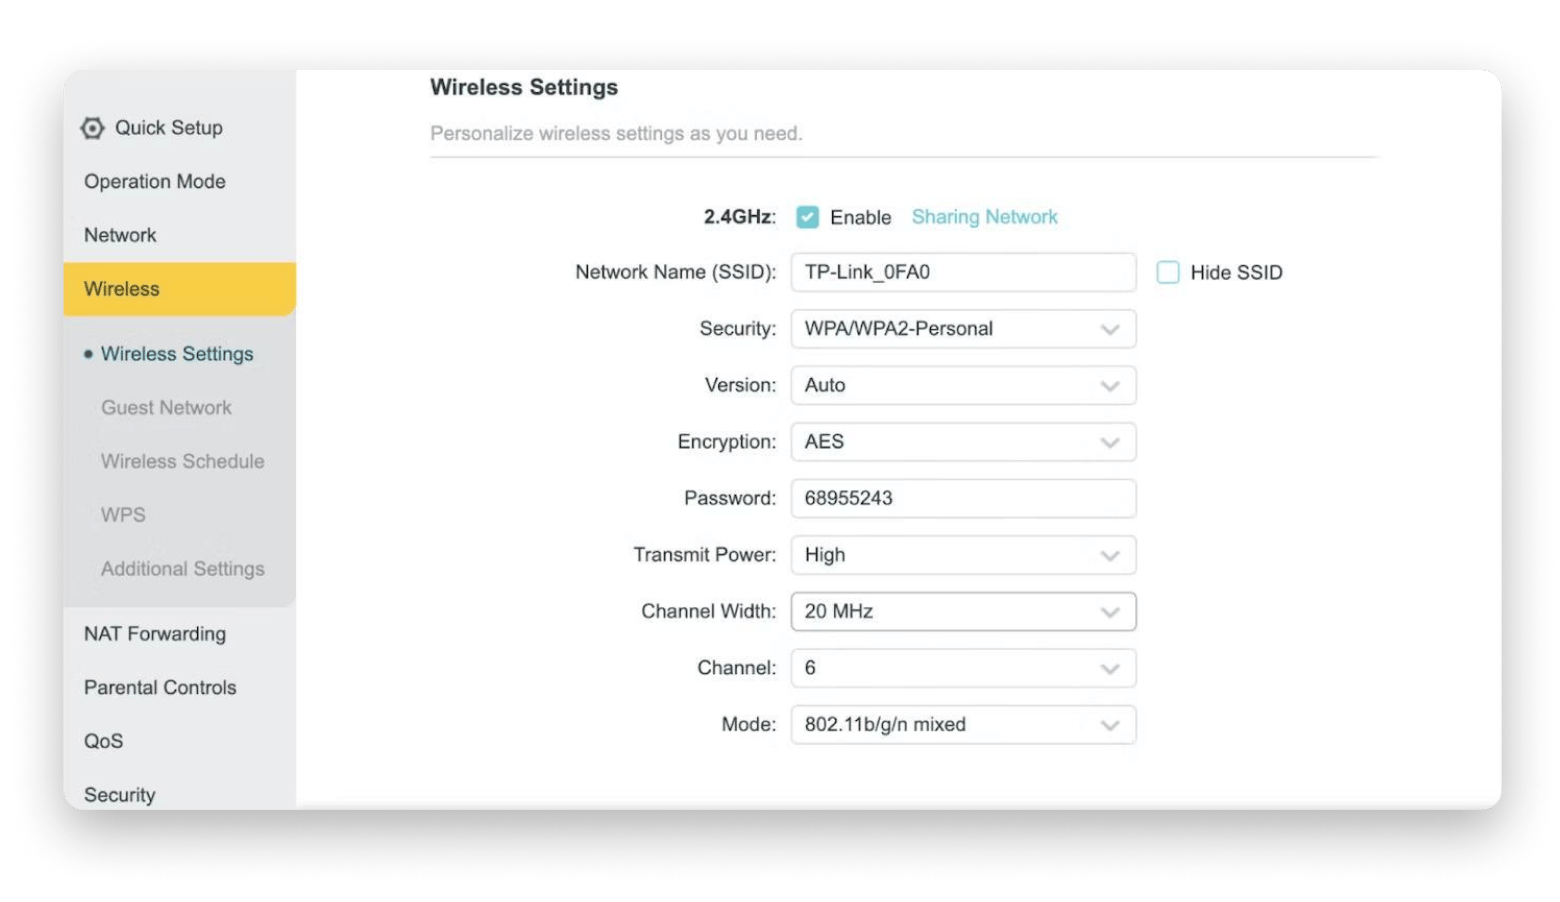
- To scan wireless channels, go to the Wireless Settings (or similar name) in your router's menu.
- Search for the Channel dropdown > Pick a channel that has less interference, and then save your changes.
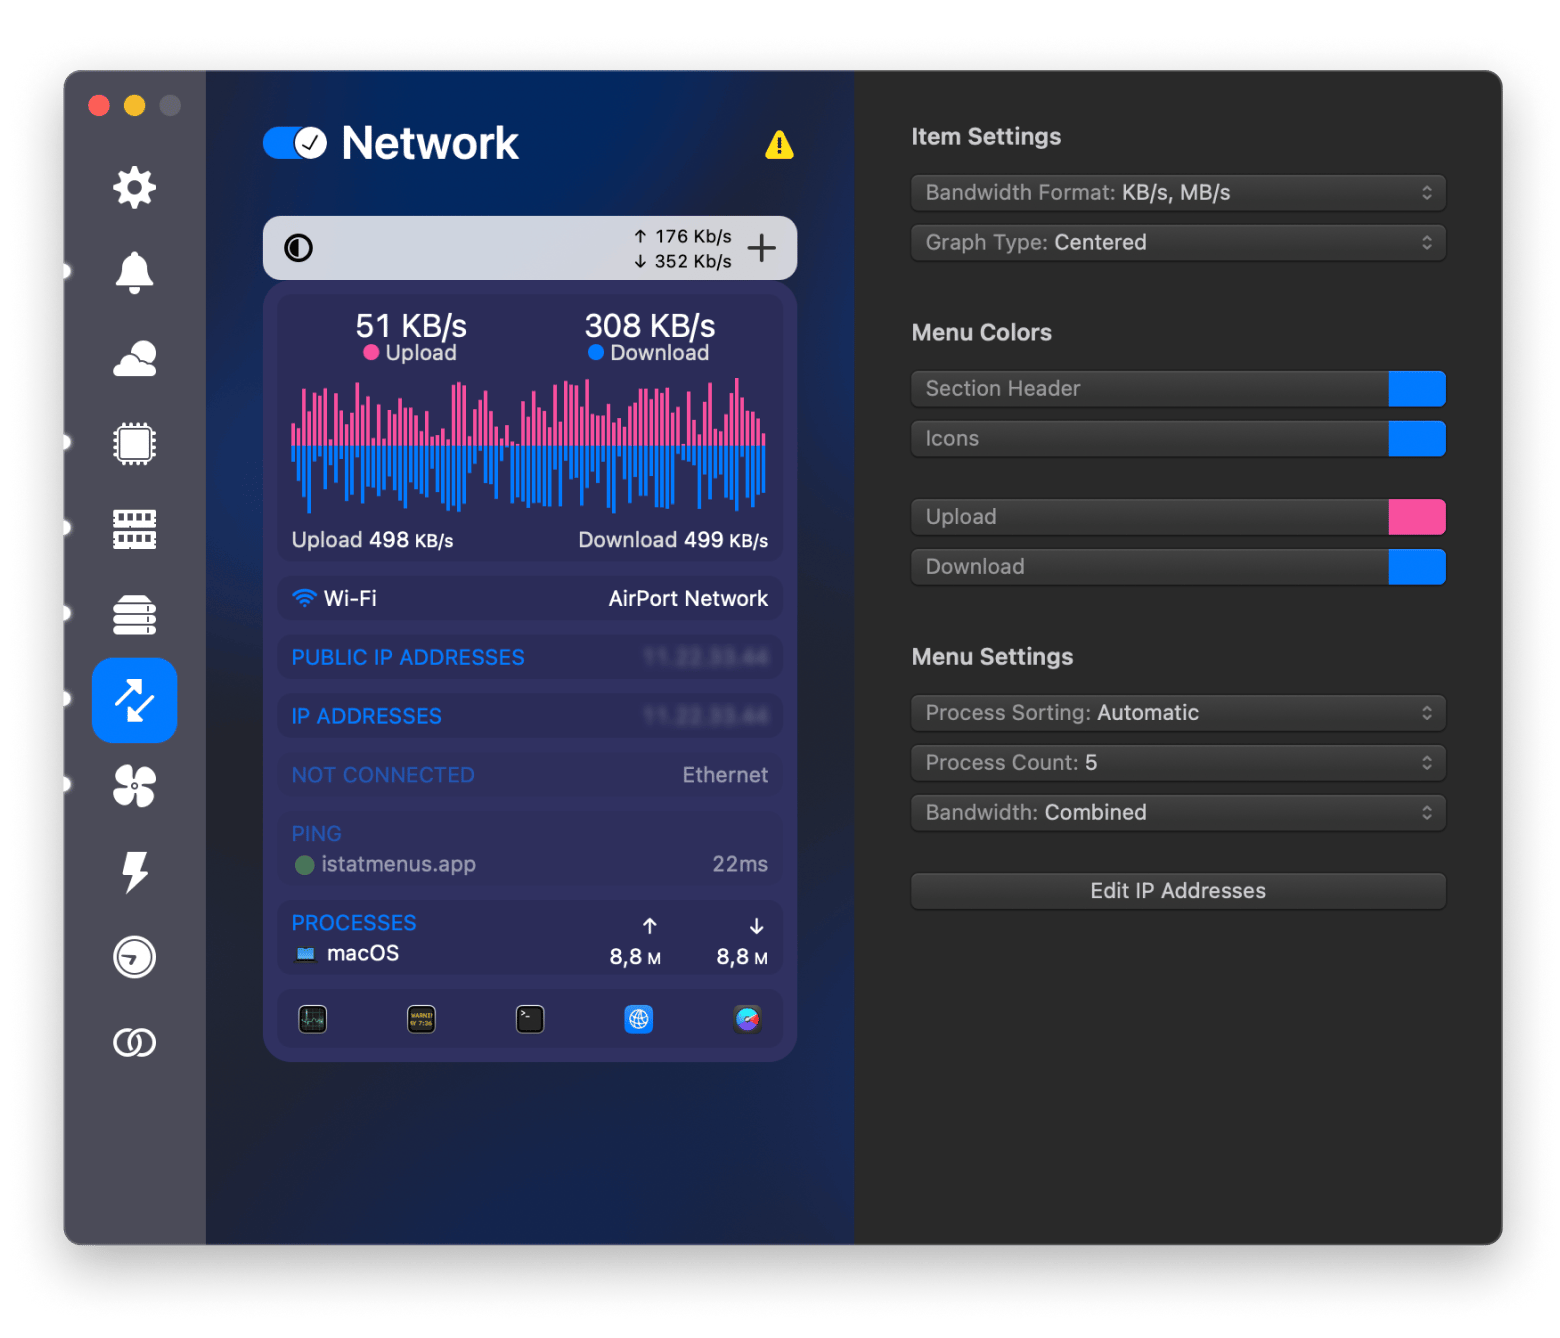
While scanning and changing to the best Wi-Fi channel is essentially one important thing, having tools like iStat Menus is essential for checking your network’s overall health. This tool monitors Wi-Fi channels, provides real-time bandwidth usage details, and provides historical data graphs. It can also effectively identify whether the channel switch has a lasting effect on speeds. Moreover, it provides a comprehensive bandwidth breakdown for the top apps using the network.
Monitor WiFi channels like a pro
So, which channel is faster? Selecting the ideal Wi-Fi channel can be an arduous task, but it surely impacts your network performance by a great margin. The key to increasing the speed and stability of your network is choosing the appropriate Wi-Fi channel.
Apps like WiFi Signal, NetSpot, and WiFi Explorer (optimal channel selection for crowded Wi-Fi), available through Setapp, are useful tools for for Wi-Fi channel and network monitoring and analysis that can help with channel selection. For the best performance, they can assist in recognizing congestion while making sure you're utilizing the least busy channel. Plus, iStat Menus is a great idea for network monitor health checks, just in case.
Test Wi-Fi channels with these tools out at Setapp, a subscription-based service that offers access over 250+ productivity apps for Mac and iOS. WA big bonus, all available tools can be explored in one package with a 7-day free trial. Sign up now and start being more productive right away!
FAQ
What’s the difference between 2.4 GHz, 5 GHz, and 6 GHz Wi-Fi?
The difference between these bands is the following:
2.4 GHz: More interference, better penetration, and a wider range with a maximum speed of 600 Mbps.
5 GHz: Shorter range, less interference, and faster speeds (up to 1300 Mbps).
6 GHz: Thanks to Wi-Fi 6E, shorter range but faster speeds, less interference, and less congestion.
Does changing Wi-Fi channels make Wi-Fi faster?
Changing Wi-Fi channels makes Wi-Fi faster. It can reduce interference from nearby networks and devices that operate on the same frequency.
What are the best Wi-Fi channels for 2.4 GHz Wi-Fi?
The best Wi-Fi channels are 1, 6, and 11, which don’t overlap.
What are the best Wi-Fi channels for 5 GHz Wi-Fi?
As a common rule, the best WiFi Channels for 5 GHz Wi-Fi are 36, 40, 44, and 48.
What are the best Wi-Fi channels for 6 GHz Wi-Fi?
The best Wi-Fi channels for 6 GHz Wi-Fi are 1 to 233. Most channels in the 6 GHz band are non-overlapping channels, so use these for optimal performance.
What Wi-Fi channels don't overlap?
If you want to find Wi-Fi channels that dont’s overlap, these are:
2.4 GHz: Channels 1, 6, and 11.
5 GHz: Many non-overlapping channels, with 36, 40, 44, and 48 as the most common ones.
6 GHz: All channels are non-overlapping.
What is the best Wi-Fi analyzer app for iOS for measuring WiFi signal strength?
Usage is the best Wi-Fi analyzer for iOS, and it can check channel Wi-Fi data for the last 30 days to see how your network performed.
What is the best WiFi analyzer app for macOS for measuring WiFi signal strength?
NetSpot and WiFi Explorer are the best Wi-Fi analyzer apps to monitor signal strength and choose the optimal channel on macOS.


