Fix “Wi-Fi not configured” issue: I found the best ways to fix it
Have you ever come across the “Wi-Fi: Not Configured” on your Mac? Typically, you will notice this message when you click on the “X” on the grayed-out Wi-Fi icon.
As you can imagine, if this connection isn’t working, then you can say goodbye to accessing the internet. There are multiple reasons why this has happened, the most common being system bugs and software misconfigurations.
In this guide, I’ll cover the Wi-Fi problem when it’s not configured on a MacBook. Get ready, there will be plenty of advice on what to do and how to prevent it from happening again.
Troubleshooting Wi-Fi configuration problems
Do you love a good tech problem and relish the idea of fixing it? Even if you don’t, having some simple explanations is a great way to understand your tech and how it works. You may find the solution on the first try or the fifth, but there is a way out of this internet-less hole…
| Possible problem | Follow the steps |
|---|---|
| Wi-Fi adapter not detected or missing from network list | Go to System Settings > Network > Wi-Fi. If missing, restart your Mac or reconnect the USB Wi-Fi adapter with drivers. |
| Hardware issues with internal Wi-Fi adapter | Run Apple Diagnostics (hold D key on startup) to identify hardware problems. |
| Saved network is misconfigured | Go to System Settings > Wi-Fi > Three dots > Forget This Network > Reconnect with password. |
| No internet despite Wi-Fi connection | Go to System Settings > Network > Details > TCP/IP tab > Renew DHCP lease. |
| Wi-Fi interface not responding | Use Terminal to reset interface: sudo ifconfig en0 down > sudo ifconfig en0 up. |
| System clutter or outdated settings causing connectivity bugs | Use CleanMyMac to run maintenance scripts using the Performance feature. |
| External Wi-Fi adapter not working | Visit the manufacturer’s website to download the latest macOS-compatible drivers. |
| Environmental interference or weak signal | Use WiFi Explorer to scan for interference or NetSpot to identify weak spots via heatmaps. |
| Corrupted system configuration files (for advanced users only!) | Backup data with Get Backup Pro. Then, delete and regenerate files via Terminal: sudo rm -rf /Library/Preferences/SystemConfiguration > Restart Mac. |
| Network settings are corrupted | Go to System Settings > Network > Locations > Edit > “+” > Switch to the new location. |
| Third-party apps interfering with Wi-Fi | Boot into Safe Mode to test connectivity. Use Pareto Security to monitor system issues. |
Check your Wi-Fi adapter and hardware
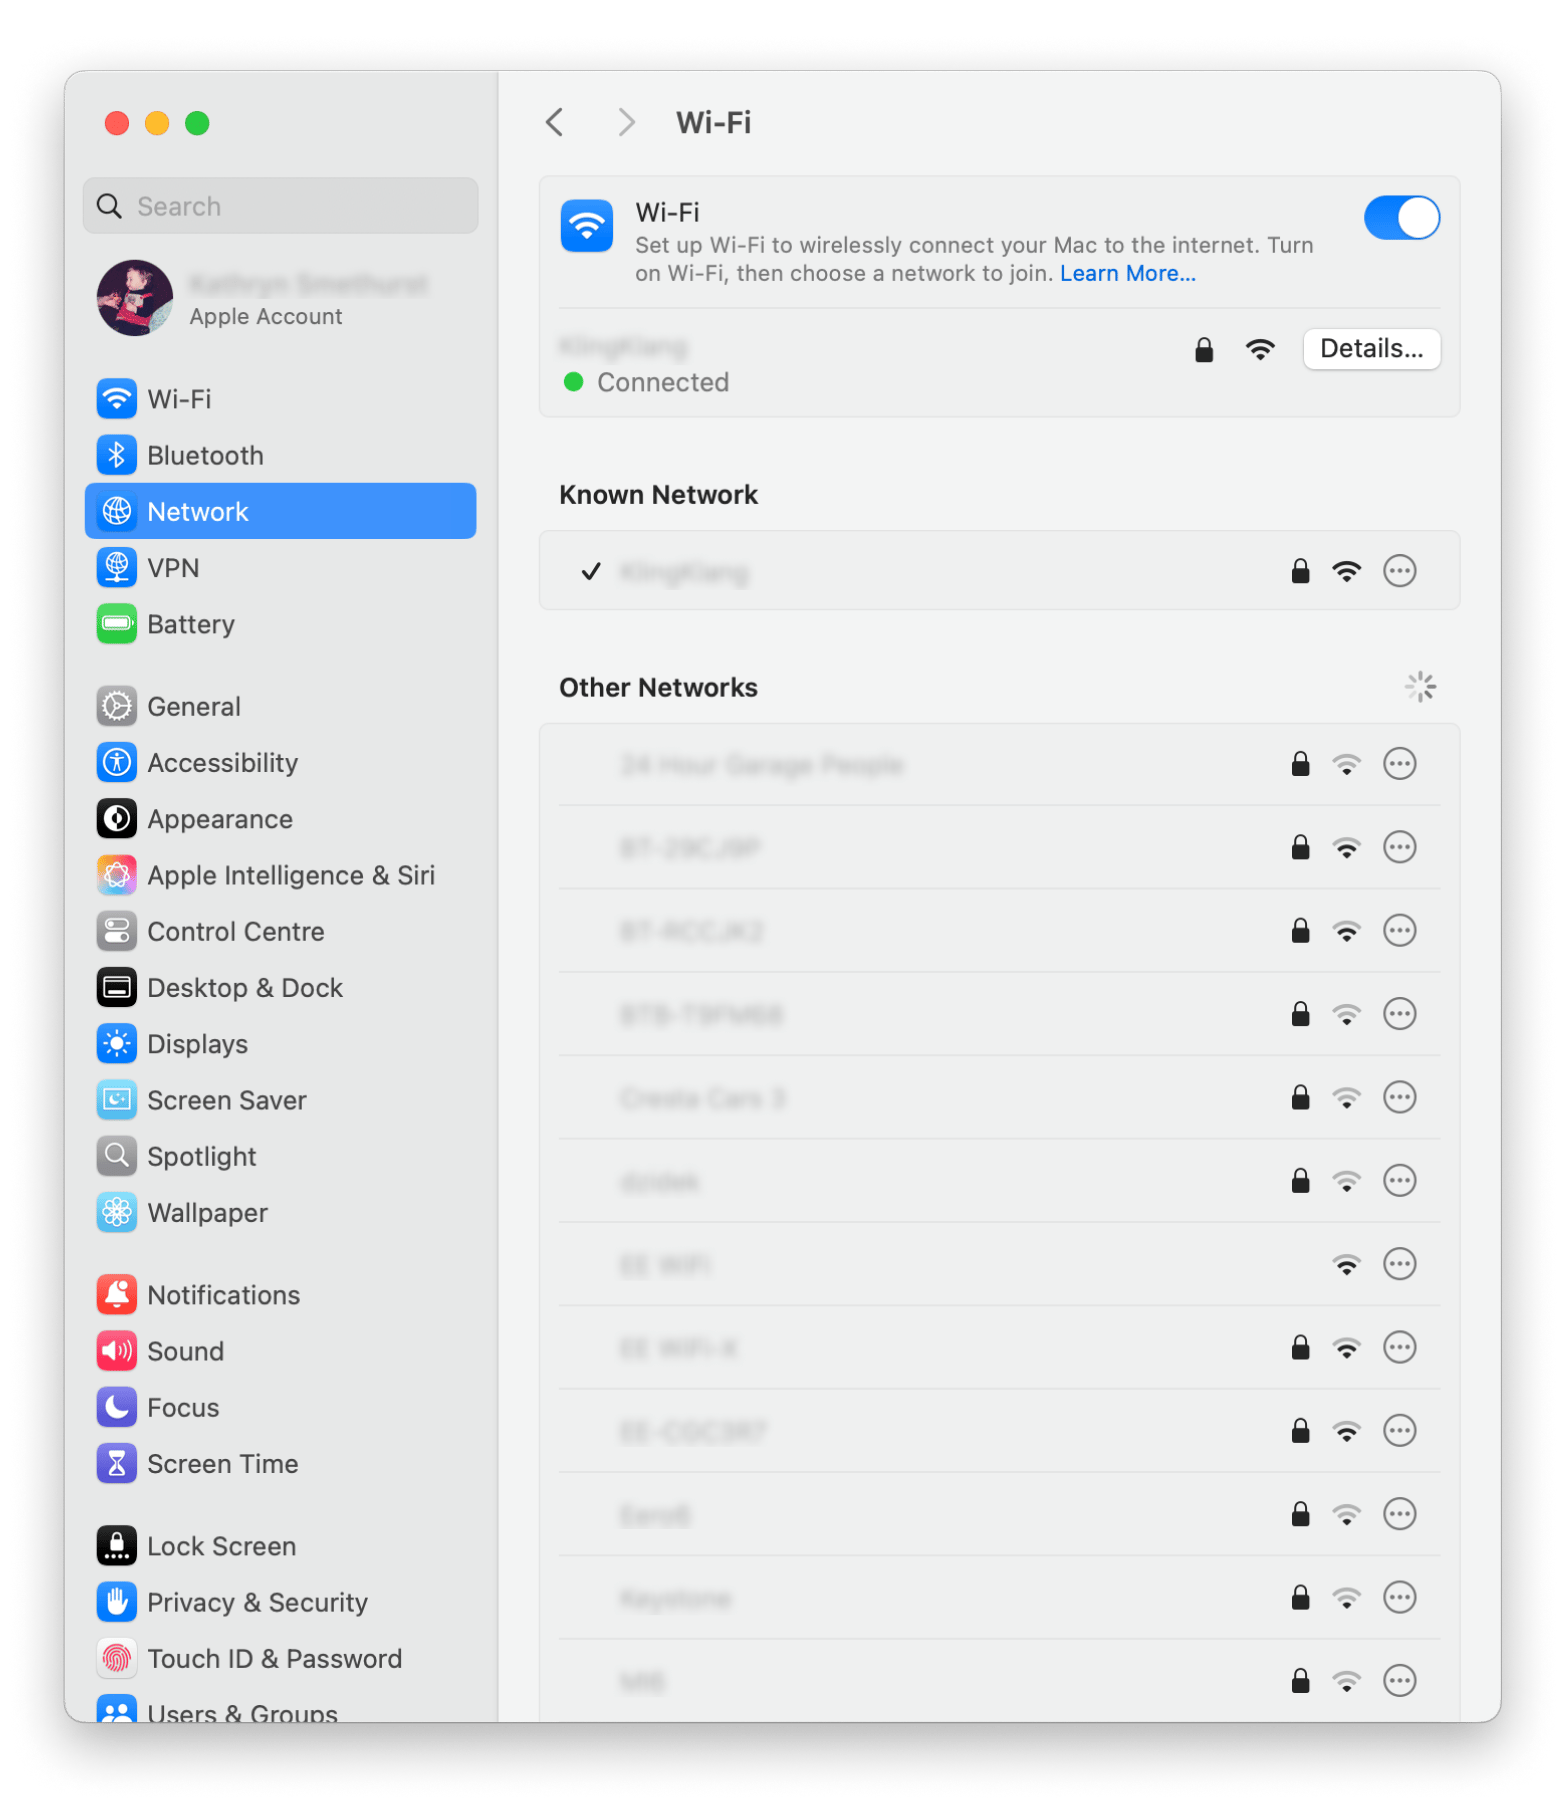
Sometimes, it’s as easy as adjusting some settings. Make sure that your Mac is detecting the Wi-Fi adapter by following these steps:
- Click the Apple menu > System Settings > Network.
- Look for Wi-Fi in the list of available network services.
- Make sure Wi-Fi is on and marked as Connected.
Run Apple Diagnostics
If your Mac isn't recognizing its internal Wi-Fi adapter, try running Apple Diagnostics to see if it's a hardware issue. Just restart your Mac and hold down the D key. Then, follow the on-screen prompts to check for any problems. If something's off, it might be time to take your Mac in for repairs.
Reset your network settings
If everything is okay with your Wi-Fi adapter and other hardware components, it’s time to look inward. Resetting network settings can often resolve the “Wi-Fi: Not Configured” message.
To reset your network settings:
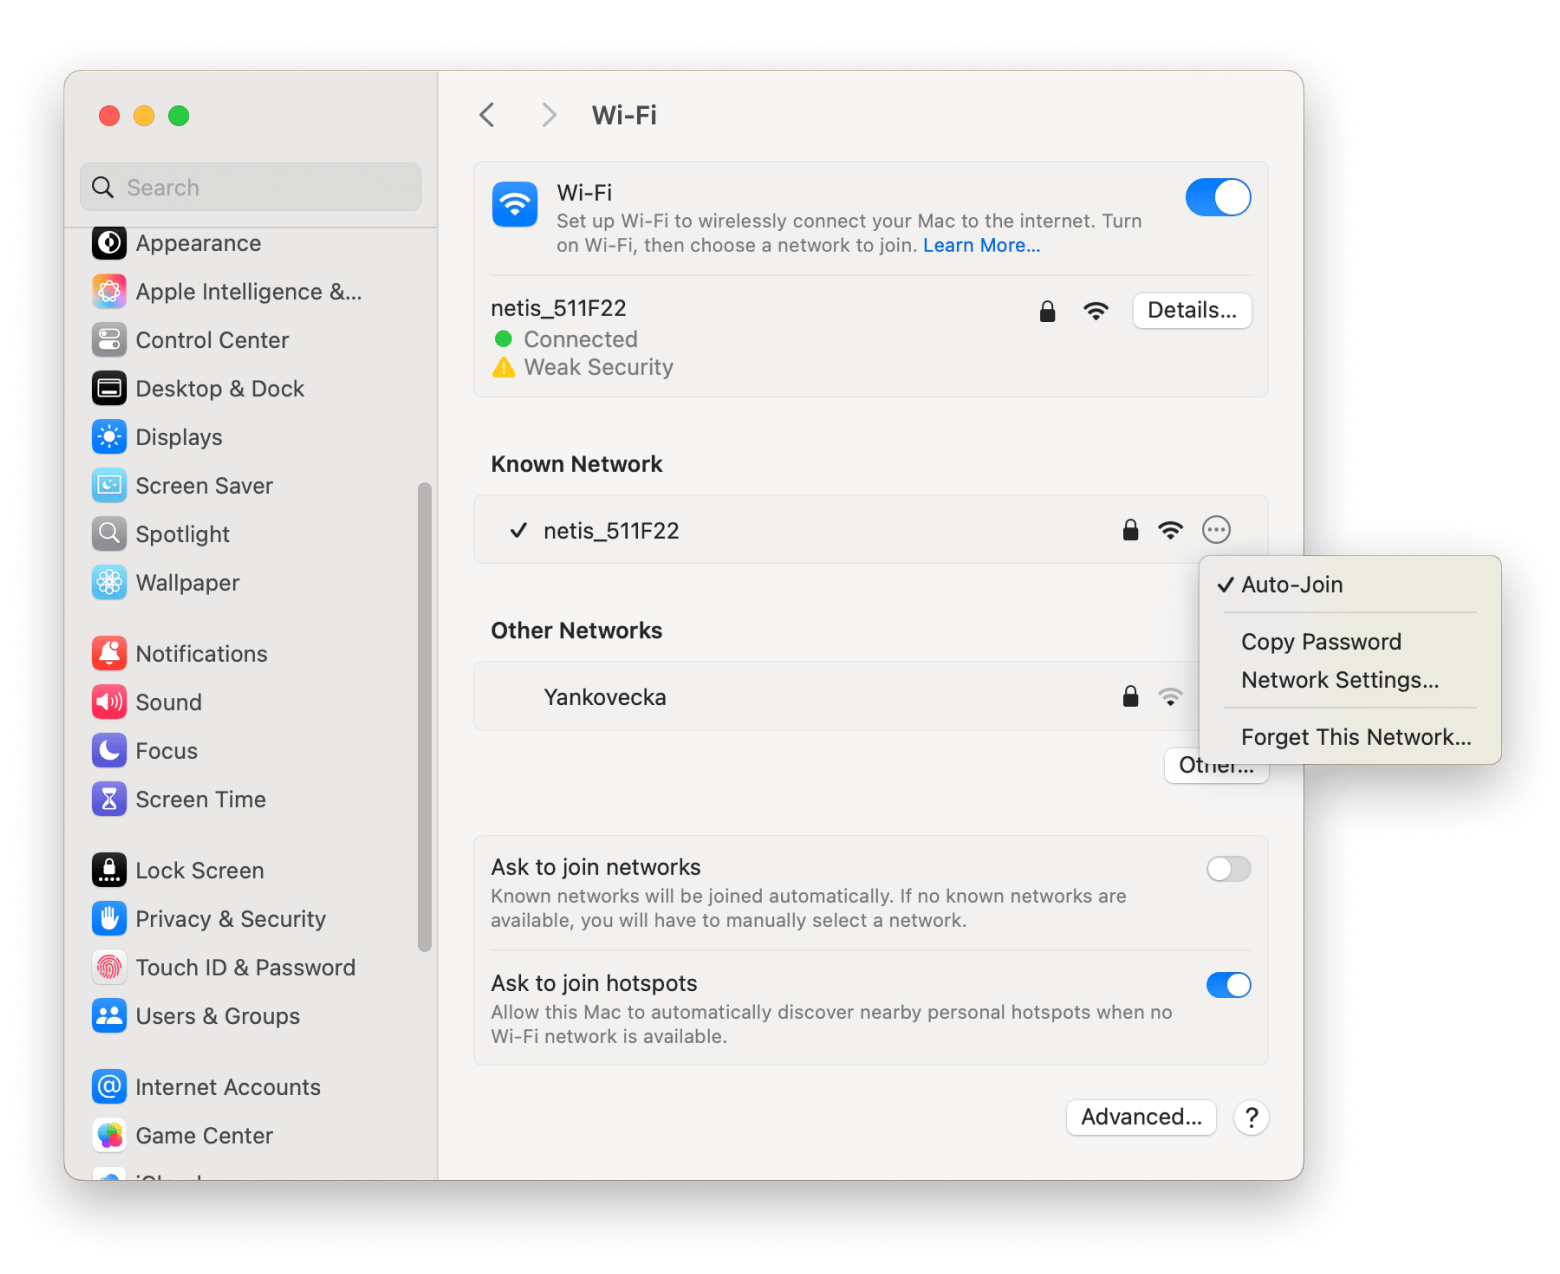
- Click the Apple menu > System Settings > Wi-Fi.
- Click the three dots next to the Wi-Fi name > Select Forget This Network.
- Restart the Mac, and go back to Wi-Fi.
- Click Connect under other networks to add again > Enter the password.
Renew DHCP lease
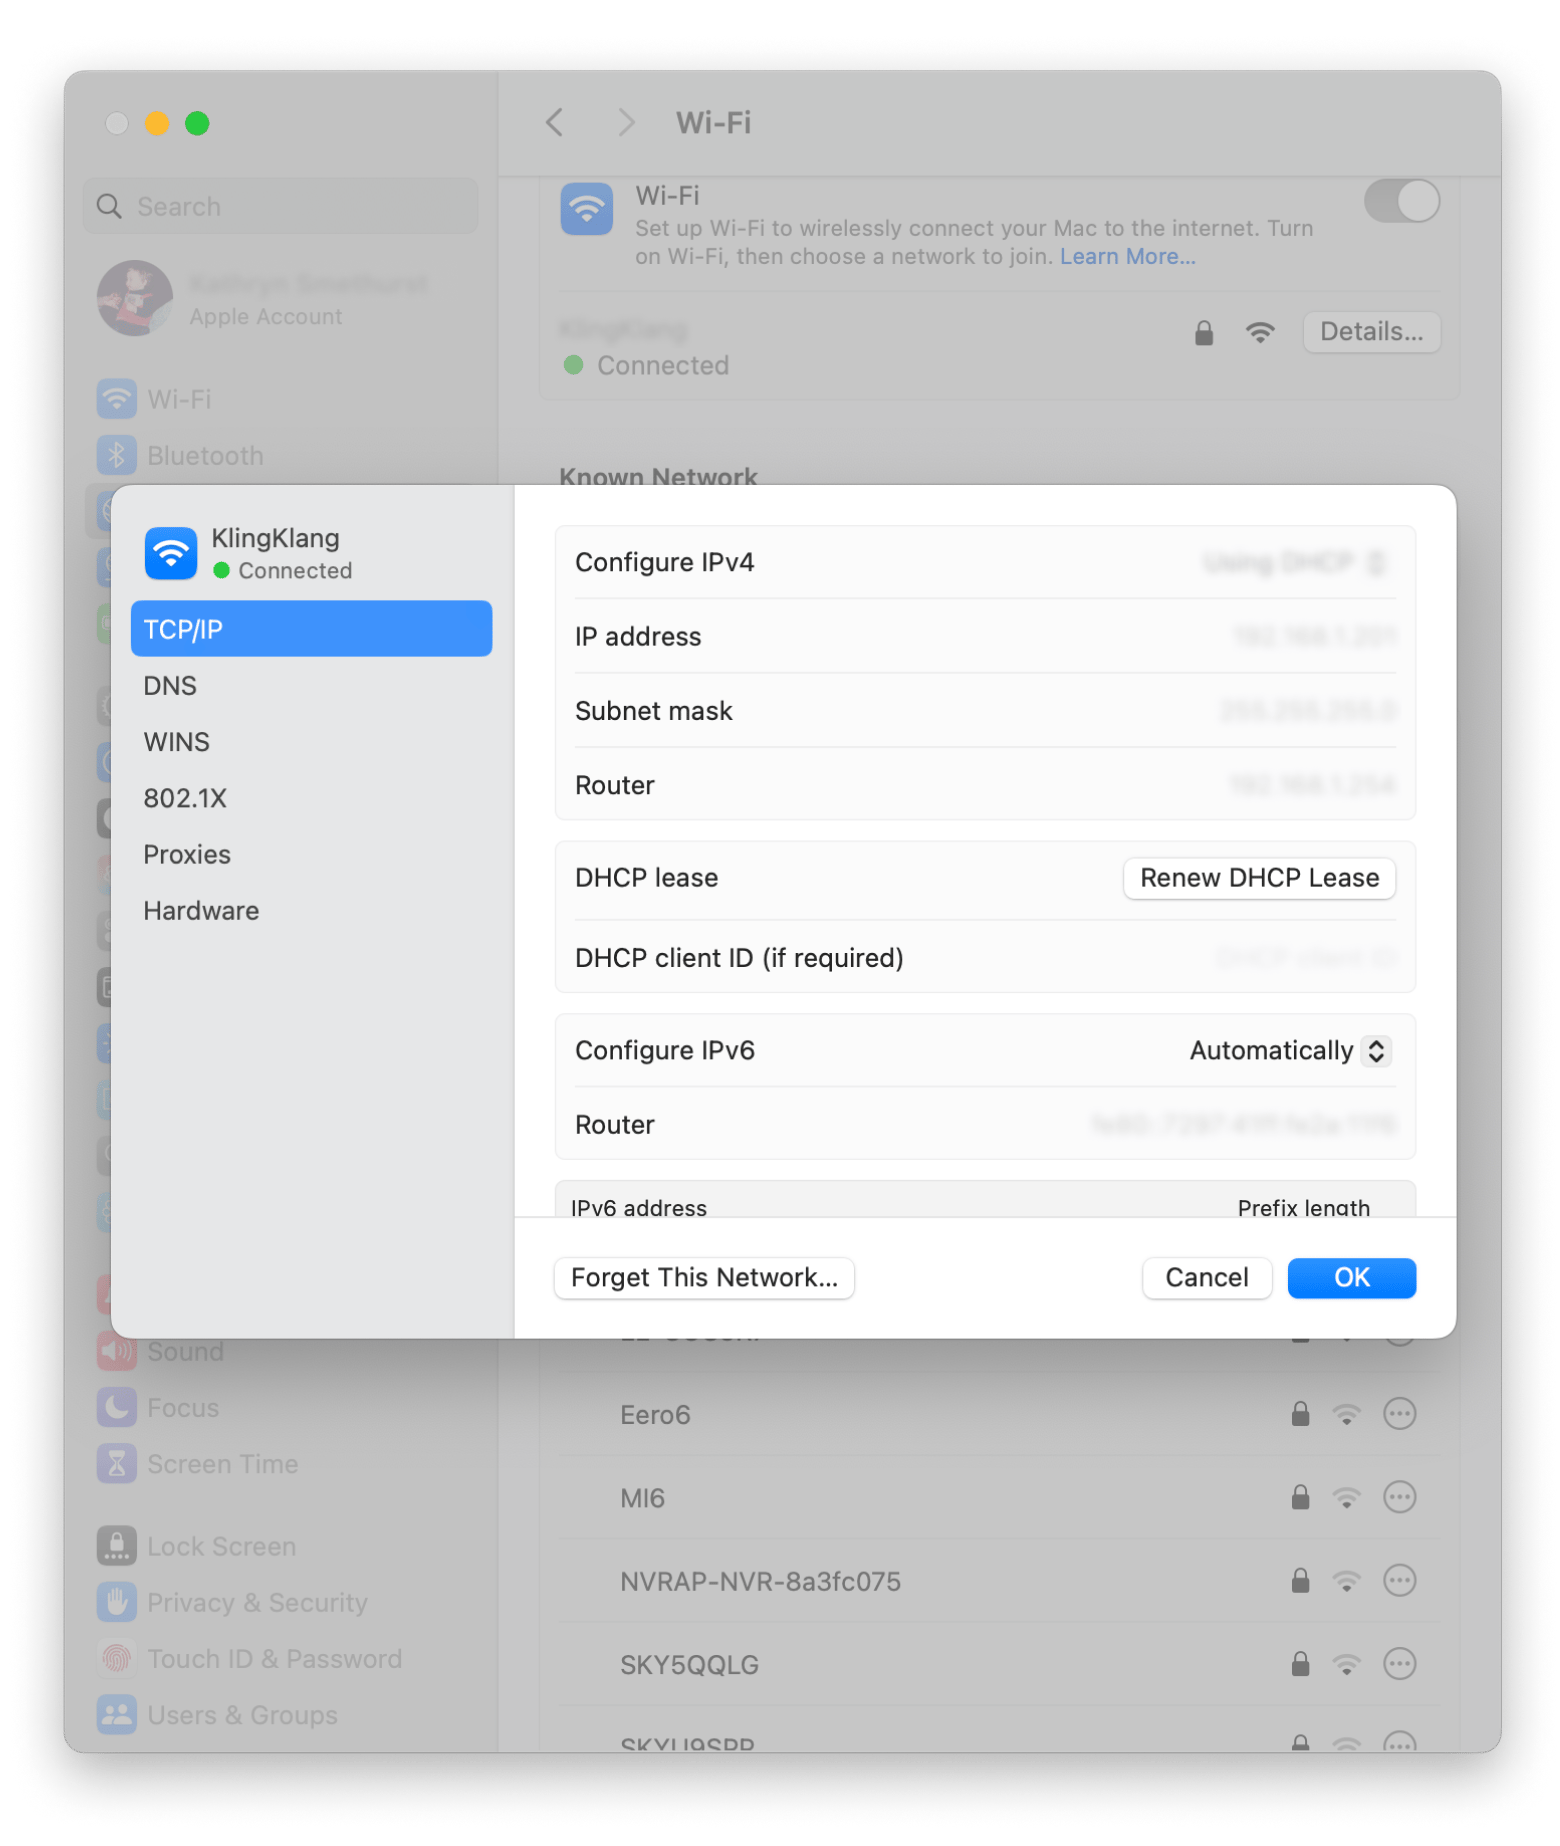
Your Mac might be connected to Wi-Fi, but it might not actually be getting internet. A simple fix for this is to renew your DHCP lease. Basically, if you're not on a static IP address, a DHCP lease is just how long your device keeps a specific IP. Renewing it helps clear up any IP address issues and makes your Mac ask the router for a new connection.
Here’s how to renew a DHCP lease:
- Click the Apple menu > System Settings > Network.
- Select your Wi-Fi connection > Click Details.
- Go to the TCP/IP tab > Click Renew DHCP Lease.
- Confirm and wait for it to refresh.
Reset the network interface using Terminal
If you’re into commands, then you can try this method to fix the Wi-Fi not configured. To do so:
- Go to Terminal via Finder > Applications > Utilities.
- Type
sudo ifconfig en0 down> Press Return to turn off the Wi-Fi. - Type
sudo ifconfig en0 up> Press Return to restart Wi-Fi.
This command temporarily disables and re-enables your Mac’s primary Wi-Fi interface.
Run maintenance tasks
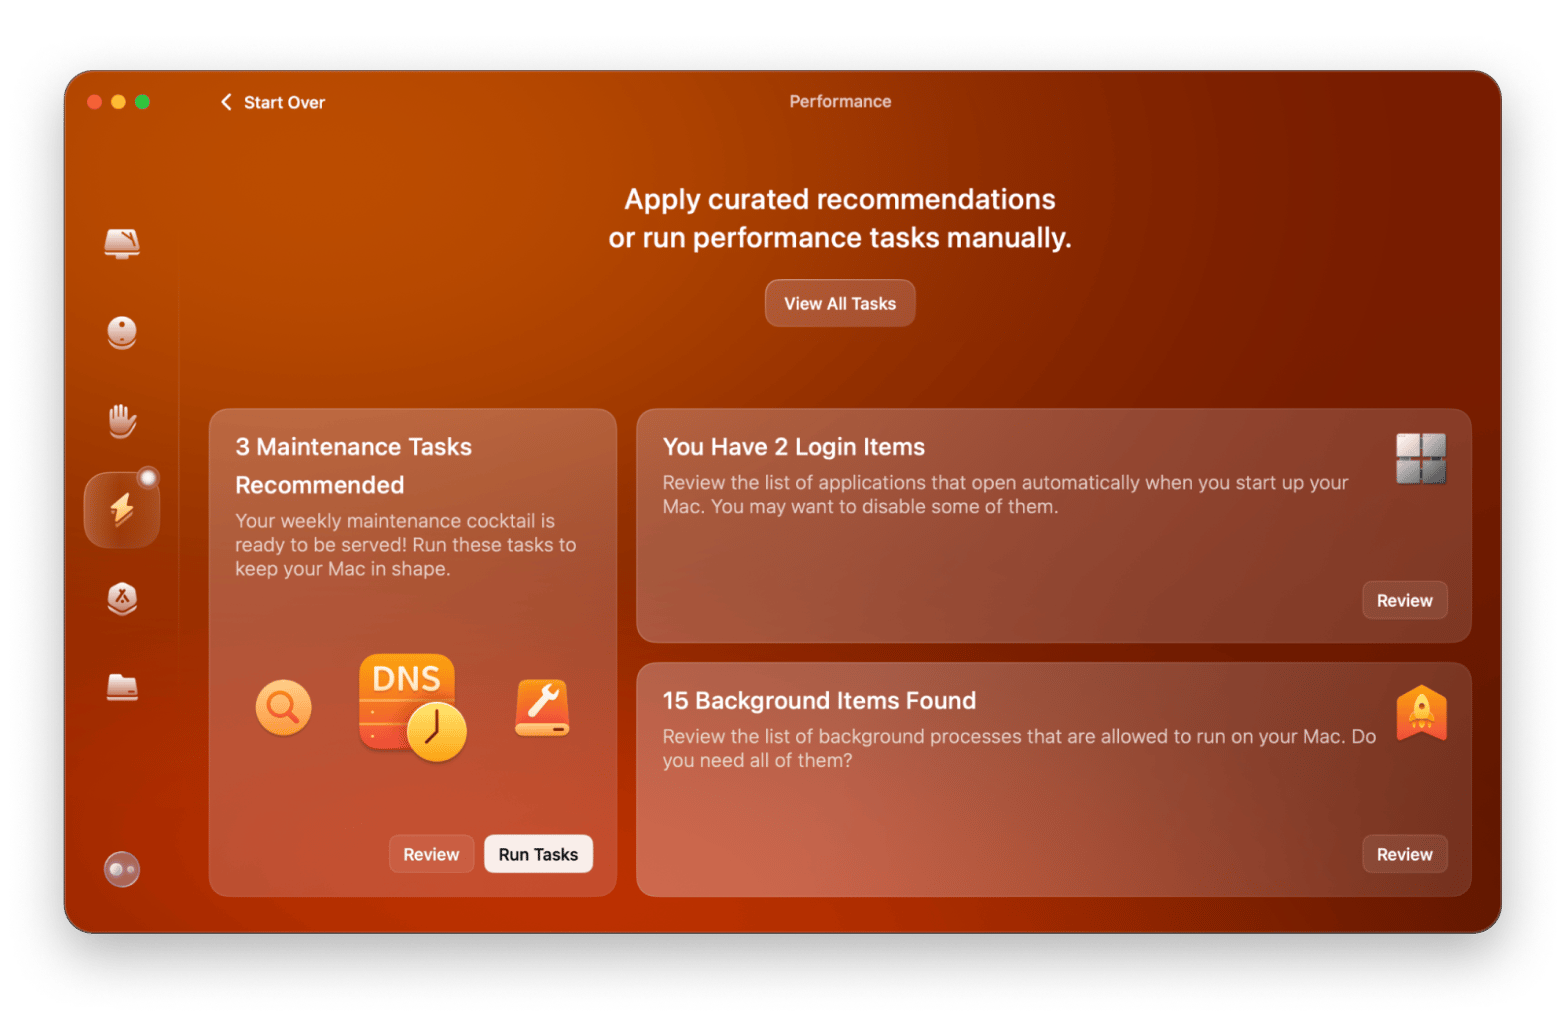
Did you know network issues often stem from cluttered system files or corrupted logs? Running maintenance scripts such as ensuring your macOS is up to date, your system and apps are all current, and regularly clearing your cache and resetting memory, helps boost your Mac’s performance. With this, you should notice the network improving, too.
Instead of painstakingly sorting through all of your Mac’s files and only seeing a portion of the clutter, bring a trusted companion on board. I rate CleanMyMac as one of the best sidekicks for clearing your Mac’s storage and scanning for driver updates or permission errors. Simply open up the app and run the Performance scan module, and it’ll let you know which maintenance tasks need to be dealt with.
Update your macOS and drivers
There are frequent bug fixes for Wi-Fi connectivity issues for macOS. It’s easy to miss an update once in a while. If your system is running an outdated operating system, there’s a good chance the Wi-Fi not configured error is linked.
To update your drivers:
- Go to System Settings > General > Software Updates. Your Mac might do a quick scan.
- If there are any updates, install them. Even if it’s a minor update.
- Restart your Mac after the update and re-establish your Wi-Fi connection.
Use diagnostic tools to identify the issue
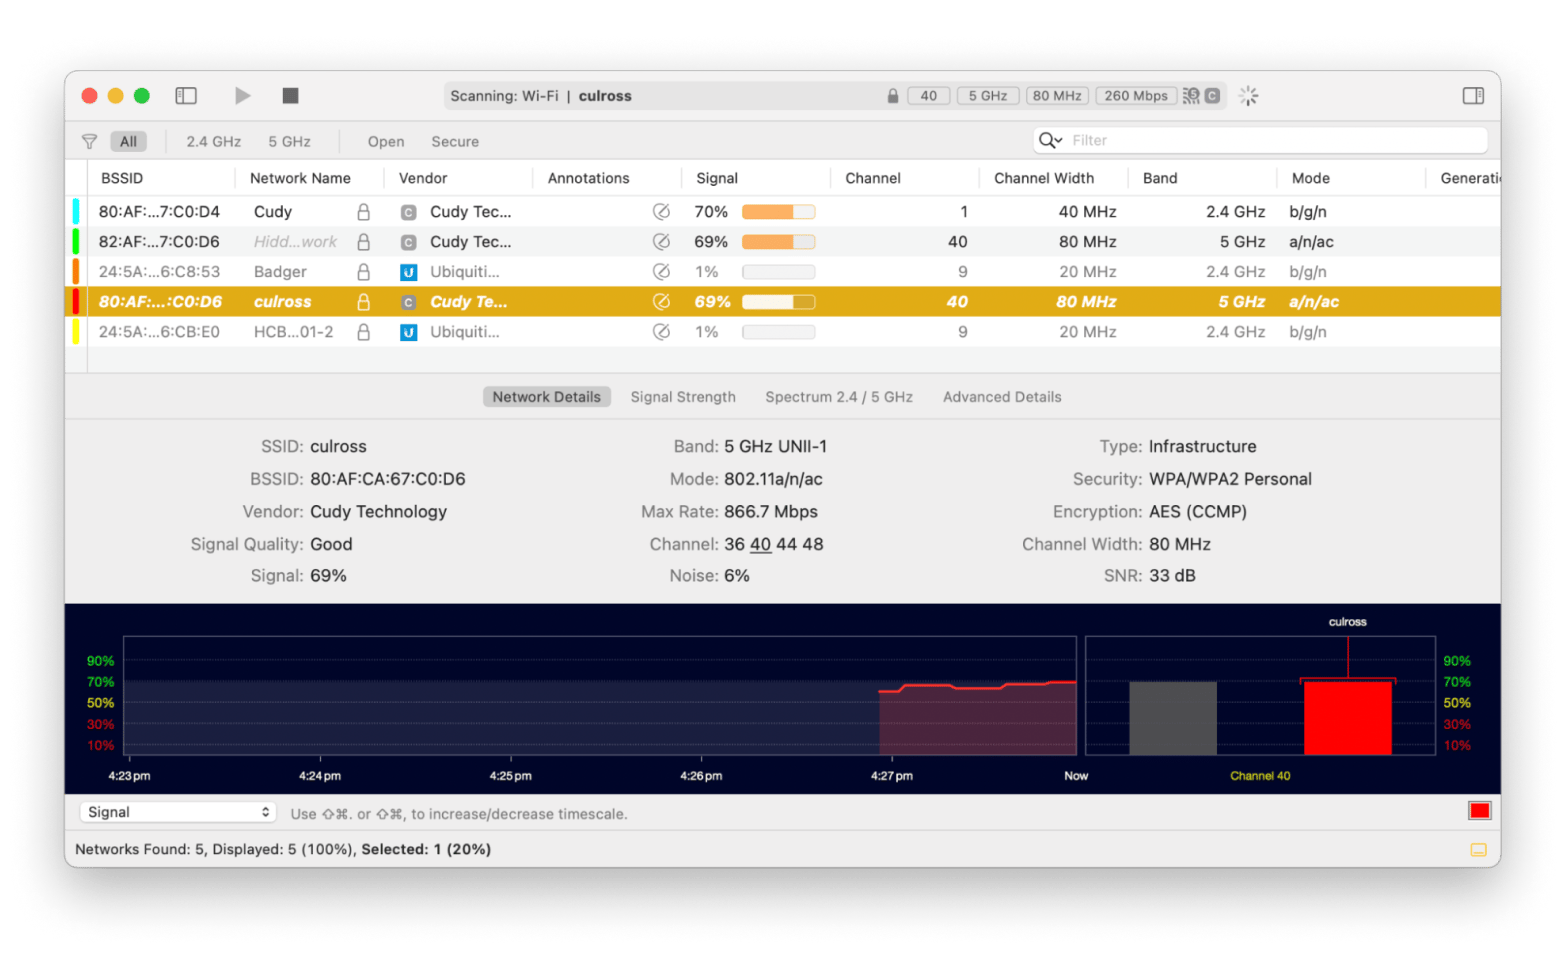
If none of the above solutions work for you, turn to a Wi-Fi diagnostic tool from a trusted third-party app like WiFi Explorer or Netspot. This can help provide deeper insights into what’s causing the problem. Wi-Fi issues on Mac aren’t always due to misconfigurations. Sometimes, interference from other devices or a weak signal strength can play a part in the problem.
WiFi Explorer is great for me. It scans my entire network environment to detect signal interference and other connectivity issues. When my Mac can’t keep an internet connection, I usually find it’s an issue with the router.
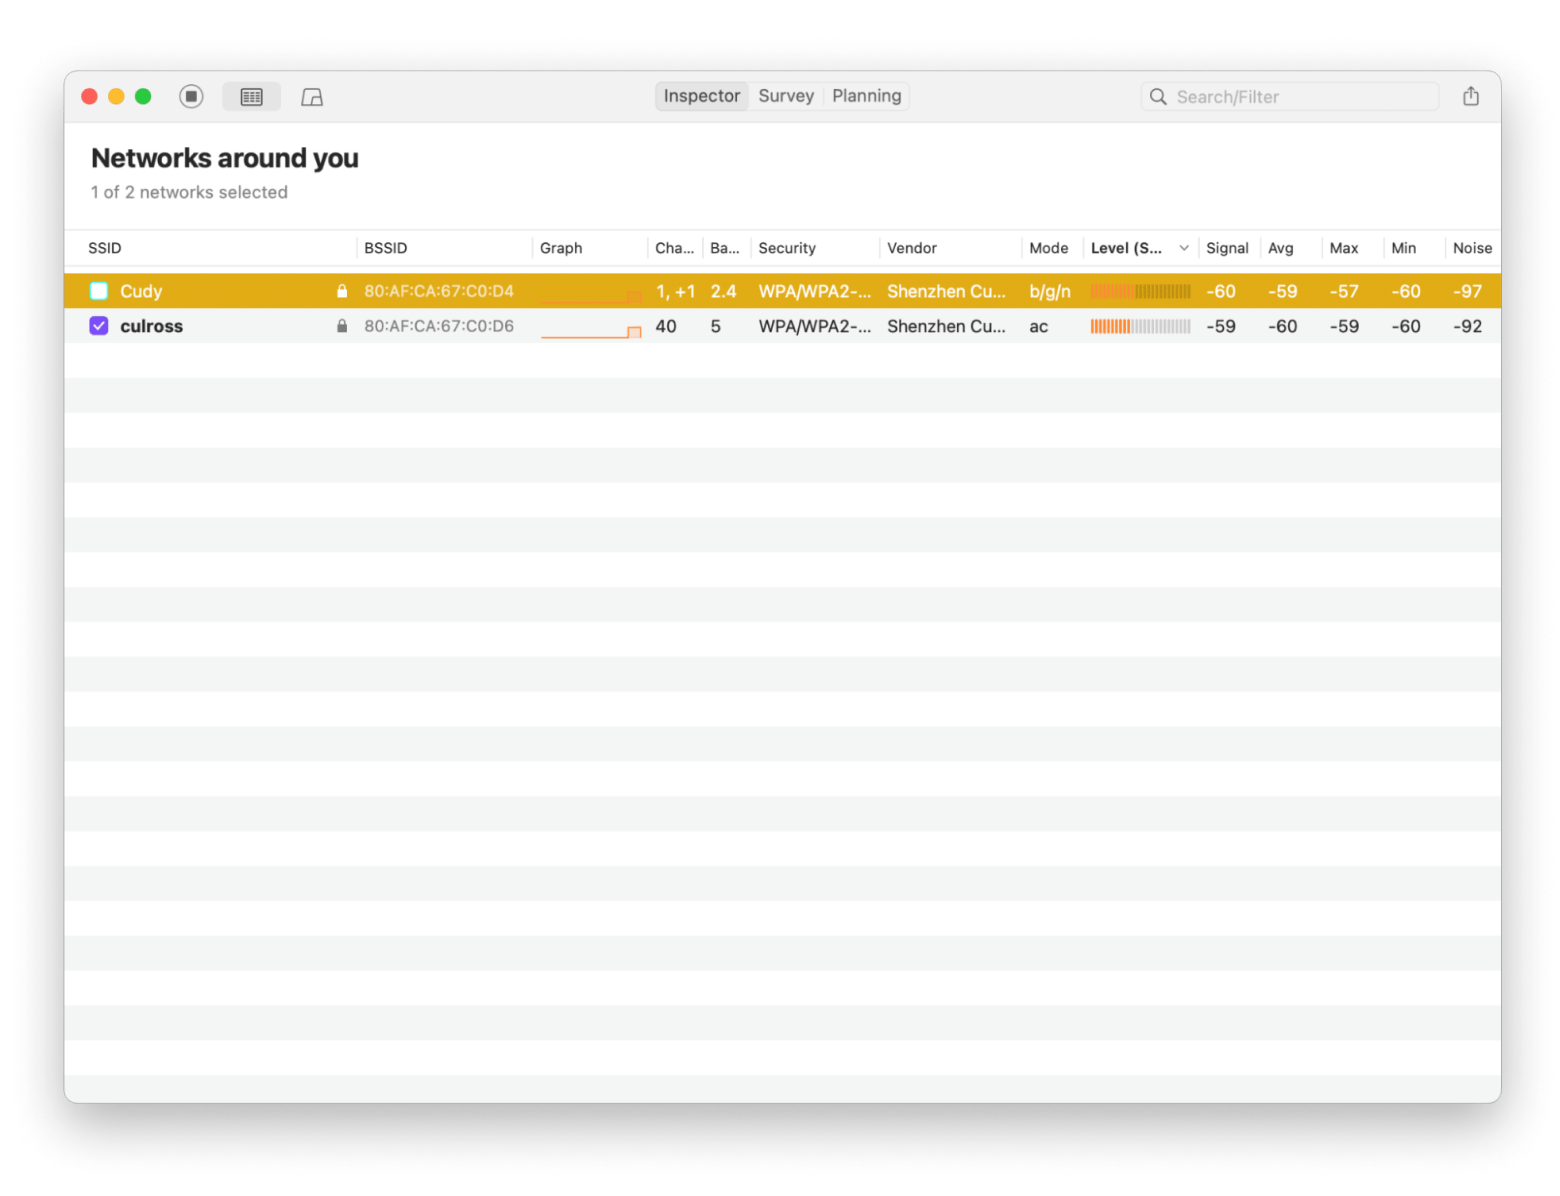
Another great tool to use is NetSpot. It’s the perfect visual aid, presenting Wi-Fi heatmaps to show signal strengths. In some cases, my Mac can see the Wi-Fi network but can’t connect to it. This typically means it’s too far away. NetSpot helps me choose the best place to put my Mac where it’s not interfered with by other devices, such as a microwave.
Advanced fixes for persistent Wi-Fi issues
A stubborn “Wi-Fi: Not configured” message may require more advanced steps to solve. These solutions target deeper system issues. While getting under the hood can sound daunting to some Mac users, it’s straightforward and has the right guidance.
Reinstall macOS network components
Network settings are stored in system files that can become corrupted over time. This is especially common after failed updates or unexpected shutdowns. Reinstalling these network components can force macOS to recreate them.
To do so:
- Open Terminal (Finder > Applications > Utilities.
- Type
sudo rm -rf /Library/Preferences/SystemConfiguration> Press Return. This command deletes the entire SystemConfiguration directory, which contains various .plist files responsible for network settings. - Restart your Mac after entering this command, and the operating system will generate fresh network files as it reboots.
Delete and recreate your network location
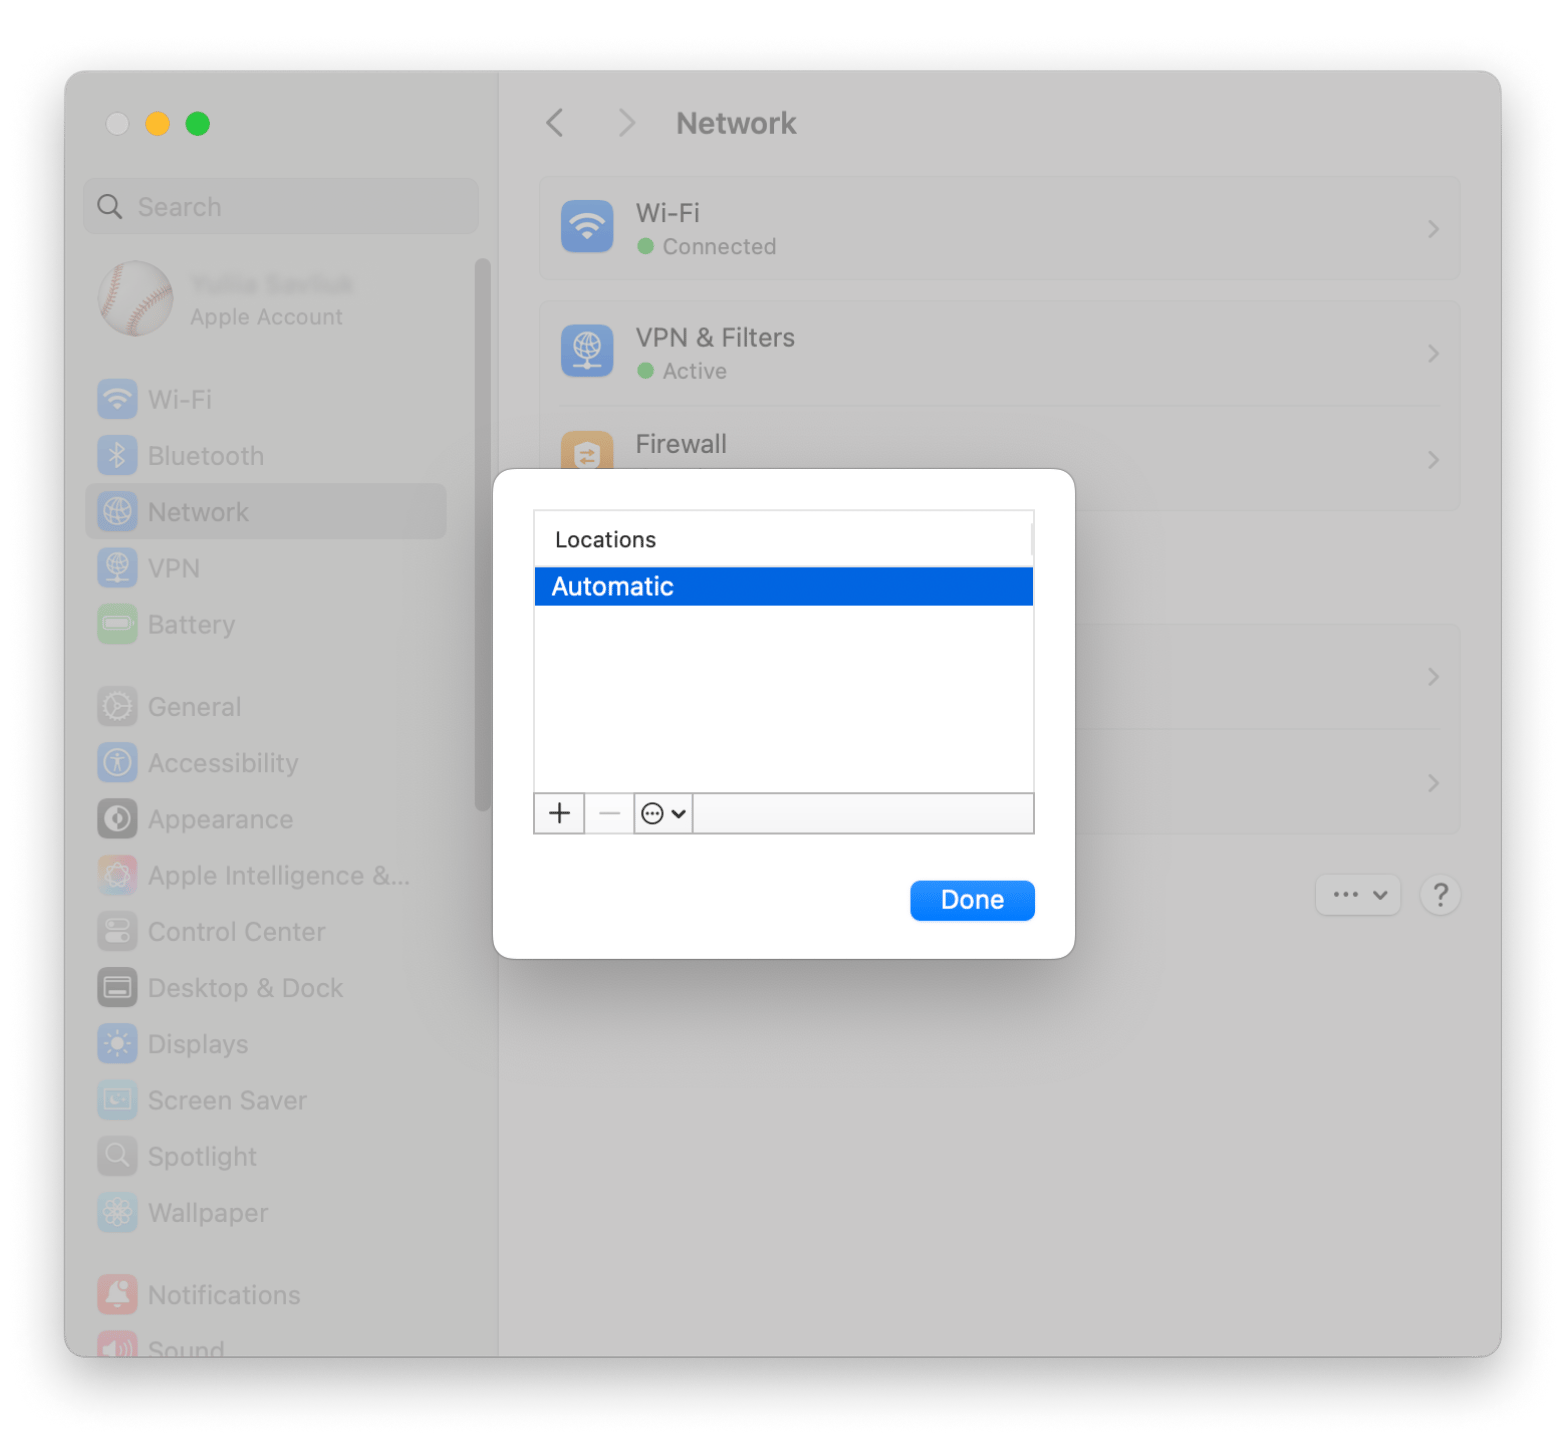
You can create and manage different network locations on macOS. These are sets of saved network settings that could be why your Wi-Fi isn't configured. If your network settings are corrupted, deleting the current location and creating a new one could be the answer.
To delete and recreate your network location:
- Click the Apple menu > System Settings > Network.
- Click the three-dot menu in the bottom right corner and choose Locations > Edit Locations.
- Click the “+” button to create a new location > Name the new location and switch to it.
- Reconnect to Wi-Fi and test if it’s working.
Reset PRAM/NVRAM or SMC (Intel Macs)
PRAM (Parameter RAM) and NVRAM (Non-Volatile RAM) are small memory sections in Intel-based Macs that store important system settings. This includes network preferences. When these memory caches are corrupted, the Mac can’t detect and configure hardware components, including the Wi-Fi adapter. Resetting PRAM/NVRAM clears stored settings and gives the Mac no option but to rebuild them.
You’ll want to grab a detailed guide for this, so check out the full article on how to reset PRAM/NVRAM and SMC on your Mac.
Use safe mode to isolate third-party app interference
Booting your Mac into safe mode can help determine whether a third-party app is interfering with the Wi-Fi issues your Mac has been struggling with.
How to boot into safe mode on Intel-based Macs:
- Shut down your Mac.
- Turn it on while holding the Shift Key.
- Release Shift when the login screen appears. Safe Boot should be visible in the menu bar.
How to boot into safe mode on Silicon M-series Macs:
- Shut down your Mac.
- Press and hold the power button until the startup options appear.
- Choose your startup disk > Press and hold Shift > Continue in safe mode.
Now that you are in safe mode, check if Wi-Fi is working. If it is, it’s a sign that a third-party app is interfering with your network connectivity. Restart the Mac normally and uninstall recently installed tools like VPNs and security software.
Understanding the "Wi-Fi not configured" error
If your system is unable to communicate with the Wi-Fi module, it will display the “Wi-Fi not configured" error. The Wi-Fi might disappear completely from the settings menu, or it may just be grayed out.
This is known to happen after a macOS update or a settings reset. It stems from network configuration issues or conflicts within the operating system. This may surprise some, as it is often assumed to be a hardware problem.
What does the Wi-Fi isn’t configured error mean?
Well, it shows that your device isn't able to obtain a valid IP address from your router. Obviously, this is fairly crucial for getting connected to the internet!
Sometimes, it might be because your macOS does not load the Wi-Fi driver at startup. This leads to a required system reset or manual reconfiguration in Network Settings. In other instances, the Wi-Fi service has been removed from the system preferences. In this case, your macOS will no longer recognize it as an available network service.
Although rare, some third-party apps like VPNs can interfere with the network settings. As far as the Mac is concerned, this means the Wi-Fi adapter is missing. System corruption and failed software updates can cause macOS to get confused and disable the Wi-Fi interface.
Common causes of Wi-Fi configuration issues
With so many moving parts, pinpointing why your Wi-Fi isn’t configured is difficult. Here are some of the most common reasons for these issues:
- Corrupted network preference list: macOS keeps configuration data for Wi-Fi connections, so the system won’t recognize the Wi-Fi adapter if the list becomes corrupted.
- Wi-Fi driver didn’t load at startup: A system glitch can stop macOS from properly loading the Wi-Fi module.
- Third-party apps changed network settings: VPNs and system utilities can get in the way of network preferences, even going as far as disabling the Wi-Fi adapter.
- PRAM/NVRAM or SMC issues: These refer to your system’s memory. If it’s corrupted, it may not be able to detect Wi-Fi hardware.
How to configure Wi-Fi on Mac: Solved
Not having a network connection is bad at the best of times, but when you don’t understand what’s causing the issue, it gets immeasurably worse. The “Wi-Fi: Not Configured” error essentially strips your Mac of its wireless capabilities.
For most people, easy fixes like restarting the Mac or updating the operating system will get Wi-Fi functionality back on track. For persistent network issues, try advanced approaches like resetting PRAM/NVRAM or booting into safe mode.
Cut troubleshooting corners by using diagnostic tools like WI-Fi Explorer and NetSpot. Even though your Mac isn’t in its best behavior right now, you should look after it. Apps like CleanMyMac for maintenance and Pareto Security for security help prevent further problems down the line. And in case you want to back up essential data, Get Backup Pro will help you with this. All these apps and 250+ more can be found via Setapp, and you can get a free 7-day trial to see what we’re all about!
FAQ
Why does my Mac say Wi-Fi is not configured?
Your Mac says “Wi-Fi: Not Configured” because it can’t detect the Wi-Fi adapter. Lots of things can cause this, including missing network settings and corrupted files. Resetting network preferences or PRAM/VRAM can help fix the problem.
Why is my Mac not detecting my Wi-Fi?
Your Mac not detecting Wi-Fi can be due to network interference or an outdated macOS, which are common reasons. Restart your Mac, update your macOS, and reset network settings in System Settings > Network.
How do I force my Mac to connect to Wi-Fi?
To force your Mac to connect to Wi-Fi, restart your Wi-Fi, forget and reconnect to the network through System Settings > Wi-Fi, and reset the DHCP lease under Advanced > TCP/IP.


