How To Set Up Find My Mac And Protect Your Data
Without a doubt when you take your MacBook to a public space, outside your work or home, you should exercise extra caution. Never leave your Mac unattended and lock it up with a cable if you have to step away. After all, most of your life’s information is inside that machine and compromising it could lead to all sorts of unpredictable consequences.
Alas, sometimes you happen to be in the wrong place at the wrong time, where your MacBook could be stolen. You might search around and call the police, but it’s likely that by then your computer is nowhere near you. Luckily, you can see its exact location.
In macOS versions prior to Catalina, you can rely on Find My Mac app, a default Mac utility, sort of like a Find My Friends Mac alternative or Find My iPhone app for Mac, that lets you track the location of your MacBook either through your phone or the web. It’s incredibly important to have this functionality enabled on your Mac right now, so that if something disastrous happens, you’re fully equipped to deal with it.
If your Mac runs Catalina or later, you can use the all-new Find My that enables extended device tracking: Relying on Bluetooth connection, your Mac’s location will be spotted by Apple devices around it. So even if it’s sleeping or disconnected from network, a lost computer will still be “seen.”
In this step-by-step guide, we’ll walk through everything you need to know to set up the tracking process for your precious Mac:
- How to use Find My Mac in macOS prior to Catalina
- How Find My works in macOS Catalina and Big Sur
- What to do when you find your MacBook
- Best ways to back up your Mac
How To Use Find My Mac in macOS prior to Catalina
You’re likely to never actually have to use Find My Mac. As one of those utilities that sits quietly in the background, Find My Mac only becomes desperately needed when worst comes to worst. This makes its configuration so much more important and urgent that we hope you’ll follow along throughout this tutorial and set up this utility before you finish reading.
Set up Find My Mac in seconds
To enable your computer to tap into this find my laptop Mac technology, you need to ensure that your Mac is sending out its location and that the service is turned on in iCloud.
First, check whether location services are active:
Open System Preferences and go to Security & Privacy
Select the Location Services tab
Make sure the box next to Enable Location Services is checked
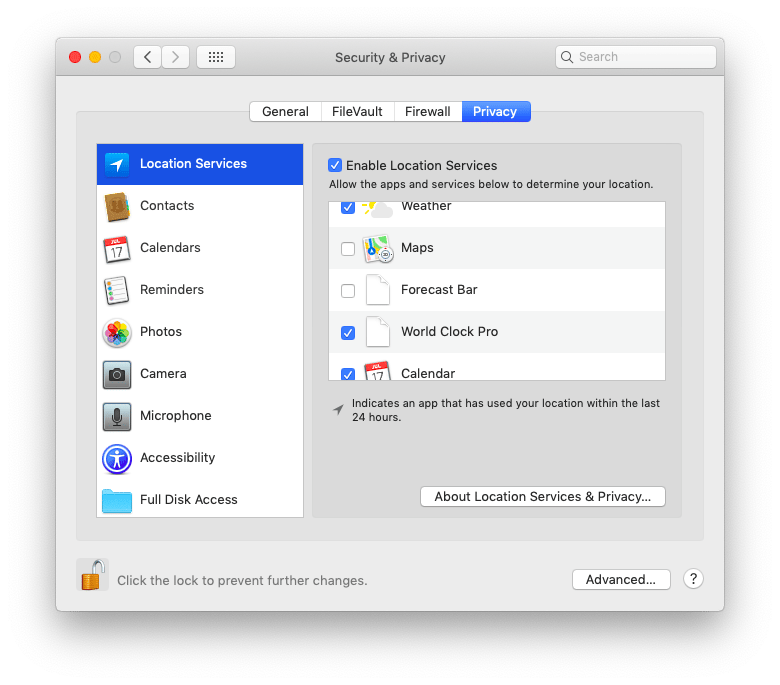
Great, not only your Find My Laptop Mac utility is going to work, but a whole group of other apps will leverage your location. Think weather forecasts, websites, and maps.
The second part of turning on Find My Mac is connecting it to iCloud:
In System Preferences, go to iCloud
At the end of the list, check the box next to Find My Mac
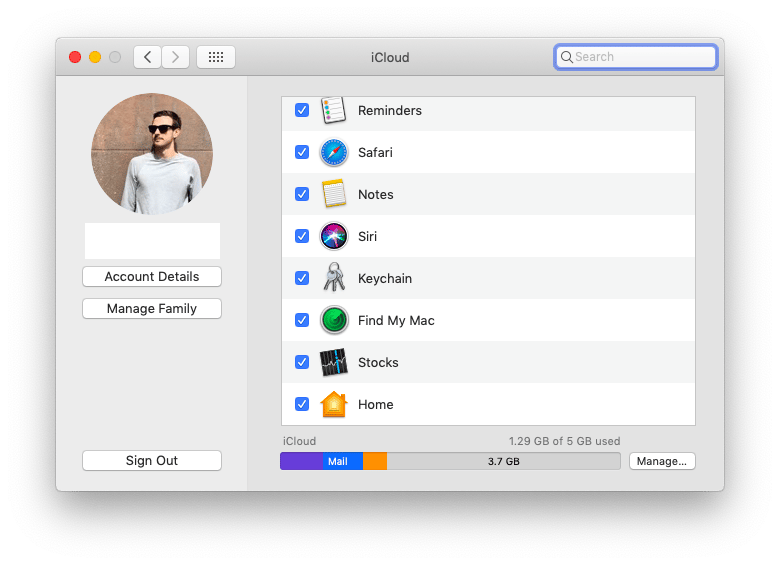
Now information about your Mac’s location will be uploaded to iCloud, which means all the devices that sync with it or simply have access could be used to locate your Mac in case it goes missing.
Find your Mac with iPhone or iCloud
If you notice your Mac gone, you have a reasonable chance of locating it before your private information gets stolen or the whole Mac completely reset. You can either use your iPhone or any computer with the internet access to do that.
With your iPhone:
Download or launch the Find iPhone app
Log in using your iCloud credentials
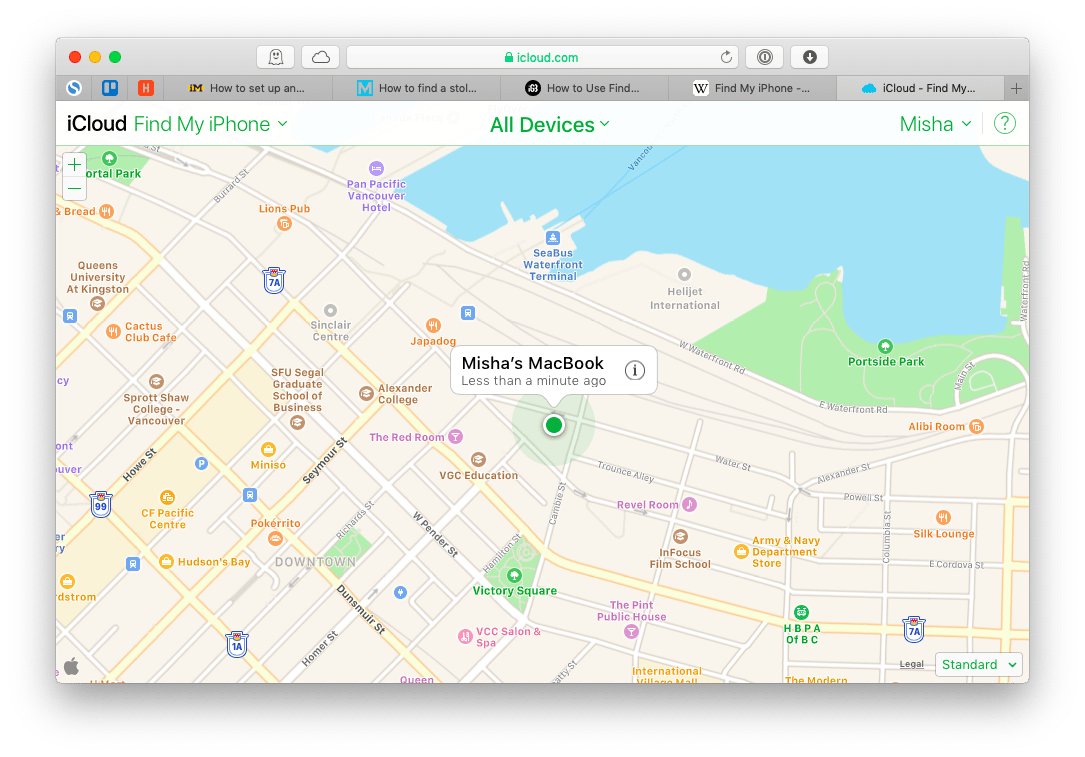
You should see your MacBook in the list of devices and a corresponding location on the map
With your iCloud account:
Log in to icloud.com
Open the Find iPhone web app
From the list of devices at the top, choose your MacBook
How Find My works in macOS Catalina and Big Sur
Starting with macOS 10.15 Catalina, Apple gets rid of iCloud dependency in terms of how you can track your Mac. So even if your computer is shut down or sleeping, there’s a way to spot it’s location with Find My in Catalina.
Now that you know how to use Find My app on Mac in Catalina and Big Sur or Find My Mac in previous macOS versions, we hope you’ll never lose it. Besides, ensure that your password is strong and unique, and make it easy for yourself to lock down your Mac. Finally, create frequent backups, so that no event, whether theft or flood, can affect all the content of your life and work.
Find My app is a native system for tracking your Mac via nearby devices while protecting your data from being intercepted by these devices. Here’s how it works:
Set up Find My with your Mac and another Apple device. The app will generate a private key shared only between these two.
Each device will also be generating “rotating” public keys. Serving as beacons, these keys will be used by nearby devices to spot the location of Mac. No worries about the privacy—each public key can be decrypted only with your private key.
In case your Mac is lost, a nearby Apple device will pick up a signal from your public key via Bluetooth and encrypt the current location of your Mac with the same public key.
Next, the encrypted location along with a hash of the public key is uploaded to Apple’s server. Once it happens, you can access and decrypt your Mac’s location with a private key via your second device.
What to do when you find your MacBook
Hopefully, you were successful in finding a little dot on the map representing your MacBook somewhere in your city. What next?
First, notify the police that you’ve tracked the location of your device (but don’t try to go there yourself).
Then, you have a few options: to play a sound on your Mac, lock it, or completely erase the hard drive. All of them are available right from the same Find My MacBook app on your phone or iCloud.
Playing a sound was originally conceived as a way to locate your MacBook within your house. But it could also potentially notify the thieves that you’re aware your MacBook is stolen, which might deter them from looking through your personal information.
Another thing you can do is to completely lock down your Mac, shutting off anyone but you from accessing it by inputting a four-digit passcode you will then create. No one without the passcode will be able to log in. Note that if you lock down your Mac, you won’t be able to erase its contents remotely anymore.
At last, when some time has passed and you’re convinced that getting your Mac back isn’t an option, you can erase it, which will delete all the content from its hard drives. You will lose everything you have on your computer, but at least your personal information wouldn’t be leaked to other people.
To avoid situations in which you have to be afraid for your data, you should always use a password to log in to your Mac, set an auto-lock after a certain time interval, and lock your Mac manually every time you leave it on its own.
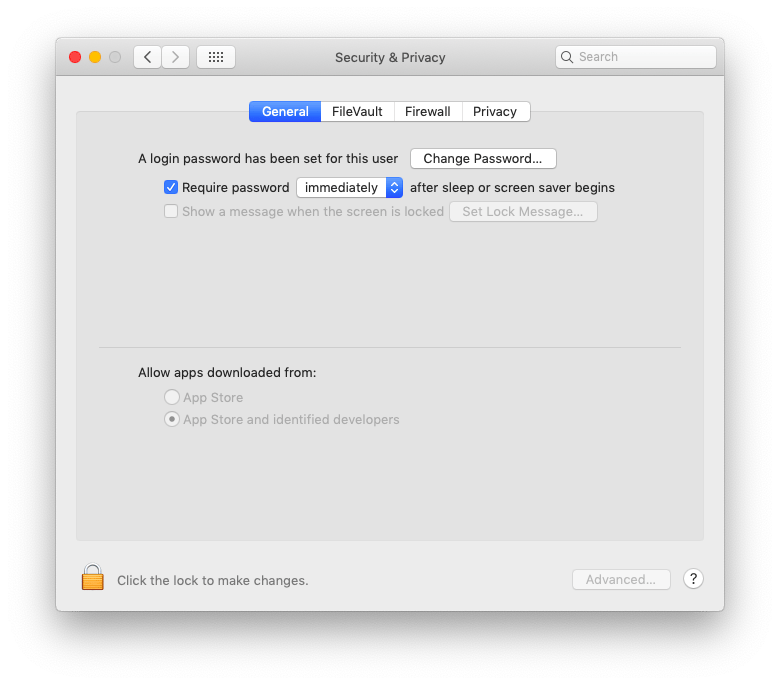
To change a password and set an auto-lock:
Open System Preferences
Click on Security & Privacy > General
Select Change Password…
Check “Require password immediately after sleep or screen saver begins”
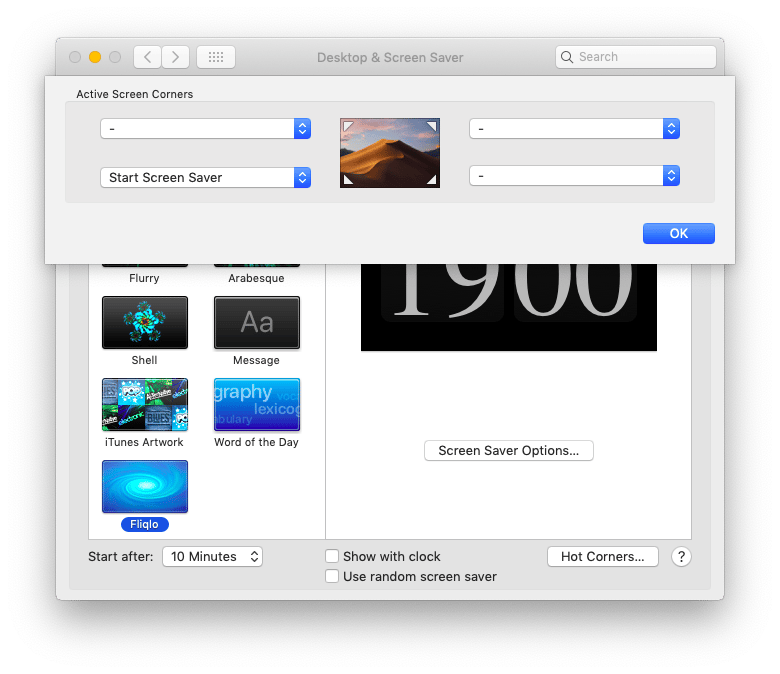
Another useful trick here to quickly lock down your Mac is to establish Hot Corners:
In System Preferences, choose Desktop & Screen Saver
Select Hot Corners…
Use one of the dropdown menus and pick Start Screen Saver
Now, every time you need to step away, just point your cursor in that corner of the screen and Screen Saver would start automatically, locking your Mac.
Best ways to back up your Mac
The first rule of working on any computer is quite simple — back everything up. Computers could be unpredictable and if you don’t save your information somewhere else too, one day, you could lose it in a snap.
Similarly, when someone steals your machine, even when you’re successful with Find My iPhone on Mac and actually able to locate the computer — the truth is, unless you have a strong password, you have to erase all its contents to prevent identity theft. That is not such a big deal if you have a recent backup in place, but it’s devastating if you don’t.
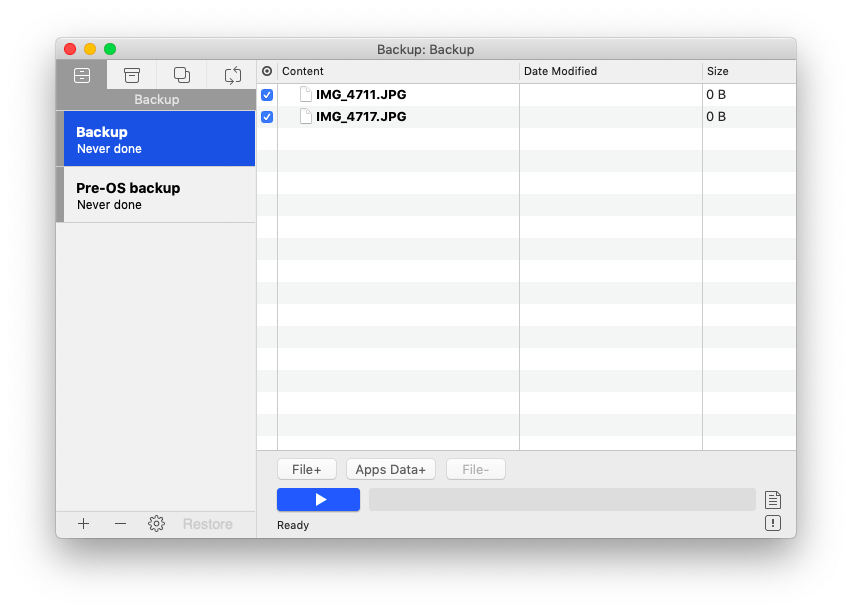
Luckily, backing up your computer doesn’t have to be painful or take that much time at all. A professional backup software such as Get Backup Pro will take care of your computer automatically.
Get Backup Pro lets you seamlessly back up, clone, or synchronize volumes on your Mac so you never have to worry about losing information if your find my laptop Mac app doesn’t yield any results.
Now that you know how to use Find My app on Mac in Catalina or Find My Mac in previous macOS versions, we hope you’ll never lose it. Besides, ensure that your password is strong and unique, and make it easy for yourself to lock down your Mac. Finally, create frequent backups, so that no event, whether theft or flood, can affect all the content of your life and work.
Best of all, the backup app mentioned here, Get Backup Pro, is available to you for a free trial through Setapp, a platform of more than 150 Mac apps and utilities for every situation. Don’t postpone that feeling of being secure!


