How to upload photos to iCloud: The best methods only
We all love iPhone cameras, right? They take amazing photos and help us capture all those special moments, so keeping them safe is super important. iCloud makes storing and syncing your pics across devices easy, so you won’t have to worry about losing them.
But hey, if you like to be a bit more hands-on, some folks prefer to upload their files manually or use other tools to manage their photo libraries.
In this guide, I’ll cover multiple ways to upload photos to iCloud, including from iPhone, iPad, and Mac. I’ll also highlight useful apps that improve storage and make the overall process much easier. Let’s start!
How to upload directly to iCloud
If you're an Apple user, you start off with 5 GB of free iCloud storage, which is pretty handy. If you find yourself needing more space, you can easily upgrade to 50 GB, 200 GB, or even 2 TB for a monthly fee. And hey, if you want to upload your photos manually, just hop on to iCloud.com — it's easy.
To upload photos to iCloud:
- Go to iCloud.com in your web browser.
- Sign in with your Apple Account.
- Click on Photos from the main dashboard.
- Click the upload button (cloud icon with an upward arrow) at the top of the screen.
- Select the photos from your Mac that you want to upload, or simply drag and drop the photos into the iCloud Photos window.

This method works great for occasional uploads, but it might not be the best way to handle a huge bunch of pictures.
How to upload all photos to iCloud on iPhone
Uploading photos manually can be tedious. If you want all of your images to sync automatically, iCloud Photos is the best solution. When enabled, it ensures that every photo taken on an iPhone or iPad is backed up immediately.
How to upload all photos to iCloud on iPhone:
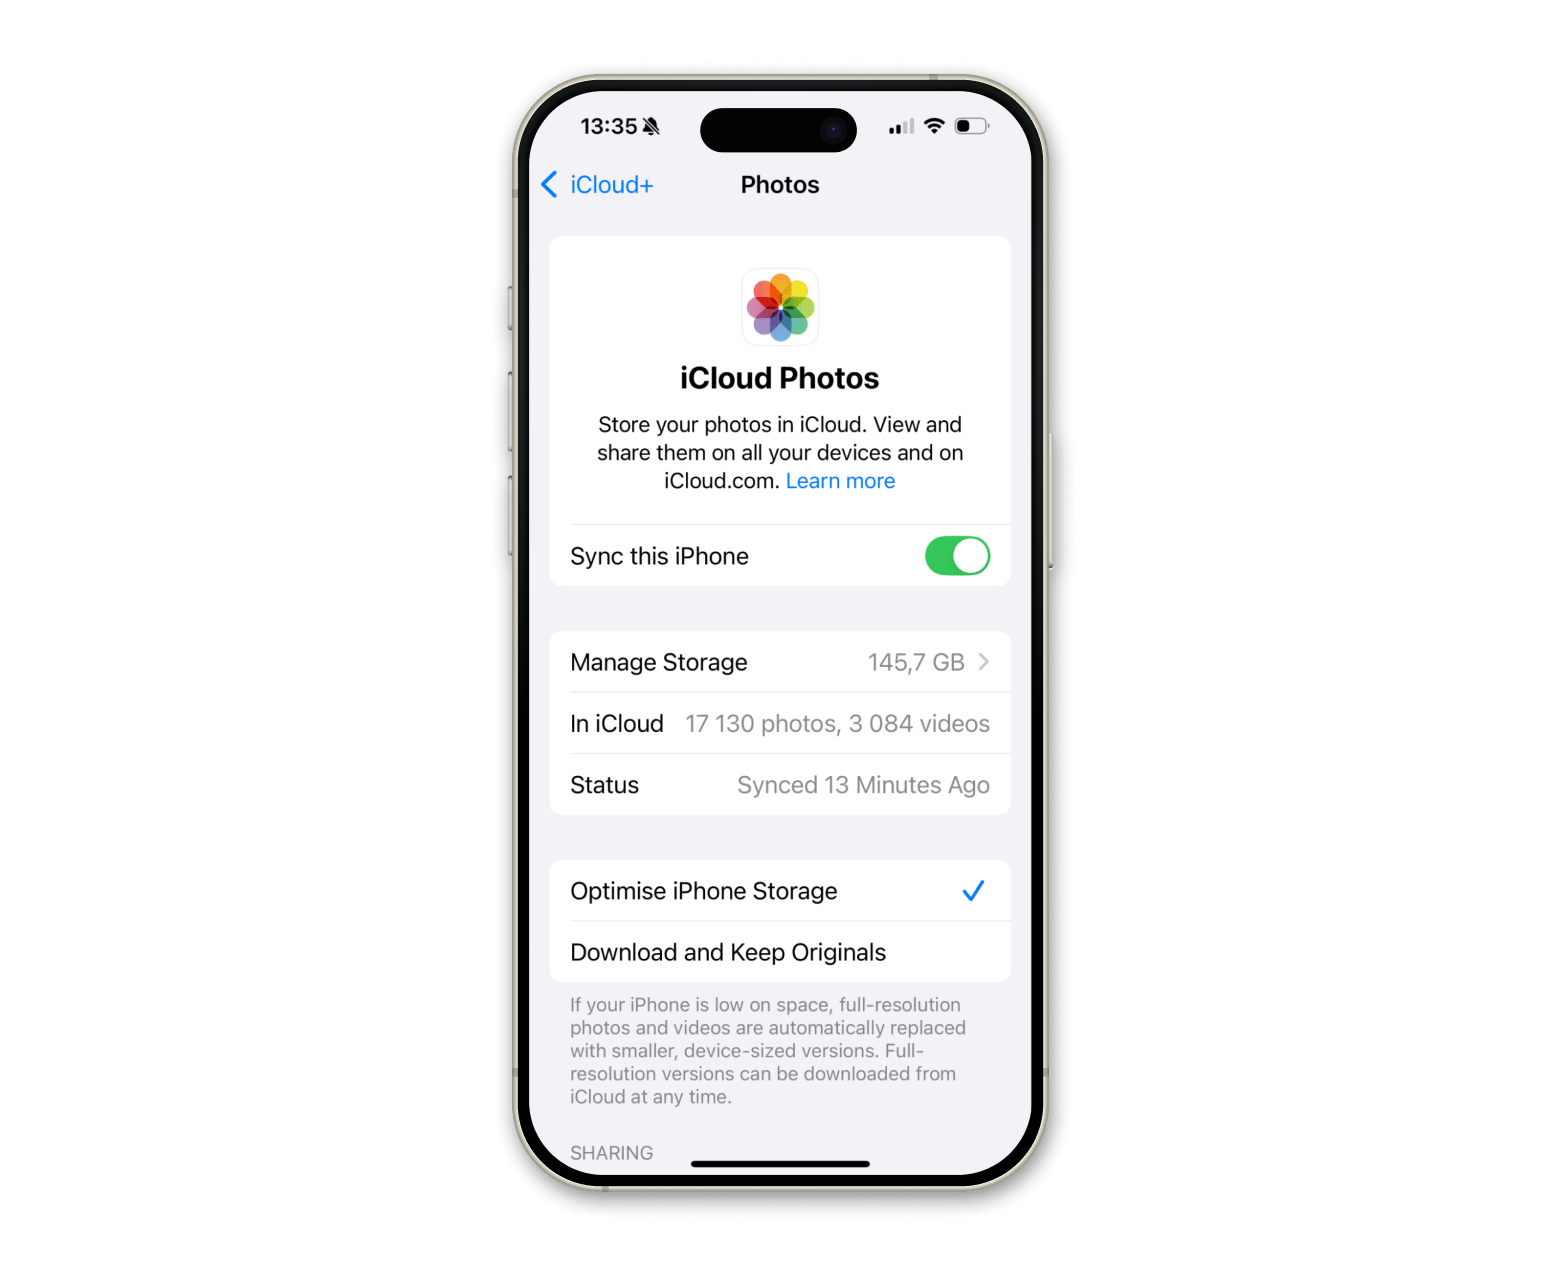
- Go to Settings on your iPhone.
- Tap Apple Account > iCloud.
- Tap Photos > Turn on Sync this iPhone.
- Choose one of the two options:
- Optimize iPhone Storage: This option saves space on your device by keeping full-resolution photos in iCloud and only lightweight versions on your iPhone.
- Download and Keep Originals: This option keeps full-resolution photos both on your iPhone and in iCloud.
How to upload all photos to iCloud on Mac
If you're using your Mac, follow these steps:
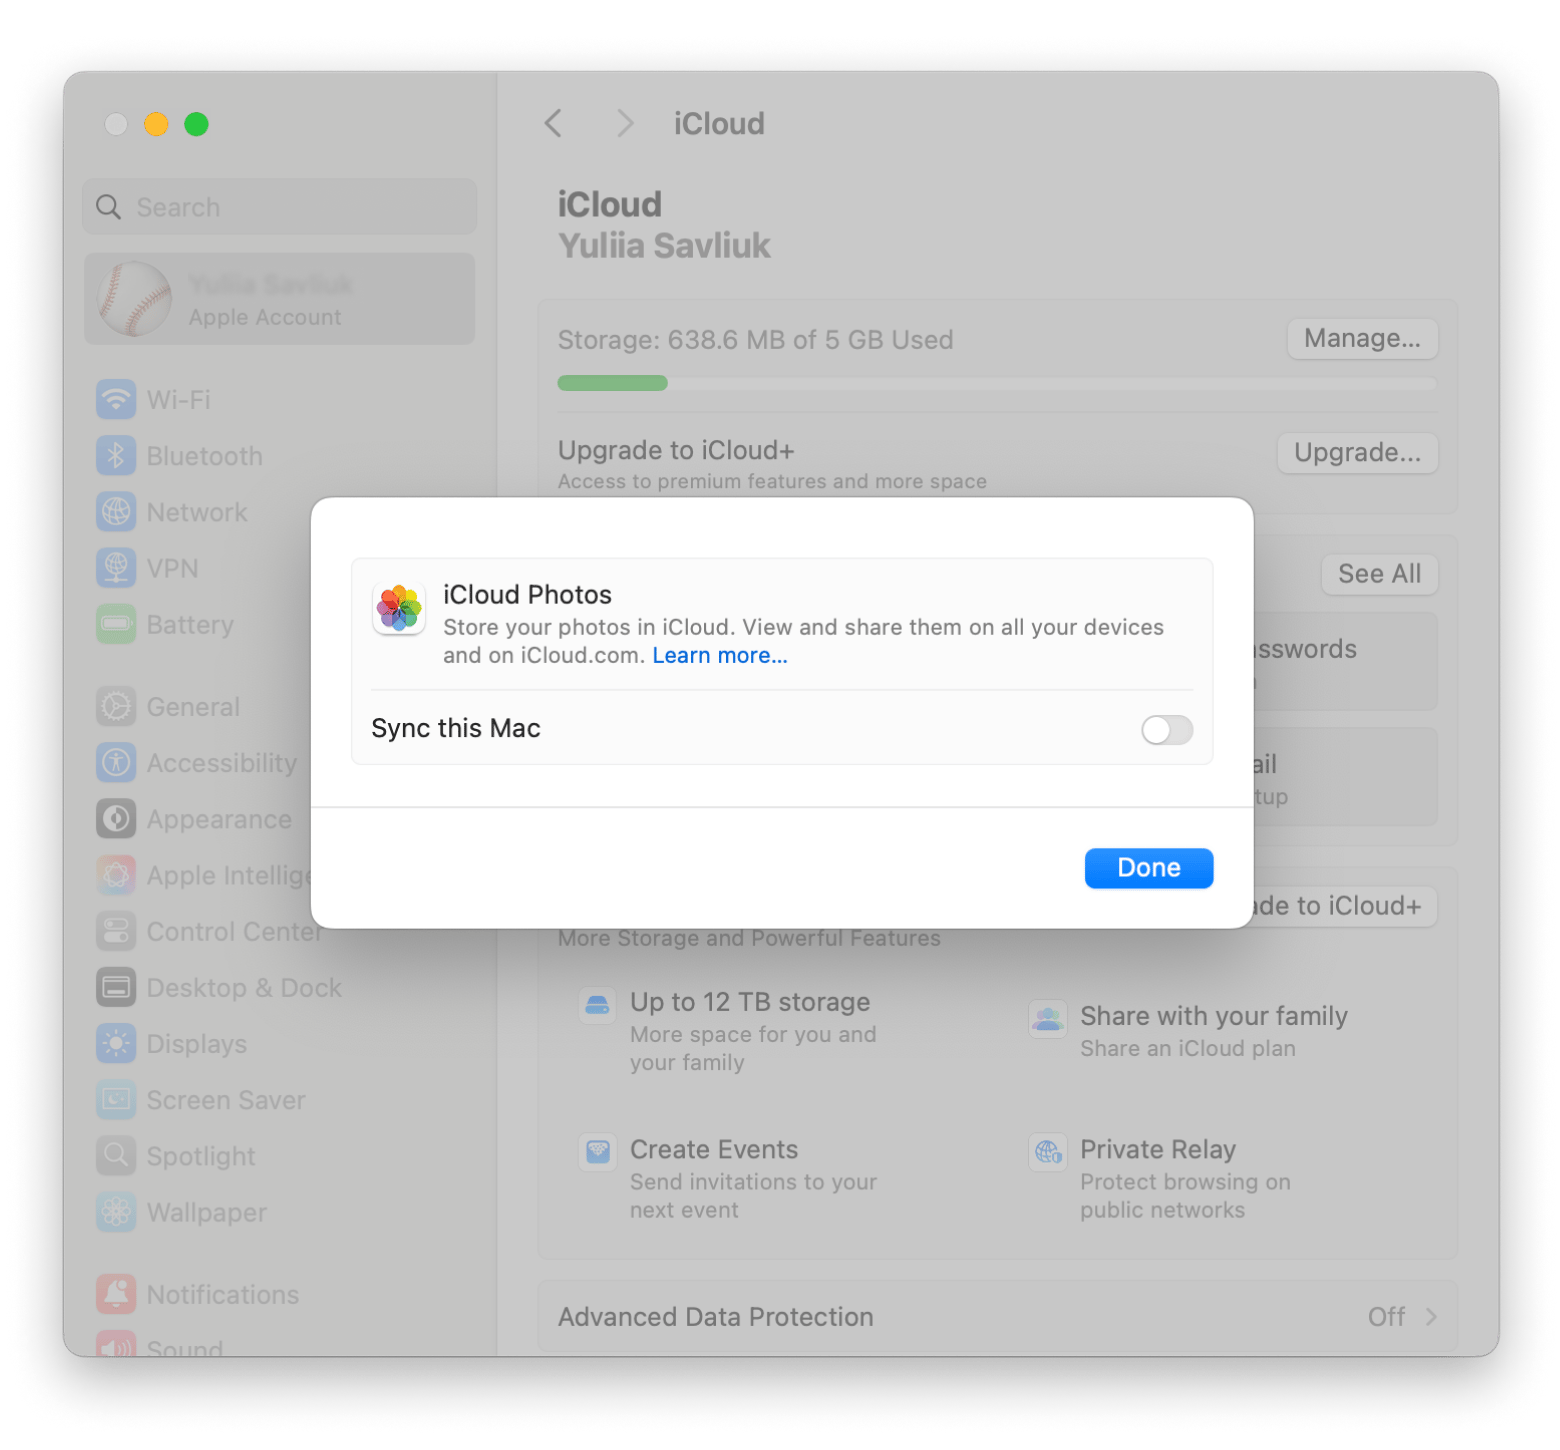
- Click the Apple menu > System Settings.
- Click Apple Account > iCloud.
- Click Photos > Turn on Sync this Mac.
Read also:
- Transfer Photos From Android to Mac
- Sync Contacts From iPhone to Mac
- Shared Album In Photos
- Download From Google Drive
Bonus tip: Delete unnecessary photos before uploading to iCloud
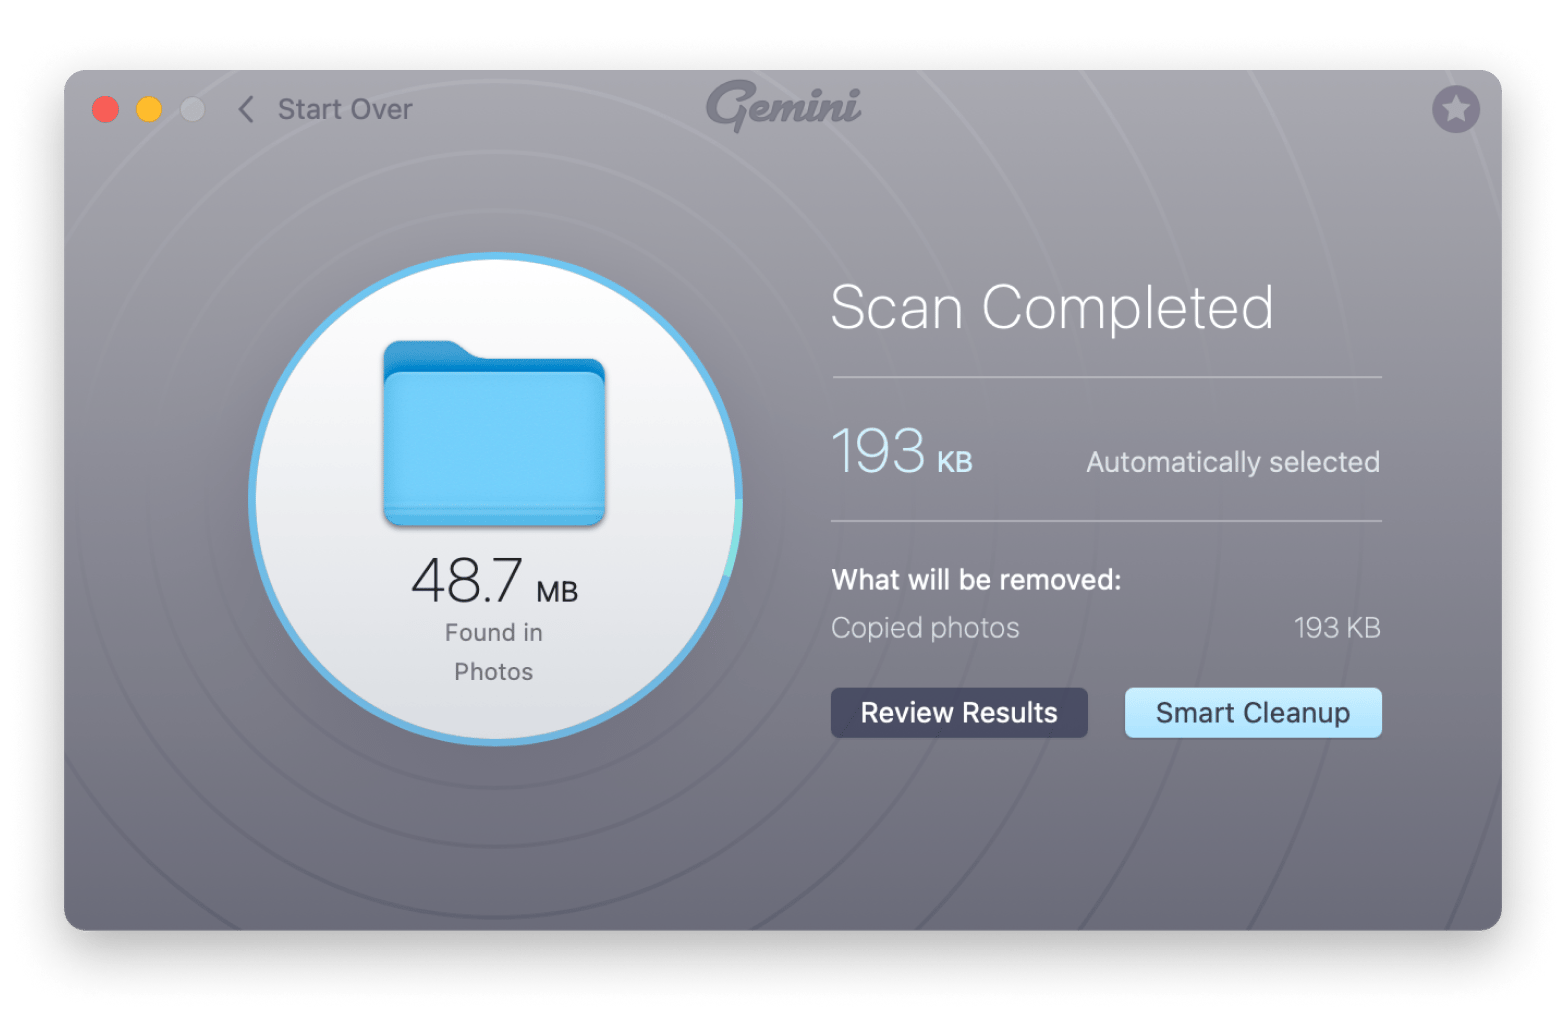
Before uploading your photos to iCloud, it’s a good idea to remove any duplicates or similar shots that could clutter up your cloud storage. Gemini can help with this by scanning your photo library for exact matches and near-identical images. Instead of manually sorting through thousands of photos, Gemini uses AI-powered recommendations to quickly and accurately identify which ones to keep.
To use Gemini:
- Install and open the Gemini app on your Mac.
- Drag and drop files to the app’s window.
- Click Scan for Duplicates.
- After the scanning is complete, click Review Results or Smart Cleanup.
How to upload photos from iPhone to iCloud storage
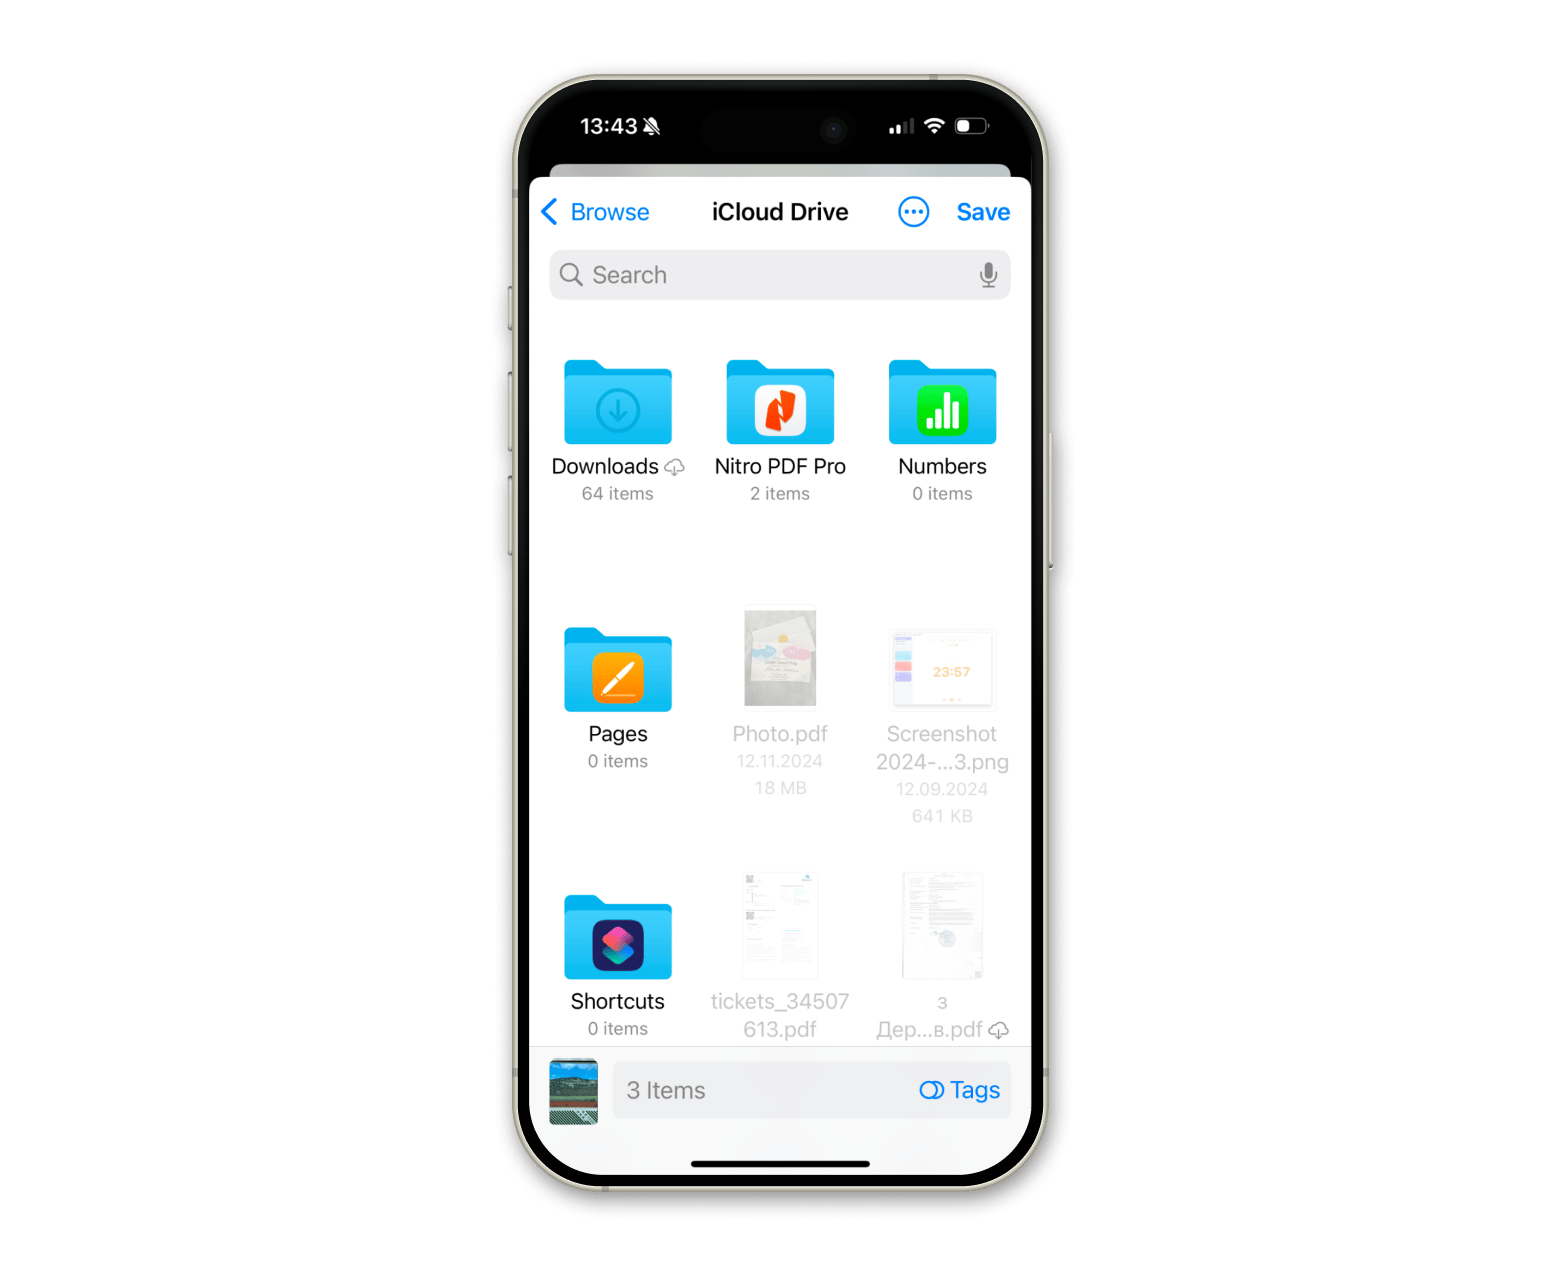
If iCloud Photos is not enabled, you can still upload photos manually. Some people prefer to back up only selected images instead of syncing their entire photo library. Luckily, iCloud Drive makes this process easy and gives you full control over what gets uploaded.
To upload photos manually from your iPhone:
- Open the Photos app > Select the Photos you want to upload.
- Tap the Share button.
- Choose Save to Files from the options.
- Choose iCloud Drive as the destination.
- Pick or create a folder where you want to store the images.
- Tap Save to upload them.
Also, check out how to access iCloud Photos (with or without Mac).
Why are the photos on iPhone not uploading to iCloud
Even after enabling iCloud Photos, images don’t always sync as expected. We know this is really frustrating, especially when you rely on iCloud to keep memories safe. If your iPhone photos aren’t uploading to iCloud, there are a few reasons to look into.
- Inefficient storage space: It’s possible that you don’t have enough iCloud storage space.
- iCloud is turned off: Your Photos toggle on Mac or iPhone in iCloud might not be turned on.
- No internet connection: In order for iCloud to sync, it needs to be connected to the internet.
- Logged out: Check that you are logged into iCloud on your iPhone or Mac.
How to manage multiple iCloud accounts
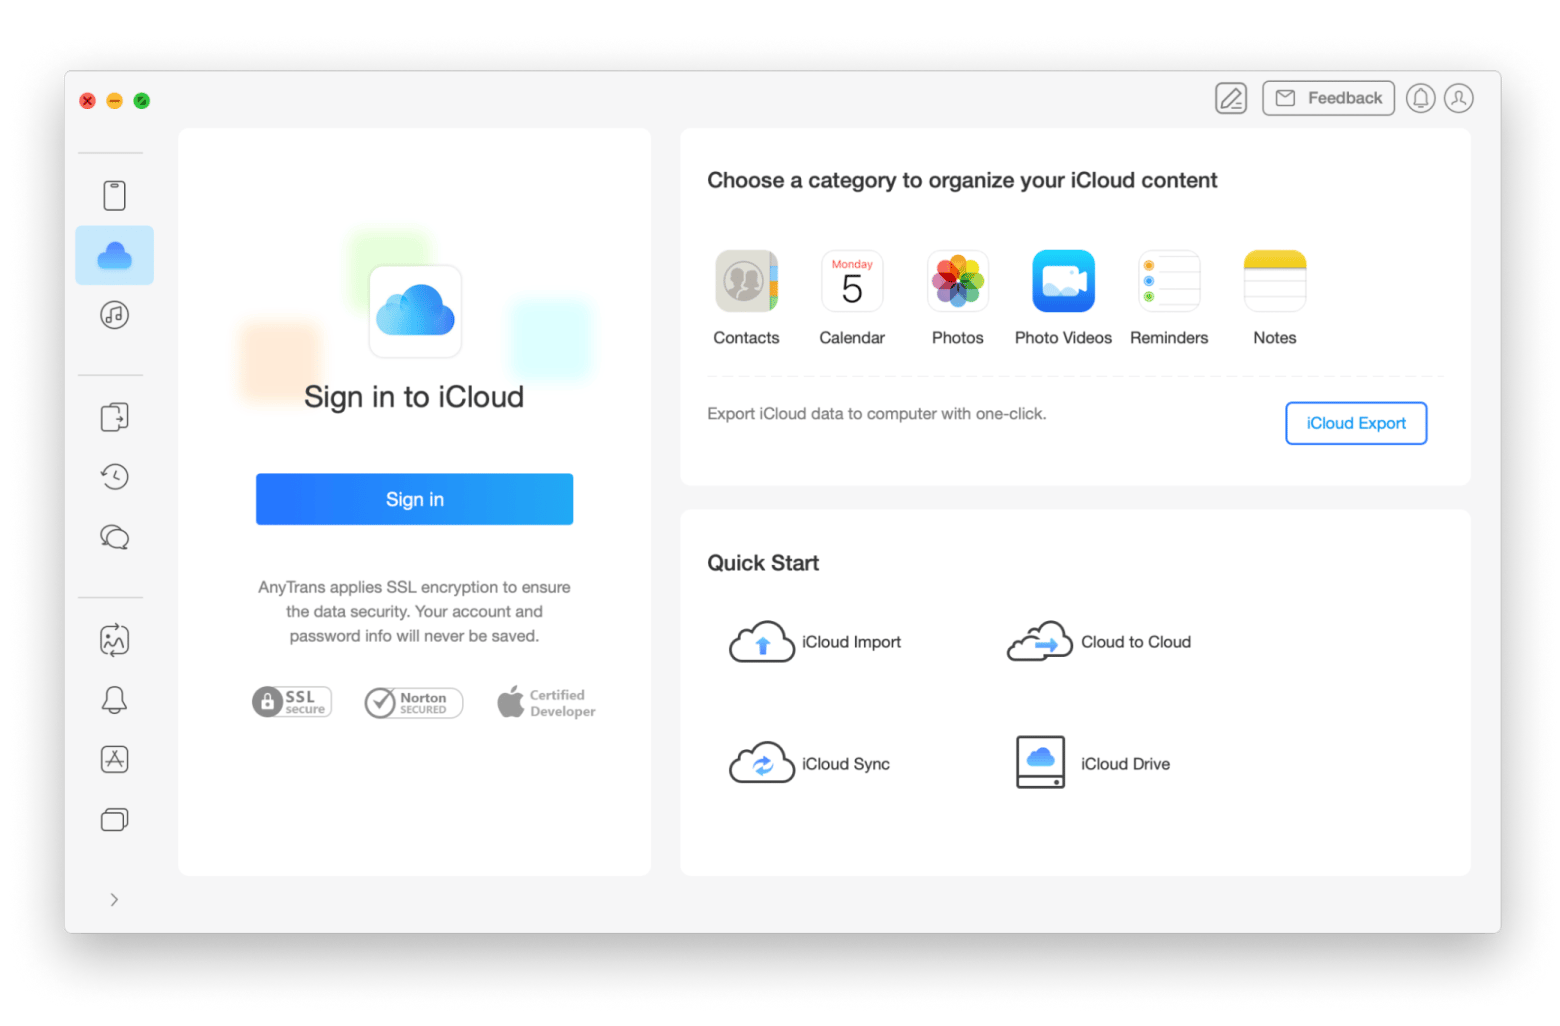
If you have multiple iCloud accounts or you're dealing with backups, AnyTrans for iOS can help. It lets you sync all your iCloud accounts, transfer data between them, and even tap into backups with ease. You can batch-save files from iCloud directly to your Mac or move content from your library to your Mac or iPhone.
To manage multiple accounts:
- Install and open AnyTrans for iOS.
- Go to the iCloud tab > Sign in to your account.
- Once signed in, you can manage your storage by transferring files between two iCloud accounts, starting iCloud sync, and more.
How to upload photos to iCloud the easy way: Solved
iCloud is great at syncing photos, but you don’t have to rely on automatic uploads alone. iCloud Photos handles full-library backups, while iCloud Drive gives you control over individual files.
If you want everything in one spot, CloudMounter lets you connect your drives to Finder, making photo transfers easy. For managing multiple iCloud accounts, AnyTrans for iOS is a great tool.
Just remember, storage fills up fast with duplicate photos or uncompressed images. Tools like Squash help reduce file size without losing quality, allowing for faster syncing and more space. Gemini is my top pick for finding and removing duplicates. These apps are available through Setapp.
Setapp gives you access to more than 250 Mac and iOS apps with just one subscription. You can try it out for free for a week and check out a bunch of tools for getting stuff done, being creative, and more.
FAQs
How do I upload all photos to iCloud?
To upload all photos to iCloud:
- On iPhone: Go to Settings > Apps > Photos and turn on iCloud Photos.
- On Mac: Open the Photos app, go to Photos > Settings, and turn on iCloud Photos.
How to keep iCloud Photos synced?
To keep iCloud Photos synced:
- On iPhone:
- Go to Settings > Apple Account > iCloud > Photos.
- Turn on Sync this iPhone.
- Choose either Optimize iPhone Storage or Download and Keep Originals, depending on your storage preferences.
- On Mac:
- Click the Apple menu > System Settings > Apple Account.
- Click iCloud > Photos.
- Turn on Sync this Mac.
How do I move photos from iPhone to iCloud?
To move photos from iPhone to iCloud:
- Go to Settings > Apple Account > iCloud > Photos.
- Turn on Sync this iPhone.
- Choose either Optimize iPhone Storage or Download and Keep Originals, depending on your storage preferences.
How do I make my photos go to my iCloud?
To make your photos go to iCloud, go to Settings > Apple Account > iCloud > enable Sync this iPhone or Sync this Mac.
Do photos stay on iCloud if deleted from iPhone?
If iCloud Photos is enabled, deleting a photo from your iPhone removes it from iCloud and all synced devices. To keep a backup, move the photo to iCloud Drive before deleting it.


