How to clear purgeable space on macOS? Best tips & quick solutions
Are you facing storage issues, slow performance, or trouble installing updates on your macOS? Yeah, I’ve been there too.
This could happen because system files, backups, and cached data fill up the purgeable space on your Mac. While macOS typically clears this space automatically, there are times when it doesn’t do it correctly. I'll explain how to clear the purgeable space on Mac and get rid of it.
What is purgeable space on Mac?
Purgeable space is a collection of files that macOS can safely delete when more space is needed, like cached data, old user files, temporary files, and iCloud-synced content (if you've enabled Optimized Storage). This feature, first introduced with macOS Sierra, marks these files as purgeable.
It usually means old files that have not been used for a while and other files that are synced with iCloud automatically when space runs low. It doesn't store copies of the deleted files, ensuring that only non-essential data is cleared.
Easy ways to clear purgeable space on macOS
Before I guide you through each step, I’ve put together a simple way to clear purgeable space on macOS:
What to do? | Follow these steps |
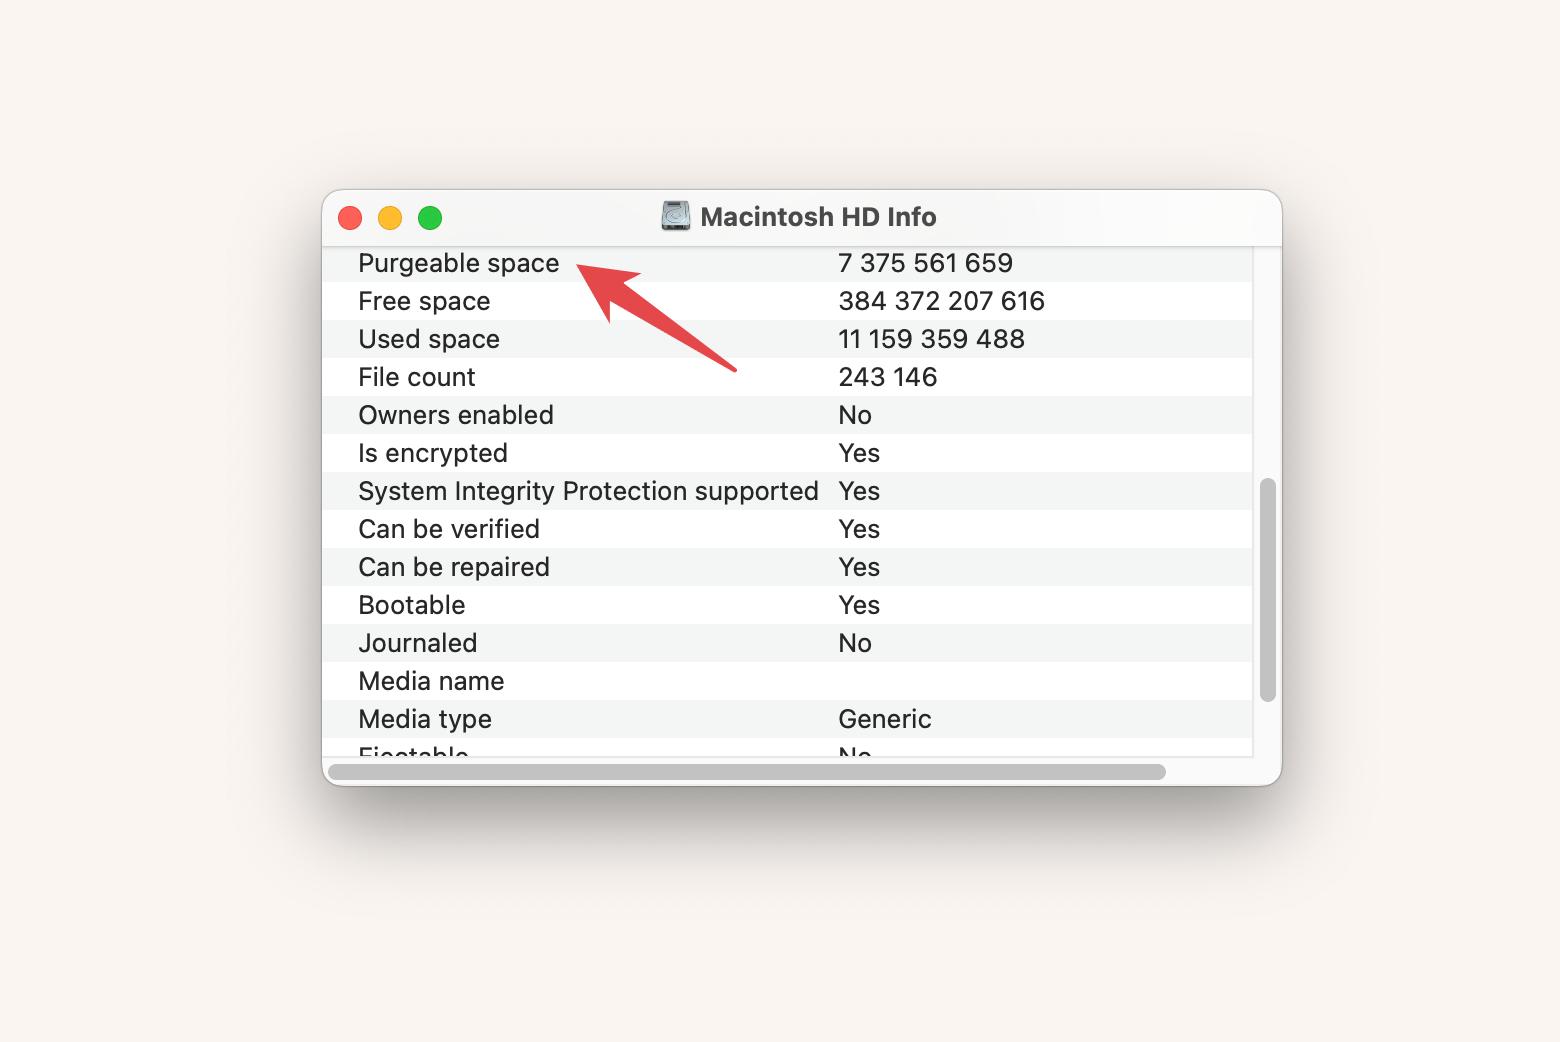
Check purgeable space on macOS | Open Finder > Applications > Utilities > Disk Utility and select a device or volume from the sidebar. Click View > Show All Devices, and click Info in the toolbar > Purgeable space. |
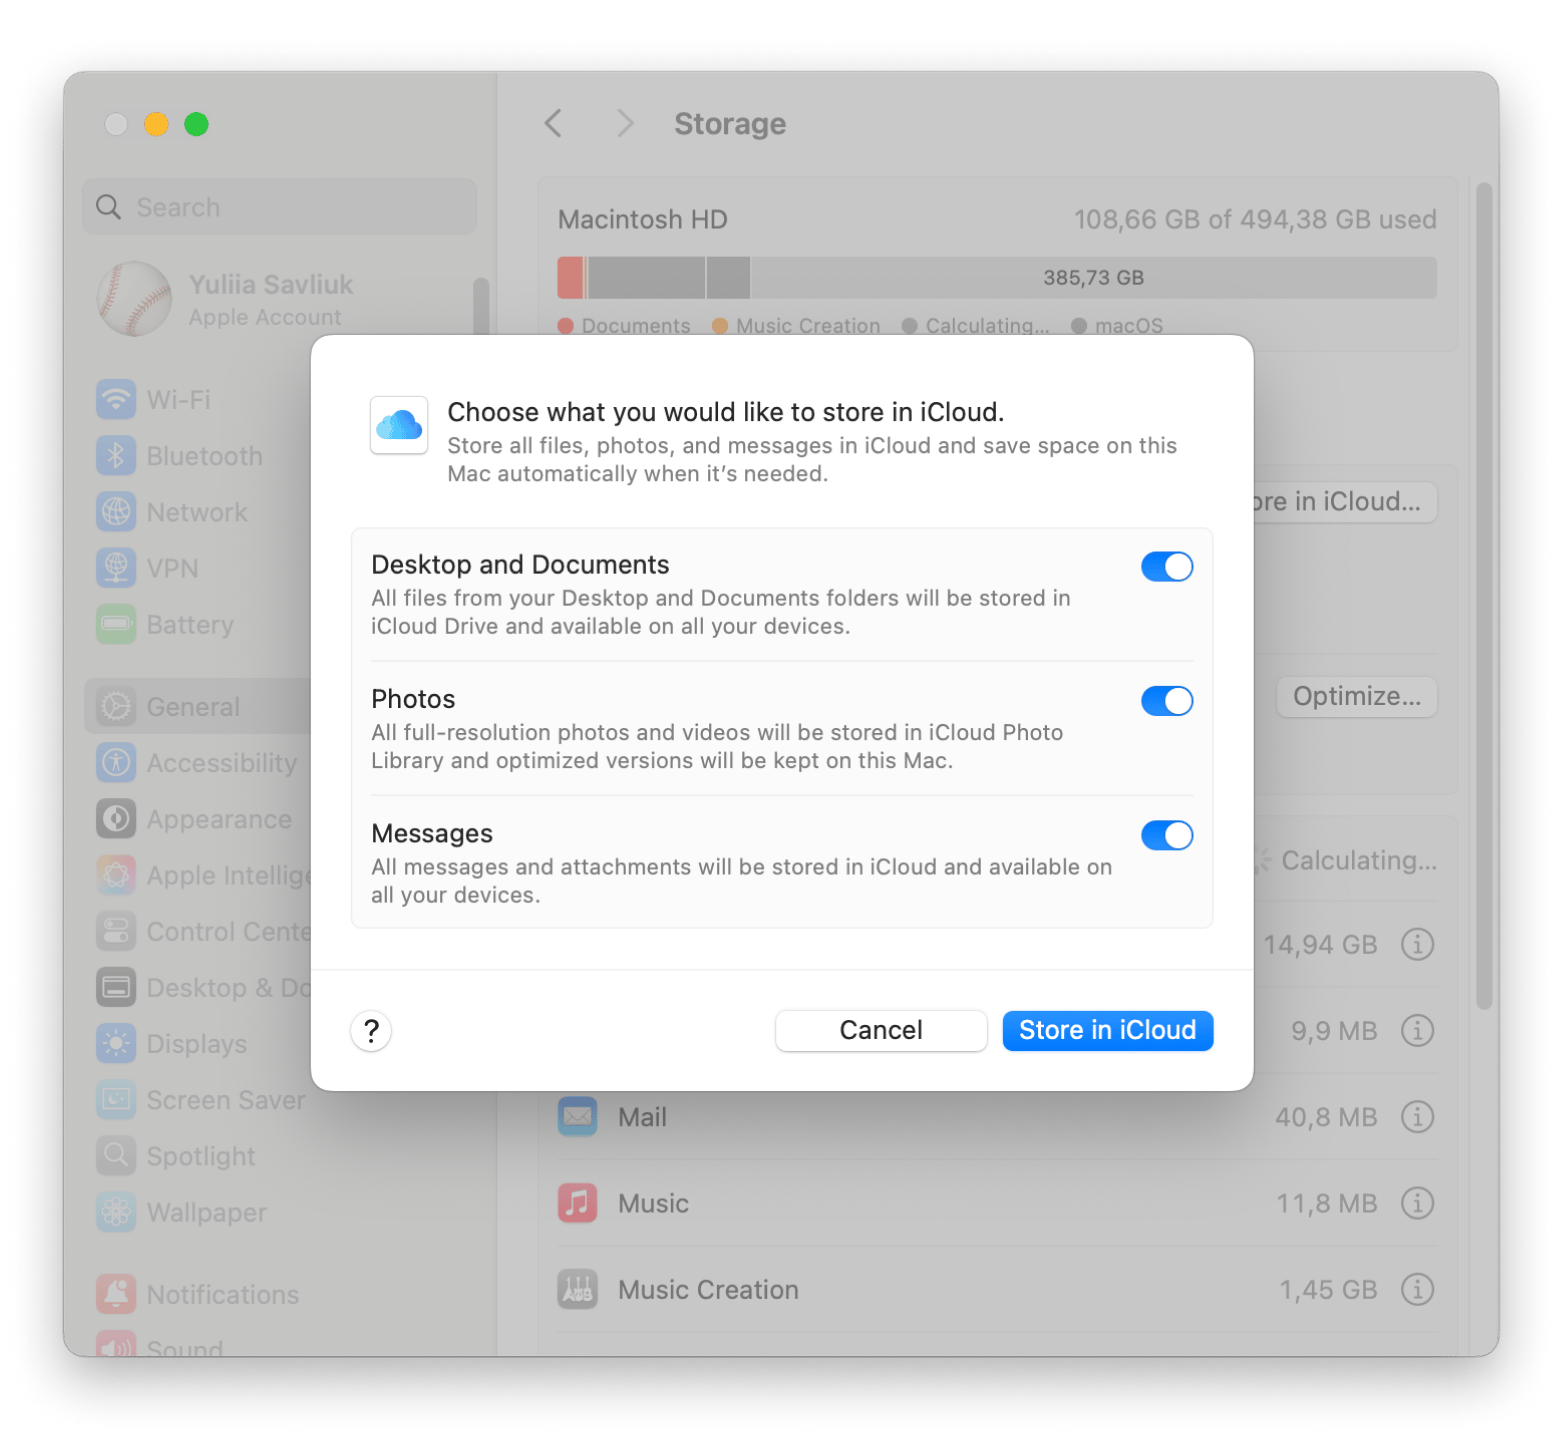
Optimize storage via iCloud | Click the Apple menu > System Settings > General > Storage. Under Recommendations, click Store in Cloud > Turn on Photos, Desktop & Documents, and Messages to offload data to iCloud. |
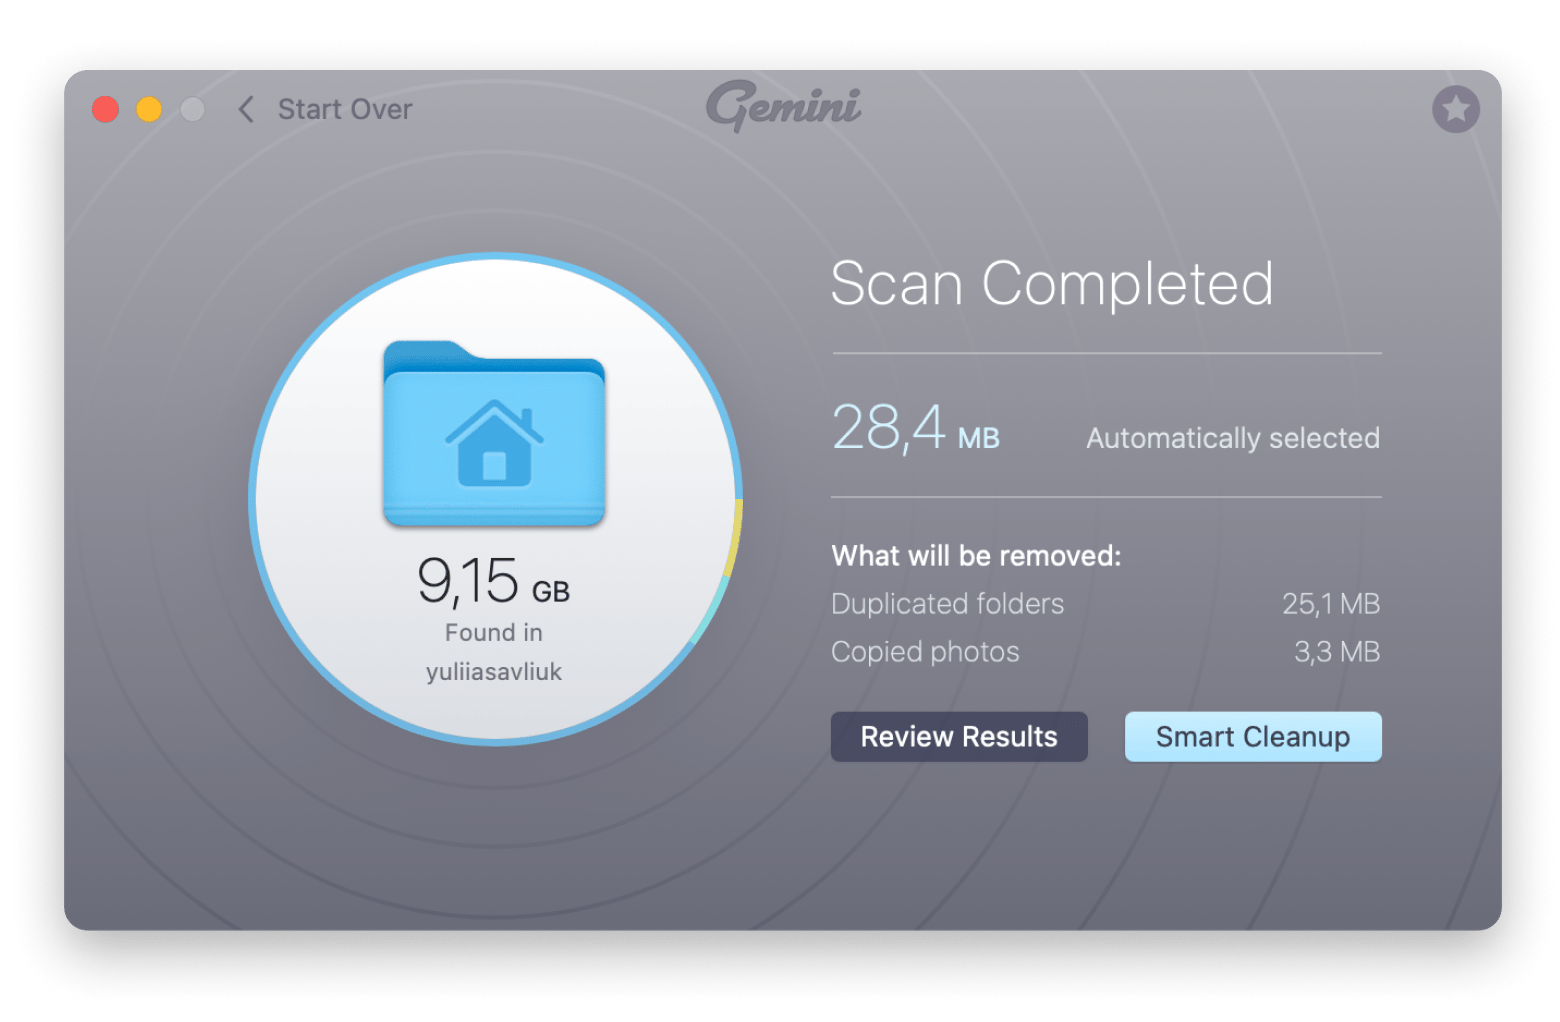
Get rid of duplicates | Install and open Gemini >, Drag a folder onto the app window > Scan for duplicates > Click Smart Cleanup. |
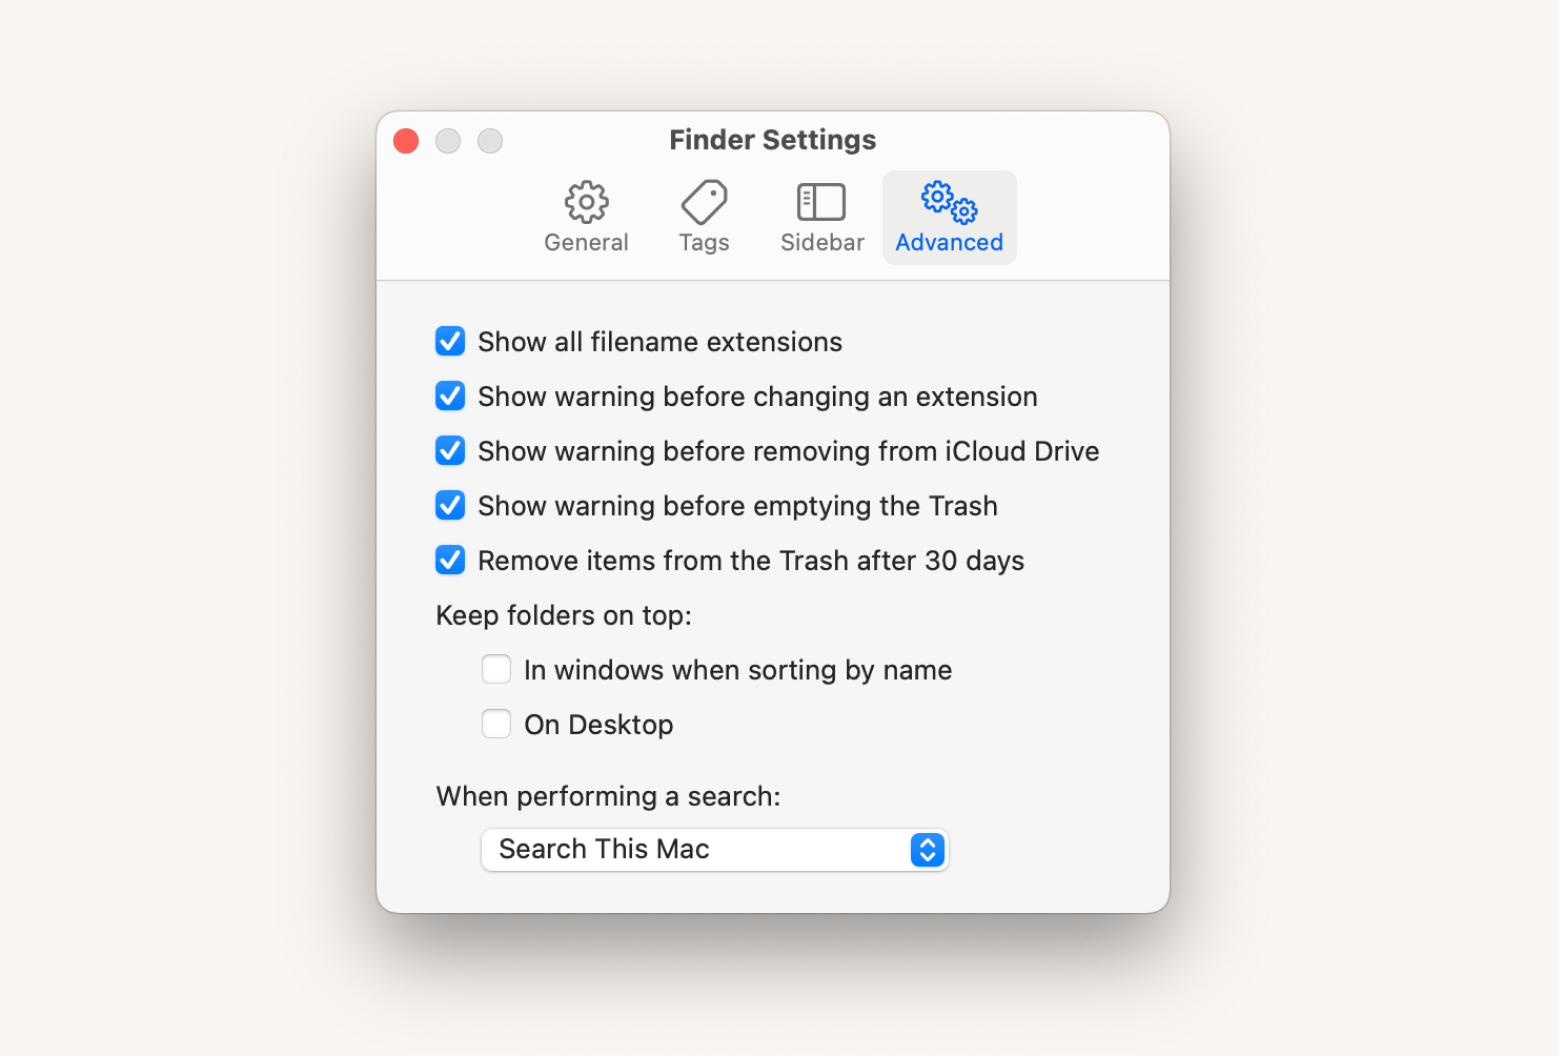
Empty Trash automatically | Open Finder > Click Finder in the menu bar > Settings > Advanced > Select Remove items from the Trash after 30 days. |
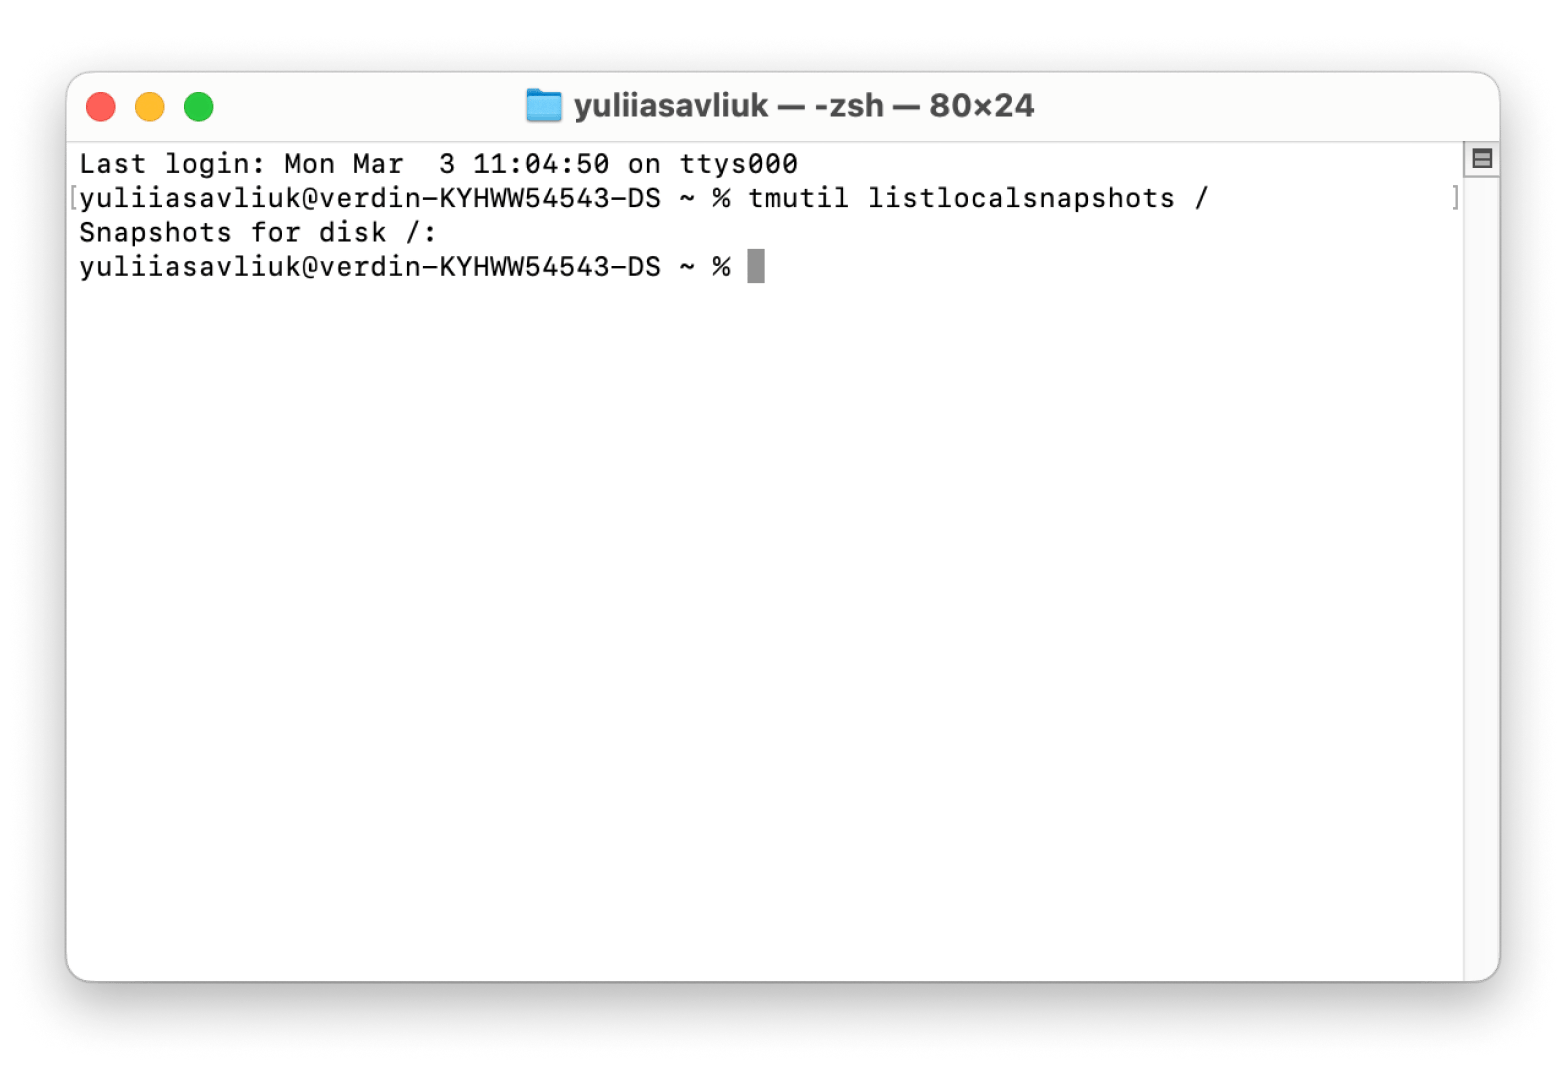
Delete old Time Machines snapshots | Open Terminal > Type tmutil listlocalsnapshots / > press Return. It will display a list of snapshots > Type tmutil deletelocalsnapshots |
Reformat your Mc’s drive ( ‼️last resort) | Open Disk Utility > Choose the drive to reformat > Click Erase > Choose a file system format: APFS (for macOS 10.13 High Sierra and later), Mac OS Extended (Journaled) (for older macOS versions) > Enter a name for the drive >Click Erase > Done. |
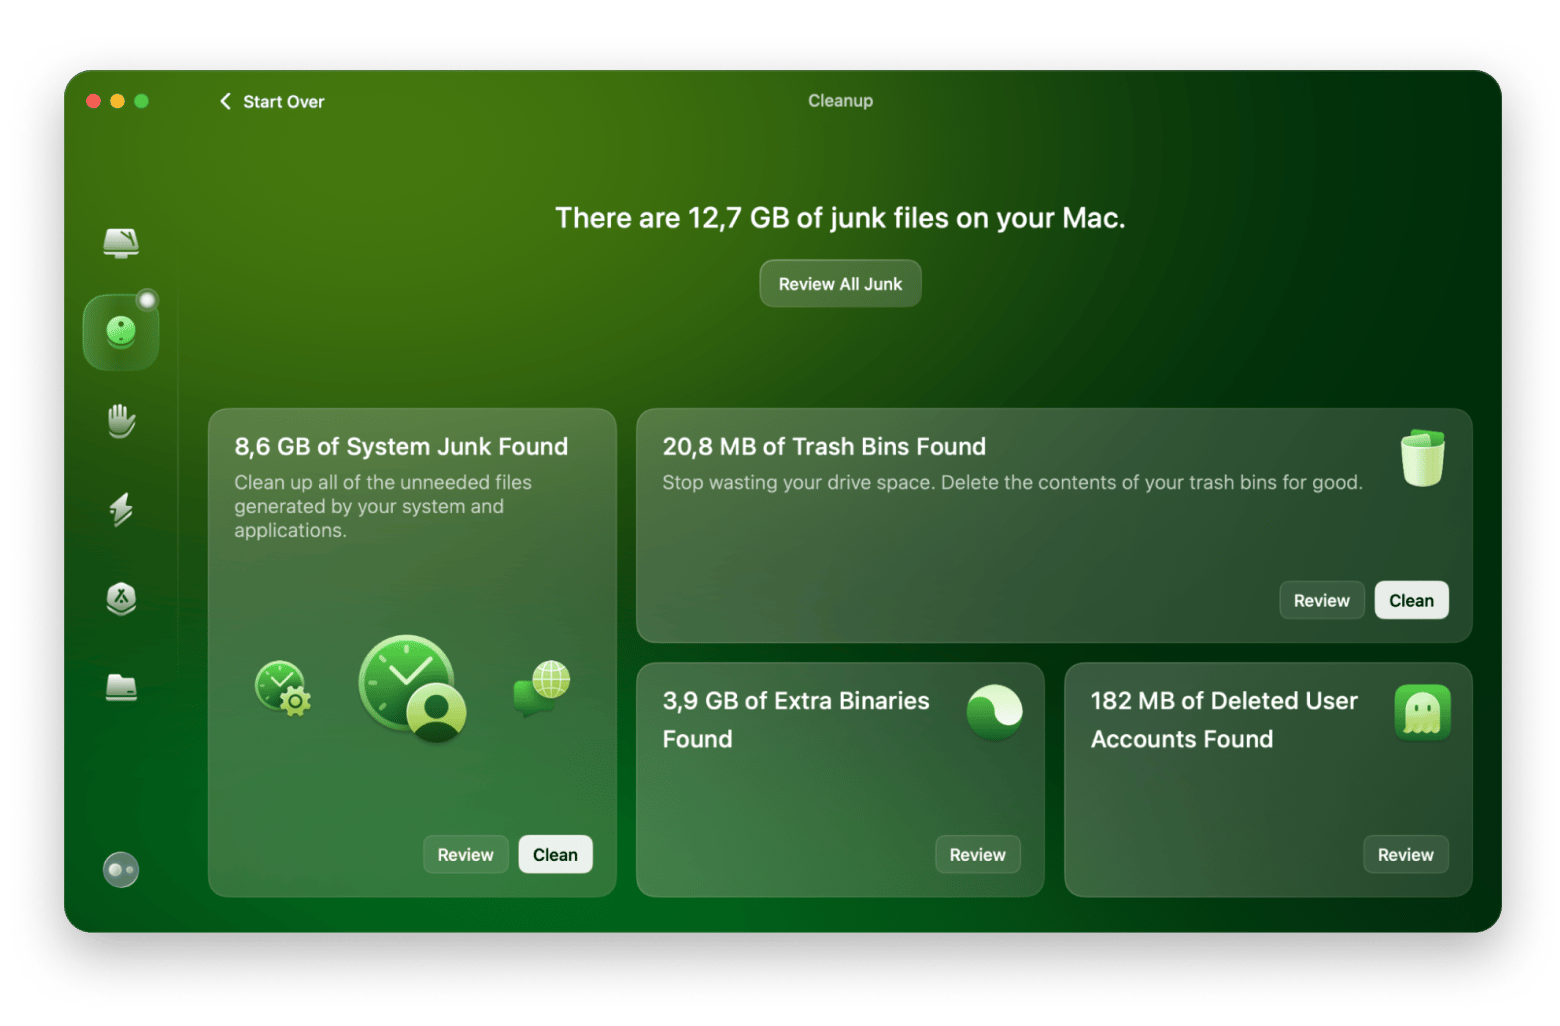
Quickly clear purgeable space on Mac | Install and open CleanMyMac > Cleanup Scan > Review the scan results and click Run to clear unnecessary files on your Mac. |
How to check purgeable space on macOS?
To check purgeable space on your Mac, follow these steps:
- Go to Finder > Applications > Utilities > Disk Utility.
- Click View > Choose Show All Devices.
- Choose a device or volume from the sidebar.
- Click Info in the toolbar.
- View purgeable space.
How to reduce purgeable space manually?
Freeing up purgeable space using tools is a convenient way to optimize your Mac performance. However, learning to reduce purgeable space manually is a good idea as it comes with minimal risks.
Here are some of the manual cleanup techniques I generally use to manually reduce purgeable space on my macOS. Let’s take a look at them.
Optimize storage via iCloud
You can reduce and optimize purgeable space by enabling the Optimize Storage feature on your Mac. This will allow macOS to manage your files more efficiently, offloading older files to iCloud and freeing up space on your local drive when necessary. Follow these simple steps to enable it:
- Click the Apple menu > System Settings.
- Click General > Storage.
- Under Recommendations, click Store in Cloud.
- Turn on Photos, Desktop & Documents, and Messages to offload data to iCloud when space is needed.
Also, check out the guide on how to manage storage on Mac.
Get rid of duplicate files on Mac
Duplicate files can take up a surprising amount of storage, slowing down your Mac and reducing available space. Removing them is another way to clear purgeable space. You can easily find and delete duplicate files across your system using tools like Gemini.
Gemini uses advanced algorithms to detect duplicate files, photos, videos, etc., that you can review and delete with just a single click.
Here is how to get rid of duplicate files using Gemini:
- Install and open Gemini.
- Once you see the window with a big “+’” symbol, drag a folder onto it to identify duplicates > Click Scan for duplicates.
- Once the scan is complete, click Review Results and decide what to delete and what to keep.
- After that, click Smart Cleanup.
Empty Trash automatically on Mac
Even when you remove the unnecessary files from your Mac, deleted items take up the disk space in the Trash. If you often forget to empty your Trash, it can quietly take up valuable space on your Mac.
To empty Trash automatically:
- Open Finder > Click Finder in the menu bar > Settings.
- Click Advanced.
- Select Remove items from the Trash after 30 days.
This will ensure that files in the Trash are permanently deleted after 30 days, freeing up disk space without manual effort.
Delete old Time Machine snapshots
Time Machine backs up your files every hour, day, and week, keeping local snapshots on your storage device at the same time. These snapshots can take up a lot of space on your Mac, so if you're running low on storage, you can easily delete the older Time Machine snapshots using some commands in the Terminal.
Here’s how to do it:
- Go to Finder > Applications > Utilities > Terminal.
- Type tmutil listlocalsnapshots / > press Return. It will display a list of snapshots.
- Find the snapshot you want to delete.
- Type the following command replacing
with the actual name of the snapshot: tmutil deletelocalsnapshots > Press Return. - Repeat the process to delete more snapshots.
Reformat your Mac’s drive (Last resort)
Reformatting your Mac drive is a big deal and should really be your last resort if you can't find any other way to free up space. Just a heads up: it will wipe out everything on the drive.
Make sure to back up all your important files on Mac before you go ahead and reformat your macOS. After you’ve done that:
- Go to Finder > Applications > Utilities > Disk Utility.
- Choose the drive you want to reformat.
- Click Erase.
- Choose a file system format:
- APFS (for macOS 10.13 High Sierra and later).
- Mac OS Extended (Journaled) (for older macOS versions).
5. Enter a name for the drive.
6. Click Erase, then click Done.
The fastest way to clear purgeable space from Mac
You can clear purgeable space on your Mac in various ways. However, the fastest way to free up purgeable space on Mac is by using third-party tools. I use CleanMyMac to free up storage, eliminate duplicates, optimize performance, and seamlessly manage apps — it's all in one app. Pretty cool, right?
Here’s how to clean space on your Mac:
- Install and open CleanMyMac.
- Click the Cleanup feature to start scanning.
- Review the scan results and click Run to clear unnecessary files on your Mac.
Clear purgeable space on Mac effortlessly
I have mentioned multiple methods of how to delete purgeable files on Mac in this guide. However, suppose you can’t clear purgeable space directly by using your Mac for any reason. In that case, you can try these revolutionary tools, including CleanMyMac and Gemini, via Setapp to manage and optimize purgeable space.
Setapp gives macOS and iOS users access to a curated collection of premium apps. Instead of purchasing individual apps, you can have a single subscription plan with a wide range of high-quality tools without ads or extra charges. Visit Setapp now to start your 7-day trial.
FAQ
What does purgeable space mean on Mac?
Purgeable space on a Mac refers to storage that macOS can automatically free up when needed. It includes cached files, local Time Machine snapshots, and files stored in iCloud but not recently accessed.
What is the purge command in Mac?
The purge command is a Terminal command that clears a Mac's RAM and disk cache contents. It releases resources no longer needed for running applications and improves overall Mac performance. However, it doesn't directly interact with the purgeable space, and users follow instructions to use the purge command to free up the space temporarily.
Should I free up purgeable space?
You should free up purgeable space only if you're running low on storage or have performance slowdowns. However, if you’ve enabled the Optimized Storage, Mac automatically manages and clears this space when required.
How do I increase purgeable space on my Mac?
To increase purgeable space on your Mac:
- Delete large or unnecessary files
- Empty the Trash
- Offload files to iCloud
- Clear caches
You can also try CleanMyMac to easily clear out any junk files and free up some space in just a few clicks.


