How to check storage on Mac: Top 5 easy ways
Have you ended up reading this article because your startup disk is almost full or because your Mac is running slowly? Or maybe you’re a responsible user who loves keeping everything organized, including storage space.
No matter which scenario is yours, look no further, as you’re in the right place. In this article, I’ll walk you through all the possible ways to check memory on MacBook. This way, you will always know how many gigabytes are available to manage them efficiently and keep your device working effectively.
What is storage on a Mac?
In simple terms, storage is the place where everything on your Mac is saved. And by “everything,” I literally mean every possible type of data, from your favorite games and thousands of photos to installer packages and app extensions.
Most importantly, storage keeps System Data, which includes crucial files necessary for your Mac to work properly.
What’s taking up space on your Mac?
Understanding what fills up your Mac’s storage is the first step toward effective space management. However, this might be time-consuming, as there are a variety of possible reasons for that. First of all, large apps, system files, caches, and old backups might be the culprits.
Another common source of data that eats up much space is media files. If you’re a big fan of high-resolution photos and videos, this might be why your disk is almost full. And, of course, pay attention to the Downloads section, as it usually contains numerous hidden “treasures” that you forgot even existed.
If you only have a minute or so to fix your problem, check out this table. The most important solutions are already here. For more detailed information, scroll down.
| Problem | Solution |
|---|---|
| Unclear total disk space | View disk information in the Apple menu > About This Mac. |
| Storage is cluttered | Use CleanMyMac to clear any digital clutter. |
| Detailed disk analysis needed | Check Mac storage via Disk Utility. |
| Want to check storage space, plus Mac performance | Monitor storage space, CPU load, temperature, and more with iStat Menus. |
| Need general info about Macintosh HD | In Finder, right-click Macintosh HD > More Info. |
| Want to expand storage space | Connect your cloud storage accounts to your Mac’s Finder through CloudMounter. |
| Need a command-line solution | In Terminal, type df -h and view disk space in the /System/Volumes/Data line. |
How to check disk space on Mac
Apple provides several ways for you to view the disk space on your Mac. The only drawback is that you need to know the specific process for each method. And if you prefer not to memorize numerous steps, a comprehensive Mac monitor app like iStat Menus might be your choice.
This app collects crucial information about your Mac’s key indicators, including not only storage space and memory stats but also CPU load, disk activity, temperature monitor, and more. The best part? All this info is one click away in your menu bar.

#1. View Mac storage via About This Mac
If you haven’t installed any specialized apps like iStat Menus and are wondering how to view storage on Mac, this method might be the easiest for you. In just a few clicks, you get all the details about what takes up space on your Mac.
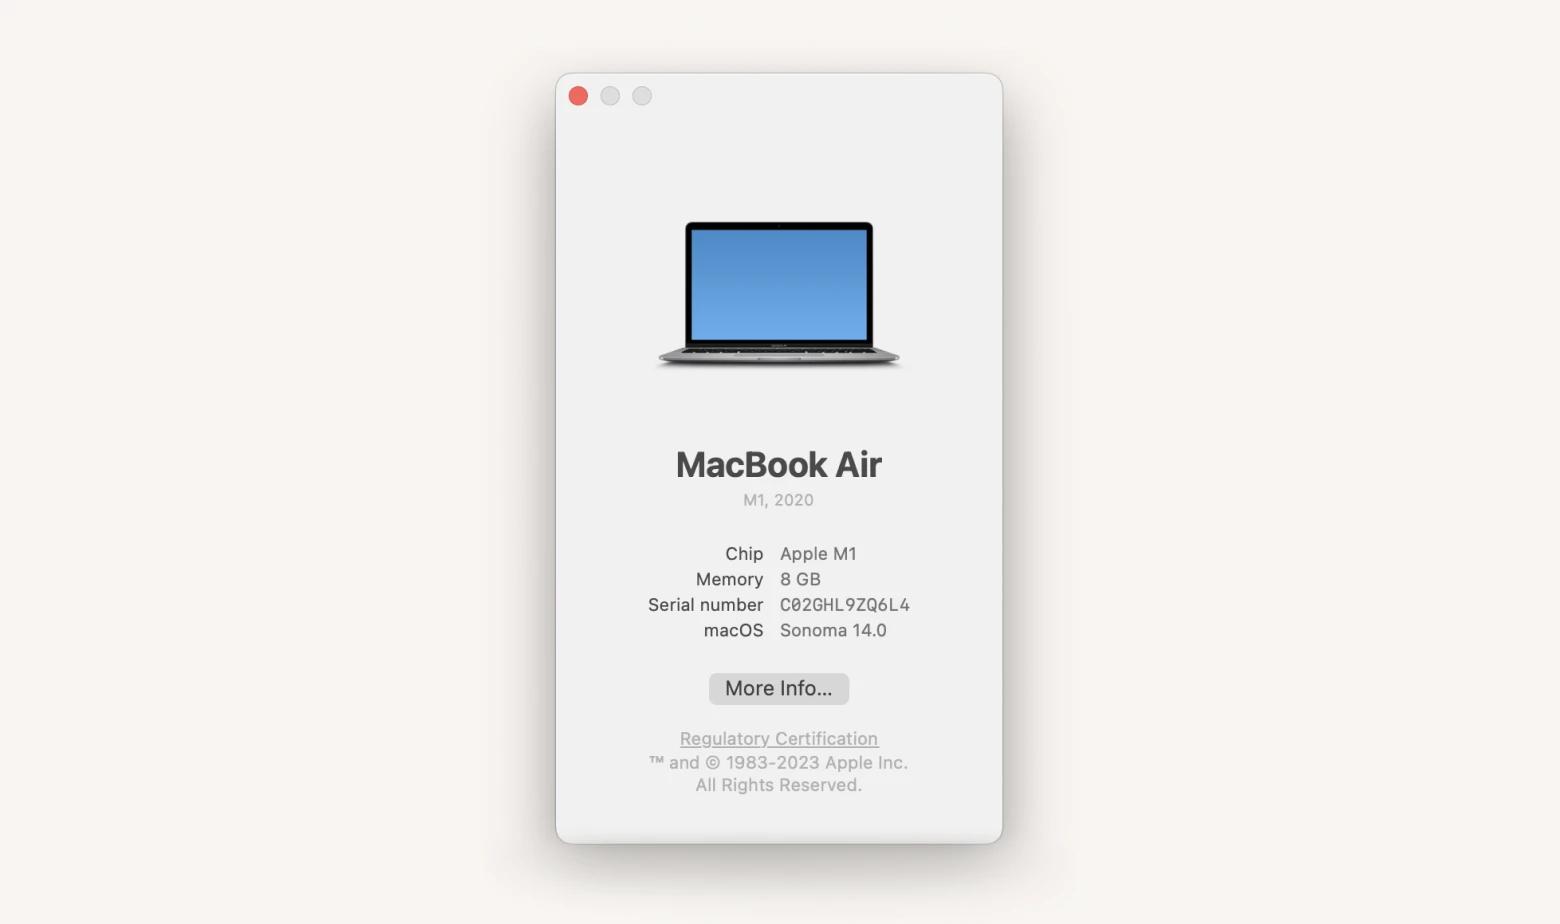
Click the Apple icon in the top-left corner and choose About This Mac in the drop-down menu.
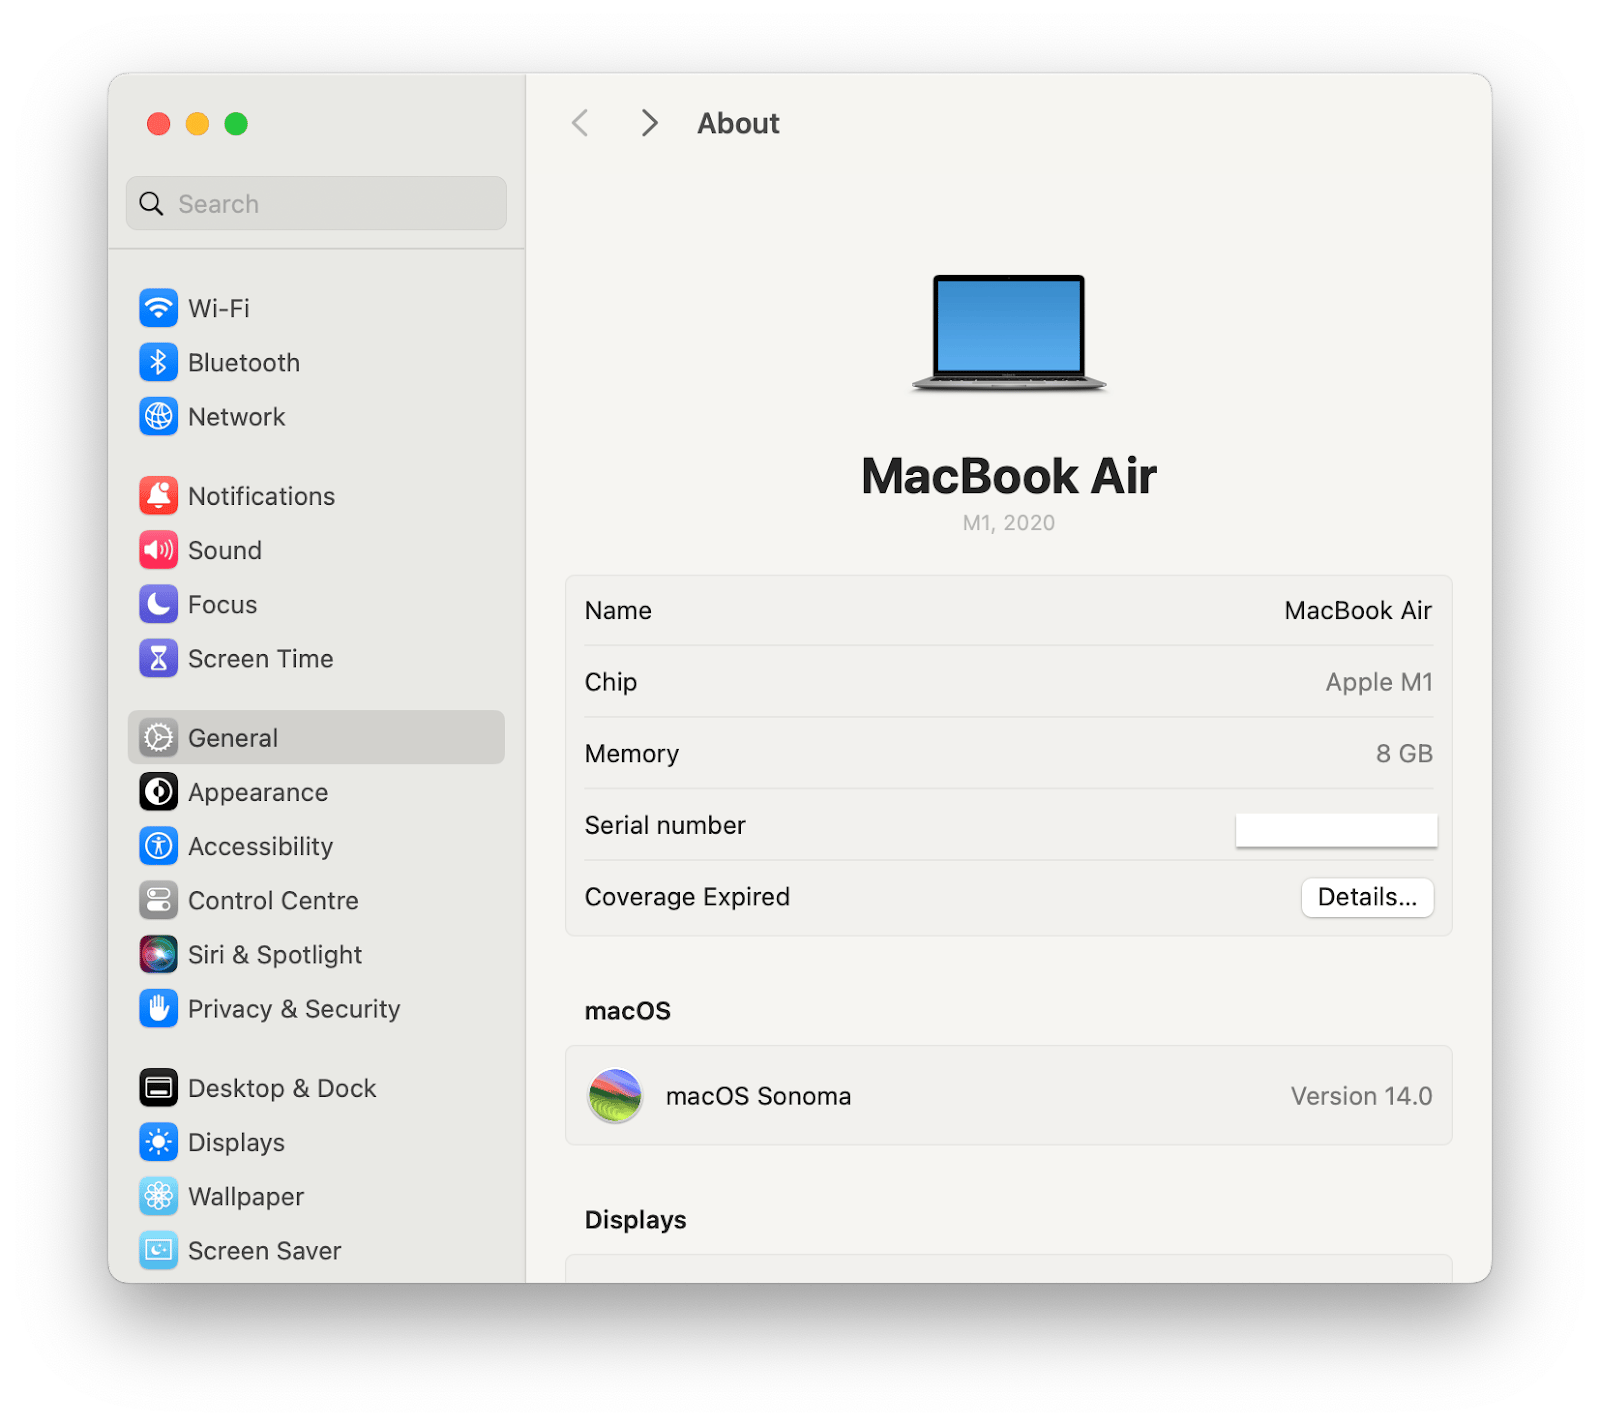
Once the new window appears, click More Info, which will take you to General.
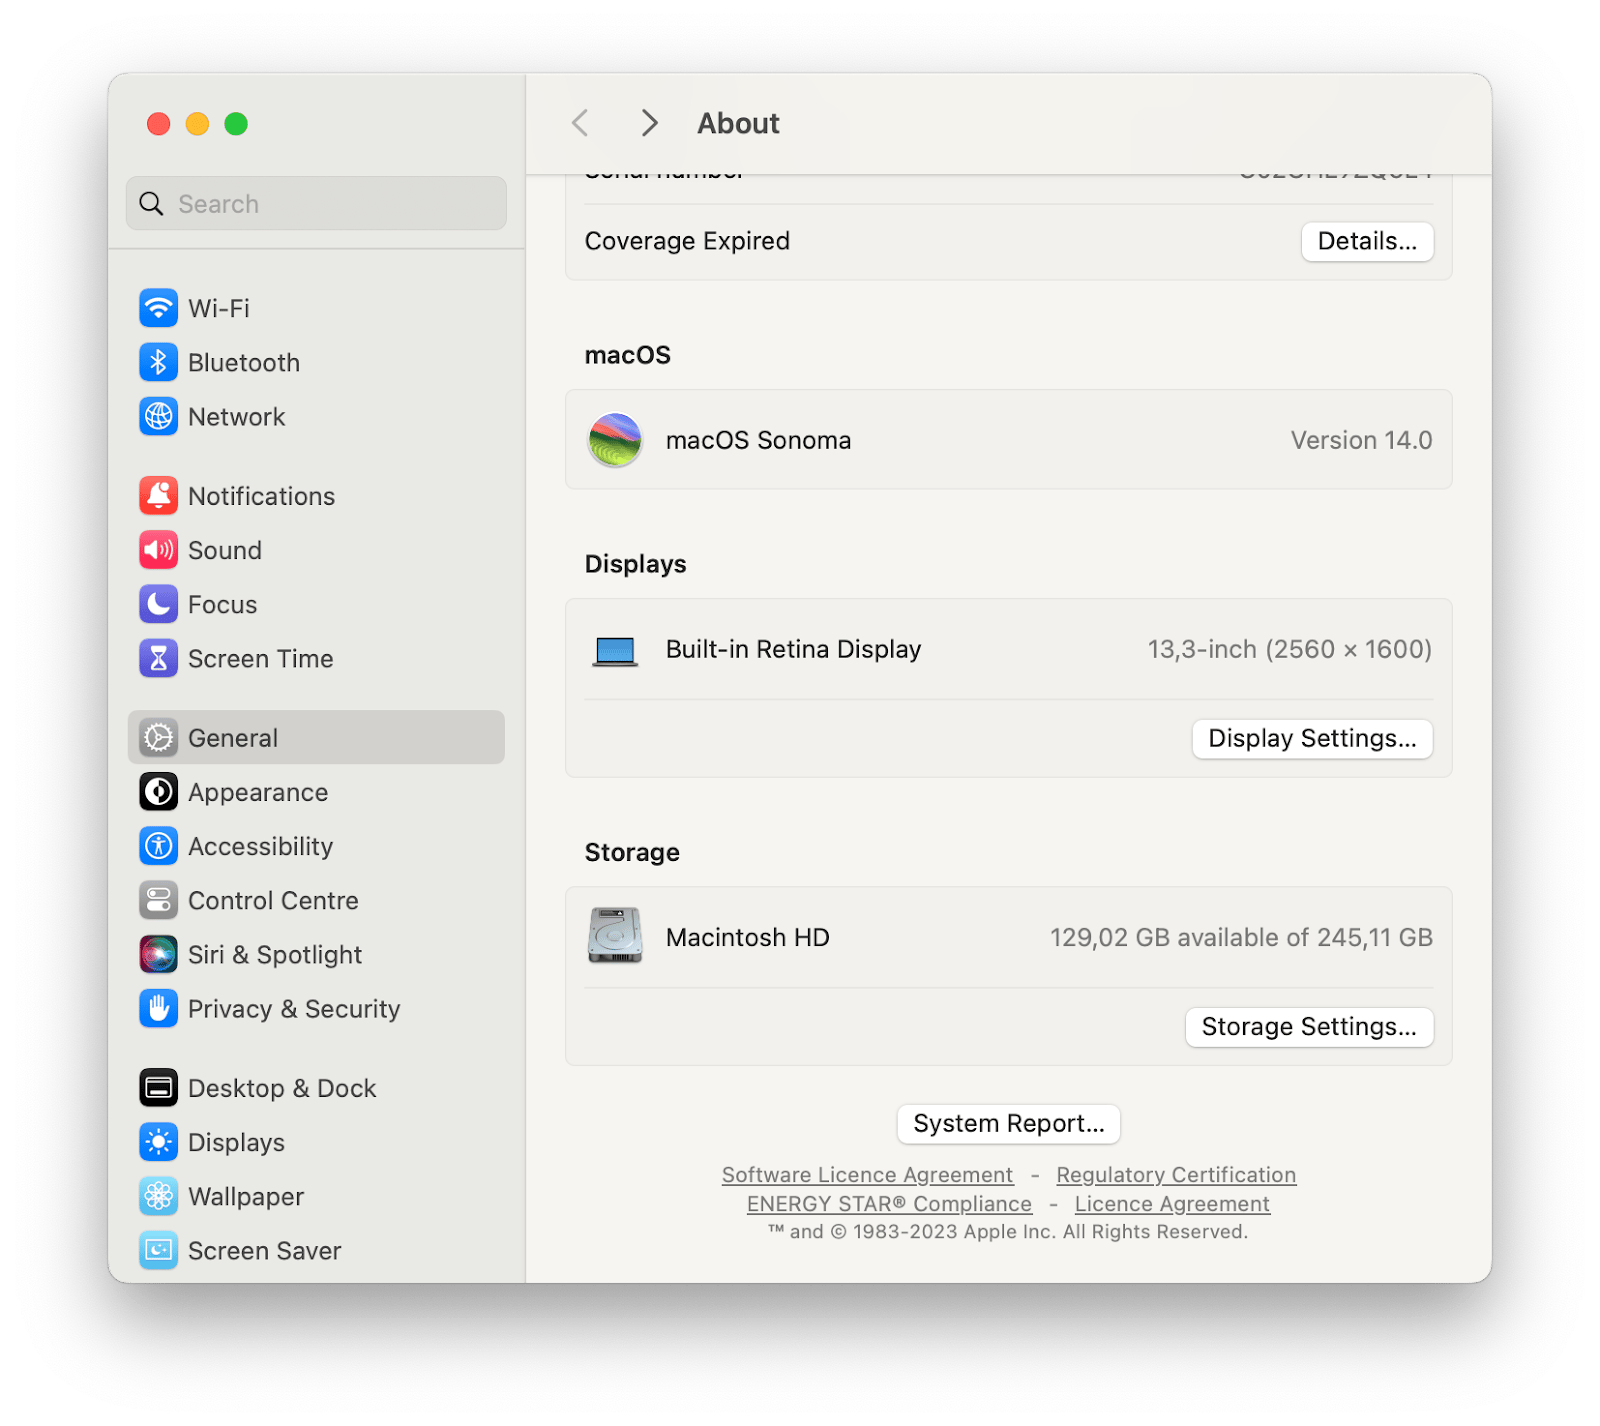
Scroll down to find the Storage section, which shows how many gigabytes are available on your Mac.
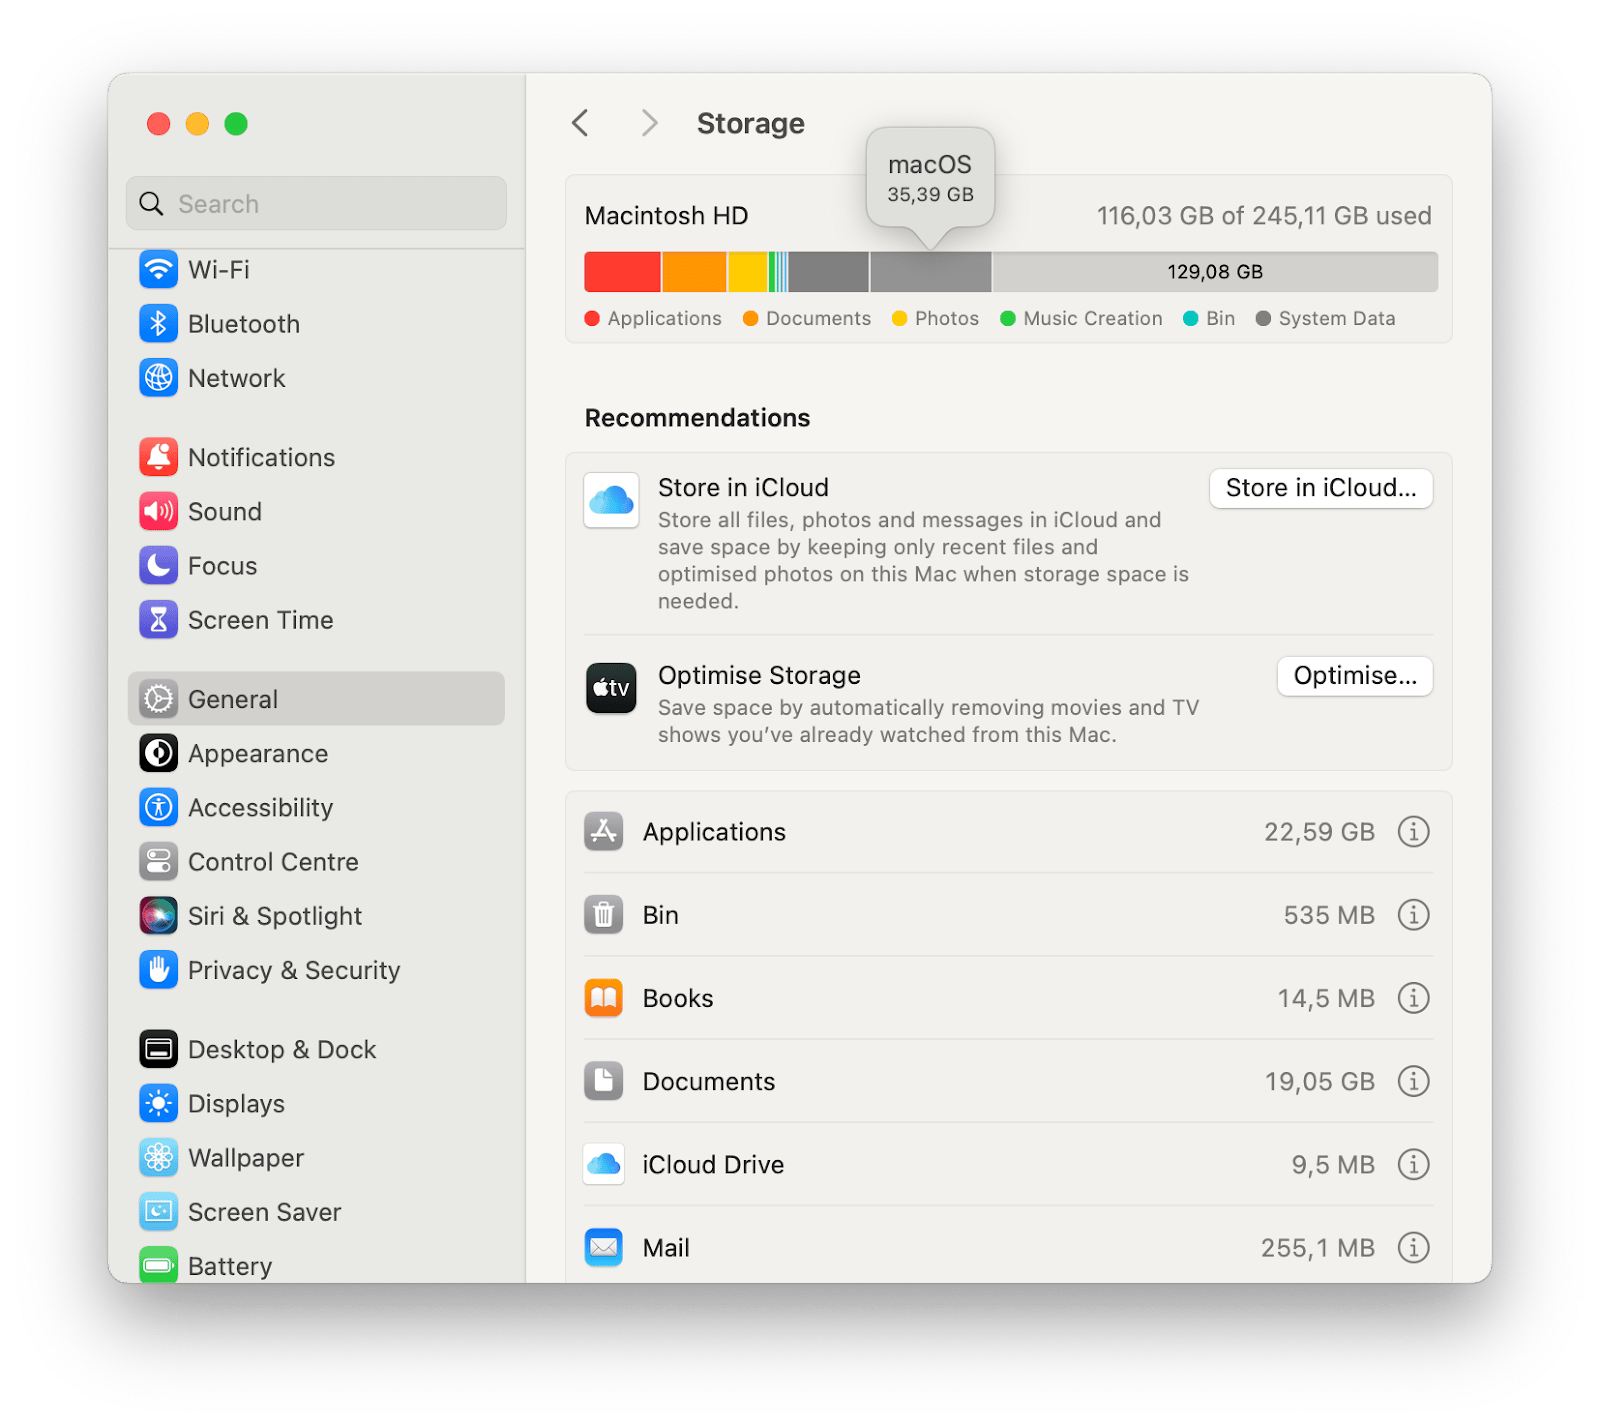
Click Storage Settings to see a detailed space breakdown by categories. By hovering over the bar sections, you’ll see the category name and how much space it takes up.
Below, you’ll find storage recommendations and a list of categories, each of which can be opened to see all items and delete any if you want to free up space.
In older macOS versions, this process is even simpler. Once you click on the Apple icon and choose About This Mac, you’ll find the Storage tab in the new window that appears.

#2. See Mac storage via Disk Utility
Disc Utility is a built-in macOS app designed specifically for managing storage devices. With its help, you can format drives, combine several disks, check memory on MacBook, and much more.
- Open Disk Utility (you can find it through Spotlight).
In the sidebar, choose Macintosh HD and view all the storage information.
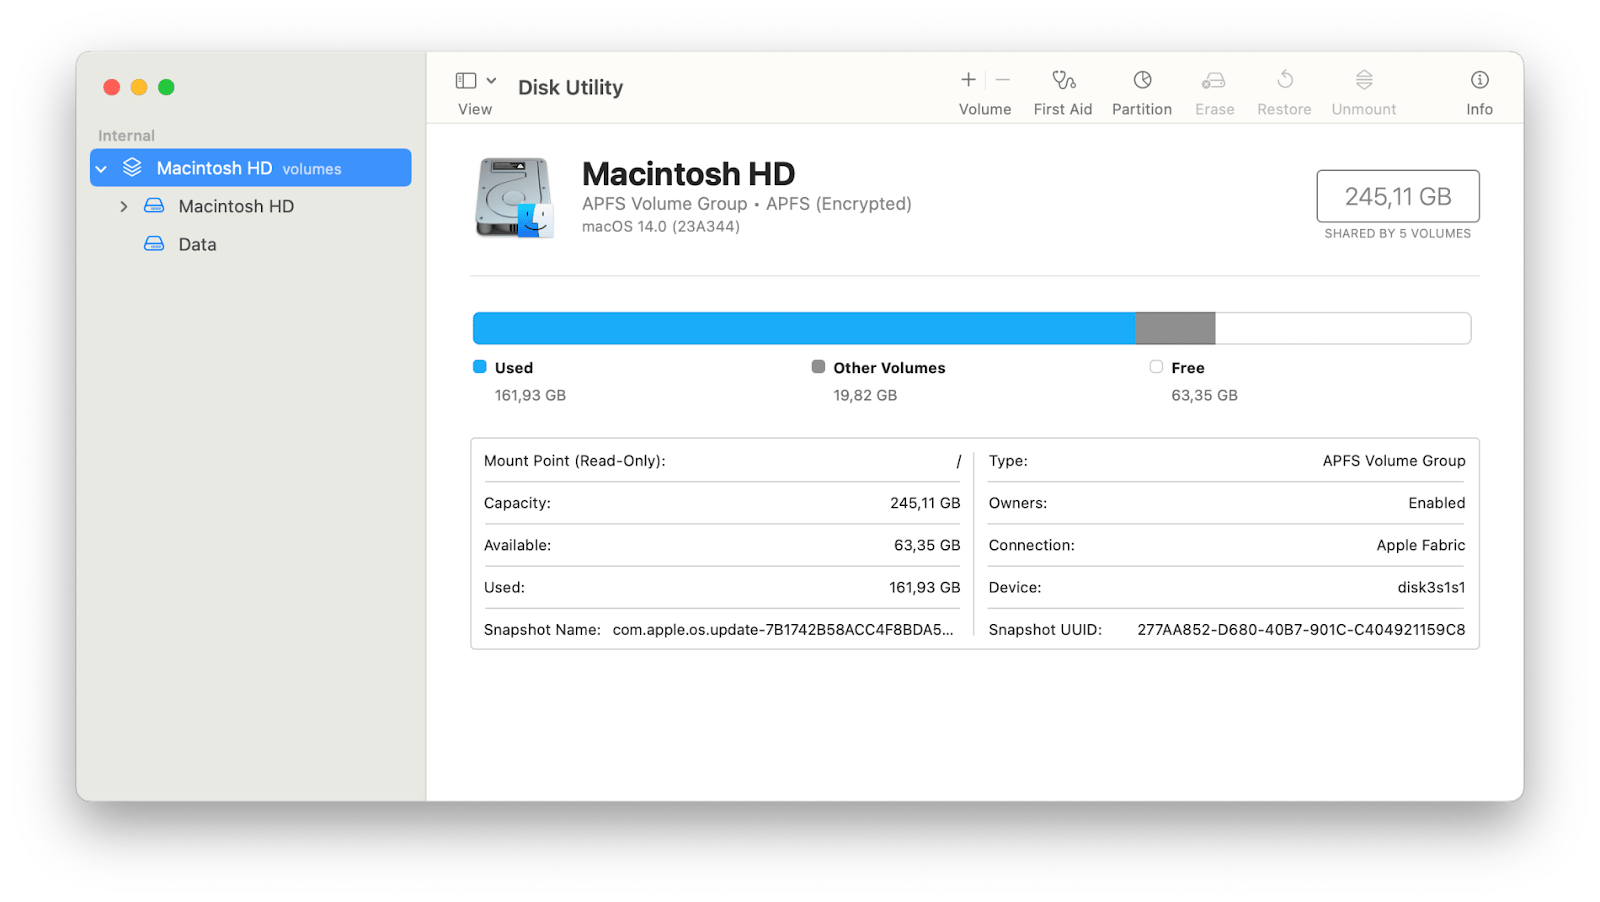
Comparing Disk Utility to About This Mac, I’d say the latter wins. While Disk Utility provides only a general overview, About This Mac shows detailed information in categories, displaying all the items within each.
#3. Сheck Mac storage using Finder
If you’re wondering how to see storage on Mac another way, use Finder, the smiley icon on your Doc. It organizes all the documents, apps, folders, and other files, including information about the hard drives.
- Click Finder on the Dock.
- In the sidebar, find the Locations block and click MacBook.
- Right-click Macintosh HD, then click More Info.
View the storage information in the opened General block.
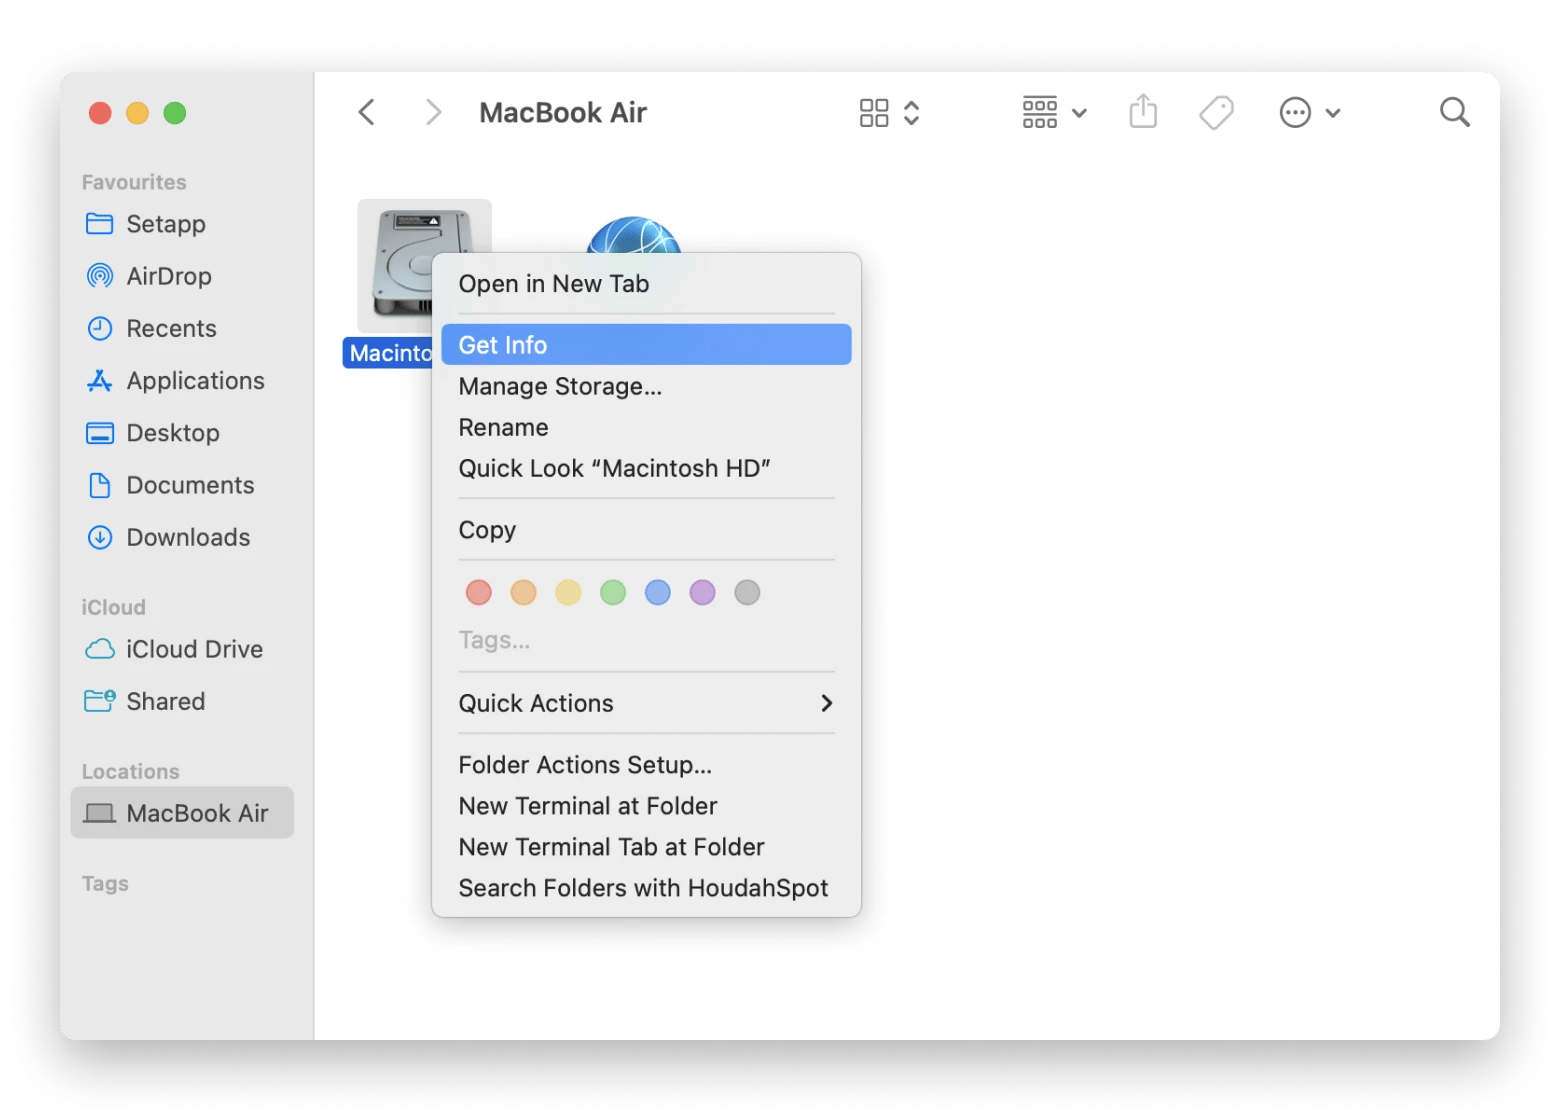
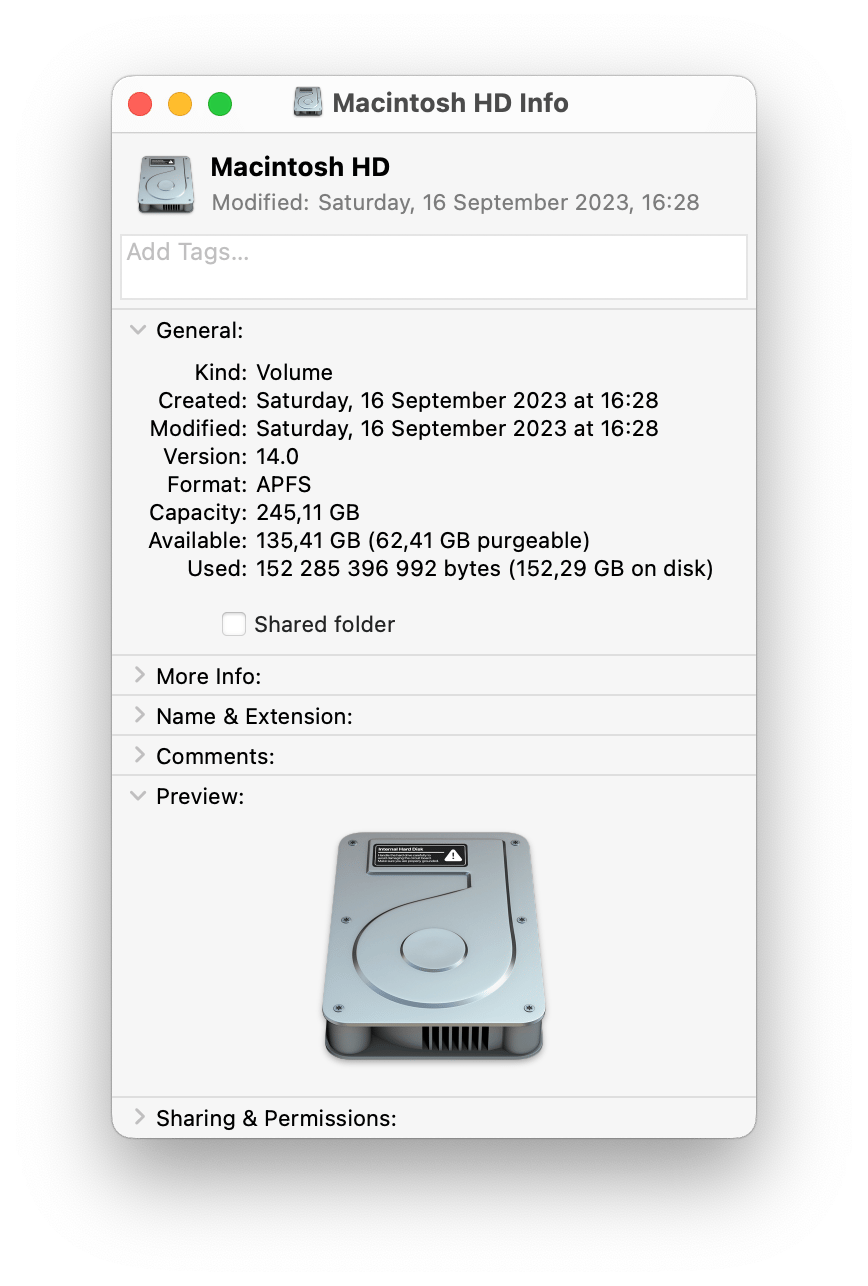
Your Mac’s drive might not be shown in the Finder sidebar. If you can’t find it there, open Finder, click Finder on the menu bar, and then choose Settings. In the Sidebar tab, find the Locations block and select your Mac’s name.

#4. See storage via Quick Look
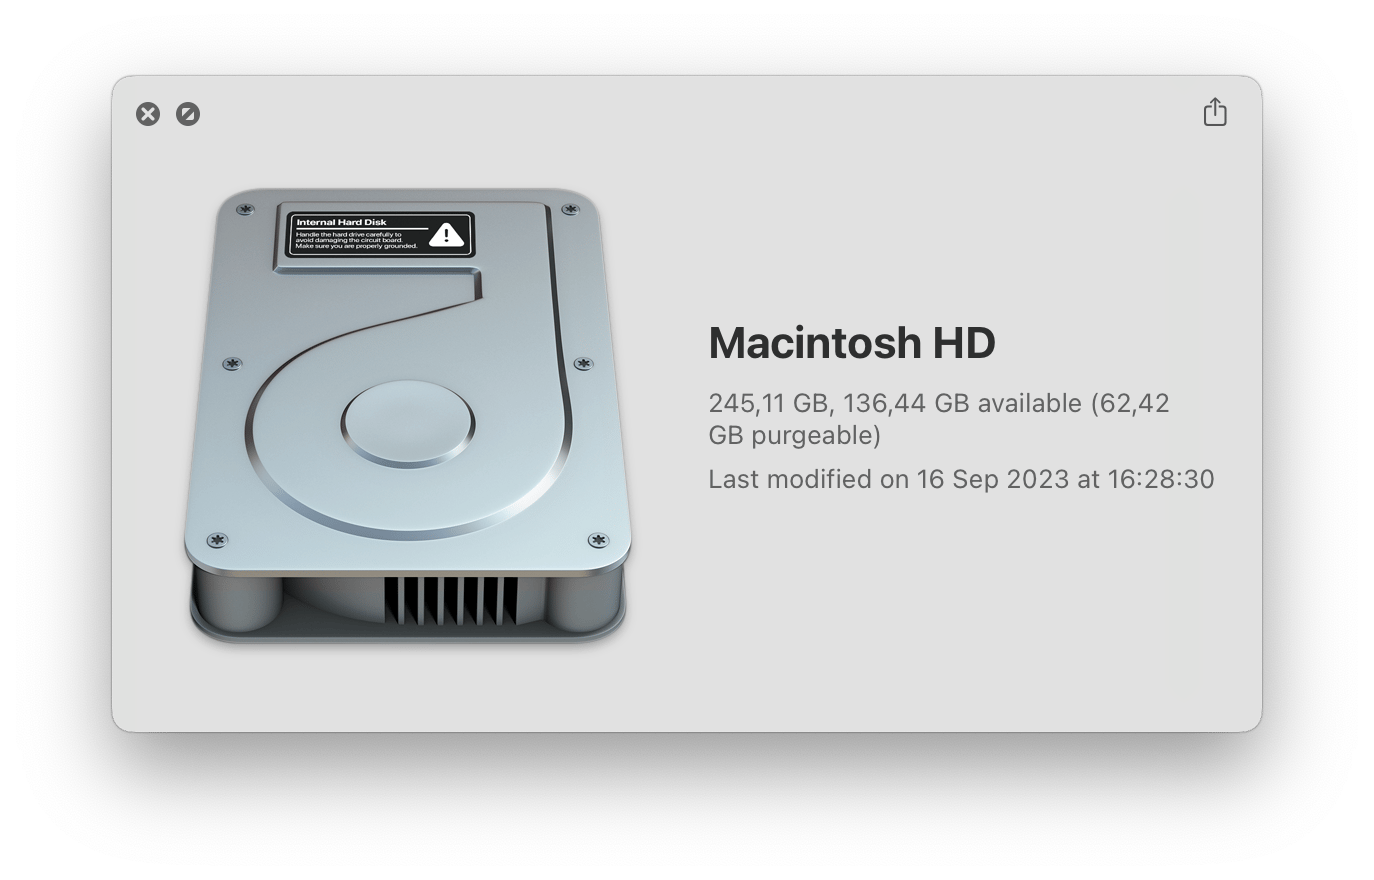
Here is another method to add to the “How to check storage on MacBook” list — Quick Look. Its only minor drawback is that you need to make some preparations in settings so you can easily access your Mac’s drive on the Desktop:
- Open Finder, then go to Finder Settings on the menu bar.
- In the General tab, select Hard disks and close the window.
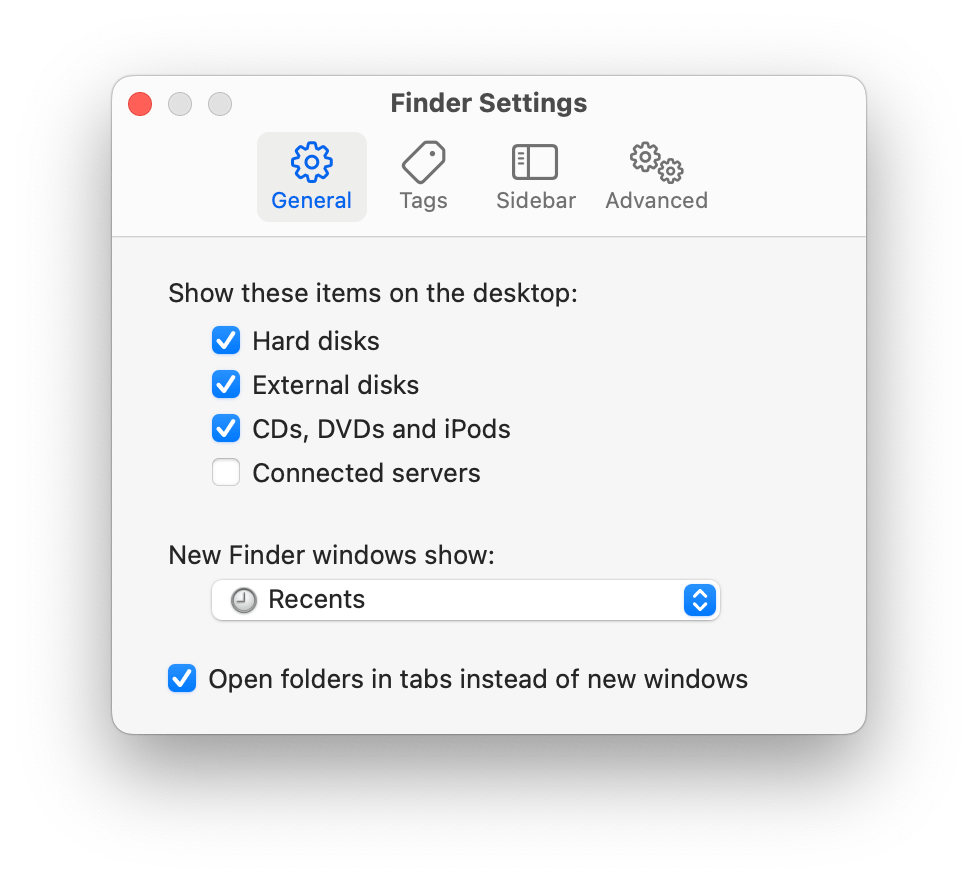
Once these actions are done, follow these steps:
- On the desktop, find the icon of your Mac’s drive.
- Click the icon and press the space bar.
- The Quick Look window appears, allowing you to check available storage space on your Mac.
#5. View Mac storage via Terminal
Here is the ultimate method for those pondering how to view storage on Mac. If you feel comfortable working with command lines, use Terminal. However, if you’re unsure or have never used it before, it’s better to start with the easier methods described above.
- Go to Finder and click Applications in the sidebar.
- Find the Utilities folder, open it, and click Terminal.
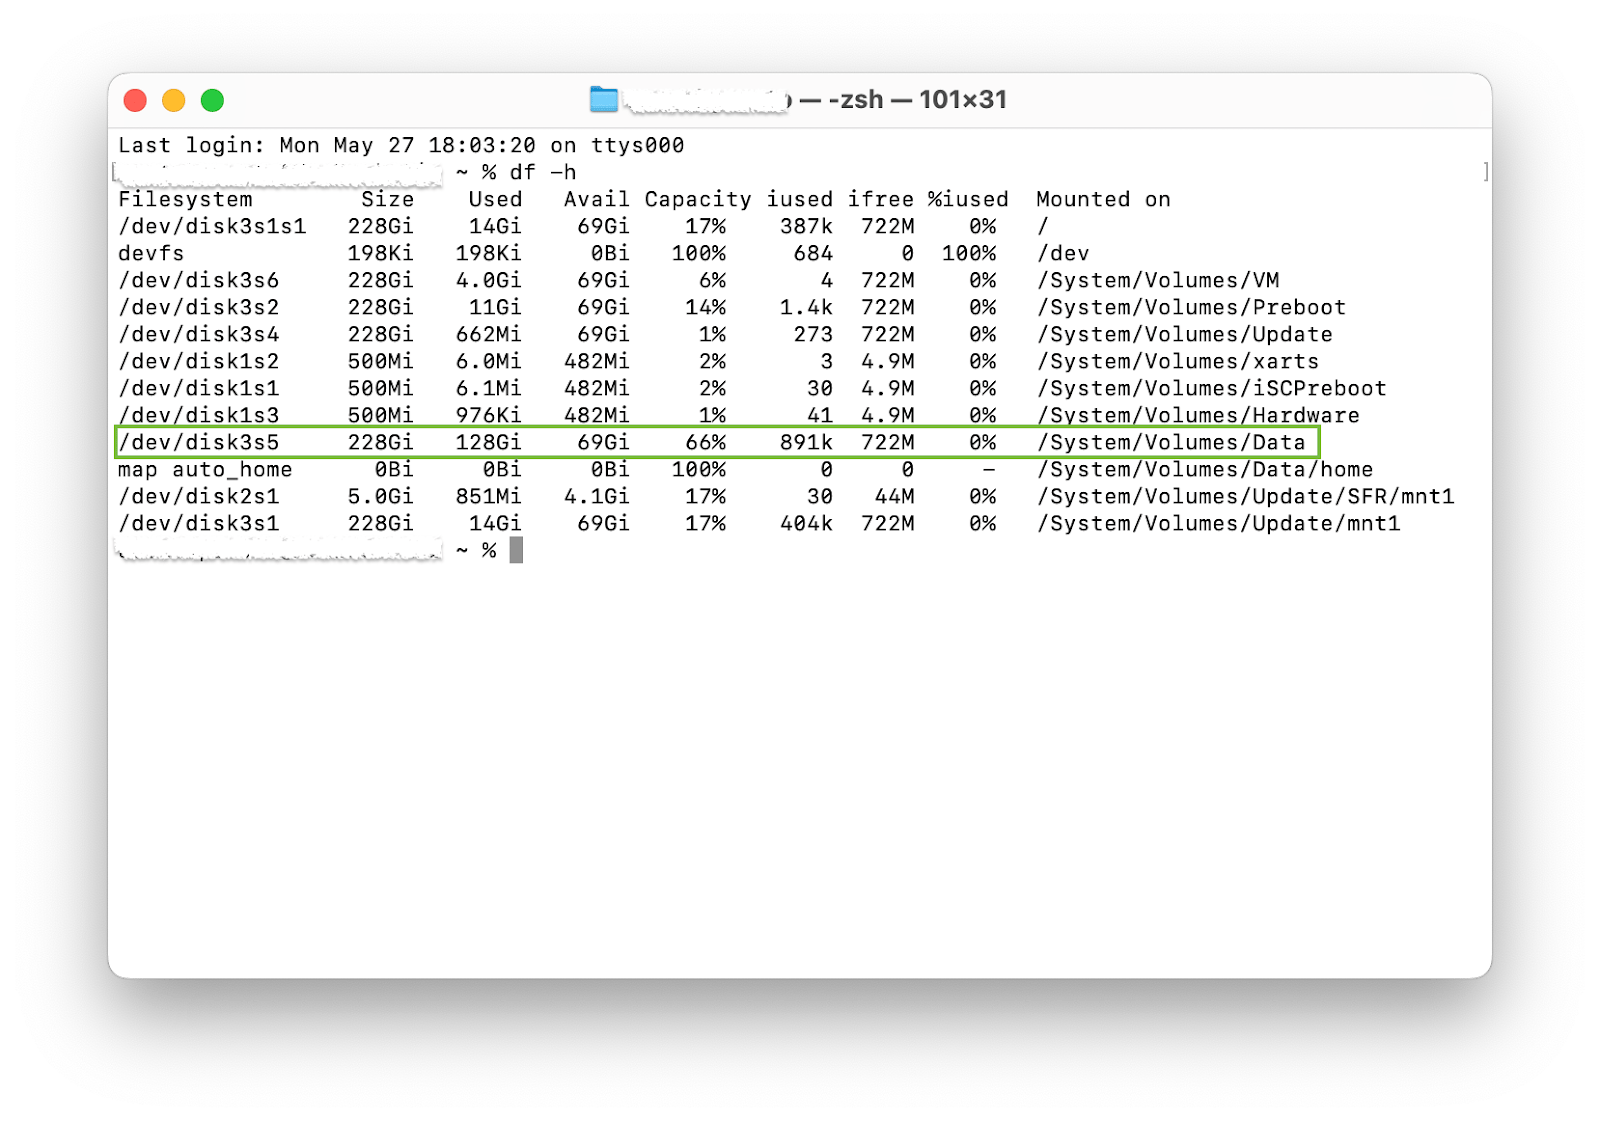
- Type df -h and press Return.
- Once the list of all disks appears, look for the /System/Volumes/Data line. In the Avail column, you’ll see how much space is available.
Best practices for storage optimization on your Mac
If you want your Mac to run smoothly, get ready to dive into storage optimization. In this section, I'll show you simple yet powerful ways to keep your Mac tidy and efficient. From cleaning up unused files to scheduling automated backups, these tips will help you make the most of your Mac's storage.
Free up disk space
Start by deleting unused applications. It’s recommended to regularly check memory on MacBook to review and uninstall apps you no longer need. The same goes for large files — make sure there are no big “guys” lying around on the disk instead of in the Trash.
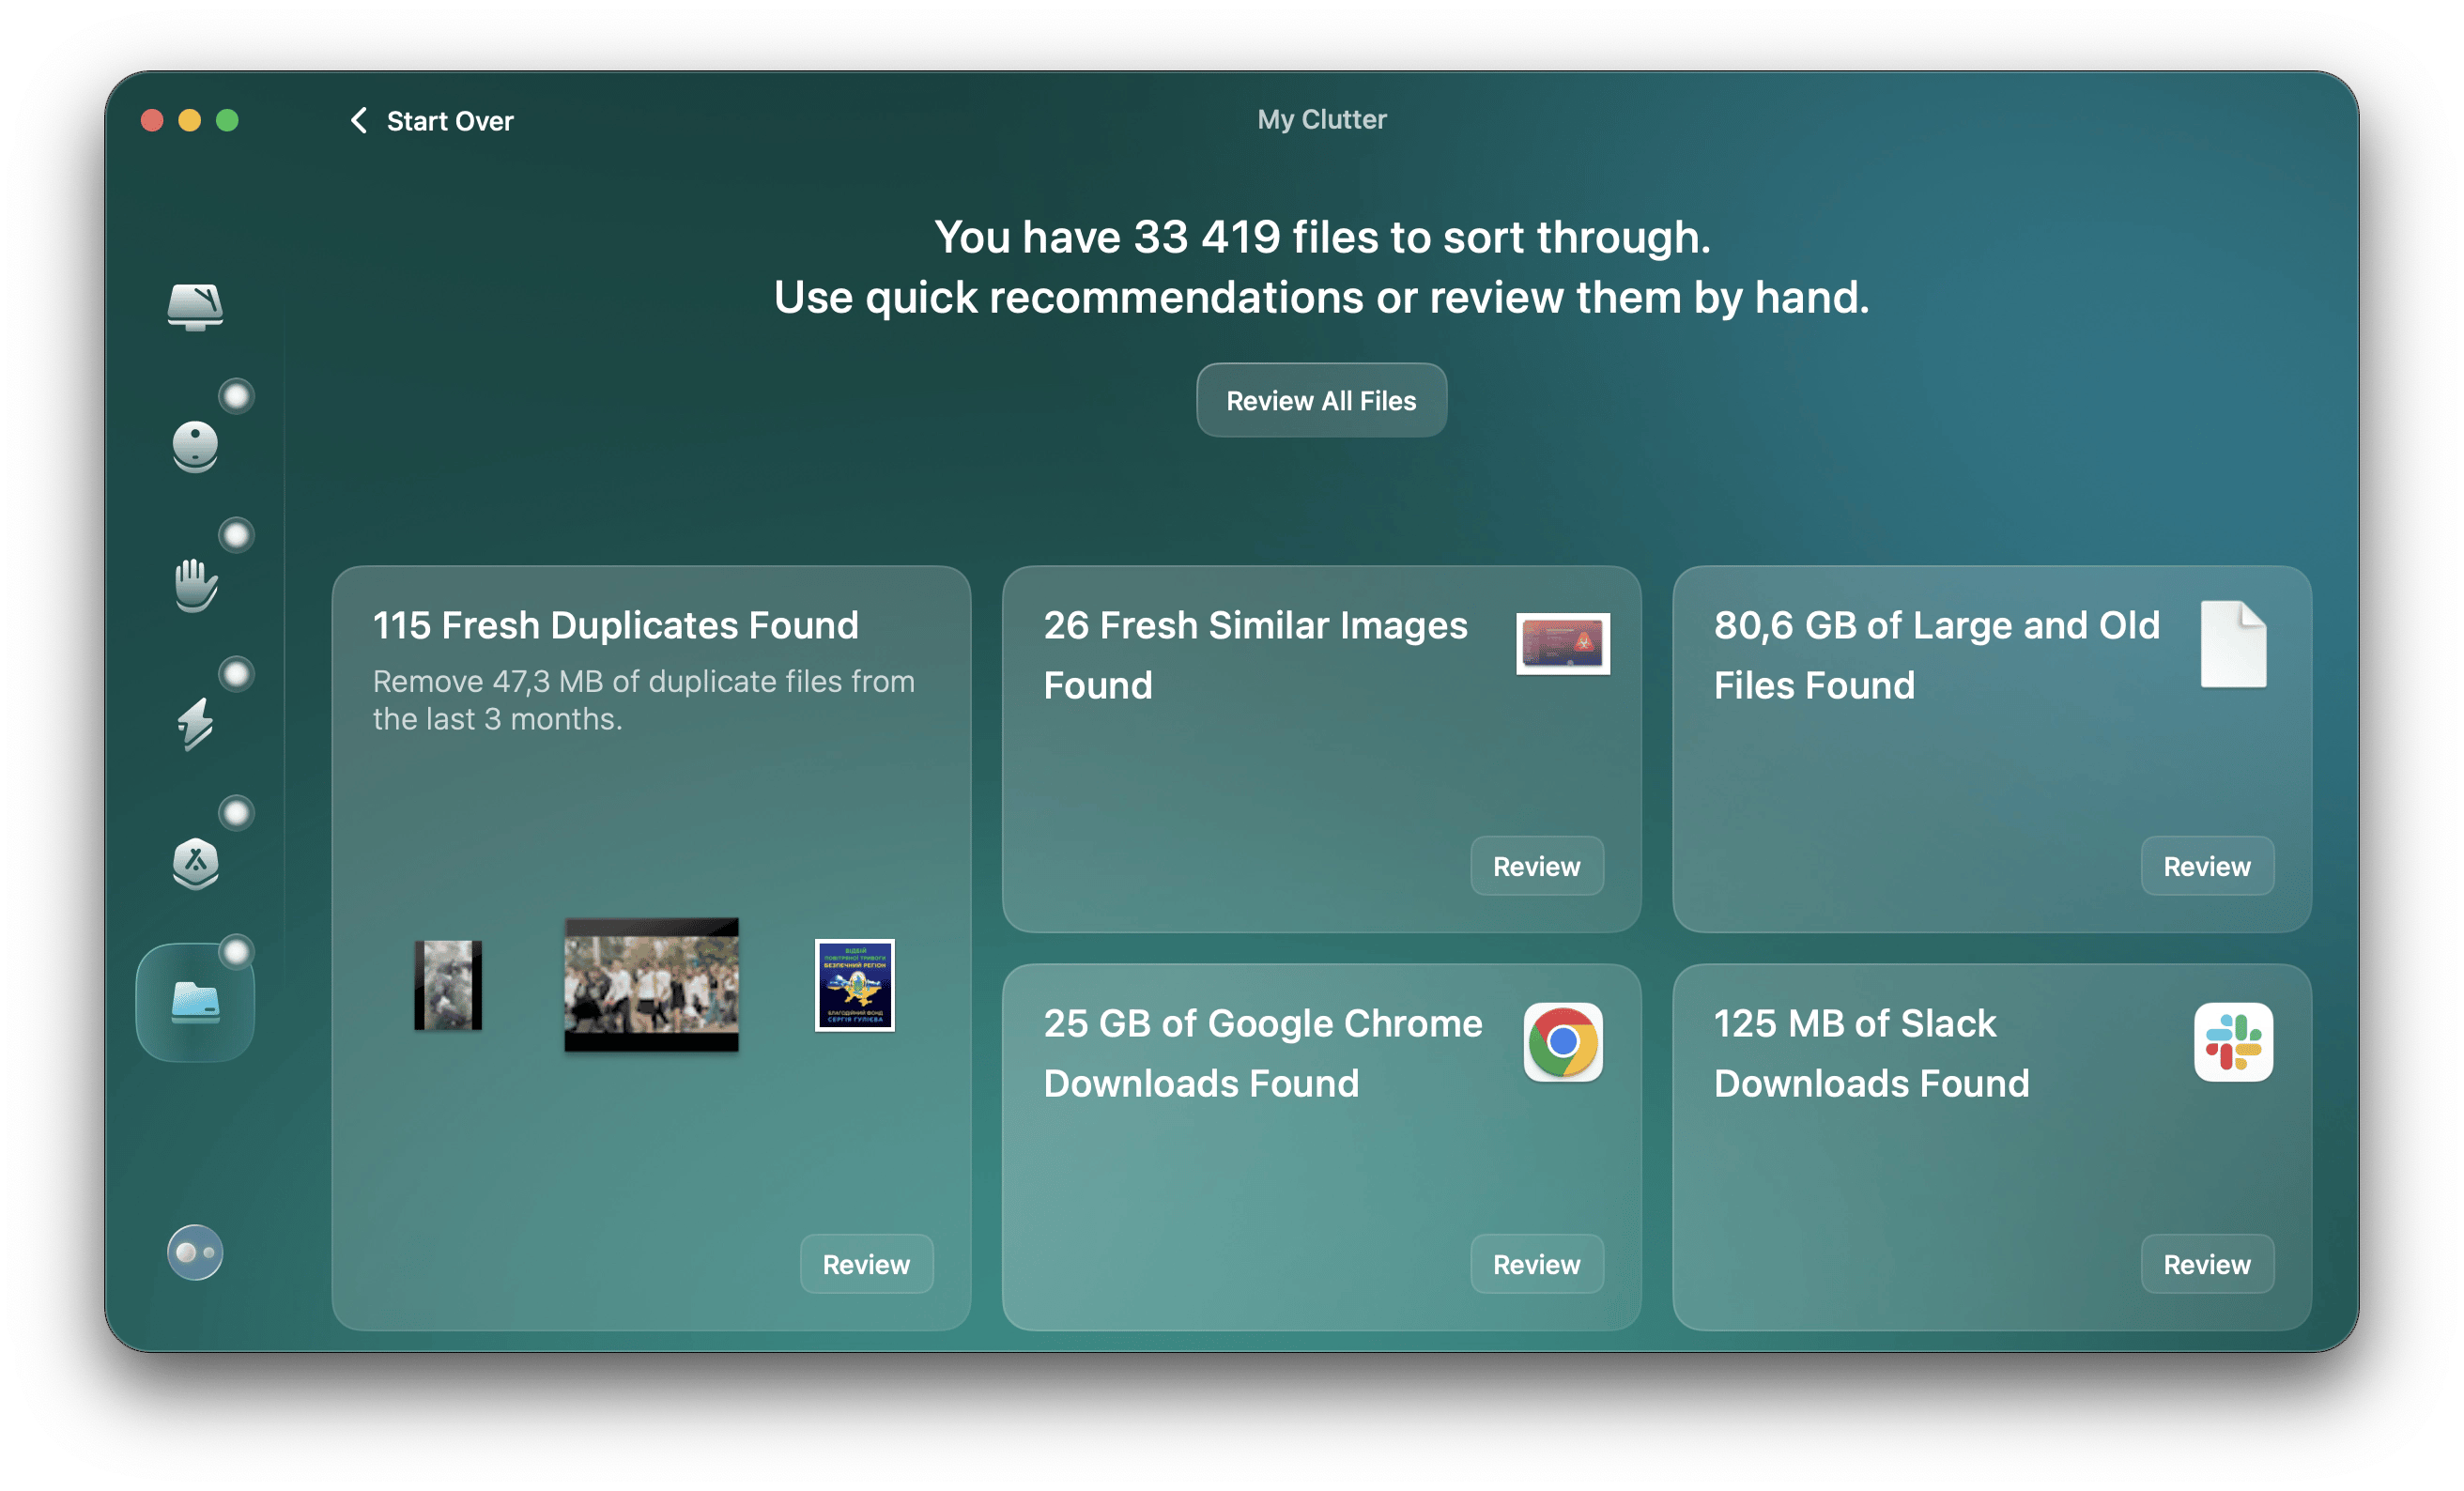
Remember to clear system and application caches, but be cautious not to delete crucial files. Personally, I love doing all of that via CleanMyMac, as it automatically scans and deletes unnecessary old and big files, duplicates and similar images, cash, and other types of data for good.
Use organizational strategies
Organize your files into folders. I know that might take some time, but once you have a clear structure, it’s much easier to keep your space clutter-free and manage it efficiently. Also, while organizing your files, pay attention to those you hardly ever use and archive them.
Another way of dealing with large or rarely used files is moving them to cloud storage solutions like iCloud, Google Drive, or DropBox. And if you still need to frequently access those files, try using CloudMounter, as it connects cloud storage accounts to your Mac’s Finder.

Have regular maintenance routines
Always keep your apps and macOS system updated with software updates. They often include performance improvements and bug fixes that can help optimize storage usage and overall system efficiency.
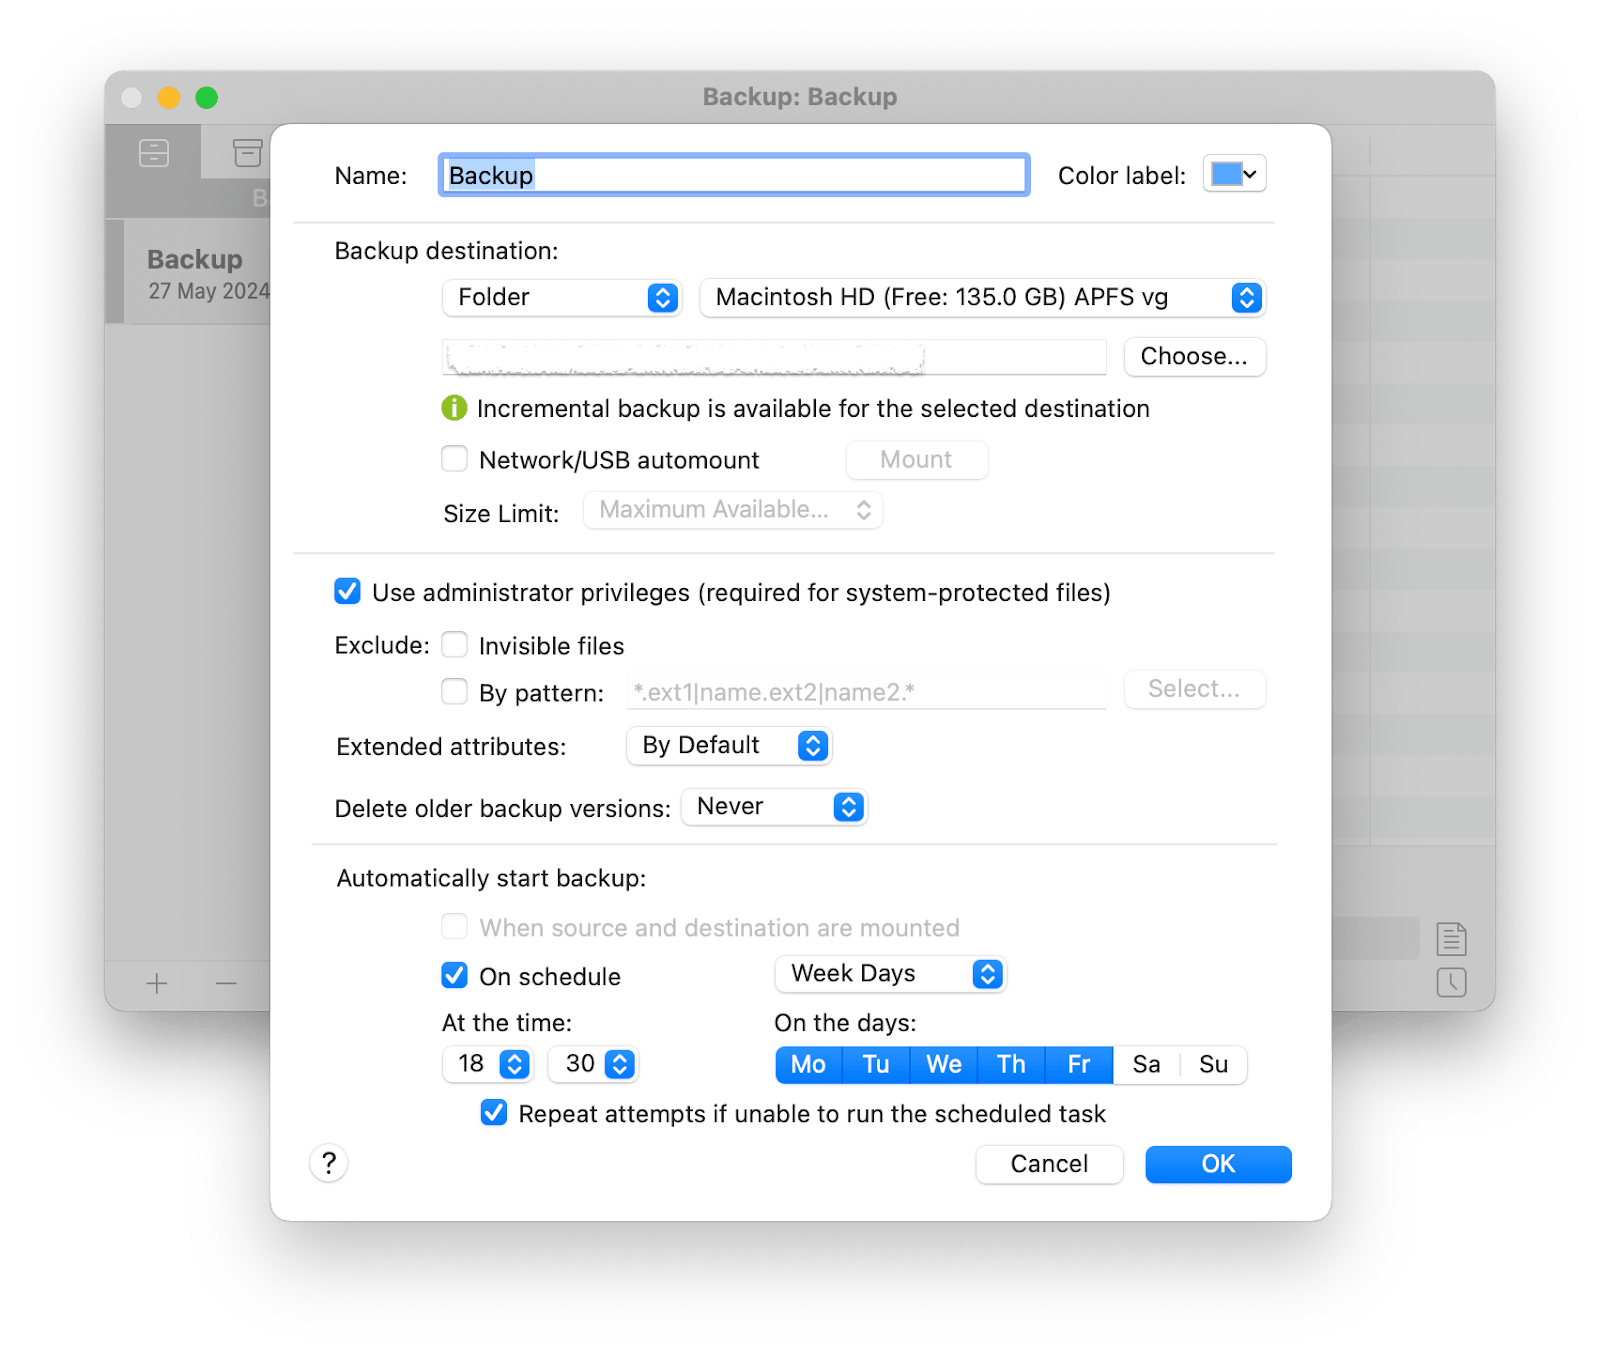
Also, optimize Mac’s storage by scheduling automated backups. This will help you protect your data and free up space by moving files off your main drive. For that, I recommend using Get Backup Pro, which not only allows you to set a schedule but also offers four backup methods and can recover lost files to any Mac, even if this app isn’t installed on it.
How to check storage on MacBook: Final thoughts
Apple allows you to view memory on your Mac in numerous ways, from a few clicks in the menu bar to command lines in Terminal. Still, most of these methods allow you to check only general information like capacity and available gigabytes on the disk.
In contrast, apps mentioned in the article provide extended breakdowns of key indicators, like iStat Menu, and robust options for Mac care, like CleanMyMac. These apps plus CloudMounter, Unclutter, and Get Backup Pro (also mentioned in this article) are available through Setapp, a platform with over 250 apps for any needs, from digital drawing to coding.
The best part is you can use all of them for free during a 7-day trial period starting at any time. So, why wait?
How to view storage on Mac FAQ
How do I find my storage on a Mac?
You can find the details about your Mac storage in various ways. Here are steps for one of the easiest ones. Click the Apple icon in the top left corner of the screen, choose About This Mac, and then More Info. In the window that appears, scroll down and click Storage Settings.
How many GB are in my Mac?
To check how many GB of storage your Mac has, use one of these methods:
- Click the Apple menu > About This Mac > More Info, then scroll to the Storage section to see your total capacity and available space.
- Open System Information via Spotlight Search: Press Command + Space and type System Information > Enter > Click Storage in the sidebar to view detailed capacity information.
- Right-click your Macintosh HD in Finder and select "Get Info" to see the total capacity listed at the top of the window.
Most modern Macs come with storage options ranging from 256GB to 8TB, depending on your model and configuration.
How to check iCloud storage on a Mac?
Click on the Apple icon in the top left corner of your screen and choose System Settings.
In the window that appears, click your Apple ID at the top of the sidebar and then choose iCloud.
Can I add more storage to my MacBook?
Yes, there are a couple of possible ways. For most Mac models, the easiest way is to use external drives which can be connected via USB or Thunderbolt ports. An effective way without physical hardware is using cloud storage services like iCloud, Google Drive, or Dropbox.
Also, some older Mac models (pre-2016) allow for internal storage upgrades by replacing the existing hard drive or SSD. However, modern MacBooks’ (2016 and later) don’t allow internal storage upgrades.
In such a case, you can try CleanMyMac to tidy up your laptop in a few clicks and win extra storage space.


