What to do if macOS System Data is large
Have you ever checked your Mac's storage only to find that most of it is filled by System Data? Well, once, it happened to me, and I was so mad. I couldn't download anything else, nor could I even update my apps. But fear not — I looked into it and found a way to manage System Data taking up all my storage. Let me break it down and try to make sense of what exactly causes that and how we can fix it.
Here's a table summarizing the tips from the article on dealing with large macOS System Data:
| I want to | I can | |
|---|---|---|
| Free up system space | Use CleanMyMac: Perform a system scan and clean up temporary files and junk. | |
| Optimize storage | Use the built-in Optimize Storage tool: Check for large files and remove duplicates. Go to Apple Menu > About This Mac > More Info > Storage Settings. | |
| Clear cache files | Go to ~/Library/Caches directly in Finder and remove unnecessary cache files. | |
| Remove log files | Go to ~/Library/Logs in Finder and delete unneeded log files. | |
| Declutter Downloads folder | Organize by size in Finder and discard unneeded large files. | |
| Delete old Time Machine backups | Use the Terminal command tmutil listbackups to remove outdated local snapshots. | |
| Monitor system performance | Use NovaBench to run performance tests and identify any storage-related slowdowns. | |
What is System Data on Mac?
Let's start with the basics and find out what is System Data on a Mac.
System data includes all the behind-the-scenes stuff your Mac needs to run: temporary files, system caches, logs, and backups. These files are important, of course, but boy, do they add up, turning your once-functioning Mac into a storage nightmare.
How to check System Data on Mac
Depending on the version of macOS you're running, the steps for checking System Data are slightly different.
Here's how to check System Data on macOS Ventura and later:
- Go to the Apple menu > System Settings > General > Storage.
- Then, wait for the colored graph to load and hover over the dark gray color. You can also scroll down until you see System Data.
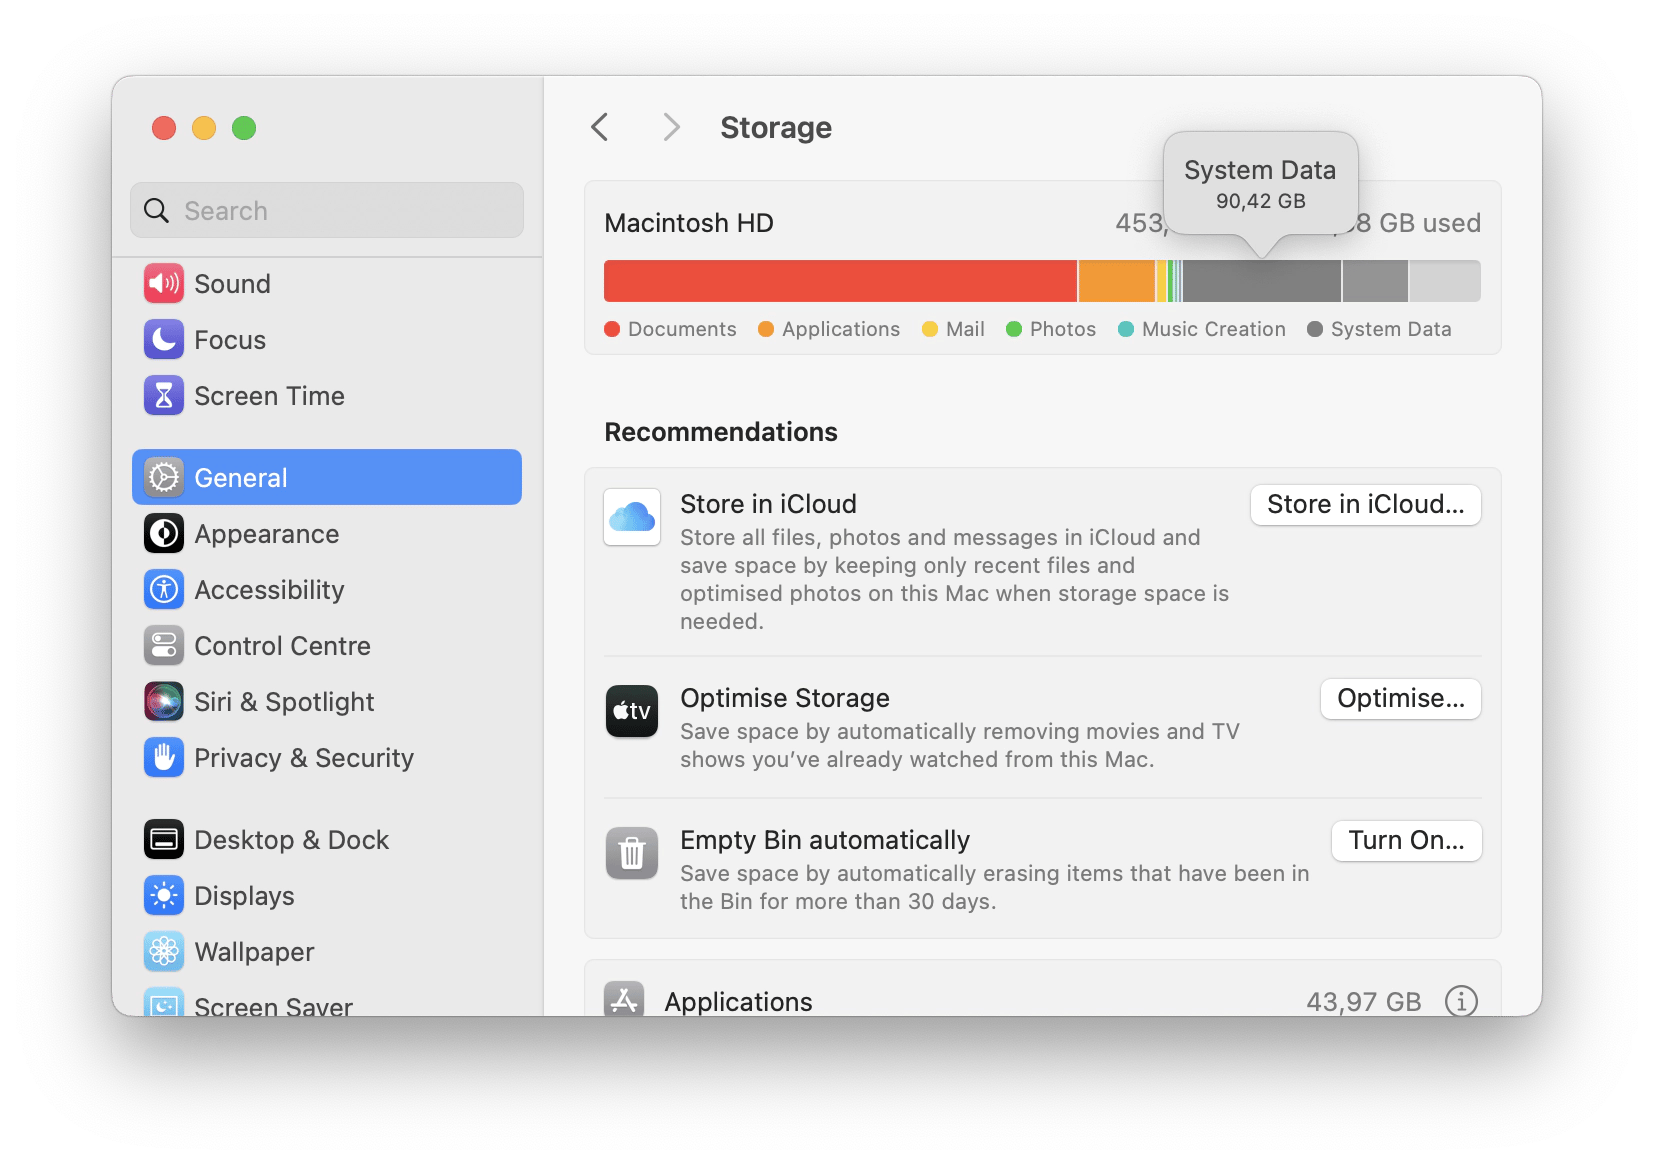
If you're running macOS Monterey or older, follow these steps:
- Go to the Apple menu > choose About This Mac.
- Click Storage and wait for the graph to load.
- Hover over the dark gray color. You can also click Manage and go to System Data in the sidebar of the window that opens.
How much space does macOS take up?
If you don’t know how much System Data is normal on Mac, we’ll figure it out.
Typical space allocation can vary between operating systems. For instance, macOS Sequoia, Sonoma, and Ventura generally take up around 12 to 20 GB of space. This footprint is efficient compared to older macOS versions, which could demand up to 30 GB. However, beyond the initial OS installation, System Data can grow with updates, app installations, and cached files.
Ideally, System Data should remain within those initial bounds, but it may gradually swell due to accumulated background data and temporary files.
Why is System Data so big on a Mac?
The reason your System Data on Mac is huge is often due to accumulated cache files, logs, and old backups. Things like podcasts, emails, and iOS backups might also be lurking in there, contributing to the bulk.
Why does System Data keep increasing?
Over time, your Mac runs software updates, installs applications, and creates cache files — all sorts of things that add up to System Data. Before you know it, it quietly piles up until you suddenly wonder, why does system take up so much storage on Mac. Let's finally take a look at what you can do about the issue.
What to do if Mac System Data is large
By default, Apple hides System Data because removing some important files could damage the system. However, some files can be removed safely.
In this section, we'll talk about measures you can take to resolve System Data taking too much space.
1. Clean up system junk
When my Mac started running low on space, I turned to CleanMyMac, and it quickly became my go-to for cleaning up system junk. I love its dedicated Cleanup tool because it tackles cache and temporary files with ease, reclaiming precious storage in just a few clicks.
Here's how CleanMyMac works:
- Open CleanMyMac and pick Cleanup from the sidebar.
- Press Scan, and watch it do its thing.
- Under System Junk Found (or any other category), click Clean.

The first time I used it, I was genuinely amazed by how many gigabytes of outdated system files it cleared, seriously slimming down the System Data. It's reassuring knowing I don't have to manually dig through files or risk deleting something vital — the app safely handles all that for me. Plus, CleanMyMac lets me review the files before deletion by clicking Review All Junk. I can easily check and deselect anything I want to keep. Once I'm ready, I click Clean Up, and it's done.
2. Use the built-in Optimize Storage tool
I've found that the built-in Optimize Storage tool isn't very helpful when tackling the System Data category since clicking on it doesn't reveal anything. If you're curious, take a peek:
- For older macOS versions: Go to Apple Menu > About This Mac > Storage > Manage.
- For macOS Ventura or later: Apple Menu > About This Mac > More Info > Storage Settings. You might see an Optimize Storage tab under Recommendations. If not, it means there's nothing the OS thinks you can optimize right now.
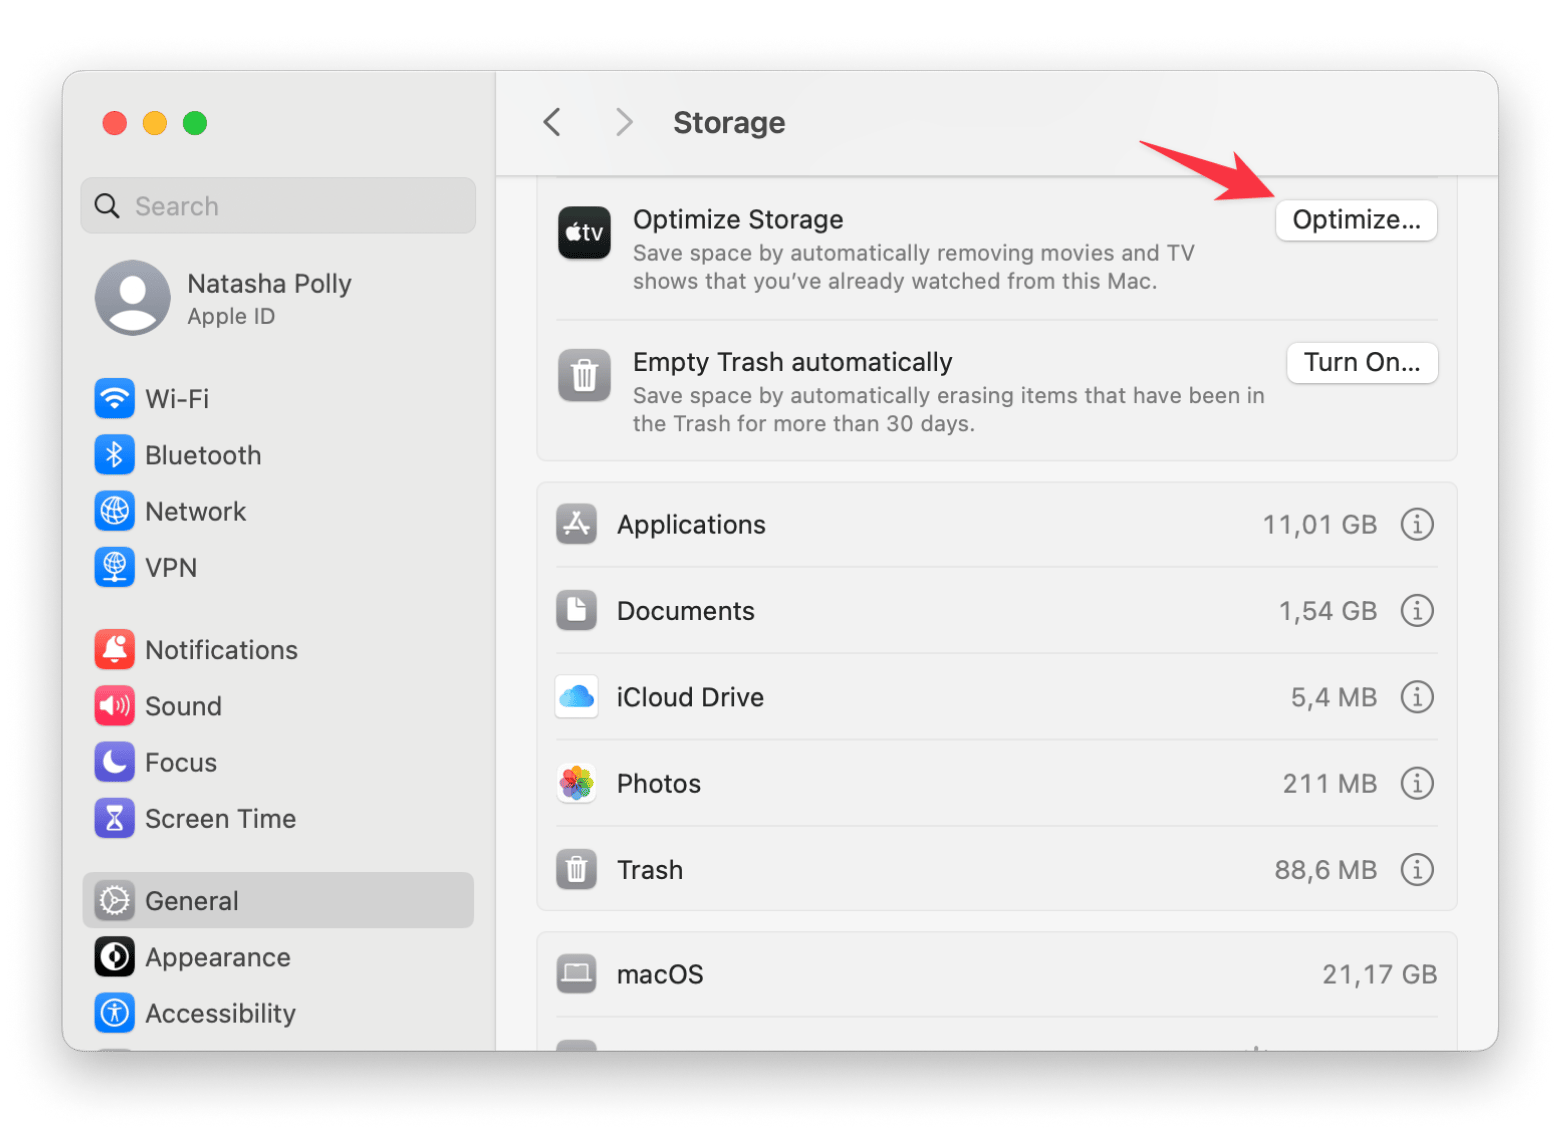
While options like Store in iCloud and Empty Trash aren't quick fixes, you can check large files manually by clicking the "i" icon to find and review them. The tool mainly suggests cleaning files you've created, which doesn't help with the macOS System Data problem. But don't worry — there are other workarounds to explore.
3. Remove cache files
Removing cache files by hand can be a bit of a pain. It's important to be cautious and make sure you don't delete something vital by mistake.
Here's the approach for tackling System Data files:
- Open Finder and navigate to Go in the menu bar > Go To Folder.
- Enter ~/Library/Caches and hit Return.
- Look through the subfolders, use Command + I to get details about each, and clear out anything unnecessary by moving it to the Trash.
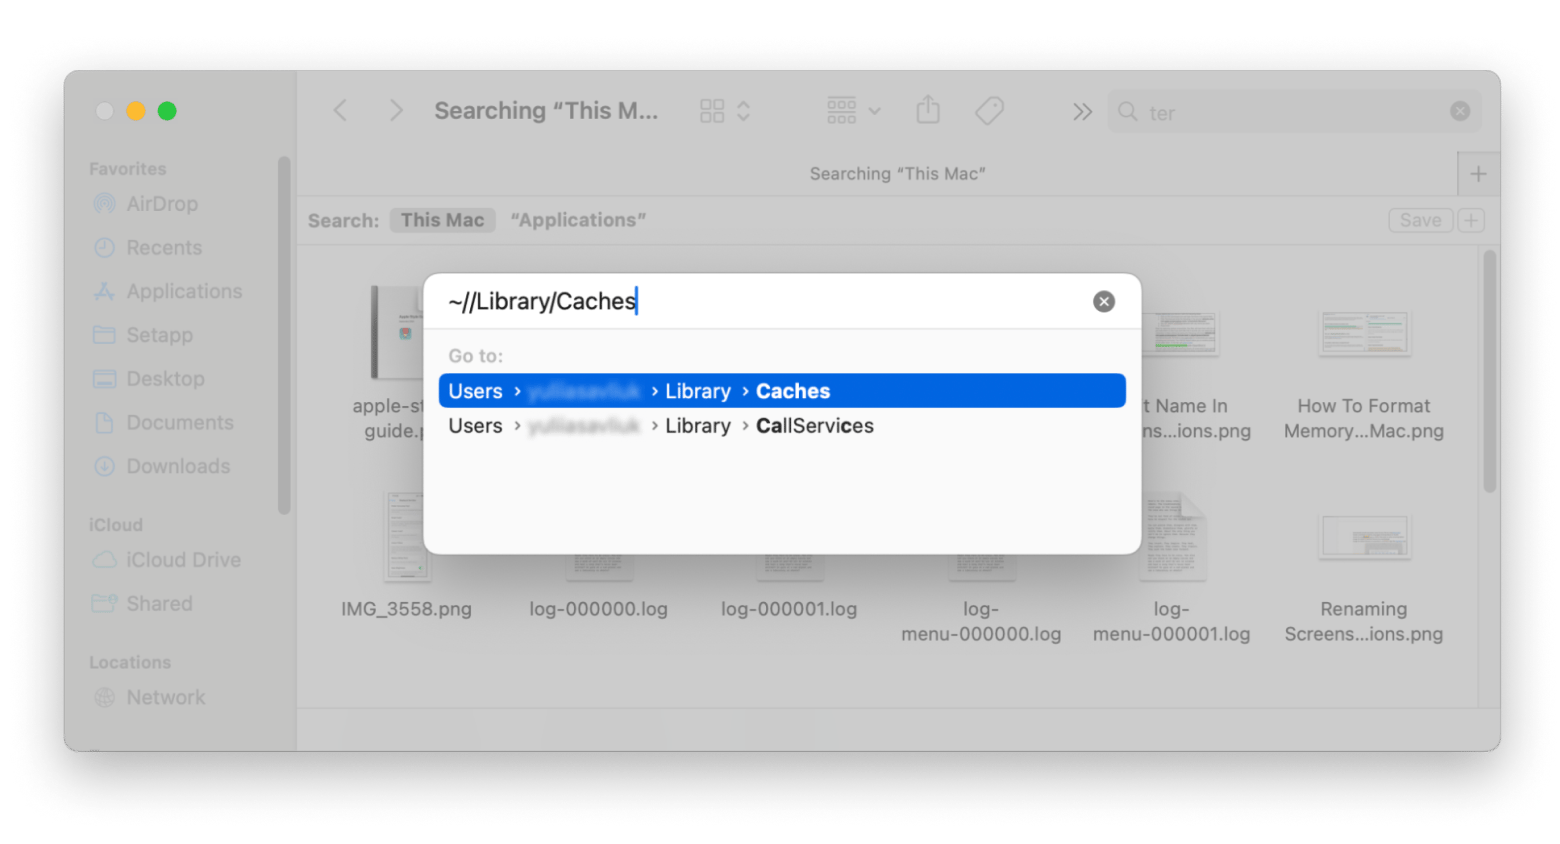
Just ensure you’re only trashing items you really don't need!
4. Get rid of log files
After clearing caches to free up space, your next target should be log files, which can also contribute to the "Mac System Data large" problem. Here's how you can remove them:
- Open a Finder window and navigate to Go in the menu bar > Go to Folder.
- Enter ~/Library/Logs/ and press Return.
- Identify the log files you no longer need, but make sure to double-check their importance before sending them to the Trash.
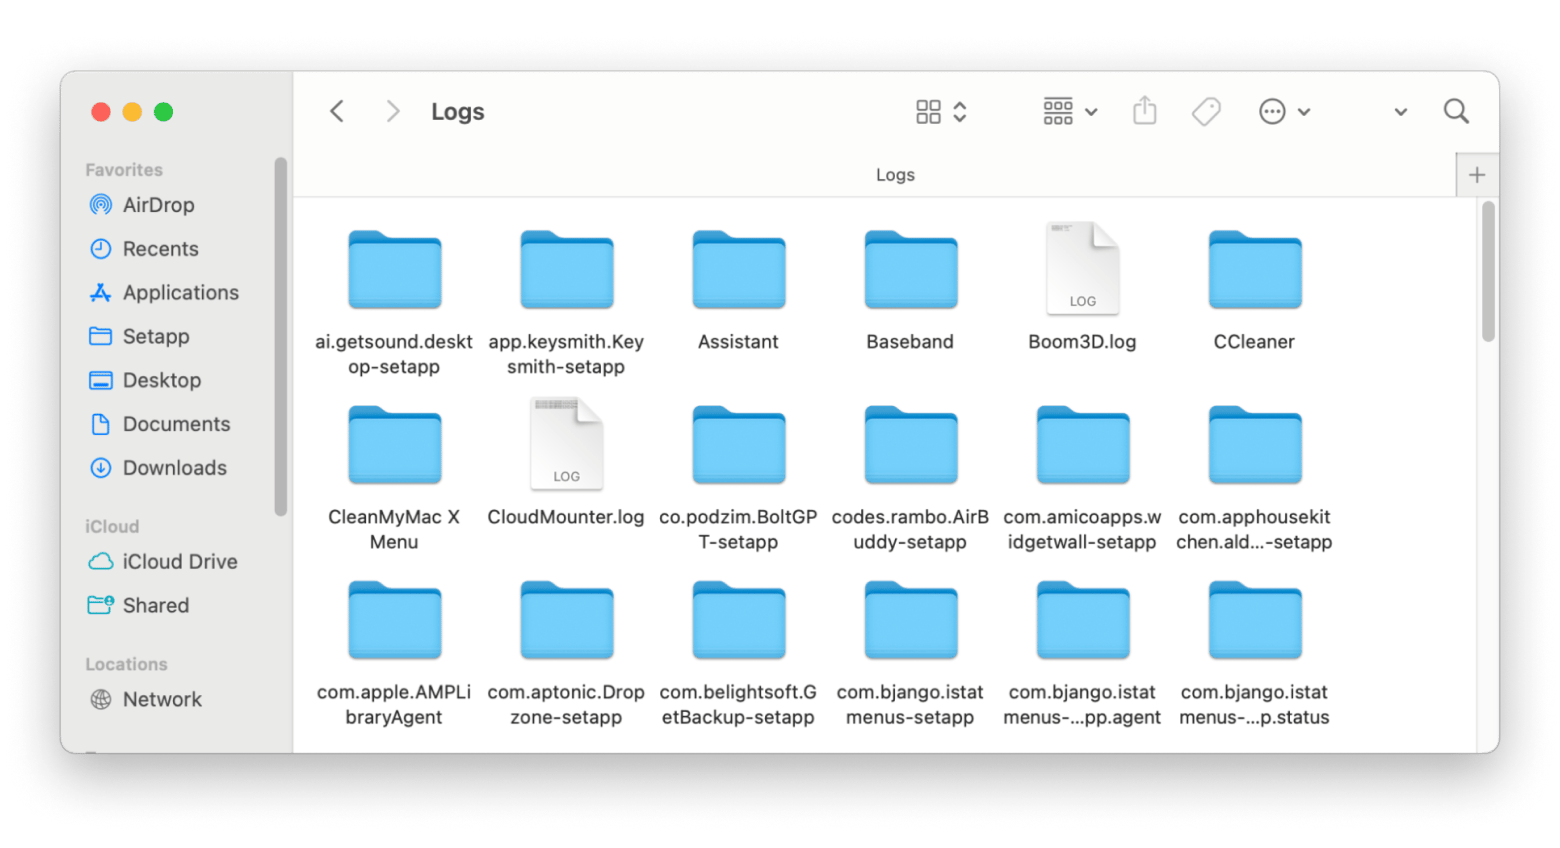
5. Clean up your Downloads folder
The Downloads folder often becomes a forgotten stash of clutter over time. It's loaded with everything from old photos and movies to documents and installers that could contribute to System Data bloat.
Here’s a quick way to tidy Downloads folder up:
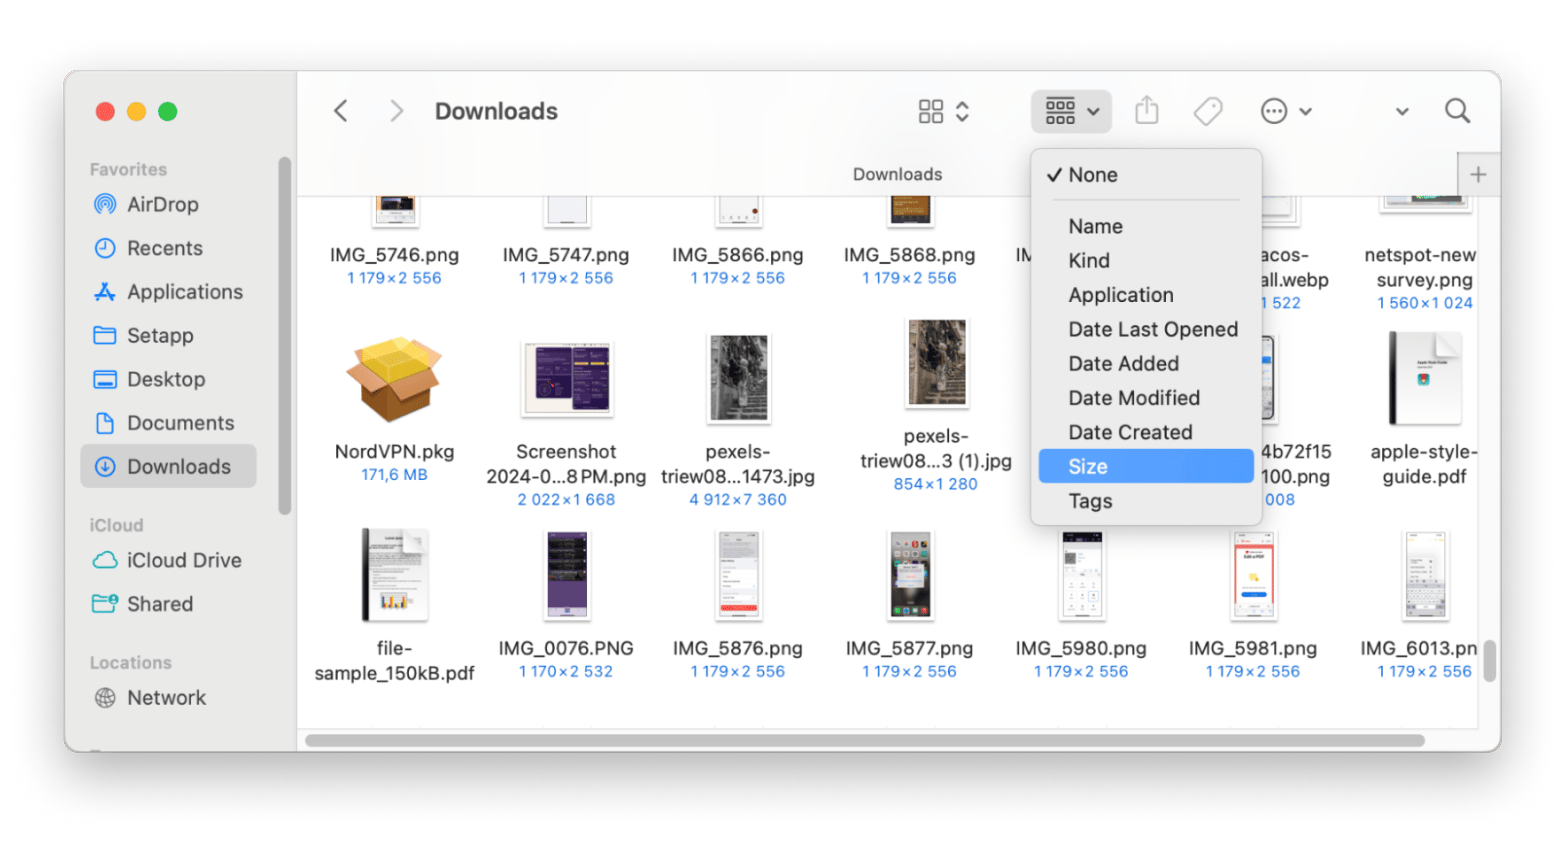
- Open Finder and head to the Downloads folder.
- Click on the the Sort icon to sort files by size.
- Review the largest files at the top, and drag any you no longer need to the Trash.
6. Remove old Time Machine backups
Your Mac often holds onto local copies of Time Machine backups, which can hog space. These are usually cleared automatically, but if they stick around, you can manually delete them to free up storage. Here's how to do it:
- Open Finder, go to Applications > Utilities, and launch Terminal.
- Type tmutil listbackups and press Return to view a list of backup dates.
- When you locate the backup to delete, remember its directory path.
- Type sudo tmutil delete followed by the path.
- Then press Return to delete it.
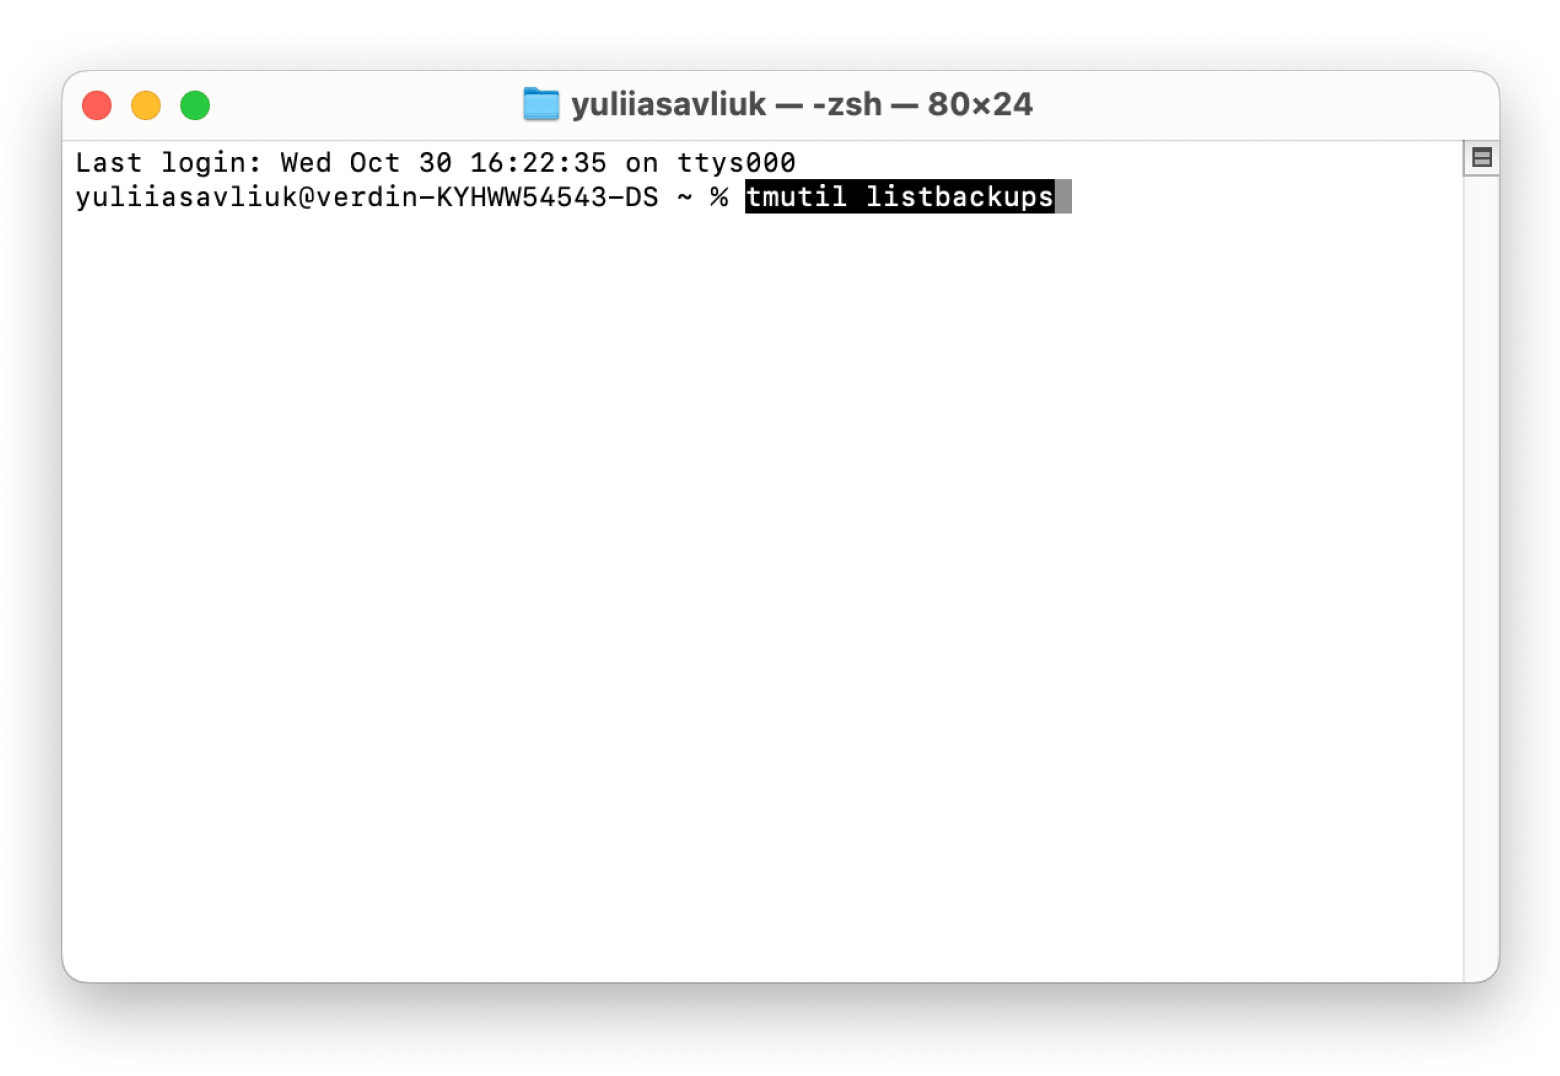
Repeat this process for any additional backups you want to remove. I like to check the Storage tab afterward to see how much space I've regained. But remember, only delete local copies you're sure you won't need later. This task can be time-consuming, so patience is key.
7. Empty the Trash
Emptying the Trash might seem basic, but it's a crucial step in freeing up space on your Mac. When you delete files, they're just sitting in the Trash, still taking up room on your drive. Make sure to empty the Trash to permanently remove these files and reclaim that space. Just remember, once you empty it, those files are gone for good, so give everything a quick check before doing it.
Also, be sure to check out this article for additional strategies on how to clear system storage on Mac.
Why is System Data so big Mac: Get it fixed
By following the tips, you'll tackle the mystery of macOS System Data being huge and free up some valuable space in the process. You can also check out the apps I mentioned via Setapp.
Setapp is a subscription service offering a variety of apps for macOS and iOS that can assist with managing System Data on your Mac. Sign up for a free trial and explore tools like CleanMyMac for optimizing storage, CloudMounter for easy cloud access, and NovaBench for performance checks. Plus, access dozens of other valuable apps, all conveniently in one place.


