Clipboard on Mac: How to view and manage copy-paste history on macOS [2026 update]
- How to view clipboard on Mac
To see your most recently copied item, open Finder, click Edit in the top menu, and select Show Clipboard. This shows the latest copied content. - Mac clipboard only stores one item at a time
There's no built-in way to access clipboard history. - Unlock extra clipboard features with shortcuts
Use Control + K to cut and Control + Y to paste with a hidden second clipboard. Or drag text to your desktop to create quick-access clippings without using copy-paste. - Copy between devices with Universal Clipboard
If your devices use the same Apple Account, are on the same Wi-Fi, and have Bluetooth turned on, you can copy on one device and paste on another. No extra setup needed. - Use the clipboard manager Paste to save and search clipboard history
The Paste app from Setapp stores everything you copy — text, images, links — and keeps it organized. Press Shift + Command + V to open the paste tray and search through your clipboard history. It also syncs across devices and survives Mac restarts.
- Setapp gives you even more solutions for copy-pasting
Setapp gives you access to Paste, Unclutter, TextSniper, and over 250 other expert-picked apps for Mac and iOS. Try them all free for 7 days.
Let me guess what annoys you most about the clipboard on a Mac: it only holds one item, and it gets overwritten as soon as you press Command + C again. Pfff, right? Let's explore the best ways to enable clipboard on Mac, and whether there’s a way to copy text on one device and paste it on another.
I’ve gathered the quick solutions in the table. If you need deeper explanations, scroll down for more details and additional ideas.
How do I manage clipboard history on a MacBook Air or other Mac?
| What happened? | Possible solution |
|---|---|
| You want to keep more than one item in your clipboard. | Use Paste or Unclutter to store multiple items. |
| Can’t see what you last copied. | Open Finder > Edit > Show Clipboard. |
| Need to copy text from an image. | Use TextSniper to extract text from any image. |
| Need a second clipboard. | Use Control + K (cut) and Control + Y (paste). |
| Want to use a clipboard across devices. | Copy on one device and paste on another as usual. Use the same Apple ID and Wi-Fi, and turn on Bluetooth. |
| Need to save bits of text for later. | Drag text to your desktop or app to save snippets for quick access. |
| Clipboard is cluttered with old items. | Clear the clipboard by copying a blank space or using the Terminal command pbcopy < /dev/null. |
How to view and manage clipboard history on macOS
The clipboard tool is easy to use, but can be tough to manage, so here is a rundown of the top user tips and solutions for the most common issues with this native macOS feature. These tips are accurate for the most recent versions of macOS, including macOS Tahoe.
How does the macOS clipboard work in 2026?
After you’ve copied or cut an image or a piece of text, it gets stored in your Mac’s short-term memory, and it’s important to paste it before it gets wiped (e.g., after a Mac restart) or a newly copied item takes its place.
Although a great feature, the clipboard is only designed to hold one item at a time, which can add unnecessary challenges to the work process. Fortunately, there are independent tools and utilities that fill those gaps and expand the available memory on clipboard.
Where is the clipboard located on a Mac?
To find your clipboard on Mac, go to Finder > Edit > Show Clipboard. It runs quietly in the background while you work and doesn’t have its own standalone full-featured app.
You can’t edit text, links, or images stored in the clipboard, nor can you manage its contents in any way beyond simply pasting them somewhere. So, the native macOS clipboard is really only useful when you want to double-check what you last copied or need to be sure of what you're pasting.
In short, it's a quick peek tool, not a powerful clipboard manager.
If you prefer to watch, check out this quick video on how to access the clipboard history on your Mac. Or, scroll down for detailed instructions.
How do I view my clipboard history on a MacBook?
Here’s how to see clipboard history on Mac:
- Open Finder.
- Click Edit from the top menu.
- Choose Show Clipboard.
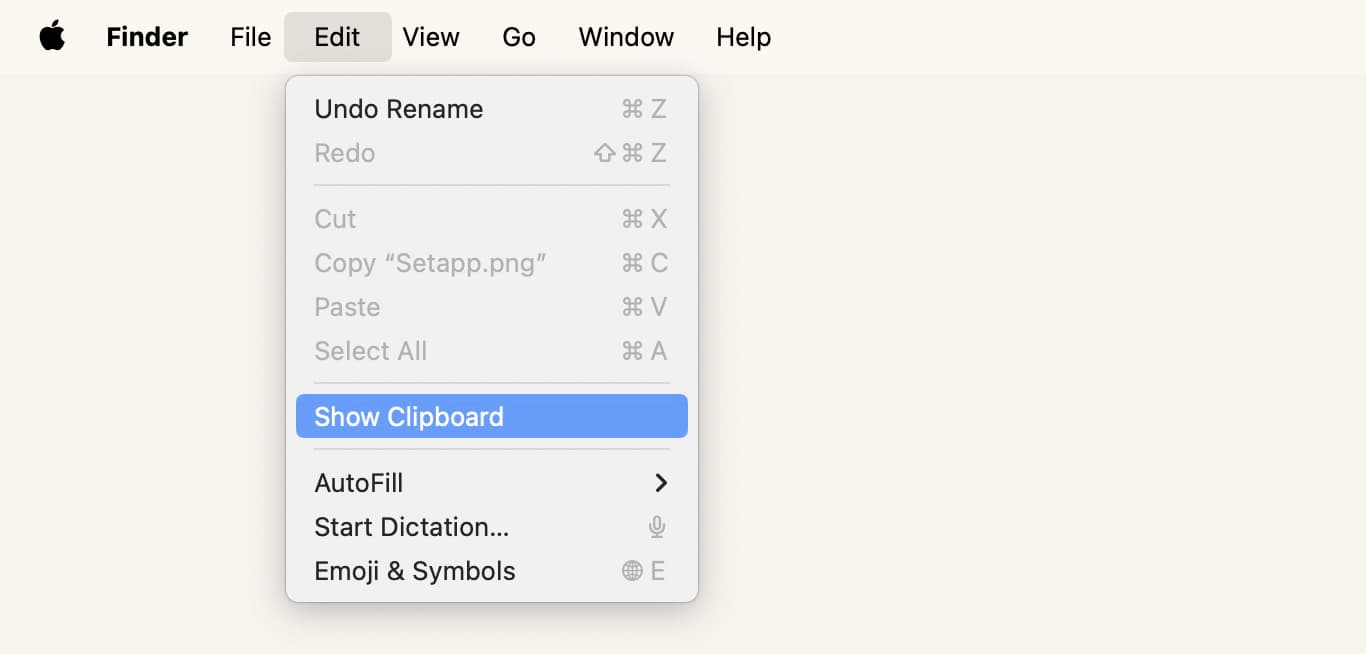
A window will appear, presenting you with the most recent contents of your clipboard for review.
Another method involves using Terminal.
Here's how to use the Command Line to view clipboard contents on Mac:
- Open Terminal.
- Type pbpaste.
If your clipboard contains text, it will be displayed directly in the Terminal. But if it holds an image or a file, the Terminal will only return the name of the copied item, for example: setapp-main-page-screenshot.webp.
Since these methods only show one item at a time, they are useful when you want to double-check what you’re pasting, or if you simply forgot what you last copied and need to see what will appear when you hit Paste.
Does macOS have a clipboard history?
Basically, the macOS clipboard doesn’t have a history — it only stores one item at a time: the most recently copied one. On macOS, the term “clipboard” refers to the part of memory that temporarily holds this item.
Why does Mac not have a clipboard history?
By default, all modern operating systems, including macOS, Windows, and Linux, store only the most recently copied item in the clipboard. This is likely done to minimize security risks and keep the common copy-and-paste action simple.
If you open your clipboard history on a Mac (Finder > Edit > Show Clipboard) and find nothing there, it could mean your Mac was restarted or you simply haven’t copied anything recently.
So, yes: macOS doesn’t include a built-in feature for tracking anything besides your most recently copied item.
This feature limitation becomes highly inconvenient when you start using your clipboard more frequently and might want to see everything you’ve copied. But it's impossible.
Since macOS can only access your most recently copied item, your best solution would be to install a third-party clipboard app.
How can I recover clipboard history on Mac?
As I mentioned above, there’s no way to easily view or recover the contents of a Mac clipboard history beyond one last item. To go back to something you’ve pasted multiple steps ago, you can try using Command + Z and undo the actions up to that point.
A much easier solution would be to use a clipboard manager like Paste, which is a great alternative to Mac’s native clipboard tool.
On Setapp, you can get Paste — a clipboard manager tool that automatically keeps track of everything you have copied. The format doesn’t matter—whether it’s text, images, screenshots, links, or anything else. Remove the limit from your Mac’s clipboard capacity with Paste by being able to simultaneously copy and paste multiple items and get back the things you’ve copied before within seconds.
NoteWith Paste, your clipboard history isn’t wiped when you restart your Mac. Plus, you can choose to keep your history for as long as you like, from one day to forever, depending on your settings. The app is available on Setapp, a platform with over 250 hand-picked apps for your Mac, iPhone, iPad, and the web. You get access to all of them under one subscription. |
To view clipboard history Mac with Paste simply open the app and press Shift + Command + V to bring up the paste tray. Paste has a convenient search bar to help you navigate through the items you’ve copied, so you save time to spend on other, more important things.

How to unlock a secondary clipboard on Mac?
Find the secondary clipboard on Mac using these keyboard shortcuts: Control + K to cut the text and Control + Y to paste it in a new location.
Wait... What?!
Yes, many Apple users are unaware that there’s a hidden secondary clipboard available. This clipboard can be used to hold a second item while retaining the one stored on the main clipboard.
Keep in mind that there’s no copy option here, so you can only use this hidden secondary clipboard with cut text.
What is Universal Clipboard on Mac and how does it work?
Starting with macOS Sierra and iOS 10, users were given the option to copy an item on one device and paste it on another. Cool, right?
To use the Universal Clipboard, ensure your Apple devices are signed into the same iCloud account, connected to the same Wi-Fi, and have Bluetooth turned on. Now copy the content on one device and transfer it to the other by pasting it there in the usual way.
How can I avoid clipboard limitations on Mac?
There are only two built-in ways to work around the one-item clipboard limitation on your MacBook:
- Use Control + K and Control + Y. Press Control+ K to cut text and Control + Y to paste it elsewhere. While this method still stores only one item at a time, it’s separate from the standard Command + C clipboard. That means you can have two items ready to paste — one cut with Control + K, and another copied with Command + C.
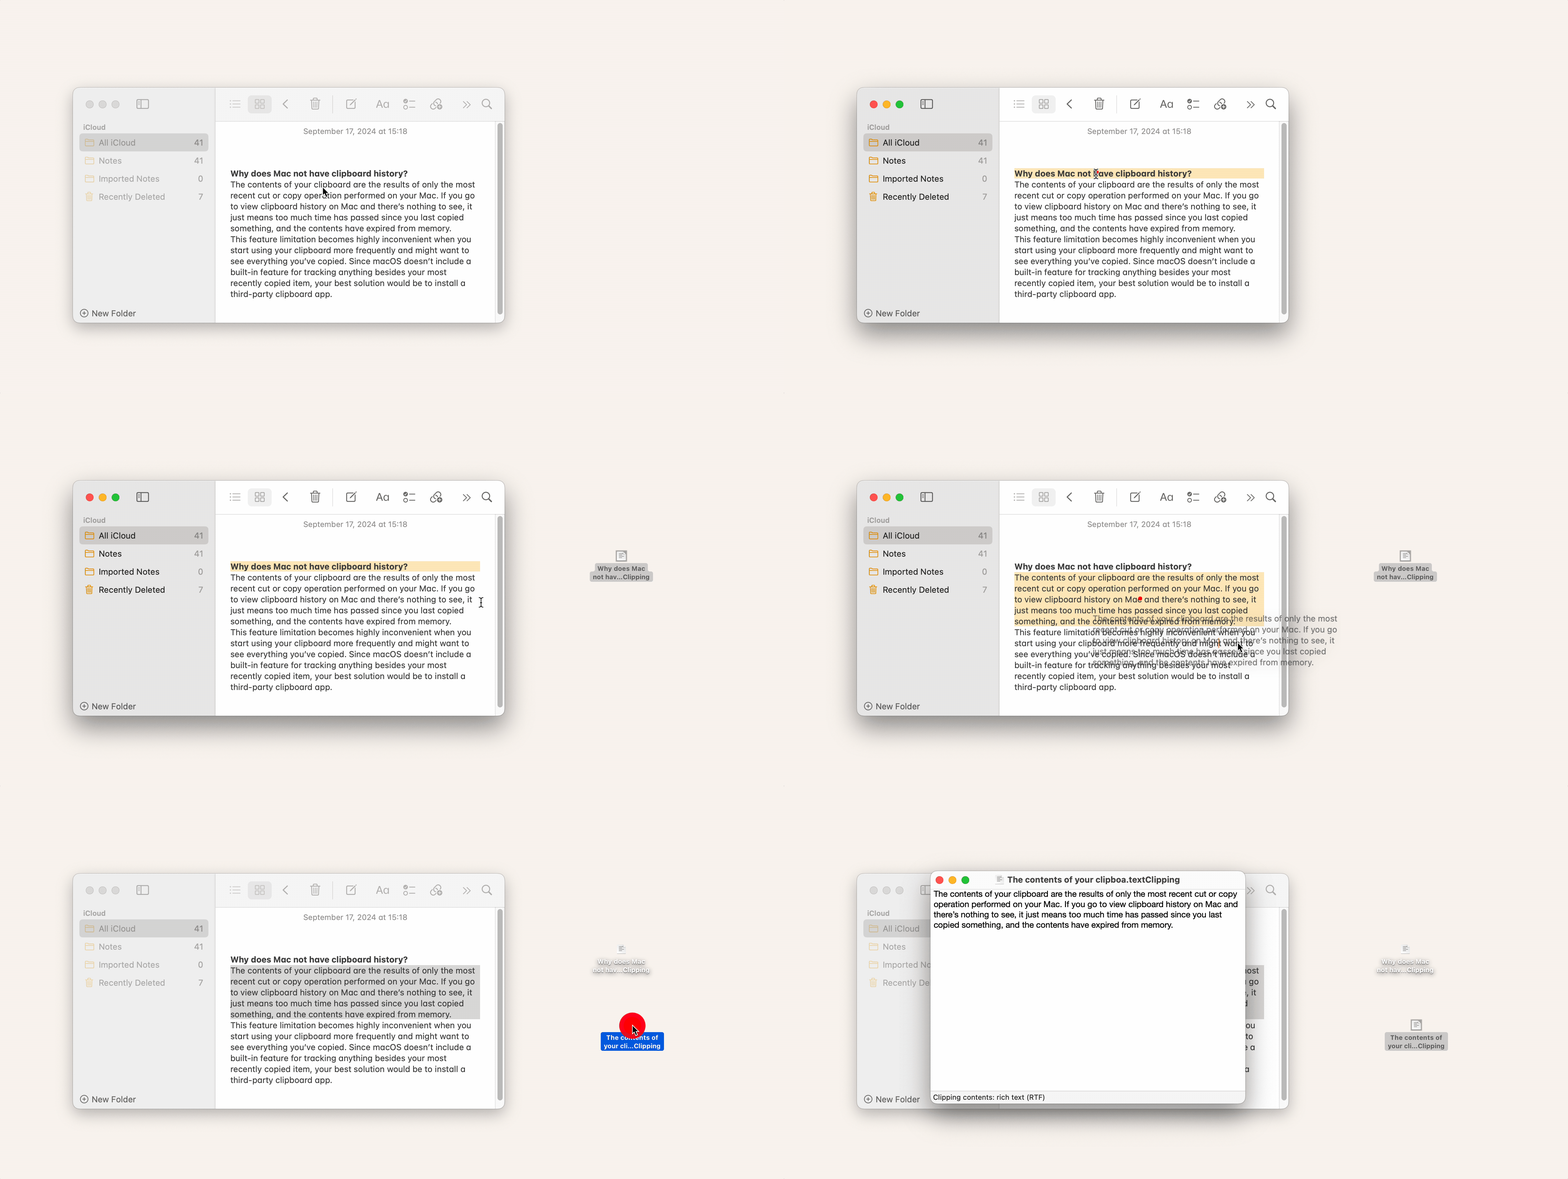
- Use text clippings. This is a more advanced workaround. Select any text and drag it out of its original document to create a snippet of text that looks like a file, but can’t be edited. From here, you can drop it onto the desktop or directly into any document or app at a point where you want it pasted.
An easier way to enable a clipboard on a Mac with longer history possibilities is to turn to Setapp and its clipboard manager, Paste. This utility combines all aspects of the native Mac clipboard and the Universal Clipboard by letting you store all copied items in one place in a well-structured manner and access them easily across all your devices.
How can I keep multiple items on Mac clipboard?
As you now know, you cannot copy or store multiple items on a Mac’s native clipboard. If you’re looking for such functionality, you’ll need a third-party clipboard manager. Setapp is where you can get some.
Unclutter is a full-featured memo assistant that gives you unlimited clipboard copy-pasting powers and a clean place to store all your temporary notes. Unified in one handy window, Unclutter’s tools range from quick full-text search and clipboard history tracking to drag-and-drop file management and consolidated temporary storage.

And I won't get tired of reminding you about Paste, another clipboard utility that can completely replace your Mac’s native tools, as well as expand your copy-pasting options. Use this robust snippets manager when you need to copy and paste multiple items at once or take advantage of the intelligent search features within the app to instantly find the copied item you’re looking for.
How do I paste from the clipboard on Mac?
To paste from Mac’s native clipboard, press Command + V, and your most recently copied item will appear in front of you.
When you’re using clipboard managers like Paste and Unclutter, you have more options on what to paste and how to do it. Here are some of the ways to paste from a clipboard manager I highly recommend to you to try:
- Use customized shortcuts to paste the most recent as well as old items.
- Drag and drop items from the utility’s interface directly to any Mac app.
- Select and paste multiple items at once.
- Paste items as plain text, no matter the format of the original.
- Access and paste files from other devices through iCloud sync.
- Share and paste snippets over AirDrop.
Read also: Apple serial number check
How do I copy text from images to my Mac clipboard?
The latest iOS and macOS have a Live Text feature that lets you copy text from an image on an iPhone or Mac. However, the image should be saved on your device to copy from it. If you want to copy text from anywhere, I suggest turning to Setapp and downloading TextSniper.
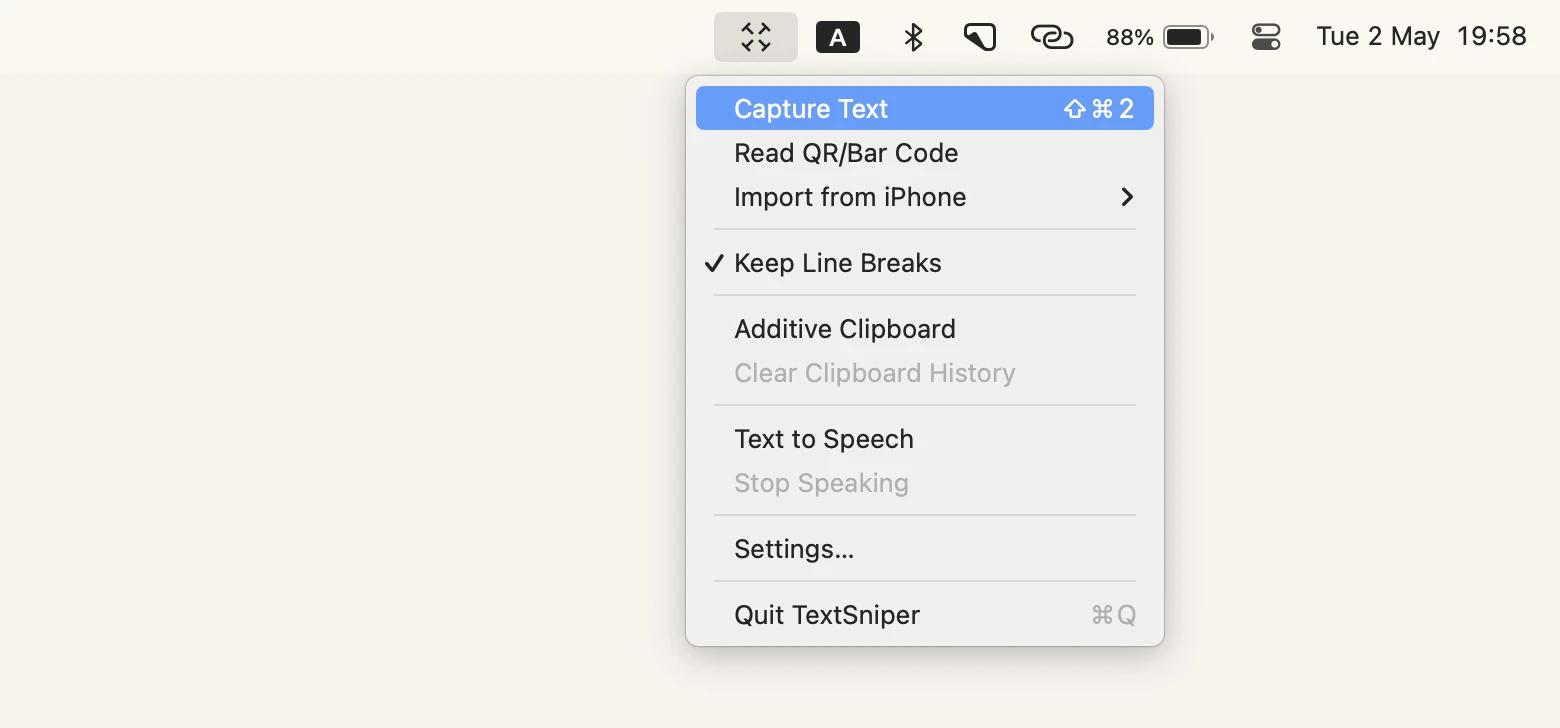
TextSniper is a text recognition app for Mac that can extract text from a selected portion of your screen or another image using optical character recognition, or OCR. Easily accessible from your menu bar, TextSniper is ready to capture text when you need it. Pro tip from me: enable the Additive Clipboard feature in the app to be able to copy multiple bits of information and paste them all at once.
The best way to get TextSniper is through Setapp, because you’ll also get access to over 250 hand-picked apps for macOS, iOS, and the web. All under one subscription, without ads or hidden fees.
How do I paste screenshots from the clipboard on macOS?
The native macOS clipboard lets you copy and paste screenshots. The next time you take a snippet of your screen, hold the Option key simultaneously and then press Command + V to show the clipboard contents and paste the screenshot.
Clipboard managers and Mac desktop organizers like Paste and Unclutter offer even more functionality when it comes to copying screenshots. Paste has the option to set custom shortcuts to achieve greater productivity, while Unclutter will organize all your random screenshots in one neat place so they’re easily accessible when you need them.
Can I store multiple items in clipboard history on a MacBook?
The short answer is no. Mac's native clipboard only holds the most recent item.
Before Apple creates a way to store multiple clipboard items, my best solution is to turn to Setapp and its apps, like Rocket Typist.
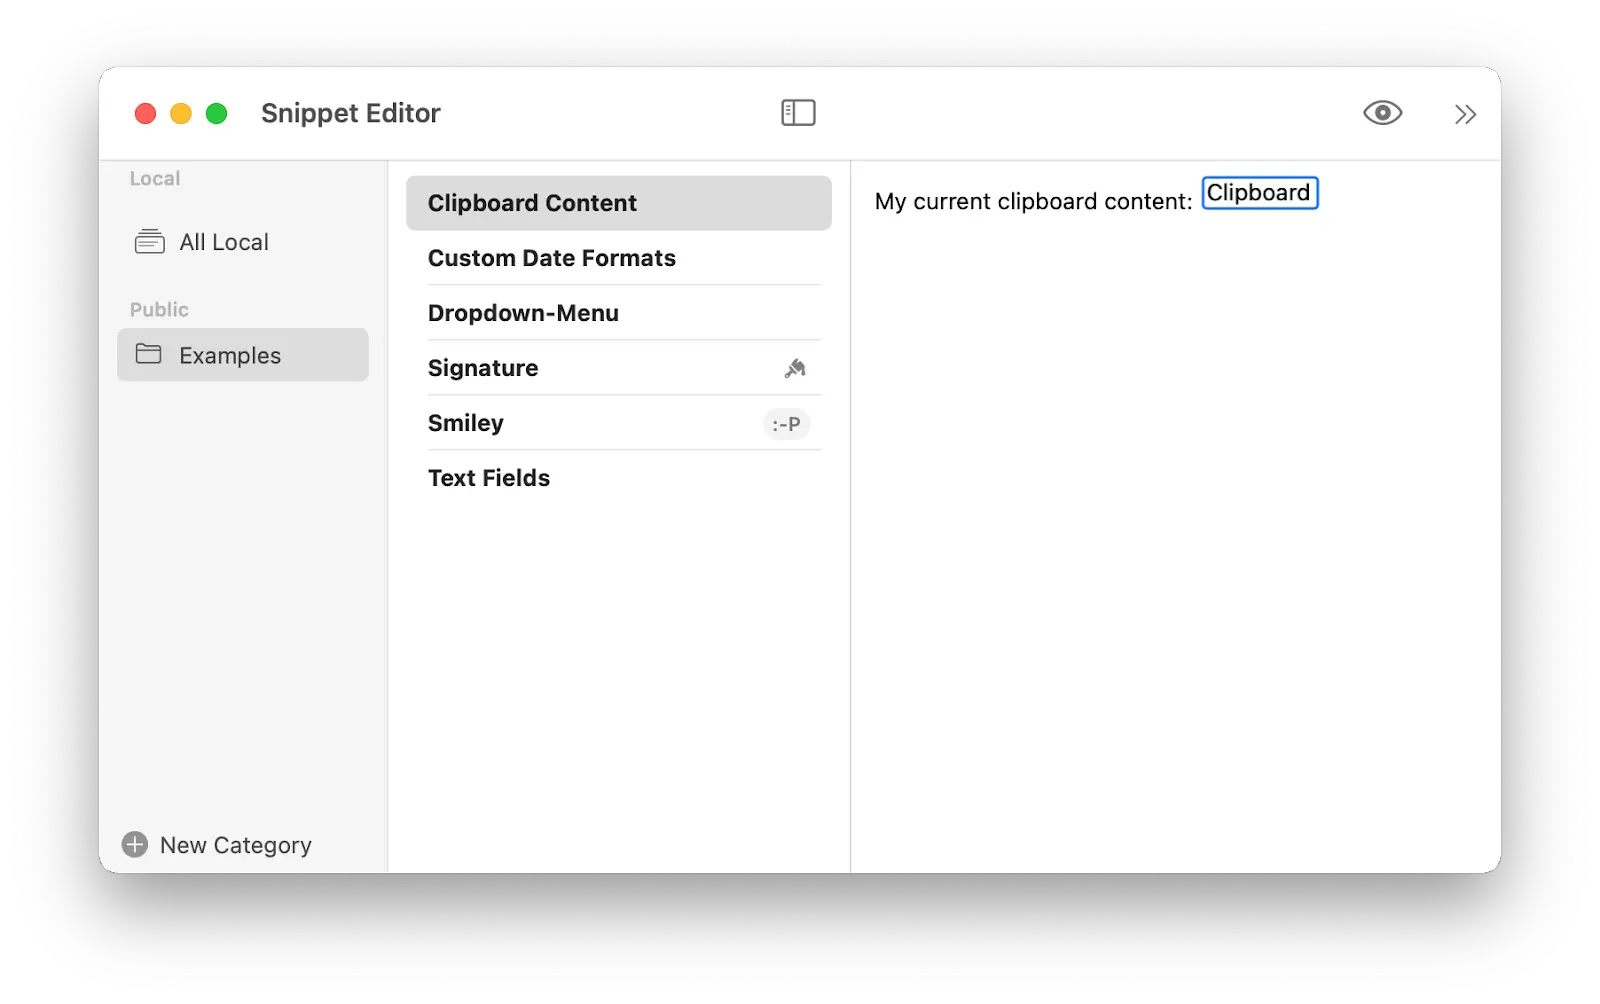
Rocket Typist goes around clipboard limitations using text snippets. Forget about typing the same phrases and sentences over and over again, as Rocket Typist will provide you with a clean database of text bites you use frequently for anything from email greetings to PHP scripts. Choose the phrases to paste into any document using a drop-down menu, or set them to appear automatically when you type an abbreviation.
What’s the easiest way to clear my Mac clipboard history?
You can clear the Mac clipboard history by copying a space, using the Terminal command (pbcopy < /dev/null), or restarting your Mac.
The easiest way to clear the clipboard history is to replace it with a new item. Open any text file on your Mac, and copy the space between two words. Now, if you go to view clipboard history on Mac, it’ll be empty.
There’s also a more nuclear way of wiping clipboard contents on Mac, and that’s by using a Terminal command:
- Open Terminal.
- Type in the following command pbcopy < /dev/null and press Enter.
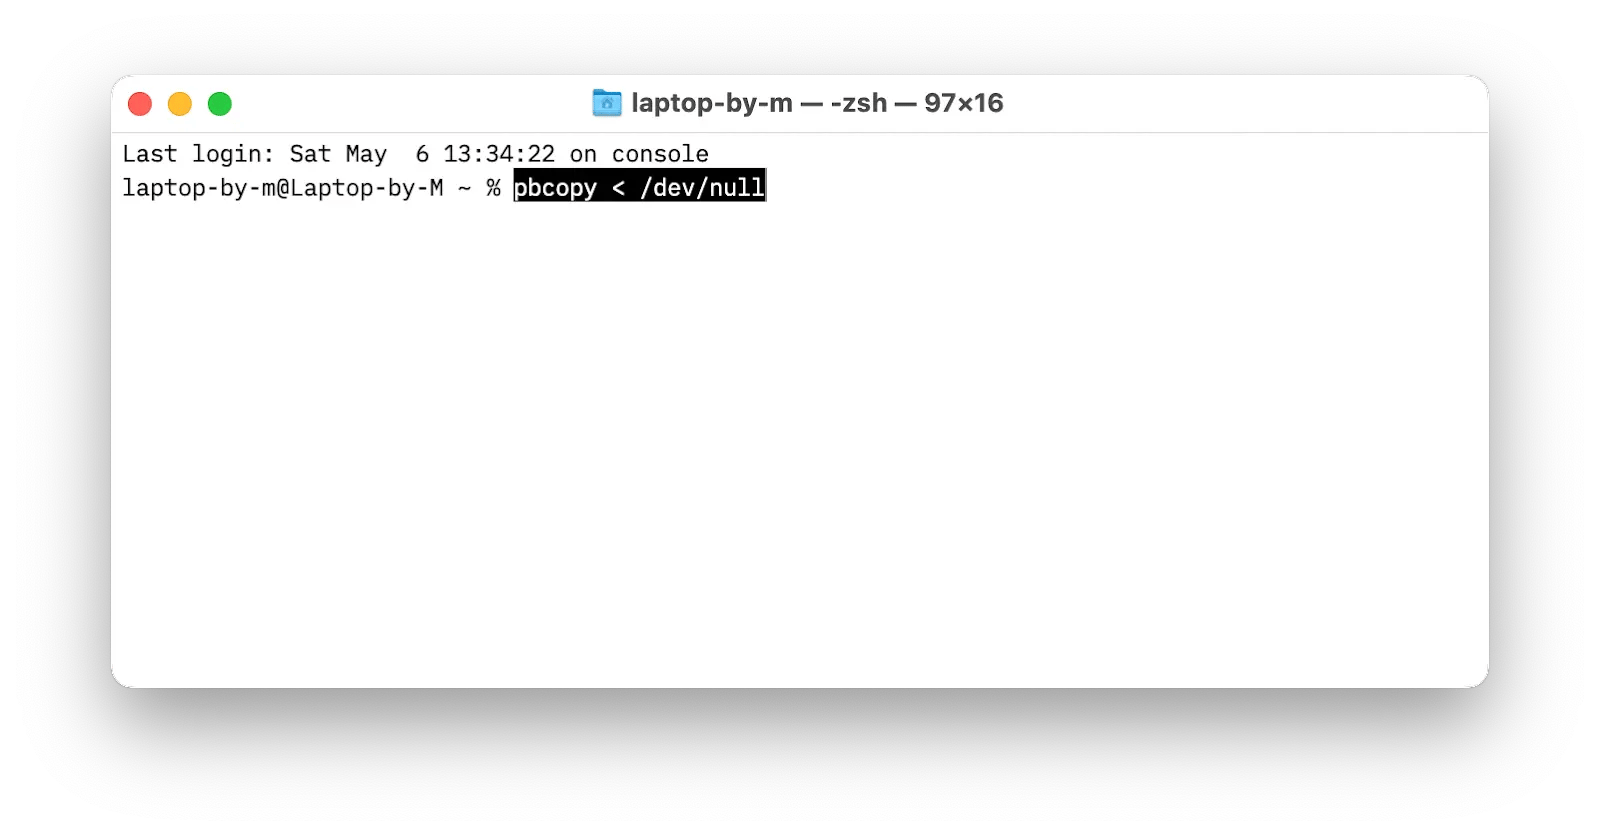
Alternatively, you can restart your Mac by going to the Apple menu in the upper left corner and clicking Restart. This will delete the clipboard content completely.
In case you’re using one of the clipboard managers mentioned above, all of them will have the option to delete clipboard history with just a few clicks.
Default Mac clipboard vs. Third-party tools
Now, let's discover the pros and cons of using third-party clipboard tools on macOS vs the native clipboard.
| Feature | macOS native clipboard | Paste | TextSniper | Rocket Typist |
| Storage capacity | The most recent item | Unlimited items (text, images, links, files) | Extracts text to clipboard; supports additive clipboard for multiple selections | Stores predefined text snippets for reuse |
| Cross-device sync | Yes (Universal Clipboard) | Yes. Syncs clipboard history across Mac, iPhone, iPad via iCloud | Yes (through Universal Clipboard) | Limited sync; iOS version available separately |
| Customization | No customizable shortcuts or editing | Custom shortcuts, paste as plain text, Quick Paste, Paste Stack, edit/rename items | Customizable shortcuts, text-to-speech, remove line breaks, add custom words | Custom abbreviations to auto-insert snippets, drop-down menu for selection |
| Best for | Basic copy-paste for single items | Advanced clipboard management for frequent copying across apps and devices | Extracting text from non-selectable sources (PDFs, videos) | Reusing frequently typed text snippets (e.g., email templates, code) |
| Get via Setapp | No (built-in) | Yes | Yes | Yes |
Which clipboard manager is best for Mac users in 2026?
If you decide to use Setapp, here's a quick reminder of what its clipboard management apps can do.
| Tool | Feature | Available on Setapp* |
|---|---|---|
| Paste | Stores unlimited number of copied items: text, images, links and more. | Yes |
| Unclutter | Creates a space on your desktop where you can drop clipboard data, files, notes, and other information. | Yes |
| TextSniper | Copies text from unselectable images, videos, websites, graphics, and more. | Yes |
| Rocket Typist | Saves an unlimited number of your most commonly used words and phrases, which are easy to paste using a shortcut. | Yes |
*Setapp is a platform with over 250 apps for macOS, iOS, and web under one subscription. It's free to try for seven days. No ads and hidden fees. Need a couple of these apps at once? It might be more cost-effective to get them under a single subscription. Find out with this free, quick Calculator — Setapp vs. Individual app subscriptions.
Why is copy and paste not working on my Mac — and how do I fix it?
If you’ve discovered that your Mac’s copy and paste functions aren’t working, determine if it’s your keyboard that’s acting up, an app that’s malfunctioning, or if it’s a deeper software problem with macOS, and then refer to a step-by-step guide on how to fix it.
Clipboard managers providing a simple solution
When you work with your Mac, convenience is essential. So if you’re tired of worrying about expiring clipboard contents, or overriding them with other copied text, try Setapp and its smart solutions.
Clipboard managers like Paste and Unclutter, as well as all other apps I've mentioned in the article, are free to try through a seven-day trial of Setapp, an app suite with more than 250 utilities. Each of them is created by experts to save you hours in the long run and let you enjoy every moment of interaction with your Apple devices!
FAQ
Where do things go when copied to a clipboard?
Things copied to a clipboard temporarily go into your device's clipboard memory until pasted or replaced.
What is the shortcut key for the clipboard on Mac?
There isn't a specific shortcut key for the clipboard on Mac. To copy and paste, press Command + C and Command + V.
How do I see my clipboard on Mac?
To see your clipboard on Mac, open Finder > Edit and click Show Clipboard.
How to find the previous copy and paste on Mac?
To find the previous copy and paste on Mac isn't possible. Mac does not have a built-in clipboard history feature. You need a third-party app like Paste (available on Setapp) to access previous copies.
