How to change the default Finder folder on Mac
Finder is the first thing we open on our Macs. It’s the main folder management system and the gateway to everything in macOS, from opening apps to accessing downloads to browsing the desktop, external drives, and servers.
The happy Mac icon that represents Finder has been there since 1984, the very beginning of the graphical user interface on macOS (then Mac OS). Finder is the first icon in the Dock, and it can’t be removed.
Are there better folder management systems out there? Yes, of course. Since it’s used by millions of people in infinite ways, Finder is slow to change and innovate.
The key is to make sure that your Finder is tailored to the way you work. And it starts with the default folder Macs tend to use.
![]()
Why change Finder’s default folder?
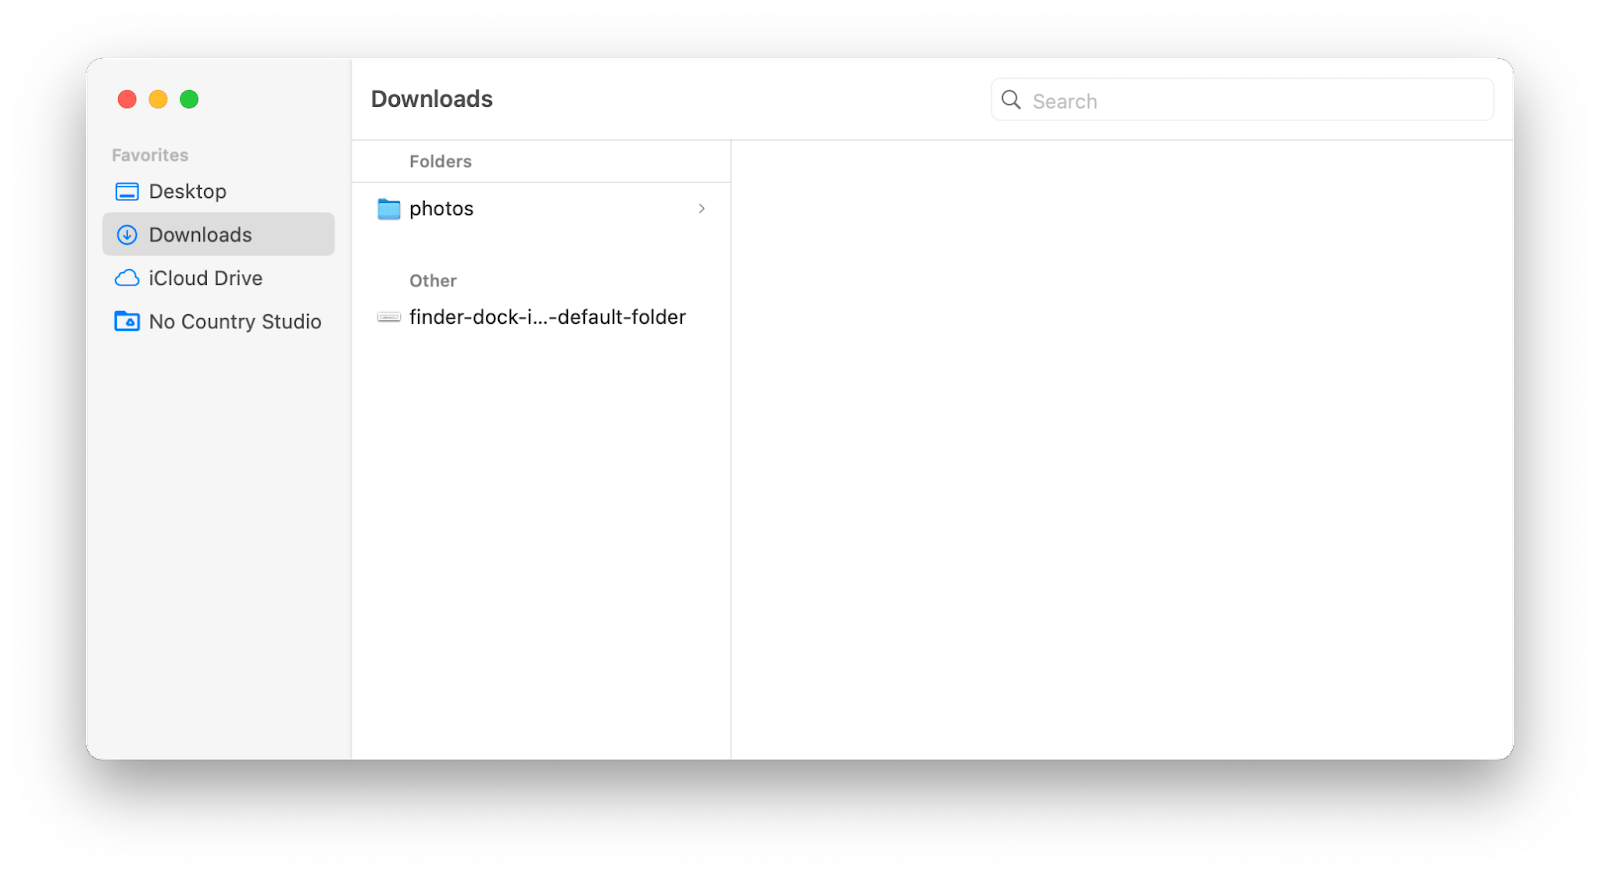
By default, when you open Finder, you end up in the Recents folder, showing you a mix of files you’ve recently interacted with. While it works for some, it might be confusing for others since Recents is not technically a folder on your Mac — it’s a collection of files gathered from other folders.
To find files on your Mac with ease, it’s better to have your default folder in Finder be set to something within the macOS folder structure, such as Downloads, or Desktop, or Documents.
When you set Finder to Downloads by default, for example, you always know where you are and how to find your files in other ways if needed.
How to change the default folder in Finder
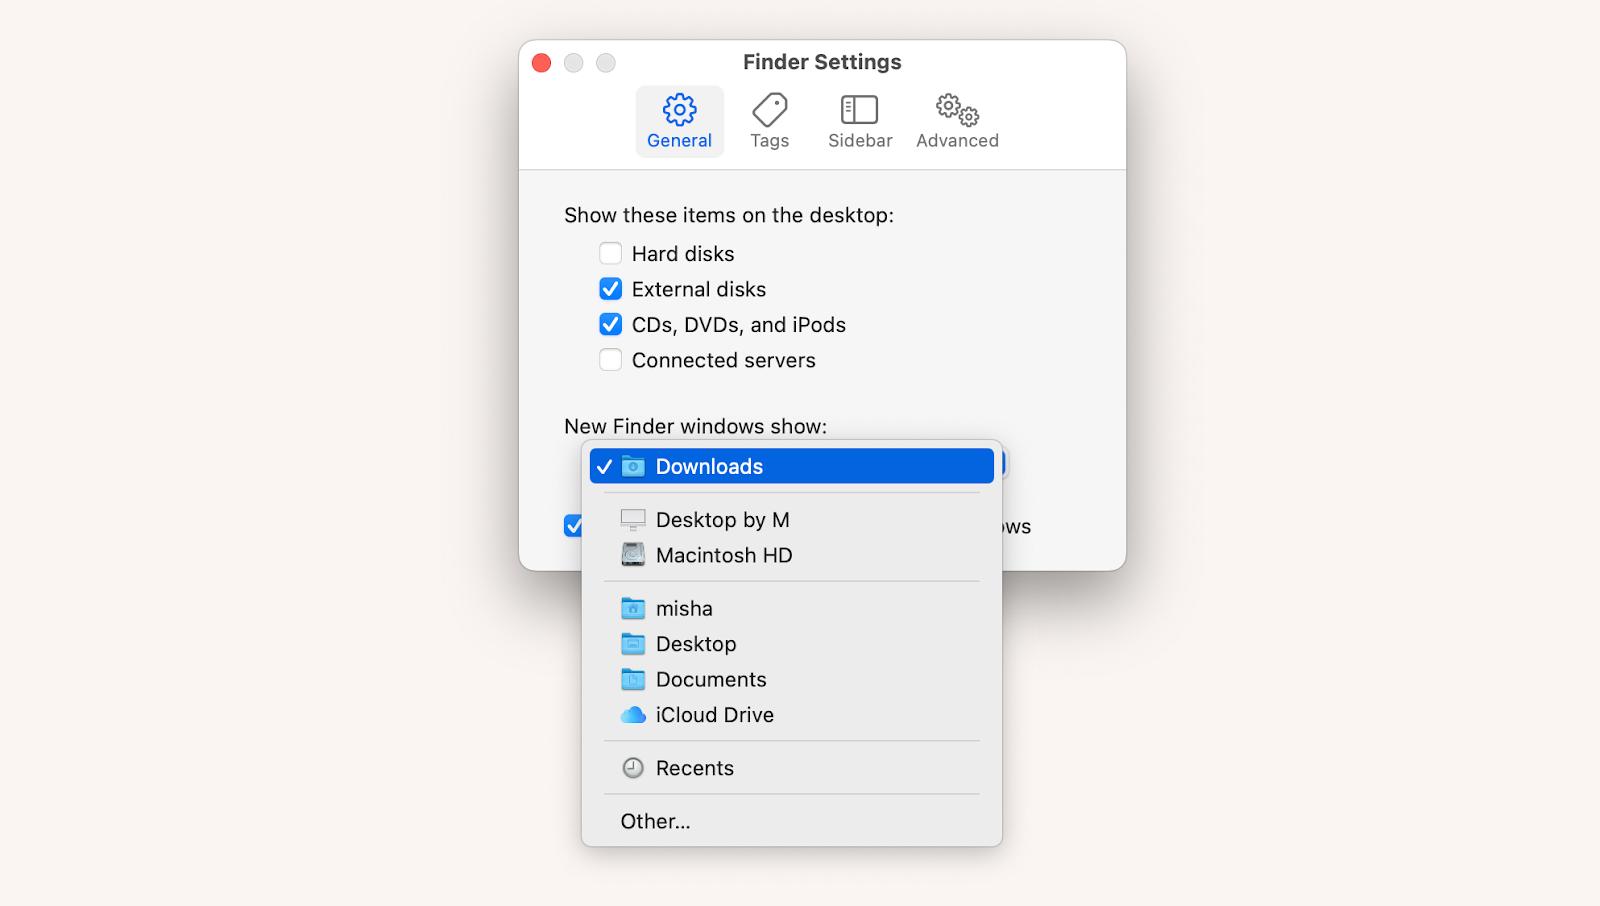
Here’s how to change default Documents folder or Recents on Mac:
- Activate Finder by clicking on its icon in the Dock
- Go to Finder ➙ Settings… (Command + ,)
- In “New Finder windows show,” select Downloads or another folder
Tip: To set Finder to a custom folder, select Other… from the dropdown and find the folder you want.
Customize your Finder experience on Mac
Why stop at the default folder Macs use? You can continue improving your Finder experience with a few extra tweaks.
For example, by default, Finder doesn’t show you the hierarchy of folders, so you’re never exactly sure where in the folder structure you are and how to quickly get a few levels up or down.
To fix this, you can add a path structure to Finder:
- Click on Finder to activate it
- In the menu bar, select View ➙ Show Path Bar
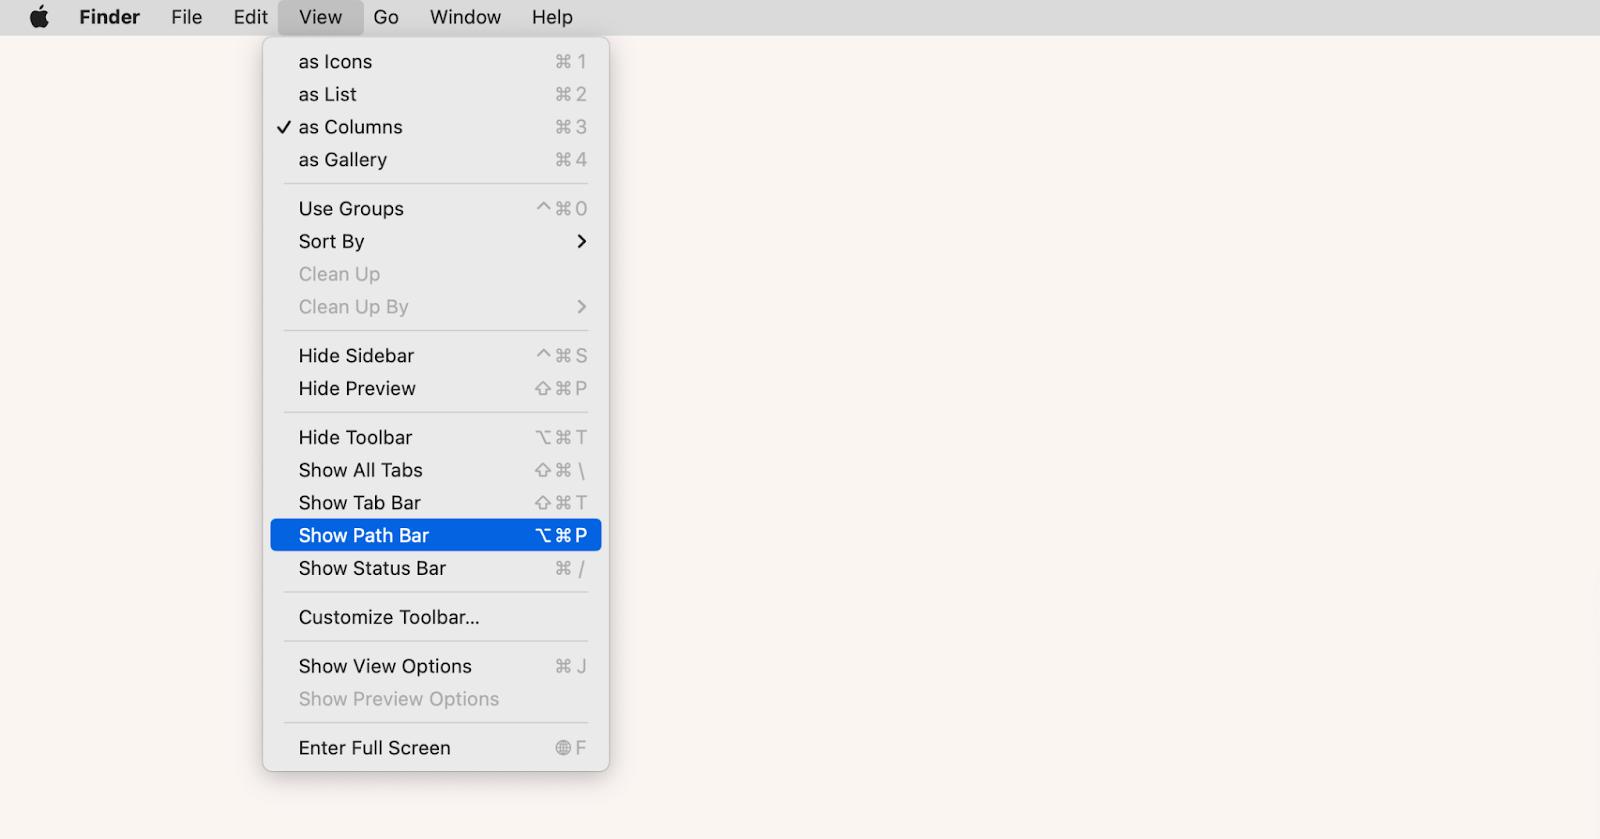
Now the path bar will be displayed at the bottom of your Finder window. You can navigate through it easily by double-clicking on any folder.
Another popular improvement is switching the Finder search functionality away from looking throughout your Mac (default) to only searching the current folder.
To change the scope of search:
- Go to Finder ➙ Settings…
- Switch to the Advanced tab
- In the “When performing a search” dropdown, select “Search the Current Folder”
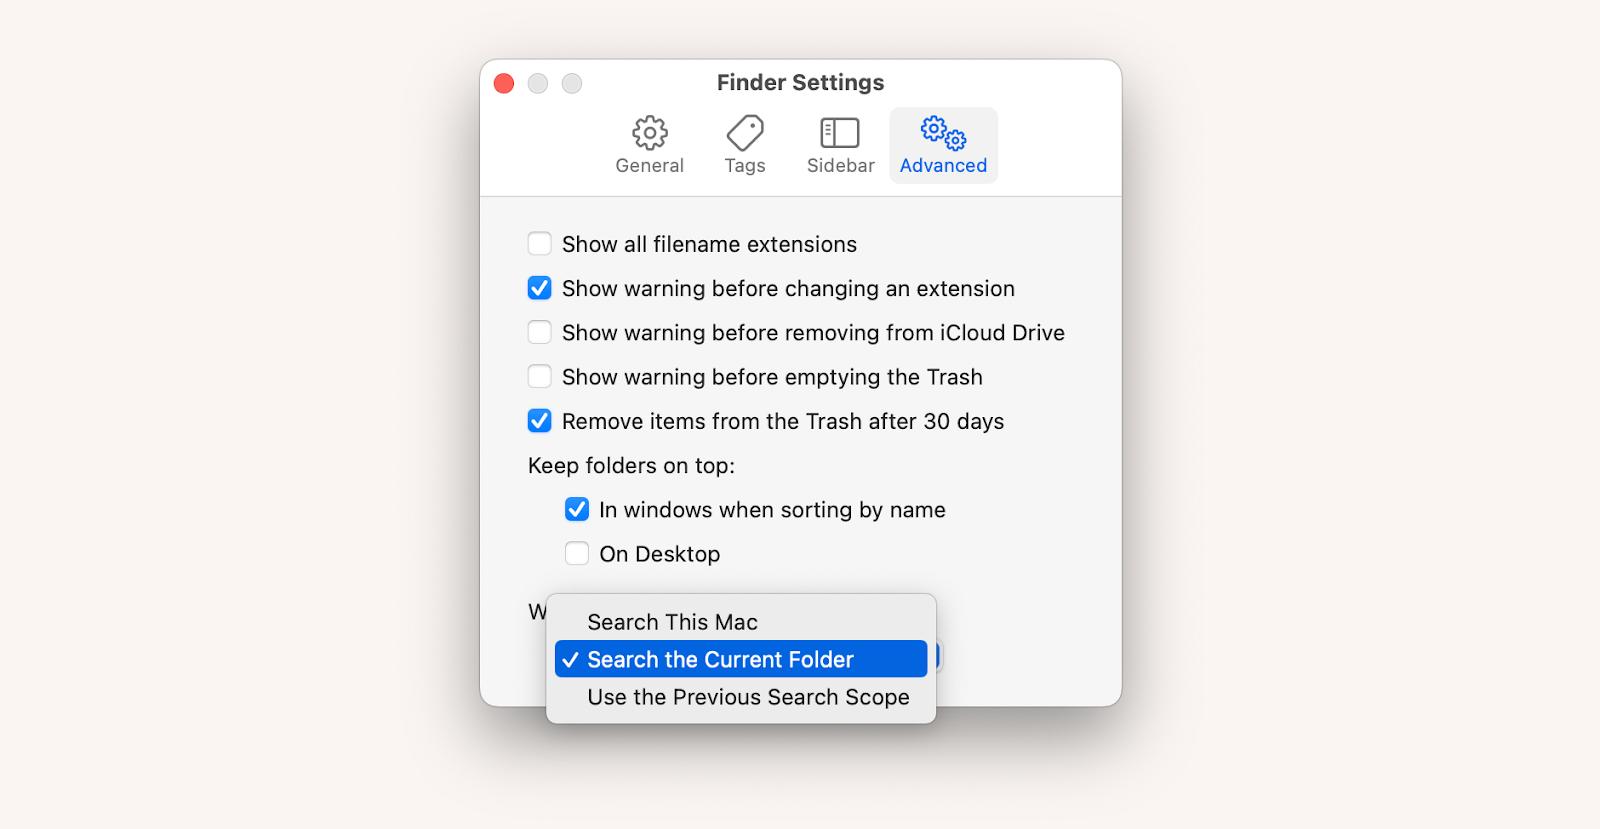
Tip: Another optional improvement you can make while you’re in the Advanced tab is keeping the folders at the top of the list in any folder. To do that, check “In windows when sorting by name” under “Keep folders on top.”
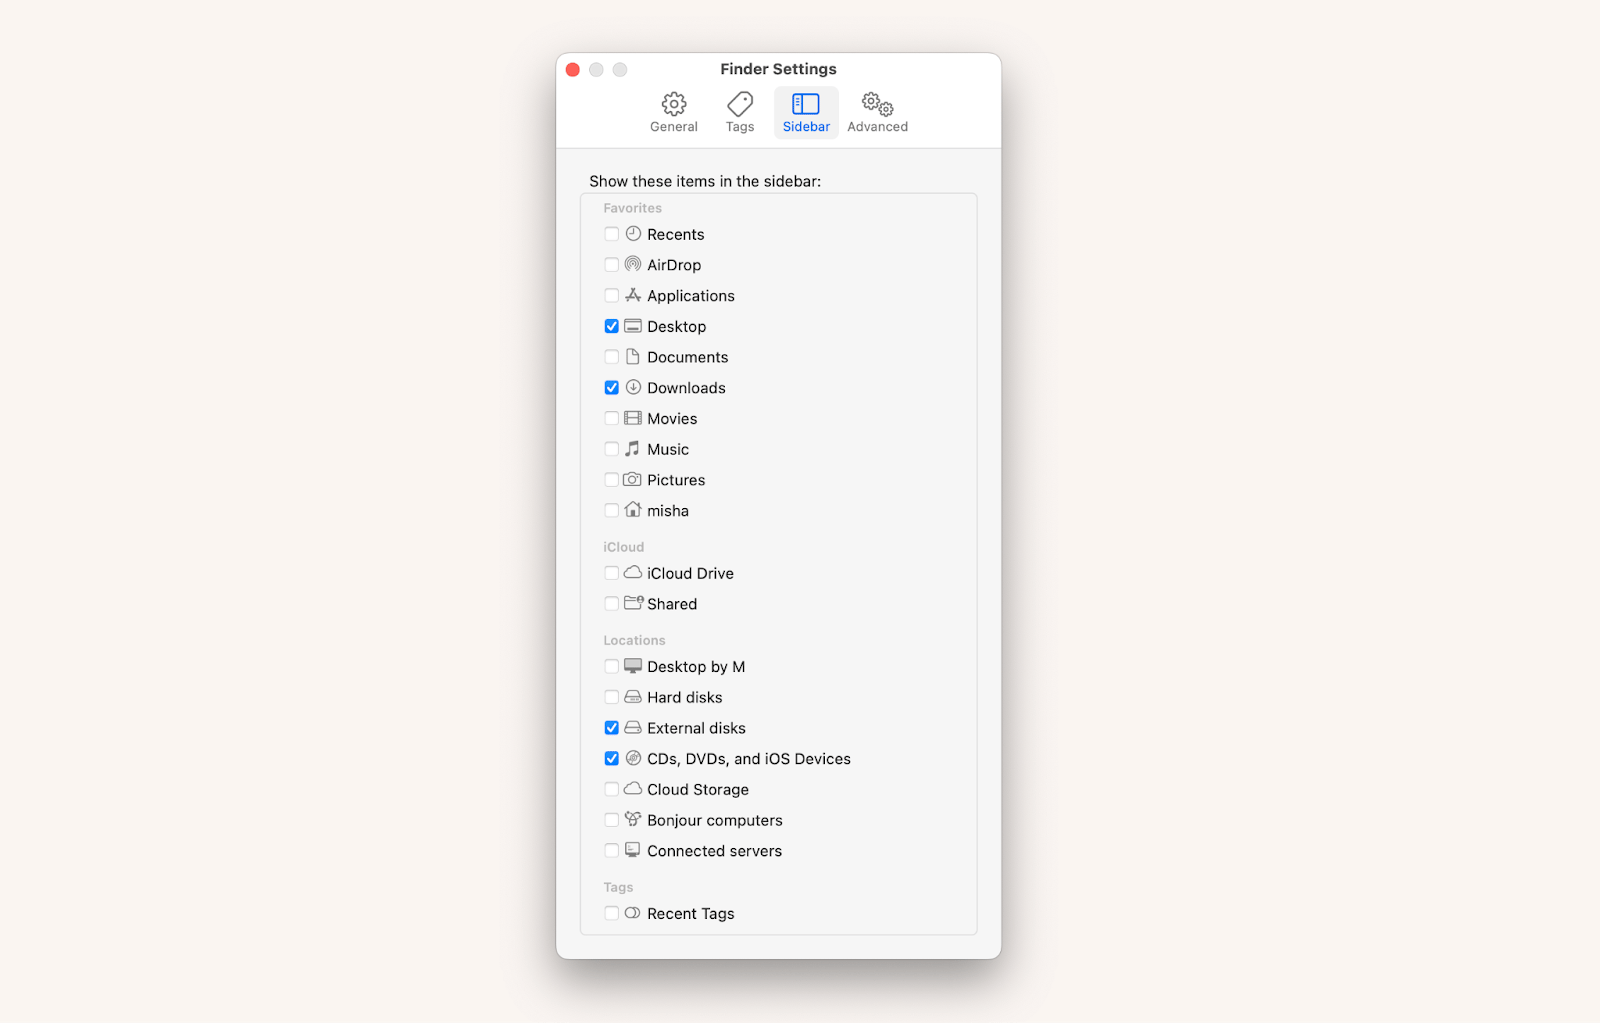
Finally, it’s good to clean up Finder’s sidebar, which features lots of things by default that most people don’t use:
- Go to Finder ➙ Settings…
- Switch to the Sidebar tab
- Uncheck anything you don’t use
Extend your Finder to organize your Mac
As much as you can twist and tweak your Finder, you can’t go too far without using third-party apps and utilities. Luckily, you don’t have to wait for new Finder features to appear in macOS releases — you have access to a great selection of apps through Setapp.
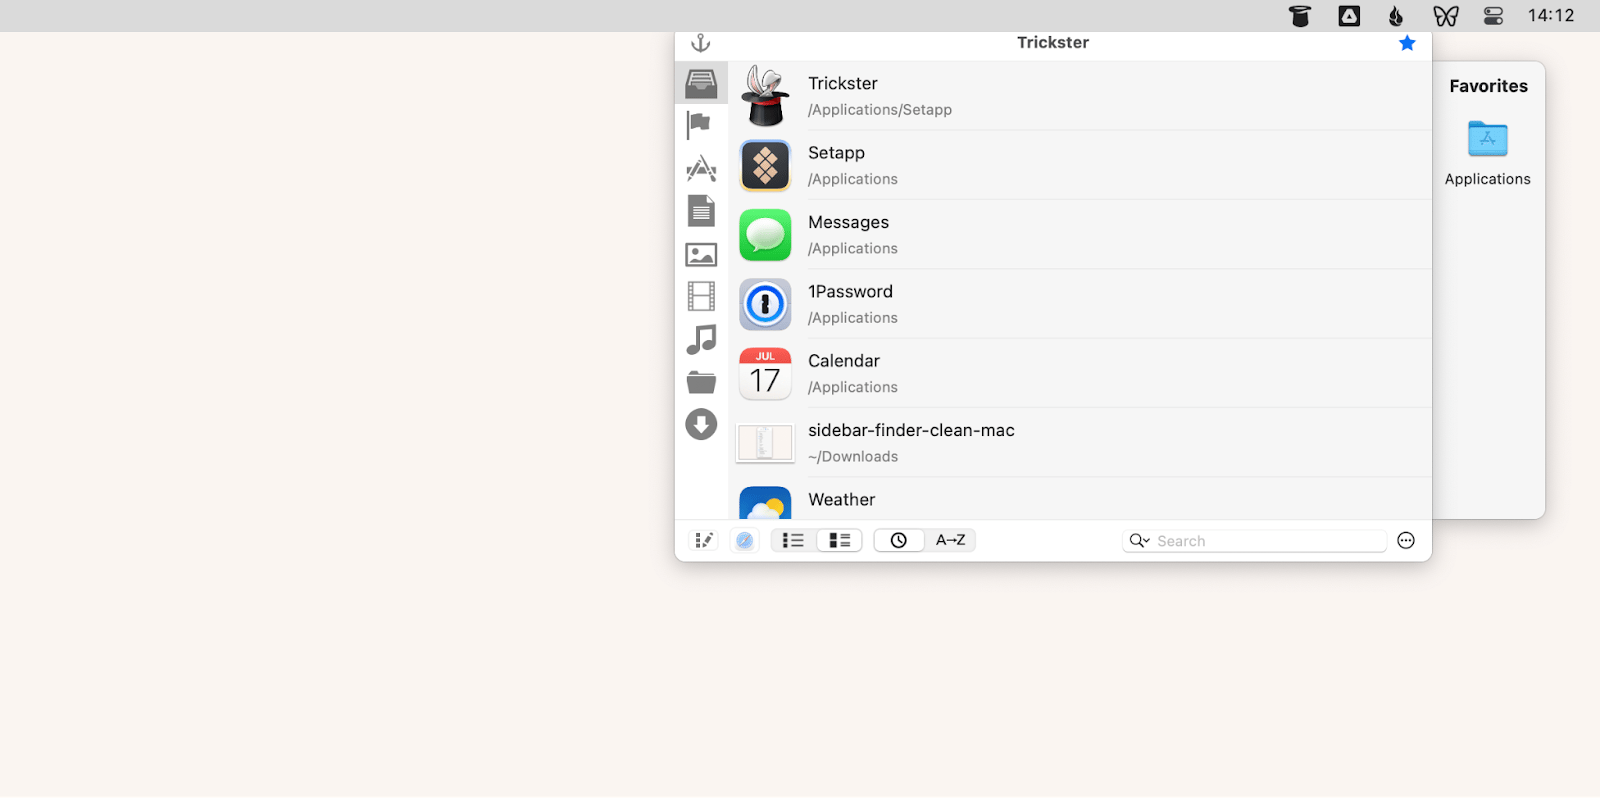
Trickster is a nifty menu-bar utility that expands Finder’s capabilities by keeping track of every file you might find interesting. You can see your recent files and folders, filter them by file type, drag and drop them without opening Finder, and track specific files you change often.
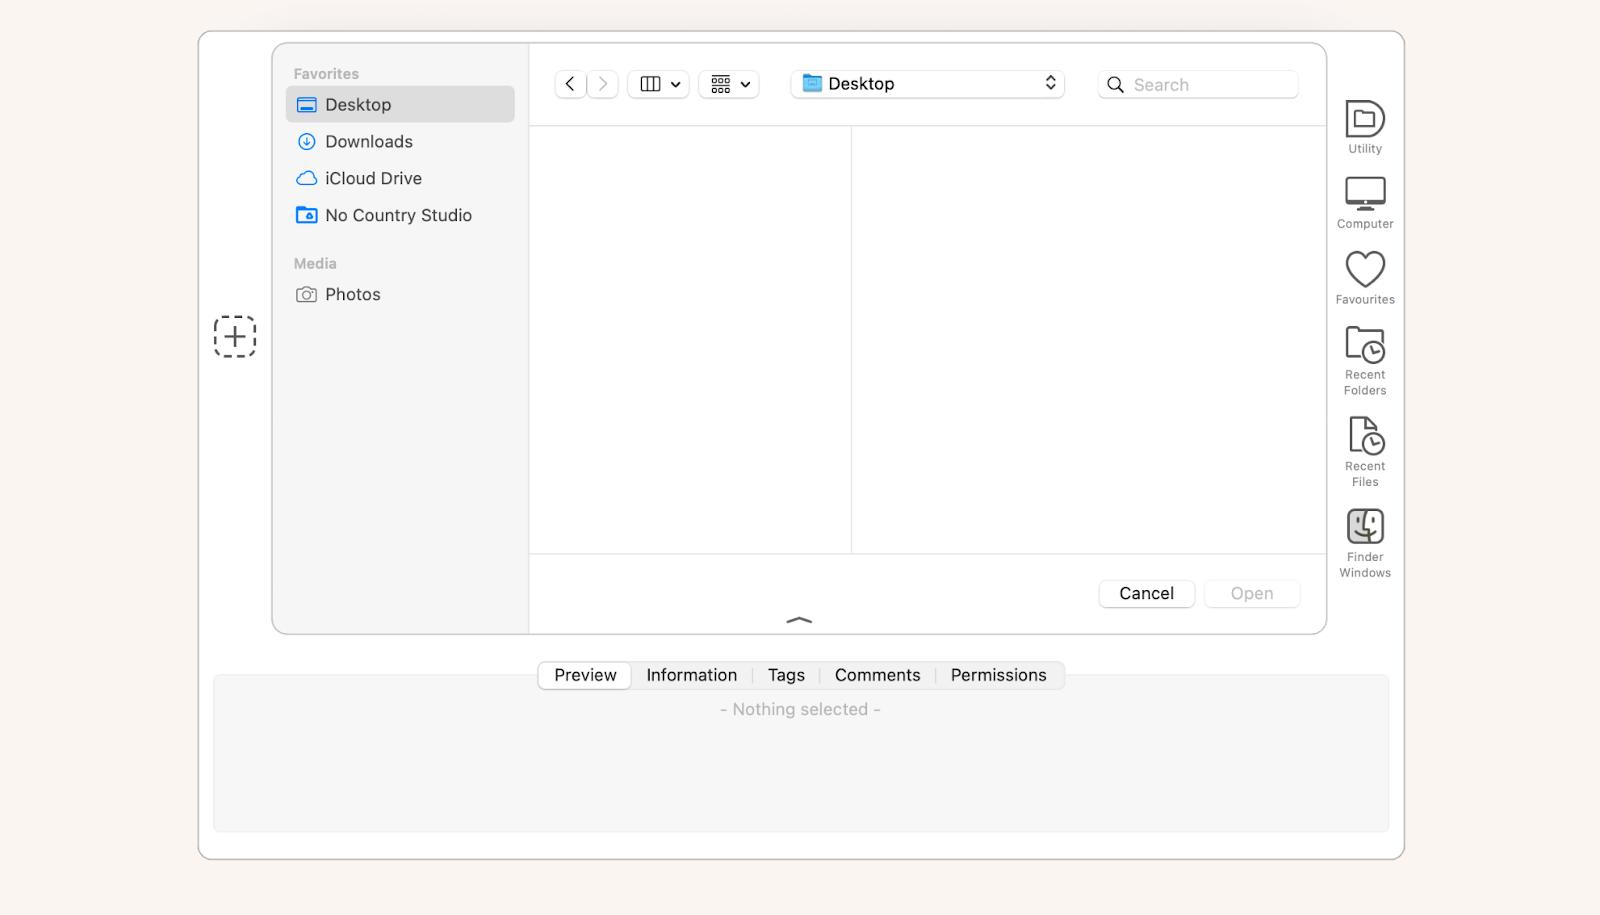
Default Folder X similarly organizes the most important recent files and folders right in the dropdown of the menu bar but also expands the Save and Open dialog menus in Finder itself to change default save location Mac uses.
With Default Folder X, you get extended information about every file, with preview, information, and permissions accessible just below the dialog window. To the sides, you get access to recent folders, favorites, and other frequently-used files. You can configure shortcuts for most actions too, and significantly cut down your Finder dialog navigation time.
If you use your desktop as a temporary space for files and folders, you’d agree that it’s hard to keep it clean. Old files continue to linger before you have the time to figure out their permanent location. Using an automatic organizer like Spotless would help.
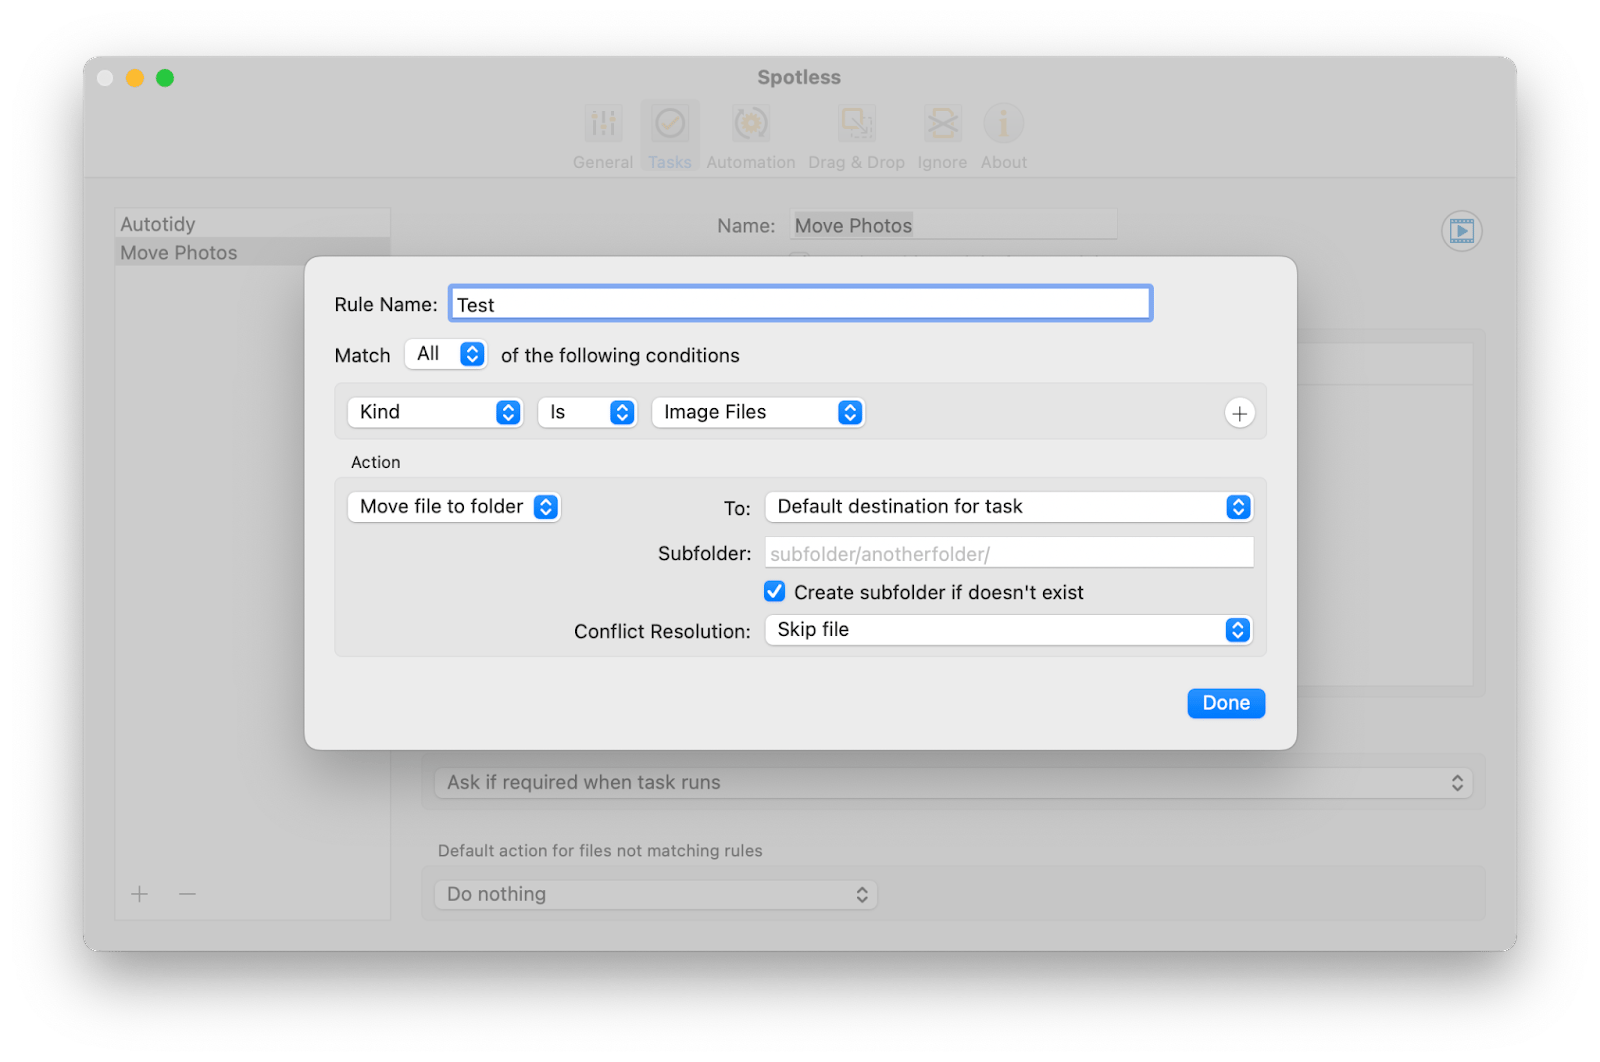
Spotless sorts all your files for you, taking them from your desktop or any other folder and arranging them in the way you specify. You can configure tasks to be done, automation (intervals), drag & drop, and ignore lists. Be as obsessive with file types and sequences as you like.
For example, when you drag and drop an image to Spotless in the menu bar, it can trigger a specific task, such as moving it to your Photos library or other direct folders.
You can save hours every week relying on apps like Trickster, Default Folder X, and Spotless. After all, productivity is not all about what you’re doing but also what you’re able to delegate to an automated solution that can do it for you.
Plus, make sure to customize Mac default save location in Finder along with other settings described in this guide.
Use the features apps — Trickster, Default Folder X, and Spotless — for free during your seven-day trial of Setapp. Setapp is a unique platform with more than 240 curated apps for Mac and iOS across all possible categories. Browse the collection and find your new favorites!


