How to restore Mac default fonts
Macs are known for their beautiful font rendering — the fact which has become even more noticeable since the introduction of Retina screens.
As we spend our days surrounded by text, fonts matter more than ever. The fact that they often seem invisible is precisely the point; but try to change the font you’ve been using to something else, and you’ll instantly notice it — everything will seem a little off.
Sometimes Macs can’t render fonts properly, or the default macOS system font can get corrupted. In this case, you’ll see squares with question marks or icons instead of words on every menu. But don’t worry, it’s an easy fix. Let’s walk through how to change default font on Mac and reinstall fonts that might be causing this issue.
Why do fonts get corrupted on Mac?
Most likely, you need to change system font Mac displays improperly because of some third-party process that somehow has intervened into your system’s font rendering and font recognition.
Unfortunately, simply restarting your Mac or updating your apps or macOS wouldn’t work here. But there are a few easy commands you can use to repair the bug through Terminal.
Here’s how to set default font recognition on Mac:
- Shut down your Mac and power it back on while holding Shift to boot in Safe Mode
- In Safe Mode, your fonts should look normal. Launch Terminal.
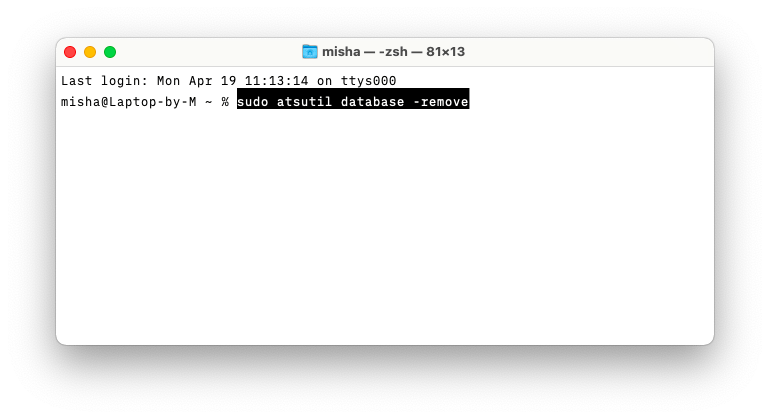
- To clear your font cache and reset the font database, type sudo atsutil database -remove
- To turn off your Mac once again, type sudo shutdown -r now
- Power your Mac back on

Now your default macOS system fonts should be properly displayed and the font database should be rebuilt. You can read the text once again!
How to change default font on Mac
Not every font bug leads to your macOS system fonts being completely broken. More frequently than not, it’s actually third-party typefaces that can interfere with how various apps display text. In addition, if you’re a font aficionado, it’s easy for your font library to grow uncontrollably and take up lots of space on your hard drive.
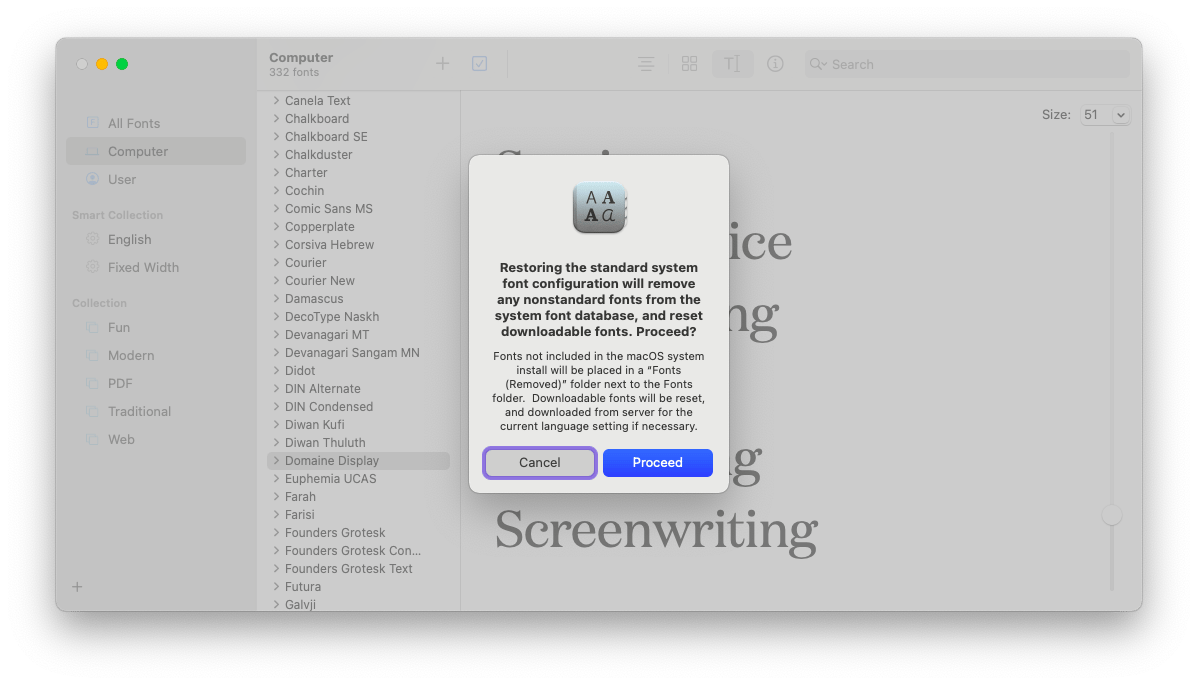
What you can do to resolve situations like these is to reinstall fonts back to default settings using Mac’s Font Book utility:
- Launch Font Book from your Applications folder
- Navigate to File ➙ Restore Standard Fonts…
- Click Proceed

Now, only the fonts that have been shipped together with macOS will be left in Font Book.
Note: Your third-party fonts won’t be deleted completely. You can still find them in the Fonts (Removed) folder (in System ➙ Library) next to your newly reset fonts and reinstall them as necessary.
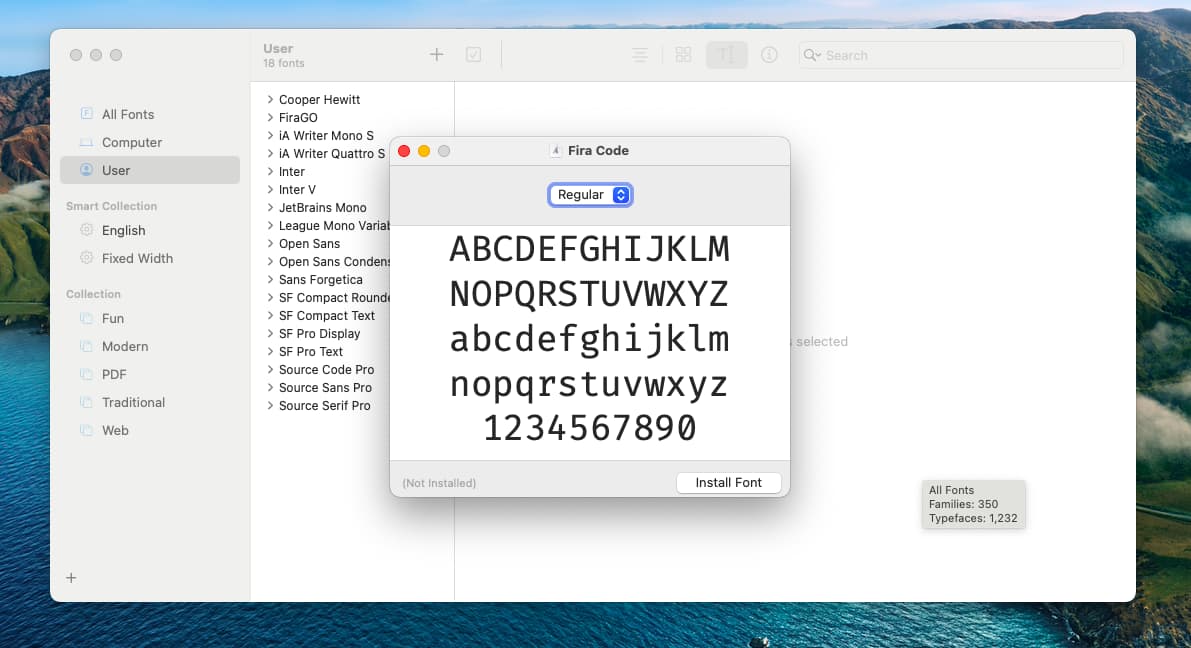
To reinstall your fonts again, or install any fonts you buy in the future, simply make sure they are in either .ttf or .otf format, double-click on the file to bring up the Font Book menu, and click Install Font. If you have multiple weights of the same font, you can select and install them all at once. You can see the newly installed fonts in the User tab in the sidebar of Font Book.

The best font apps on Mac
While Font Book does the basics of keeping your system and downloaded fonts in one place, it’s not a particularly powerful app and doesn’t have many features that typography enthusiasts would be delighted to see. So it’s worth exploring other high-quality alternatives that add new functionality to the mix.
Typeface a brilliant font manager that picks up right where Font Book left off. While it uses the same library of default and third-party fonts on your Mac (so there’s nothing to reinstall), it also lets you preview more than 2,000 Google web fonts right within the app. The preview panel itself is much more visual and customizable as well, making it easier for you to pick the right font for your next project.
You can even use Typeface to compare fonts side by side and by overlaying them on top to detect the smallest of differences. Dark mode is the best way to see how your fonts perform on different backgrounds, and PDF to print lets you evaluate fonts on paper. Check out our article about how to add fonts to your Mac.
When you’re selecting fonts in Typeface, you can create custom collections and tag fonts for seamless future reference.

Glyphs Mini is the perfect app for those who want to take their typeface work to another level. Sometimes you want to adjust fonts or create icons or logotypes with a customized look. Well, Glyphs Mini features an easy to use vector editor that will help you transform every character, export the new variation as a complete font, and use it anywhere.

As you can see, when you have a critical problem with your Mac default fonts, you can use Terminal to resolve it. And when you think third-party fonts interfere with your Mac, now you know how to set default fonts with Font Book. Beyond that, if you like typography, you should absolutely switch to using Typeface as your default font library and Glyphs Mini as your type editor.
Best of all, Typeface and Glyphs Mini are available to you absolutely free through the seven-day trial of Setapp, a platform with more than 210 top-performing apps in the world, from system monitoring (iStat Menus) to media conversion (Permute). Try every Setapp app at no cost today and create your own collection of favorites.


