Screenshot not working on Mac? Here’s how to fix it quickly
- Screenshots work by default on Mac. Just remember the shortcuts.
Press Shift + Command + 3 for a full screen, Shift + Command + 4 for a selection, or add the Space bar to capture a specific window. - Check your shortcut settings and save location first.
Go to System Settings > Keyboard > Shortcuts > Screenshots to verify they're enabled. Also, check where screenshots are being saved via the Screenshot app (Shift + Command + 5). - Malware or system glitches can block screenshot functionality.
If shortcuts aren't working, scan your Mac with CleanMyMac to remove threats, restart the Screenshot utility in Activity Monitor, or boot in Safe Mode to identify conflicts. - Low storage can prevent screenshots from saving.
Check your available space in System Settings > General > Storage. Use CleanMyMac to clear junk files or move files to cloud storage with CloudMounter. - Try CleanShot X and other alternatives for powerful screenshot features.
Apps like CleanShot X, Xnapper, and Capto offer scrolling capture, cloud uploads, editing tools, and more. Get instant access with a free 7-day Setapp trial and explore 260+ other apps for your Mac, including CleanMyMac and CloudMounter.
Imagine asking webinar attendees to smile for a picture — only to find that your Mac won’t screenshot as it usually would. And think about how awkward I was when I apologized to them for the technical mishap. They would have thought I didn’t know how to screenshot on a Mac.
The good news is, you don’t need to worry about how to turn on screenshots on your Mac, as the feature is on by default. All you need to remember is the key combinations for your screenshots:
- Press and hold Shift + Command + 3 to capture the entire screen.
- Press and hold Shift + Command + 4 to capture a part of the screen.
- Press and hold Shift + Command + 4 + Space bar to capture a window or menu.
The instructions are simple. But sometimes, your Mac’s screenshot is not working despite using the correct shortcuts. To fix the issue, try the methods below.
Need quick help? Use our free ChatGPT assistant, how to screenshot on Mac, to find an instant solution for your exact case.
How to fix screenshot not working on Mac step by step
If you can’t get Apple’s default screenshot shortcuts to work, try these methods.
1. Check your Mac screenshot shortcut settings
Before assuming the worst, take a quick look at your Mac’s screenshot shortcuts and make sure they’re configured correctly. If some of its settings have been altered, you won’t be able to take a screenshot. To check the settings, follow these steps.
- Click on the Apple logo at the top left.
- Select System Settings.
- Click Keyboard > Keyboard Shortcut.
- Make sure all the options on the right are checked. If they’re not, enable them or click Restore Defaults.
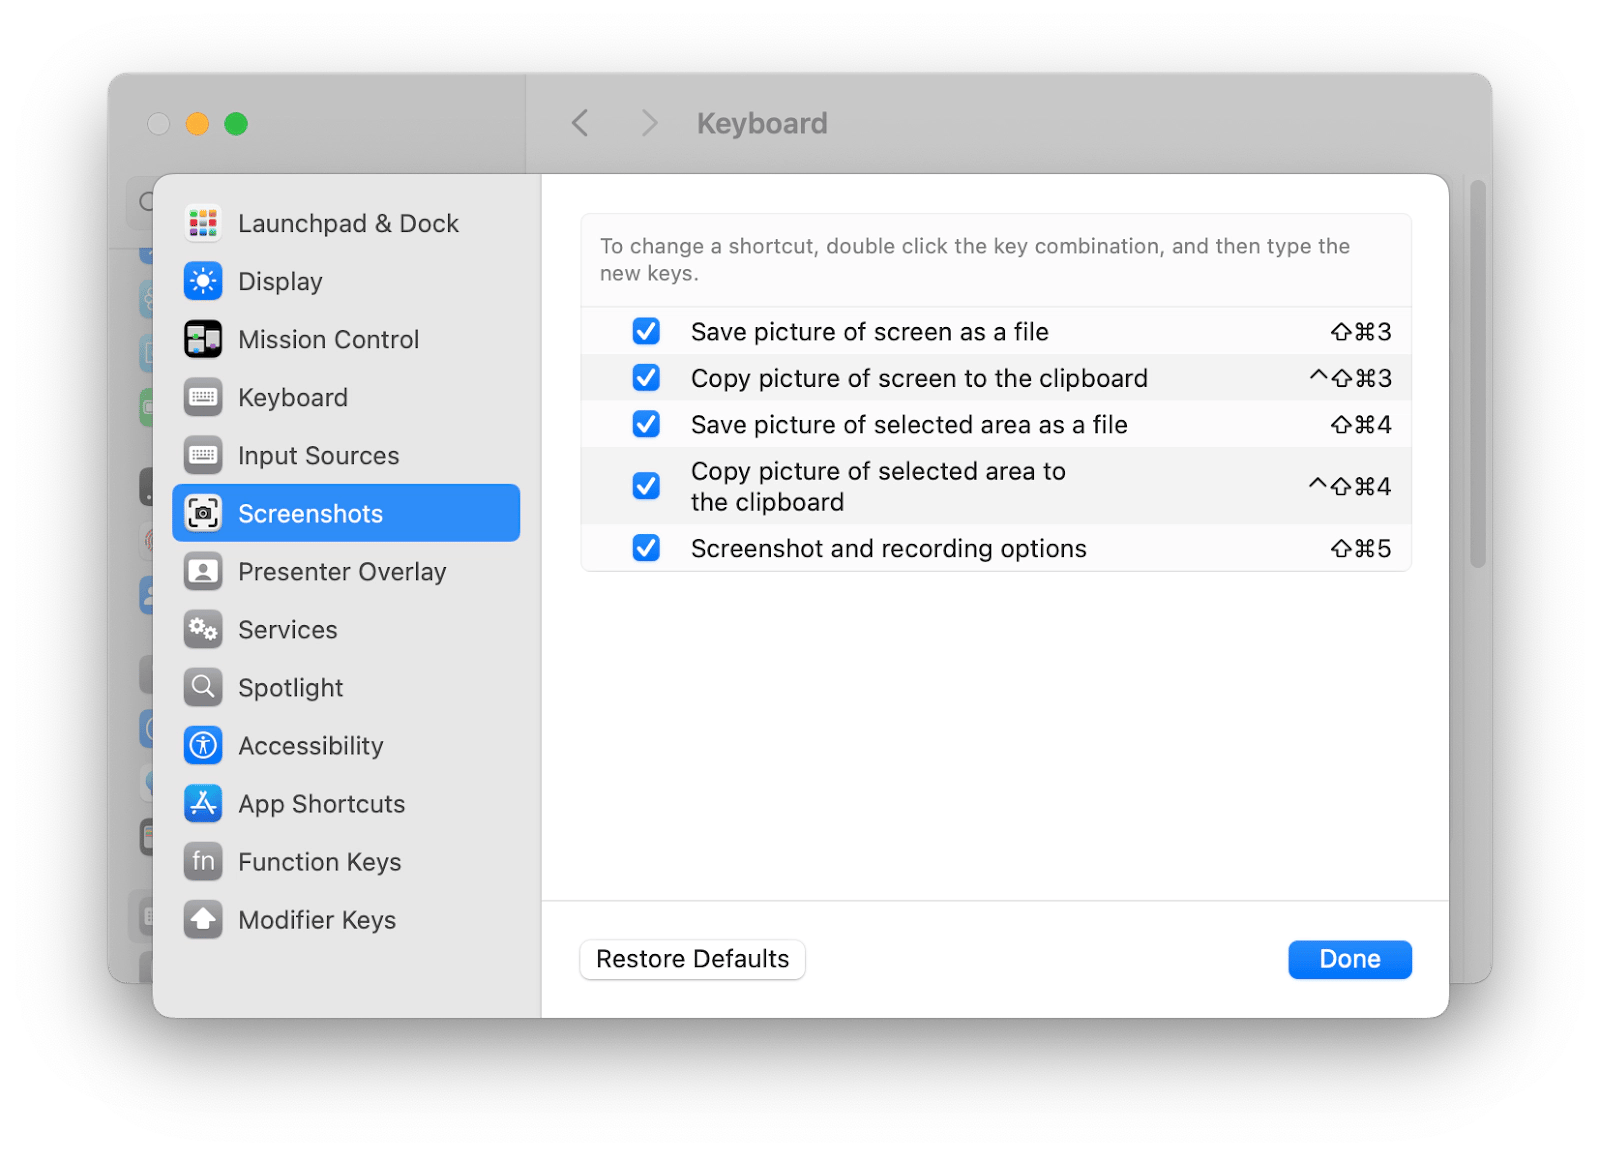
Try the screenshot shortcuts again. They should be working now.
Learn more about how to take screenshots on Mac.
2. Check where your screenshots are saved on Mac
Sometimes, you can’t capture on-screen images, not because the screenshots are not working on your Mac. Rather, your Mac has saved the screenshots in a different destination. If so, check where the screenshot tool is saving your screenshots.
- Open the Screenshot app (or press Shift + Command + 5)
- Click Options at the Screenshot app’s menu.
- See which location is currently enabled. You’ll see a tick sign next to the current location.
- Select the location you want to save the screenshot.
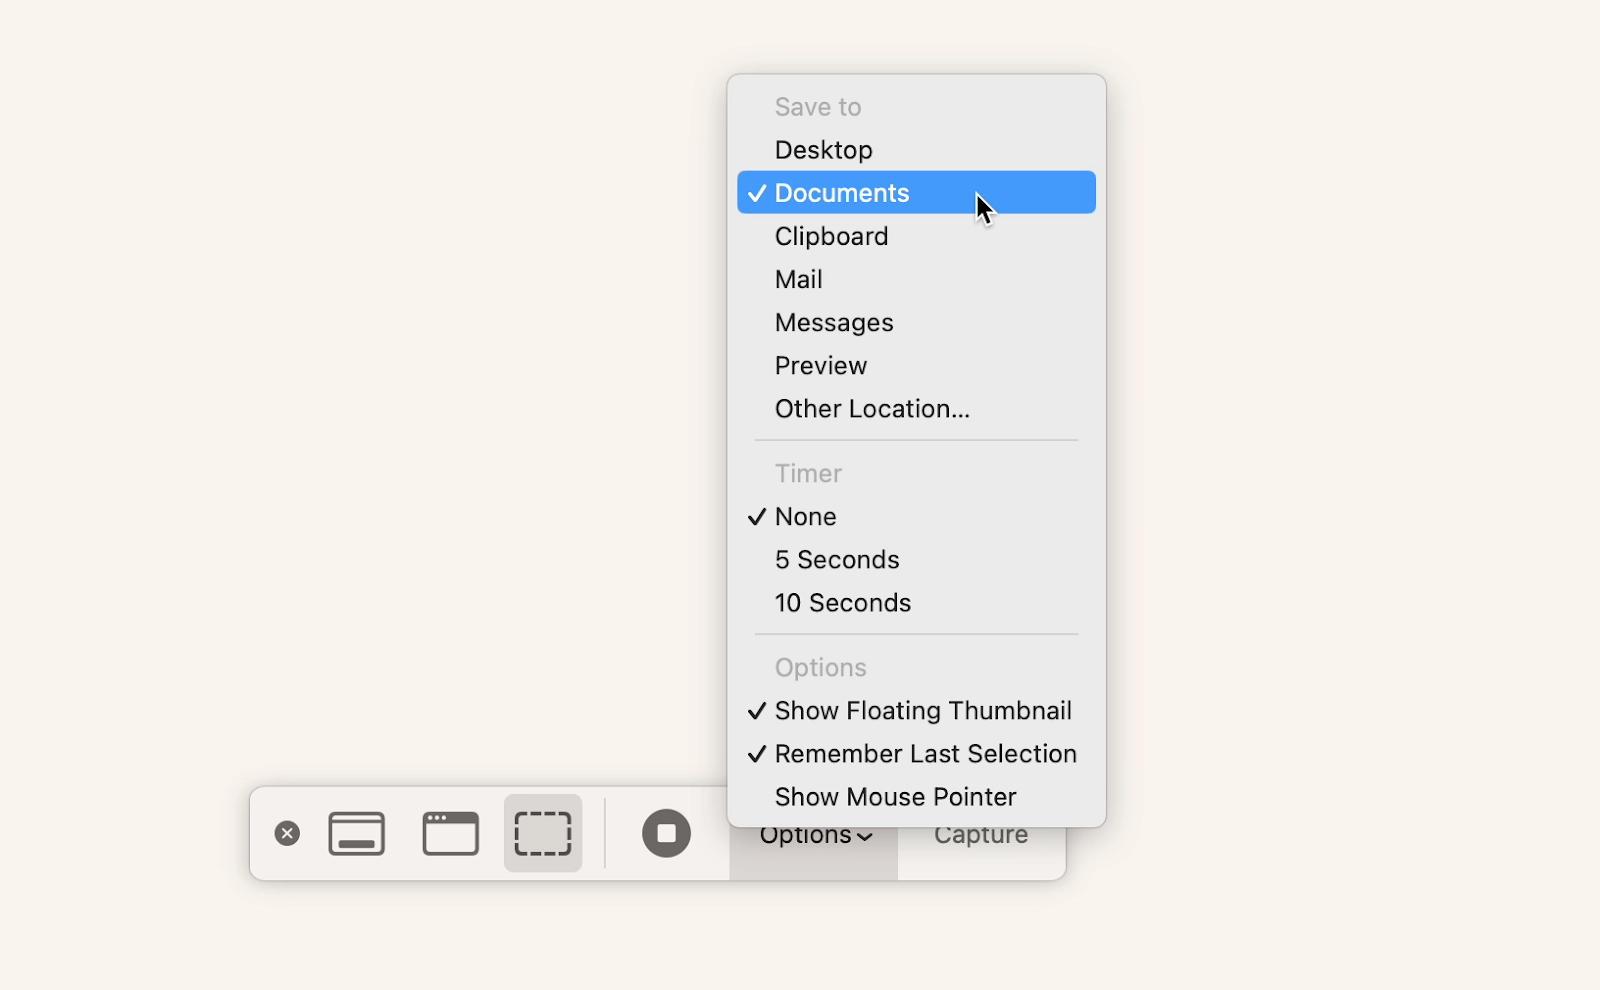
Your subsequent screenshots will be saved to the new location. If you want to find the past screenshots, go to the previously selected location. However, you may not find them if they’re saved in the Clipboard and have been overwritten.
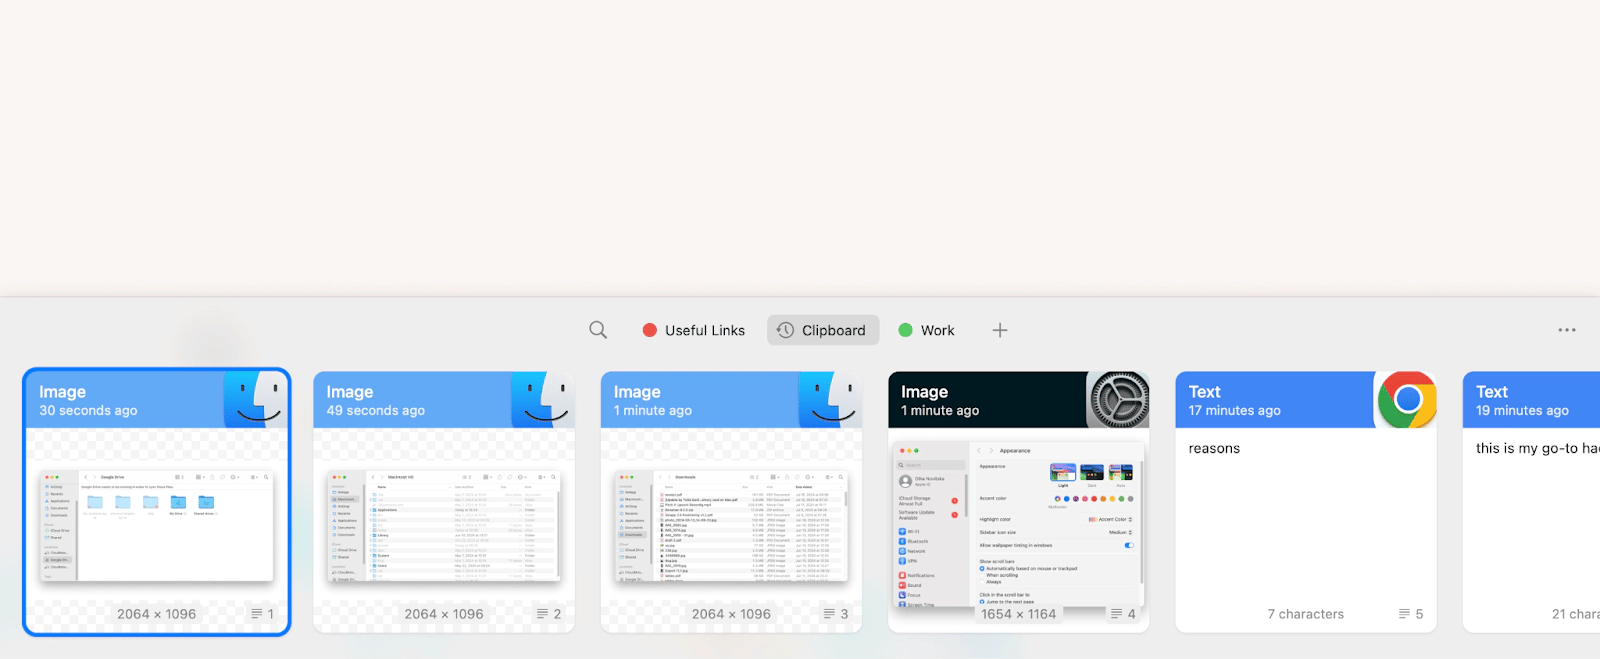
To prevent that, I use Paste. It’s an app that saves all clipboard history, including images, text, links, and more, and automatically syncs it to the cloud. This way, I wouldn’t lose any of my screenshots if they were set to be sent to my Mac’s clipboard.
3. Scan your Mac for malware
Sometimes, malware or system corruption can prevent screenshot functionality on a Mac. Other signs of infection include slow performance, system crashes, frozen screens, or unexpected app behavior. Even subtle issues, like MacBook screenshots not working, may indicate malware.
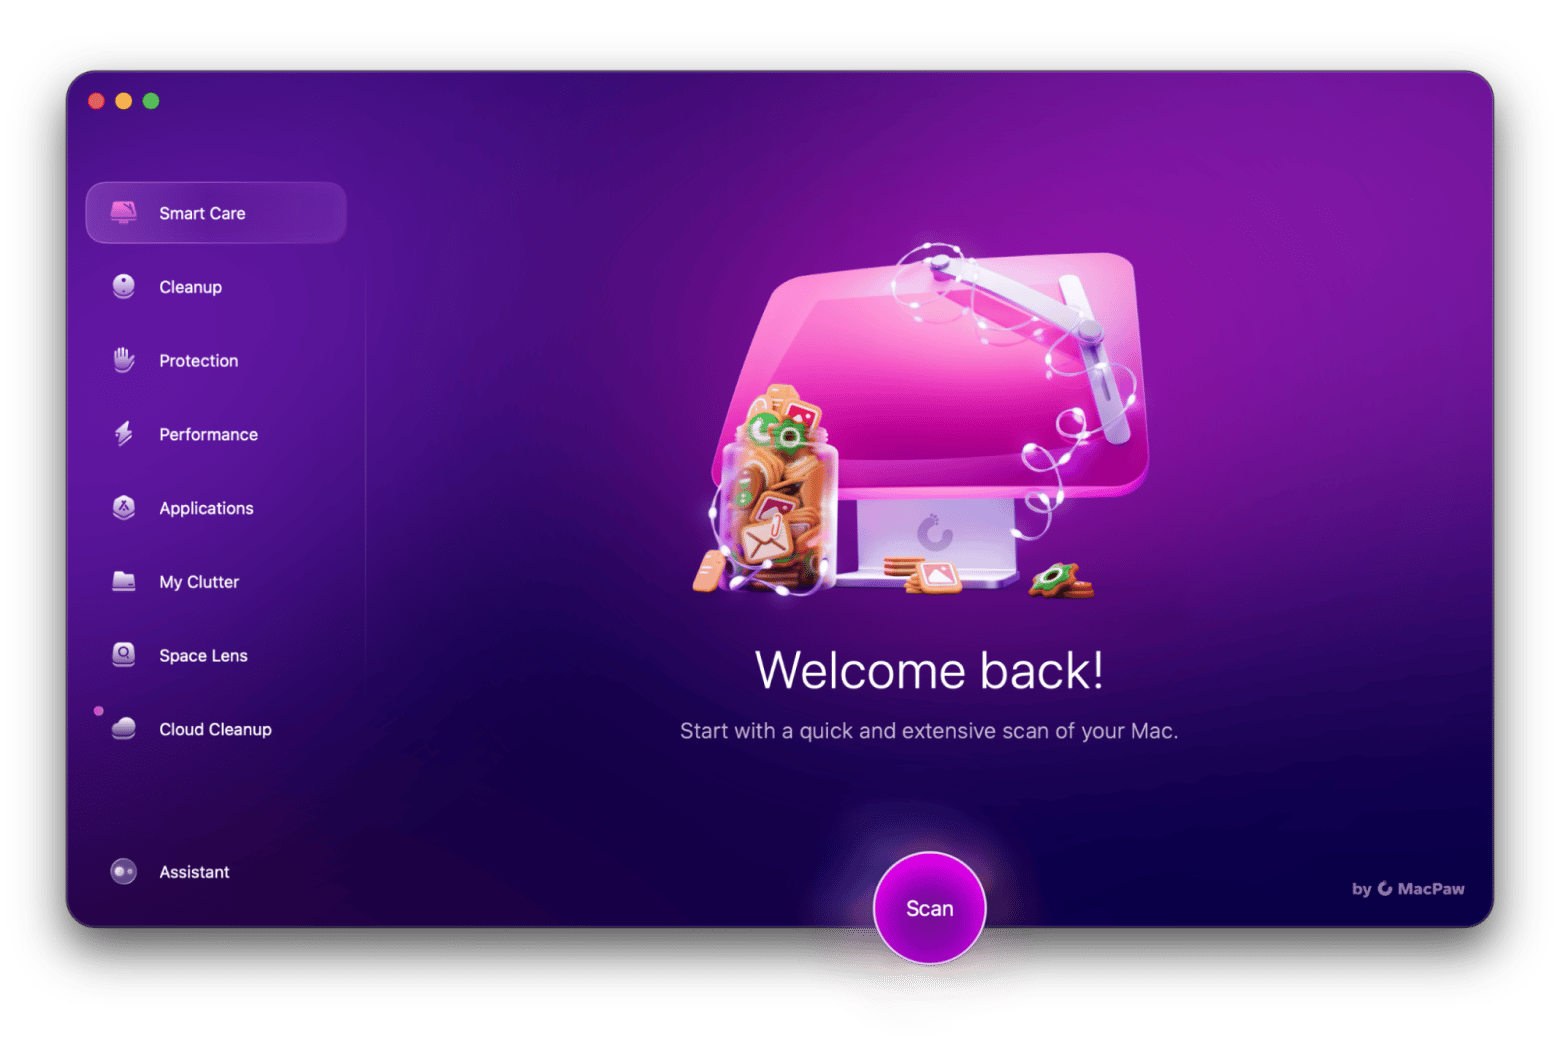
To fix this, scan your Mac with a trusted tool like CleanMyMac. Open the app, run a malware scan (Protection tab), and remove any detected threats. CleanMyMac also helps clear junk files, uninstall unused apps, and optimize your system. After the scan, try taking a screenshot again to confirm your Mac is back to normal.
4. Restart the screenshot utility on Mac
Another reason why image capture is not working on Mac is that the screenshot utility has stalled. When the screenshot service is not running, it can’t pick up the shortcut keys you pressed. To restart it,
- Go to Applications > Utilities
- Select and open Activity Monitor.
- Find and select Screenshot in the process name.
- Click on the X button at the top left of the window.
- Click Quit when asked to confirm.
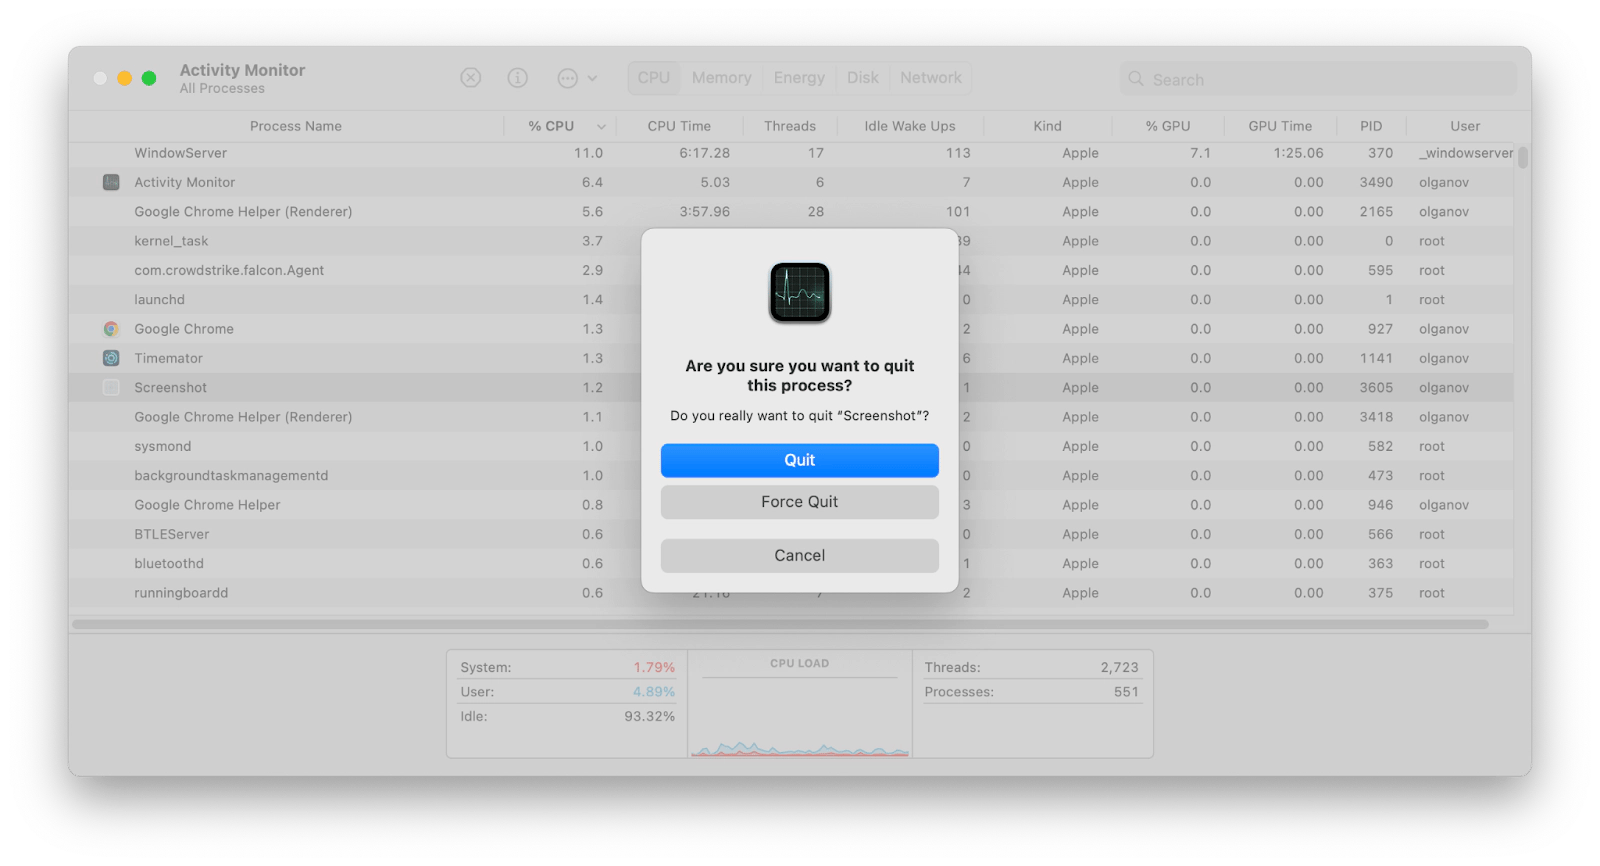
If the screenshot utility is still running, repeat the steps but select Force Quit instead of Quit. Apple would then automatically relaunch the utility. Try taking a screenshot to confirm it’s working again.
5. Use Preview to take screenshots on Mac
Despite your efforts, the screenshot shortcut might still refuse to function. As a workaround, try capturing with Preview, a native macOS app for basic photo editing. Here’s how.
- Open the Preview app.
- Click File > Take Screenshot.
- Select From Selection, From Window, or From Entire Screen.
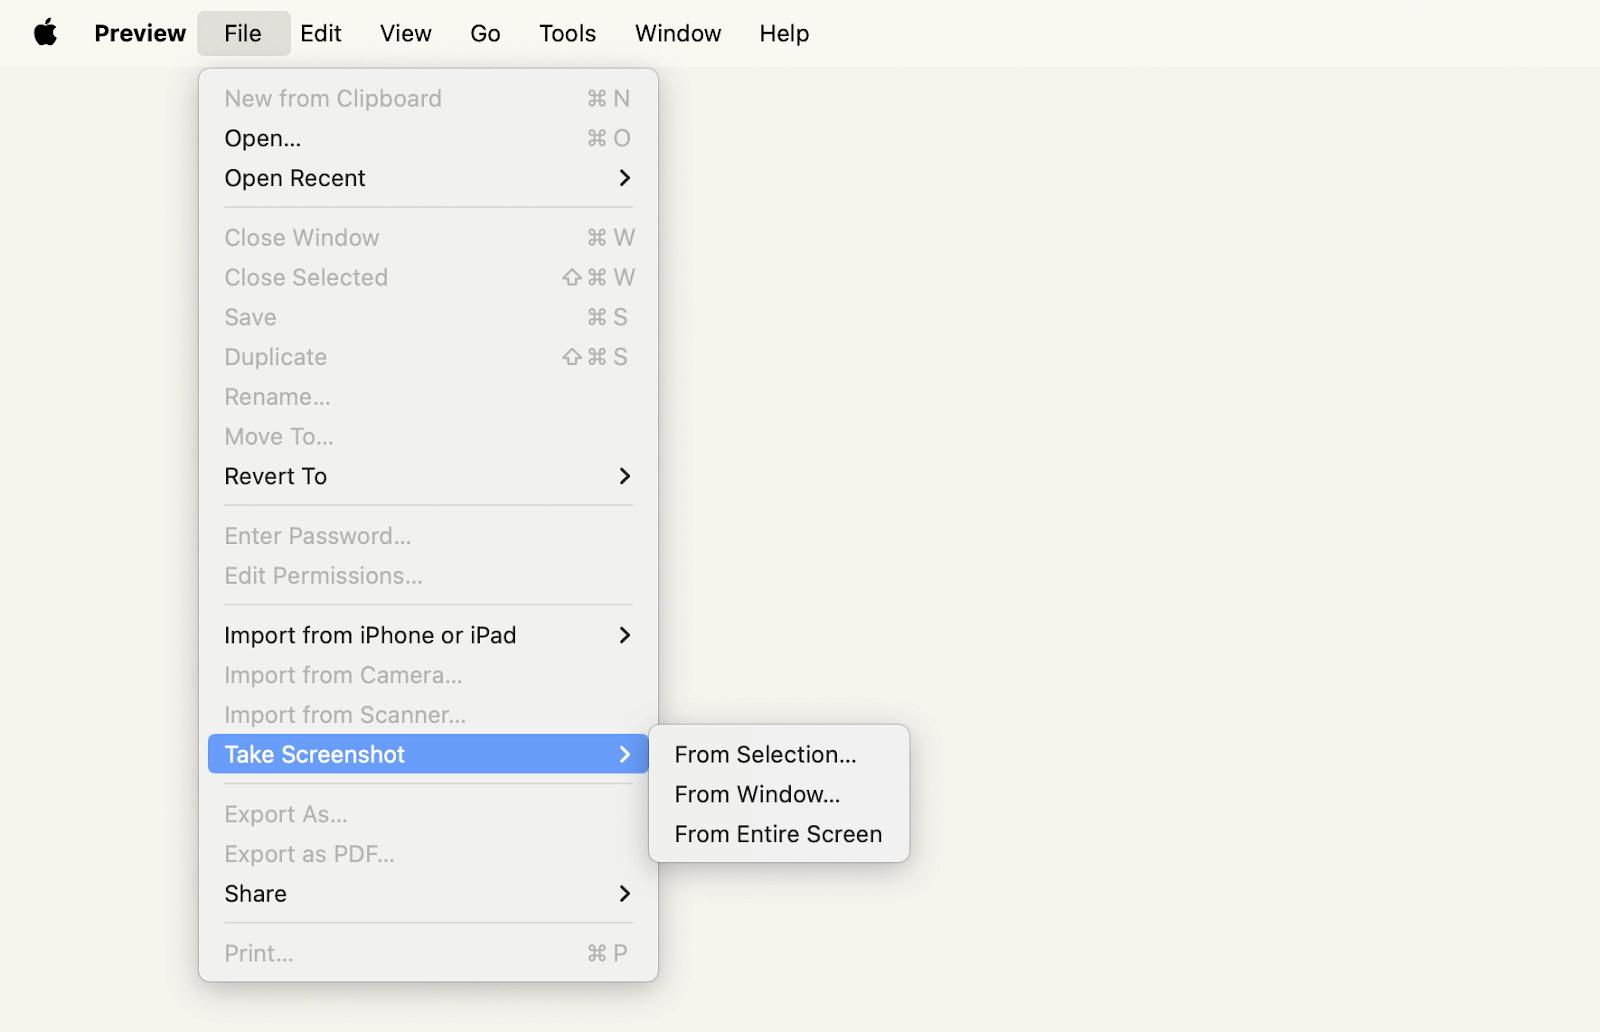
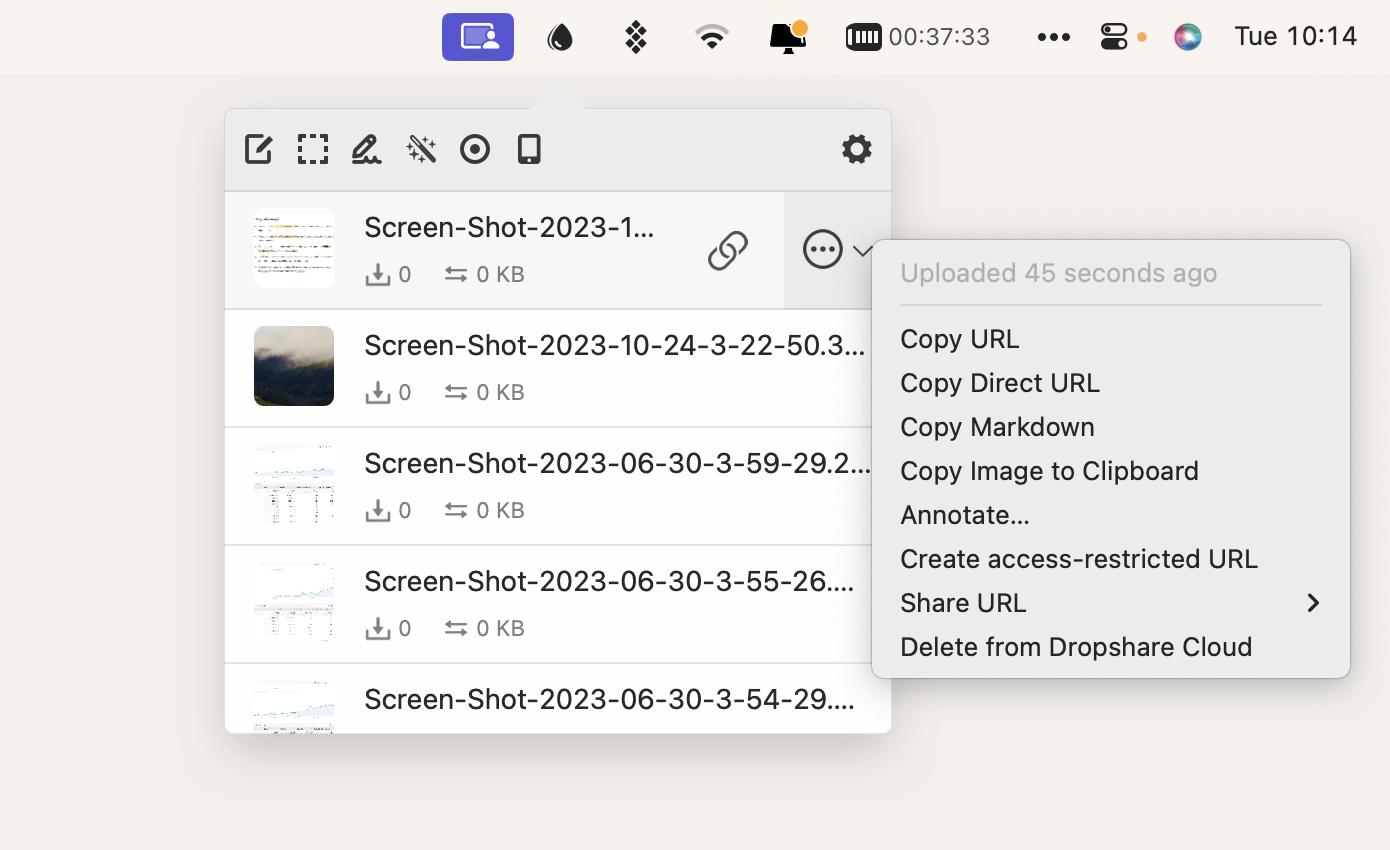
You will find the captured image loaded on Preview, which you can save to your Mac. Then, you can upload it to Dropshare so that you don’t lose it. If you’re worried about privacy, you can secure access to your screenshots with passwords. Besides, Dropshare lets you share your screenshots easily with friends with links.
Check out the full guide on how to crop a screenshot on Mac.
6. Alternative apps to fix screenshot not working on Mac
If you don’t want to spend the next hour trying to fix the Mac’s screenshot, you can try alternative apps. Here’s my top 3.
- CleanShot X. Personally, I prefer CleanShot X. This tool lets me capture and save my screenshots directly to the cloud. I can also hide desktop icons before capturing and editing the screenshots I took before sharing them with others. More importantly, CleanShot X is easy to use. You can capture your screen with shortcuts or by selecting the type of screenshot from its menu.
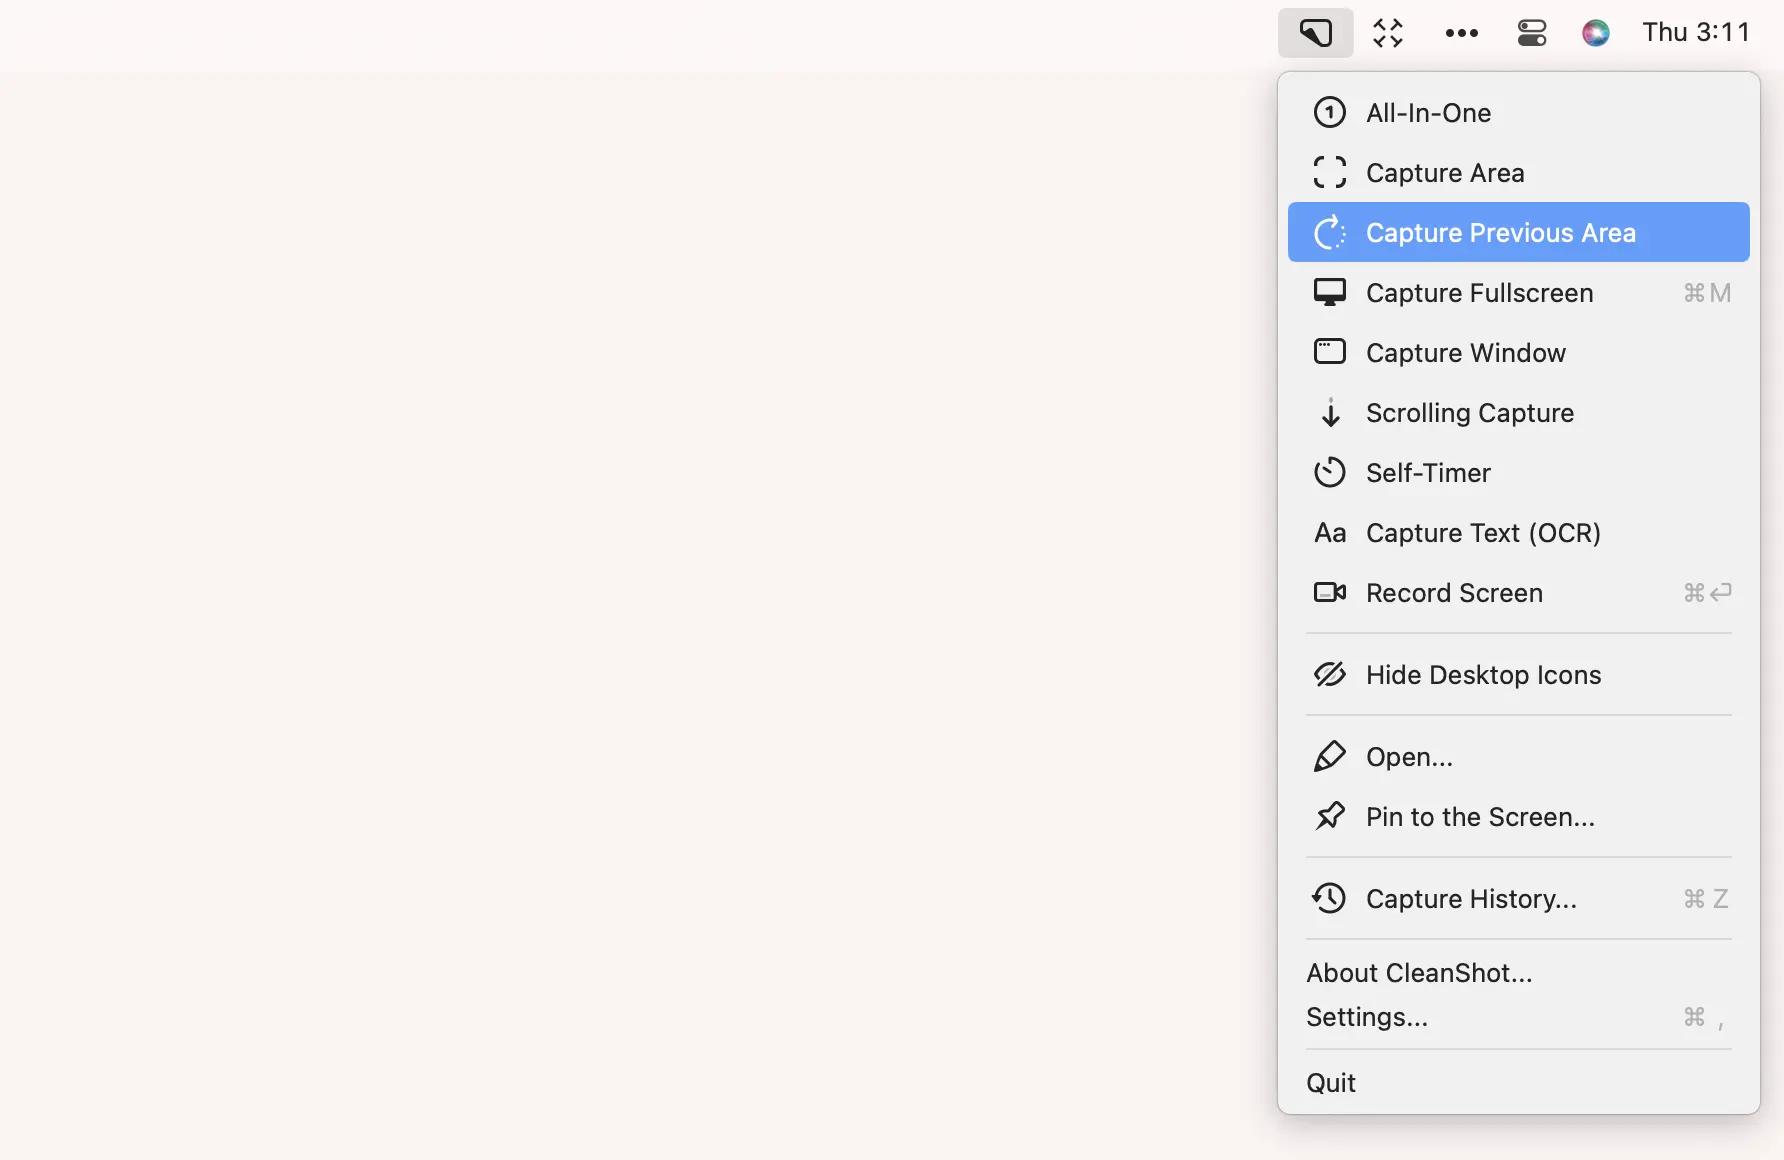
Besides taking standard screenshots, CleanShot X can perform a scrolling capture, which automatically scrolls down the webpage while capturing its content. I find this feature useful when discussing ideas with web designer colleagues.
- Xnapper. Like with CleanShot X, I can easily capture any part of my screen by selecting the area. But what makes Xnapper special is how it allows me to edit the screenshots to make them more visually appealing.
Let’s say I want to share a chart I found on a website with my LinkedIn audience. I can use Xnapper to add a background, hide sensitive information, and align it with a few clicks.
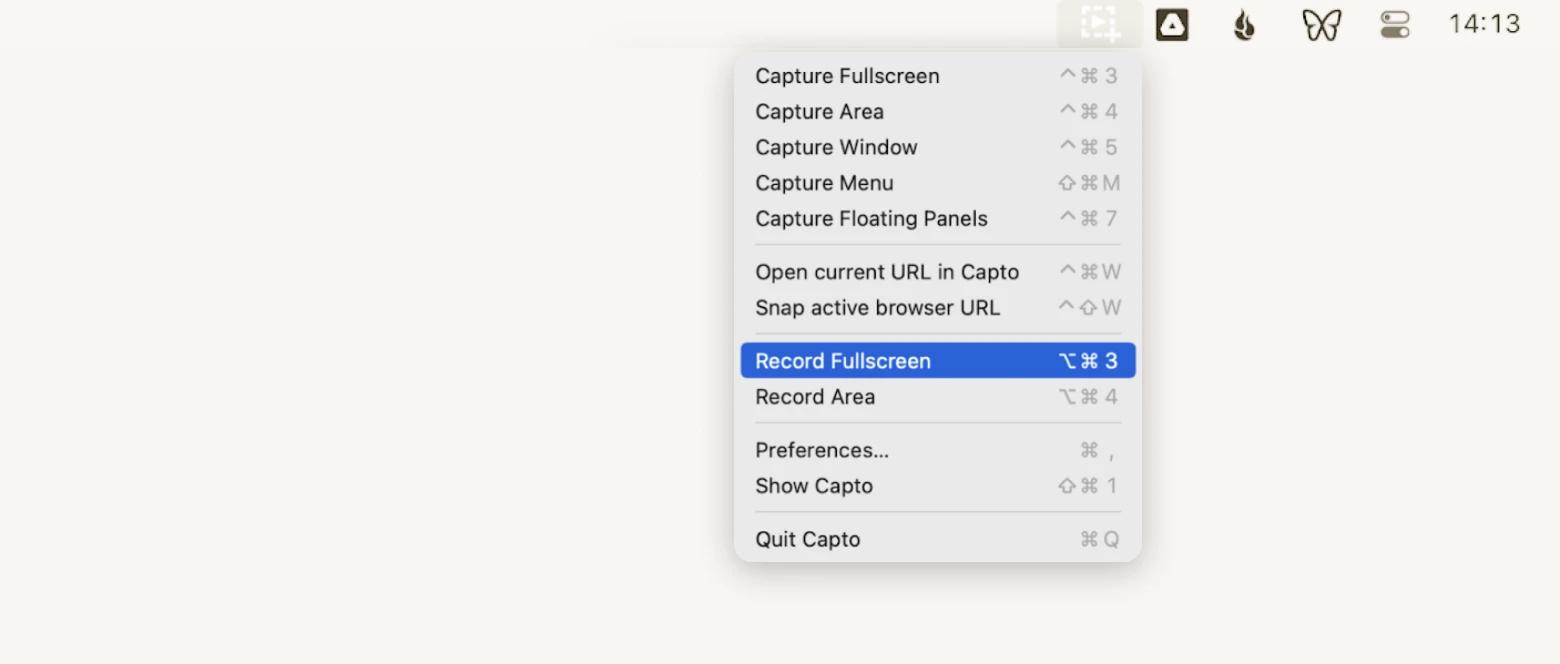
- Capto. If you want a screenshot app with video recording capabilities, Capto is the go-to alternative. It does all the basic stuff you expect, from capturing your Mac’s screen to editing and sharing them on social media.
7. Restart Mac in safe mode to fix screenshot issues
Sometimes, a temporary system glitch can trigger the Screenshot on Mac not working issue. Usually, rebooting your Mac will solve the problem. Just power off your MacBook, restart it, and try the Screenshot shortcuts.
If they didn’t work, the problem might be more persistent. For example, some apps you recently installed are causing conflict with Mac’s Screenshot service. To find out for sure, load your Mac in safe mode. You can do so by following these steps.
- Turn off your Mac.
- Power it on and hold the Shift key.
- Log in to your Mac. You should see the Safe Boot wording at the top right of your screen.
Try capturing again with the shortcut keys. If they work, that means some apps or services that run in the normal mode are preventing the screenshot function.
8. Reset NVRAM to restore screenshot functionality
The screenshot tool, along with other services on your Mac, stores some parameters in a special memory module called NVRAM. If the parameters are corrupted, the screenshot tool won’t be able to function correctly. In that case, resetting the NVRAM can restore it. Here are the quick instructions:
- Turn the Mac off.
- Turn on the Mac and immediately press and hold Option + Command + P + R.
- Hold the keys until the Mac restarts.
- Release the keys when you hear the startup sound or see the Apple logo.
- Allow the Mac to restart automatically.
Now, this method only works if you’re using an Intel-based Mac. For Macs powered by Apple’s silicon, the process is handled by the processor chip itself. So, just restarting your Mac might solve the issue.
If you need more details on how to reset NVRAM, check out this guide.
9. Ensure your Mac has enough storage for screenshots
Though rare, screenshots on Macs not working can also be due to low storage space. Usually, you will get other tell-tale signs, such as your MacBook struggling to load.
If you’re unsure, you can check how much storage you have by selecting Settings > General > Storage. Then, check how much storage you’ve used up (you can use our guide for it). If you barely have any storage space left, you’ll need to delete unwanted apps or files. Again, here’s where CleanMyMac proves handy. It scans your Mac for junk files so you can remove them for more space.
Alternatively, you can subscribe to cloud storage providers like Google, Dropbox, and One Drive. Personally, I store my files on several cloud drives and connect them to my Mac with Cloud Mounter. This way, I can browse them as if they’re stored on a local disk.
Why screenshot not working on Mac, and what causes it?
There’s no simple answer to this. Usually, I would put on my investigative cap to reason why I couldn’t take a screenshot when I badly needed to. But such effort is futile. Many factors might cause your Mac’s screenshot to fail. For example:
- Glitches in the macOS or other apps
- Malware infection
- Insufficient storage for the screenshots
- Corrupted screenshot configuration
The list could go on. But rather than wondering why isn't my screenshot working on Mac, it’s better to find solutions.
Also, check out where screenshots go on Mac.
How to turn screenshot back on Mac and prevent issues
If you need a quick (and powerful!) solution when your Screenshot tool is down, start with its third-party alternatives. CleanShot X, Capto, or Xnapper are great for capturing the screen and have many more additional features than the built-in tool. You can download them, along with other apps I mentioned on Setapp. Try them for 7 days at no cost.
If you decide to stick with manual fixes, try resetting your Mac, restarting the Screen Capture application, NVRAM, deleting malware, etc. Hopefully, you'll find the fix that allows you to capture screenshots again.
FAQ
Why is my screenshot not working on Mac?
Screenshots may fail due to incorrect shortcuts, full storage, system bugs, or malware. Restarting your Mac and checking shortcut settings often resolves the issue.
How do I fix screenshot shortcuts on Mac?
Go to System Settings > Keyboard > Shortcuts > Screenshots. Reassign or reset shortcuts, then test by pressing Command + Shift + 3 or 4.
Where do screenshots go on a Mac by default?
By default, screenshots are saved to the Desktop. You can change the location via Screenshot app settings (Command + Shift + 5).
Can malware stop screenshots from working?
Yes. Malware can block system functions, including screenshots. Scan your Mac with CleanMyMac or another trusted tool to remove threats.
What's the best app to take screenshots on a Mac?
For advanced features, apps like CleanShot X make it easy to capture, annotate, and manage screenshots efficiently.


