How to downgrade macOS Sequoia on the first try
Every fall, my colleague from the IT security department gives the same advice: “Wait a few days after a new OS release before upgrading. Early versions often have bugs or compatibility issues that could disrupt your work.”
This is usually what I do, but this year, my curiosity got the better of me. Not only did I skip the waiting period, but I also installed the Sequoia beta. And sure enough, after a few days of testing, I had to downgrade.
If you've also upgraded and now want to roll back because of bugs or other issues, you can downgrade from macOS Sequoia to Sonoma, too. This guide shares my experiences and tips — I hope you find it helpful!
Before downgrading macOS Sequoia
Before you downgrade macOS Sequoia, start with proper preparation. First, check that your Mac and essential apps are compatible with the target macOS version using themacOS Compatibility guide. Then, close all running apps and back up your Mac to protect your data. Taking these steps upfront helps prevent data loss and avoids app compatibility issues after the downgrade.
Step 1. Prepare a backup
When downgrading, you’ll need to completely wipe your MacBook’s hard drive. That means making a full backup of your system — or at least of your most important files.
To back up your Mac downgrade, you'll need a storage device. Ideally, it should be twice the size of your Mac’s hard drive.
Here’s how to prepare your backup drive:
- Connect the drive to your Mac.
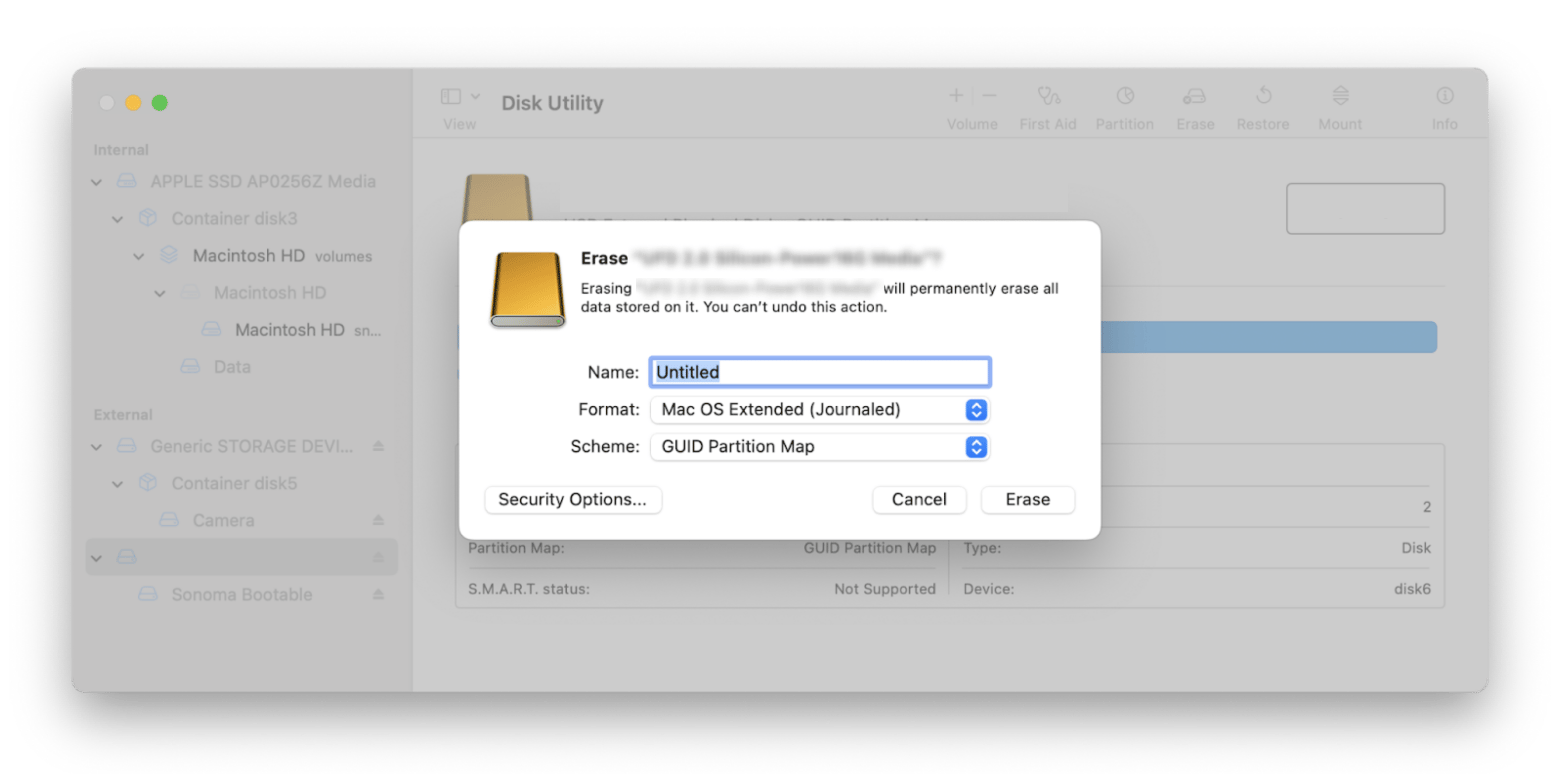
- Open Disk Utility and select Erase.
- In the Format drop-down menu, choose APFS or Mac OS Extended (Journaled), then click Erase.
- Close Disk Utility.
Next, create your backup using Time Machine:
- Open Time Machine by going to System Settings > General > Time Machine.
- Click Add Backup Disk, choose the desired disk, and click Set Up Disk.
- Set a password if desired (you’ll need it to restore the backup later), then click Done.
- Click Options to configure which files to back up and how often, then click Done.

Backing up should start automatically. If not, click the clock icon in the menu bar and select Back Up Now. Wait for the backup to complete.
Alternatively, use Get Backup Pro if you want more control and smaller backup sizes. It creates highly compressed backups, lets you choose specific folders or system data, and supports incremental backups to save time and disk space. This makes it especially useful if you’re backing up a large Mac or working with limited external storage.
Step 2. Clean up your Mac's junk
I like to think of this step as cleaning up a construction site before starting a new build.
Over time, your Mac accumulates system junk that can interfere with the smooth work of a new operating system. Since it's nearly impossible to remove this junk manually, I recommend using CleanMyMac. It's a Mac care app that clears out system trash, removes viruses, and speeds up your system.
To clean up your Mac:
- Install and open CleanMyMac.
- Click Scan.
- Review the junk found and click Run to remove it.
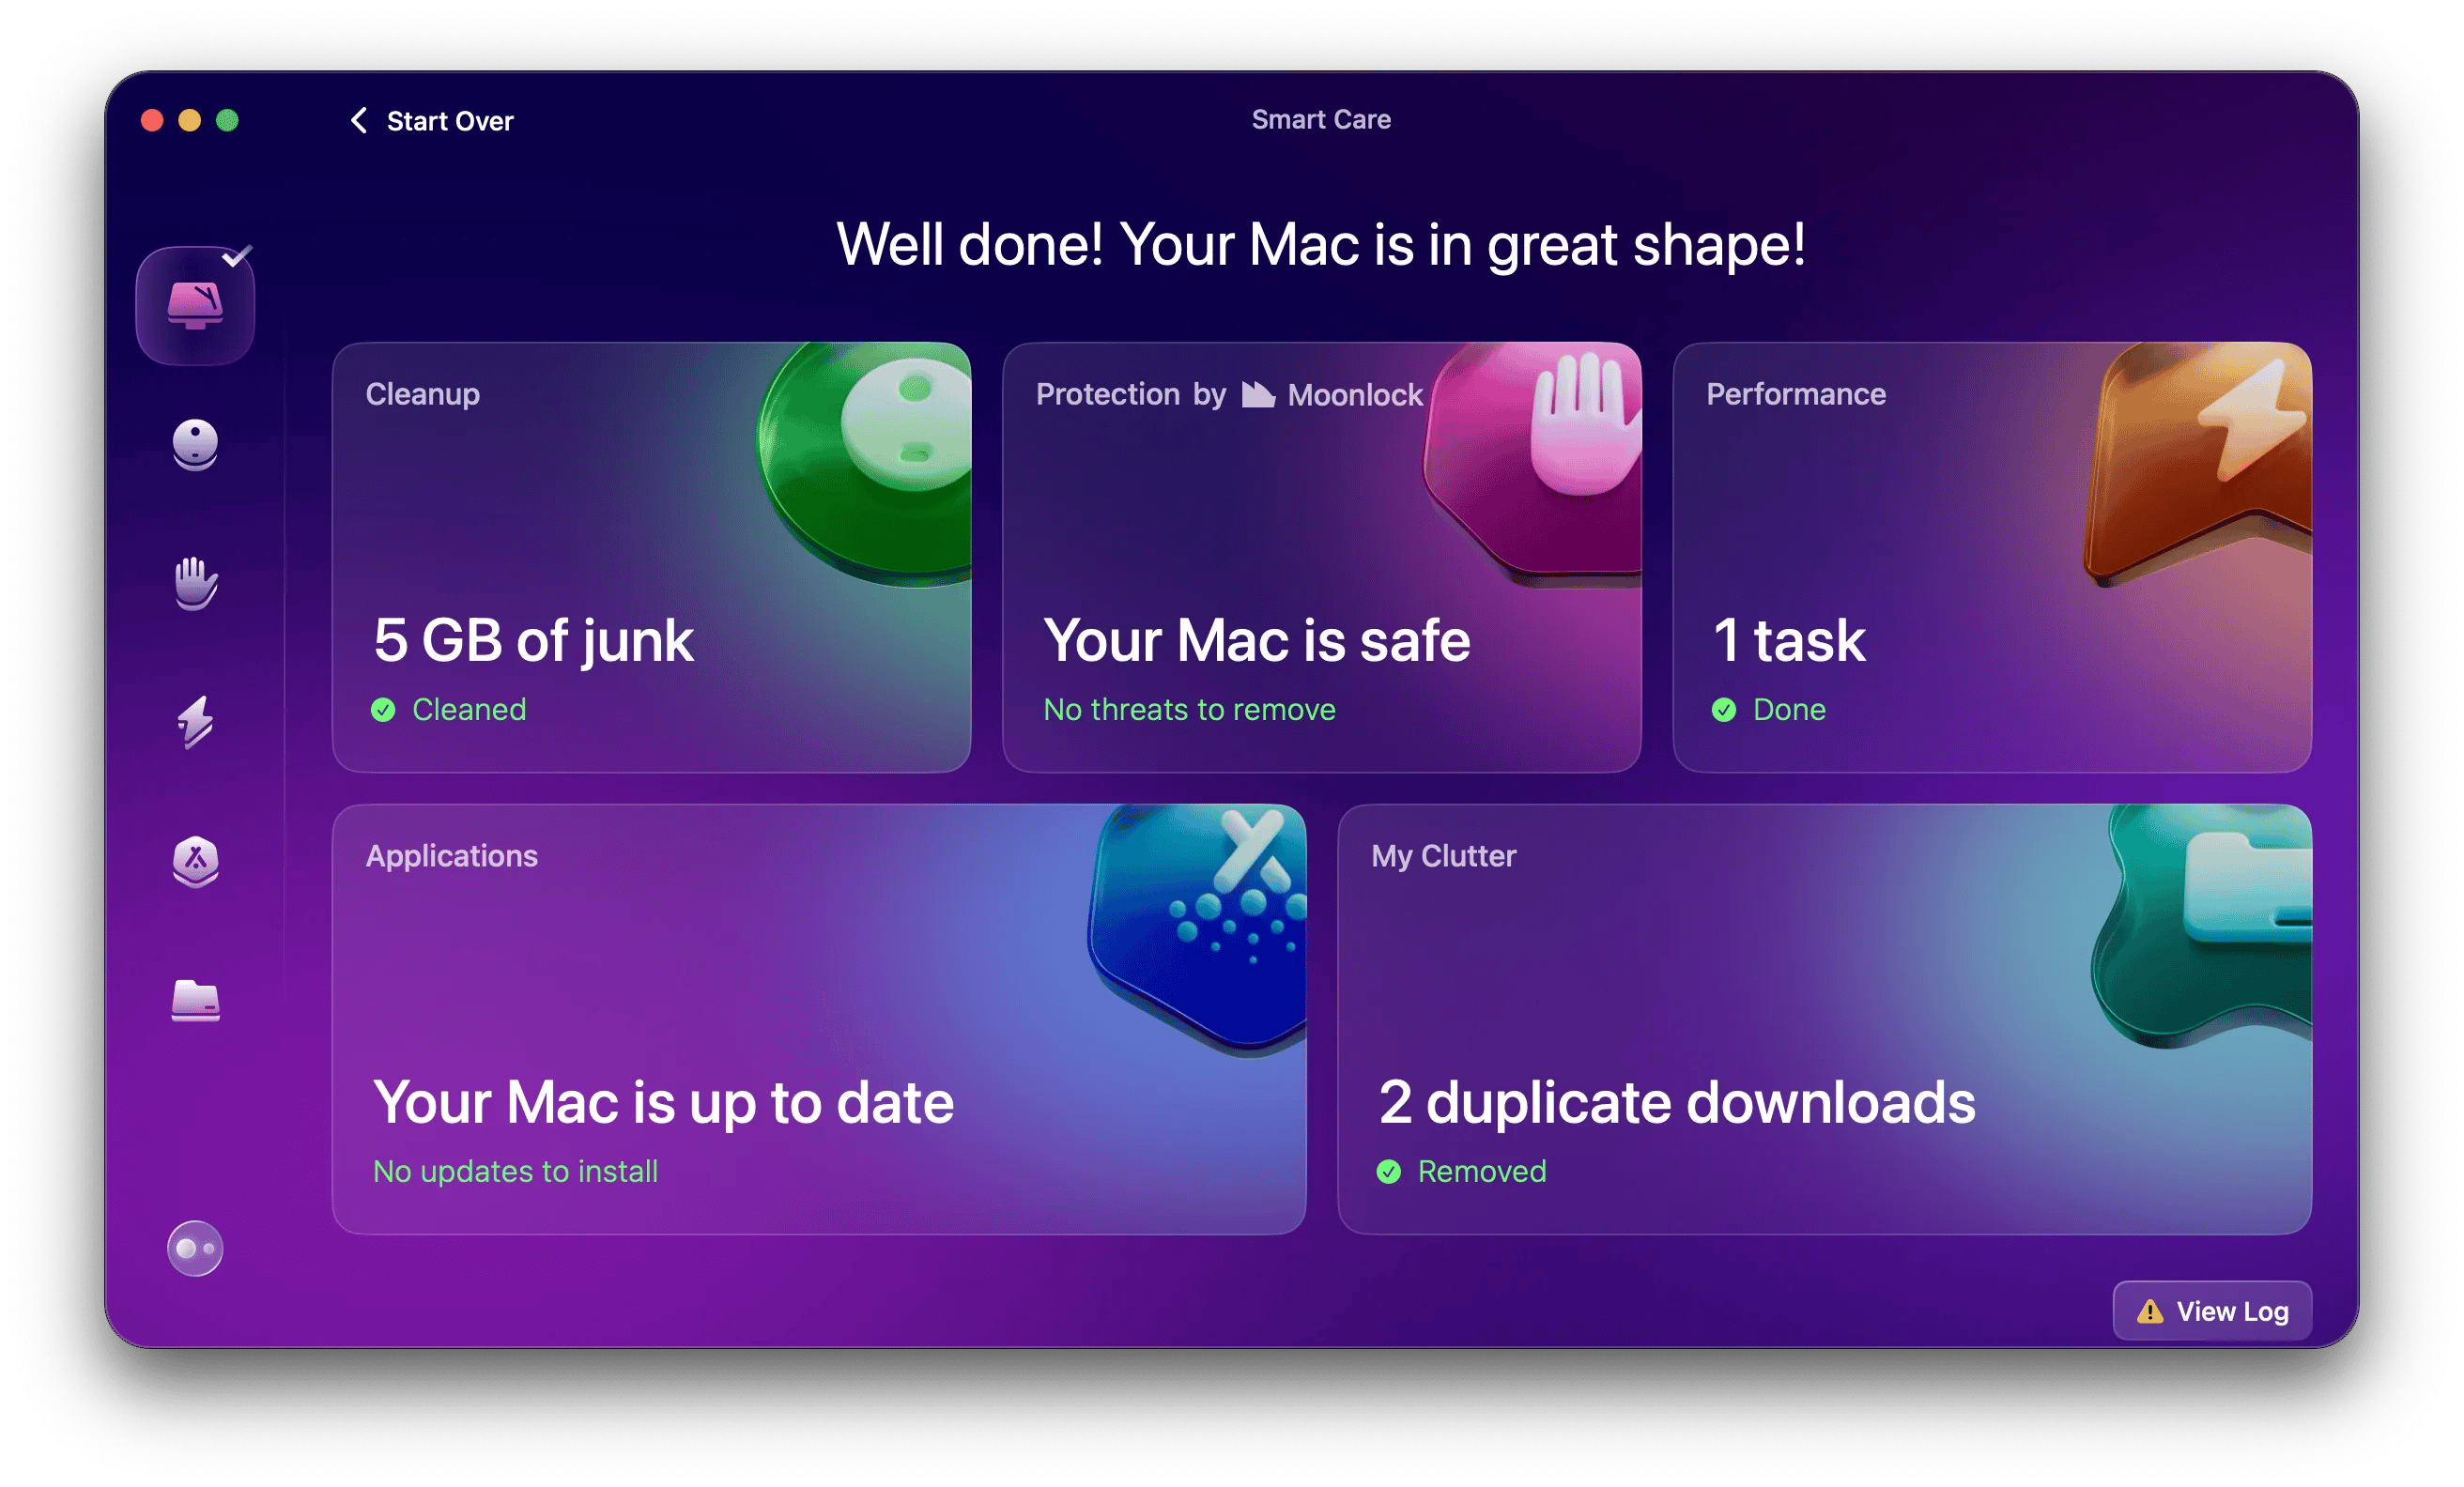
The process takes up to 10 minutes and can free up several GBs of space. Check out my results:
How to downgrade macOS Sequoia
There are three ways to revert the macOS Sequoia update: using Time Machine, Internet Recovery, or a bootable macOS USB installer. Which method to choose?
Let's compare! | Time Machine | Internet Recovery | Bootable USB installer |
Best if… | You have a backup of your Mac while on Sonoma and want to restore data and settings. | You need a clean install. | You need to install a specific version of macOS (not necessarily Sonoma). |
Time needed | 30 minutes to several hours, depending on data size. | 1 to 3 hours or more, depending on internet speed. | 30 minutes to 2 hours (+ extra time to create USB). |
Control over macOS version | No, restores from backup. | No, installs original/latest version. | Yes, you choose the version. |
Hardware required | Backup drive | None | USB drive (32GB) |
Downgrade using Time Machine
If you backed up your Mac before upgrading to Sequoia, downgrading should be quick. You can restore your Mac to the exact state it was in just before the upgrade.
In my case, I only had a few GB of files and programs, so I backed up just those. I find Time Machine inconvenient for selective backups, so I used GetBackup Pro instead. It's simple: you just select the files you need, and the app creates a backup. In my experience, it’s also more space-efficient than Time Machine’s backups.
Here's how to downgrade from Sequoia using Time Machine:
Connect the drive with your Time Machine backup to your Mac.
Restart your Mac in recovery mode.
For Intel-based Macs: Press and hold Command + R until you see the Apple logo.
For Apple silicon Macs: Hold down the power button until you see the startup options.
Click Options > Continue > Restore from Time Machine > Continue.
Select the Time Machine drive, and in the list of backups, choose the one you made before upgrading to Sequoia.
Click Restore.
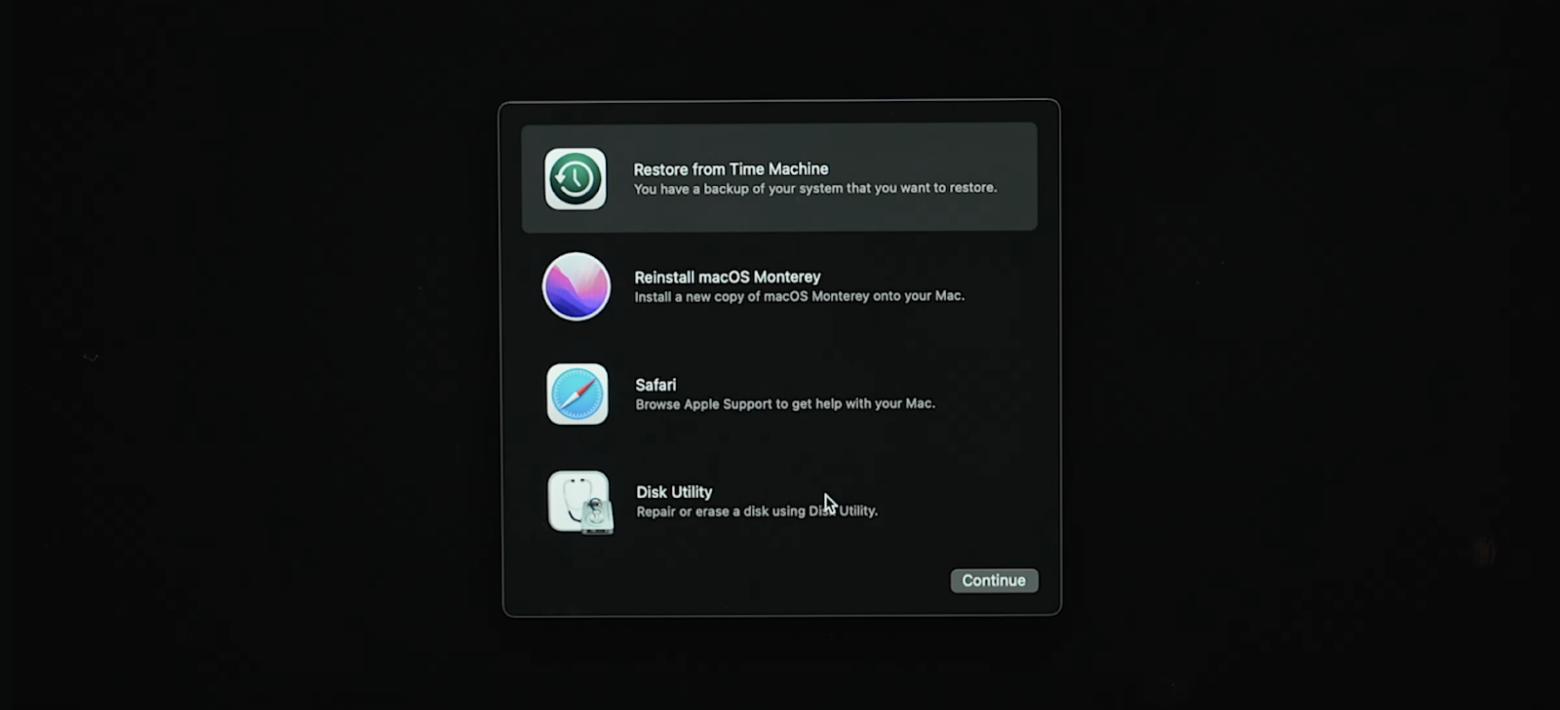
Follow the on-screen instructions and wait for the system to restore.
Downgrade using Internet Recovery
Internet Recovery restores your Mac to the operating system it was originally shipped with, not your previous OS. Why "internet"? Because in this method, your Mac downloads the OS from Apple's servers. Afterward, you can upgrade to the OS you prefer.
Just a reminder: you’ll need to wipe your entire Mac, so make sure you have a backup of important files or the entire system ready.
Here's how to reinstall older macOS using Internet Recovery:
Shut down your Mac.
Enter the Recovery mode. First, shut down your Mac. Then:
For Intel Macs: Hold down Shift + Option + Command + R and press the power button.
For Apple Silicon Macs: Press and hold the power button until the Options button appears.
Select Disk Utility.
In the left pane, click on your drive (typically named Macintosh HD).
- Press Erase and confirm your actions. Wait for the erase process to complete.
- Connect to Wi-Fi.
- Click Exit to Recovery.
- Click Reinstall macOS [Name] > Continue.
Then, follow the on-screen instructions: agree to the license terms, select the disk to install the OS (typically Macintosh HD), and wait for the installation to complete.
Downgrade using a bootable macOS USB installer
For this method, you'll need:
- A flash drive to turn into a bootable installer. Initially, I used a 16GB drive, but when I tried to burn Sonoma to it, I was short by… 83MB. So, I switched to a 32GB USB.
- macOS Sonoma: Download it from the Apple Store. The download may take up to an hour or more, depending on your internet speed.
Now, let's move on to the macOS Sequoia downgrade guide using a USB installer.
Step 1: Format the USB
Insert the USB drive into your Mac.
Open Disk Utility, select your USB and click Erase.
In the Format drop-down menu, choose Mac OS Extended (Journaled), then click Erase.
Common mistake
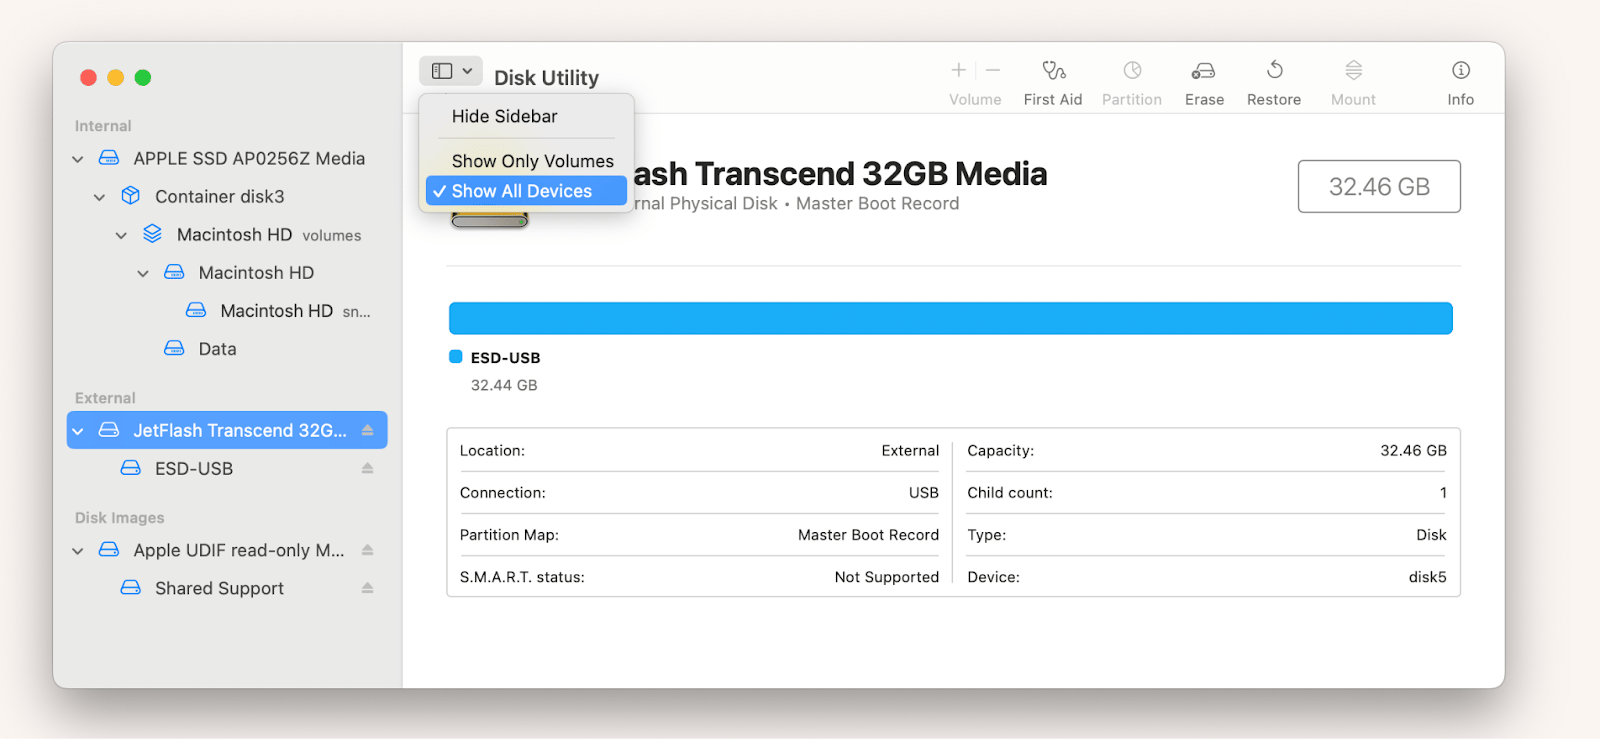
If you don't see Mac OS Extended (Journaled) in the Format drop-down menu, it's likely because you're trying to format a volume rather than a physical disk. To fix this, go to the upper left corner, click View > Show All Devices, and select the physical disk on the left pane.
Step 2: Make the USB bootable
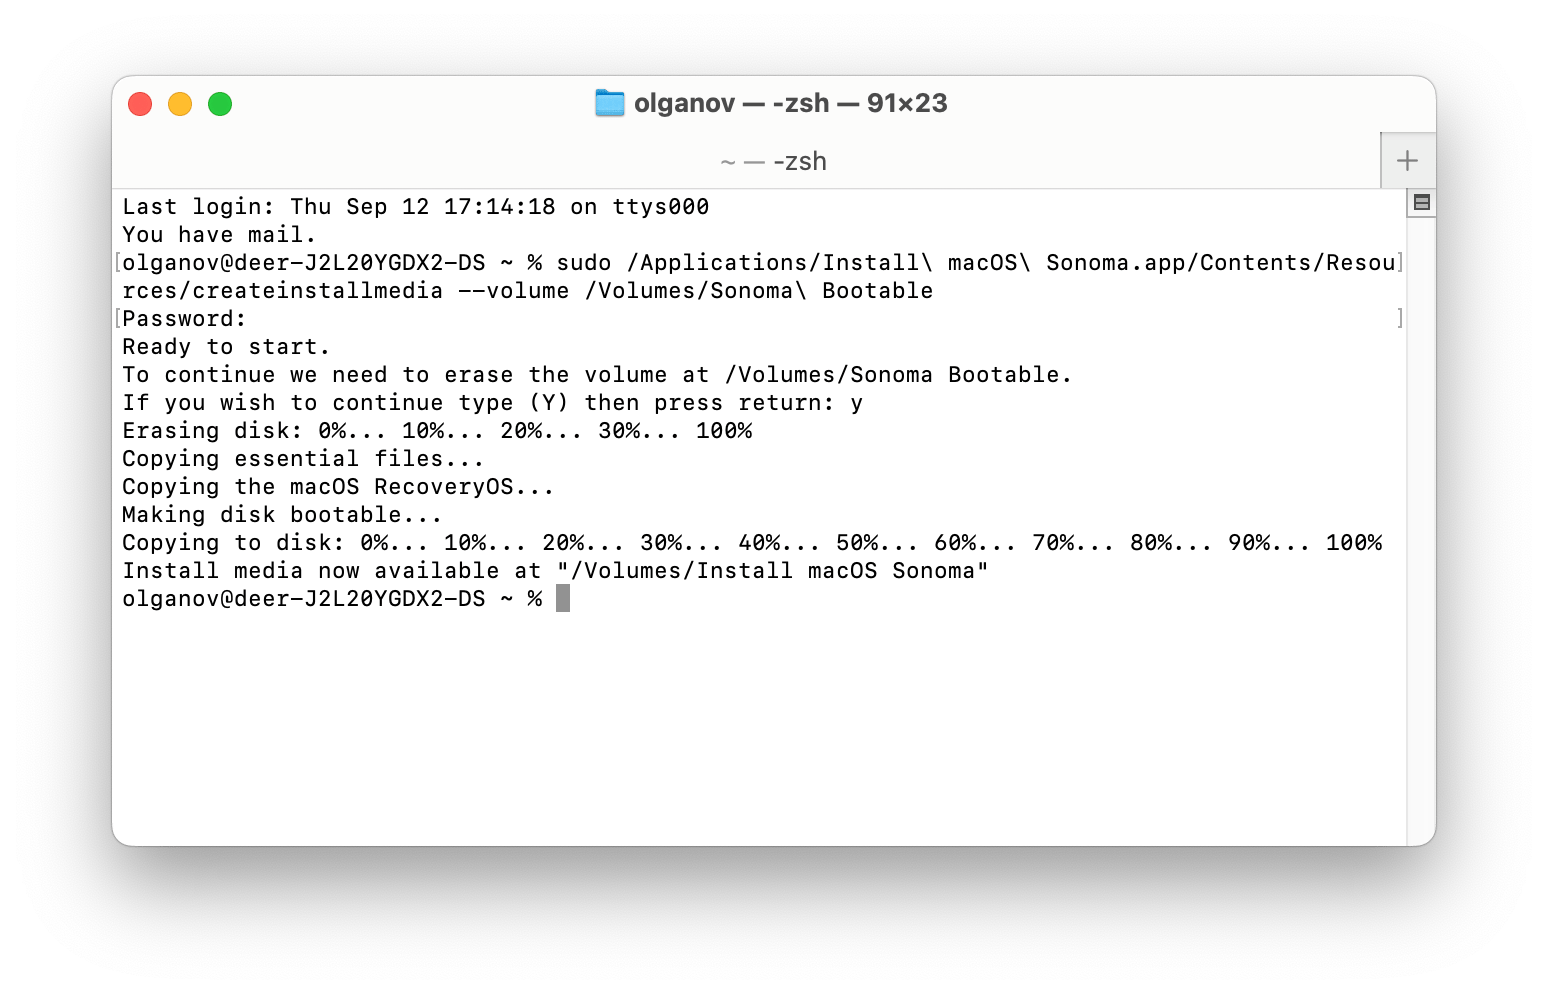
- Open Terminal and type sudo /Applications/Install\ macOS\ Sonoma.app/Contents/Resources/createinstallmedia --volume .
- Open Finder > Go > Go To Folder, type /volumes, and press Return.
- Select your USB drive and drag it into Terminal.
- Press Return, enter your password, and wait for the process to complete — it can take up to 30 minutes.
Here’s what you should get:
Step 3: Downgrade to macOS Sonoma
- Turn off your Mac.
- Hold the power button until startup options appear.
- Choose Install macOS Sonoma > Continue.
- Select Disk Utility > Continue.
- Select your hard drive (usually named Macintosh HD) and click Erase in the upper right corner.
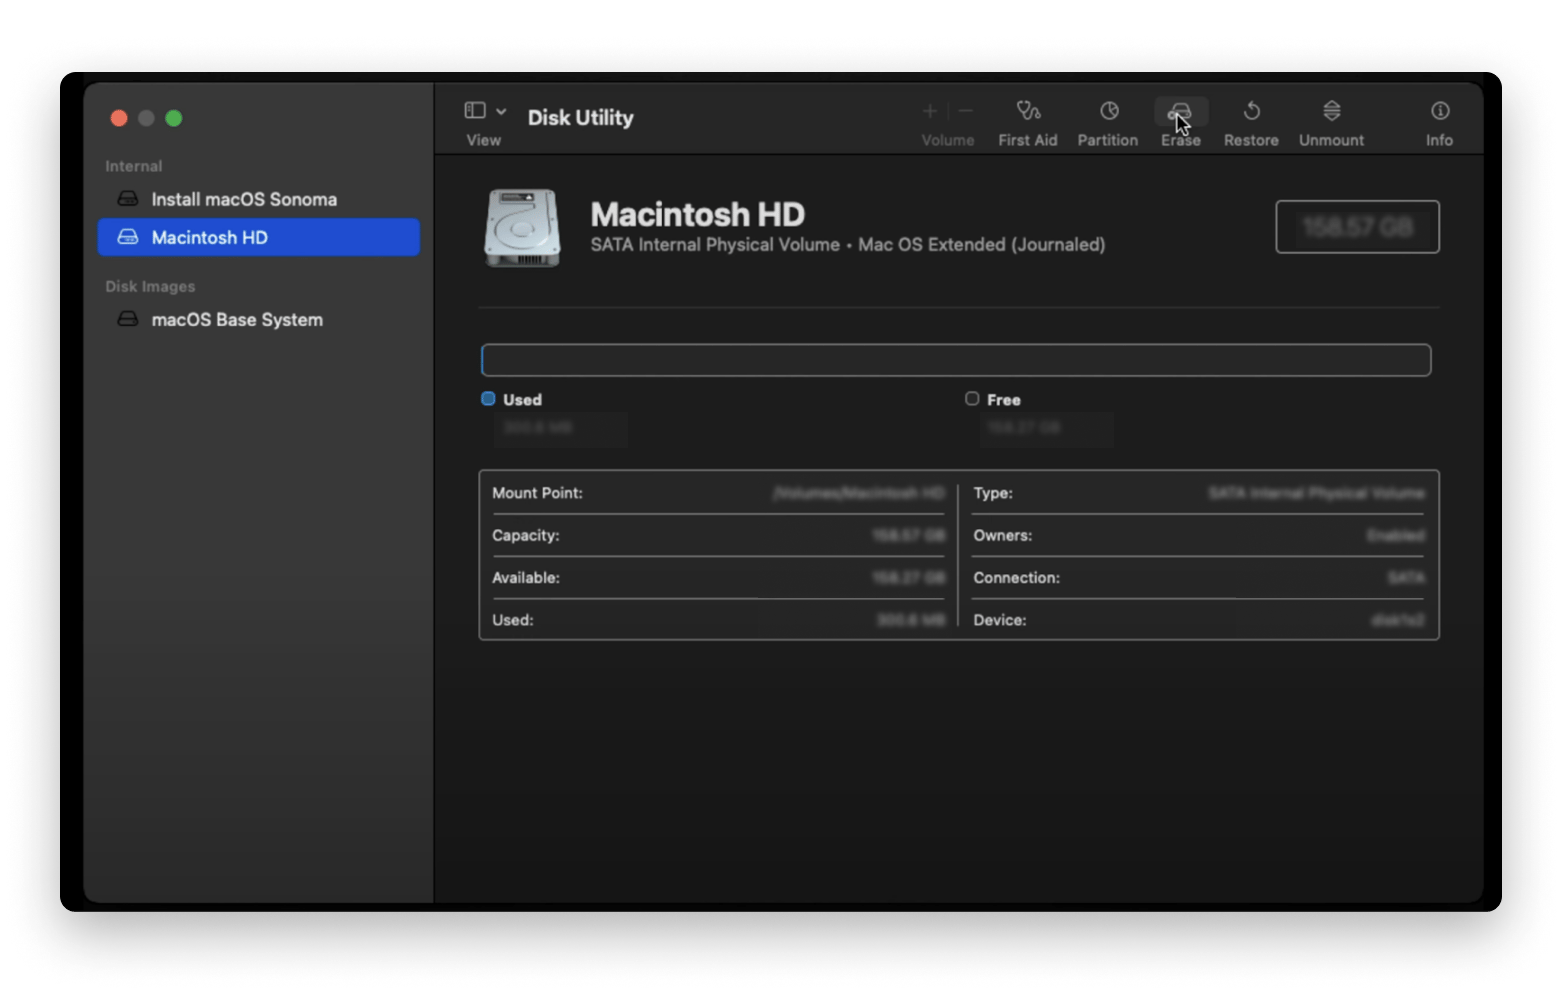
- In the Format drop-down menu, select APFS, then click Erase.
- Wait for the process to complete, then close the Disk Utility window.
- Select Install macOS Sonoma > Continue.
- Agree to the license agreement and follow the on-screen instructions.
The OS installation will start and take about 30 minutes.
Proper preparation to revert the macOS Sequoia update
The rules for downgrading from macOS Sequoia to Sonoma can be summarized in a few key points:
- Make a backup. Back up your current system or any important files you've created while using macOS Sequoia. If you plan to restore with Time Machine, use that tool. Personally, I prefer Get Backup Pro for its convenience and more compressed backups.
- Clean up your Mac. Don't bring unnecessary junk into the new system. Use CleanMyMac to clean out system garbage.
- Reserve time for it. The process can take up to 3 hours or more, so be prepared not to use your Mac during this time.
The apps I mentioned to help you prepare for a backup are available on Setapp, a platform with 250+ apps for macOS and iOS. You can try all of them with full features for free for 7 days.
FAQ
Which Macs can downgrade to macOS Sequoia?
Any Mac that supports macOS Sequoia can downgrade, but only to the macOS version it originally shipped with or later. Intel Macs (2017+) and Apple silicon Macs (M1 and newer) are supported, though the downgrade method differs by chip.
How do I safely downgrade macOS without losing data?
Create a full Time Machine backup before starting. Close all apps, keep your Mac plugged in, and restore your data from the backup after downgrading to avoid data loss.
Can I downgrade macOS Sequoia using a Time Machine backup?
Yes. If you have a Time Machine backup from before upgrading to Sequoia, boot into macOS Recovery, choose Restore from Time Machine, select the older backup, and follow the on-screen steps.
How long does it take to complete a macOS downgrade?
It depends on the method. Time Machine restores usually take 30–60 minutes. Internet Recovery can take 1–3 hours. A bootable USB install typically takes 30 minutes to 2 hours, plus setup time.
What are the common issues when downgrading macOS Sequoia?
Common problems include power interruptions, choosing the wrong disk in Disk Utility, corrupted installers, and insufficient storage space. Always keep your Mac plugged in and double-check disk selections.
Can I reinstall macOS 15 Sequoia after downgrading?
Yes. You can upgrade back to macOS Sequoia anytime through System Settings > General > Software Update, as long as Apple still supports your Mac.
Where can I find a full list of macOS versions for downgrade purposes?
Apple maintains a list of older macOS versions on its support page, and you can download the most recent versions directly from the Mac App Store. Just search for the specific version name like "macOS Sonoma" or "macOS Ventura."


