Reinstall macOS without losing data: You can safely reinstall macOS using recovery mode (Command + R) without erasing your personal files. However, errors during installation may corrupt data, so always back up before starting.
Back up your Mac before reinstalling: Use Time Machine or Get Backup Pro to save your important files. Get Backup Pro is especially convenient because it creates bootable backups and lets you back up selected folders instead of the whole drive.
Clean your system for better performance: Before reinstalling macOS, use CleanMyMac to remove junk files, malware, and cache. This helps prevent leftover issues and ensures your Mac runs smoothly after reinstallation.
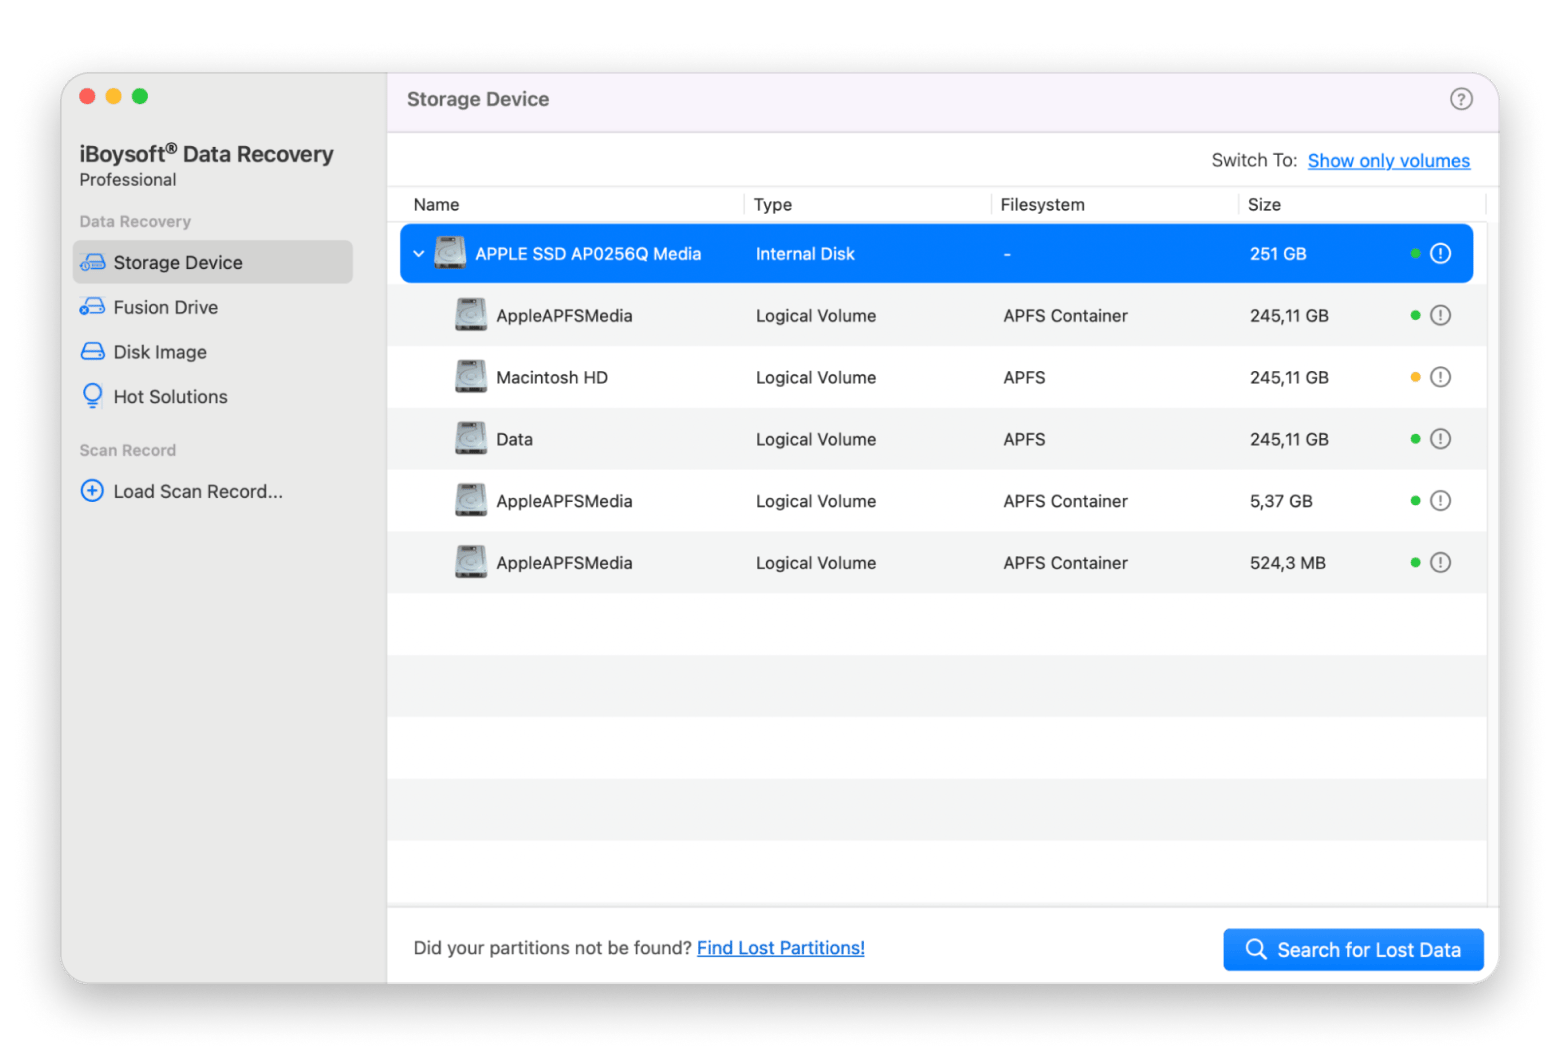
Recover lost files after reinstalling: If you lose data during or after reinstallation, use iBoysoft Data Recovery to restore your files. It works on both Intel-based and Apple silicon Macs, including unbootable systems, and can recover data from formatted or corrupted drives.
Tip: You can find Get Backup Pro, CleanMyMac, and iBoysoft Data Recovery on Setapp, which offers 250+ Mac and iOS apps in one subscription with a 7-day free trial.
Does your Mac often run slowly, restart all of a sudden, or have apps that crash for no reason? If yes, then your operating system might be faulty. You need to reinstall macOS to return it to its most efficient condition.
In this post, I'll walk you through all you need to know about how to reinstall macOS and get your laptop running like new.
How to prepare your Mac for reinstallation
Reinstalling your Mac’s operating system is a huge deal, and like any big event, you need to prepare. This involves backing up your important files, deleting files that may slow your CPU, and even checking whether the OS you’re about to install is compatible with your current Mac.
Let me explain in more detail.
Step 1. Back up your data
If you’re like me and you use your laptop for both work and play, then you likely have important files, photos, and documents stored on your Mac. You need to back them up on an external drive or the cloud so that you don't lose them forever.
One recommended tool is Time Machine, which comes built into your Mac. This free software enables you to back up your Mac and recover the saved data after an update or whenever needed. Here’s the detailed guide on how to use Time Machine on Mac for backup.
While Time Machine is reliable, it isn’t seamless, and many users find it clunky at times. Personally, I recommend Get Backup Pro since it makes saving my files quick and painless. What I love about the app is that it lets me back up separate files and folders, not the whole drive.
What's more, it creates bootable backups. This means you can reboot your Mac from the last update, which can be super useful if the macOS reinstallation runs into problems.
Here’s how to back up your files:
Install and open Get Backup Pro.
Press “+” in the lower left corner to create a backup project and specify the settings.
Press File+ or Apps+ to choose files to back up.
Select the location for backup. I recommend an external hard drive.
Press the Play button to start the backup process.
Step 2. Check your Mac’s compatibility
Just as you can’t expect the latest iOS 26 update to work on an iPhone 6, the same applies to your Mac and the macOS version you’re installing. For example, the macOS 15 Sequoia (2024) is only compatible with Mac models made in 2018 and later. Check out this list of the latest macOSs and the Macs they're compatible with.
Step 3 (optional). Clean your Mac with CleanMyMac
Sometimes, you need to wipe off unwanted files and programs from your computer before you reload macOS. This ensures stuff like malware, junk files, and cumbersome cache don’t slow down your system even after you reinstall the operating system.
In this case, CleanMyMac is the handy tool I recommend. This awesome app helps optimize any Mac system by removing unwanted files and programs, as well as managing large and old files.
Here's how to use it:
Install and open CleanMyMac.
Click My Clutter > Scan.
Review the scan summary. Pay attention to Large and Old Files, and select what you want to remove. I usually delete everything because the app only finds the trash.
Run the Smart Care scan to optimize your Mac.
Keep in mind that you can specify the scan type. For example, Protection will detect and remove malicious apps, while CleanUp will remove unnecessary files that bloat your system.
How to reinstall macOS on an Intel Mac
If you have an Intel Mac, here's the step-by-step process on how to reinstall macOS:
Restart your Mac.
Once you see the Startup screen, quickly press and hold the following key combination until you see the Apple logo:
Command + R: This will reinstall the latest version of macOS that's currently running on your system.
Option + Command + R: This will upgrade your macOS to the latest version available for your system. Note that you'll need an internet connection.
Option + Shift + Command + R: This lets you reinstall the version of macOS that came with your Mac or the closest version that’s still available.
3. Enter your laptop’s password if you see a lock.
4. Pick an administrator account (if prompted), click Next, then enter the account password and continue.
5. You’ll be taken to the Utility screen, where you can either restore the previous Time Machine backup or reinstall macOS.
The reinstallation process may take an hour or more, depending on the Mac you’re using.
Reinstalling macOS on an Apple silicon Mac is just as easy as installing macOS on an Intel-based Mac. Here’s how:
Shut down your Mac, then press and hold the power button to enter recovery mode.
Choose Reinstall for your macOS release, then click Continue.
Follow the on-screen guide until you reach the settings where you need to select your macOS volume. In this case, just select your current macOS version.
What if the macOS reinstall fails and data is lost?
If your macOS reinstallation fails and leaves some data inaccessible, you can use Disk Utility in recovery mode to repair the drive. Another option is to try a restoration via Time Machine backup if you've done periodic backups with it.
For a more advanced and targeted approach, you can use iBoysoft Data Recovery to restore lost partitions, recover data from your startup disk, or rescue data from formatted/corrupted drives.
Reinstalling macOS through recovery mode doesn’t delete your data, but an error can stop the installation and corrupt your precious files. To prevent this from happening during the reinstallation process, the best option is to back everything up.
I recommend using Get Backup Pro for bootable compressed backups, especially if you need to back up separate files and folders.
Use these tools to make reinstalling macOS easier
Learning how to reinstall macOS from scratch can give your Mac a new life, solve many problems, and increase performance. But before you reinstall the OS on your Mac, make sure to back up your data, confirm your system’s compatibility with the OS, and install according to your processor type.
To make things easier for you, take advantage of the tools I mentioned: Get Backup Pro for reliable backups, CleanMyMac for clearing out junk and optimizing performance, and iBoysoft Data Recovery for restoring lost files if something goes wrong.
The good news is that you can find all of these apps on Setapp, a platform that gives you access to 250+ Mac and iOS apps for a single monthly subscription. There's also a free seven-day trial, so take these apps for a spin before committing.
FAQs
How do I reinstall macOS after installing Windows?
To reinstall macOS after installing Windows:
Reboot your Mac.
Press and hold Command + R as it turns on.
Wipe the Windows partition with the help of Disk Utility while on the macOS Utilities screen.
Choose Reinstall macOS.
After choosing to reinstall macOS, you'll receive additional prompts, such as a request to insert your password.
Will reinstalling macOS erase everything?
Reinstalling macOS using macOS Recovery is safe and doesn't delete your apps or personal data. However, it’s recommended to back up your files in case an installation error corrupts your data. A reliable option is Get Backup Pro, which lets you create bootable backups and easily restore your files if something goes wrong.
Why is reinstalling macOS not working?
If reinstalling macOS not working:
Check for a stable internet connection.
Make sure you’re correctly entering recovery mode and the macOS you’re trying to install is compatible with your system.
If this persists, try an NVRAM reset (only on Intel Macs) or contact Apple Support for assistance.
Why you should reinstall macOS
Reinstalling macOS can:
Resolve software issues
Boost performance
Help prevent future breakdowns.
It’s especially useful if you plan to sell your Mac, need to remove malware, or face system problems that can’t be fixed by other means.
Can I recover files if I lost data after reinstalling macOS?
Yes, you can recover lost data after reinstalling macOS using system tools like Time Machine or third-party solutions like iBoysoft Data Recovery, which also works on unbootable Macs.
Does iBoysoft work on unbootable Macs?
Yes, iBoysoft Data Recovery works on unbootable Macs. You can run it directly from macOS recovery mode with just a few commands. It scans your startup disk to recover lost or deleted files, including documents, photos, and emails, even from encrypted APFS drives, Apple Silicon, and Macs with a T2 chip.
Is iBoysoft compatible with Apple silicon Macs?
Yes, iBoysoft Data Recovery is fully compatible with Apple Silicon Macs. It supports the M1-M4 chip models, as well as Intel Macs with the T2 security chip. The software can recover files from encrypted APFS drives, unbootable systems, and a wide range of storage devices.