How to fix the "my Mac won’t update" issue: 9 easy fixes for macOS update errors
After years of using a PC, switching to a Mac felt like a big step forward. Everything seemed easier and more seamless. Then the update failed, and I hit my first real problem.
In this guide, I’ll walk you through the exact steps I took to solve the problem. You’ll learn how to check your system, free up space, fix update errors, and even reinstall macOS if needed.
But first, here’s a quick guide to common macOS update problems and what you can do to fix them:
| What’s the problem? | Do this |
| macOS update won’t start | Restart your Mac and try again. |
| Update stuck on black screen | Press Command + L to view progress, then restart in Safe Mode. |
| Not enough disk space | Delete unused files or apps; use a cleanup tool like CleanMyMac to free up storage. |
| Wi-Fi connected but no internet | Forget the network and reconnect; check for interference. |
| Internet is slow or unstable | Use NetSpot, a Wi-Fi analyzer app, to find strong signal spots. |
| Mac doesn't support latest macOS | Check your Mac model’s compatibility on Apple’s website. |
| Login items not working after update | Go to System Settings > General > Login Items and re-enable them manually. |
| Update downloads but won’t install | Reset NVRAM (on Intel Macs) or restart in Safe Mode. |
| Reinstalling macOS and worried about losing data | Back up your files with Get Backup Pro beforehand. |
What to do if your Mac won’t update
If you’ve tried the basic troubleshooting steps and your Mac still refuses to update, it’s time to take things a bit further. These next steps go beyond the usual quick fixes and can help resolve more stubborn update problems.
Here’s what to try when your Mac won’t budge.
Mac won’t update to macOS 15 Sequoia
Some users with M-series Macs have noticed slower startup times after updating to macOS Sequoia. This often comes down to small glitches that pop up during the startup process.
One simple fix is to restart your Mac in safe mode and try the update again from there. If you’re on an Intel-based Mac, you can also reset the NVRAM, which might clear out any settings that are slowing things down. For M-series Macs, there’s no need to reset NVRAM manually; your Mac handles that automatically when it starts up.
Problems with macOS 14 Sonoma
After updating to macOS 14 Sonoma, you might notice that your Wi-Fi connects, but there’s no internet access, or the update won’t download at all. In that case, try resetting your network settings:
- Click the Apple menu on your Mac.
- Go to System Settings > Wi-Fi > Details.
- Click Forget This Network, then reconnect to it.
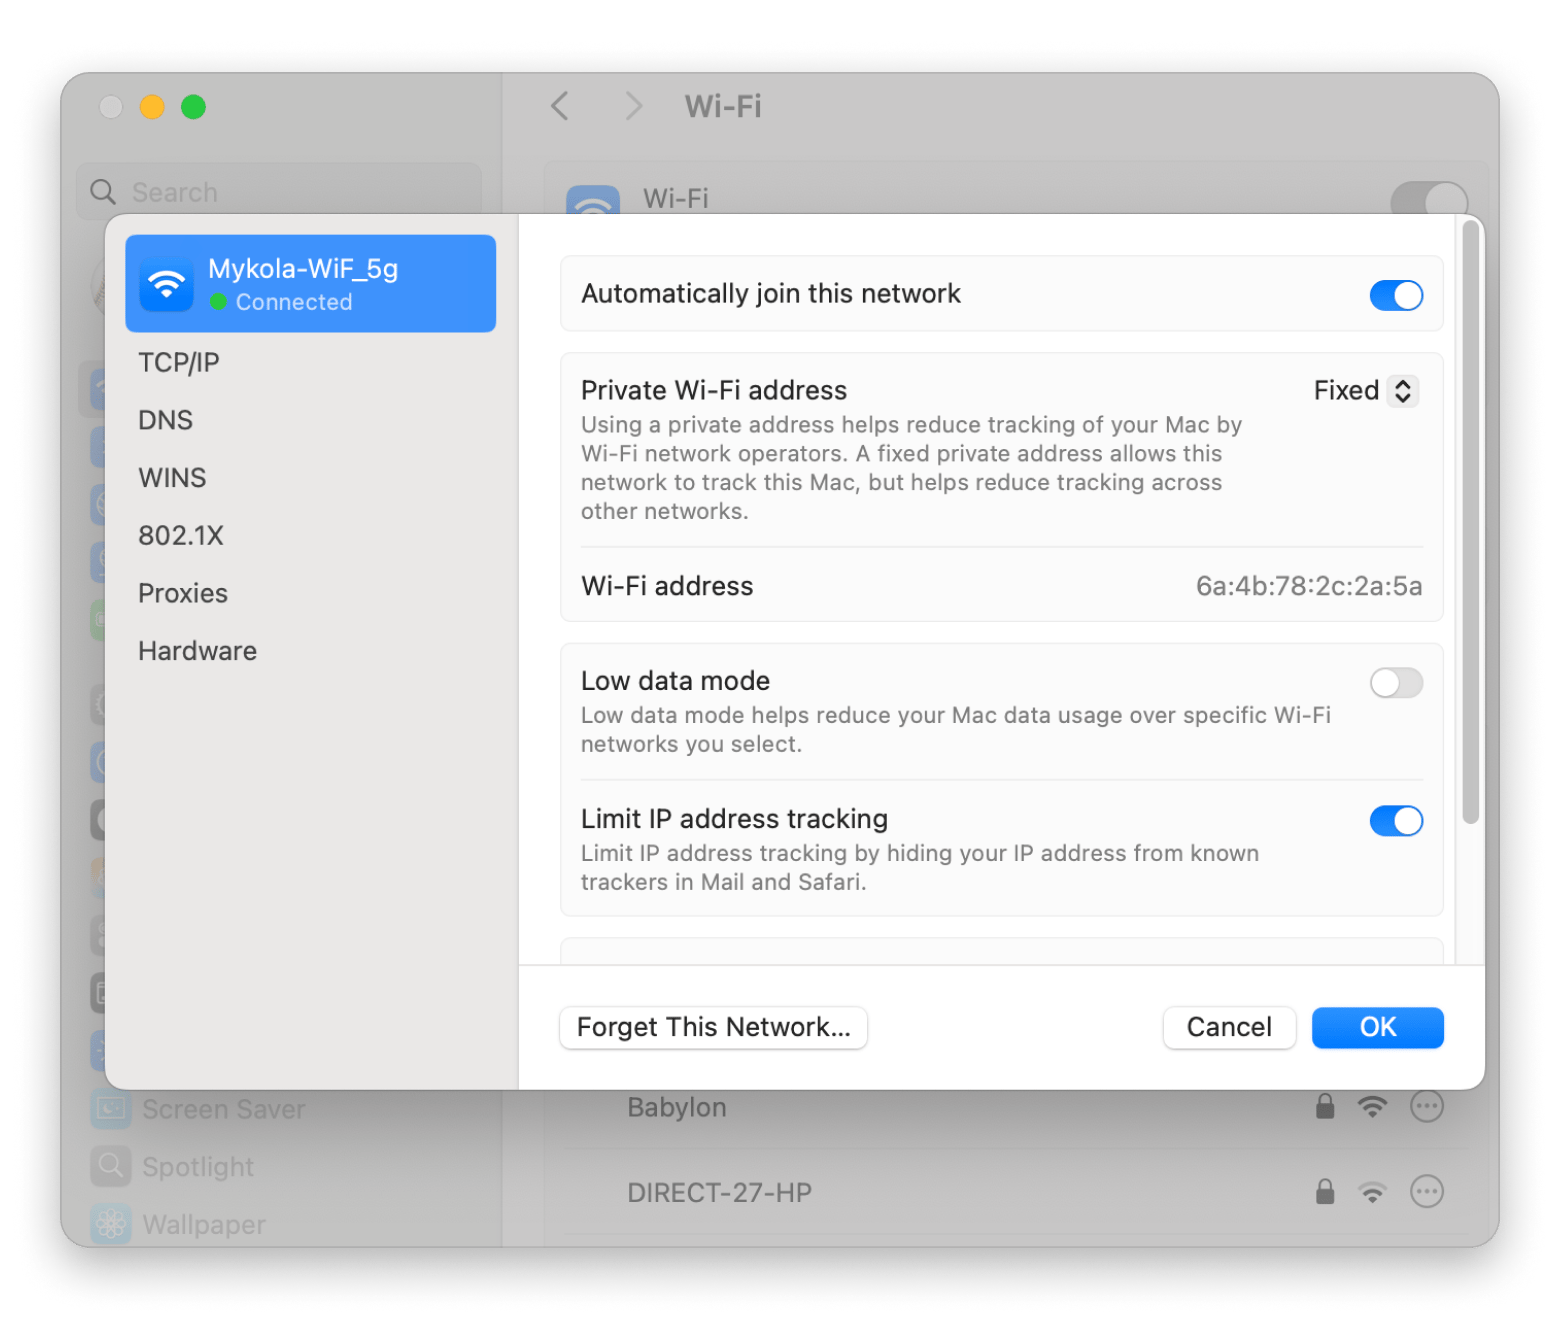
Once you’ve rejoined the network, try updating to Sonoma again. This should also resolve any lingering Wi-Fi issues caused by the update.
Mac won’t update to macOS 13 Ventura
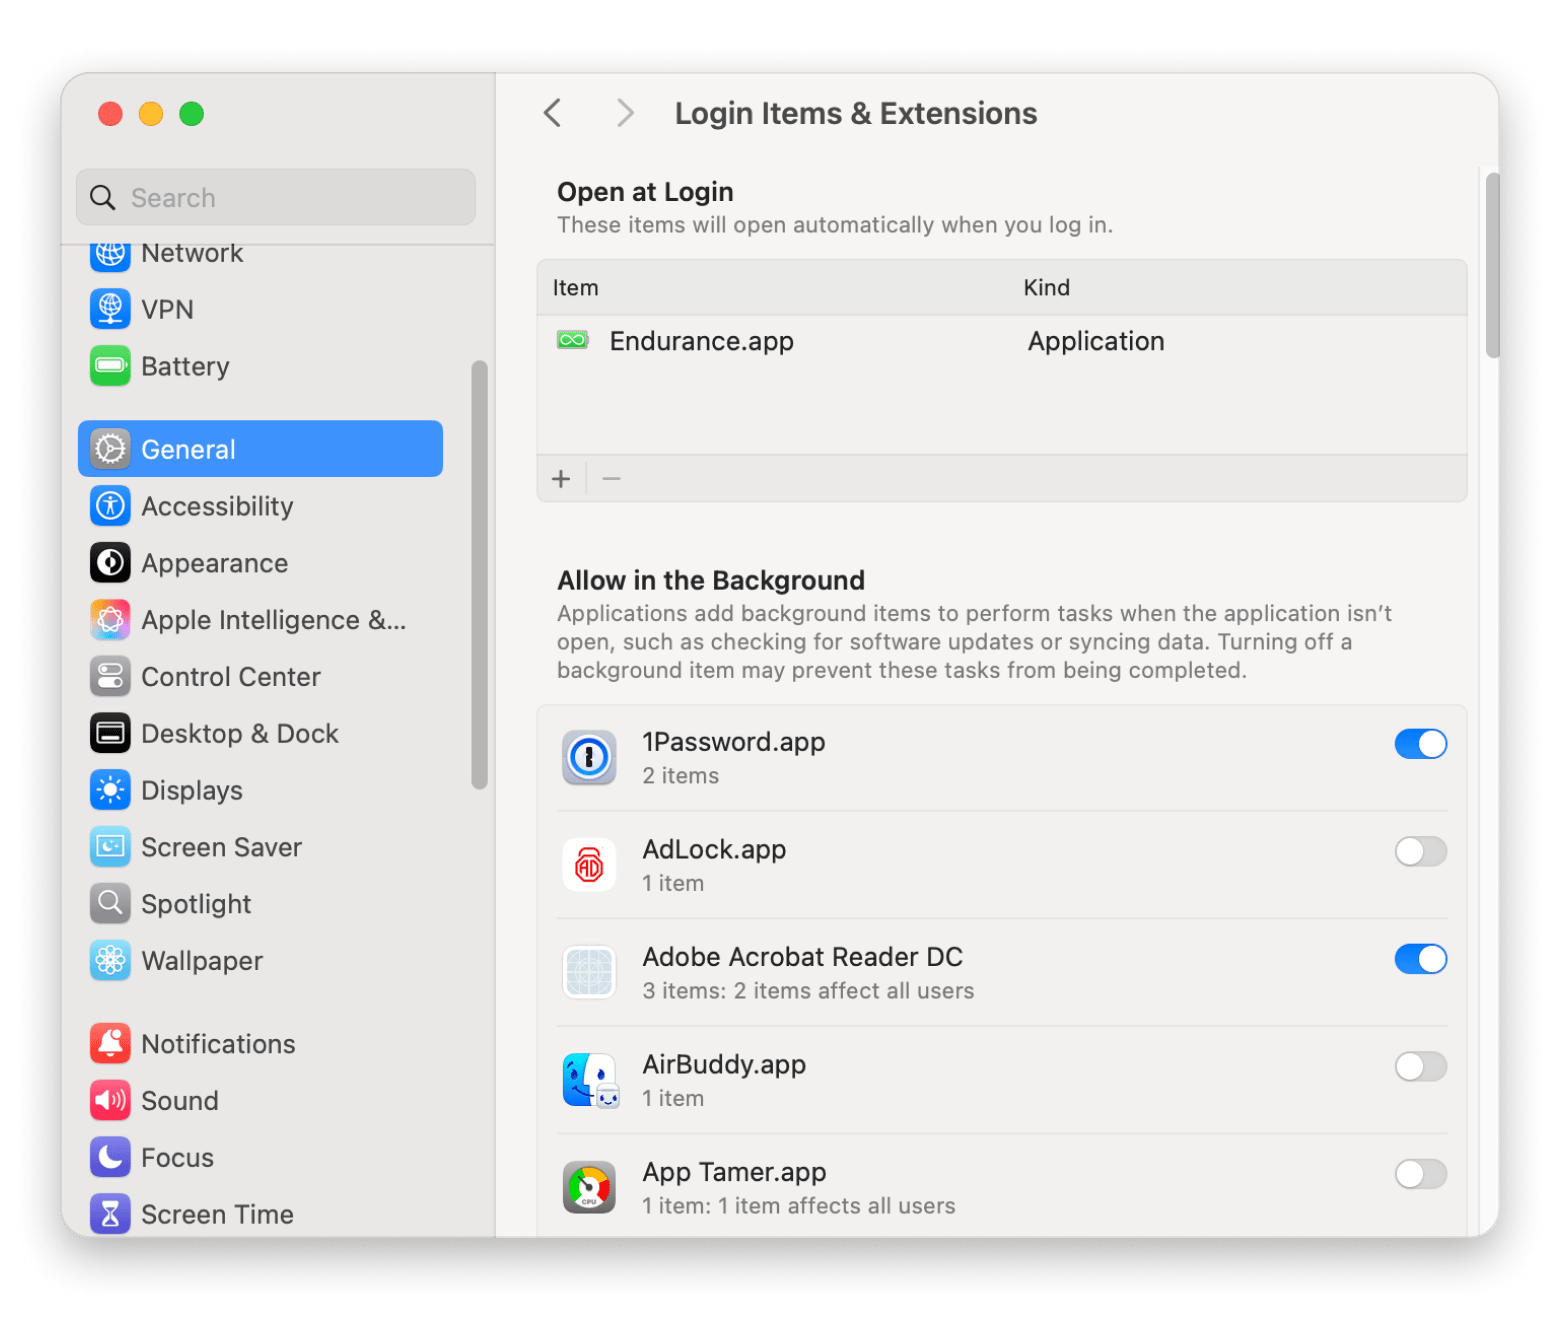
If your Mac isn't updating to macOS 13 Ventura and login items aren't functioning, the problem could be in Ventura system settings.
To fix this:
- Go to System Settings > General > Login Items & Extensions.
- Review the apps listed under Open at Login and Allow in the Background.
- Re-enable the necessary apps using the plus (+) button, and restore any missing ones.
- Restart your Mac and try updating again.
Make sure your Wi-Fi network is up
If Apple’s network isn’t the issue, your unstable Wi-Fi might cause the “macOS installation couldn’t be completed” error.
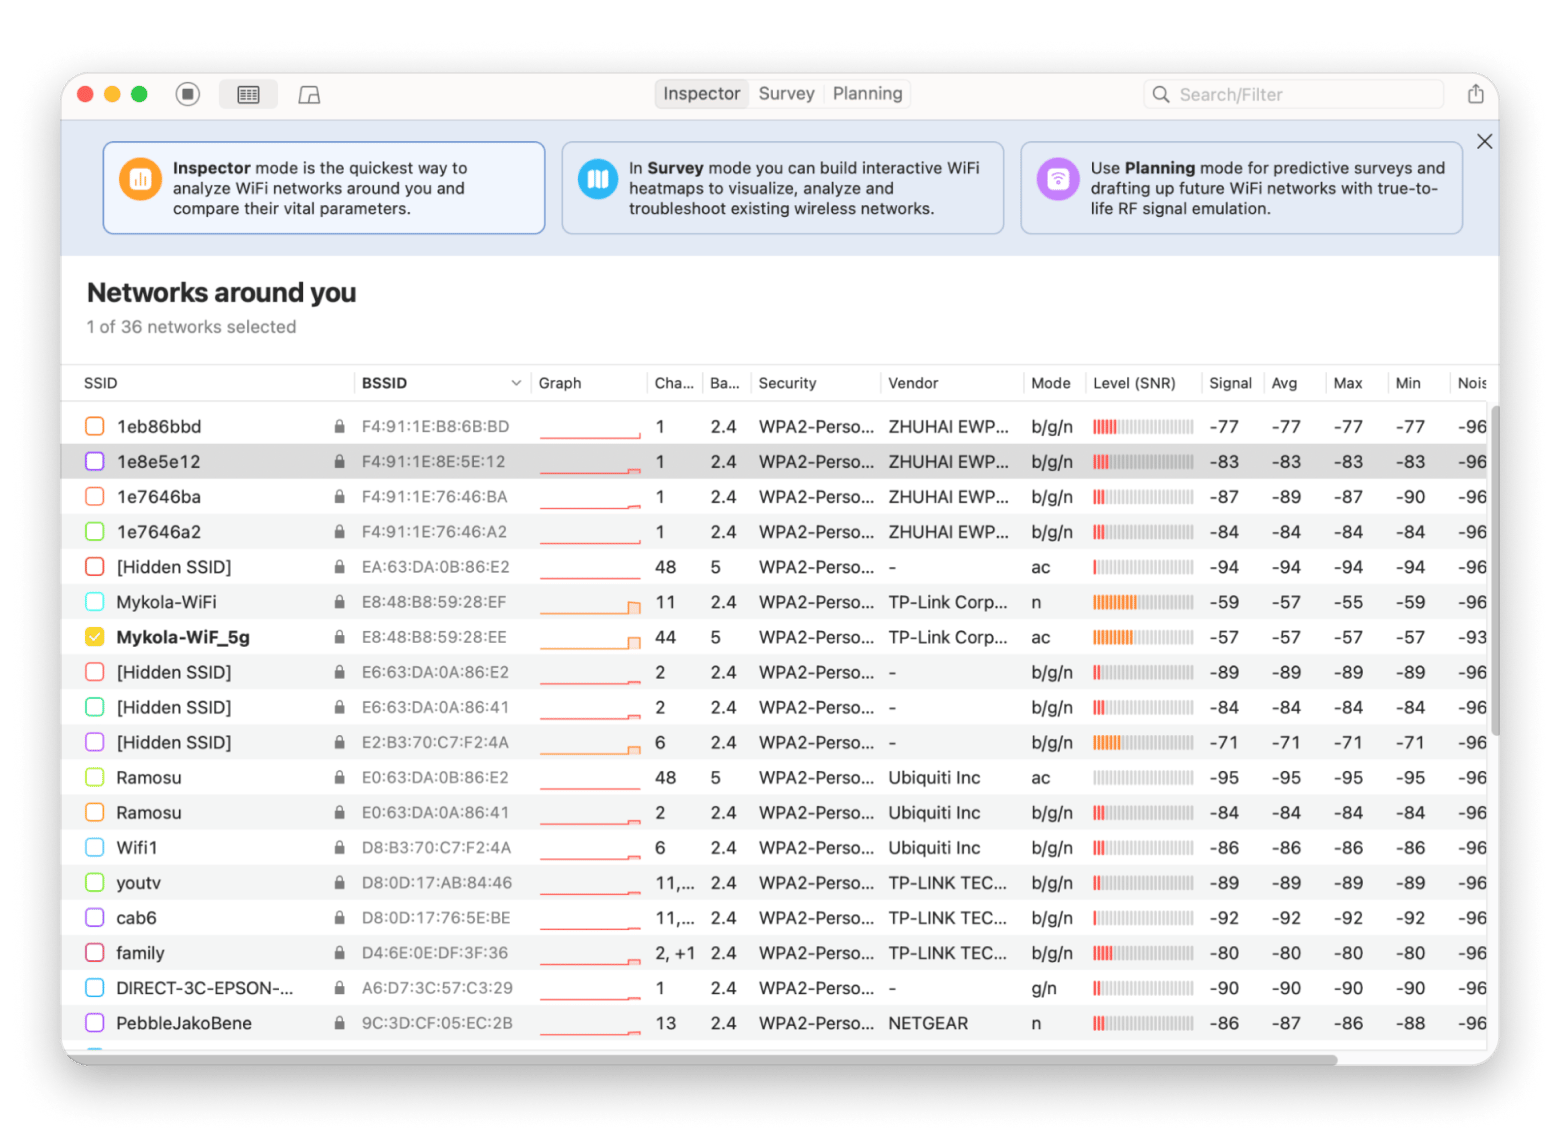
To establish the best network connection possible in your environment, try a tool like NetSpot. It’s a super-easy tool that lets you walk around your space and see a heatmap of your Wi-Fi coverage. Just upload a floor plan and take a stroll, and it shows you where your signal is strong or weak. You can even spot interference from other networks and figure out the best spot for your router.
Restart your Mac and retry the update
Sometimes, the easiest answer to "why won't my MacBook update?" is to simply restart your Mac, then retry the update:
- In the Apple menu, choose Restart.
- If your Mac doesn’t respond to the Restart, press and hold the power button to turn it off.
- Once you restart your Mac, go to Software Update and retry installing the OS.
Update Mac software via App Store
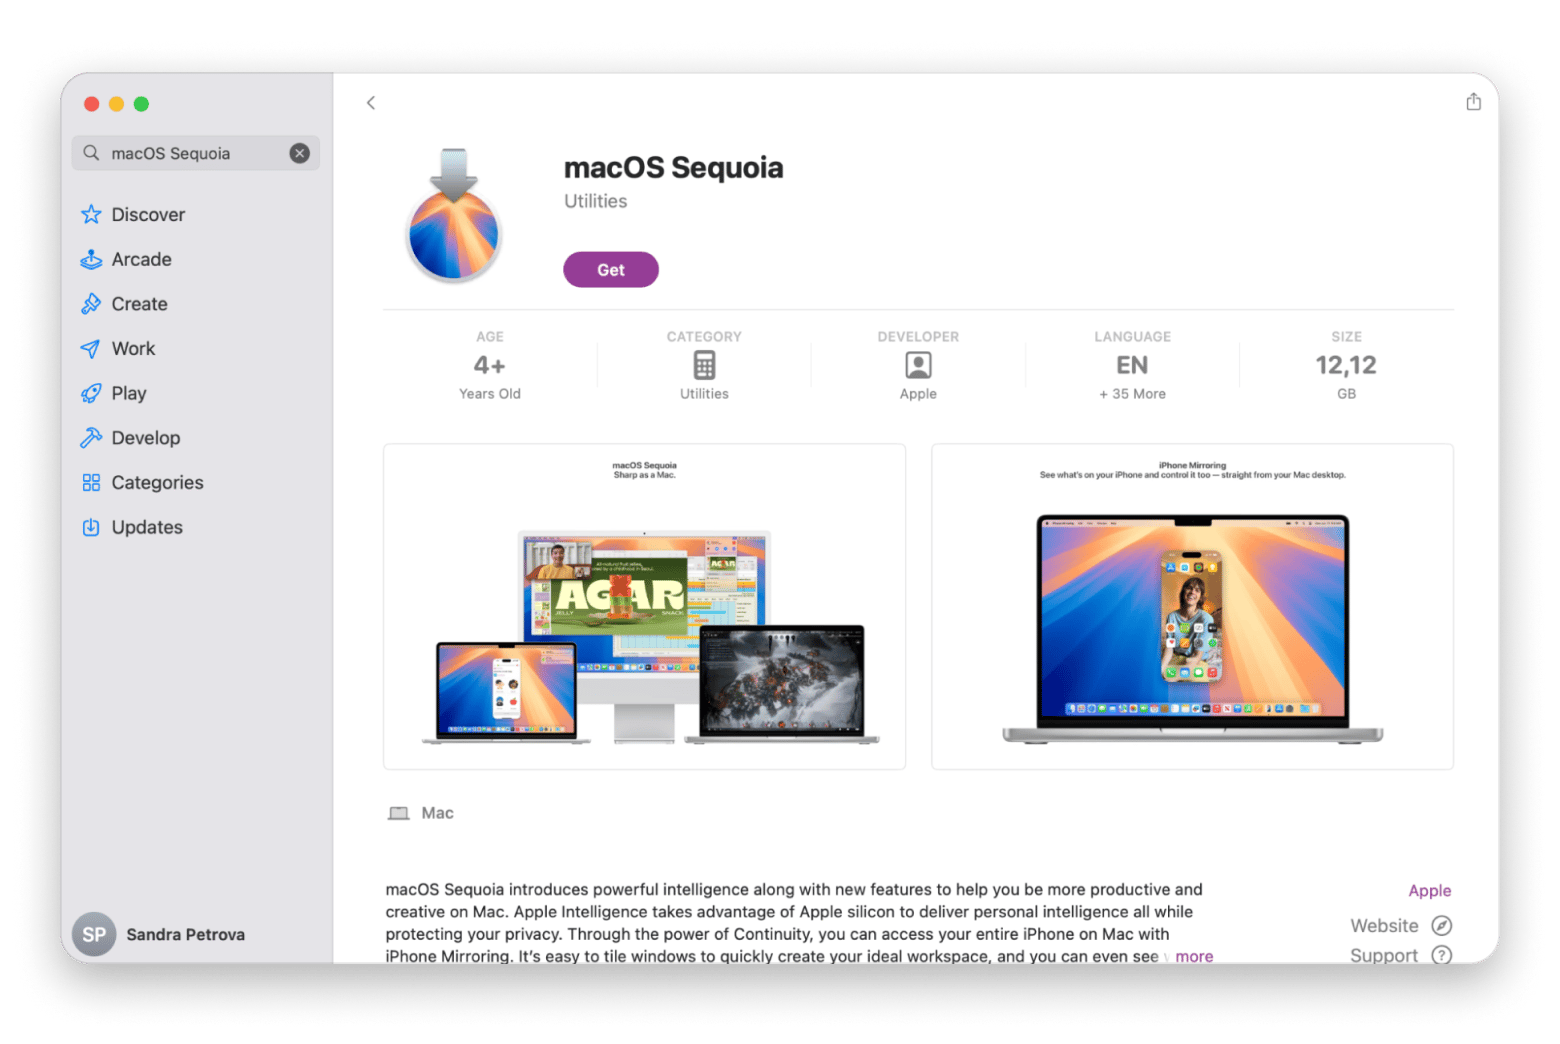
You can also try updating the software via the App Store. Here's how:
- Open the App Store on your Mac.
- Search for "macOS Sequoia".
- Click Get to download the installer.
Set the date and time to automatic
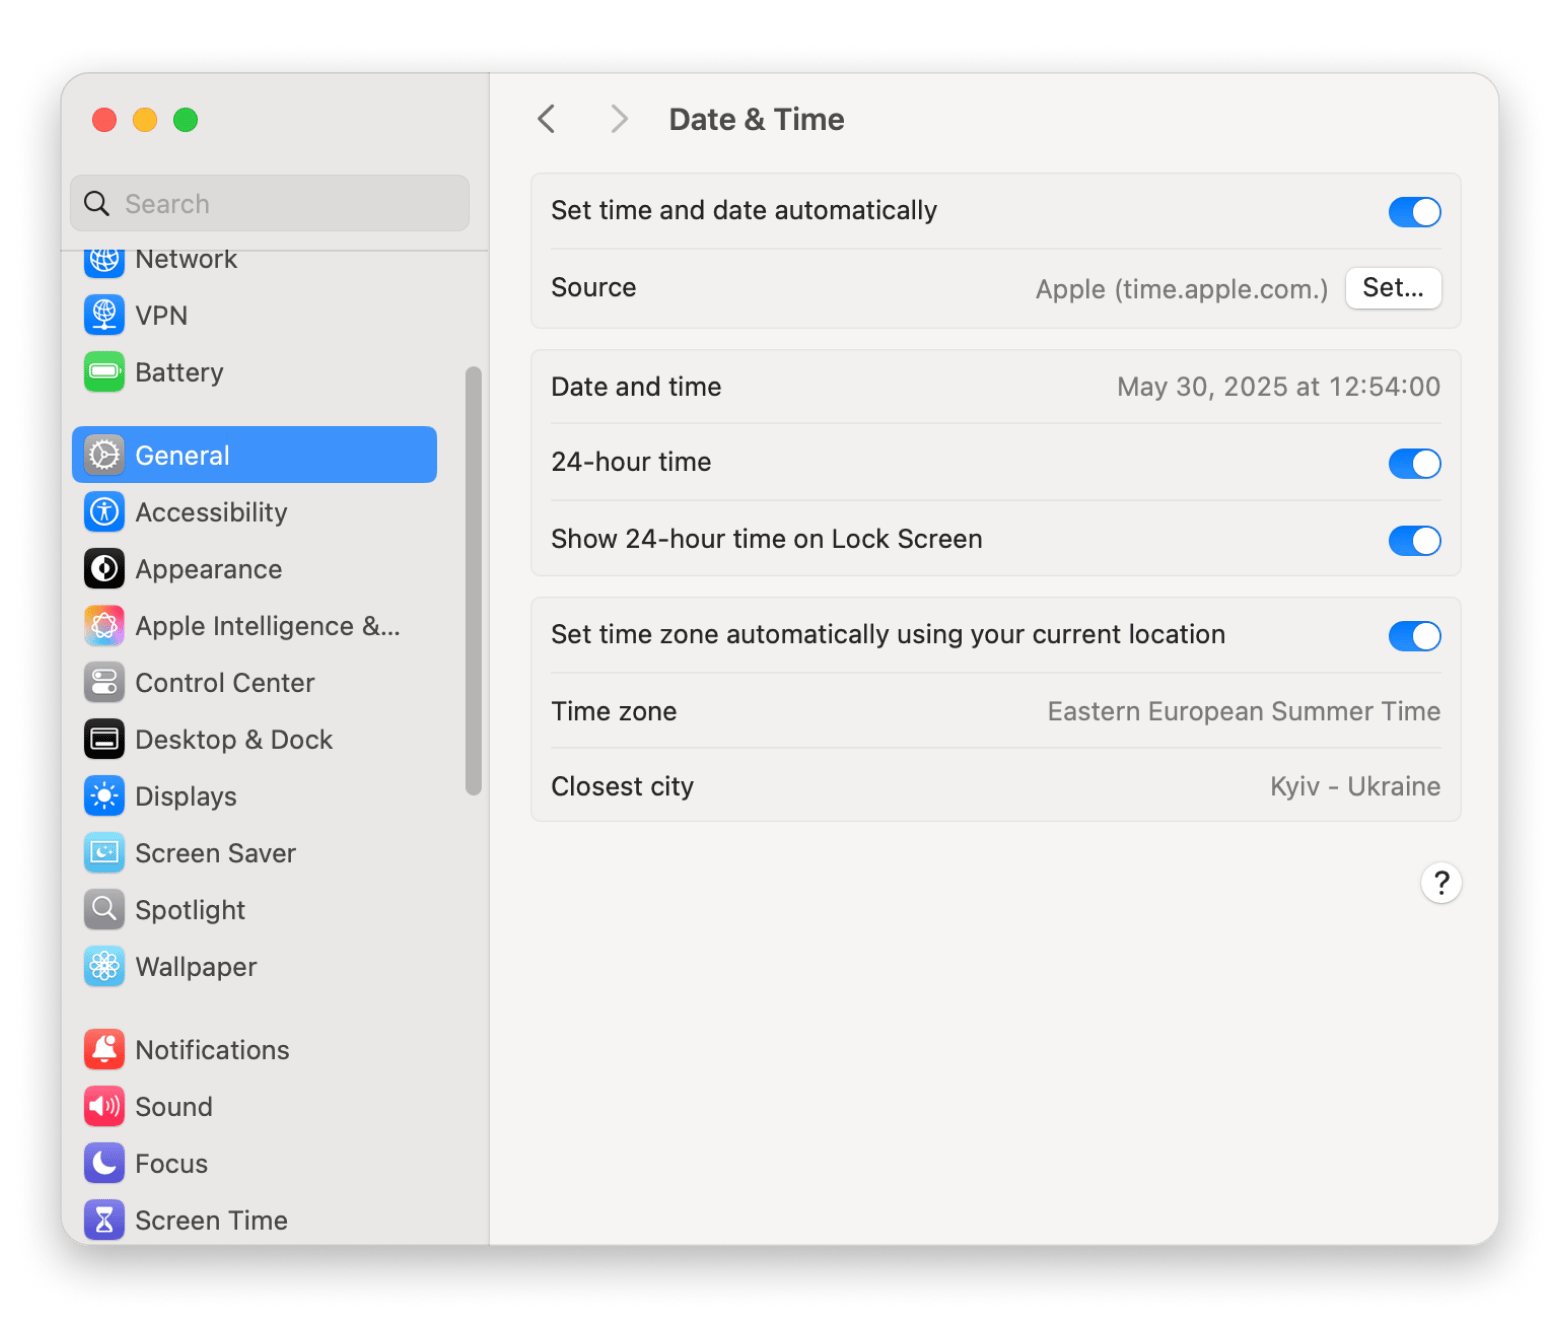
For one reason or another, you might have set your laptop to display custom time. Unfortunately, such a change might interfere with the MacBook update.
To resolve this, try setting your time and date to be determined automatically. Simply go to System Settings > General > Date & Time. Then, turn on Set date and time automatically.
Start your Mac in safe mode
If there’s no progress, some processes might be blocking the installation. Restart your Mac in safe mode to disable these and allow a smoother update.
For Apple silicon Macs:
- Turn off your Mac.
- Press and hold the power button until you see the startup options screen.
- Select your startup disk.
- Hold down Shift, then click Continue in safe mode.
- Log in and try the update again.
For Intel-based Macs:
- Turn off your Mac.
- Turn it on and immediately hold down the Shift key.
- Release the key when you see the login window.
- Log in. You should see Safe Boot in the menu bar.
- Try updating macOS again.
Reset NVRAM on your Mac
Resetting your NVRAM, which stores settings and preferences, is a deeper step after Safe Mode. Clearing it can fix update issues caused by corrupted logs.
To wipe out NVRAM, restart your Mac and hold Command + Option + P + R. Then, try to initiate the update once again.
Read more about how to update your operating system on a Mac.
| Note On Apple silicon Macs, NVRAM doesn’t exist as such, and the process that's equivalent to resetting NVRAM is handled automatically. |
Reinstall macOS in recovery mode
If safe mode and resetting NVRAM don’t work, try reinstalling macOS in Recovery Mode. This installs a fresh OS version and, if needed, lets you erase your hard drive via Disk Utility to prevent future installation errors.
To reinstall macOS in Recovery Mode on Apple silicon Macs:
- Turn off your Mac.
- Turn your Mac back on by pressing and holding the power button until you see the startup options screen.
- Choose Options > Continue.
- Reinstall macOS from Recovery.
To reinstall macOS in recovery mode on an Intel Mac:
- Hold Command + R when restarting your Mac until you see an Apple logo or any other screen.
- Select a user and type your password if prompted.
- Choose Reinstall macOS > Continue.
Also, check out the quick guide on how to get out of Recovery Mode on Mac.
How to fix disk space issues for macOS update
Running out of space is one of the most common reasons a macOS update won’t install. I ran into this myself and spent way too long clicking around, trying to figure out what to delete. To save you the hassle, here are the steps that actually worked for me, manually and automatically:
- Delete unused apps: Sort your Applications folder by last opened and uninstall apps you haven’t used in months.
- Clear caches: Open Finder, select Go > Go to Folder, enter ~/Library/Caches, and delete the files inside the folders you no longer need (but keep the folders themselves).
- Empty Downloads and Trash: These folders can hold tens of GBs if neglected, so clear them regularly.
- Delete duplicates and large files: Open Finder > File > New Smart Folder, sort by size, and remove what you don’t need.
- Move old photos, videos, and files: Shift them to iCloud or external drives to free space.
- Clear old Mail and iMessage attachments: Set Mail to auto-remove downloads to avoid a buildup.
Personal tipIf you're running low on space, use a tool like CleanMyMac. It helped me clear out hidden junk, huge forgotten files, and duplicates I didn’t even know I had. My Mac felt faster almost instantly.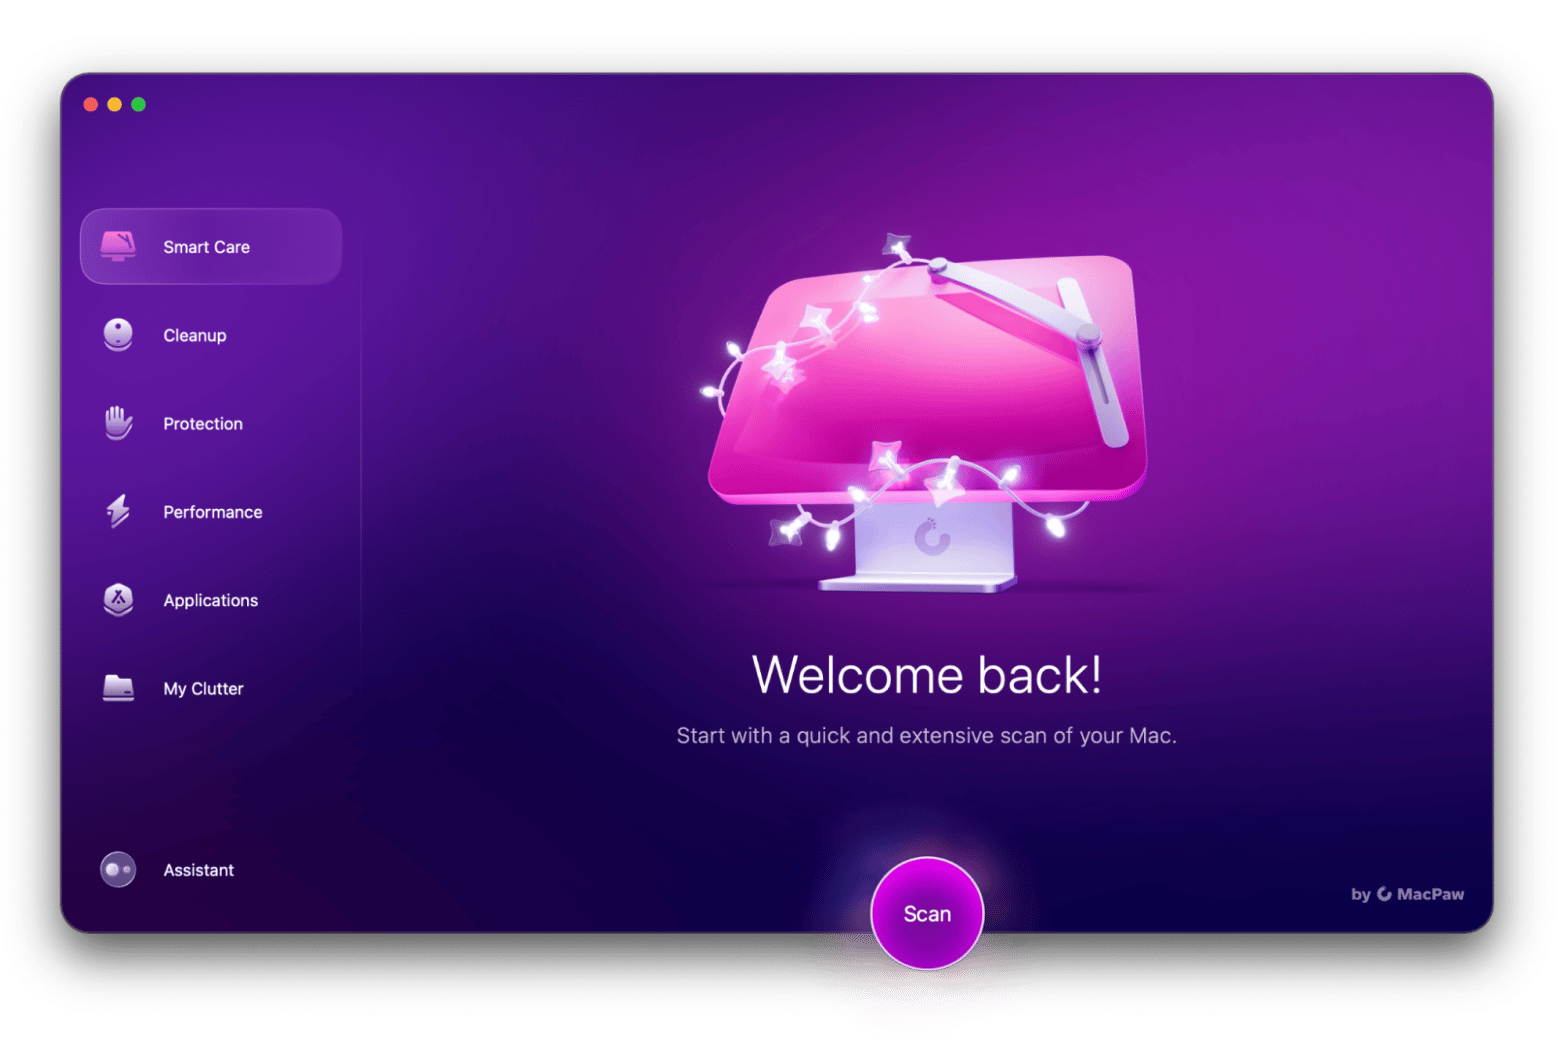 |
How to restore your Mac from backup
If you ever need to reinstall macOS or wipe your drive, having a solid backup can save you from a major headache. One app that makes it really easy to back up everything and that's super easy to use is Get Backup Pro.
It backs up everything quietly in the background, and you can schedule it so you don’t have to think about it. It also compresses backups to save space, and you can clone your entire drive if you want a full copy of your setup. If you’ve got more than one Mac, you can even sync folders between them.
Troubleshooting common macOS update issues
When your macOS update gets stuck, the first thing you must check is whether your Mac model supports the new version, as older Macs may not be powerful enough. Other common issues include poor internet, low disk space, or Apple server problems. Each update issue can be different.
Here are a few quick troubleshooting tips:
- Check Apple’s System Status: Visit Apple’s System Status page. If macOS Software Update is temporarily down, give it some time and try again later.
- Reboot your Mac: Sometimes a simple restart clears temporary glitches blocking the update.
- Update in Safe Mode: Boot in safe mode to prevent third-party apps from interfering, then try updating.
- Check your internet connection: Unstable Wi-Fi can cause downloads to fail. Try switching to a stronger network or using a tool to find the best signal in your space.
- Clean up disk space: macOS updates require several gigabytes of space. Go to Apple menu > About This Mac > Storage to see how much you have.
Final thoughts on how to fix my Mac won't update issue
Keeping your Mac up to date should be simple, but when things go wrong, it can be frustrating. Whether your update gets stuck, won’t download, or causes issues after installing, there’s almost always a fix—you just need the right steps.
Tools like Get Backup Pro can save your data before reinstalling it. CleanMyMac helps you clear out junk, free up space, and keep your Mac running smoothly. And if you’re dealing with weak Wi-Fi or unreliable internet during updates, NetSpot can show you exactly where the signal drops so you can fix it fast.
The best part? All of these tools are available in one place, Setapp. With a single subscription, you get access to all of them (and 260+ more), and there’s a 7-day free trial so you can try everything out first. It’s a simple way to keep your Mac healthy, backed up, and ready for whatever update comes next.
FAQ
What to do if a MacBook won't update?
If your MacBook won’t update, start by checking Apple’s system status to rule out server issues. Make sure you have enough free disk space, then restart your Mac. If that doesn’t work, try updating in safe mode. Also, check that your date and time settings are set automatically.
Why is macOS not updating?
Some common reasons macOS is not updating are:
- Lack of enough storage space
- Poor internet connectivity
- Apple server outage
- Outdated or incorrect system settings
- Certain apps interfering with the process
How can I force my Mac to update?
There are three ways to force your Mac to update:
- Open System Settings to check for and install macOS updates.
- Open Terminal. Type
softwareupdate -lcommand to check for available updates, andsoftwareupdate -iato download and install them. - Reset NVRAM to force your Mac to check for and install OS updates (on Intel Macs).
What to do if a Mac is stuck updating?
If your Mac is stuck updating, try restarting it in safe mode to bypass background processes. Clean up disk space using a tool like CleanMyMac, then check Apple’s System Status page to see if there’s an outage. Finally, review and update your system settings to make sure everything is configured correctly.


