How to uninstall Creative Cloud on Mac
Removing Creative Cloud from your Mac is not as easy as getting rid of a simple sticky notes app, considering that there are multiple Creative Cloud apps in the ecosystem to deal with.
We’ll explain what Adobe Creative Cloud is, guide you through everything you need to know about permanent deletion, and show you how to remove it manually – along with any related files.
What is Adobe Creative Cloud?
Adobe Creative Cloud is a popular software that includes 20+ different creative desktop and mobile apps and services. It’s a creative digital media suite that lets anyone access photo, design, and video tools under one subscription priced at $59.99/month. Alternatively, if the individual just wants to access separate tools, they can do that too with a cheaper subscription at $19.99/month for the Photography package (Photoshop and Lightroom) and $9.99/month for single apps.
Since these apps are created by Adobe, creatives can expect industry-grade quality from programs like Adobe Photoshop, Illustrator, Premiere Pro, and After Effects to use for both personal and professional work. Subscribers can also reap the benefits of tons of cloud storage, free tutorials, templates, and fonts, and access to teamwork tools and a creative community.
How to delete Adobe Creative Cloud with ease
Adobe Creative Cloud is certainly rich in value, but tools aren’t forever. When it comes time to move on, and you find yourself in a situation where you can't uninstall Creative Cloud for desktop on Mac, what do you do?
Macs are sleek and have fantastic user interfaces, but uninstalling apps can be tricky for them. Dragging and dropping them into the nifty little trash can won’t entirely do the job, nor will pressing Command + Delete on your keyboard.
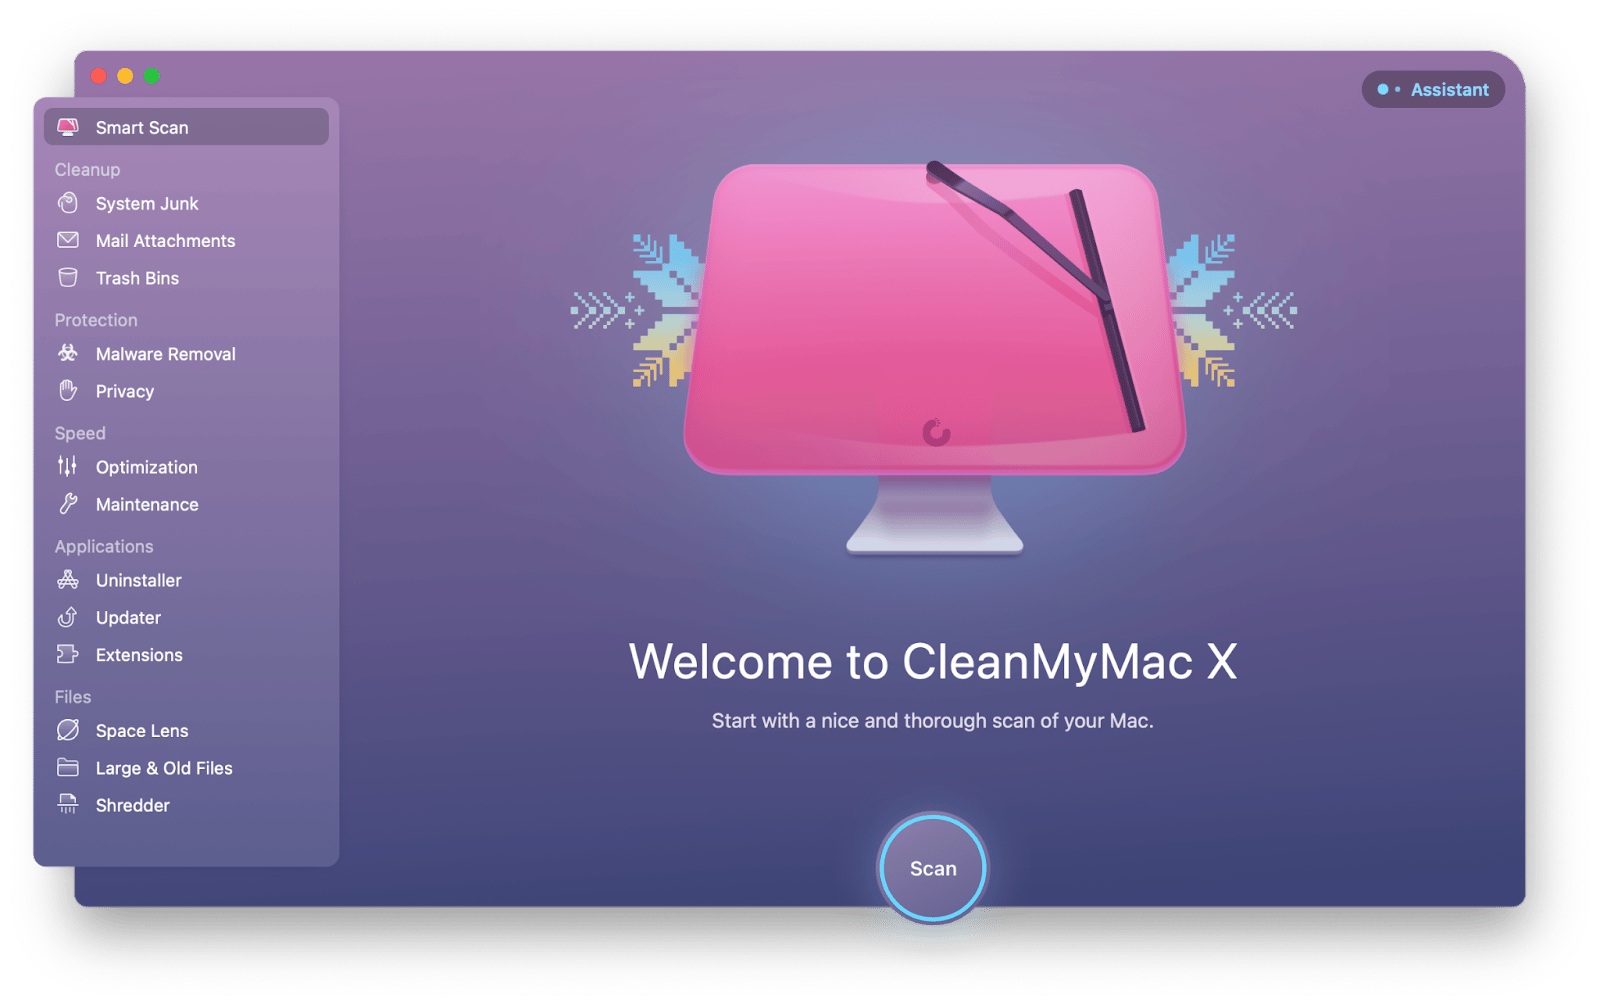
CleanMyMac can purge your Mac of all those hidden folders and associated files that will sit on your hard drive, taking up precious space.
- Download CleanMyMac X.
- Make sure all Creative Cloud applications are closed.
- Click on Uninstaller under Applications.
- Click View All 37 Applications… and then select all Creative Cloud-related applications.
- Click on Uninstall
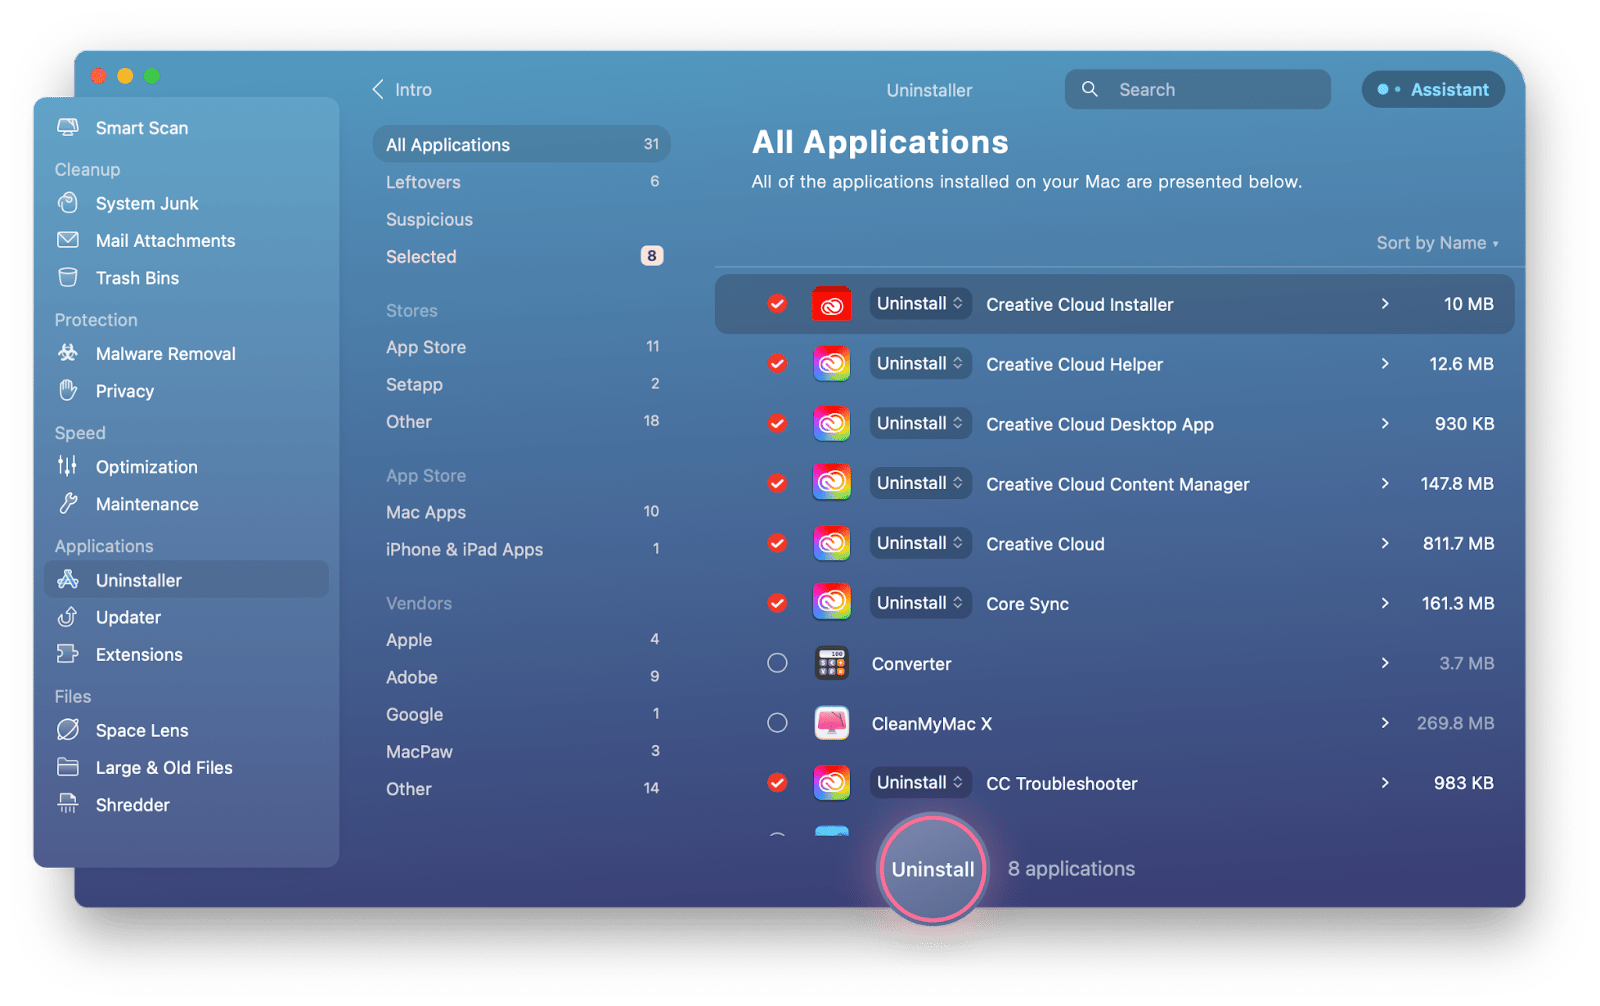
CleanMyMac X will completely remove all those apps from your Mac and then show you how many gigabytes were cleaned up and are now available.
Remove Adobe Creative Cloud from Mac manually
Another way to get rid of Creative Cloud on Mac involves a more hands-on approach. This option involves deleting the app manually through your system folders.
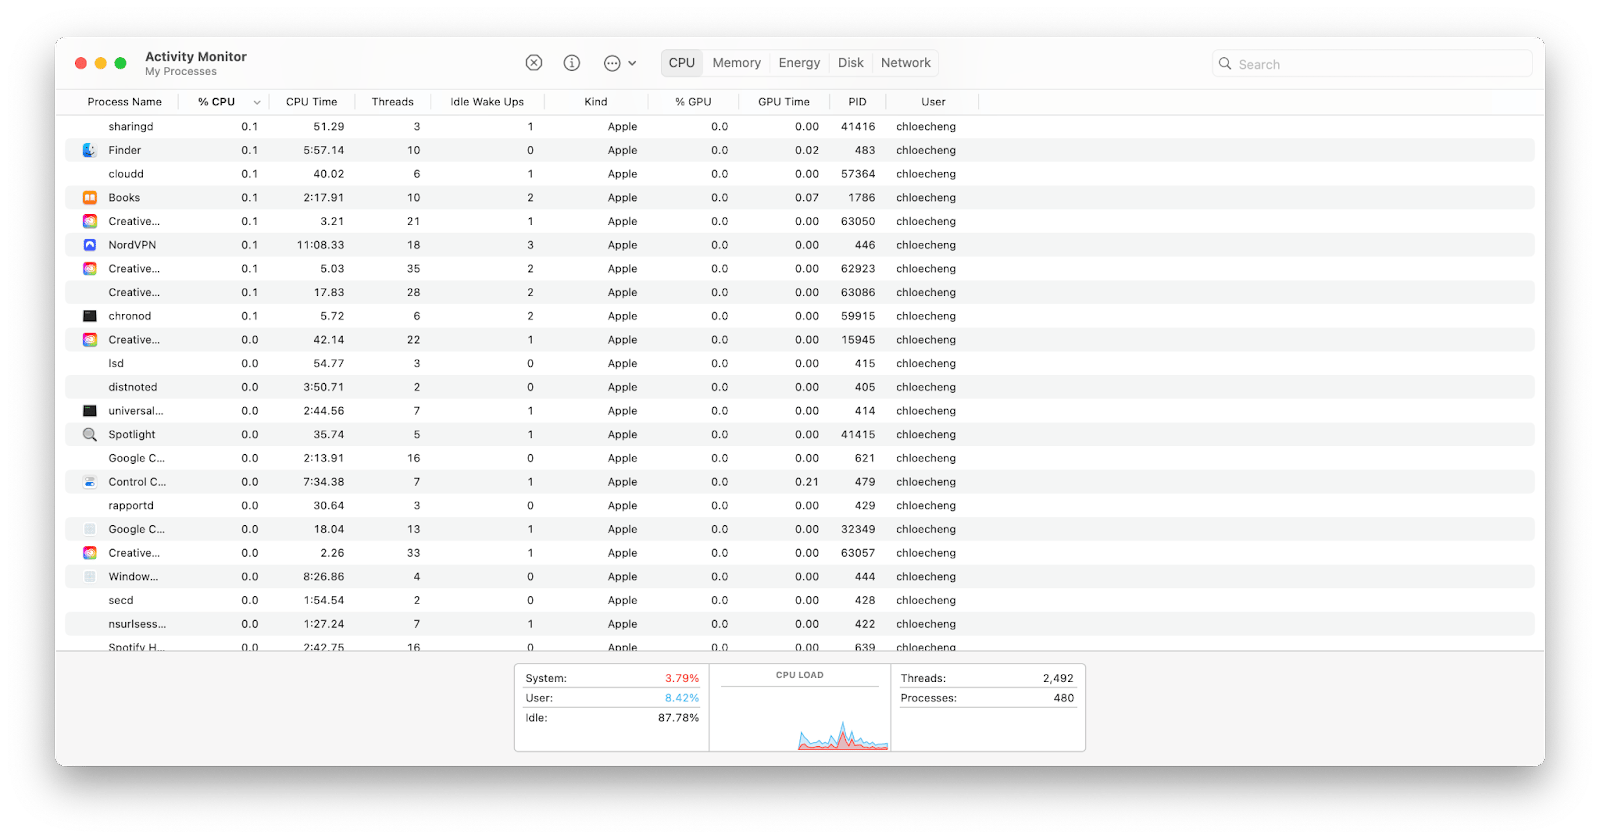
Close down all your Adobe Creative Cloud applications and windows. If you’re not sure whether there are related processes running in the background, open the Activity Monitor (Applications > Utilities > Activity Monitor). You can click on any line that has a Creative Cloud or Adobe-related logo next to it and click Quit Process to close them.
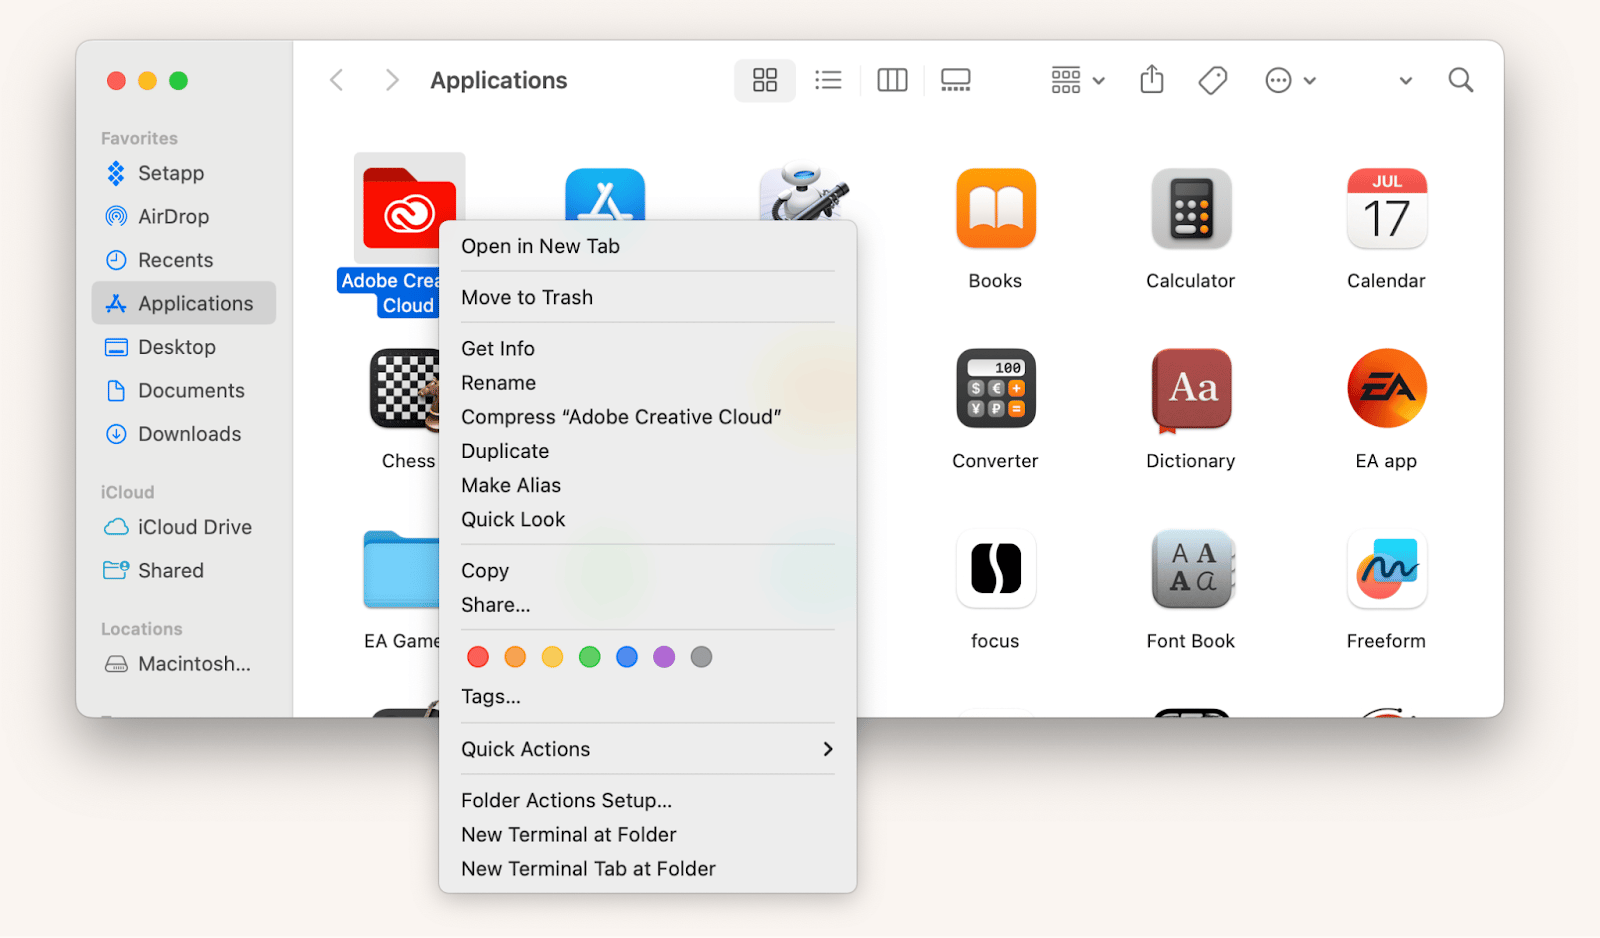
Access your Applications folder to delete the main Creative Cloud app by going into your Applications folder and searching for the Adobe Creative Cloud folder. You can either right-click on the icon and select Move to Trash or drag and drop the folder into your Mac dock’s trash can. Do the same for any other downloaded Creative Cloud applications. You may have to enter your password to give your Mac permission.
You can also look for the Creative Cloud Uninstaller that comes with the installation pack and double-click on it to start the process. You’ll be prompted to click the Uninstall button, and it will let you know when it has successfully uninstalled the program.
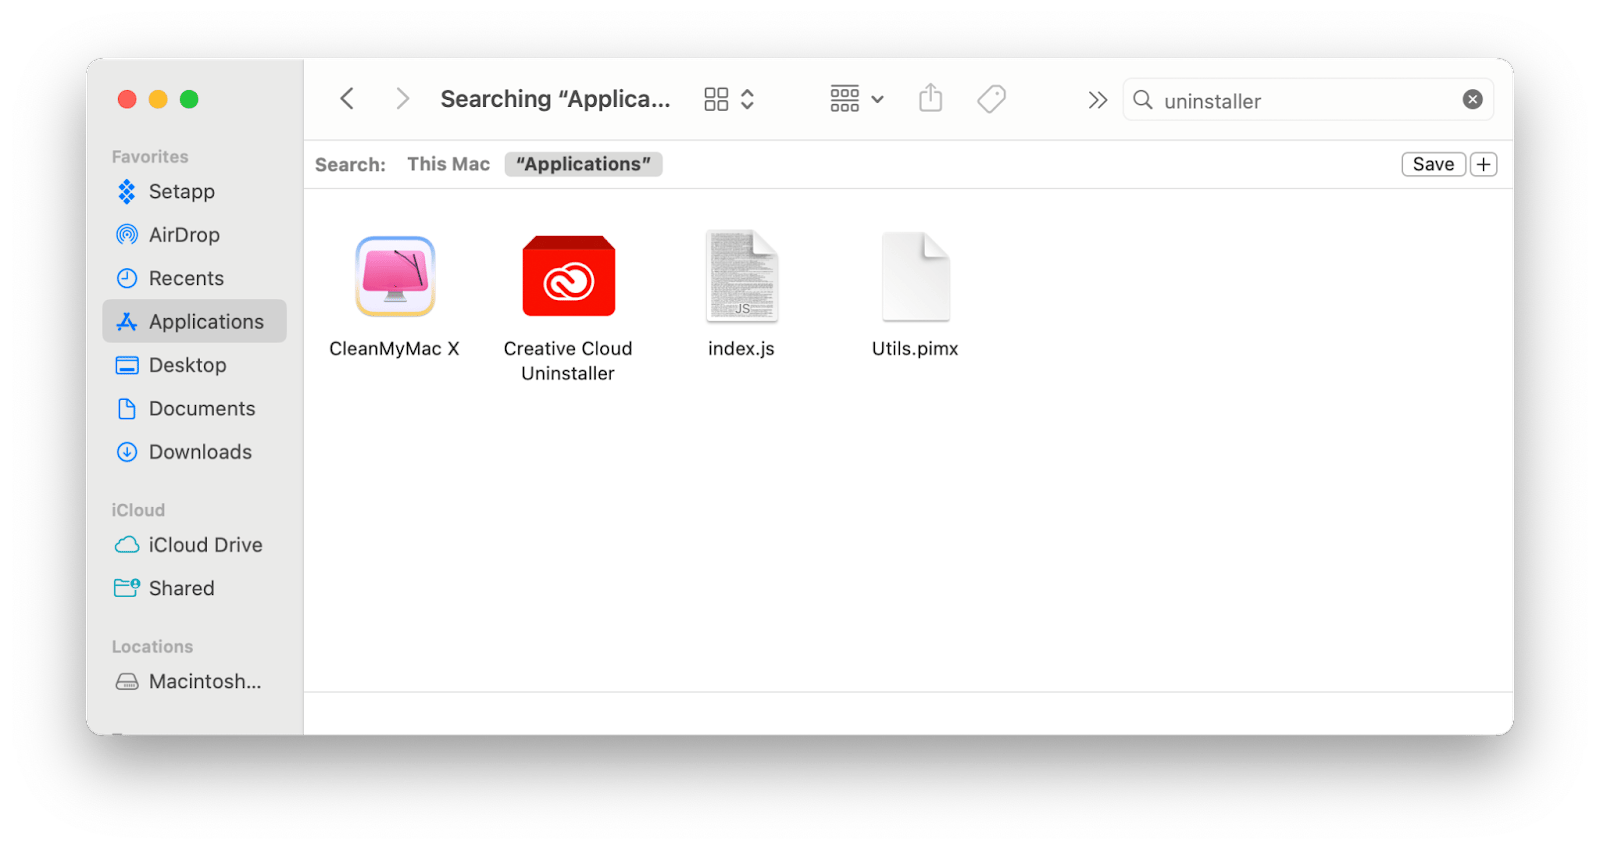
While this method is native to Adobe Creative Cloud, it’s vague and won’t show you the process. With CleanMyMac, you have the advantage of visualizing the file and folder cleanup and the removal of the app.
Delete Adobe Creative Cloud related files
Remember, just because you’ve deleted the main app doesn’t mean all those files associated with your Adobe Creative Cloud have just disappeared into the ether. Deleting these files is important because you don’t want big files, especially if they take up disk space on your Mac or cause issues down the line if you choose to reinstall the software later. Here’s how you can go a little deeper and remove those pesky leftover folders.
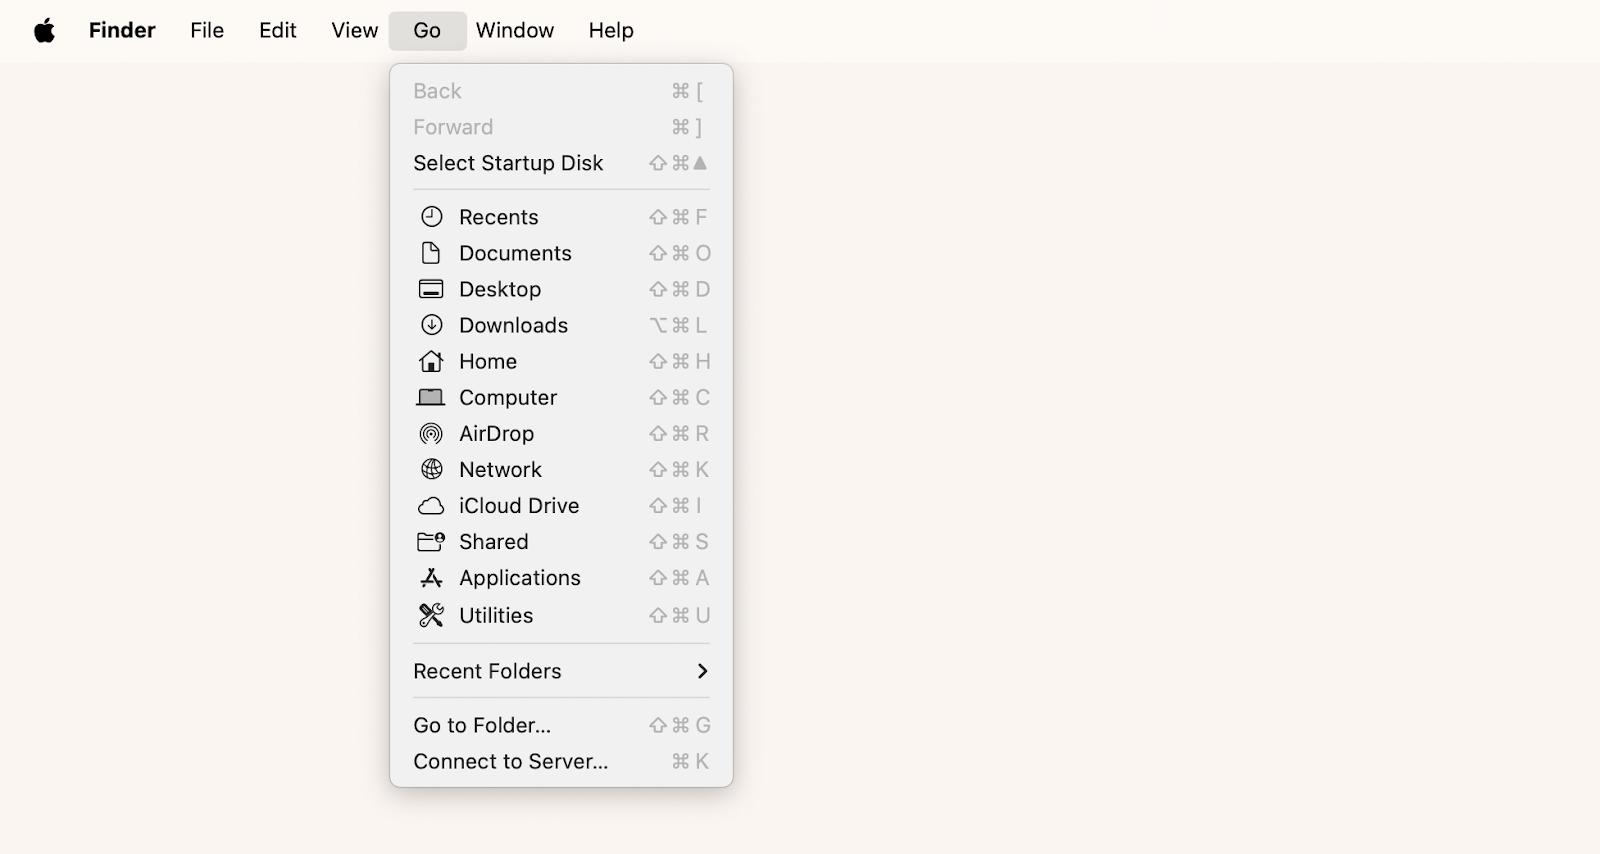
Remove any additional folders and files by opening up Finder and clicking on Go in the menu bar. Click Go to Folder and then type in ~/Library/Application Support/Adobe in the box that popped up.
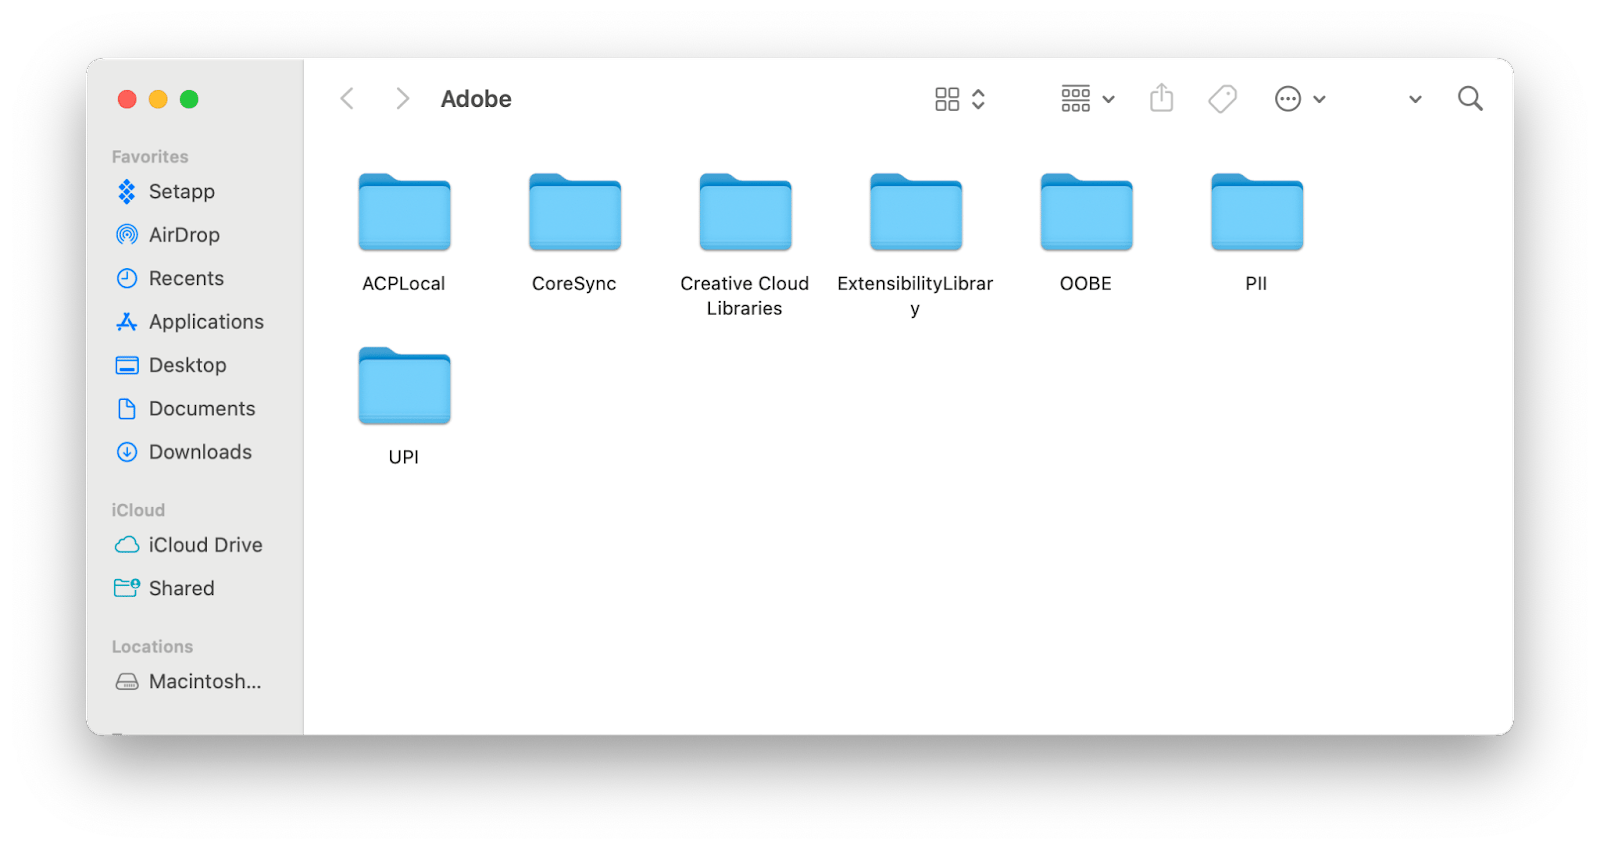
- Double-click on the first result. A folder with a variety of folders should pop up. Delete all those files by highlighting them all, then pressing Command + Delete.
- Right-click on your Trash can and click Empty Trash.
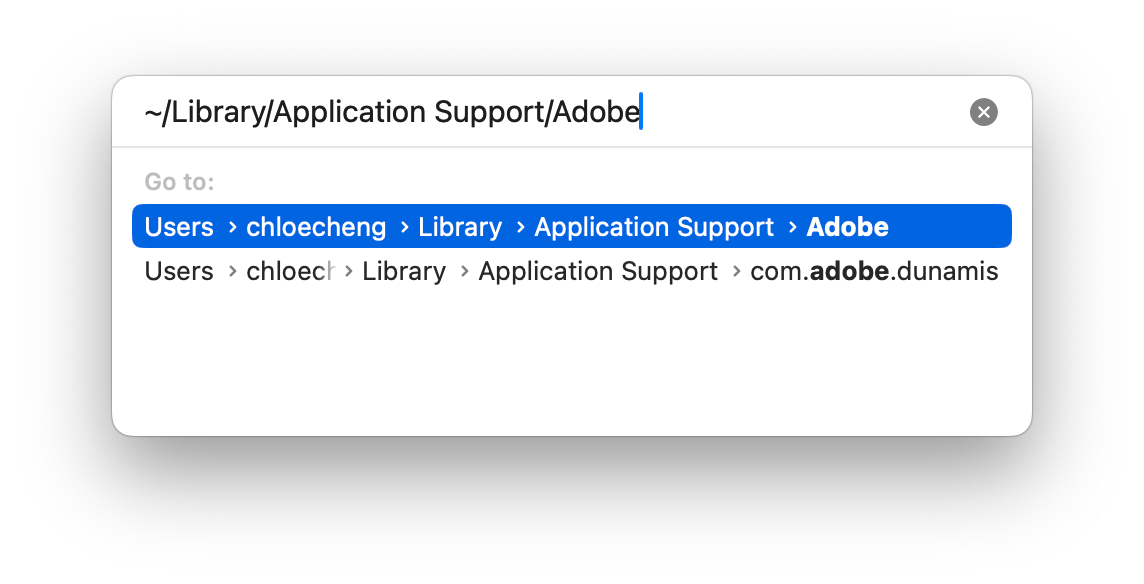
To be completely sure that all folders are deleted, you can search Creative Cloud in your Mac’s search bar and see if any stragglers pop up. It’s also useful to repeat the first step over again and type in ~/Library/Preferences/, then remove all Adobe-related files from that folder as well. If you do have projects created using Adobe’s tools, you’ll likely see a folder called Creative Cloud Files. Make sure you have these backed up if you still need them.
Delete Adobe from Mac for good
We’ve walked you through the complete process of how to remove Creative Cloud from Mac and two effective ways to do so. As well, we honed in on the importance of deleting those related, hidden files to keep your Mac fresh and decluttered. Especially when it comes to resource-intensive apps like Adobe Creative Cloud, proper deletion is important to retain valuable disk space and keep your system running smoothly.
Taking the time to uninstall any software the right way will make sure your Mac doesn’t come across any issues from leftover files. If you’re looking for a better way to organize your files or manage your Mac apps, Setapp provides a range of tools, including CleanMyMac, under one subscription starting at $9.99 + tax. These apps are all native to macOS, letting you develop, create, work, and optimize your processes with ease.
Get your 7-day free trial of Setapp today and take advantage of over 260 apps!
FAQ
How do I remove Creative Cloud from my Mac menu?
So long as you’re actively using the Creative Cloud app or have the app open, you won’t be able to remove the icon from the menu bar. If you want to get rid of the Creative Cloud icon from your Mac menu bar while you’re not using the app, though, you can close the app from your dock or do so through the app interface. Click on your profile icon in the top right-hand corner and go to Preferences. Toggle the Launch Creative Cloud at login setting off so you can prevent it from opening when you start your Mac. From the menu toolbar, click on Creative Cloud in the top-left-hand corner of your Mac screen and click Quit Creative Cloud. Now, the icon should only appear whilst you’re using the app.
Why can't I delete Creative Cloud on Mac?
There could be a variety of reasons why you can’t delete Creative Cloud from your Mac. The most common one is that you still have Creative Cloud apps or processes open in the background. Before attempting to delete the app again, go ahead and close all those apps and processes through your Mac’s Activity Monitor. After you delete the main app, you also need to make sure all related files and folders are deleted as well by using the Finder search bar or the Finder Go to Folder tool.
How do I quit Adobe Creative Cloud on my Mac?
Open the Adobe Creative Cloud app. Then, click on where it says ‘Creative Cloud’ in the top left-hand corner of your Mac to view the drop-down menu. From there, click Quit Creative Cloud. Another way to do it is to press Command + Q whilst on the app interface.


