How to use Mission Control on Mac for better window management in 2026
My workday used to be chaotic, with numerous open documents, research tabs, emails, and other apps. Whenever I opened a new window, others hid behind it, and finding what I needed was a real struggle.
One day, I discussed the madness of working on multiple windows with my colleague, and he suggested Mission Control — a built-in Mac feature for better window management.
After trying different methods to open and use Mission Control, I decided to share them with you. This step-by-step guide will help you manage apps quickly while keeping your Mac organized.
| What’s the issue? | Do this |
| Don’t know where Mission Control is located | Launchpad > Applications > Mission Control. |
| Too many open windows clutter the screen | Use Mission Control to see all open windows at once with a 3–4 finger swipe up on your trackpad. |
| Hard to switch between desktops or full-screen apps | Open Mission Control > Move cursor to top > Click “+” to add a new Space. |
| No quick access to Mission Control | Go to System Settings > Desktop & Dock > Hot Corners > Assign Mission Control. |
| Can’t close windows from Mission Control | Use Mission Control Plus to get close button & shortcuts inside Mission Control. |
| Finding it hard to switch between apps while multitasking | Use Split View or multiple desktops to organize work. |
| Want to trigger Mission Control with Magic Mouse | Go to System Settings > Mouse > More Gestures > Turn on Mission Control. |
What is Mission Control, and why should you use it?
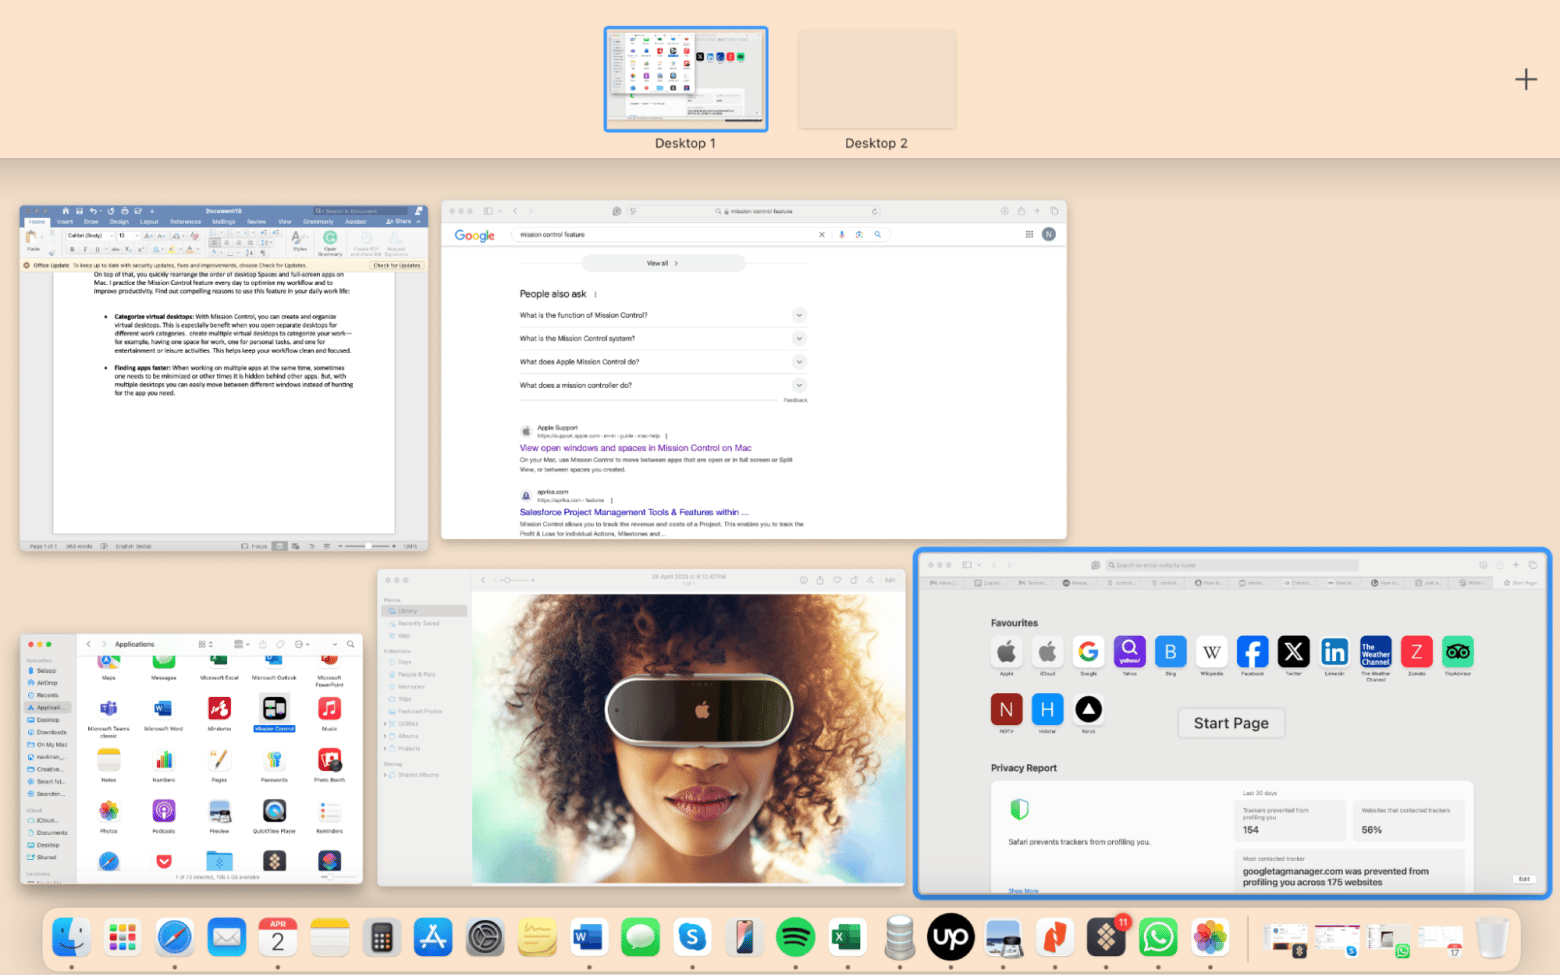
Mission Control is a one-stop tool on a Mac that manages your open windows, full-screen apps, and multiple desktops (Spaces). With a simple key tap or Magic Trackpad gesture, you can switch between windows quickly.
Are you wondering where is Mission Control on Mac? If so, you can find it in Launchpad > Applications. You can quickly rearrange the order of desktop Spaces and full-screen apps according to your work needs. I use macOS’s native window management tool every day to optimize my Mac workflow and improve productivity.
Here are some compelling reasons to use this feature:
- Improves work efficiency: No more stress to open or close windows constantly. With Mission Control, switching between apps becomes easy, which increases work efficiency and saves valuable time.
- Helps with multitasking: Arrange windows and spaces to your comfort level to handle multitasking like a pro.
- Organize desktops: With the Mac Mission Control feature, organize your Mac by creating virtual desktops to separate different tasks.
- Finding apps faster: Get rid of minimizing or searching windows, Mission Control allows you to quickly switch between windows to find what you need without losing track.
How to open and use Mission Control on Mac
I know some of you don’t know how to open Mission Control on a Mac, but don't worry — it’s super easy and simple.
Here is how to do it in different ways.
How to open Mission Control using keyboard
To activate Mission Control on Macs:
- Without Touch Bar: Press the F3 or Control + Up arrow keys.
- With Touch Bar: Press the Mission Control button (a set of three rectangles).
How to open Mission Control using Magic Trackpad
Magic Trackpad with a large and smooth surface can also be used for Mission Control on Mac. How to do:
- Place three or four fingers on the Magic Trackpad.
- Swipe upwards.
That’s it!
How to open Mission Control with Magic Mouse
Double-tap on the Magic Mouse to open Mission Control. But, for this, you first need to enable double-tapping for Mission Control.
How to do:
- Click the Apple menu > System Settings.
- Click Mouse > More Gestures.
- Turn on the Mission Control feature.
How to open Mission Control using hot corners
On Mac, you can use hot corners (corners of the screen) to open Mission Control with the following steps:
- Click the Apple menu > System Settings.
- Click Desktop & Dock.
- Click Hot Corners under Mission Control.
- Click on the arrow of the corner you want to use.
- Select Mission Control from the options > Done.
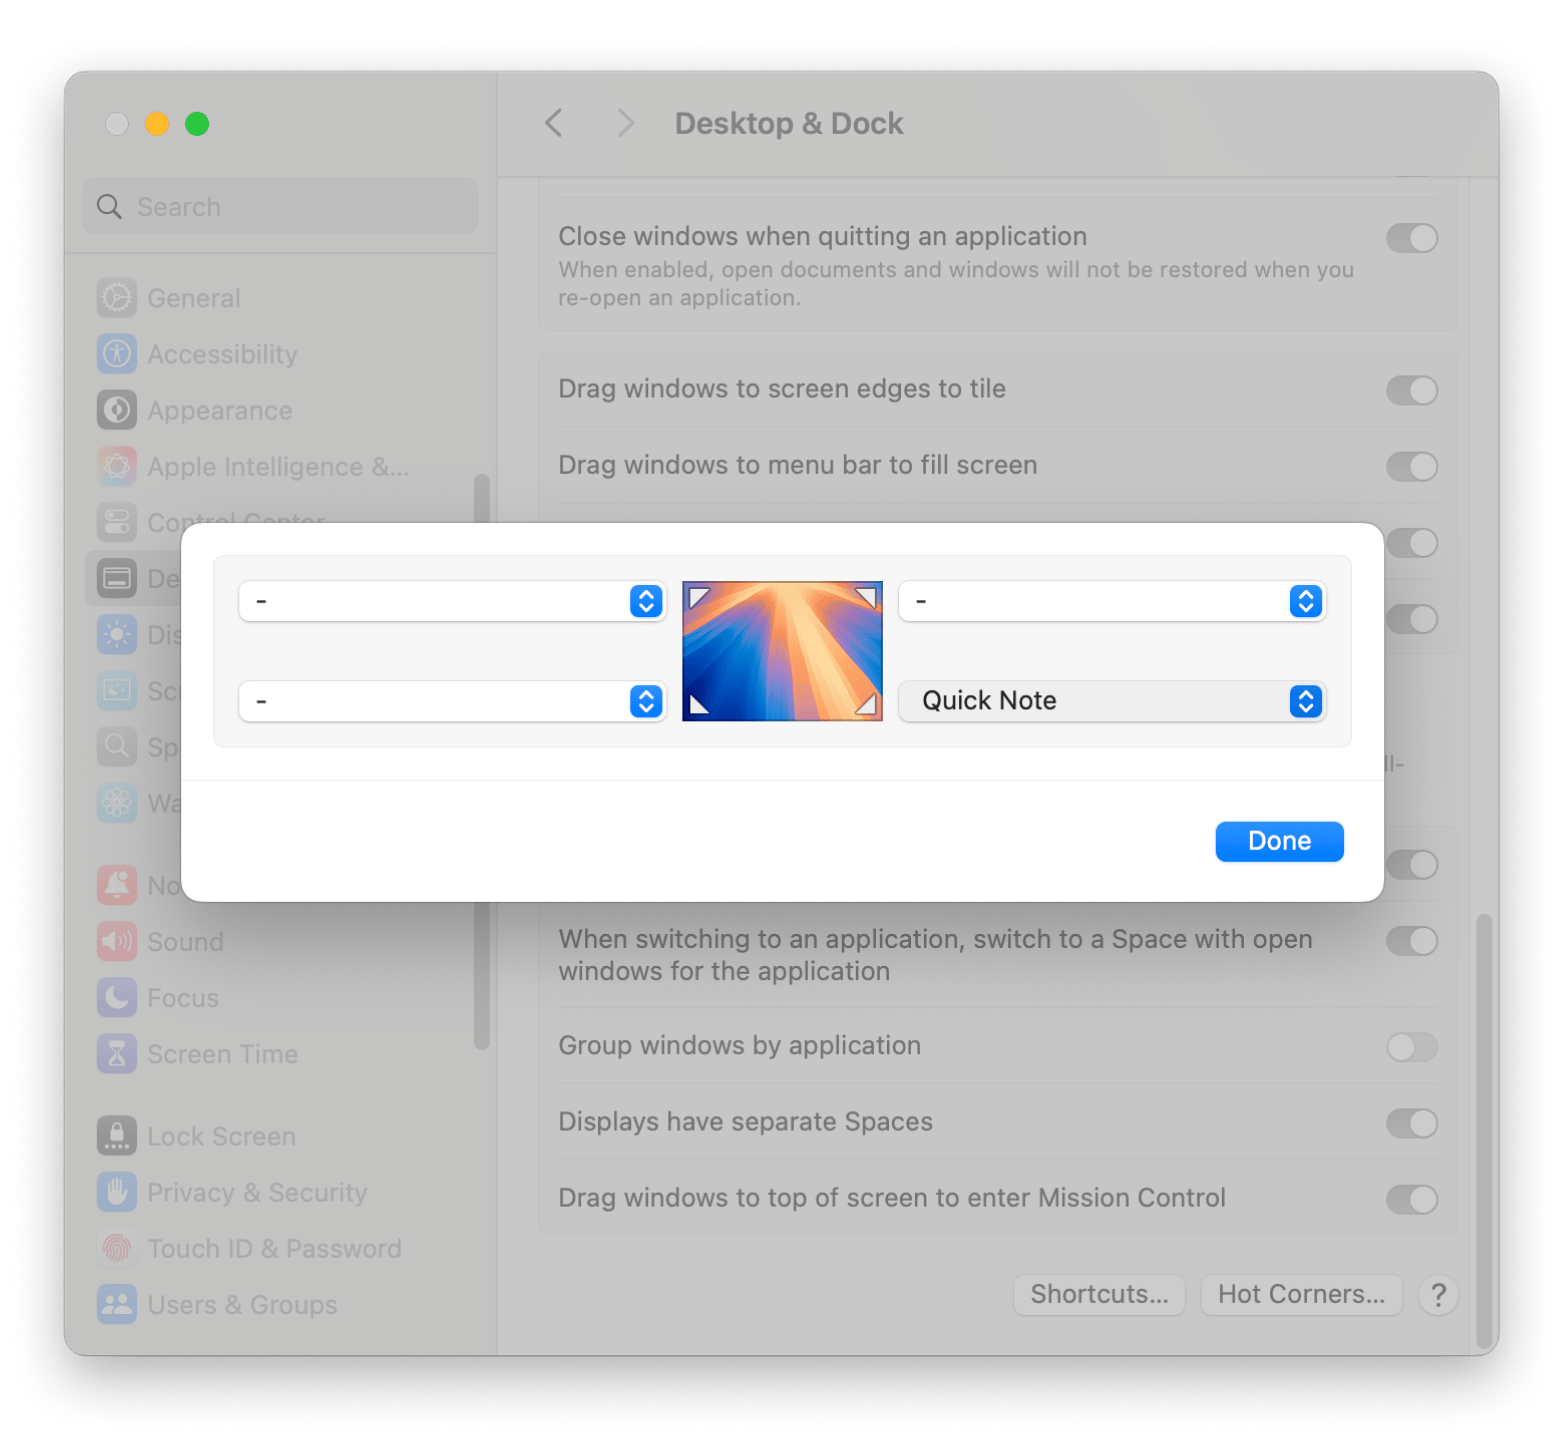
Now, whenever you move your cursor to that corner, Mission Control will open.
How to open Mission Control by dragging a window
Do you know that you can also open Mission Control by dragging the open window to the top edge of your screen? Here's how to do it:
- Click and hold the title bar of any open window.
- Drag the window towards the top edge of the screen.
But this method works only when:
- You pause briefly at the top edge while dragging.
- Your trackpad/mouse settings and system performance allow it.
- You're not using Stage Manager, which may change that behavior.
How to close windows in Mission Control
What about closing a window that you’re not using? Just to clear things up, you can't actually delete windows in Mission Control.
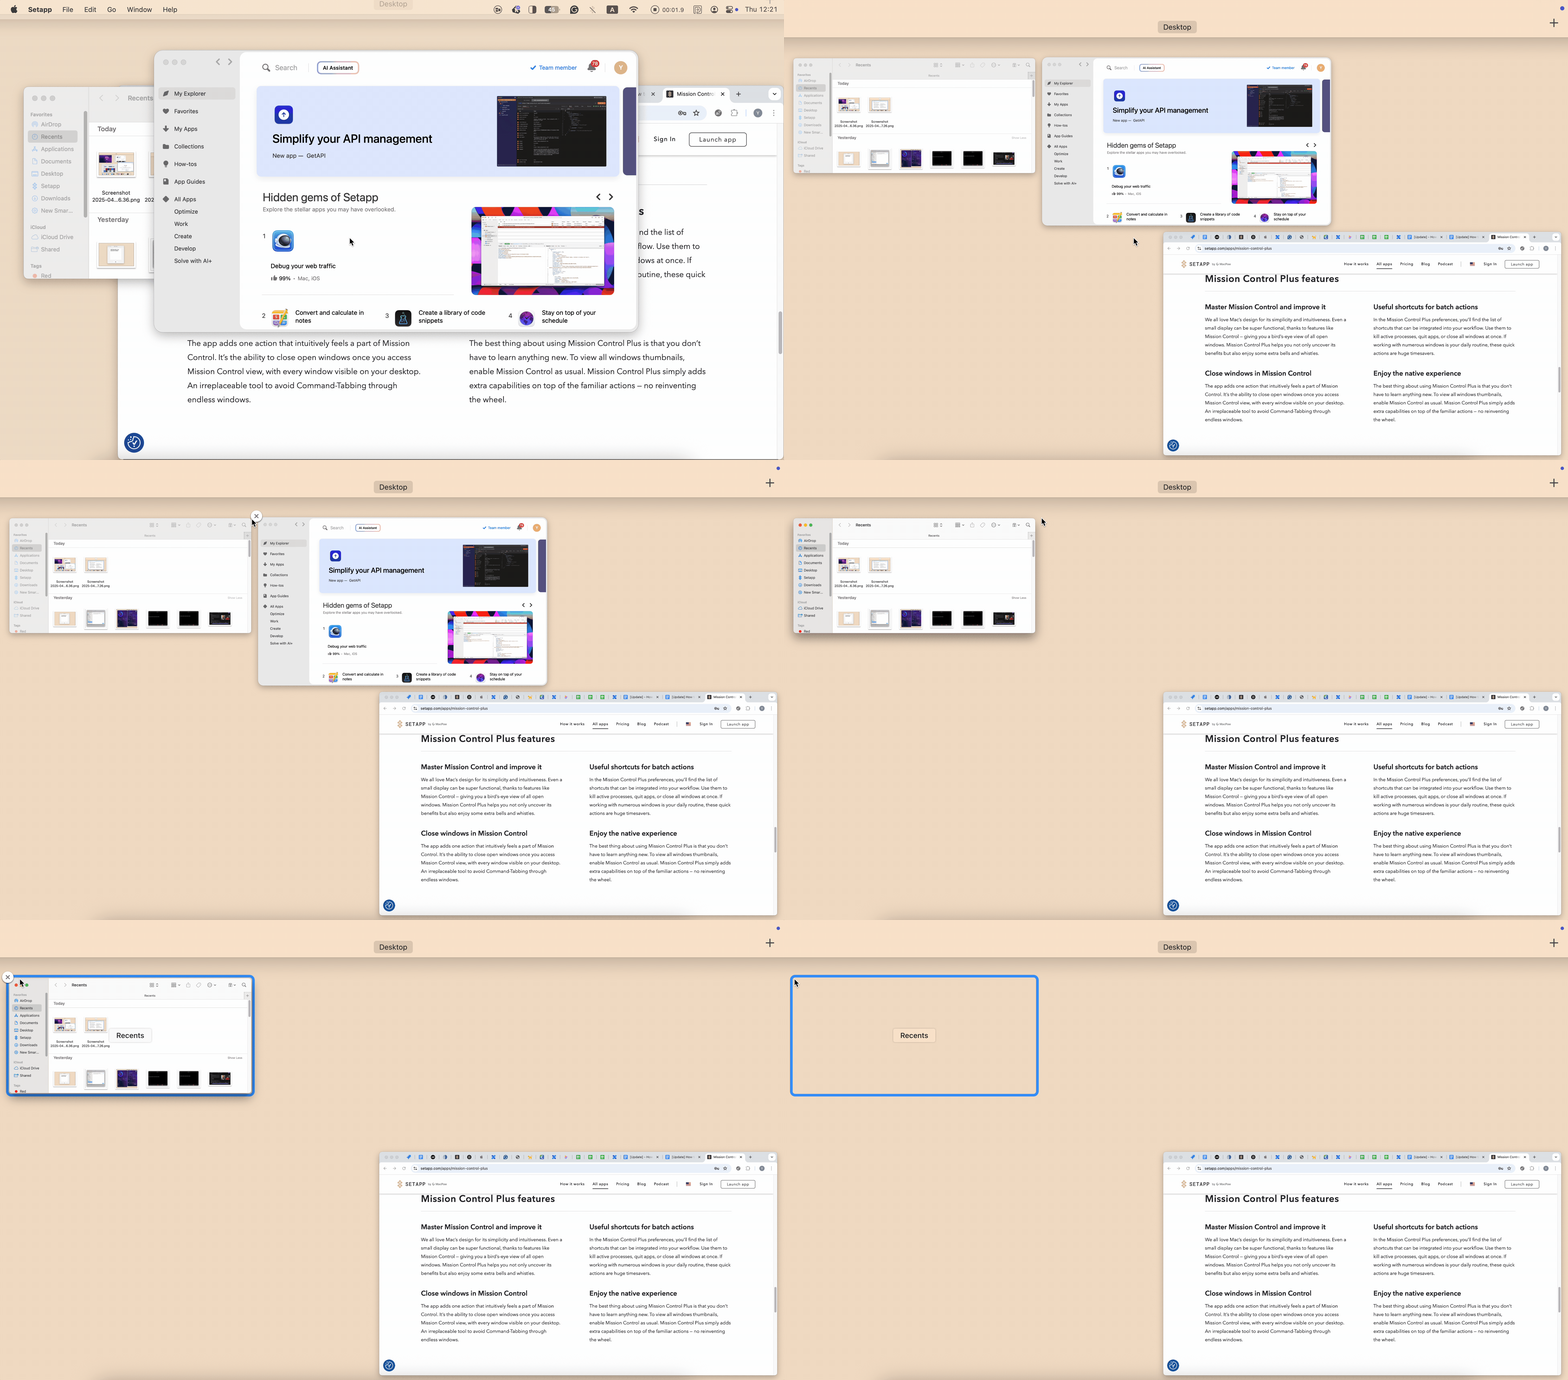
But here’s the good part: you can use Mission Control Plus. This super-easy app adds an “X” button to Mission Control, so you can just click it to close any window in a flash. Basically, the tool makes Mission Control way more useful and efficient with some cool extra features, like shortcuts for batch actions.
How to use full-screen view with Mission Control
When you use full-screen mode with a document or application, it allocates its workspace. Here is how to enter full-screen mode:
- Open any application to use.
- Click the green circle (at the top right corner).
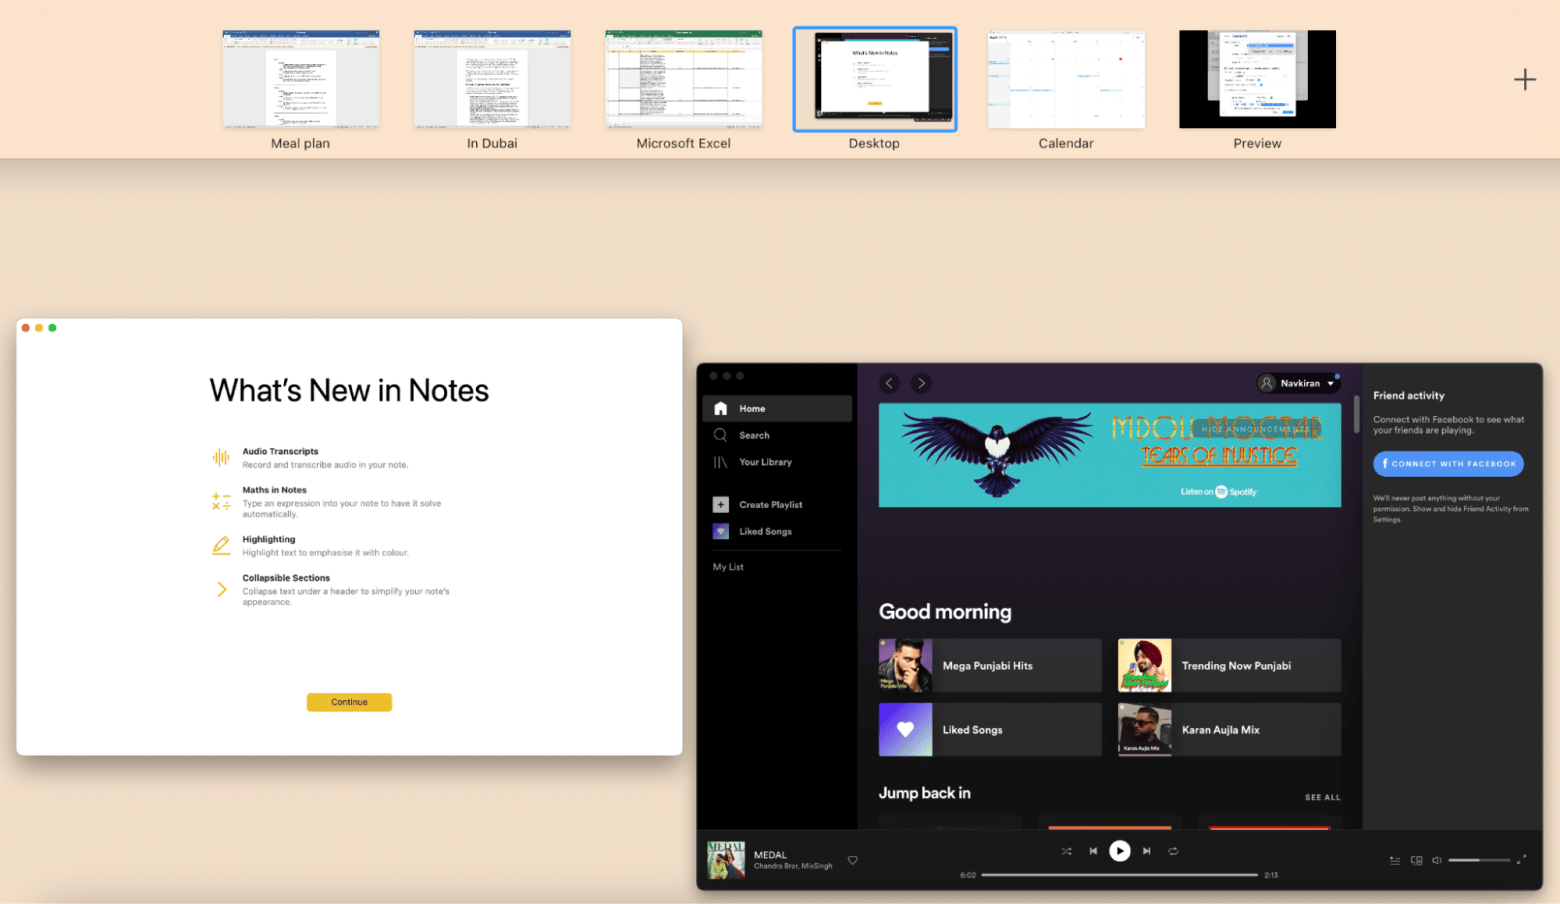
After this, place three or four fingers (depending on your trackpad settings) on the Magic Trackpad and swipe upwards. This will create a desktop for the app in full-screen view in Mission Control.
Read also:
- Turn off iMessage and notifications on your Mac
- Mac tips and tricks
- Different ways to hide apps on iPhone
- Use multiple desktops on macOS
Now, you will see all your full-screen apps and workspaces as separate desktops at the top in Mission Control. To arrange them in a desired order, simply drag them left or right.
How to use Split View with Mission Control
Split View in macOS lets you use two apps side by side, making it easy to multitask and work more efficiently. This is my favorite way to do a task on a Mac. And, creating a split view is not rocket science:
- Click and hold the title bar of the open window.
- Drag it to one side of the screen, and release. It will automatically resize to take up half of the display.
- Perform the same step with the other screen, and it will take up the other half of the screen.
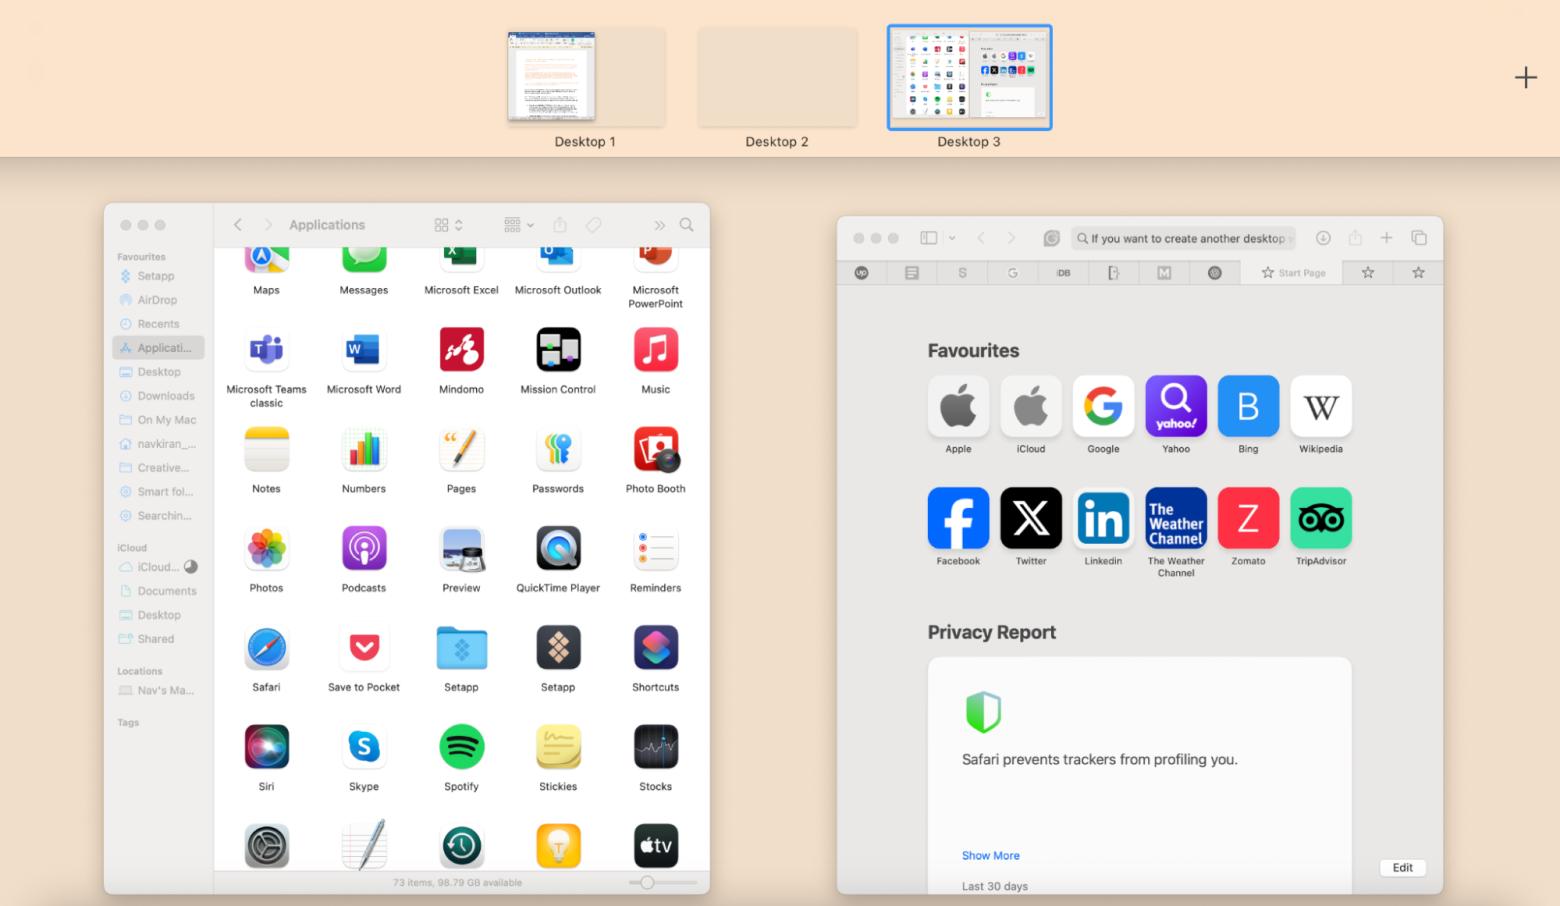
Read more: How to split screen on Mac.
How to manage different desktops with Mac Mission Control
Using separate desktops for different tasks makes it easy to switch windows without hunting for a hidden app. This not only saves you time but also makes you more productive.
To do so:
- Simply, swipe up with three or four fingers on the Magic Trackpad to open Mission Control. This will show all open windows and desktops.
- Click the add "+" icon at the top right to create a new desktop and drag windows to it. This way, you can have a separate desktop for each task — one for office work, entertainment, browsing, etc.
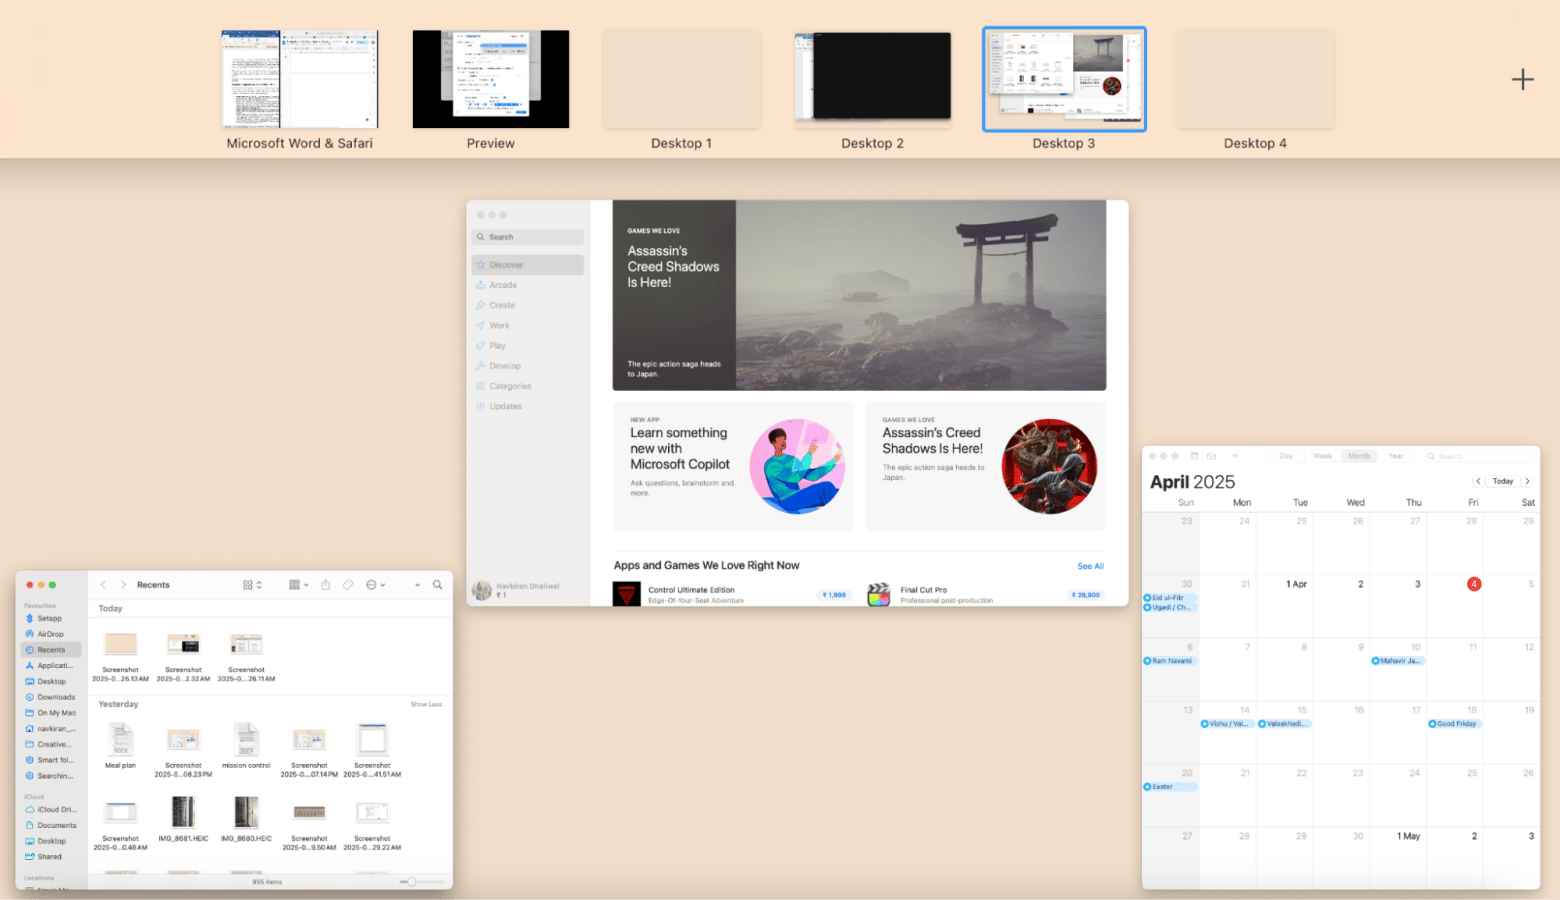
Now, just swipe left or right on the Magic Trackpad to switch the desktop.
How to customize Mission Control for efficiency
Do you know that Mission Control on Mac can be customized? You can set keyboard shortcuts and Magic Trackpad gestures to open Mission Control at your comfort.
How to do:
- Click the Apple menu > System Settings.
- Click Desktop & Dock.
- Enable/disable the options that interest you.
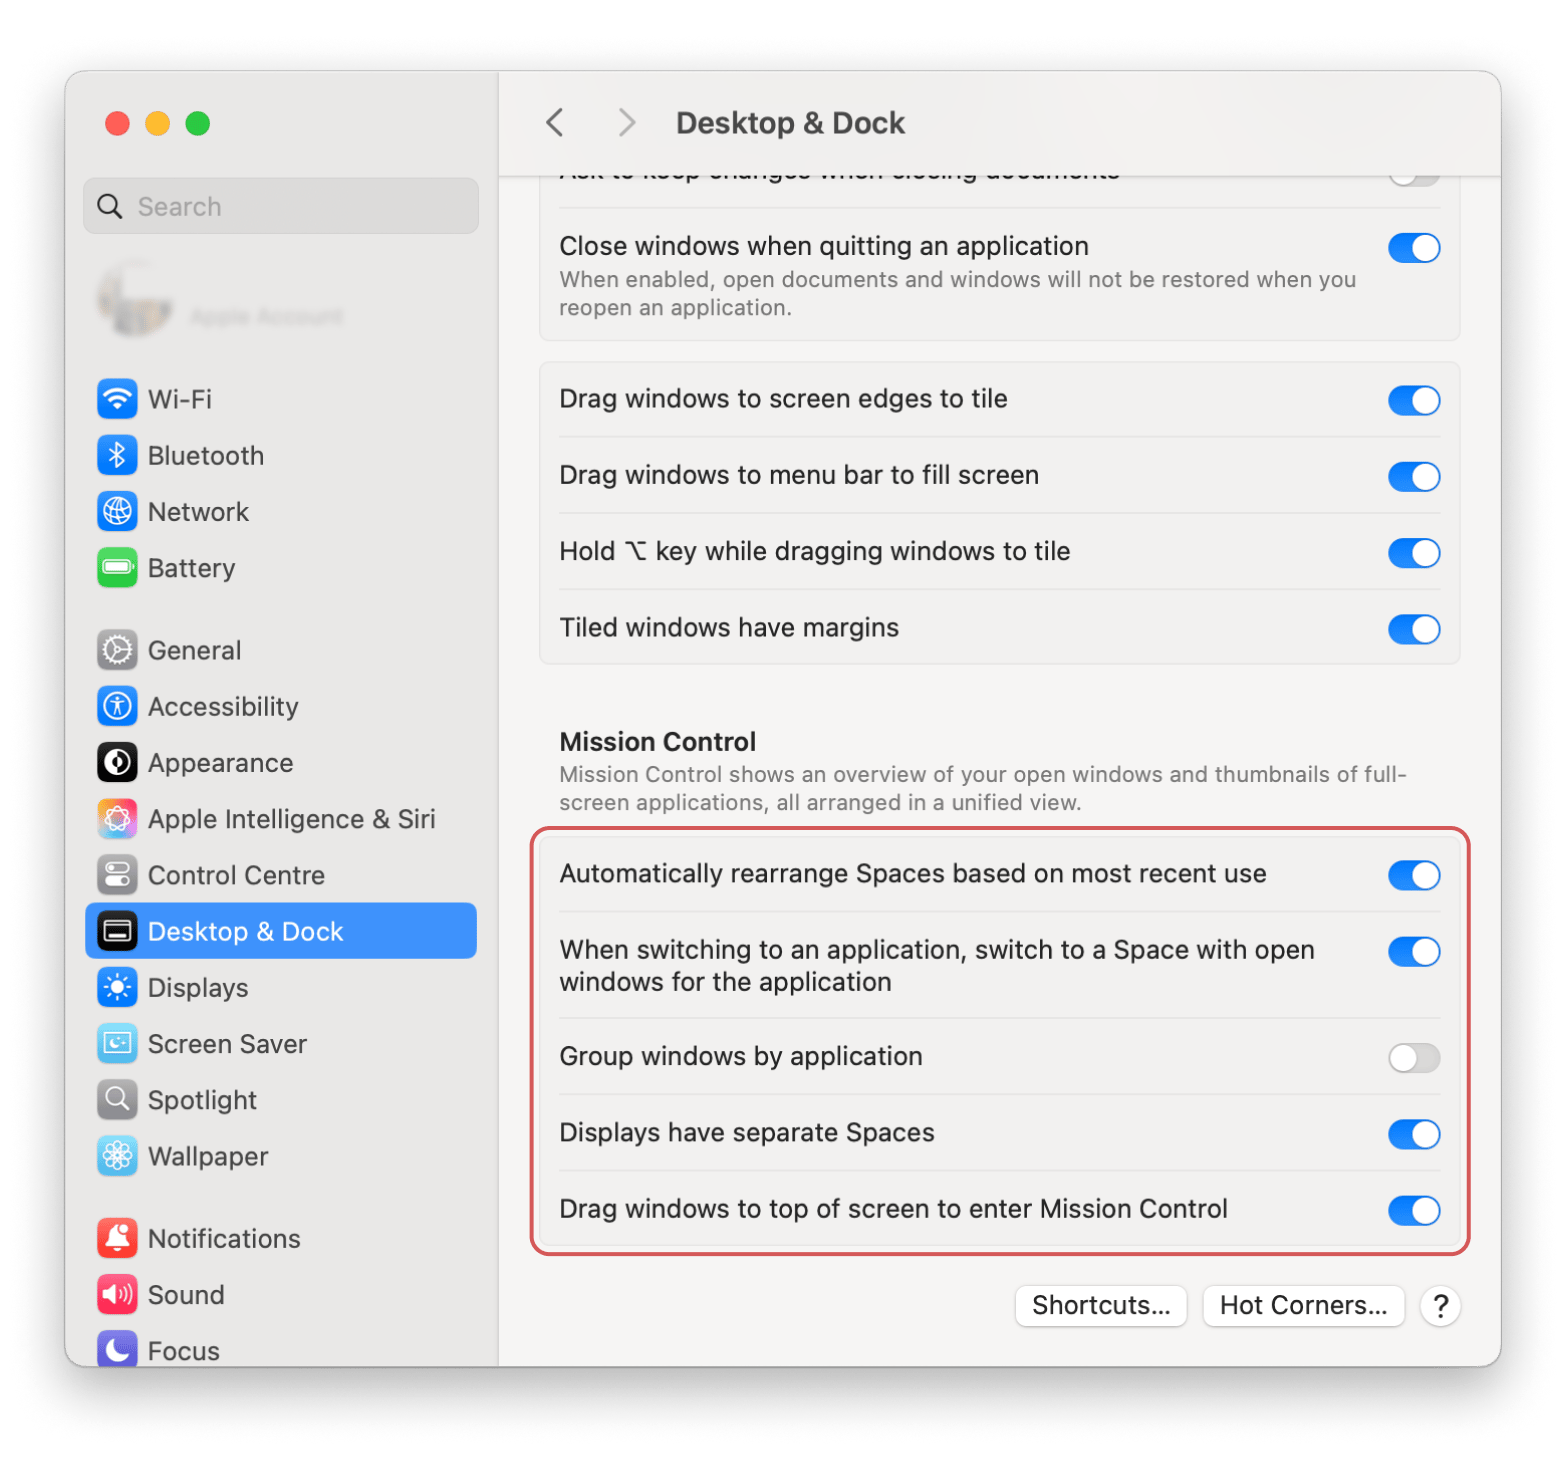
For keyboard shortcuts customization:
- Click the Apple menu > System Settings
- Click Keyboard > Keyboard Shortcuts.
- Click Mission Control from the left pane.
- Double-click the key combination against Mission Control.
- Type a new combination of your choice > Done.
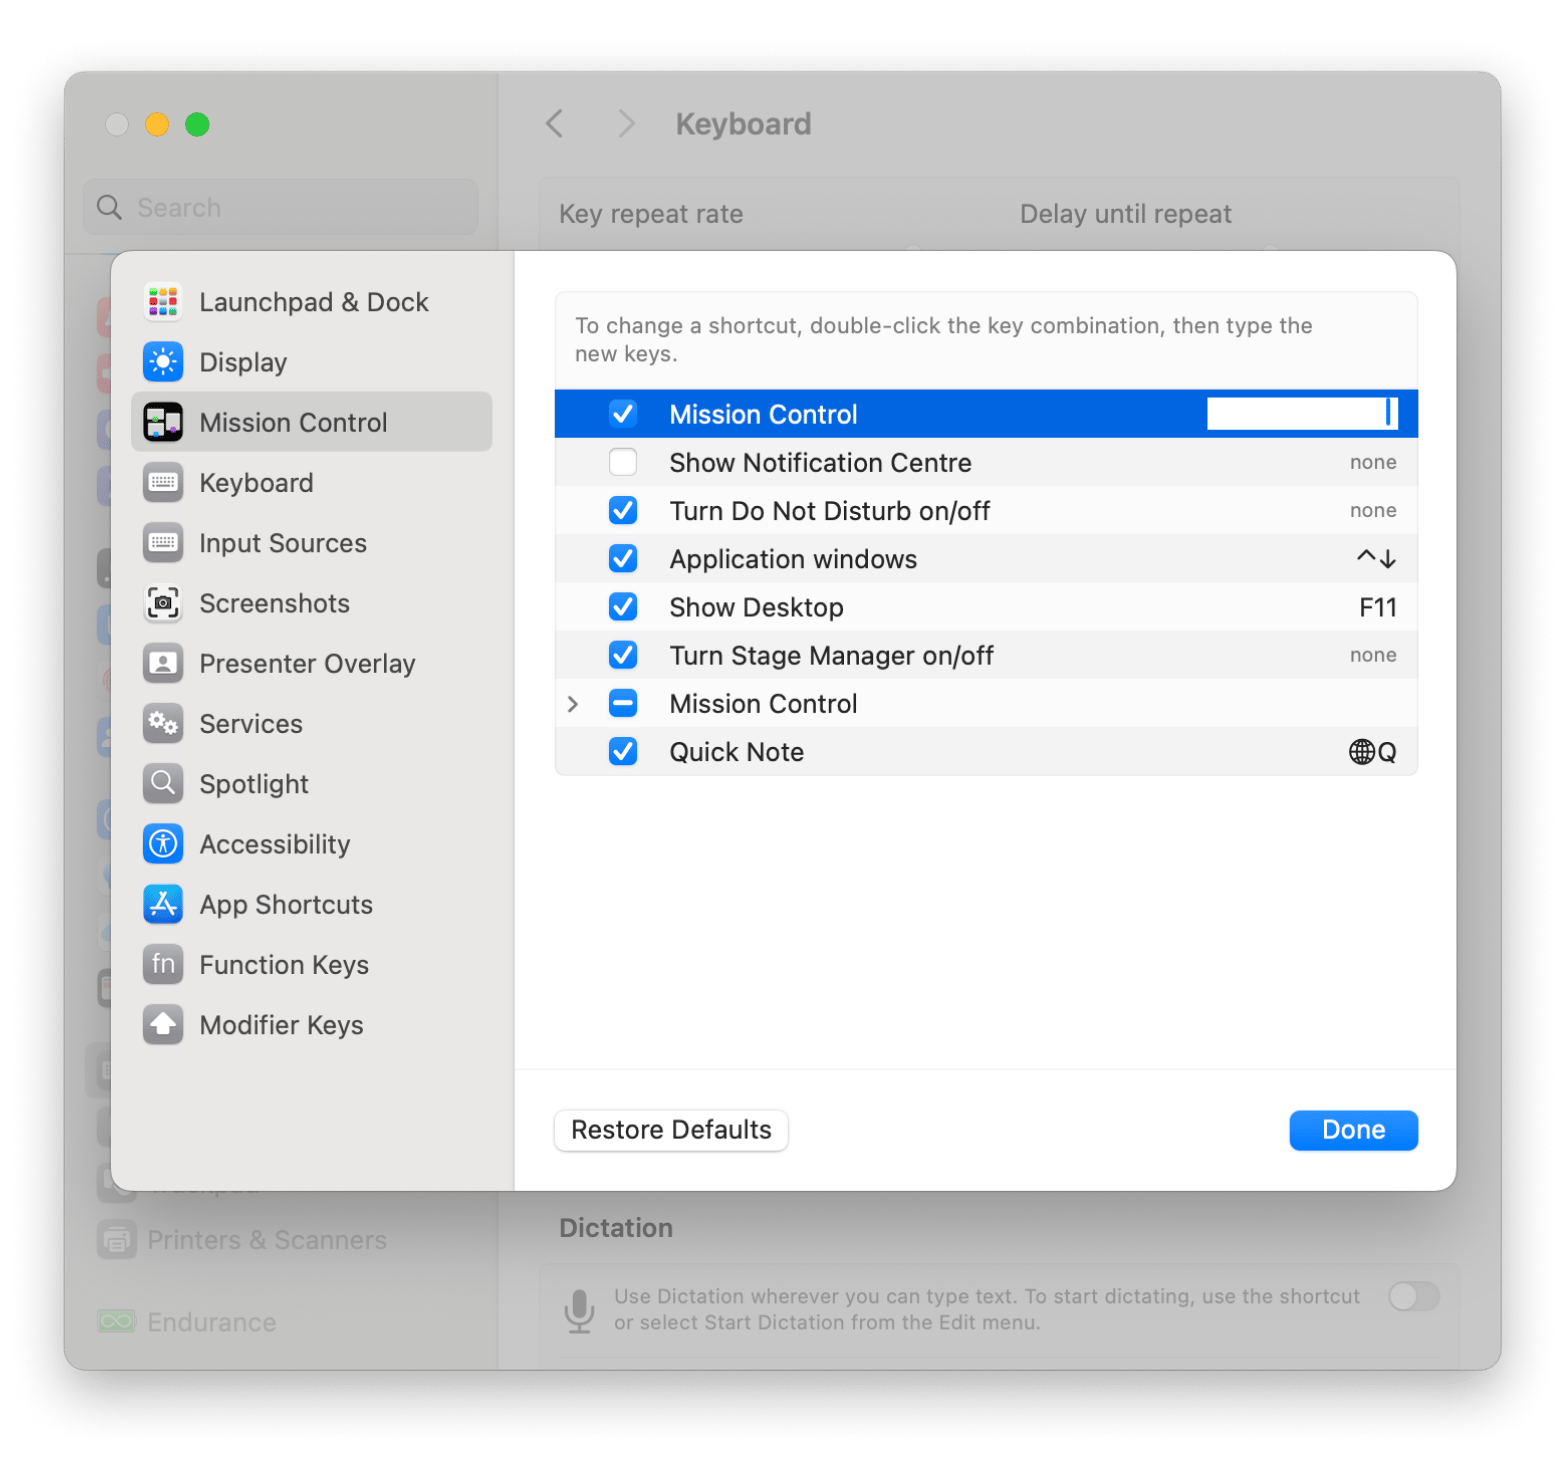
Now, to open Mission Control on Mac, you can use a new key combination.
Manage windows on Mac like a pro
Now you know how to see all windows on Mac and how to use Mission Control for managing them. Open Mission Control through keyboard, Magic Trackpad, Touch Bar, or Magic Mouse. Of course, it is a great feature of Mac for organizing and managing open windows on your Mac, but if you want to take productivity to the next level, Mission Control Plus is a game-changer. It adds smart features and customizable shortcuts in Mission Control on Mac that help you work faster and lets you close open windows in Mission Control, which is not natively possible.
In addition, many useful optimization tools, including QuitAll, Unclutter, and Bartender, are amazing for keeping your Mac organized and clean and improving speed. All the mentioned apps are available for a seven-day free trial on Setapp, a platform with 250+ powerful Mac, iPhone, iPad, and web apps. Try Setapp today.
FAQ
Can I close windows directly from Mission Control?
Unfortunately, there is no way to close windows directly from Mission Control. To close windows at once, use Mission Control Plus, which adds a close button to all open windows, allowing you to close them easily from Mission Control.
How do I disable Spaces in Mission Control?
To disable Spaces (virtual desktops) in Mission Control, follow these steps:
- Open System Settings
- Click Desktop & Dock.
- Turn off the Displays have separate Spaces feature.
- Restart your Mac.
What’s the difference between Mission Control and Exposé?
Mission Control and Exposé are both macOS features that help in managing windows, but they have distinct purposes:
- Exposé is integrated in Mission Control to show open windows of specific apps or all apps.
- Mission Control has more features that show all open windows, full-screen apps, and virtual desktops (spaces). Mission Control provides you with a broader perspective for managing multiple workspaces.


