How to snap or tile open windows on Mac
▼ TL;DR: How to split screen on Mac
- How to snap windows side by side?
Use macOS built-in tiling: Drag a window to the edge of your screen in macOS Sequoia or earlier to snap it into place. You can also hold the Option key while dragging or click and hold the green traffic-light button for left/right split view options. - How to create custom layouts?
Mosaic lets you drag windows to a toolbar and drop them into pre-set or custom layouts. It’s great if you want more precise control over how your workspace looks and feels. - How to control windows with gestures?
Swish offers intuitive touchpad gestures for snapping, minimizing, and managing windows. - How to fix tiling issues?
If tiling doesn’t work, exit full-screen mode or reboot your device. If you’re still having trouble, apps like Mosaic and Swish offer more reliable and powerful window management features. Both are included in a Setapp subscription — your one-stop access to 260+ curated apps. Start your 7-day free trial.
As I write this article, I have about three windows open — one for my notes, one for my main document, and another for my music. Thanks to macOS tiling, everything is well-placed and organized.
If you’re constantly juggling multiple tasks and apps and find yourself having to drag and adjust windows all the time (something I used to do), you’ll want to learn how to tile windows on Mac. Let’s get started!
What is window tiling on macOS?
Also known as Mac snap windows, window tiling is essentially a much more organized way to arrange open windows side by side. There’s no manual dragging and fitting needed — you simply let your Mac automatically resize and snap your windows into place for a neater workspace (or playspace). It’s also particularly handy if you’re using a screen-sharing app that keeps your shared content visible rather than switching between windows and apps.
To make things even easier, there are a couple of ways to do so to fit your needs, which I’ll go over in the next section.
How to easily snap, tile, and manage windows on macOS
Now for what you’ve been waiting for: instructions on how to up your Mac window management game and stop manually fitting your windows onto one screen forever. Let’s go over the methods.
Using Mosaic window snapping
Imagine resizing and organizing your windows with just one click and drag motion in a variety of configurations you might not have even considered. Well, that’s what Mosaic does, and that's why I love it so much.
The purpose of the app is to keep your workspace neat and tidy, arranged the way you prefer to visualize your windows. Once you get set up, you can configure all your favorite layouts in the settings and start rearranging windows in no time.
Here’s how to use it:
- Install and open Mosaic.
- Permit all accessibility settings required.
- Click and drag a window you want to resize to the top of your screen.
- Drag and drop on one of the layouts available in the toolbar

As you can see from the screenshot, I’ve managed to organize my windows in a classic side-by-side split-screen format for peak productivity. I find it less overwhelming than having four or more windows open and visible at the same time, although for those who want that level of chaos — you can completely customize that experience for you, too.
Using Swish to tile windows
Powered by a multi-motion touch engine, Swish is all about efficiency and ease. While Mosaic is perfect if you want to tile windows on Mac, Swish takes things a step further and provides a library of intuitive touchpad gestures for a variety of tasks. Anything from swiping down to minimize a window, using arrow keys to snap your windows in a certain arrangement, and more can be programmed on the app.
You can experiment to your heart’s content on Swish, but let me show you how to snap windows on Mac for now:
- Install and open Swish > Click Snapping.
- Set your Grid Spacing and other settings to your preferences.
- Click each snapping option to turn them on and off.
- Follow the gesture instructions to snap your windows to that arrangement.
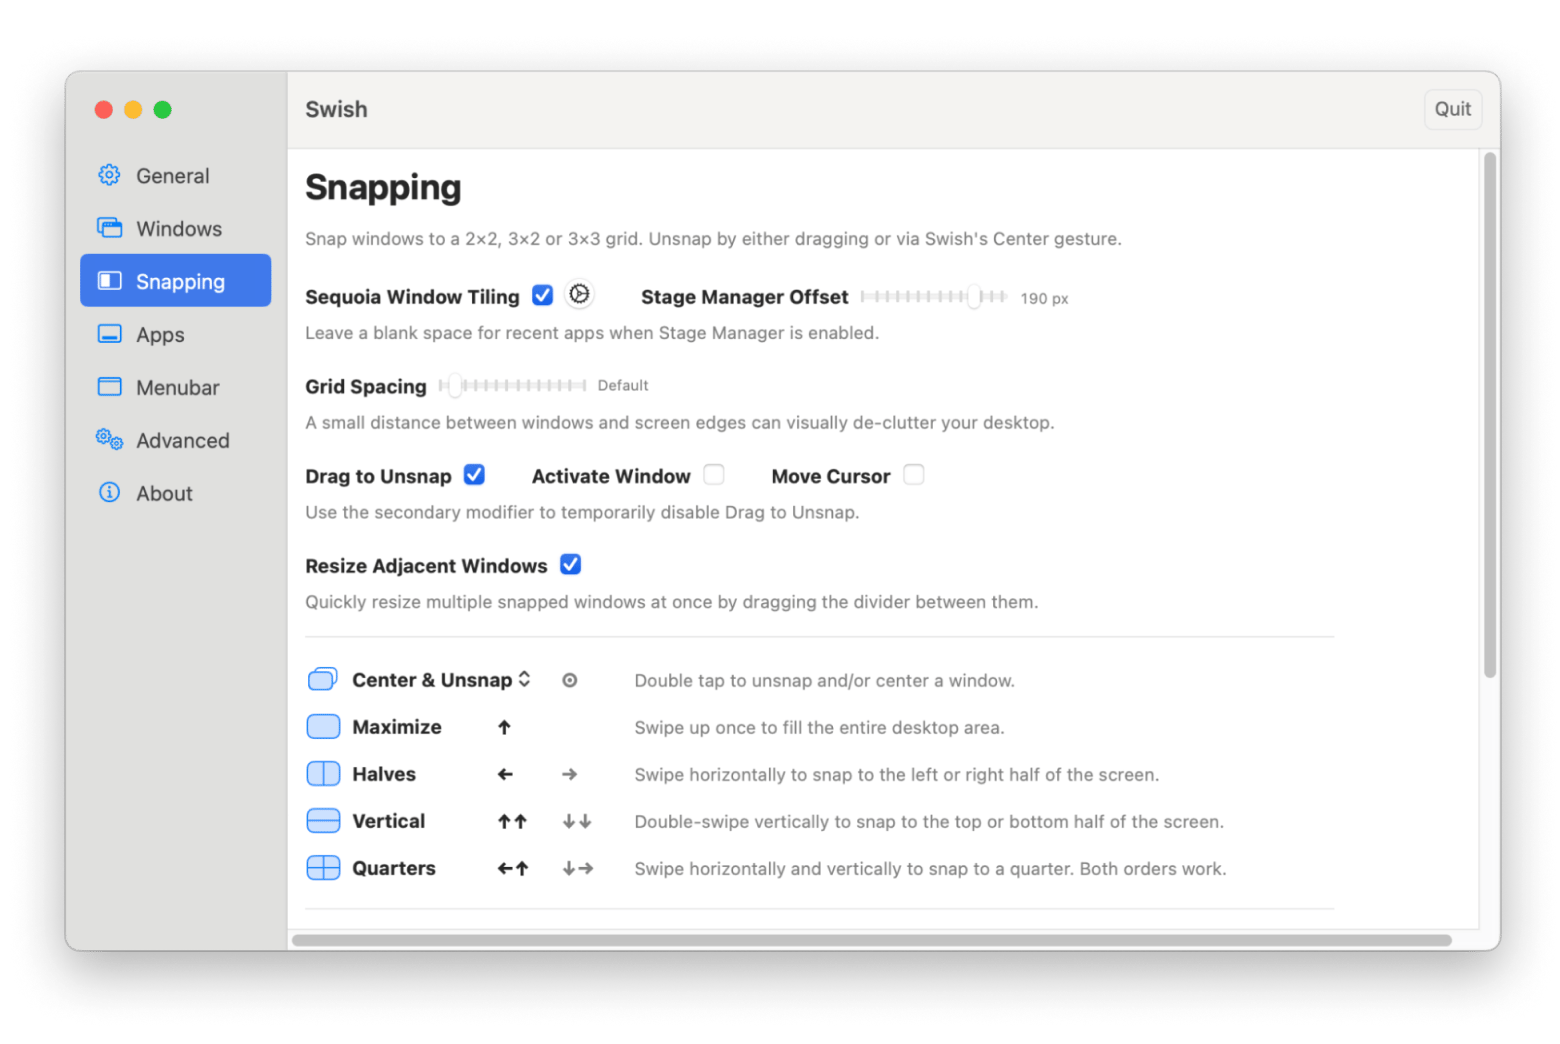
The downside to the app is that you can’t program your own gestures, but the default ones are pretty easy to remember and use.
How to tile windows on macOS Sequoia and earlier
If you happen to have macOS Sequoia or earlier, you can use the built-in function to snap windows into place. Here are some ways to do so.
Dragging and dropping windows
With the new macOS Sequoia, Apple has updated the window tiling feature with automatic suggestions for tiled positions. There are also new keyboard and menu shortcuts to organize windows even faster.
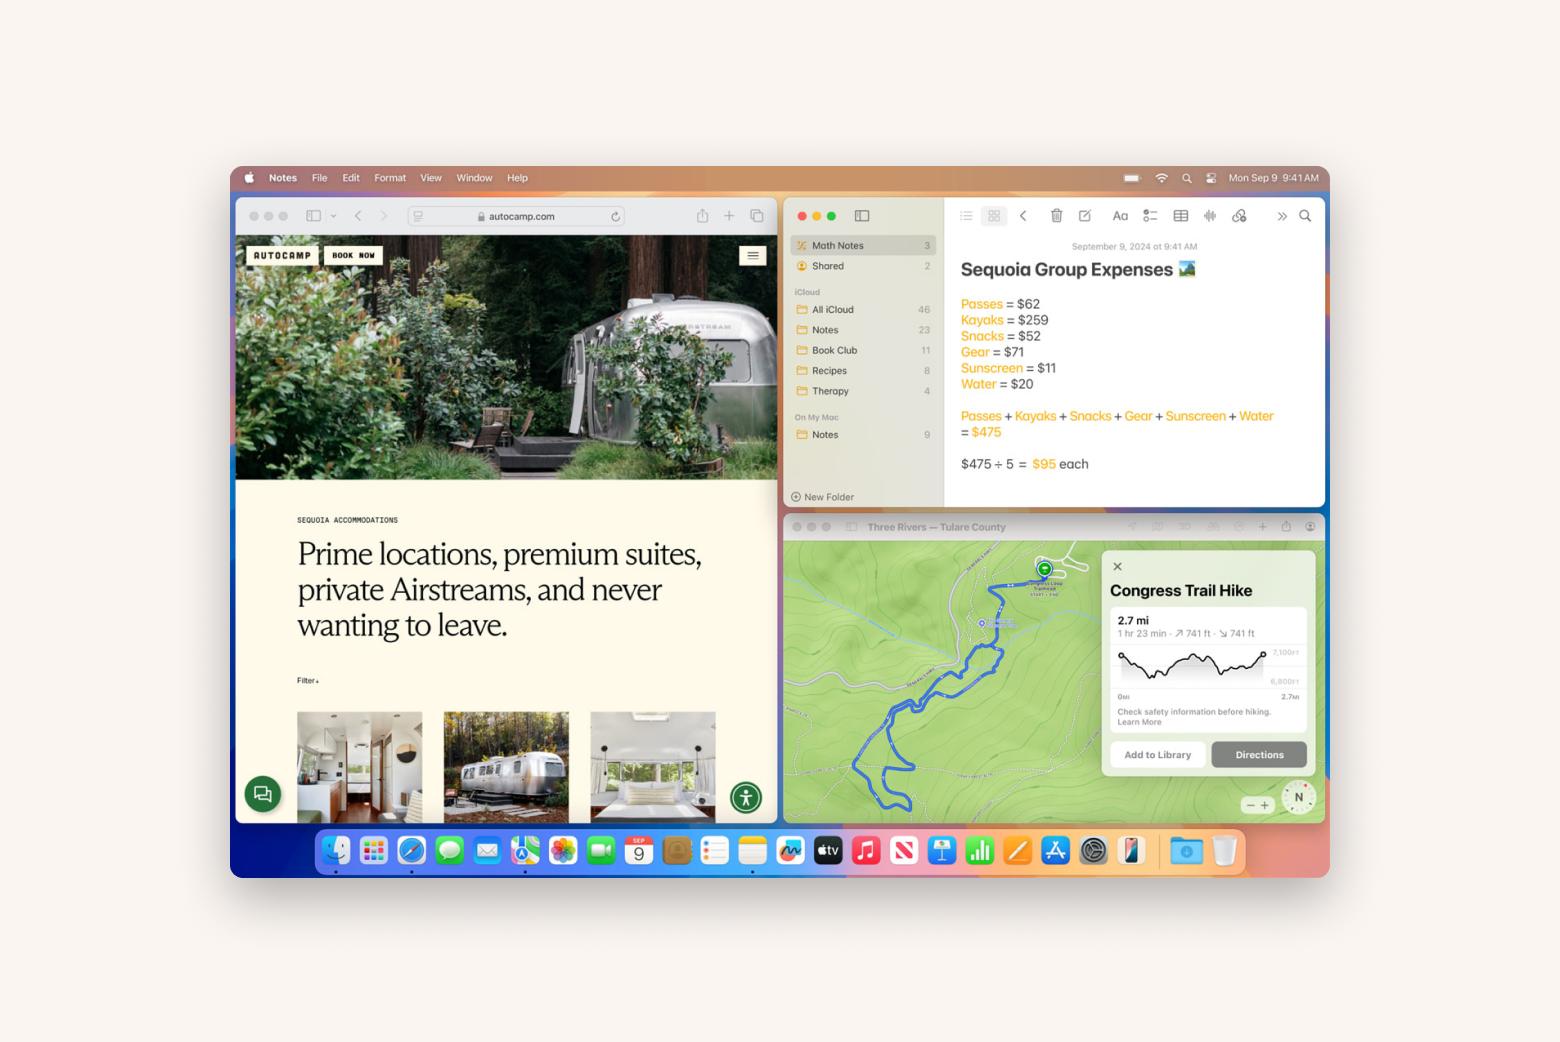
Source: Apple
All you have to do is drag a window to the edge of your screen and wait for a shaded area to appear. Then, release the window and let it automatically snap into place.
If you ever find that this split-screen format is too overwhelming or distracting, you can also try the Stage Manager feature on Mac. This feature groups windows so you can switch between tasks for work and play when it’s time.
Using Option key
Another way to arrange multiple screens together is to hold down the Option key while dragging a window to the edge of the screen. Then, drag it to the highlighted area you’d like to snap it to and release it.
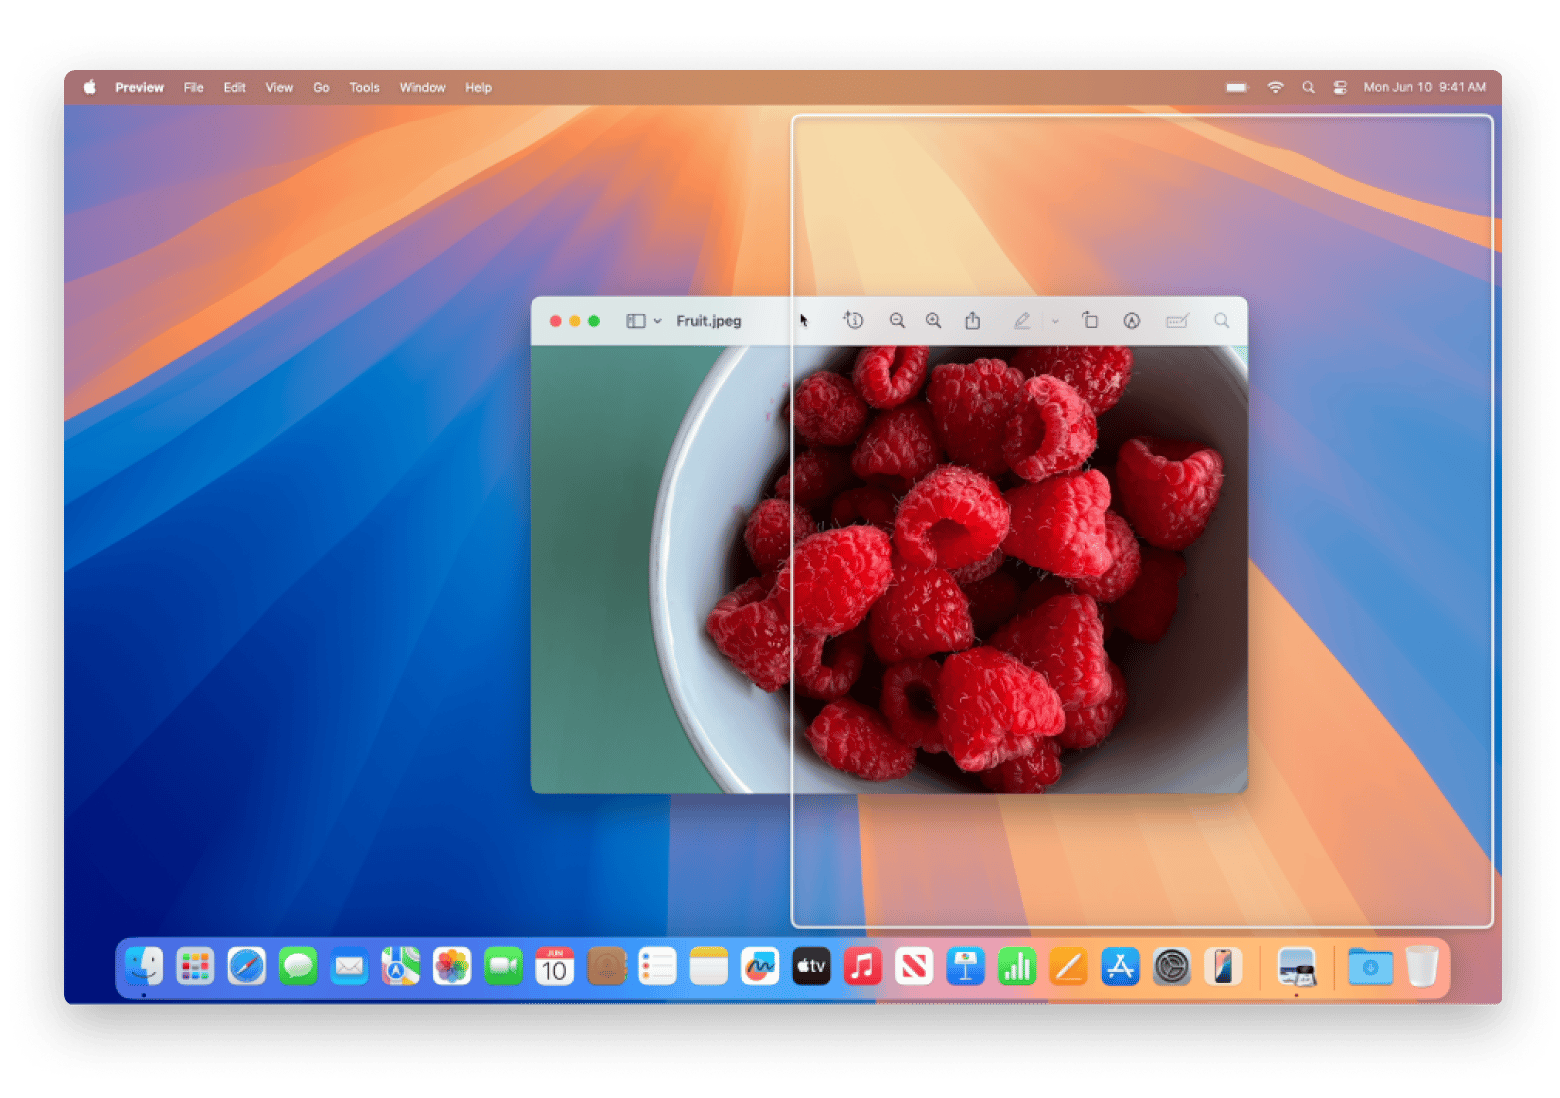
Source: Apple
Tiling with the green button
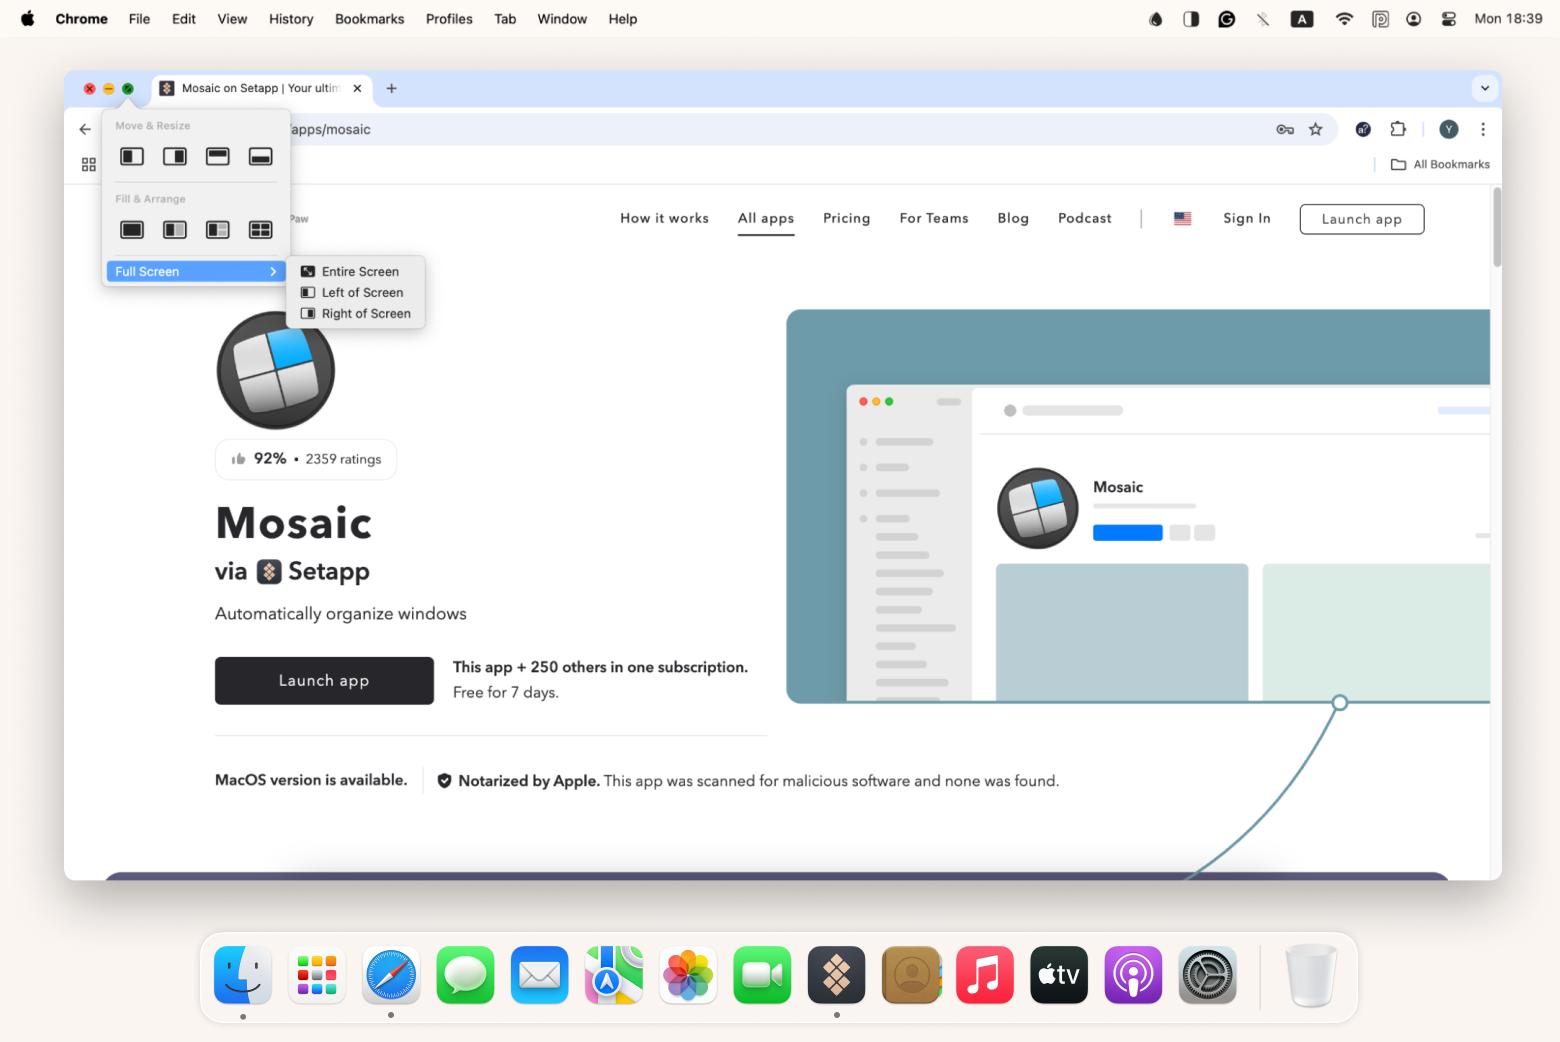
By green button, I mean the resize button among the traffic light buttons that come with every window in the browser. Open Safari (or any other browser) and click and hold the green button, and you’ll see three options: Enter Full Screen, Left of Screen, and Right of Screen.
What to do if windows tiling doesn’t work?
If windows tiling isn’t working for you, make sure your windows aren’t in full-screen mode and that your macOS version supports tiling in the first place. Still an issue after that? You may have to restart your Mac. The good news is that even if the native tiling features don’t work on your device, third-party apps like Swish and Mosaic can swoop in to save the day.
Snap and tile for better Mac window management
Gaining mastery over window management will do wonders for your workflow and day-to-day. Rather than spending time and effort arranging your windows through manual processes, built-in tiling and snapping features on the Mac and even better third-party apps like Swish and Mosaic come with additional features for more control.
Both apps are available through Setapp, a monthly subscription service to 260+ iOS and macOS apps that boost your creativity, organization, productivity, and more for just $9.99 + tax per month. Start your 7-day free trial today and experience the Setapp difference!
FAQ
How to stack windows vertically?
If you need to stack windows vertically on macOS, drag a window to the edge of your screen and snap it into the area you’d like to see it in. Then, do the same with all other windows. For even more granular control, you can use a dedicated tiling app like Mosaic.
How do I switch between two windows on a Mac?
The fastest and easiest way to switch between windows on a Mac is to press Command + Tab and continue pressing Tab until you’ve landed on the window you’re looking to switch to.


