How to take a photo on a Mac: My easy methods with Mac & third-party apps
My iPhone camera is awesome for snapping pictures, and I really love it for that. But did you know you can take a photo on a Mac to get great photos, screenshots, and more? You can easily save and share those images with other apps to add cool effects or do some touch-ups. I recently found out that a Mac can be a super handy tool for all your photography needs.
So, I’ll show you how to take and save photos from a webcam, create screenshots, and even use FaceTime to grab images. Plus, I’ll share some of the best apps (and tips!) that can make your photos look really professional.
How to take a photo on a Mac with a webcam
So, if you want to use a webcam to take a quick photo, it will turn out well, but it will never be as good as those on your iPhone. This is because the Mac webcam was primarily designed for video conferencing and not photography. But I think they still do a great job, and it’s possible to use apps to edit and add special effects to enhance and improve any pics you take.
So, let me show you the ways to take photos using webcam:
| Ways to take photos on Mac | How it works |
| Photo Booth | Open the app from Applications and click the snap button to take a picture. Edit pictures in TouchRetouch after. |
| Screenshot feature | Press Command + Shift + 5 and choose the corresponding caption option. |
| CleanShot X | Install and open the app > Click the app menu bar icon and choose the capture option. |
| Capto | Install and open the app > Choose one of the capture options in the top toolbar. |
| FaceTime | To enable FaceTime Live Photos, go to the app Settings and take a photo by moving the pointer to the white round button in the top right corner and clicking on it. |
How to take a picture with Photo Booth
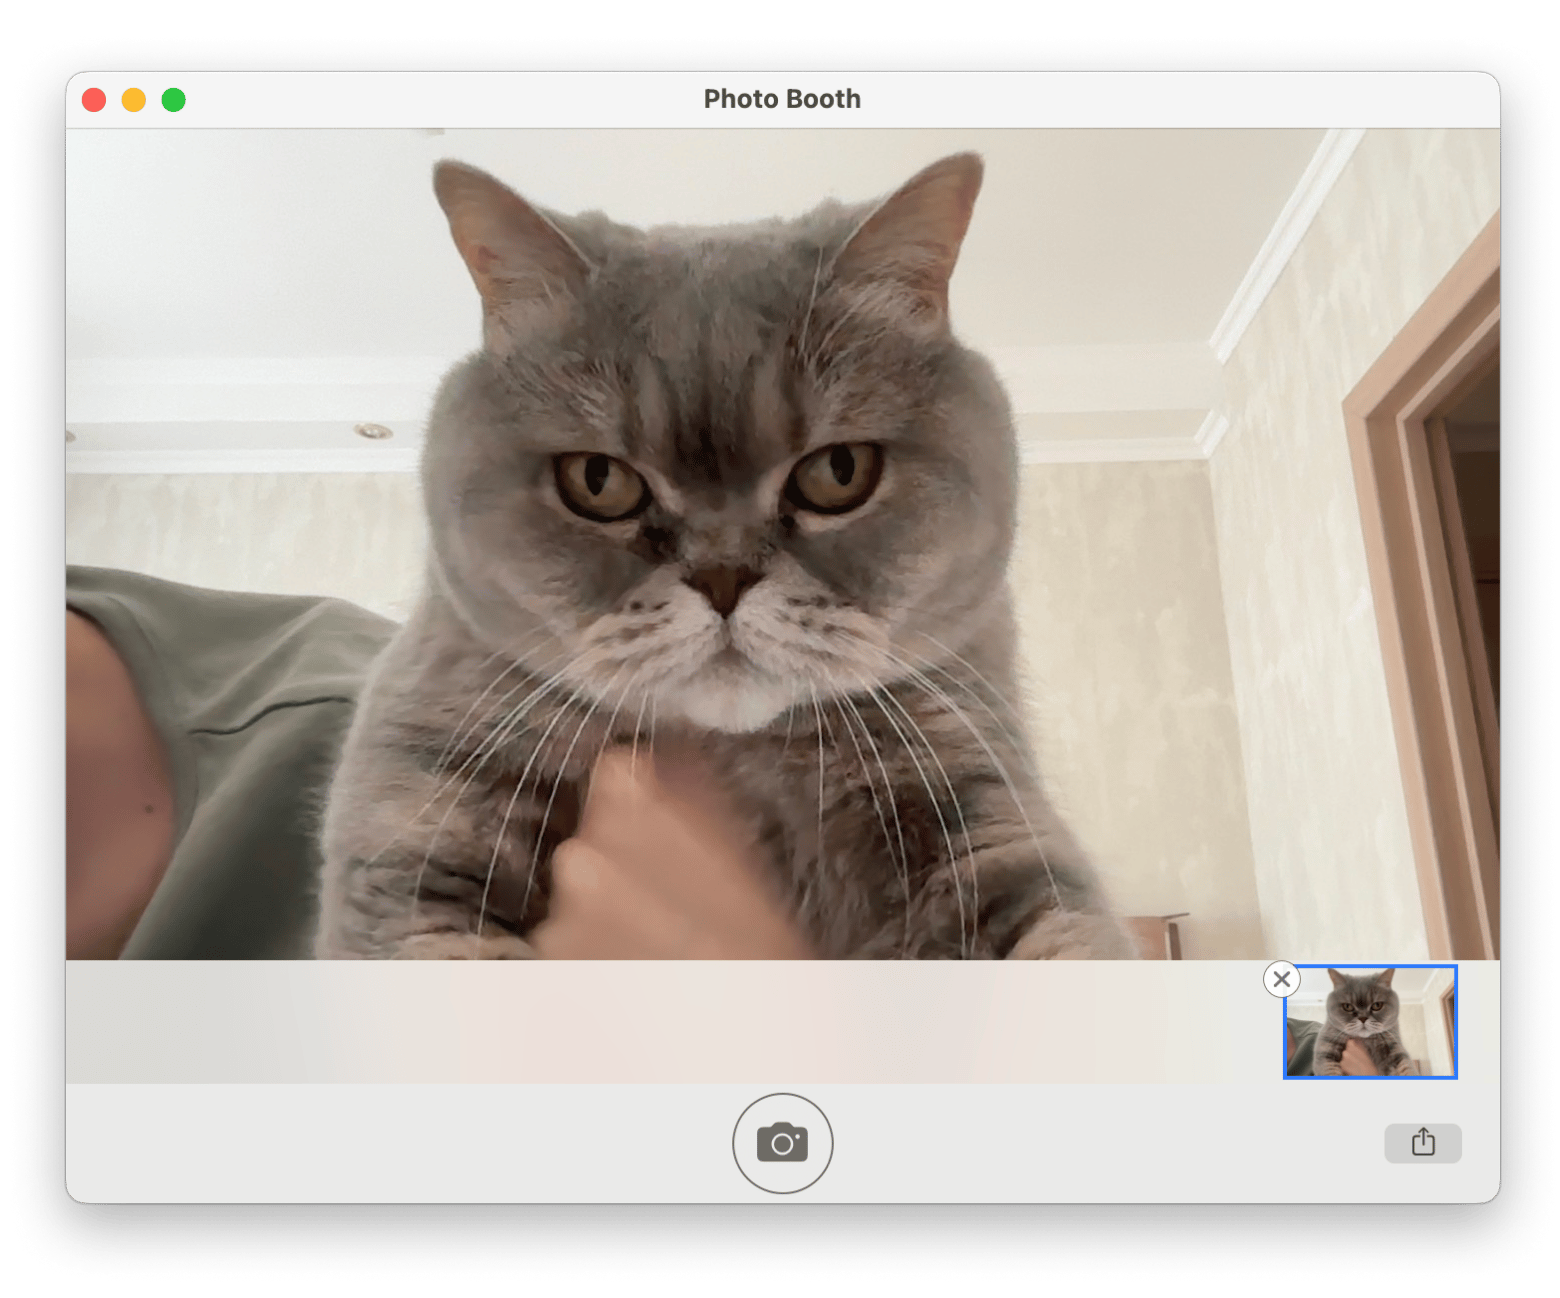
Mac has a built-in app for taking webcam photo selfies called Photo Booth. I think it’s a great way to have some fun with and experiment with taking pictures. Some fun effects are intuitive and can be added to your images. I can choose to take one photo or four at a time.
Here’s how to use Photo Booth to take a picture:
- Open Finder > Applications > Photo Booth.
- Click the snap button (the red camera button) to take a picture. Any pictures you save will appear in the bottom right-hand corner of the app’s window.

If you want to share, click on the share button on the bottom right of the picture you’ve just taken. From here, you can send it via AirDrop, save it in Notes, or add it to your Photos app to store locally.
How to take a photo on a Mac by screenshotting
You might want to send a screenshot that isn’t a selfie. Like, if you’re sharing some project instructions or an image of a document or a webpage that's open on your screen. All you need a key shortcut that’ll do the job.
To create a screenshot on a Mac:
- To open an image, file, or webpage, you need to use a screenshot.
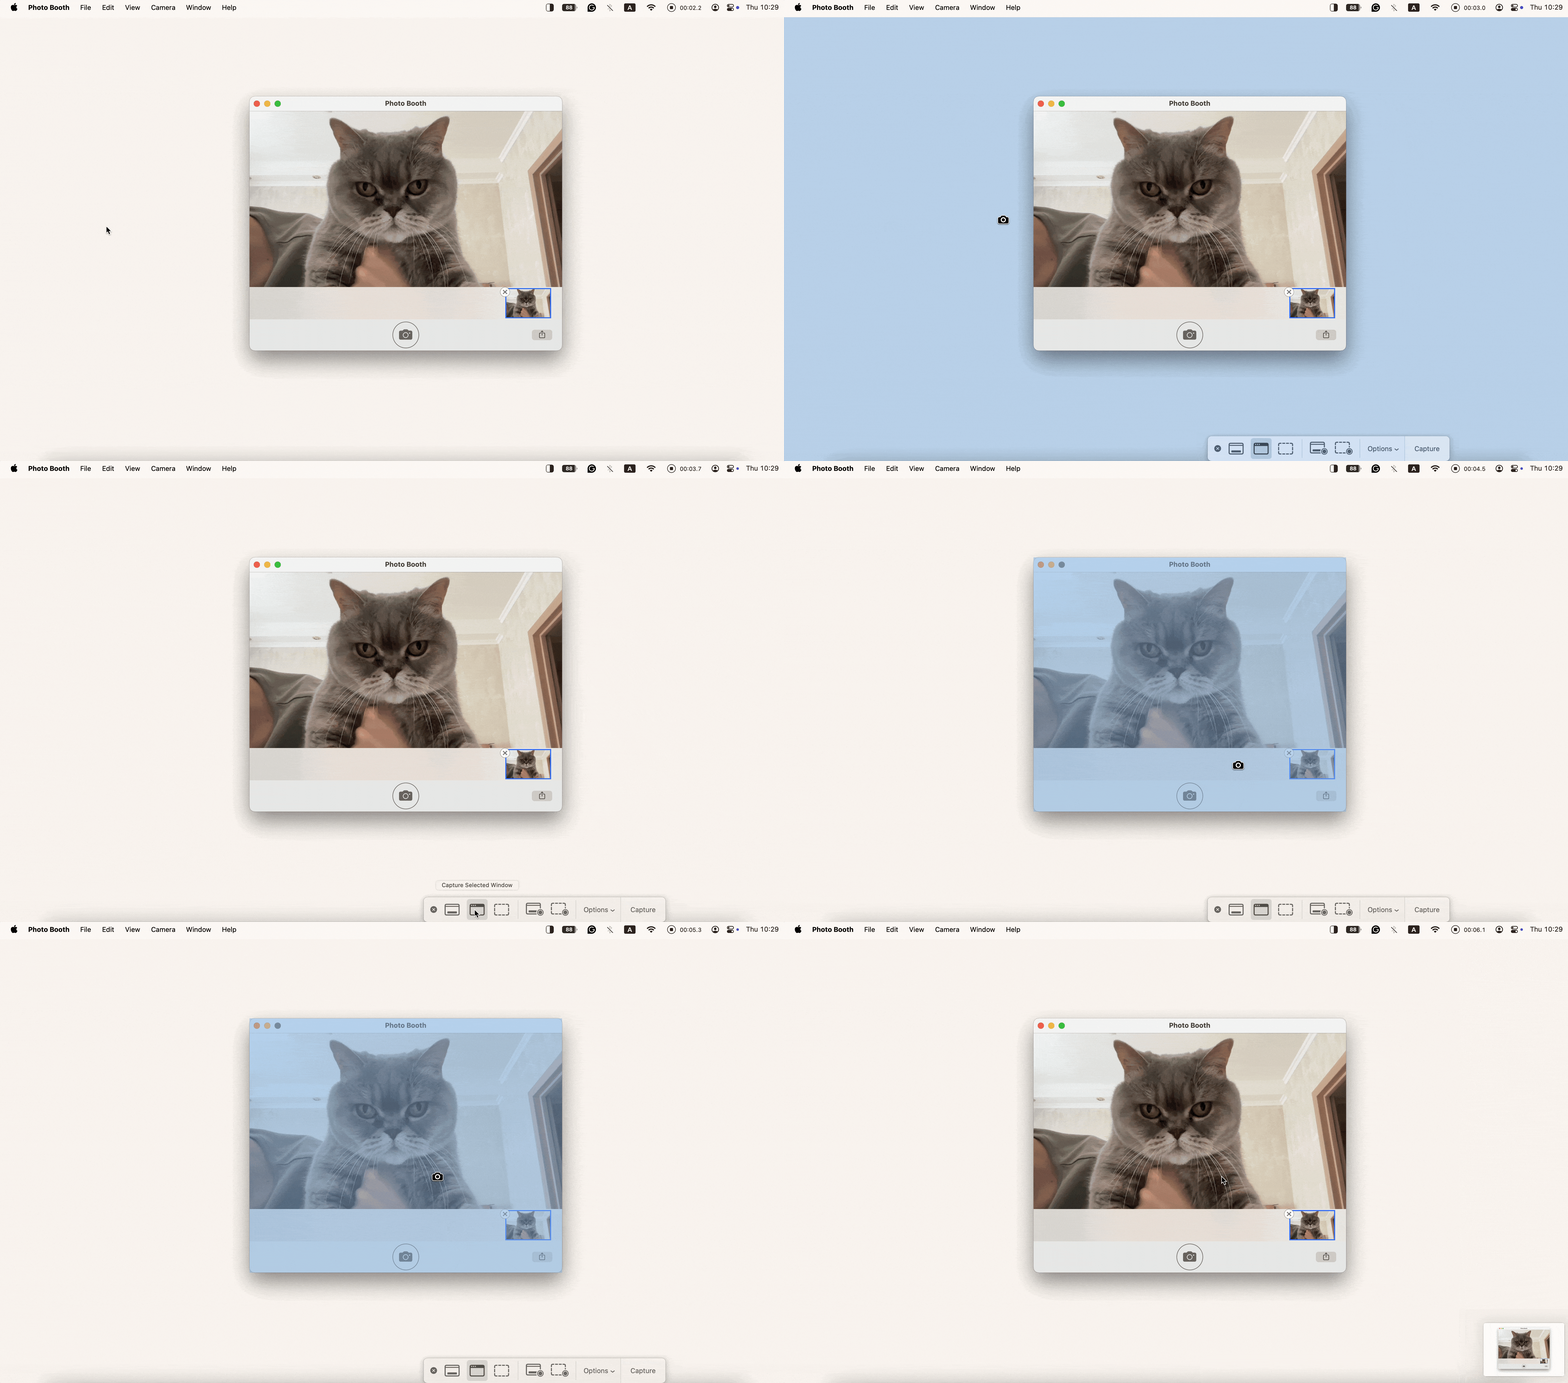
- Press Command + Shift + 5 and choose the screenshot option: Capture Selected Portion, Capture Selected Window, or Capture Entire Screen.
- Once picked, press Return or click Capture. The captured image will appear on the right-hand side of your home screen.

Screenshot a portion of your screen
If you want to capture a selected area of your screen quickly, you can use a key shortcut instead of manually selecting it from the screenshots menu. To do so, press Command + Option + 4 and select the area you want to capture. The screenshot will automatically be saved in Recents in the Finder.
How to screenshot an entire window
If you want to take a picture of your whole screen, then press Command + Option + 3. The screenshots will be added to Recents as well.
In case the shortcuts don’t work, check out the troubleshooting guide on how to fix the issue of the screenshot on the Mac not working.
How to use a built-in FaceTime camera
FaceTime is one of Apple’s most recognized apps for connecting people. It’s great for chatting and having virtual meetings. But did you know you can use the camera function on your Mac to take pictures while you talk?
To use the FaceTime camera to screenshot:
- Open the FaceTime app on your Mac.
- Click FaceTime in the menu bar > Settings > General.
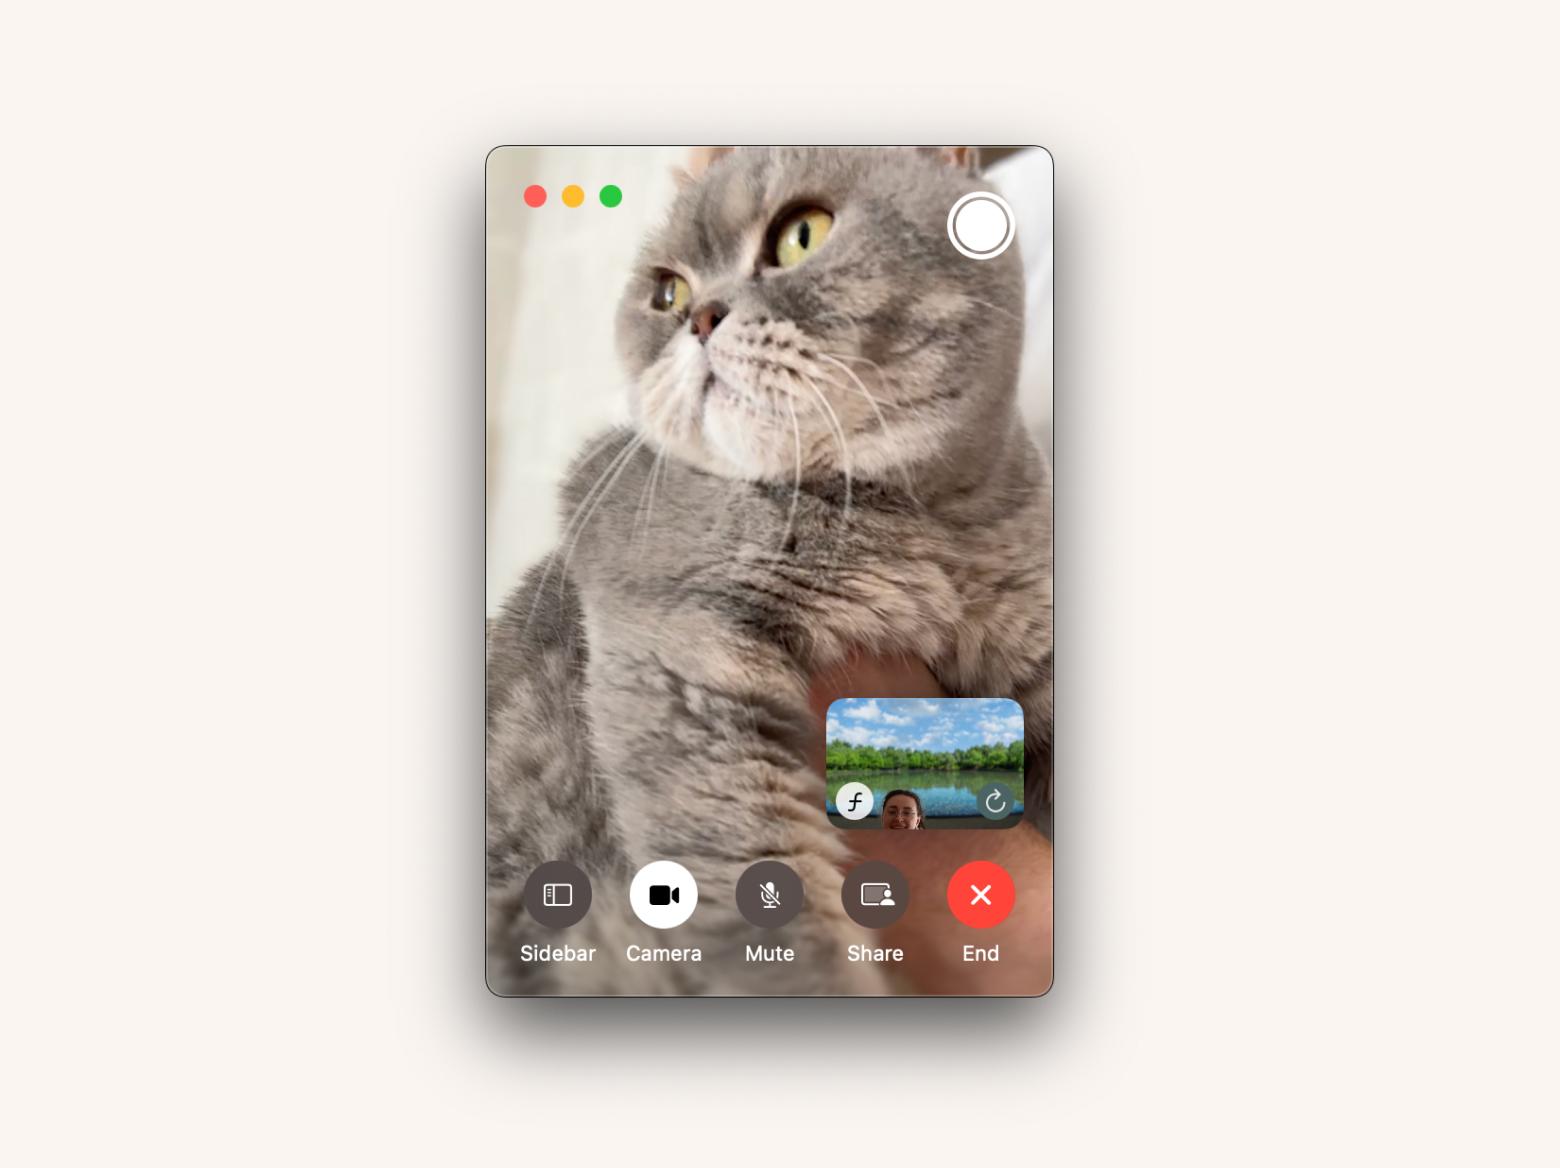
- Select FaceTime Live Photos. Note that with this option selected, others can take live photos of you as well.
- Start a video call with the person you want to capture a screenshot of.
- Select the call window, move the pointer to the capture icon (the white round button on the top right corner), and click.

Want to take a photo with a Mac? Now you know how
It's finally time to snap those photos you've been putting off on your Mac. You can use the built-in Photo Booth app, grab a quick screenshot with a keyboard shortcut, or just take a selfie during a FaceTime call.
If you want to take a photo but don’t want to go through multiple apps for editing and sharing, then use CleanSHot X or Capto. If your goal is to edit images like a pro, then I recommend TouchRetouch and Luminar Neo. You might find a new favorite that makes all the difference to your photos!
But the good news is that you can get all these apps on Setapp. It’s a cool platform with dozens of useful apps that you can use under a single subscription plan. With Setapp’s 7-day free trial, you can learn about all this and more (you’ll be spoilt for choice, actually).
FAQ
How do I take a timed photo on a Mac?
To take a timed photo on a Mac, use the Photo Booth app. It has a handy countdown feature similar to the one on your iPhone.
How do I change the camera used to take photos on a Mac?
If you need to change the camera used to take photos on a Mac, open an app like FaceTime or Photo Booth. Go to the video settings within the app and select your preferred camera.
How do I take a photo on a Mac using Terminal?
To take a photo on a Mac using Terminal:
- Install imagesnap > Type brew install imagesnap and press Return.
- Take a photo and save it with imagesnap -w 1 myphoto.png:
- -w 1 sets a 1-second delay before capturing the image
- myphoto.png is the filename; you can change it as needed


