How to crop a screenshot on Mac
- To instantly take a cropped screenshot, press Command + Shift + 4, then drag to select the area you want to capture
This is the easiest way to crop a screenshot at the moment of capture and avoid extra editing later. - To crop saved screenshots, use built-in apps
Open the screenshot in Preview or Photos, use the crop tool to adjust the frame, and click Done or Crop. Both apps are pre-installed and suitable for basic editing. - To crop a screenshot or edit it in other ways immediately after capturing, use CleanShot X
CleanShot X lets you crop, annotate, and blur screenshots all in one clean interface. Plus, you can share your screenshot as a link. - Try advanced tools with Setapp for free
Want to test CleanShot X and other screenshotting apps like Capto, Xnapper, and more? They’re all included in Setapp, a curated suite of 250+ Mac apps. Try all Setapp apps for 7 days free.
If you are not a photo enthusiast, chances are, you don’t have a photo editing tool handy at any given time on your Mac, so how do you crop a screenshot? Let’s find out.
Whether you like taking quick screenshots with the full-screen screenshot keyboard shortcut of Command + Shift + 3, or need to trim an already cropped screenshot even further to highlight the part of the screen you want your audience to focus on, this article will provide you with the tools to do just that, smoothly and with as little hassle as possible.
How to crop a screenshot on a Mac with the Photos app
One built-in Mac tool you can use to crop your screenshot on Mac is the Photos app.
Here’s how to crop a screenshot on Mac using the Photos app:
- Two-finger click on the screenshot you want to crop and select Open With > Photos. If you don’t see the Photos app on the list, click Open With > Other, go to Applications, and double-click the Photos app.
- Find and select your screenshot, then click Edit.
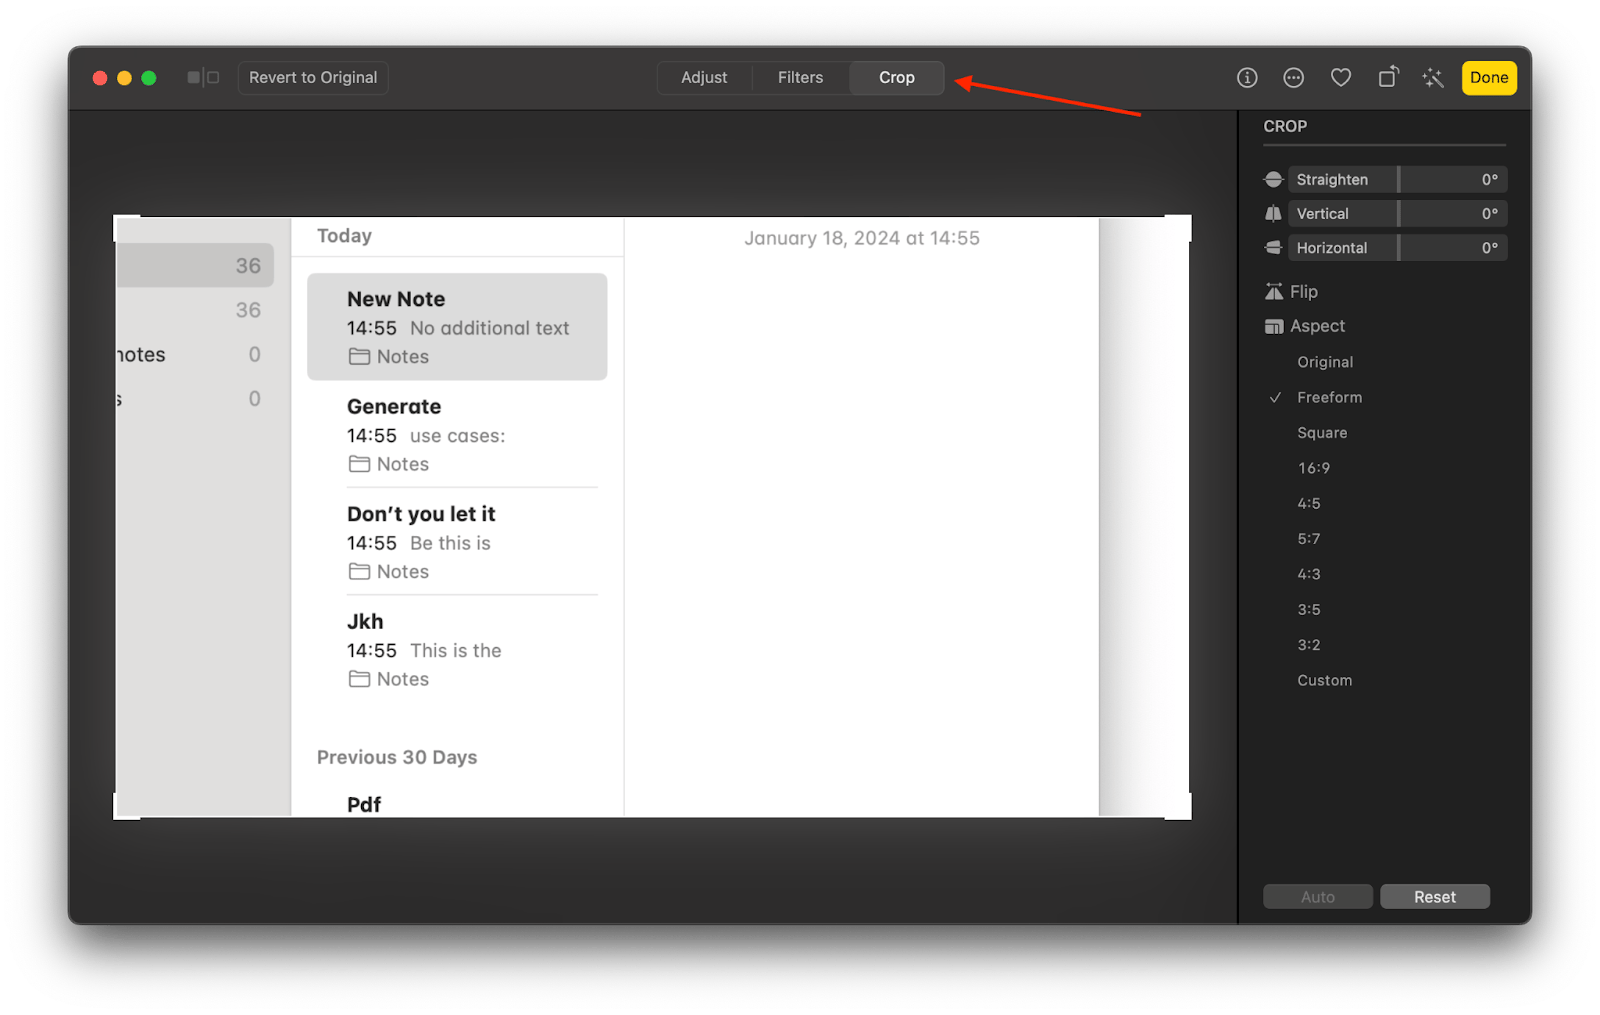
- Go to the Crop tab and manually select the area you want to crop your image to or pick an aspect ratio.
- Click Done when you are happy with your crop selection.
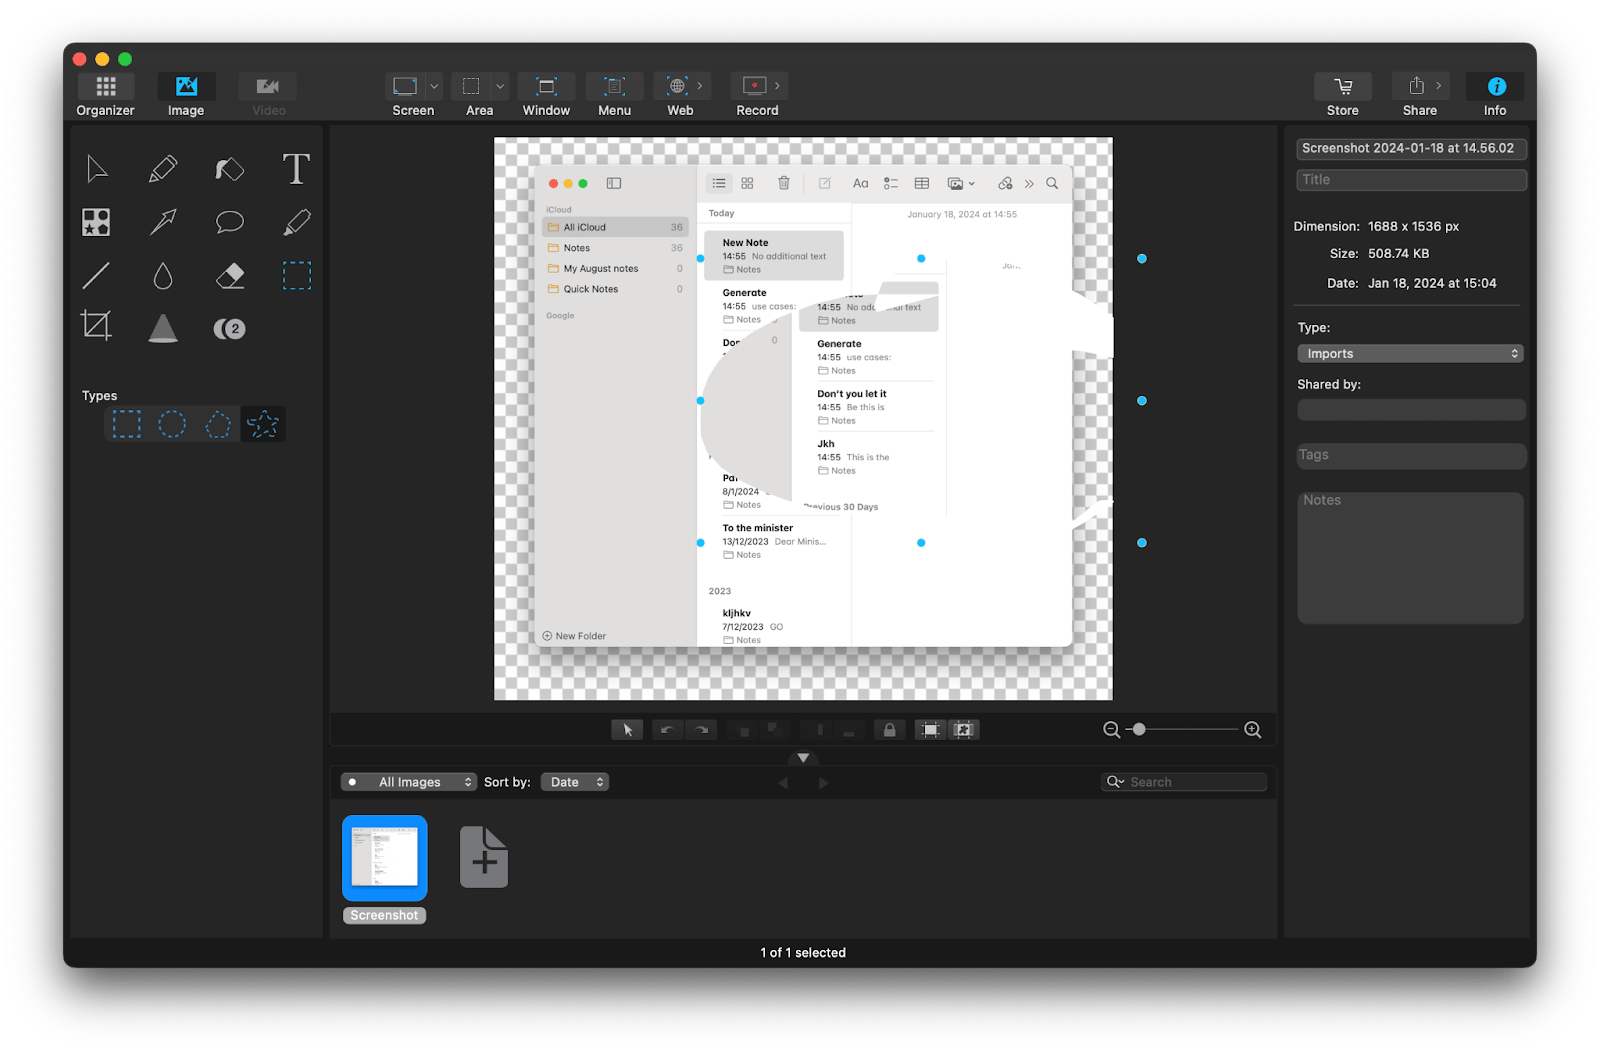
Want to take oddly shaped screenshots? I love doing that with Capto.
This screen recording and video editing app allows you to freehand-select an area of your image to crop out:
How to crop a Mac screenshot with the Preview app
If you don’t want to use Photos for the task, there’s another Apple's built-in tool on your Mac that you can use to crop your screenshot.
Preview is the default image app on Mac, so you can simply double-click on your screenshot file to open it in the Preview app.
Once in Preview, click the pencil tip icon on the top right side of your Preview app window and select the area you want to crop your screenshot to. The crop icon will appear in the top right side of your editing panel:
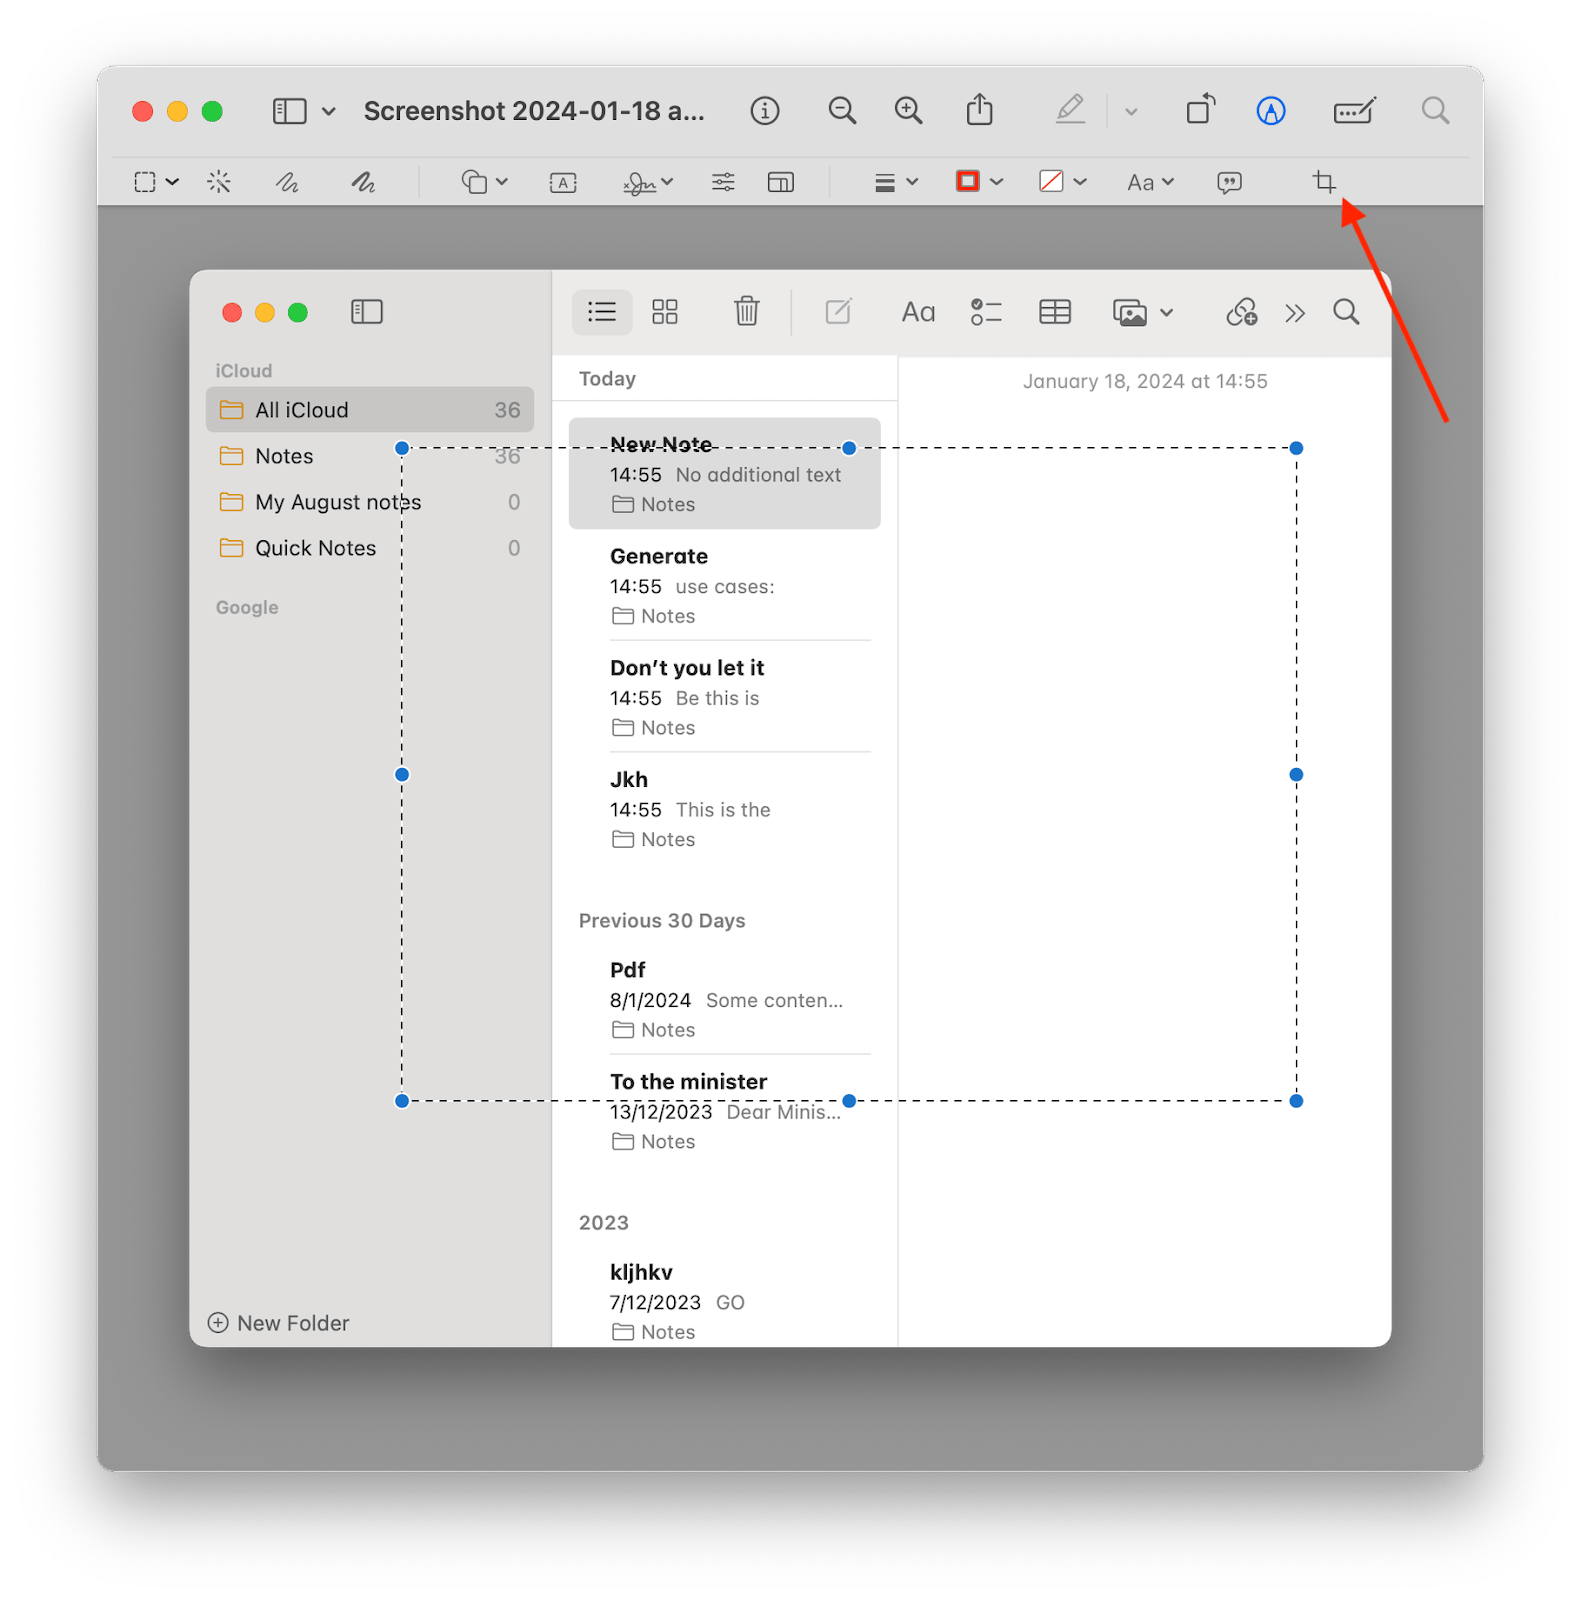
To finish your cropping, click the crop icon to snip your image to the selected area.
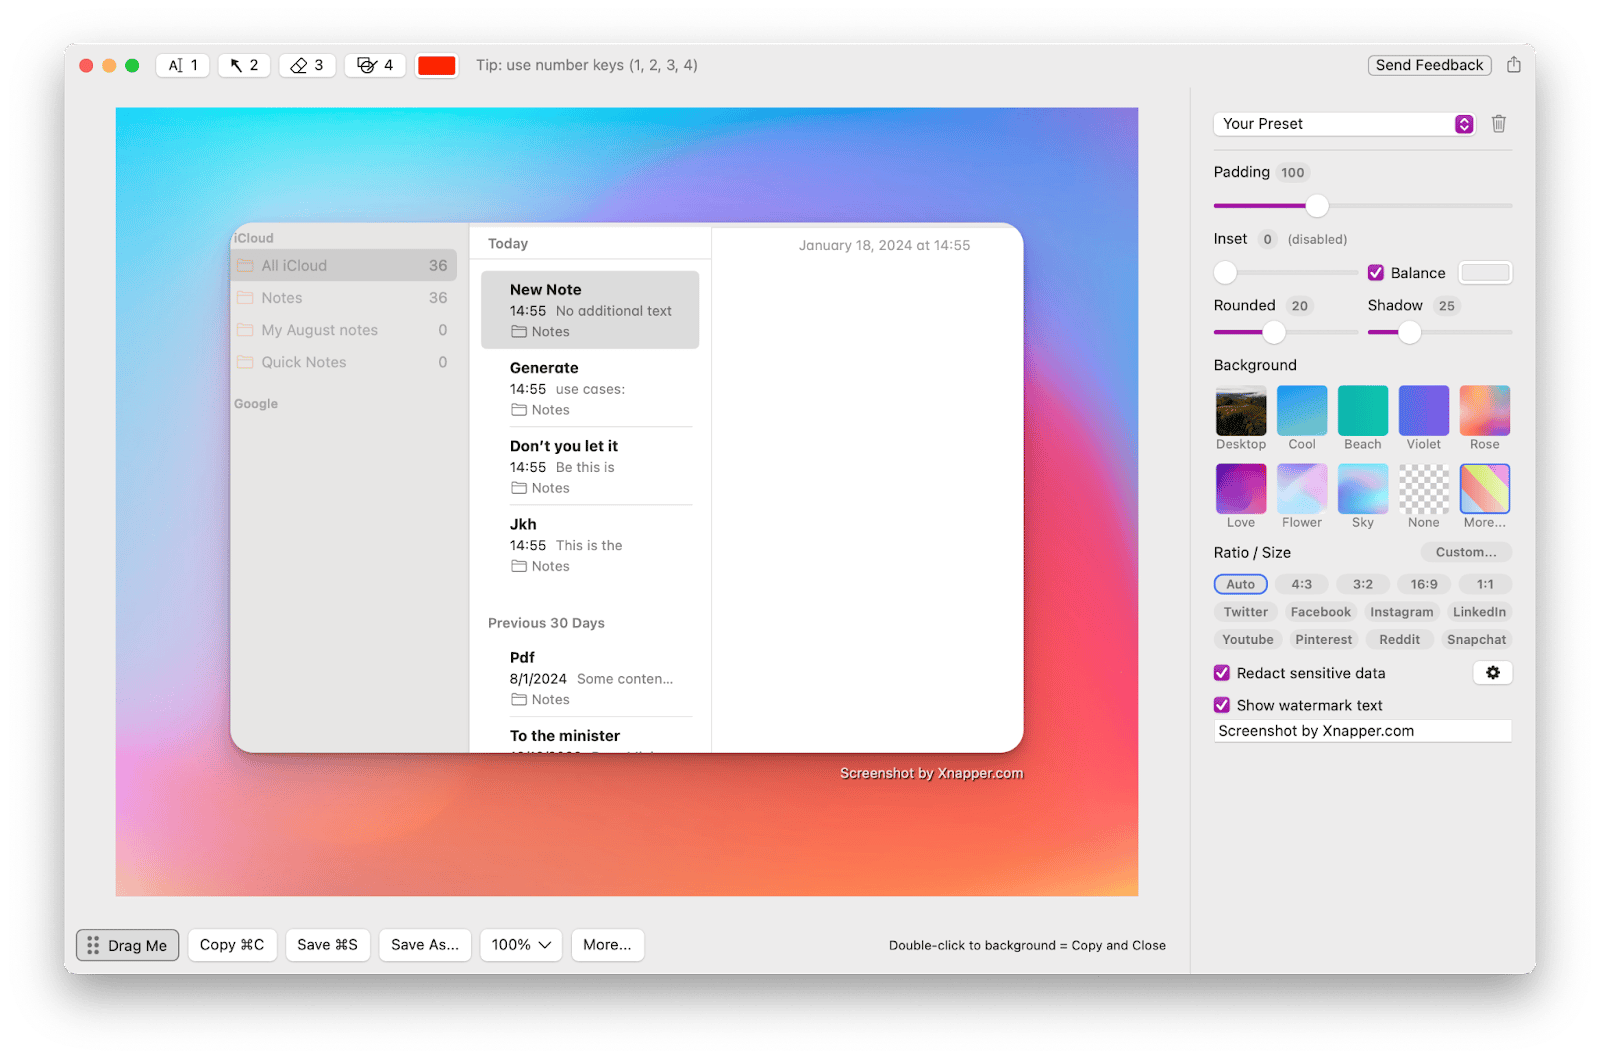
If you are looking to find out how to crop your screenshot on Mac for a sleeker social media post, I might have a better solution than plain old boring crop.
Xnapper is an app that allows you to take a cropped screenshot of your Mac screen and then automatically places it on a cool background. And just like that — your crop is instantly shareable! Want some variety? Not a problem. The app allows you to customize your screenshot background very easily:
How to take a cropped screenshot on Mac
Now, let’s learn how to take a cropped screenshot on your Mac instead of a full-screen one. This will save you time and effort on cropping the image afterwards.
The shortcut for a regular screenshot of your whole screen on Mac is Command + Shift + 3.
To take a cropped screenshot, press Command + Shift + 4 and just select the area of your screen you want to capture!
Yes, it’s that easy.
TipToo many options? Just describe your use case to our free custom GPT: How to screenshot on Mac, and it will suggest the right solution for your needs in seconds. |
Keyboard shortcuts for taking Mac screenshots
- Command + Shift + 3 — full-screen screenshot
- Command + Shift + 4 — cropped screenshot
- Command + Shift + 4, then Space, then Enter — screenshot of the active window
- Command + Shift + 5 — record a part of or your full screen
Want a scrolling screenshot? I like to use the CleanShot X app. It has a dedicated tool for scrolling screenshots and you can assign a keyboard shortcut to it specifically. The app enables you to also create shortcuts for many other screenshot options in the app, e.g. capture and annotate, capture and upload to cloud, etc.
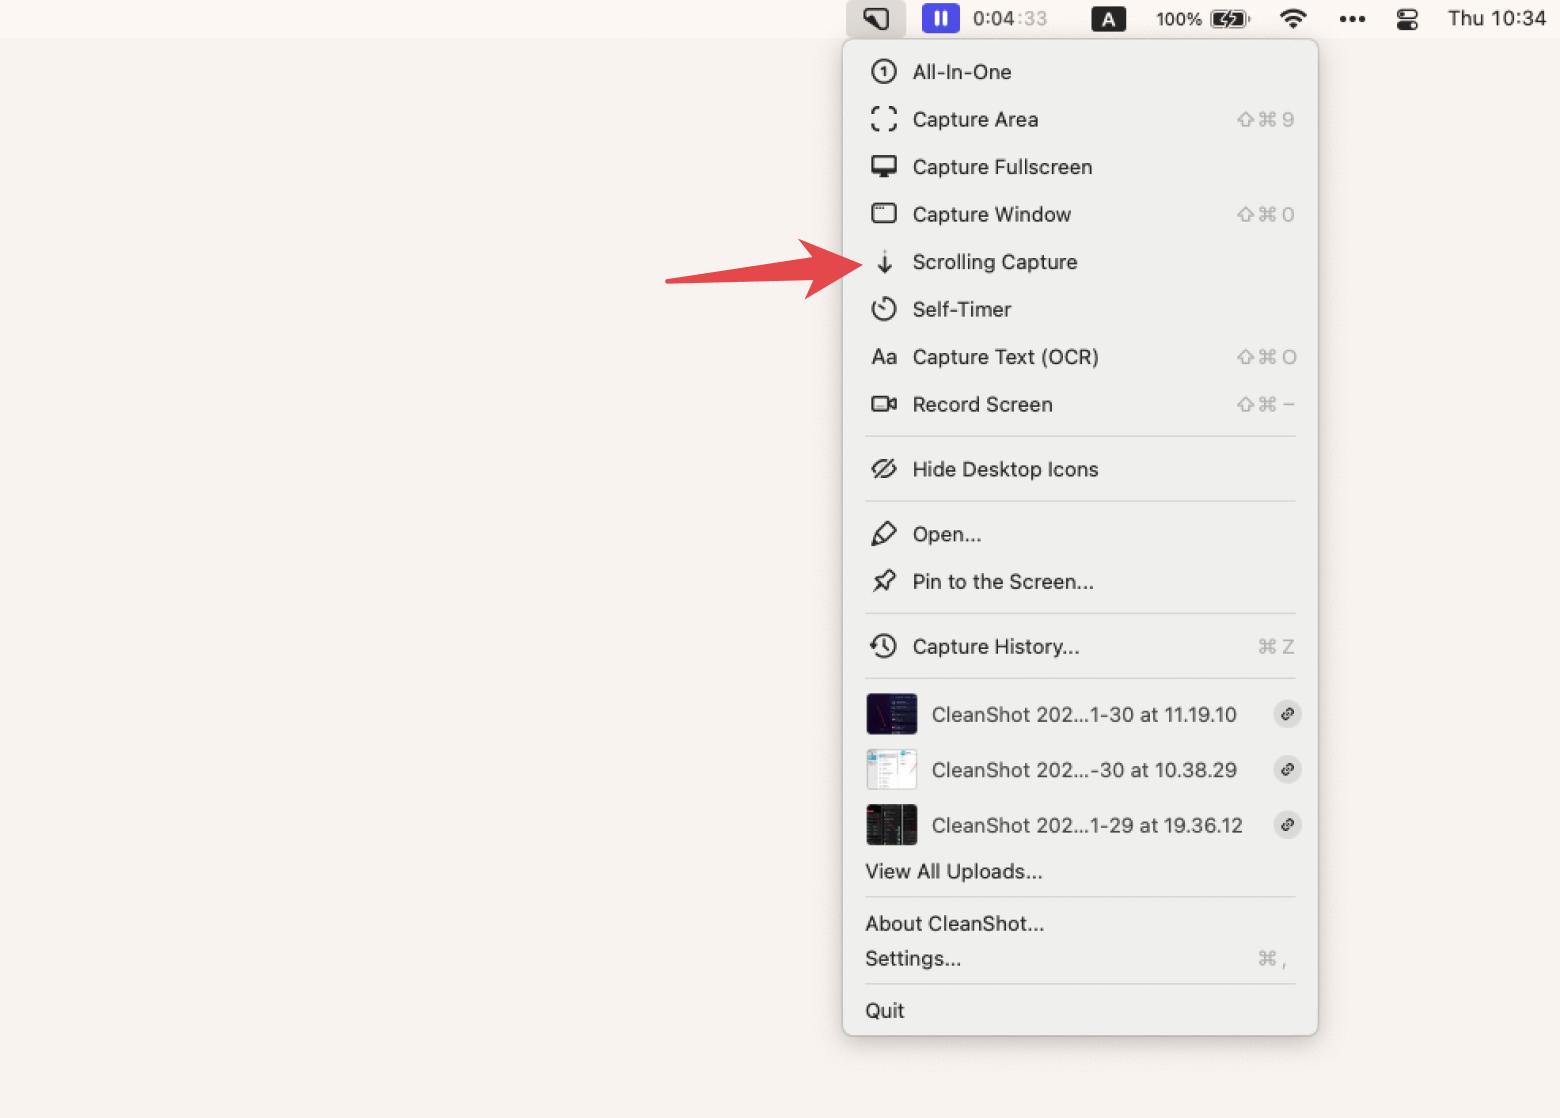
But our favorite feature in CleanShot X has to be the hide desktop icon tool. It masks desktop clutter in one fell swoop without having to move anything around.
How to crop a screenshot on Mac without saving
How do you crop a screenshot on Mac after you’ve already saved it? Use your Mac’s built-in tools like the Photos app or the Preview app.
However, you can edit a screenshot immediately after taking it with third-party apps.
Let's look at how to crop a screenshot without saving it first using CleanShot X:
- Take screenshot using CleanShot X. You can open the app from the menu bar. As for me, I created a special shortcut, Shift + Command + 9, through the app's settings.
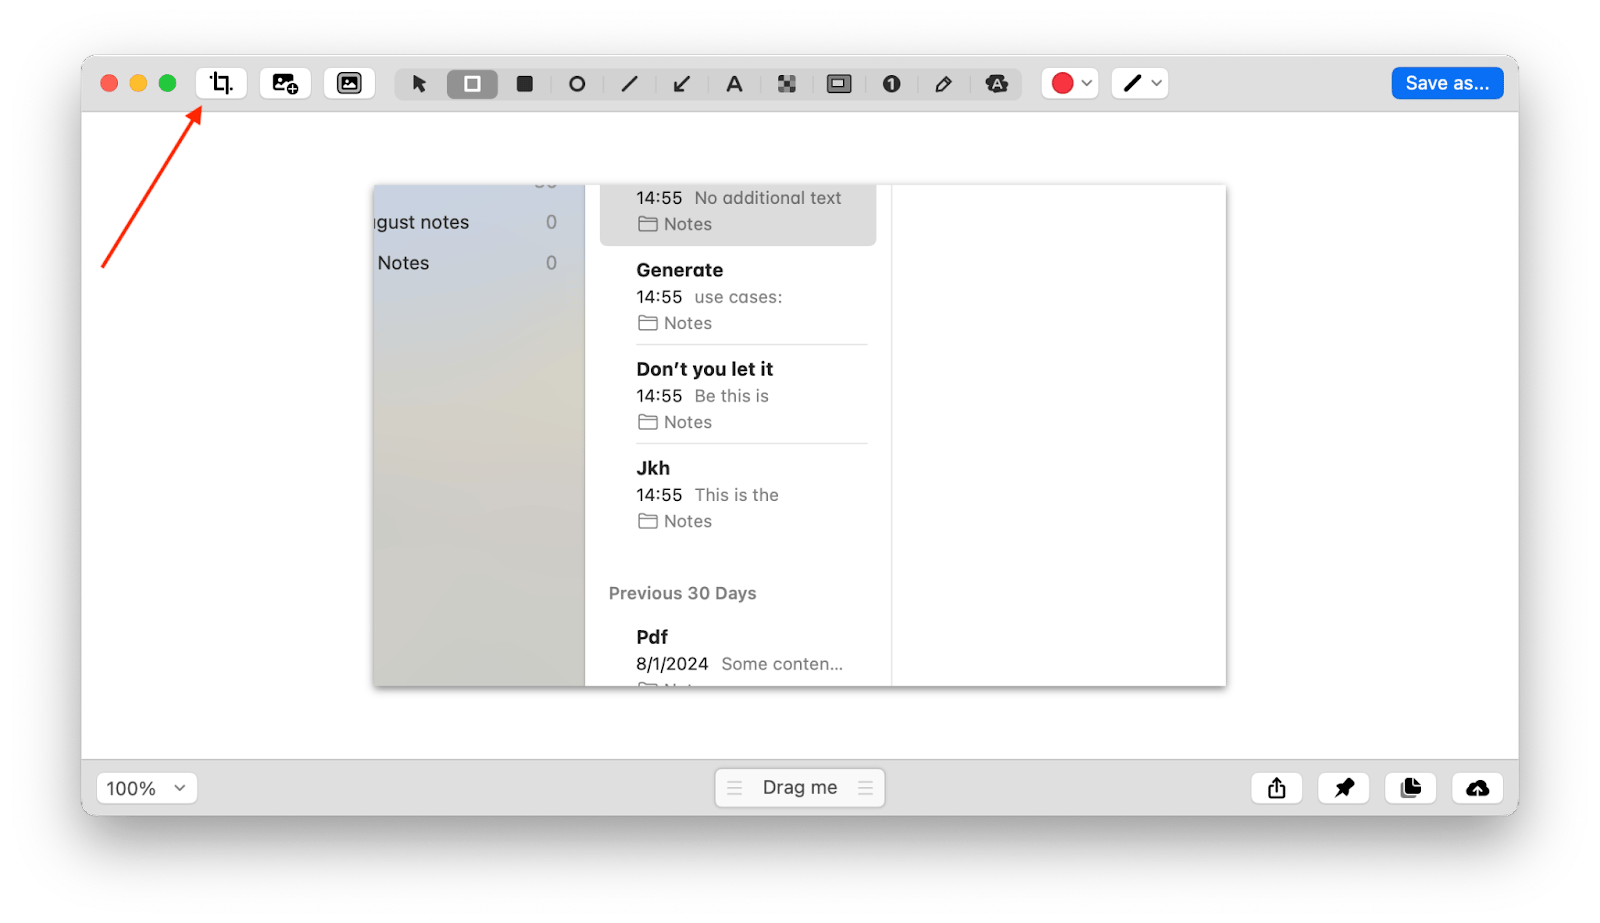
- Navigate to the screenshot's thumbnail in the lower left corner and click the pencil icon to open the Annotate tool.
- Click the crop button in the top left corner of the CleanShot X window and adjust your crop.
- Click the Copy or Share icon in the lower right corner. Alternatively, click Save As > Save.
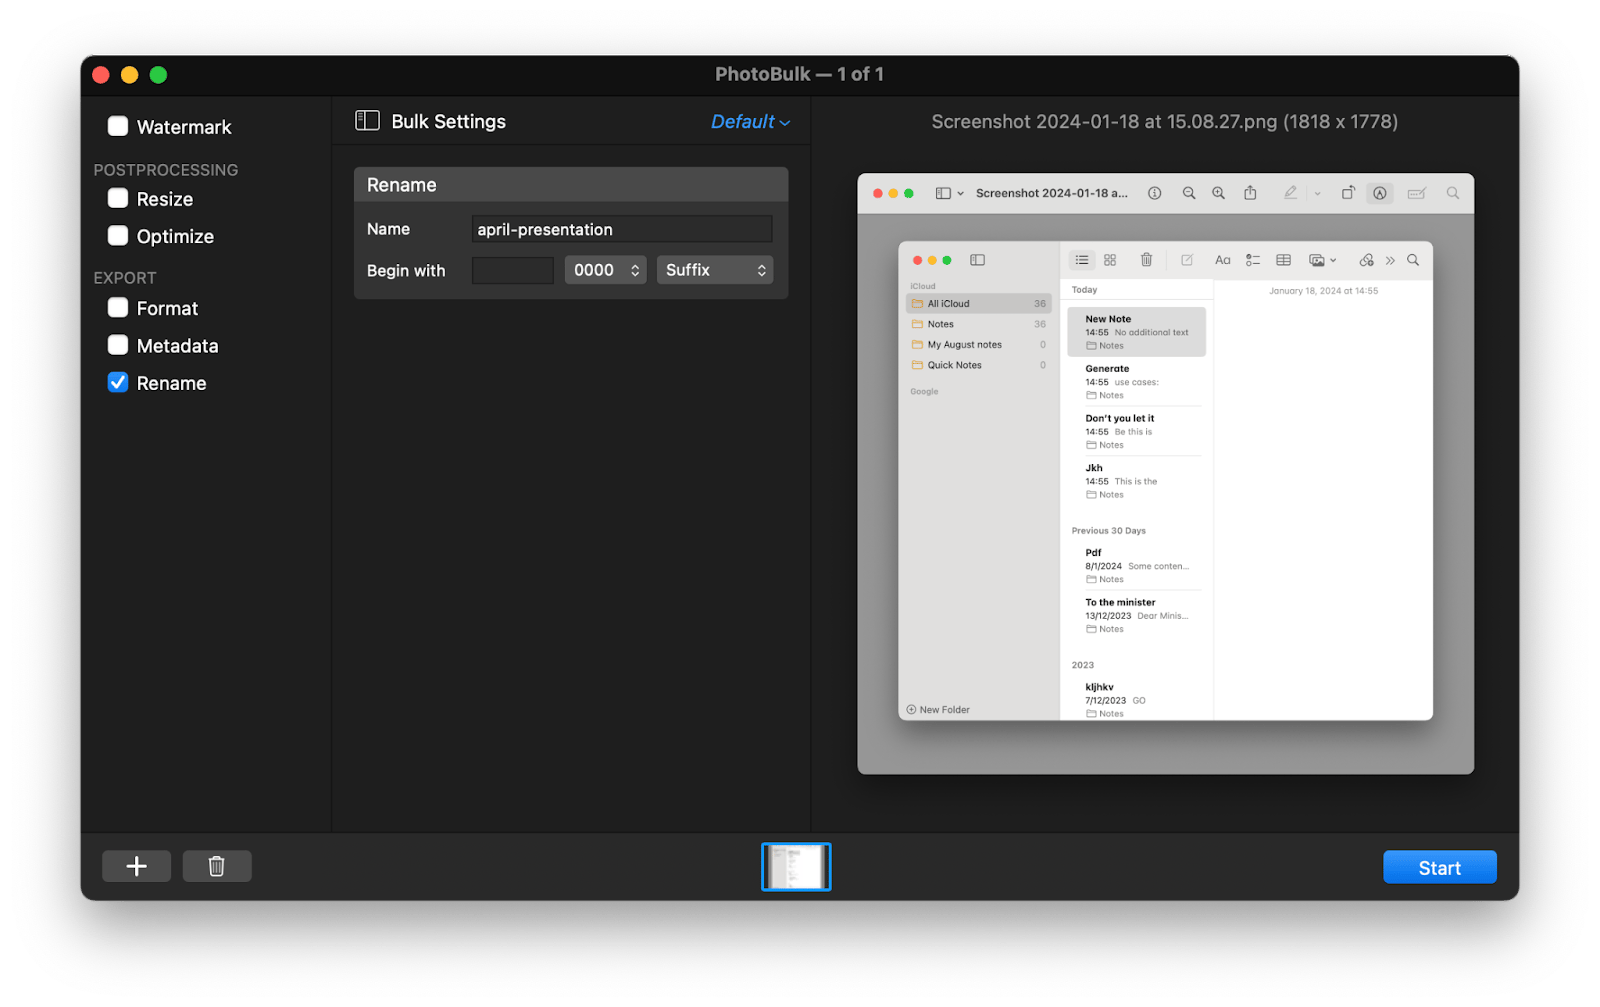
Taking numerous screenshots and want to organize them better? You can use PhotoBulk to quickly resize, rename, and watermark your screenshots en masse.
How to crop your screenshot with online tools
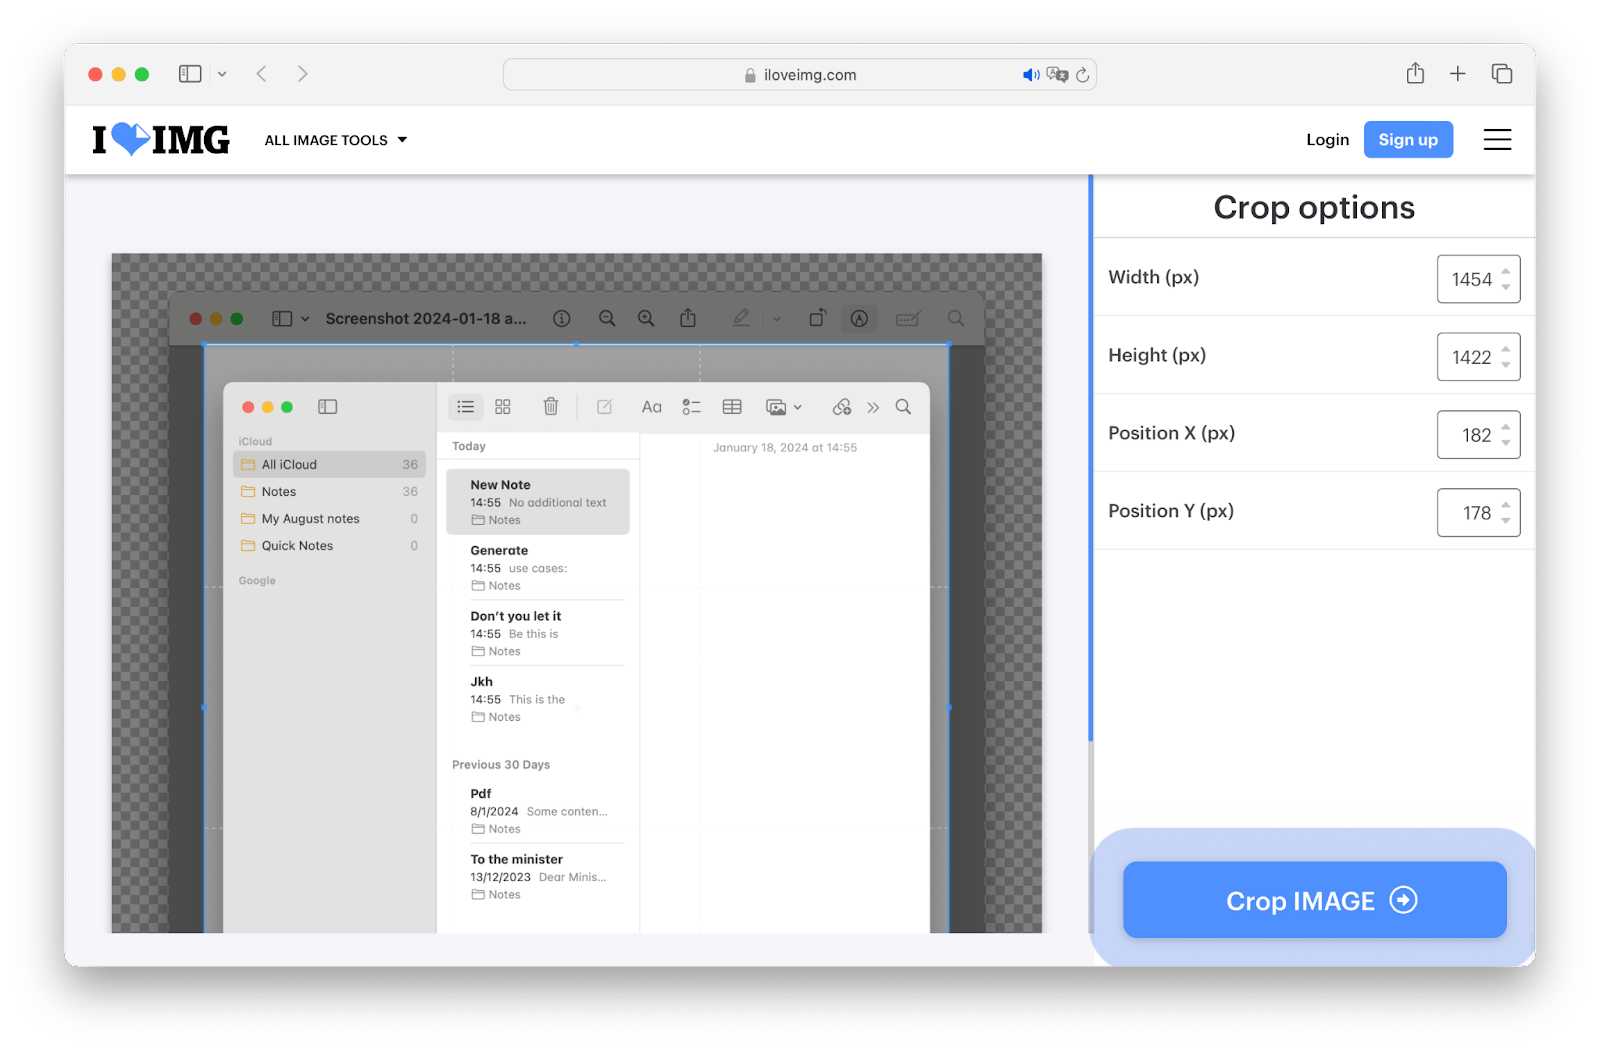
Now that I’ve covered ways to crop screenshots on your Mac, let’s wrap this up with a look at the tool you can use in your browser.
While I like to simply do a search on the best cropping tools for the most recent results, at the time of this writing, iloveimg is offering a convenient free, no-registration image cropping tool at iloveimg.com:
Final thoughts
Take cropped screenshots or crop them later — Mac allows you the flexibility to take and edit screenshots for your daily uses. Employ the built-in apps Preview and Photos to take and edit screenshots or try third-party apps for extra features.
You can explore the apps mentioned in the post — Capto, CleanShot X, Xnapper, PhotoBulk — with a Setapp subscription. Simply sign up to Setapp and try these and dozens more tools for macOS, iOS, and web for daily tasks on Mac. From photo editing and design to Mac maintenance, customization, security, coding, collaborating, and much more, Setapp has got you.
What’s Setapp? It’s an app subscription to a hand-picked variety of tools for tasks on Mac under a single fee.
If you want to use the apps I’ve mentioned, you can try them for free with Setapp’s 7-day trial. That’s right, you can sign up now and access the apps on Setapp without paying! Get started now and explore all the cropping, editing, and other possibilities with Setapp’s rich selection of helpful day-to-day tools.


