To fully uninstall Dropbox on Mac, complete three steps: Quit the app, delete it from Applications, and remove leftover files from the Library folder. Skipping any step means Dropbox isn't completely gone.
For an automated cleanup without digging through Library folders, use CleanMyMac. It removes the app, cache, preferences, and hidden support files in one scan.
Deleting the Dropbox app does not delete your files. Your local Dropbox folder and online account stay intact. Uninstalling only removes the desktop client.
To stop Dropbox from launching at startup, remove it from Login Items in System Settings or turn it off directly in Dropbox Preferences.
Need to keep working with Dropbox files after uninstalling? CloudMounter lets you access Dropbox and other cloud services as local drives. Both CloudMounter and CleanMyMac are available on Setapp. Try them free for 7 days.
To uninstall Dropbox, you can use Finder to delete it from the Applications folder and remove leftover Dropbox-related files and folders from the Library directory. Alternatively, you can unlink associated accounts and deselect some online Dropbox folders via Dropbox’s account and sync preferences, respectively.
But first, here’s a quick look at common issues you can run into while uninstalling Dropbox on Mac and the ways you can fix them easily:
What’s going wrong?
Fix it this way
Dropbox won’t quit
Use Force Quit from the Apple menu or close it via Activity Monitor
Can’t delete the app
Make sure Dropbox is fully closed before trying to delete it
Leftover files remain
Manually delete files from Library folders or use CleanMyMac from Setapp to remove residual data
Don’t want to lose files
Sign out or disable sync to keep local files intact, or use CloudMounter from Setapp to access cloud storage without syncing
Dropbox opens at startup
Remove it from Login Items in System Settings or uncheck the auto-launch option in Dropbox Preferences
Finder sidebar still shows Dropbox
Right-click the Dropbox shortcut and choose Remove from Sidebar
*Setapp is a subscription service that gives you access to 300+ macOS, iOS, and web apps for one flat monthly fee.
Or get CleanMyMac as a standalone app on Setapp Marketplace.
How to uninstall Dropbox on Mac manually
macOS makes it easy to manually uninstall any third-party app if you prefer to manage your apps yourself. The same applies to Dropbox.
Here’s a step-by-step guide on how to delete Dropbox from a Mac.
Step 1: Quit Dropbox completely
To quit Dropbox:
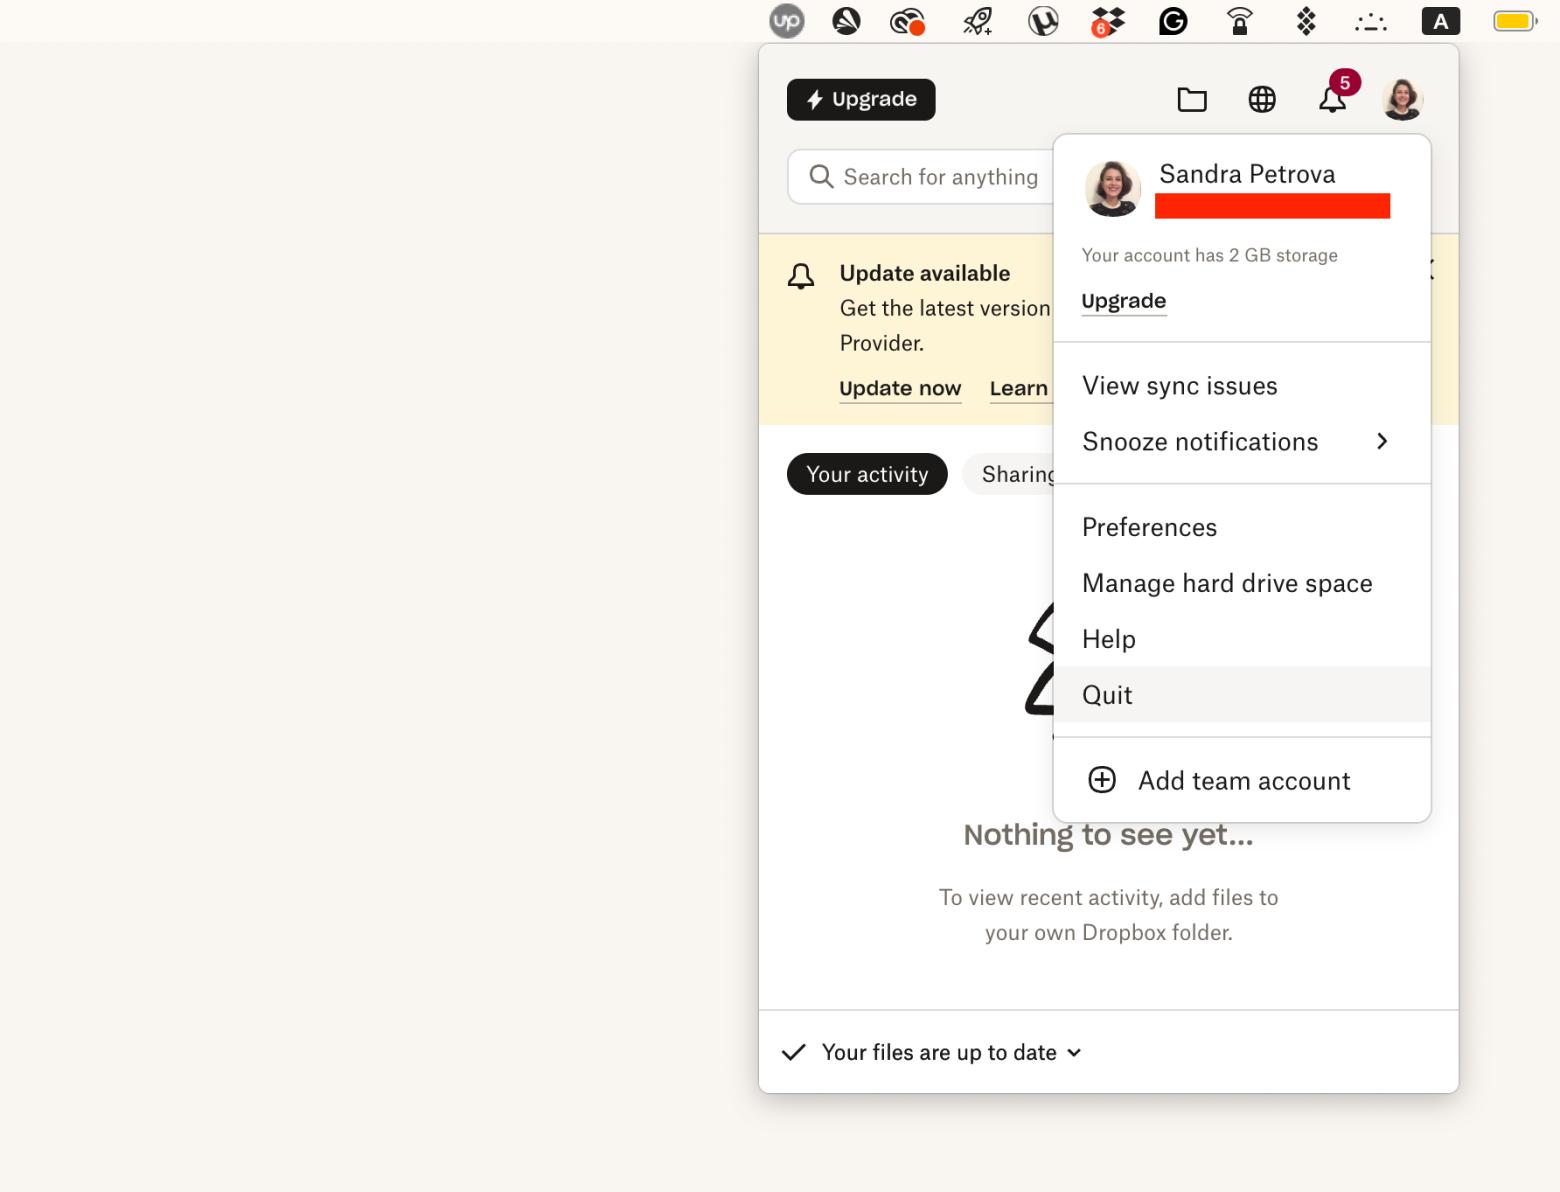
Click the Dropbox icon in the menu bar.
Click the Account icon.
Choose Quit from the drop-down menu.
If Dropbox is stubborn and won't close, close it using the Force Quit option from the Apple menu or close it using Activity Monitor (open it in Applications > Utilities).
Step 2: Delete Dropbox from Applications
After closing Dropbox, you can now remove the application. Here’s how to delete Dropbox from Mac devices:
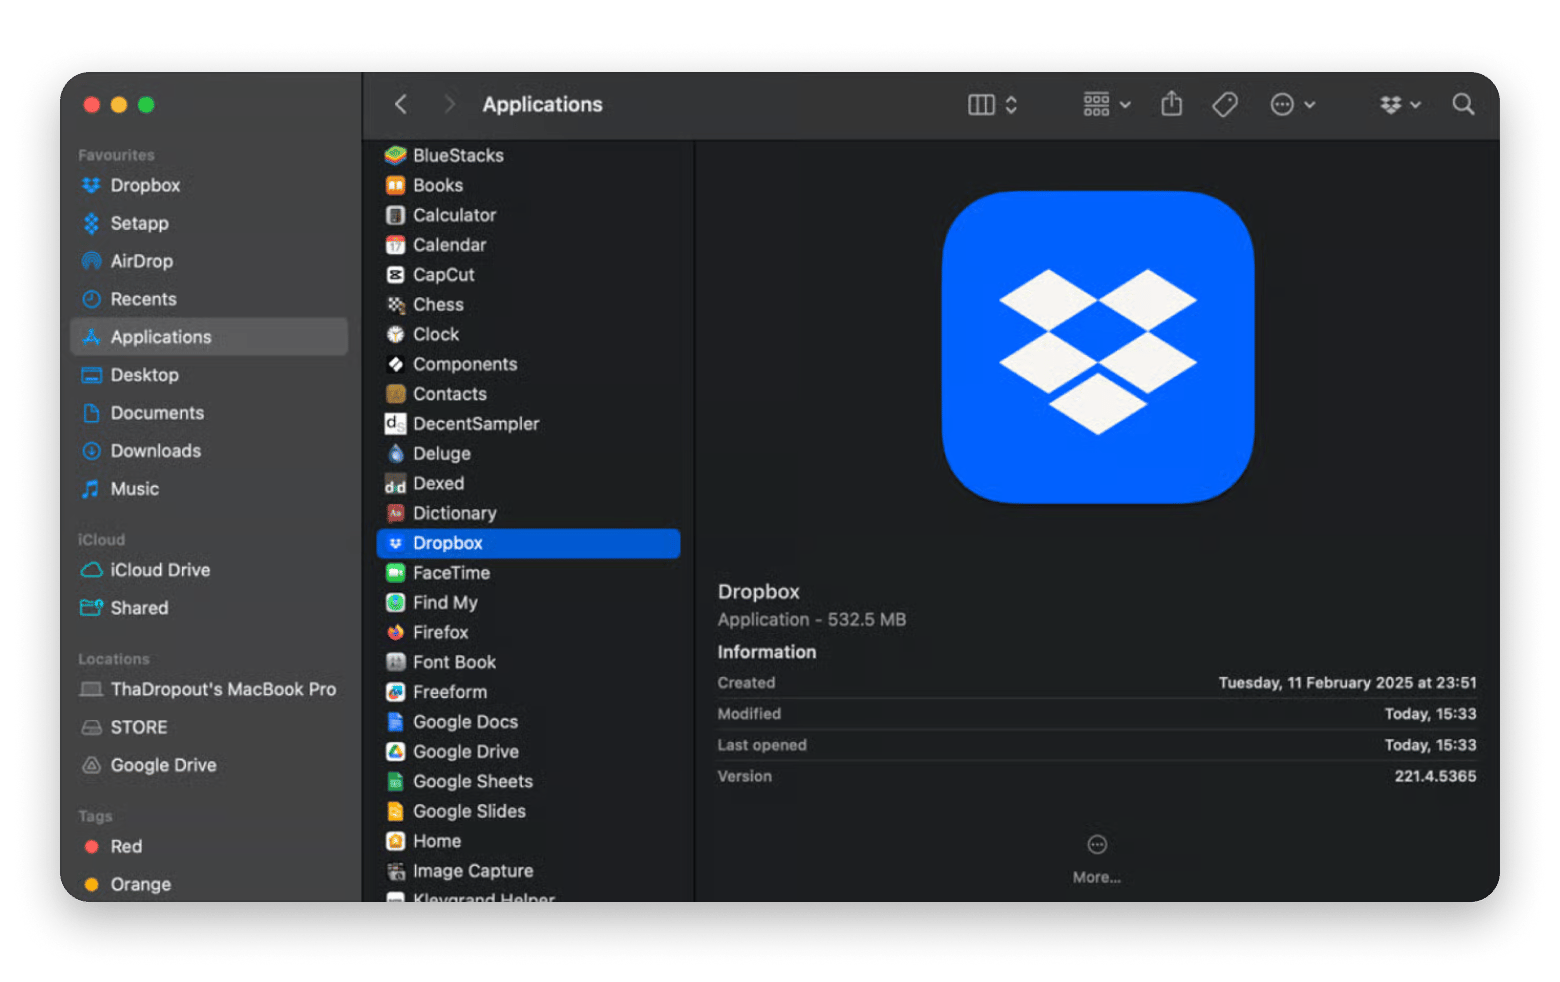
Open Finder and choose the Applications folder.
Scroll to Dropbox, right-click it, and choose Move to Trash. You can also click Dropbox and press Command + Delete.
Keep in mind that this will delete only the Dropbox application, not your Dropbox folder.
Step 3: Delete Dropbox service files
When you delete an application, it often leaves behind some files and folders. To remove any leftover Dropbox files and folders:
Open Finder.
In the top menu bar, click Go > Computer.
Open your startup disk (usually named Macintosh HD).
Open the Library folder and proceed to Application Support.
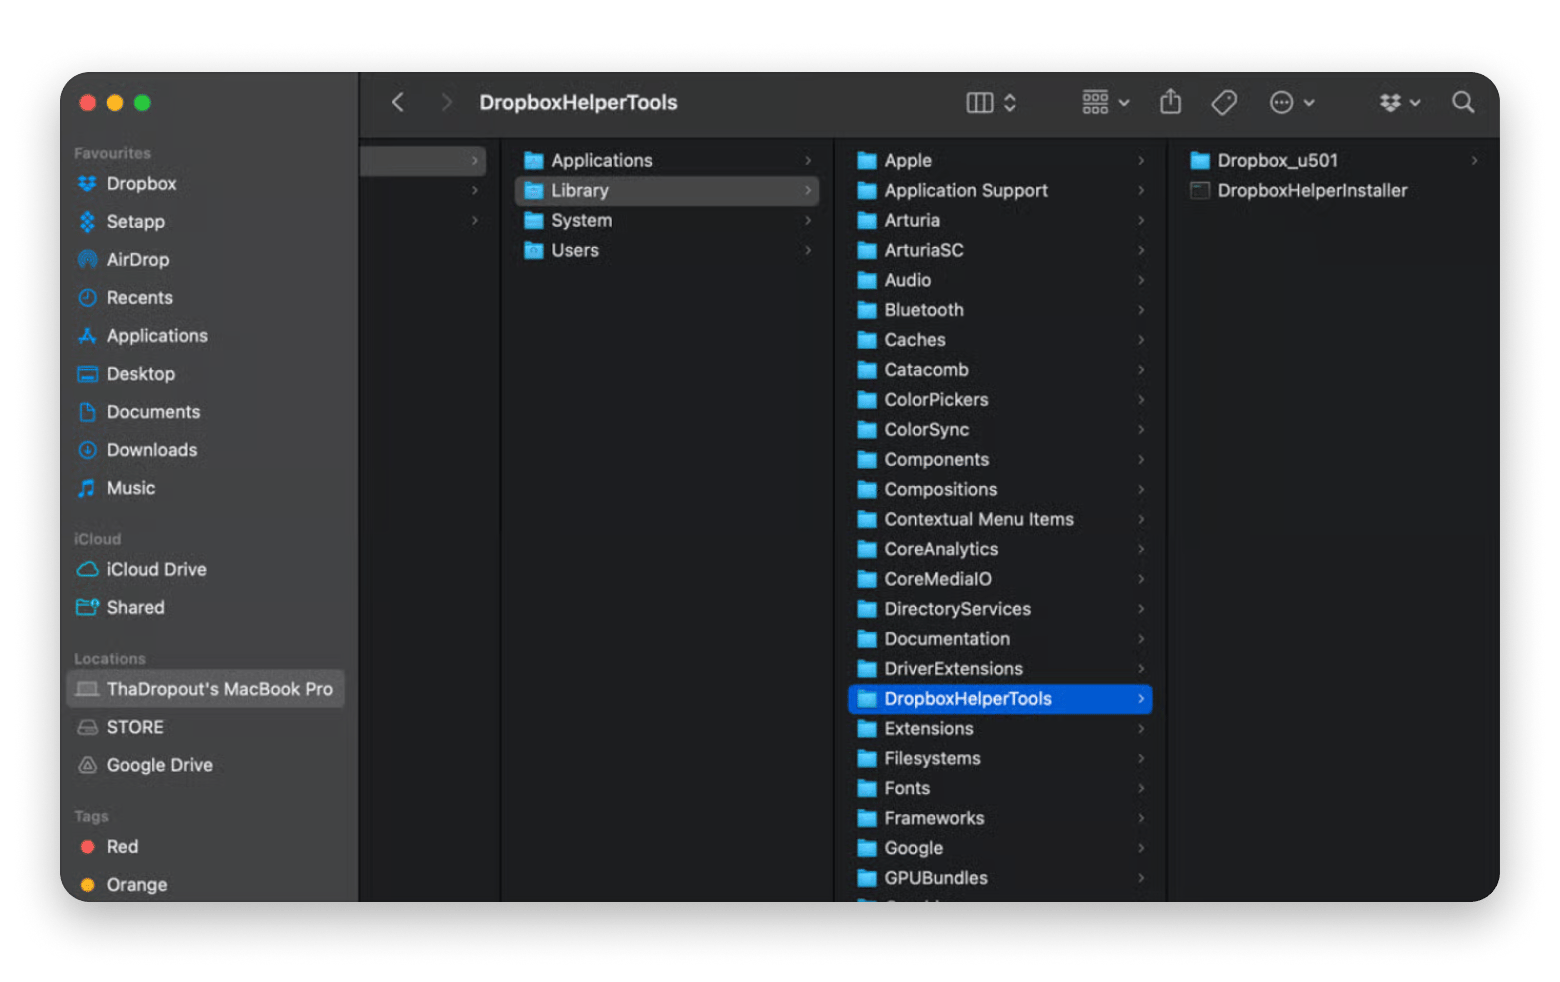
Delete any Dropbox-related items in this folder and others under Library, like Preferences, LaunchAgents, and Cache. Dropbox may also have a folder directly under Library called DropboxHelperTools that you should delete.
Always double-check filenames to avoid deleting non-related files that might be vital for other apps and system features.
How to delete Dropbox from Mac without removing files
If you're removing Dropbox because you're switching to another cloud provider, you’ll likely want to keep your local files intact. Just keep in mind that any future changes in your online Dropbox won’t sync with the unlinked local folder.
To safely disconnect Dropbox while keeping your files:
Click the Dropbox icon in the menu bar.
Click the Account icon.
Choose Preferences and proceed to Accounts.
Click Sign Out and unlink any other associated accounts listed.
Click Sign Out on the prompt that appears.
Alternatively, you can disable synchronization. This will sever the link between your local folder and online storage without removing your account or deleting the app. To do this:
Click the Dropbox icon in the menu bar.
Click the Account icon.
Choose Preferences and proceed to Sync.
Click Select folders under the Selective sync option, then select the folders in your online Dropbox storage that you want to keep on your Mac.
Stop Dropbox from launching at startup
Even when you finally learn how to remove Dropbox from Mac systems, you might still experience some of the behavior it had caused on your Mac. From longer startup times to slow Finder actions, many issues could persist.
To completely rid your Mac of this behavior, you need to remove Dropbox from your Login Items using the following methods.
Stop Dropbox Auto-Start in System Settings
You can remove Dropbox from your Login Items using native macOS features with these steps:
Click the Apple menu in the top-left corner of your screen.
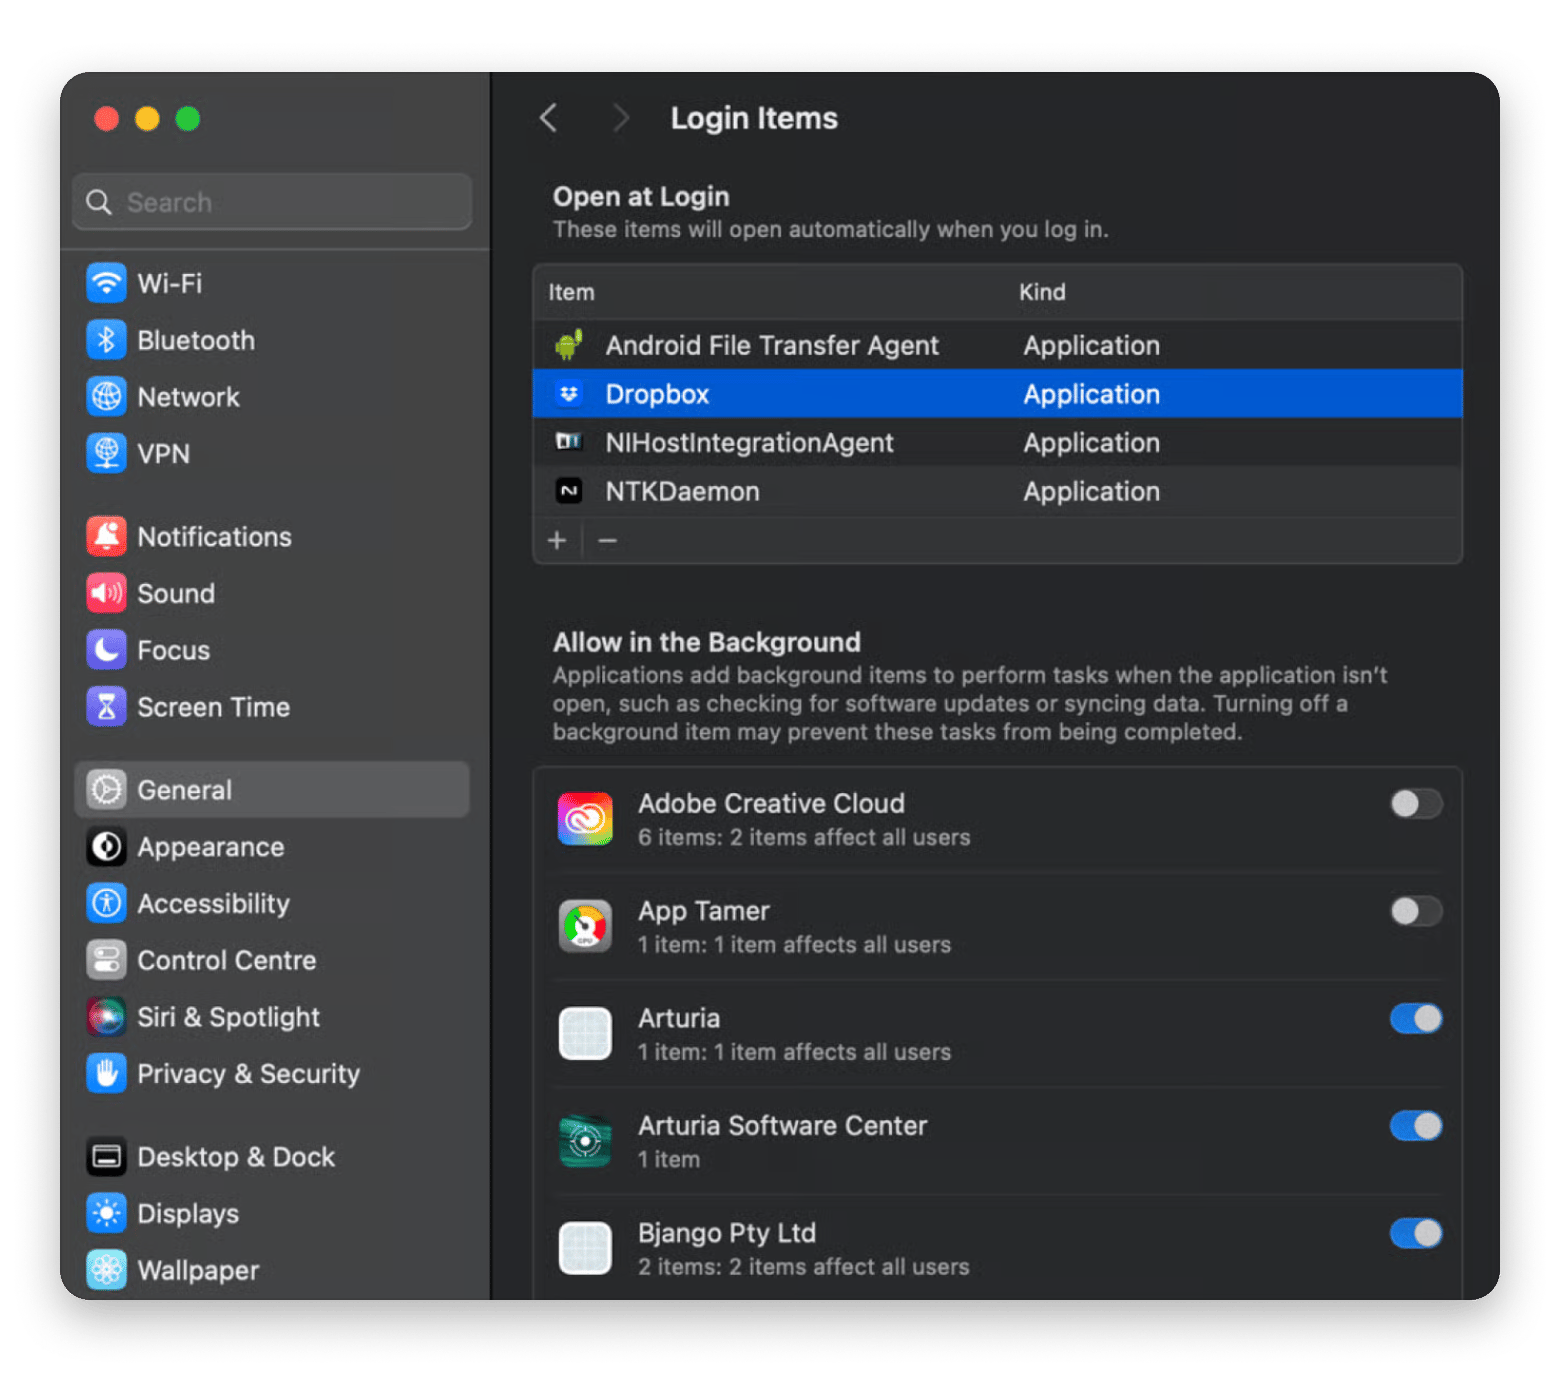
Choose System Settings (or System Preferences, depending on your macOS version), then go to General.
Click Login Items & Extensions.
Under the Open at Login section, find Dropbox, choose it, and click the – (minus) button at the bottom left to remove it.
Finding an uninstalled app still in your Login Items isn’t rare. It can happen if the app still has scripts or processes in your LaunchAgents and LaunchDaemons directories.
If you still have Dropbox on your Mac, you can remove it from your Login Items with these steps:
Click the Dropbox icon in the menu bar.
Click your Account icon, then choose Preferences.
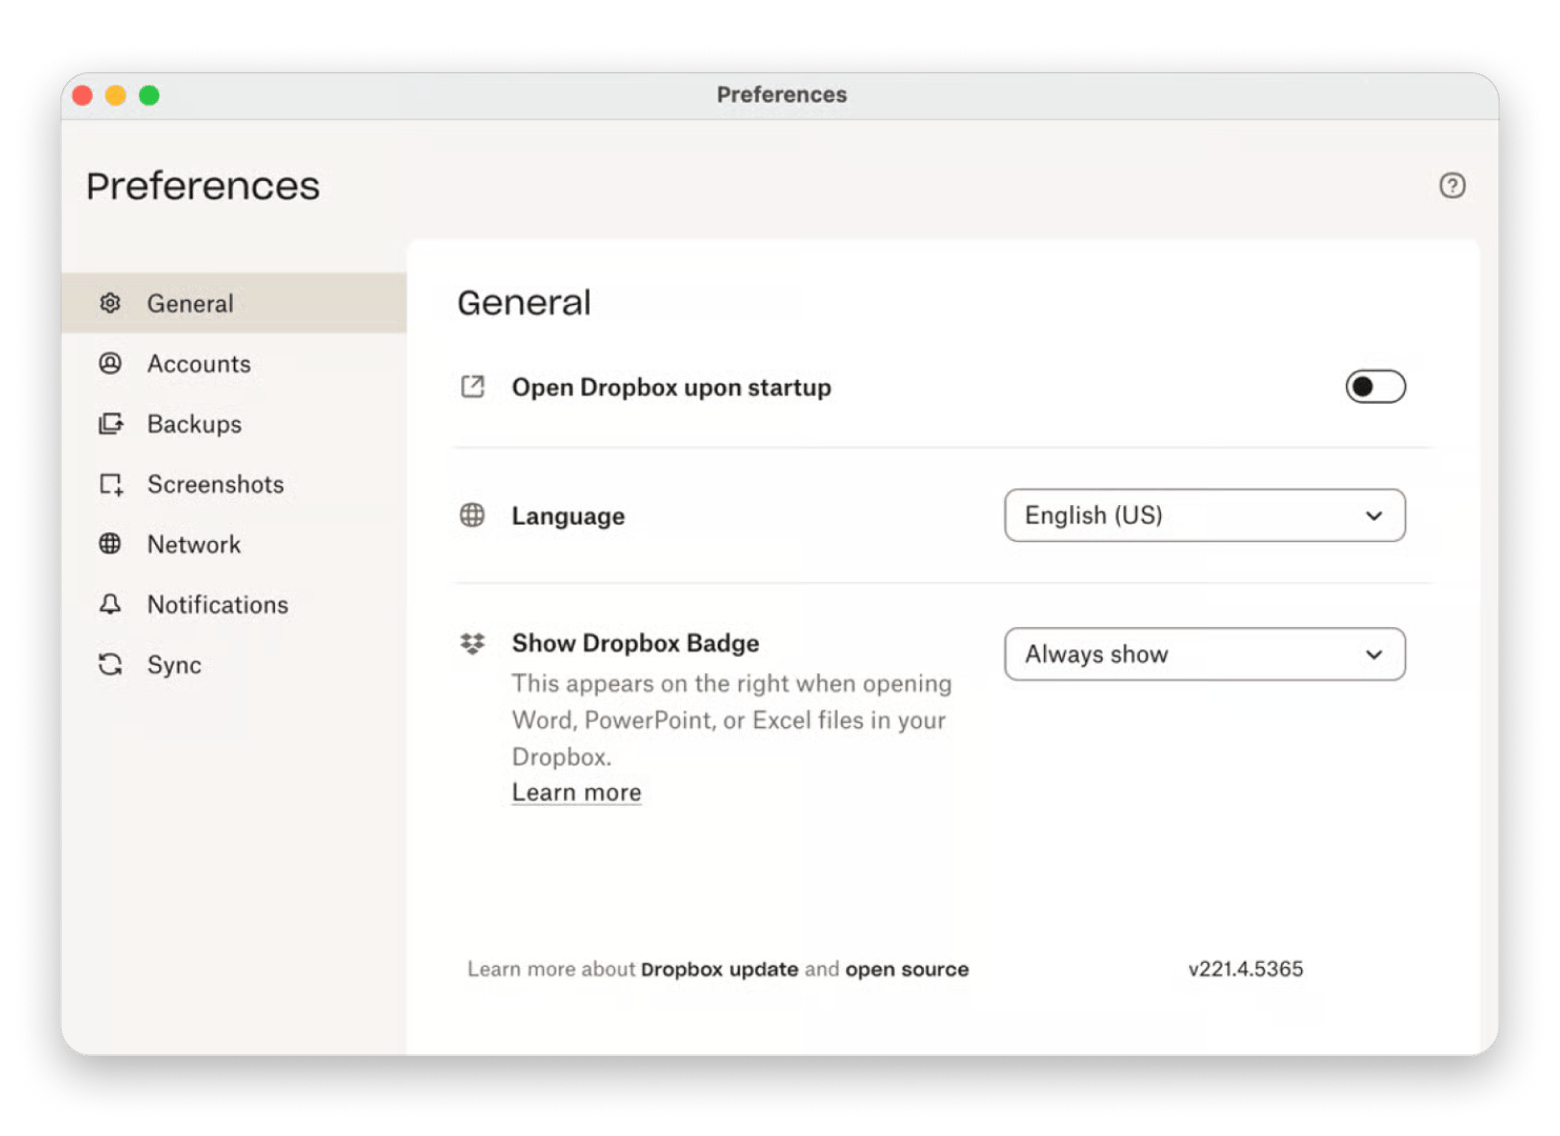
In the General tab, uncheck the box that says Open Dropbox upon startup.
This method will automatically change your System Preferences behind the scenes, and you can even see the change as you switch the setting on and off.
Or get CloudMounter as a standalone app from $7.99 USD/mo.
Uninstall Dropbox on Mac: The Bottom Line
Removing Dropbox manually gets the job done, but it takes several steps — quitting the app, deleting it from Applications, hunting through Library folders for leftover files, and disabling startup behavior. Miss any one of them, and Dropbox isn't fully gone.
If you'd rather skip the digging, CleanMyMac handles the whole cleanup in one scan, removing the app, cache, preferences, and hidden support files. And if you're moving away from Dropbox because managing cloud storage has become a hassle, CloudMounter lets you mount Dropbox, Google Drive, OneDrive, and others as local drives on your Mac — no bulk syncing, no clutter.
Both apps are available on Setapp, a single subscription that gives you access to a curated library of Mac and iOS apps. Start your 7-day free trial now.
FAQ
Why can't I uninstall Dropbox on my Mac?
Most of the time, Dropbox won't uninstall because the app is still running. Click the Dropbox icon in the menu bar, click your avatar > Quit. Then drag the Dropbox app from Applications to the Trash. Empty the Trash to finish.
How do I uninstall Dropbox without deleting my files?
Simply drag Dropbox.app to Trash from your Applications folder. This removes only the desktop app. Your Dropbox folder stays in your home directory, and all files remain accessible at dropbox.com. The uninstall process never touches your actual data.
How do I completely remove Dropbox and all its data from my Mac?
First, quit Dropbox and trash the app. Then delete ~/Library/Application Support/Dropbox and the Dropbox folder from your home directory. For automated cleanup, CleanMyMac finds all related files instantly. Remember to back up important files before removing it completely.
What happens to my Dropbox files and account after I uninstall the app?
Your account stays active, and files remain stored online at dropbox.com. Local copies in your Dropbox folder persist until you delete them manually. You can reinstall the desktop app anytime to resume syncing. Uninstalling affects only the app, not your subscription or cloud storage.
How do I disable the Dropbox Finder extension after uninstalling?
Open System Settings > Extensions. Click Finder extensions and untick the Dropbox checkbox. If it doesn't appear, the extension was removed successfully. On macOS Tahoe, you might need to restart Finder: press Option while right-clicking the Finder icon, then choose Relaunch.
Superpowers for your Mac
Tackle your tasks with dozens of helpful apps on Setapp.






 Best solution
 Best solution