How to use VPN on your iPhone and iPad
Do I need a VPN on my iPhone? The short answer: absolutely.
While iPhones are known for their strong security, they're not invincible. Hackers and data snoops can still get in without the right protection. A VPN can be your shield. But how do you pick the right one? And is your iPhone really as secure as you think? Let me show you how I lock down my device.
Why use a VPN on iPhones and iPads
Using a VPN on an iPhone ensures your data is secure and your browsing activity stays private, as it puts your device in stealth mode. This means your real location is hidden, and you can bypass geo-restrictions, like accessing Netflix US from outside the country. If you're traveling to countries with strict internet censorship, like China or Saudi Arabia, it's essential to learn how to add VPN to your iPhone before arriving, as VPN sites may be blocked there.
Here's when a VPN can be helpful:
| VPN on/off scenarios | Turn VPN on | Turn VPN off | |
|---|---|---|---|
| Hide your IP address. | ✓ | ||
| Access geo-restricted content. | ✓ | ||
| Encrypt internet connection. | ✓ | ||
| Use trusted networks. | ✓ | ||
| Prevent tracking by authorities, ISPs, and advertisers. | ✓ | ||
| Safeguard devices from hackers. | ✓ | ||
| Use online banking. | ✓ | ||
| Bypass internet censorship. | ✓ | ||
| Access local services. | ✓ | ||
How does a VPN work
VPN (virtual private network) hides your device’s IP address and encrypts the data it exchanges with websites and servers. Let’s say you turn on VPN on iPhone. At that moment, you’re basically hidden from anyone who wants to track you over the internet.
Think of a VPN as an impenetrable tunnel that prevents anyone from learning what you’ve been browsing from your phone. And that includes your internet service provider (ISP).
I know this might sound similar to iCloud Private Relay (a built-in Apple feature introduced in 2021 for iCloud+ subscribers), but they’re different. While both encrypt your data and mask your IP address, iCloud Private Relay is limited to Safari and only works for web browsing. In contrast, a VPN encrypts data across all apps and browsers on your device, providing broader protection for your entire internet activity.
For example, Private Relay can’t protect you if you’re browsing with Chrome. Instead, you need to install and activate an iOS VPN app to stay protected. Learn more ways to stop your iPhone from being tracked.
Does using a VPN slow down Internet connection?
Yes, it does a little bit unless you have a high internet speed and VPN server proximity. In that case, you won’t even notice a change.
How to get and activate a VPN on iPhone or iPad
If you search for a VPN, you'll definitely get lots of hits. But are they reliable? Well, some are great. They can protect you, But some can be slow on phones, so you can't watch HD videos when using a VPN.
Also, if you want to install a virtual private network on iPhone and iPad, don't opt for free VPNs. Usually, they run ads to cover their operation, which can be really annoying. Plus, free VPNs might also contain malware or sell your data to advertisers.
Rather, stick with trustworthy apps that have proven themselves with fellow users. For example, I use ClearVPN on all my devices. The app not only protects your privacy and data with unbreakable industry-standard encryption AES-256 but is also super easy to use. You can choose a server from dozens listed or select the activity you want to do. Then, ClearVPN will automatically connect to the best VPN server.
Here's how to set up a VPN on iPhone and iPad:
- Install and open ClearVPN.
- Tap Explore the app.
- Tap Connect.
- You will see a prompt stating that ClearVPN is trying to add a VPN configuration on your iPhone. Tap Allow.
Awesome. You've got a secure connection. As long as you don't disconnect from the VPN server, all data leaving your device will be encrypted.
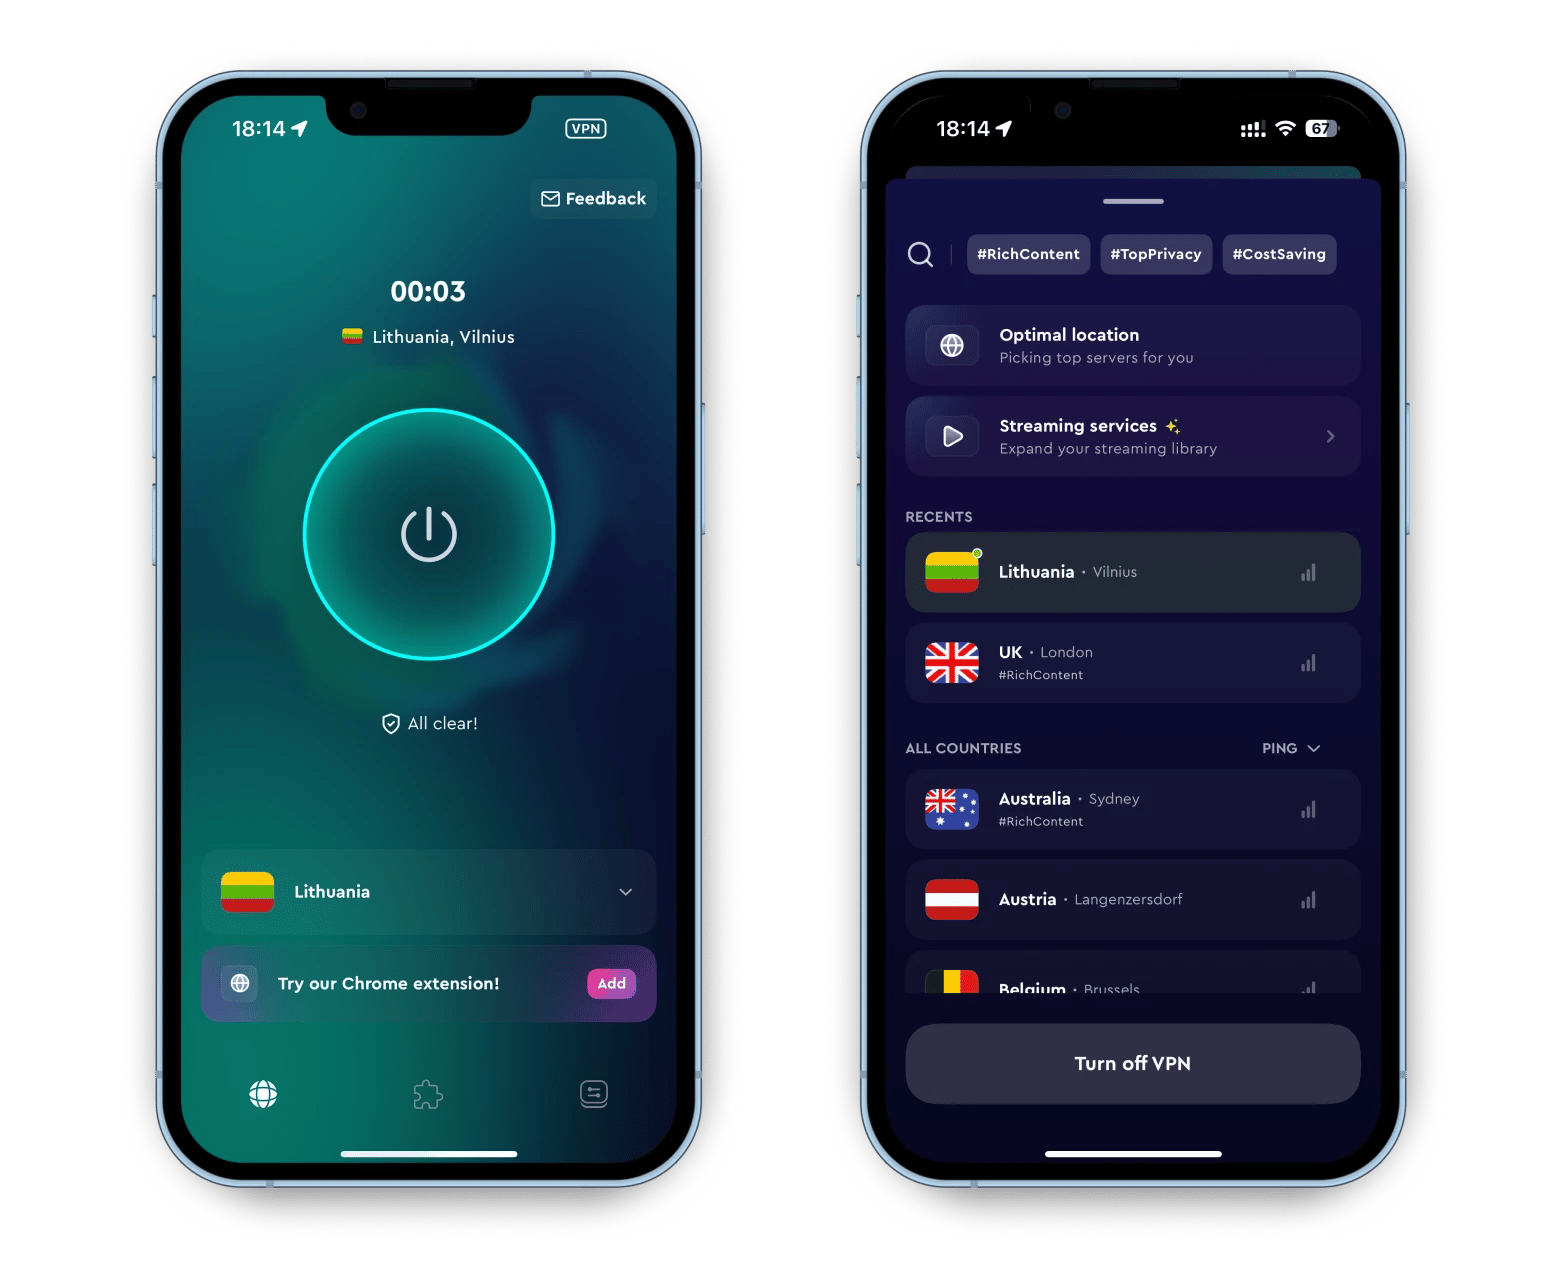
What’s more valuable than just safe browsing is the app’s Kill Switch feature. With this, ClearVPN disconnects you from the internet if the VPN fails, and you can turn it on or off as needed.
How to check if an iPhone is connected to a VPN
The easiest way is to take a look at the VPN app’s connection status. Typically, VPN apps have an indicator that tells you whether your iPhone is successfully connected. Some VPN apps also show a status icon on the phone upon connecting successfully.
That said, visual indicators may be inaccurate, particularly for unknown VPNs. Although unlikely, your IP address might still be exposed even if you have connected to a VPN.
To confirm you’re securely connected, use an IP/DNS detector to double-check. Here’s how:
- Go to IPLeak.net to check your actual IP address.
- Connect to a VPN.
- Refresh IPleak.net and compare the IP addresses.
If the IP address has changed to a new one, you’ve successfully connected to the VPN.
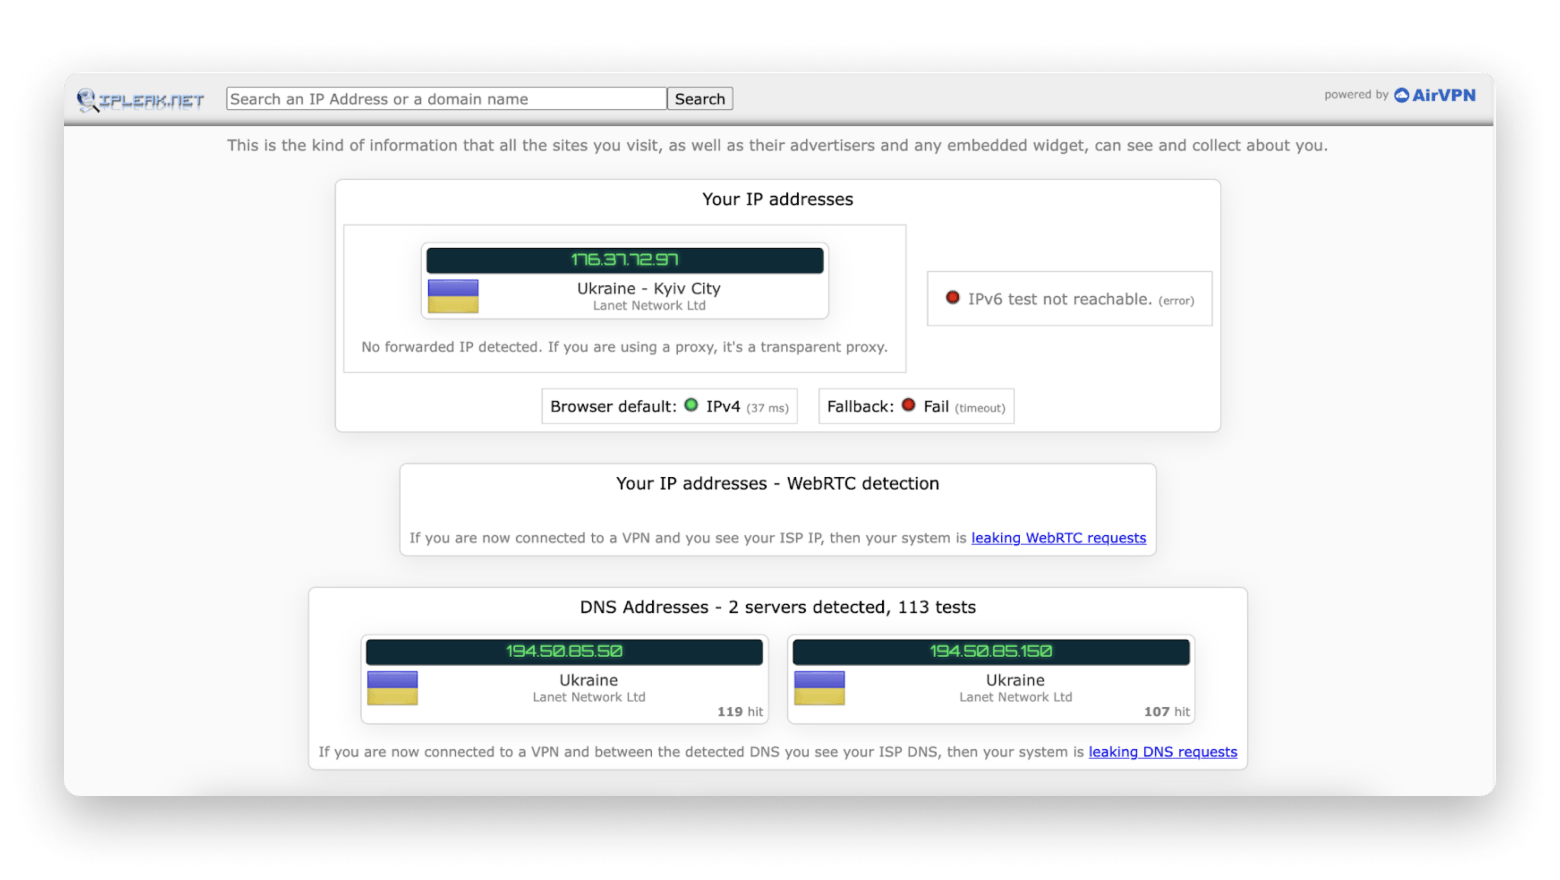
Important: Take note of the DNS addresses. They shouldn’t show your ISP’s name because that’s a sign of a DNS leak. A DNS leak means you’re not exactly hidden and can still be tracked.
How to manually configure a VPN on your iPhone or iPad
The majority of VPN apps connect you to the VPN server. However, you will sometimes have to do it yourself, especially if your VPN provider does not offer an app for using its service on iOS.
Here’s how to add VPN to your iPhone manually:
- Open Settings > General > VPN & Device Management.
- Tap VPN > Add VPN Configuration.
- Tap Type > Choose the protocol type (the default options on iPhone are IKEv2, IPsec, and L2TP).
- Enter your VPN details, including the username and password, in the appropriate fields.
- Configure the server by providing the server address and the secret key.
- Tap Done to save the configurations.
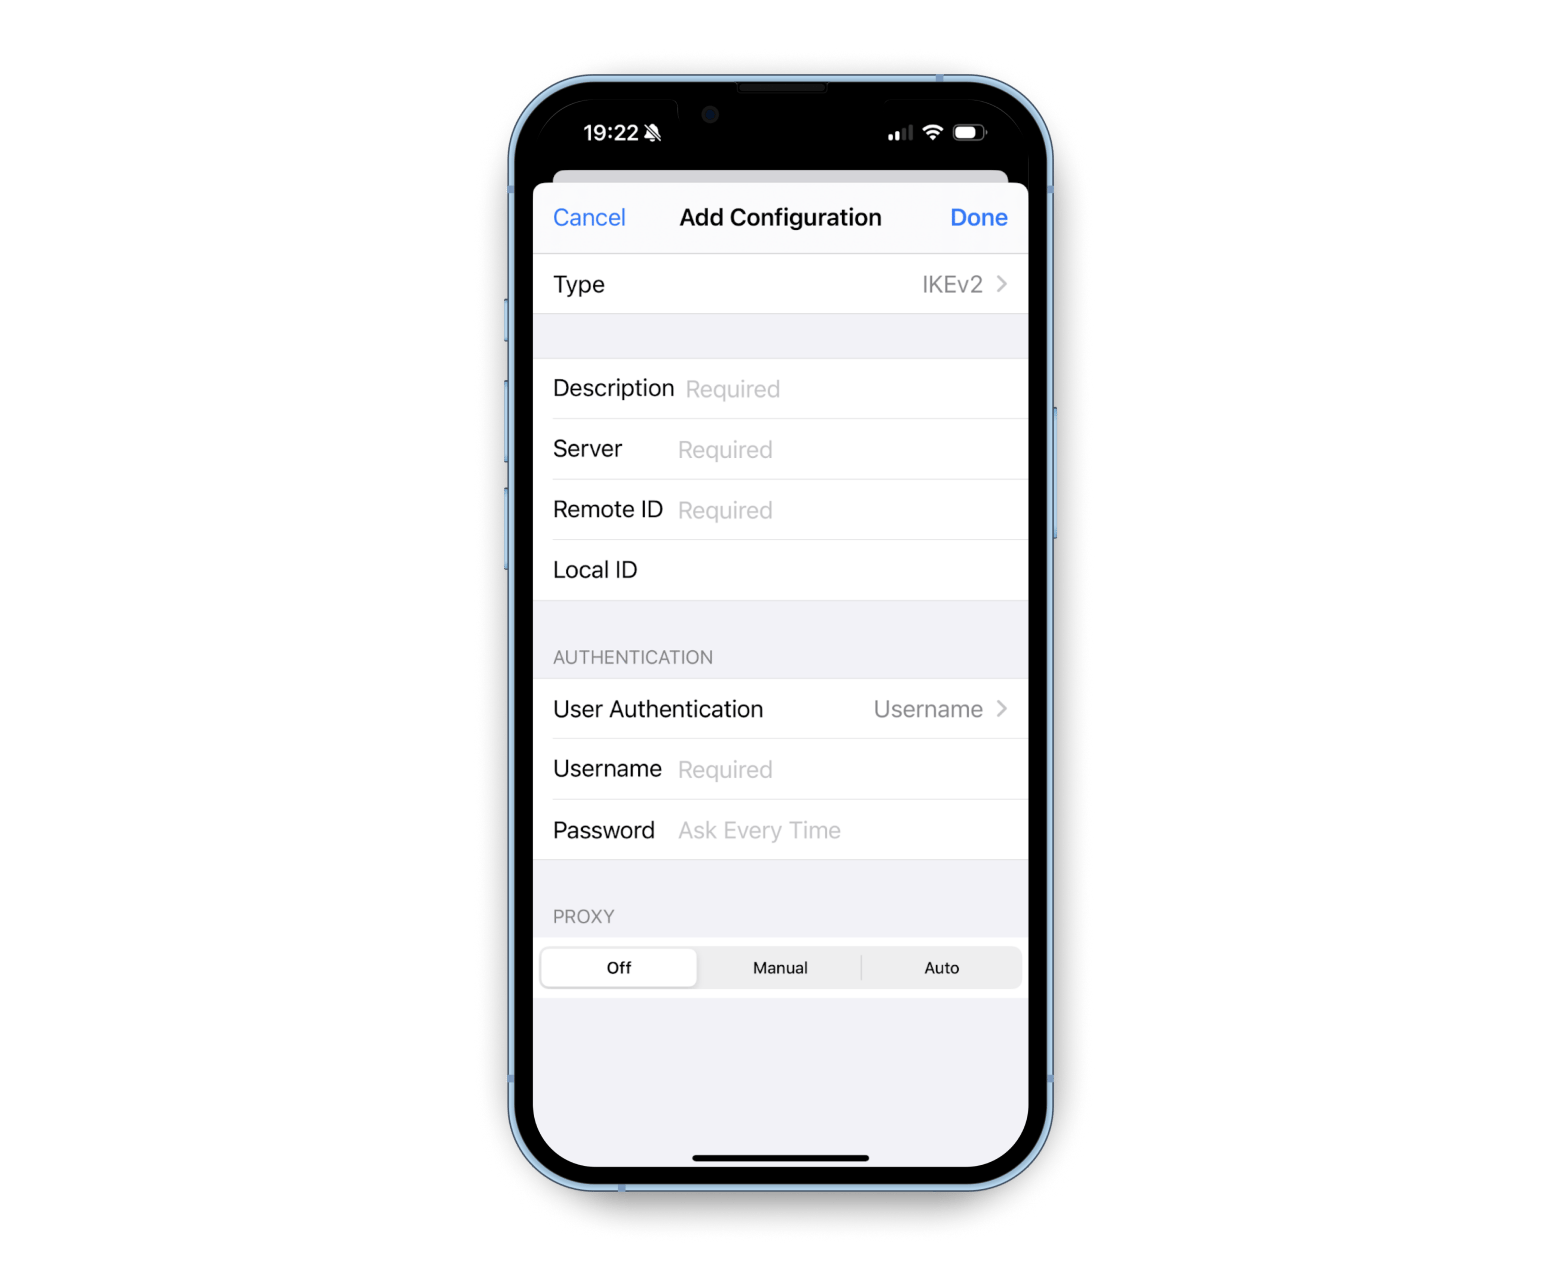
Now, you know how to get the VPN on iPhone by manually configuring it. But that’s only for one server. If you want to connect to another server, you have to repeat all the steps again. However, VPN apps like ClearVPN make this much easier and will save a lot of trouble.
How to manage your VPNs
We can use VPNs occasionally. Let's say I use it to get access to geo-restricted apps. But knowing how to change VPN on iPhone is quite simple.
Some VPNs automatically connect and disconnect based on the trustworthiness of your Wi-Fi network, while others require manual operation.
To disconnect your VPN, go to Settings on your iPhone or iPad > VPN > Turn it off. If you're using a VPN app, open the app and turn the service off from there.
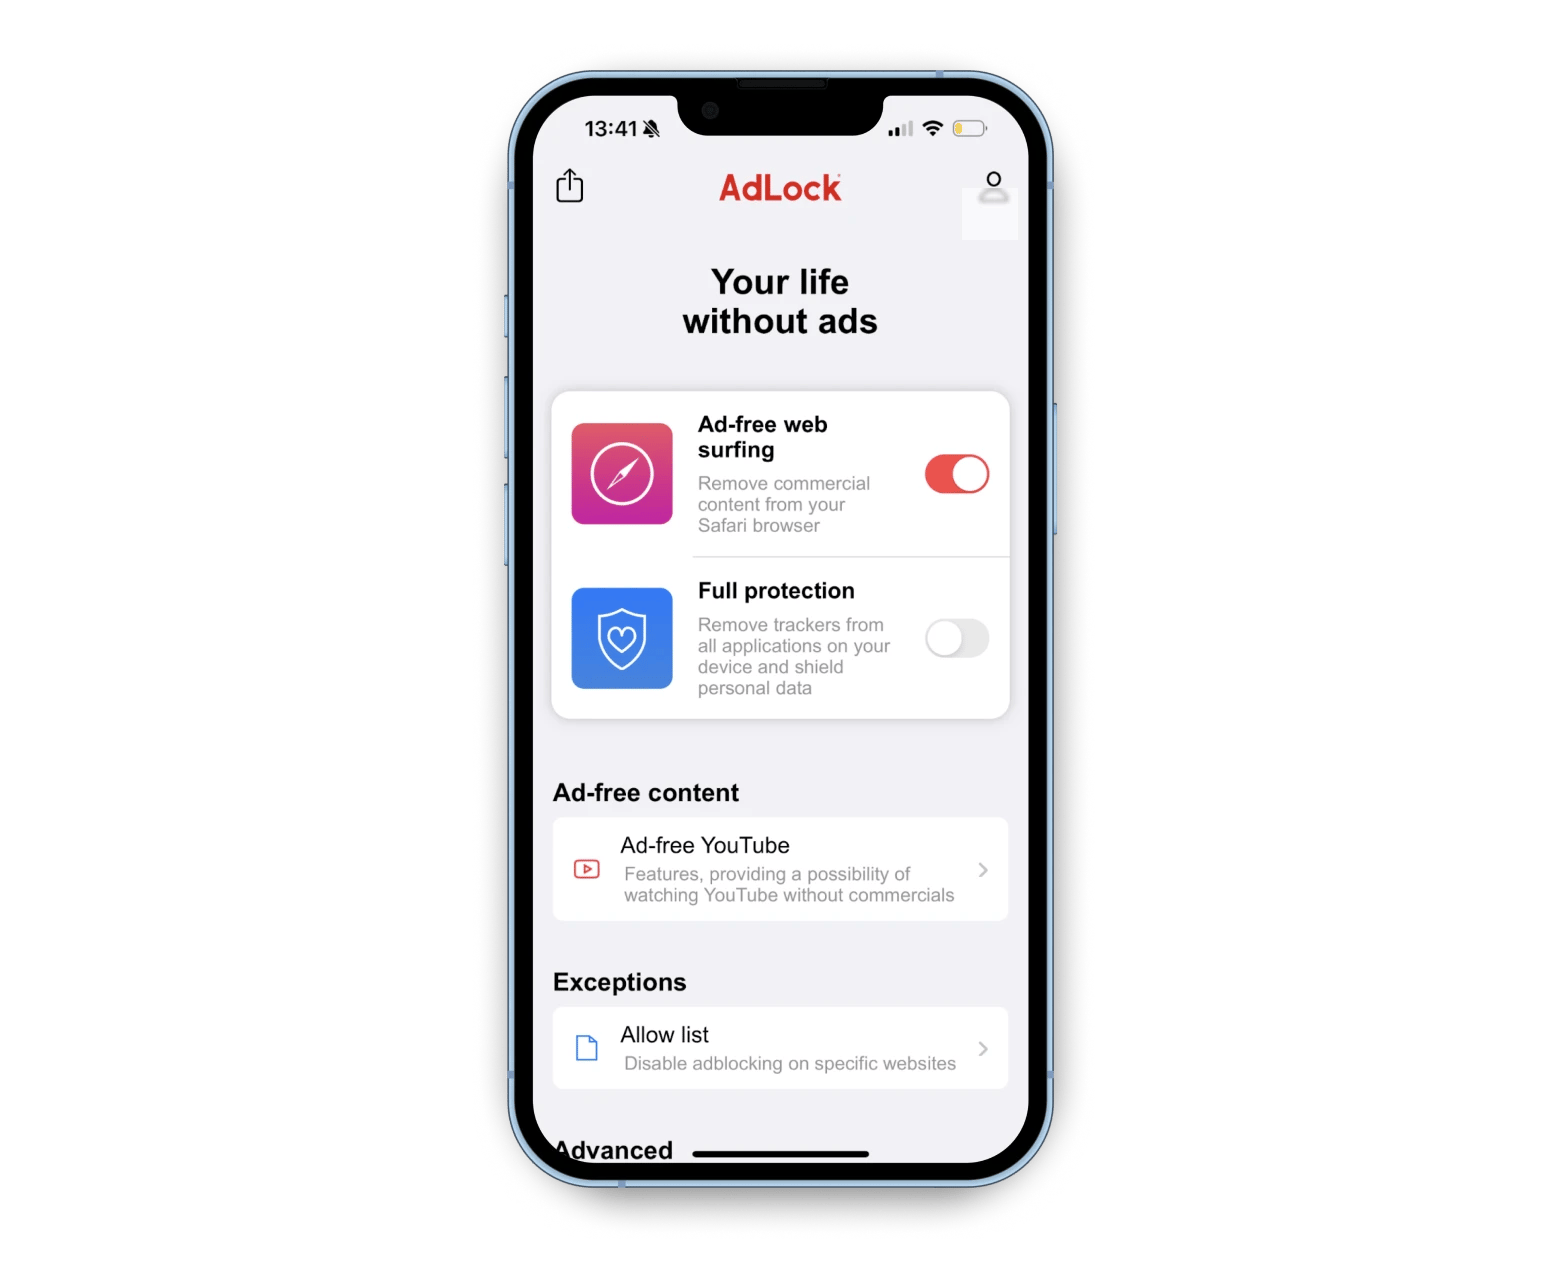
Tip: If you're frustrated by annoying pop-ups and intrusive ads, AdLock can be a great solution. It's a simple ads blocker for iPhones, which can be helpful if you're accessing sites that don't work well with a VPN turned on. Install the app and turn on Ads-free web surfing, and you won't see intrusive ads popping up anymore.
How to remove VPN from iPhone and iPad
Sometimes, you only need a VPN temporarily. Or you found one that better suits your needs. Either way, it’s better to remove the VPN you don’t need.
Here’s how to do it in the iPhone VPN settings:
- Go to Settings > General > VPN.
- Tap the i icon next to the VPN you want to remove.
- Tap Delete VPN.
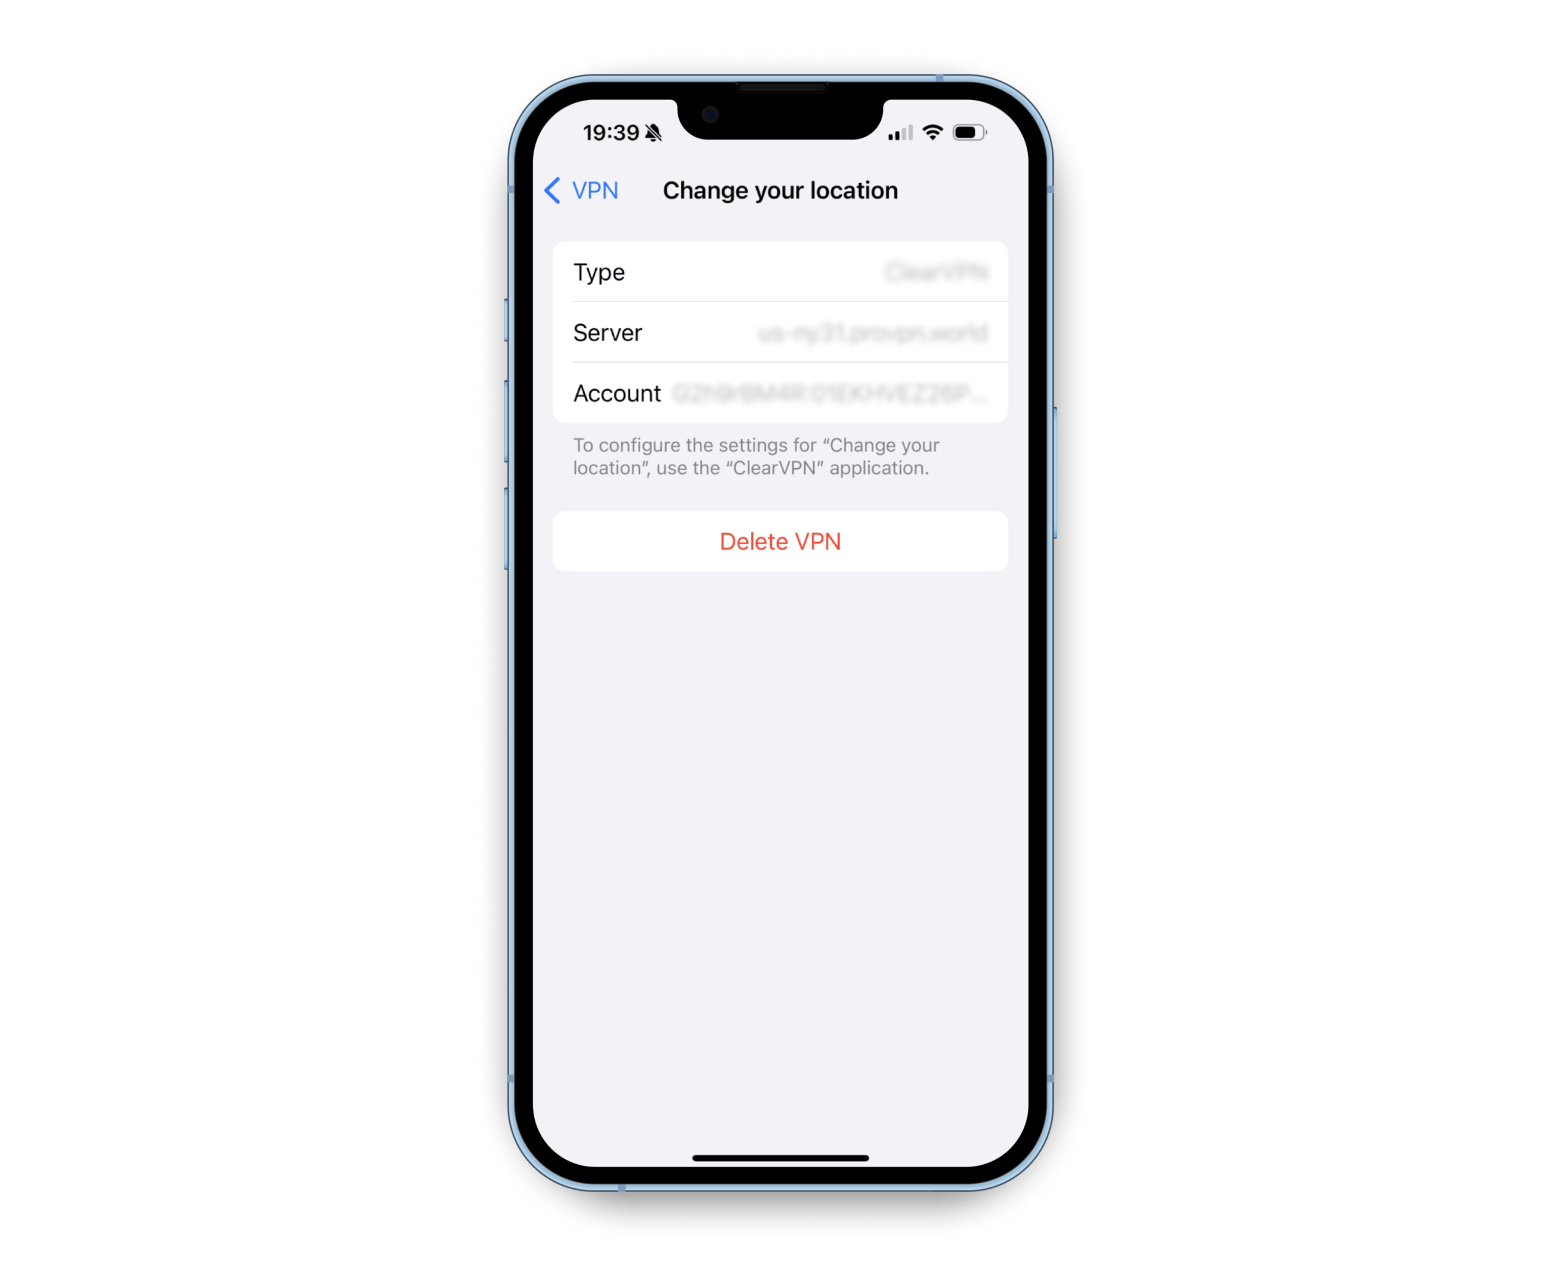
It’s even simpler if you have a VPN app installed. Tap and hold the VPN app on the screen. Then tap the Delete app or the minus sign to remove it from your phone.
How to cancel a VPN subscription on an iPhone and iPad
Remember, the bills keep coming as long as the subscription is active. Merely deleting the app won’t stop that. To unsubscribe, login to your VPN account and cancel the subscription. Otherwise, you can tell their customer support you want to stop and they’ll help you.
Now, go set up VPN on iPhone and iPad
Protect your iPhone or iPad from snoopers. You could be watched on a public Wi-Fi network or listened to when you least expect it. Honestly, it’s better to be safe than sorry by arming your phone with a VPN.
Also, I hope the steps I shared have been useful, and the same goes for the apps I mentioned.
Here’s a quick recap of what they do:
- ClearVPN connects your iPhone/iPad to a secure VPN server and hides its IP address.
- AdLock blocks annoying ads and pop-ups from showing in your browser.
If you want to download these apps, you can find them on Setapp — a single subscription platform that provides access to dozens of iOS and macOS apps. As a nice bonus, you can try them all for seven days at zero cost!


