You have multiple built-in options to move photos to your Mac.
Finder, Photos, AirDrop, iCloud, Dropbox, and Image Capture all let you transfer photos depending on your device and workflow.
AnyTrans for iOS simplifies large or complex transfers. AnyTrans for iOS is a flexible photo and file transfer tool available on Setapp and is especially helpful for moving big albums or syncing across devices.
iCloud sync keeps your photos updated across devices automatically.
Once enabled on both iPhone and Mac, all photos stay in sync, although free storage can fill up quickly.
Cleaning duplicates helps save valuable storage space.
Tools like CleanMy®Phone help remove duplicate photos so you don’t waste cloud or device storage.
Setapp gives you an all-in-one toolkit for managing and editing photos.
With a single subscription and a 7-day free trial, you get photo transfer tools, cleaners, editors, and productivity apps across Mac and iOS.
I've found that taking, editing, and sharing photos on an iPhone is incredibly straightforward. Most of my photos go straight to social media or cloud services like iCloud. But sometimes, I need to move them to my Mac for safekeeping or advanced edits.
If you’re like me and take tons of photos with your iPhone, you’ll eventually hit a storage wall. That’s when you realize you need a smart way to clear space or move them to Mac.
Filming and editing lots of videos? You might want to transfer videos from iPhone to Mac, too. Both tasks use similar steps!
Easy way to move photos from iPhone to Mac
While Apple offers several built-in photo transfer methods, third-party apps like AnyTrans for iOS can make the process even smoother. I’ve tried it for moving large albums, and it solves a lot of hassles with ease.
AnyTrans for iOS is a file transferring tool and backup manager that makes file moving simple and accessible. Get it on Setapp, launch it, then connect your iPhone and Mac. In a few clicks, you’ll have your photos organized where you want them.
Here’s how to move files:
Open AnyTrans for iOS.
Check that both your iPhone and Mac are connected to the same Wi-Fi network.
Connect your iPhone to your Mac with a USB and allow access if prompted.
Go to the Device Manager in the top menu bar.
Click Export iPhone Content to Computer.
That's it! Your photos should now be safely transferred to your Mac. The photos and albums will appear in the Photos app, and you can organize them however you like.
Move photos from iPhone to Mac with Finder
If your Mac runs macOS Catalina (10.15) or later, you can sync photos using Finder. Here’s how to do this:
Connect the iPhone to the Mac with a cable.
Open Finder and locate your phone under Devices.
Click on your phone.
At the top of the page, click Photos.
Select Sync photos.
Choose the app to sync your photos from.
Choose if you want to sync all photos or select albums.
Alternatively, you can transfer photos from your iPhone to your Mac with iCloud Photo Library.
First, turn on iCloud Sync on your iPhone:
Go to Settings > Apps > Photos.
Turn on iCloud Photos.
If you want to be able to share albums with other users, turn on the Shared Albums setting as well.
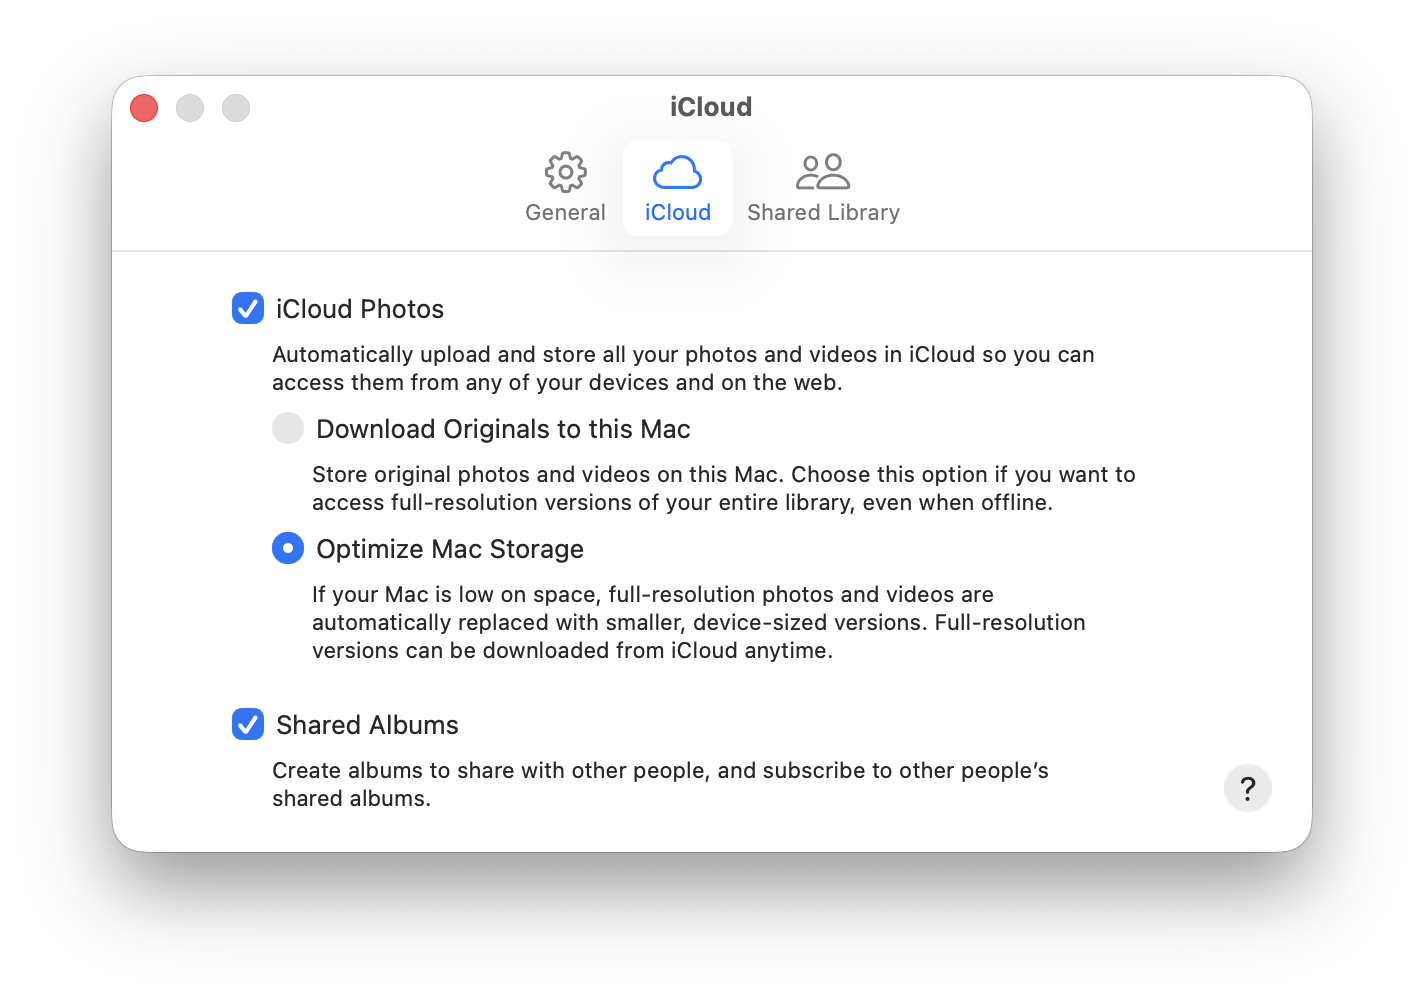
Then, turn on iCloud sync on your Mac:
Open the Photos app> Click Photos in the menu bar.
Choose Settings.
Go to the iCloud tab > Select iCloud Photos.
Your Apple Photos media now syncs to your Mac.
Remove duplicates to avoid cluttered storage
Once you sync photos to your Mac, check for duplicate images on your iPhone. This avoids wasting valuable cloud storage. You can manually search for duplicates. But as your library grows, this takes hours and isn’t perfect.
I used this GPT assistant to find the right tool. It asked me about my device and needs, then suggested the best duplicate finder apps. I picked CleanMy®Phone.
CleanMy®Phone tackles duplicates and frees up space on my iPhone, especially when I can’t fit new photos. It quickly identifies unnecessary files, so I can keep more of the pictures I love.
Here’s how I use the app:
Install CleanMy®Phone via Setapp and open it on your phone.
Tap Scan.
Review the results and tap Remove for those you no longer need.
AirDrop lets you wirelessly send photos between your iPhone and Mac without cables or cloud storage — no cables, no sign-ins.
Here’s how to transfer photos using AirDrop:
On your iPhone, go to Settings > General > AirDrop > Everyone (or Contacts Only). This setting indicates who can locate your phone via AirDrop.
Similarly, on Mac, go to Finder > AirDrop and set up your Mac’s visibility.
Ensure both devices are connected to the same Wi-Fi network
Open Photos on your iPhone and select the photos or videos you want to AirDrop to your Mac.
Tap the share icon at the bottom left of your Photos app screen.
Choose your Mac device name from the AirDrop section.
On your Mac, click Save to Downloads.
Transfer photos from iPhone to Mac in the Photos app
If you use Photos as your main photo app, you can import photos manually:
Connect your iPhone to your Mac using a cable.
If prompted, unlock your phone and confirm that you Trust This Computer.
Open Photos on Mac and locate your phone in the sidebar under Devices.
Click your phone and choose where to import your photos.
Select the photos you want to import and click Import Selected or Import All New Items.
Transfer photos from iPhone to Mac with Dropbox
You might already use Dropbox to share large files with others.
Here’s how to transfer photos from iPhone to Mac:
Visit dropbox.com and log in to your account.
Either choose specific photos to download or the entire folder.
Choose Download from the menu on the right side of the screen.
Files will be saved to the Downloads folder on your Mac.
Upload photos from iPhone to Mac using Image Capture
Your Mac has a native image importer called Image Capture. It helps upload photos from an iPhone to a Mac. It’s mainly for big photo libraries, but it works for any size.
Here’s how to use it:
Open Image Capture on Mac.
Connect your iPhone with a cable.
Click on your phone in Image Capture.
Select the photos you want to transfer.
Use the Import To menu to choose the image destination.
Click Download or Download All.
So what’s the best way to transfer photos?
After trying all these methods, which one do I actually recommend?
Free iCloud and Dropbox plans don’t offer enough space for all of your photos and videos. Make sure to check your current usage. If you’re low on space, you can remove duplicates or consider upgrading.
Wireless methods like AirDrop are the best in case you need to share a single pic.
And if you need to sync a bunch of photos or videos, use AnyTrans for iOS — the most flexible content manager for your Apple devices. The app is available for a free trial via Setapp. And by the way, a duplicate finder, CleanMy®Phone, is on Setapp too.
With Setapp, you can install a photo transferring tool and get access to a pack of photo editors and content creation apps with a seven-day free trial included. One subscription gives you 250+ curated Mac and iOS apps for productivity and creativity, always updated and fully licensed.
FAQ
A few final answers regarding the non-existent Apple version of Publisher and how you can replace it on Mac.
How do I import photos from an iPhone to a Mac without a USB cable?
How do I import photos from an iPhone to a Mac without creating duplicates?
To import photos from iPhone to Mac without creating duplicates:
Before transfer: Use CleanMy®Phone to scan for and remove duplicates on your iPhone.
During transfer: Use the Photos app’s import options to skip already imported photos.
After transfer: On macOS Ventura or later, check the Duplicates album in Photos to merge or delete extras.
Why can’t I import photos from iPhone to Mac?
If you can’t import photos from iPhone:
Check that your iPhone is unlocked and on the Home screen.
Tap Trust when prompted — otherwise, your Mac can’t import photos.
Ensure you have a compatible cable (Lightning-USB or USB-C).
Verify Optimize iPhone Storage is off if you want full-resolution transfers.
How do I transfer original-quality photos from iPhone to Mac?
To keep your photos in their original quality, open the Photos app on your iPhone, go to Settings > Apps > Photos, and tap Download andKeep Originals. Then connect your iPhone and import photos as usual. If you want even more control, open Image Capture on your Mac, select your iPhone, and drag the original files directly to your Mac. Both methods make sure you keep your full-resolution images without compression.
How do I select all photos on my iPhone to transfer to my Mac?
In the Photos app on your Mac, click Import All to grab every photo from your iPhone. You can also press Command + A to select all photos in an album. If you’re using Finder, choose to sync all photos or albums during setup.