How to move the Dock on your Mac to a second monitor
With many tasks demanding our attention, using multiple displays on your Mac can be a lifesaver when you need more digital workspace. At the same time, the Dock has proven to be an extremely useful Mac feature. But what if you want to move it to your secondary display? Yes, it's possible! In this article, you will learn how to move the Mac Dock to another screen.
Mac and multiple screens
Using multiple displays with your Mac opens up a whole new world of productivity. You can stretch out your desktop, work with multiple apps, and switch between tasks more efficiently. But can you display the Dock on all your displays at once?
Can I show the Dock on all screens at the same time?
Unfortunately, the Dock can only appear on one screen at a time.
If you go to the Apple menu > System Settings > Desktop & Dock, you'll notice that you can choose where to place the Dock, whether to show or hide it, and whether and how to animate it when you open apps or minimize windows. But there's nothing here that lets us show Dock on all screens on a Mac.
Although you can't have multiple Docks on multiple displays, you can choose which display the Dock appears on.
How to move Dock to another display on Mac
If your Mac is running macOS Mojave or a later version, you can easily move Dock on Mac to a different screen by following these simple steps:
- Move your mouse or trackpad to a non-primary monitor.
- Move the cursor to the bottom of the display, about where the Dock should appear on a Mac display.
- Wait a few seconds until the Dock appears under the cursor.
- The Dock is now active and ready to use on this display.
Now you know how to move the Dock on a Mac to the second monitor. Note that this method only works if the Dock is at the bottom, not the side.
Here's how to move the Dock to the bottom. Go to the Apple menu > System Settings > Desktop & Dock. Then, click the menu next to Position on screen and choose Bottom.
What to do if the Dock has accidentally moved to another screen
If your Dock accidentally moved to a different monitor, you can simply repeat the process above. Move your cursor down to the bottom of the desired monitor, and the Dock should immediately switch back.
If your Dock unexpectedly switches to a different display, it might be because your Mac has lost its connection to the display designated as the primary display. This usually causes the primary display to go black and the Dock to move. If this happens, make sure your cable connections are secure. A simple fix might be to turn the display off and on again to reconnect it.
How to change the primary display
If you're using more than one monitor with a macOS device, you have the flexibility to set one of them as your primary display. The primary display is important because it is home to the menu bar and the Dock and is the main work area. It's also where new windows and apps appear by default. This can be useful in situations where you're using a larger external monitor for work or gaming and want it to be your primary display.
While macOS has a default preference for a MacBook's built-in screen as the primary display, you can easily change this preference. The process is straightforward and requires only a few steps.
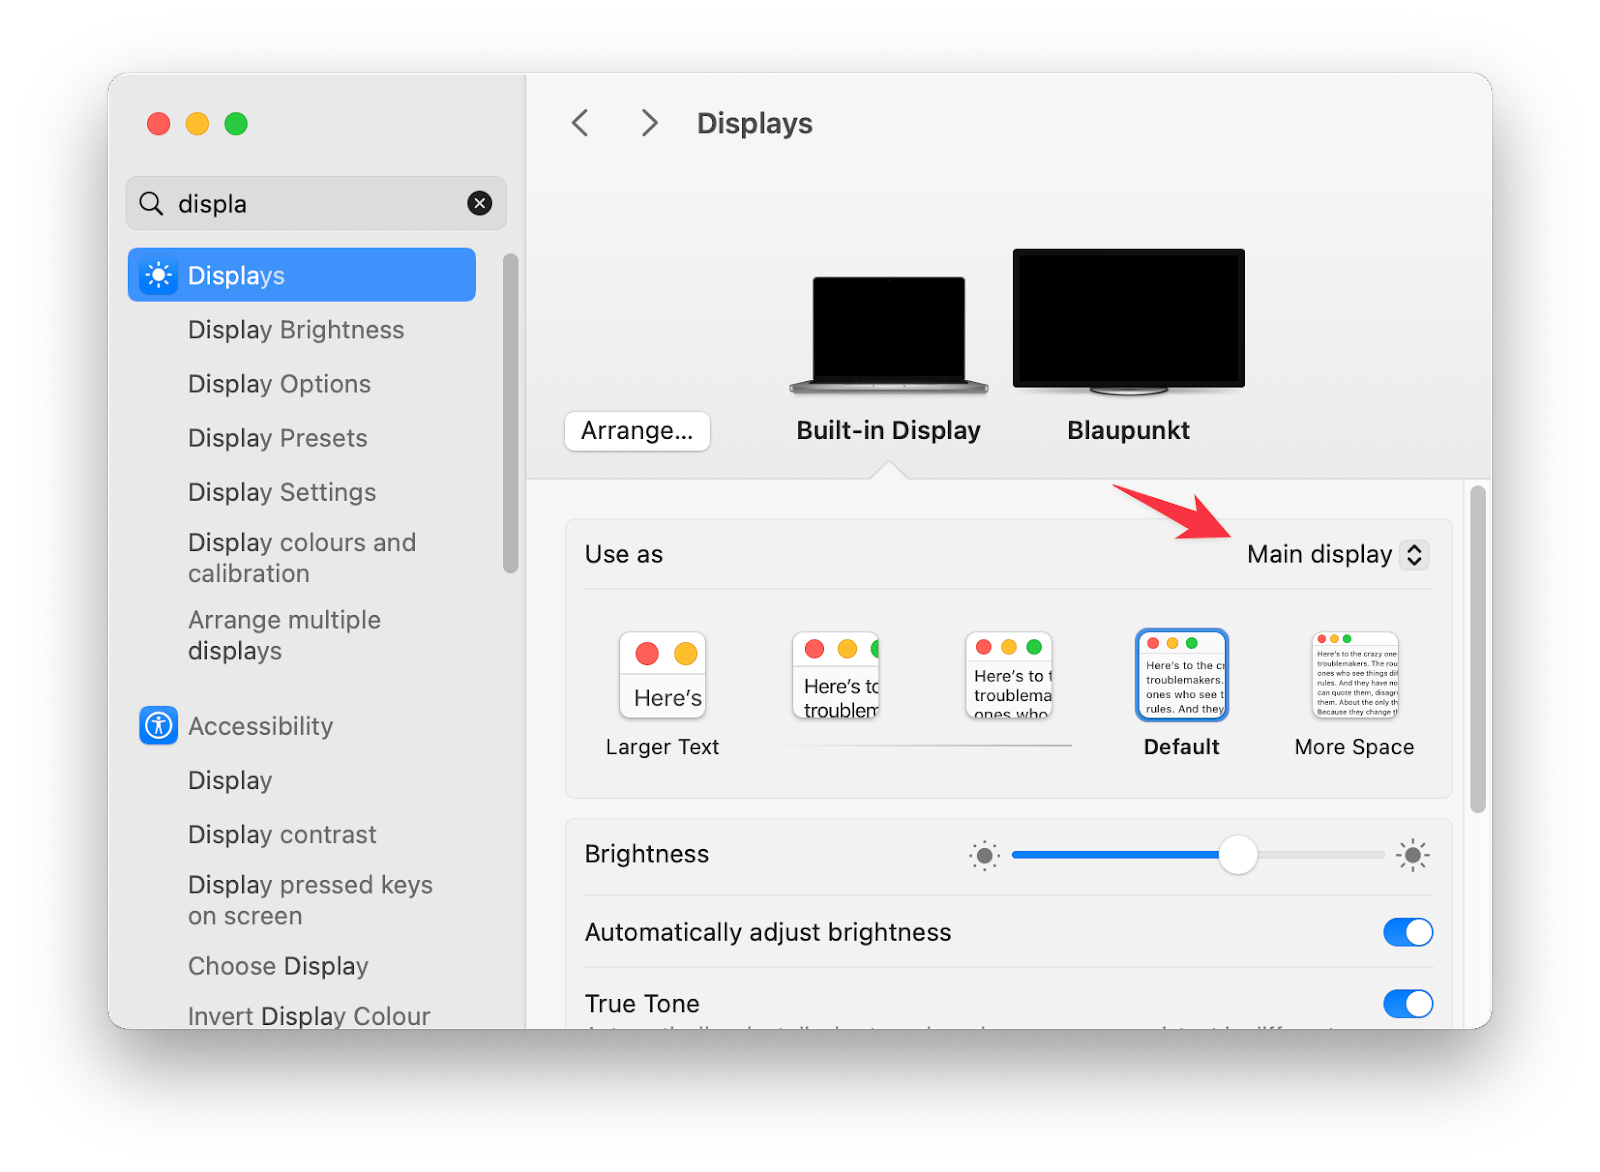
Here's how to change the primary display on a Mac:
- Go to the Apple menu > System Settings.
- In the left sidebar, click Displays.
- Click the display you want to make your primary display.
- Click on the drop-down menu next to Use as.
- Then, choose Main display.

Extend your main screen
You can also extend your main display to the external monitor. Here's how:
- Go to the Apple menu > System Settings.
- In the left sidebar, click Displays.
- If the Mirror Displays option is checked, uncheck it to extend your main screen to the external monitor.
Bonus: Free up screen space on your Mac
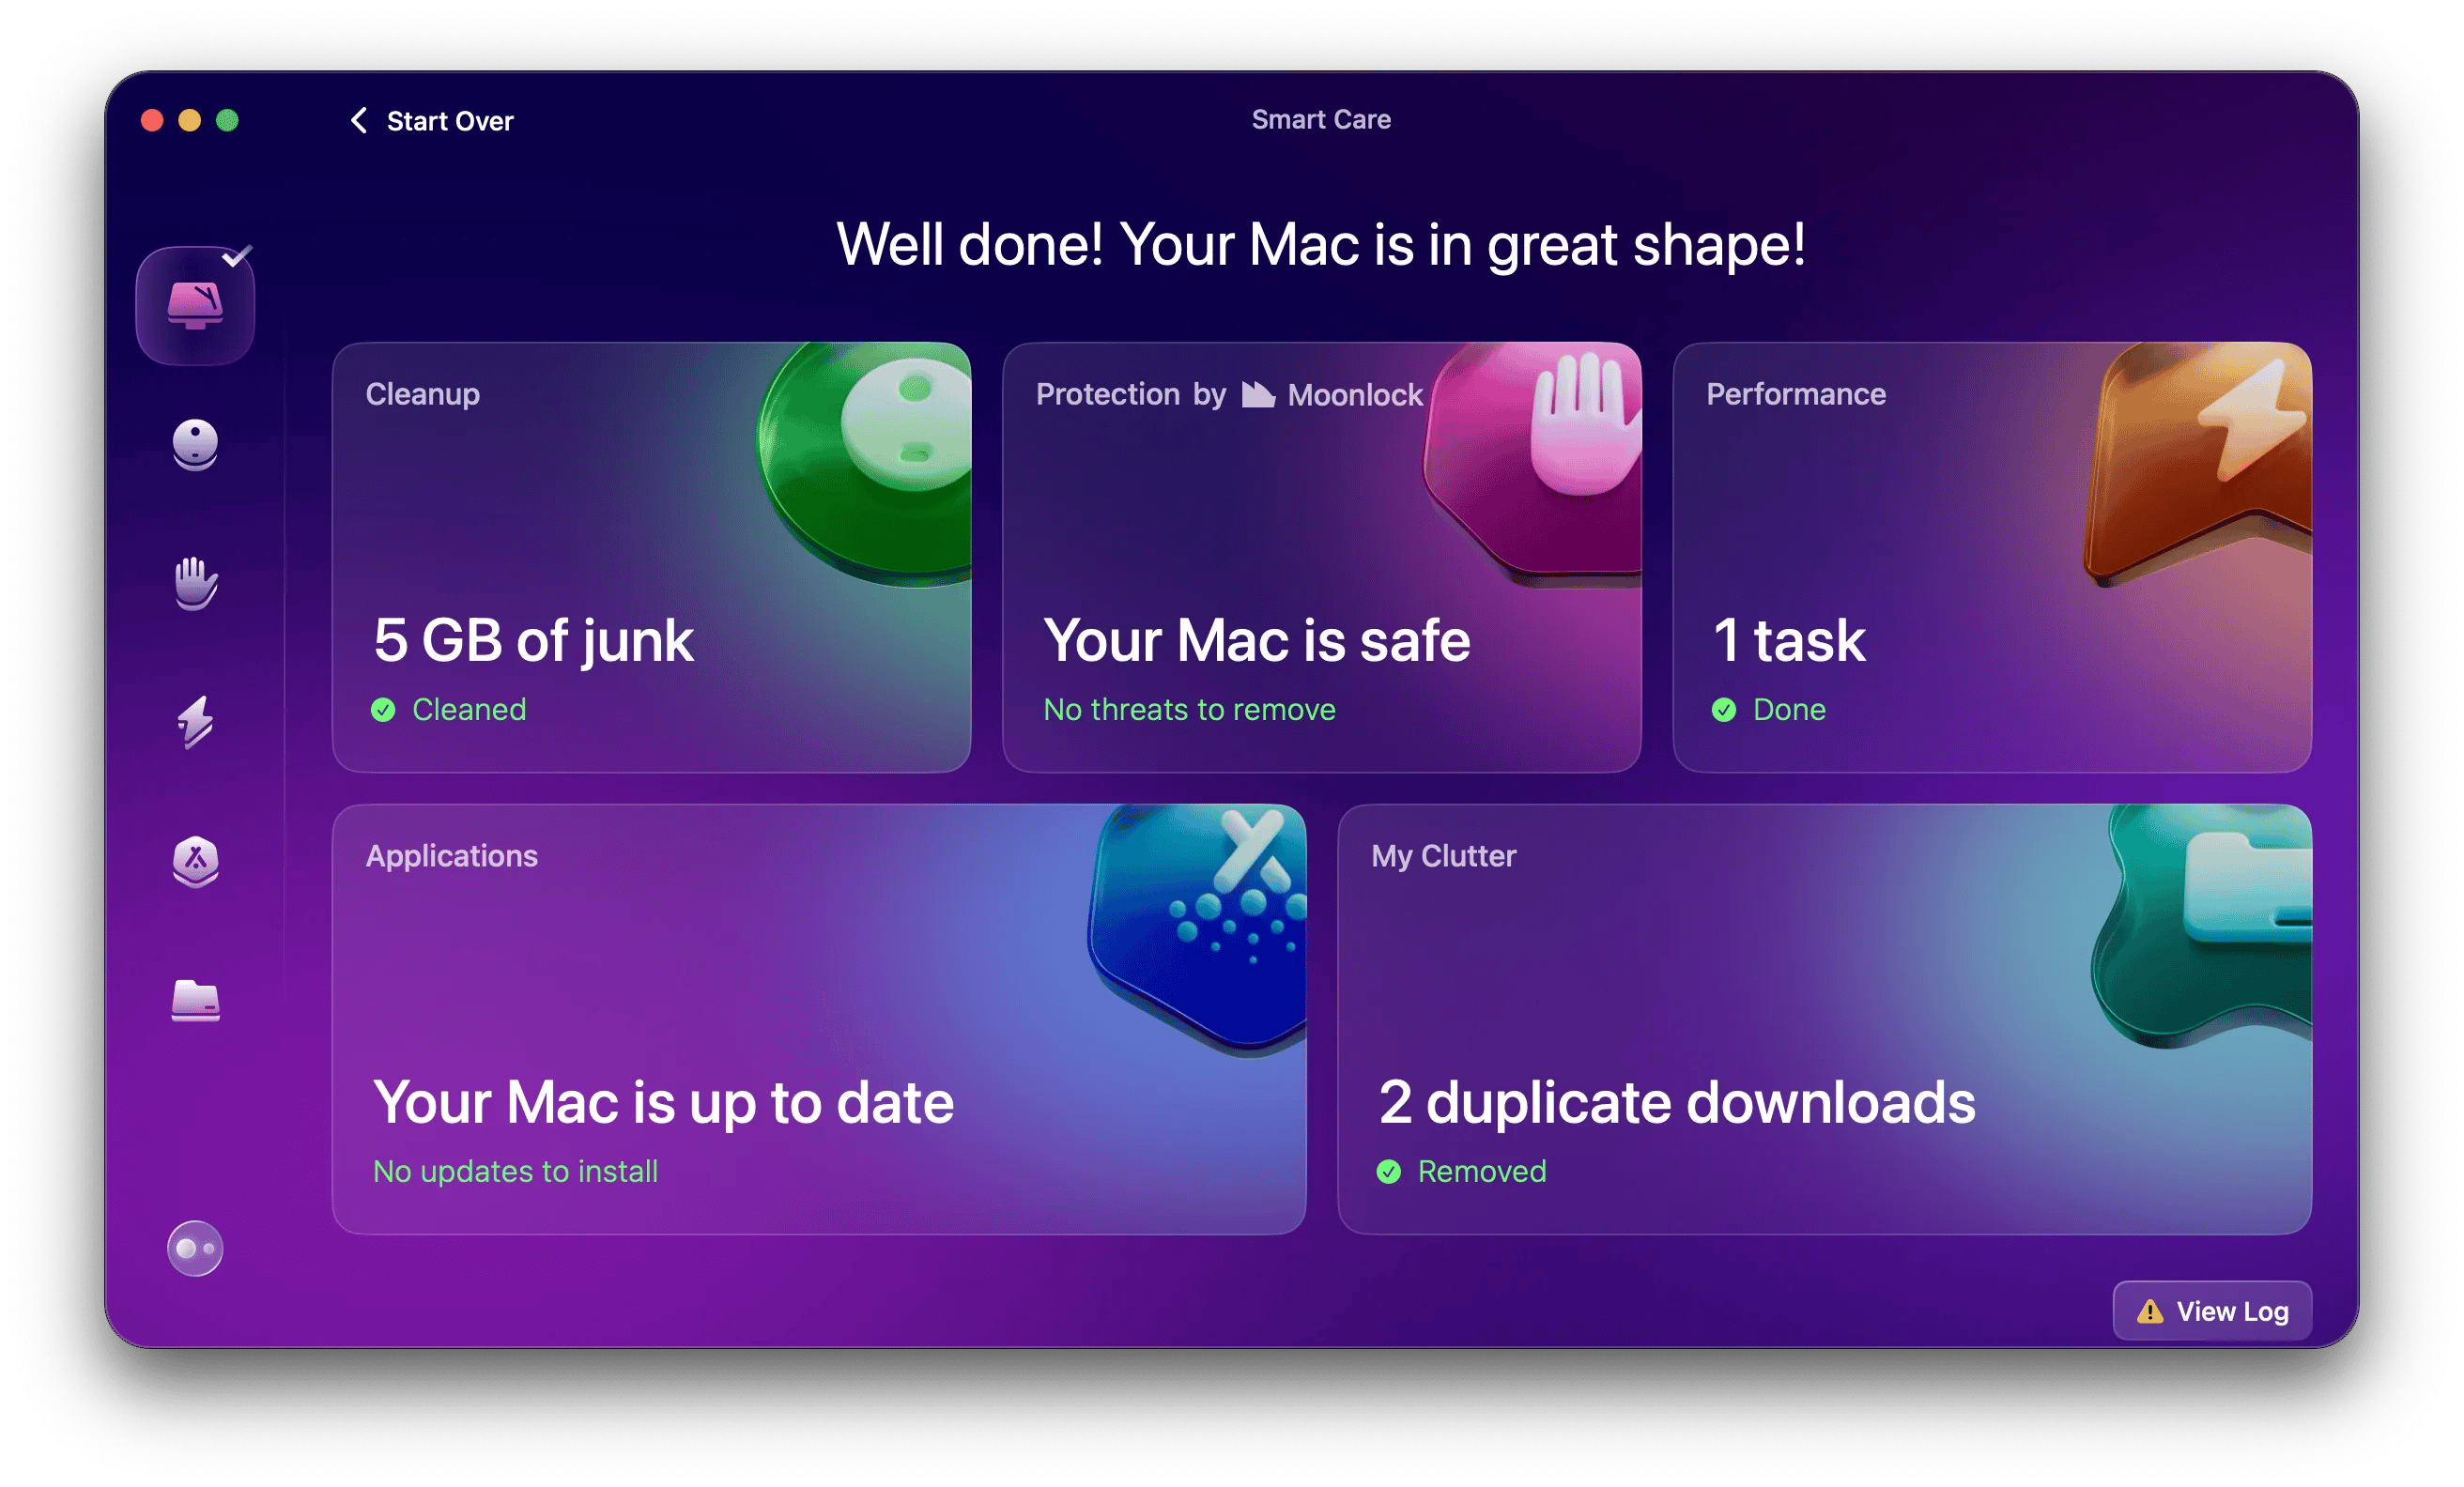
Keeping your Mac optimized is critical, no matter how many displays you use. Manually removing junk files, cleaning caches, running maintenance scripts, and repairing disk permissions is time-consuming, and you may miss some important steps. A dedicated tool can simplify this process.
CleanMyMac, a Mac care app, offers a Smart Care module designed to handle these tasks efficiently. Just click Scan, and it will evaluate your Mac's performance and free up space. After the scan, you can review the results and choose the best course of action to keep your Mac fast and clean.

Final thoughts
Many of us expand our Mac experience by using multiple displays, especially when a MacBook Pro or MacBook Air is our primary computer. This setup is also beneficial for desktop Mac users, as it can significantly increase productivity. When configuring multiple displays, it's important to customize the setup to suit your preferences. By following these steps, you can position the Dock on your preferred display and troubleshoot any issues that may arise, creating a more efficient and customized workspace.
To enhance your experience even further, we recommend you try DisplayBuddy to control the settings of your external monitors from your menu bar. You can use DisplayBuddy to adjust brightness and resolution or turn off your external monitors.
Another handy app is CleanMyMac. Use it regularly to keep your Mac free from junk and running as fast and as smoothly as possible, no matter how many displays you connect at a time.
Discover a world of handy Mac apps like DisplayBuddy and CleanMyMac with just one Setapp subscription. Sign up for Setapp and dive into a treasure trove of tools perfect for your everyday Mac needs – from photo editing and design to keeping your Mac running smoothly. Setapp is your one-stop subscription to a curated collection of Mac, iOS, and web tools for a single, simple fee.
Curious about Setapp? Try these and dozens of other apps with a free seven-day trial. No payment is required! Just sign up and start exploring all the creative and practical possibilities Setapp has to offer.
FAQ
How do I get my Mac Dock back on the main screen?
Move your cursor down to the bottom of the desired monitor, and the Dock should immediately switch back.
How do I stick my Mac Dock to one screen?
Unfortunately, as of this writing, Apple still hasn't come up with a permanent solution for keeping the Dock on one display for users with multi-monitor setups. There are a few workarounds, however. For example, you can also lock the Dock to a single display by moving it to the side. To do this, go to the Apple menu > System Settings > Desktop & Dock. Then, click the menu next to Position on screen and choose between Left and Right.
Can you move the Dock on a Mac?
Yes, you can move the Dock on a Mac. By default, the Dock is at the bottom of the screen, but you can change its location to the left or right of the screen. To do so, follow these steps:
- Go to the Apple menu > System Settings.
- In the left sidebar, click Desktop & Dock.
- There, you will find options to position the Dock on the left, bottom, or right of your screen.
Alternatively, you can control-click the divider in the Dock itself to open a shortcut menu with options for changing its position.


