DisplayBuddy lets you adjust brightness, Night Shift, and saved presets across every connected monitor — all from a single place, without opening System Settings. Available on Setapp.
While the portability of a MacBook cannot be denied, sometimes having a massive screen is just better (or required by your job, studies, or hobbies). It’s also not that uncommon to find oneself in need of a second or third monitor to have all of your windows on hand simultaneously.
This is where the option to connect external monitors to your MacBook comes in handy. Whether you already have a monitor you are trying to connect, or are simply researching how easy or difficult the process might be, don’t look any further — scroll down for everything you need to know about adding additional displays to your setup!
How to connect an external monitor to a Mac
Not all monitors will work seamlessly with just any MacBook model, so your first step when arranging your external display setup for your Mac should be checking whether the model you are interested in is compatible with your MacBook.
You can check the detailed specifications for the types of displays you can connect to your Mac in System Settings:
Click the Apple icon in the top left corner of your screen, then System Settings.
Find the Help menu option at the top of your screen and click on it.
In the drop-down menu, select MacBook Specifications.
On the web page that opens, scroll down to Display and review Supported scaled resolutions.
Next, scroll down to Video Support (or Display Support, depending on your MacBook model).
Depending on your MacBook model, the number of displays you can connect will vary. For example, MacBook Pro models made in 2023 or later that use M2 Max or M3 Max chip may be able to support up to four external displays!
Once you are sure your external monitor and your MacBook are compatible, it’s time to inspect your hardware.
Which port to use on my Mac
Normally, you connect an external monitor using a Thunderbolt or HDMI, so port and cable compatibility are the first things to check when connecting your external displays.
View your external monitor’s technical requirements for connection and locate the cables and corresponding ports using the manual for your monitor.
To find all ports available on your MacBook, follow these steps:
Click the Apple icon in the top left corner of your screen, then System Settings.
Find the Help menu option at the top of your screen and click on it.
In the drop-down menu, select MacBook Specifications.
On the web page that opens, scroll down to Video Support (or Display Support, depending on your MacBook model).
Adapters to use to connect the monitor to a Mac
In your MacBook’s specifications, you might find that your device supports VGA, HDMI, or Thunderbolt 2/3/4 output. Sometimes the connection will require adapters. Your monitor may come with connection cables as well.
Once you’ve found the output port on your MacBook that can support your display (following the instructions in the above section of this article) as well as the input port on your external display (following the respective directions in its manual), you can check which cables you have available to connect the two.
Configure your external monitor
Before you connect your monitor, read its manual and make sure to follow its instructions. Here are the typical steps you'll need to take to connect your external monitor to a MacBook:
Plug in your external display into a power source.
Plug your external display into your MacBook, using a suitable cable (and an adapter, if needed).
Ensure the external display is active and on.
Click on the Apple icon in the top left corner of your screen and go to System Settings > Displays.
Click Arrange to drag and drop the relative position of your connected displays — maybe you have your MacBook below your main monitor, so you can drag the monitor to the top, maybe you have two external monitors connected to each side of your Mac and need to put them in the right order.
Arranging your displays in Mac settings will enable easy dragging of windows between the screens.
Whether you’re using an external monitor as your only monitor or in conjunction with your MacBook monitor, there are a few things to keep in mind:
You can arrange your MacBook monitors however you like. If you want to use more than one display with your MacBook simultaneously, you can simplify your workflow with a custom screen arrangement — place your displays in the order that's most convenient for you.
Close your MacBook and keep working. Once you connect MacBook to monitor, you can choose to close its lid to make the external monitor your only display. This will keep your MacBook powered on and awake — just remember to make sure your laptop is connected to a power source, or is throughput charging via the monitors connected to power.
You will have the same options and settings. Display brightness, warmth, and Night Shift are all customizable when you connect an external display. Get DisplayBuddy to access the settings across multiple monitors from a single hub.
The monitor’s settings are also available. Monitors that support features like in-plane switching (IPS) and other features will also be available.
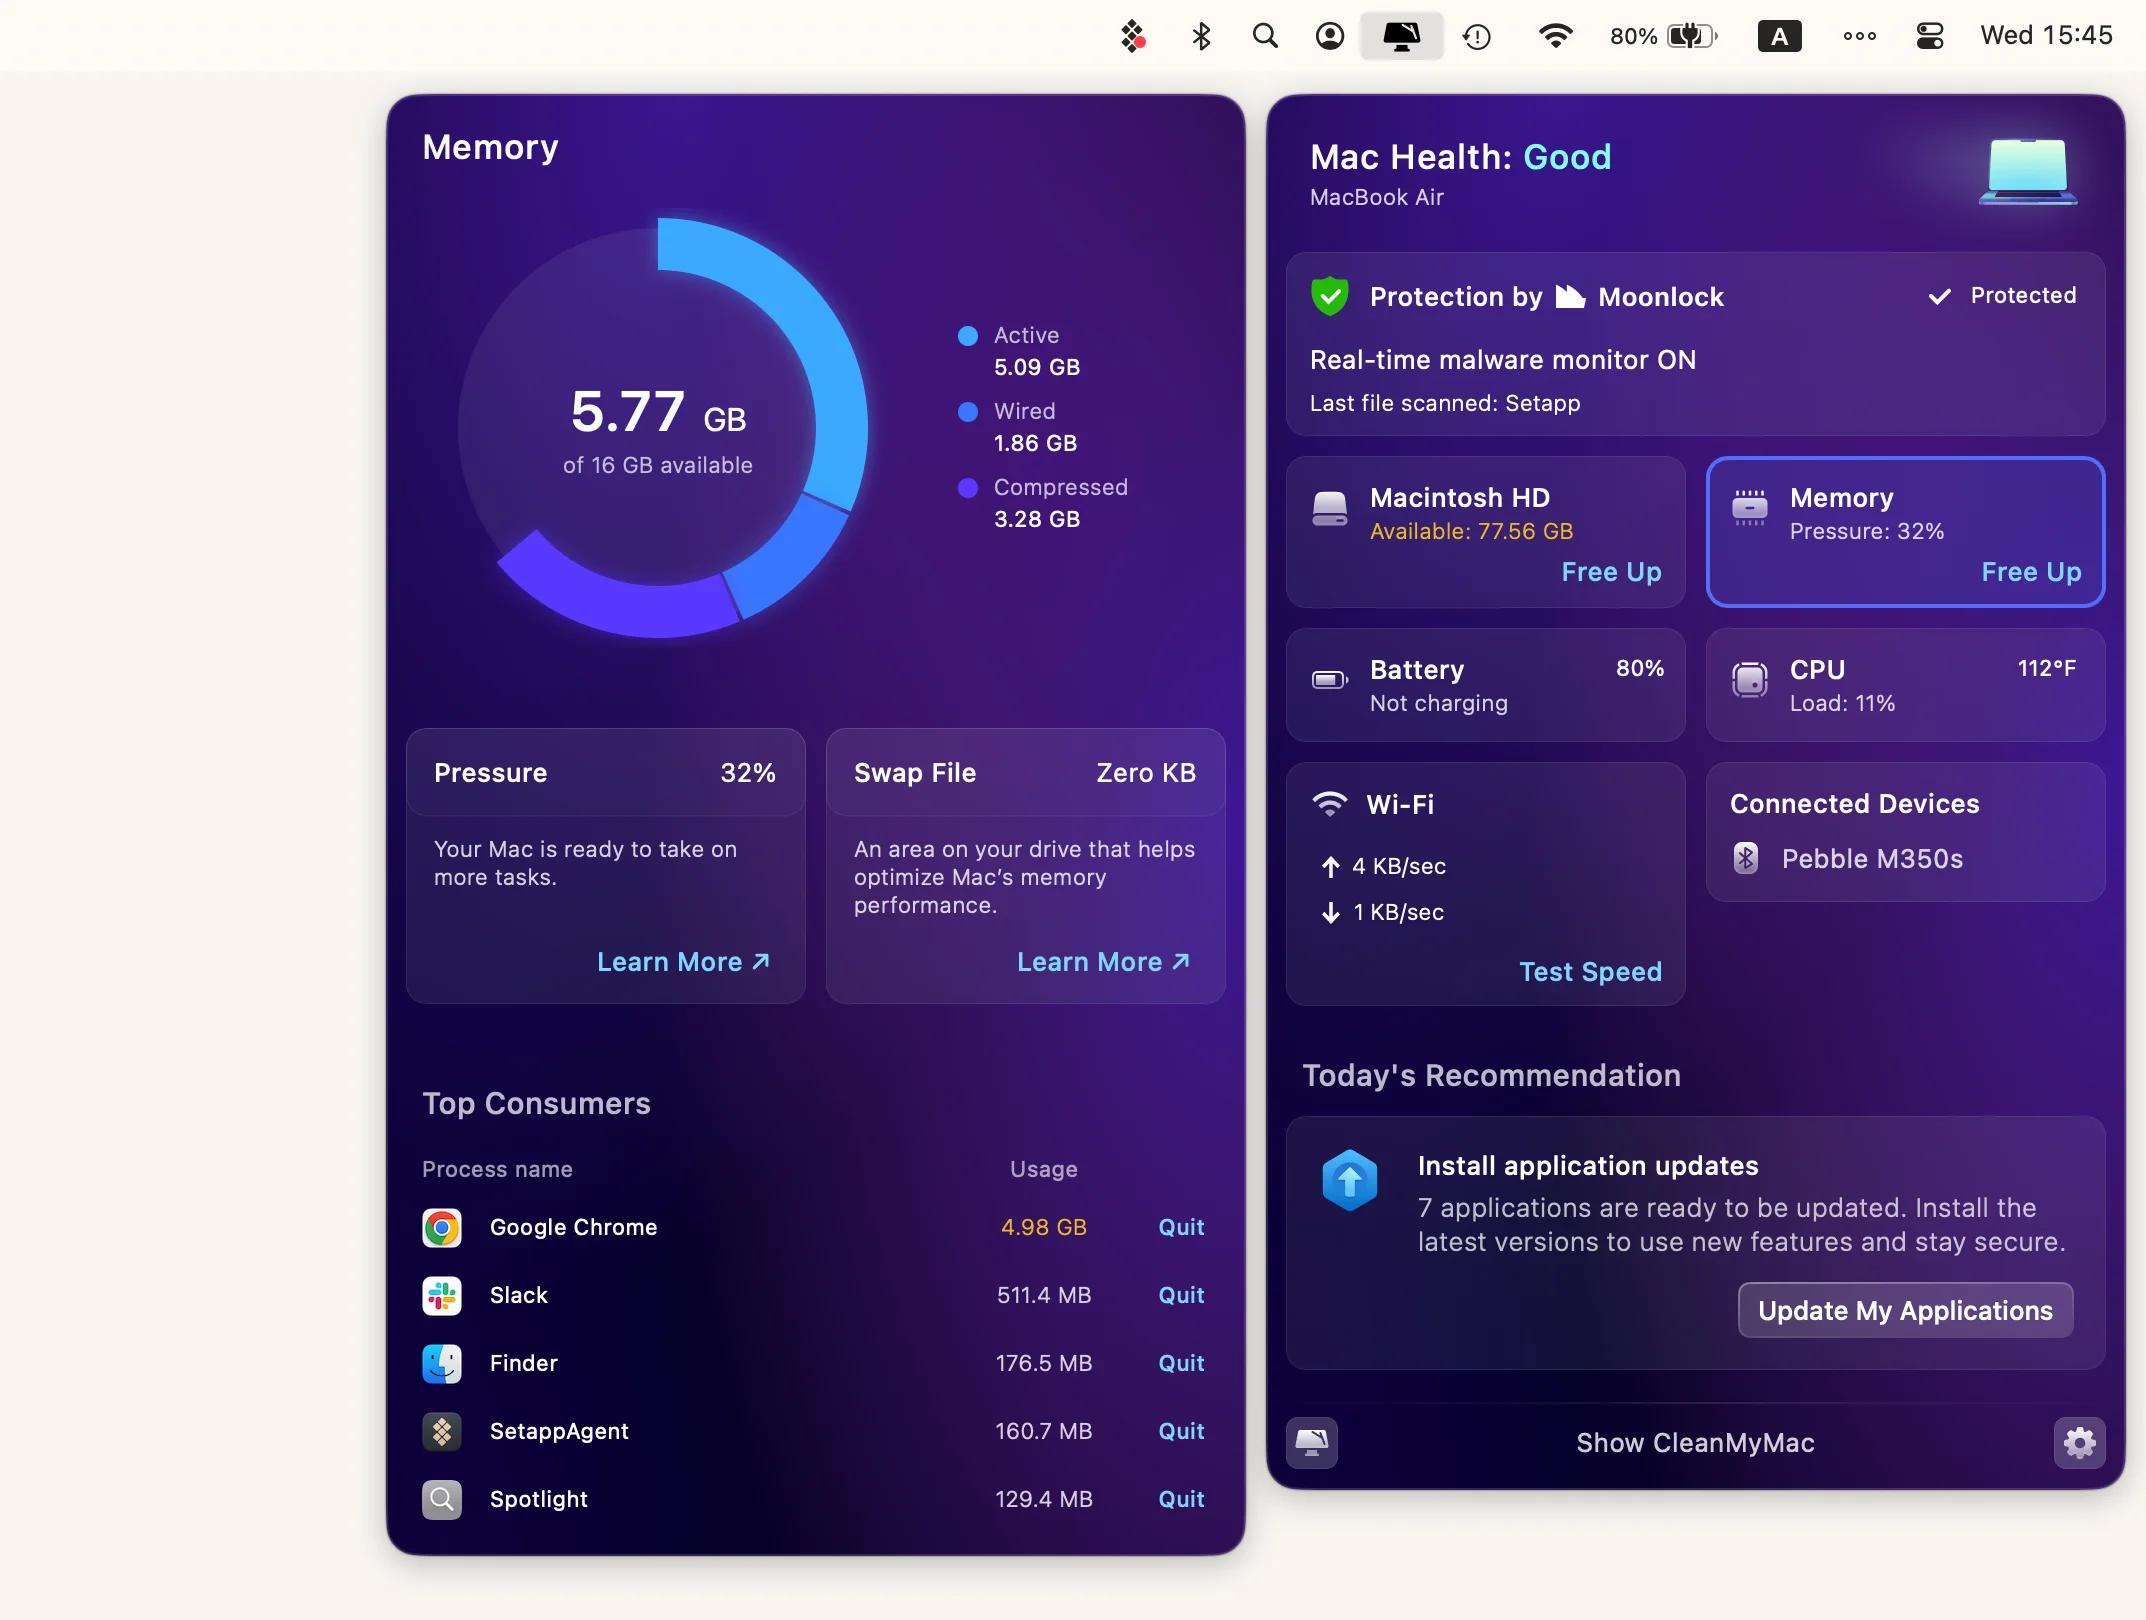
Using an external monitor can cause your MacBook to work harder than it’s used to. All the pixels being pushed around and colors changing can be taxing on your machine. This is why you need iStat Menus.
iStat Menus makes its home in your Mac’s menu bar, showing you device performance details when you click on its icon. From there, it surfaces a handy drop-down menu that provides you a look at your network, CPU, memory, and sensor performance. Hover over any section of the drop-down to show even more performance information.
Tip: See what your Mac is doing when extra pixels push it harder. Join Setapp’s curated catalog and use iStat Menus, CleanMyMac, and more. Risk-free 7-day trial. Begin Setapp trial.
Common problems
There are a few common issues that might occur with using an external monitor with your MacBook:
External monitor doesn’t turn on. Try to plug your cable into a different port on your MacBook.
Your displays don't show up in the right sequence. Rearrange the spatial positions of your displays (both external and built-in) in System Settings > Display > Arrange.
MacBook doesn’t work with lid closed. MacBook will typically only support an external monitor being the only display when the MacBook itself is connected to a power supply. You may be able to keep it connected to power via your monitor, but that’s not a sure bet.
There also a slim chance that some app settings may be interfering with the connection so a restart or even a reset might be the way to go.
You can also try to uninstall some of your unneeded apps and wipe their leftovers. For that, you can use CleanMyMac, a Mac care app that quickly uninstalls multiple apps in one go as well as get rid of remaining files from already removed apps, remove cache and log files, and more junk.
Other possible solutions include freeing up memory and scanning for malware, both of which are available with CleanMyMac.
Remove leftover files and junk that can sabotage a smooth multi-monitor setup. Use Setapp to get CleanMyMac plus 250+ curated apps for display control and performance. Cancel anytime. Open Setapp trial.
Grab helper tools on Setapp
You connected the monitor, now make the setup feel effortless every day. Run Setapp for 7 days with 250+ curated apps for display tuning, cleanup, and monitoring. Cancel before Day 7 = $0 charged. Start trial now.
FAQ
How to connect MacBook to monitor without HDMI?
You can buy an adapter from Apple or any other trusted retailer. For example, you can get a USB-C to HDMI, MiniDisplay-to-DVI, MiniDisplay-to-VGA, or HDMI-to-DVI adapter.
How to connect a second monitor to MacBook?
You should plug in your second display to a power source, then connect it to your MacBook using a cable and, if necessary, an adapter. You can check the connection in System Settings > Displays.
How to connect MacBook to monitor and close laptop?
On the latest macOS versions, you can connect your display to a power source and to your MacBook, then simply close the lid and work using only your external monitor.
On macOS Monterey and earlier, open System Preferences on your MacBook and access Energy Saver > Power Adapter. Set “Turn display off after” to Never.
On macOS Ventura, open System Settings on your MacBook and access Lock Screen. Set “Turn display off on power adapter if inactive” to Never. After that, you can use your laptop with its lid closed.