How to use a Dock on Mac
If you’re anything like me, the Dock on your Mac is something you set up once and then kind of forget about — until you realize how handy it can actually be.
It may seem like just a bunch of app shortcuts, but with a few tweaks, it can turn into your go-to launchpad, where you can organize everything just the way you like.
Need to grab an app quickly? Just drag it onto the Dock, and if something’s cluttering it up, you can easily pull it off.
Let’s check out some tricks on how to customize the Dock, change the Dock bar position, and more.
What is the Dock on a Mac?
As a Mac user for over 10 years, the Dock has become a feature I heavily rely on to get from A to B. It’s a major navigation tool on the macOS interface and is used to access apps, files, settings, and many other fundamental operations.
To new Mac users, the Dock may be confusing and, frankly, a bit annoying if it constantly disappears or is full of apps you don’t use. Getting the hang of the Dock and seeing why it does what it does is pretty straightforward. It all just clicks, and you find yourself wondering how you ever lived without it.
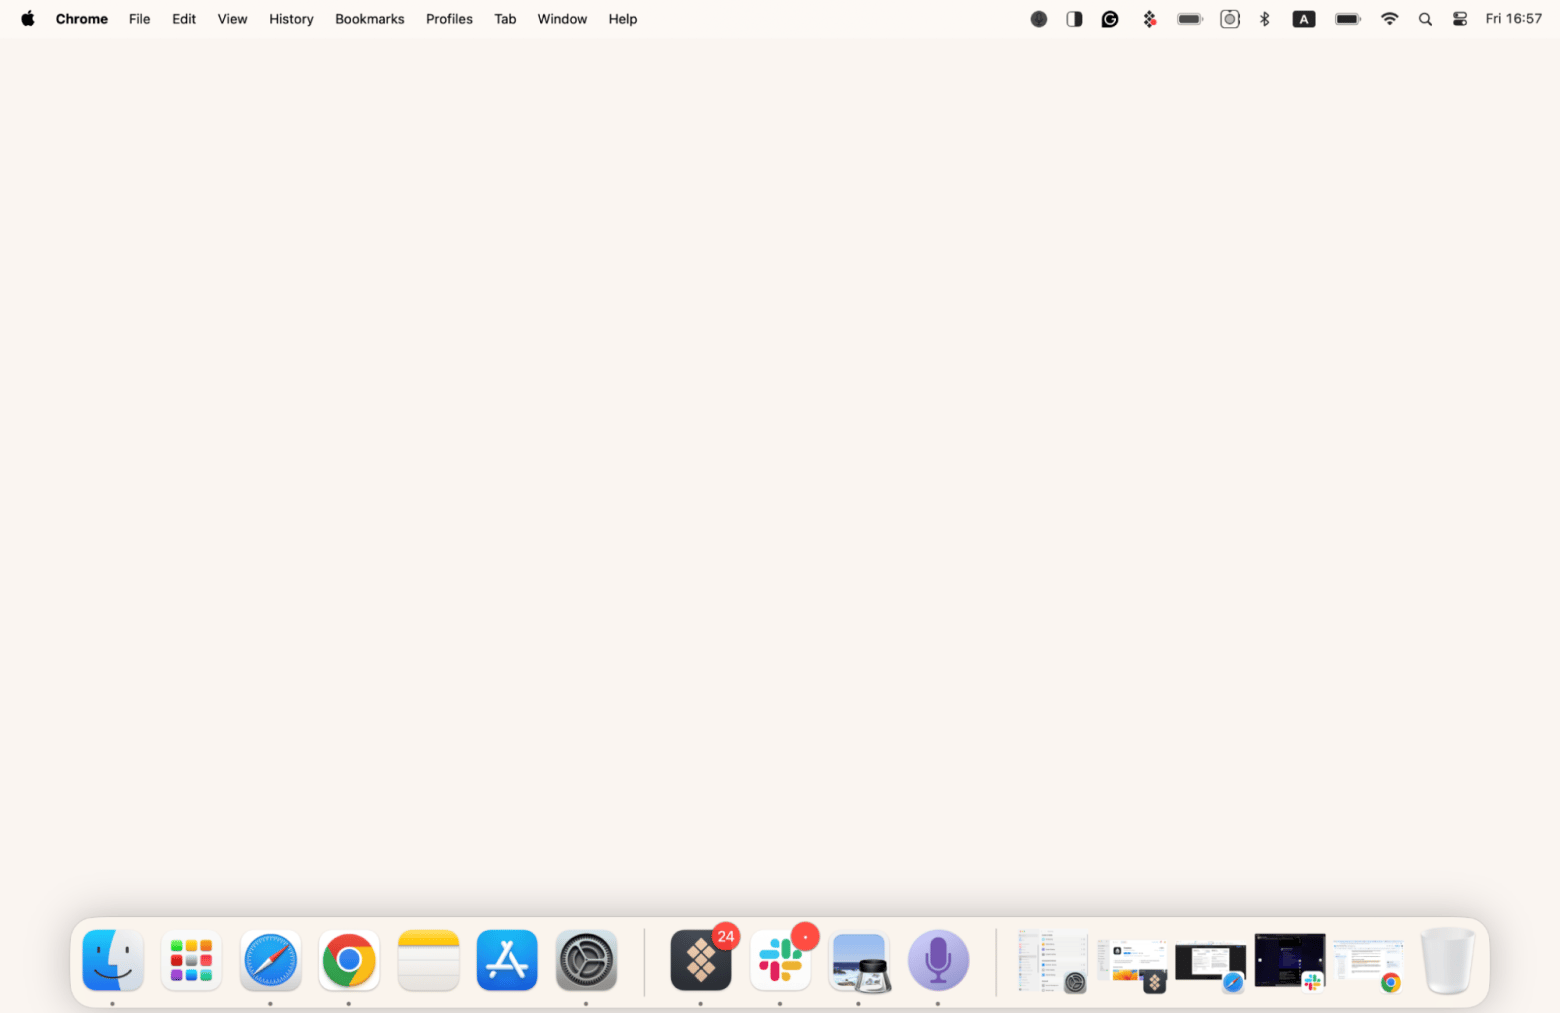
Found at the bottom of the screen, the Dock is right where you need it to be without intruding. Moreover, it can be personalized to your liking to become the ultimate tool to optimize your workflow.
If you don’t find the Dock particularly useful, you can easily remove it altogether and look for better alternatives. As much as the Dock and I have become close friends over the years, its functions are still relatively the same as when it was first launched.
If you're looking to organize your menu bar for a cleaner workspace, you can follow this guide on how to customize the menu bar on your Mac.
How to manage Dock items
Though simple, you can customize the Dock and organize your most-used applications, documents, etc., so they’re always within easy reach.
Dock utilizes a drag-and-drop approach to its functionality, which makes organizing really easy and intuitive. You can have as few or as many shortcuts as you like on the Dock; it adapts to you, not the other way around, as every good app should do.
There are basic keyboard shortcuts to navigate to the Dock and manage the apps within it:
- Option + Command + D to hide and show the Dock
- Command + M to minimize the front window to the Dock.
- Fn + Control + F3 (or Control + F3 on older Mac keyboards) to navigate between the apps using arrow keys.
How to add items to Dock
Adding apps to your Macbook Dock is an intrinsic function everyone should know to make the most of their Mac. Fortunately, it’s very easy.
To add items on the Dock:
- Open Finder > Click Applications from the sidebar.
- Find the app you want.
- Click and drag to the Dock.
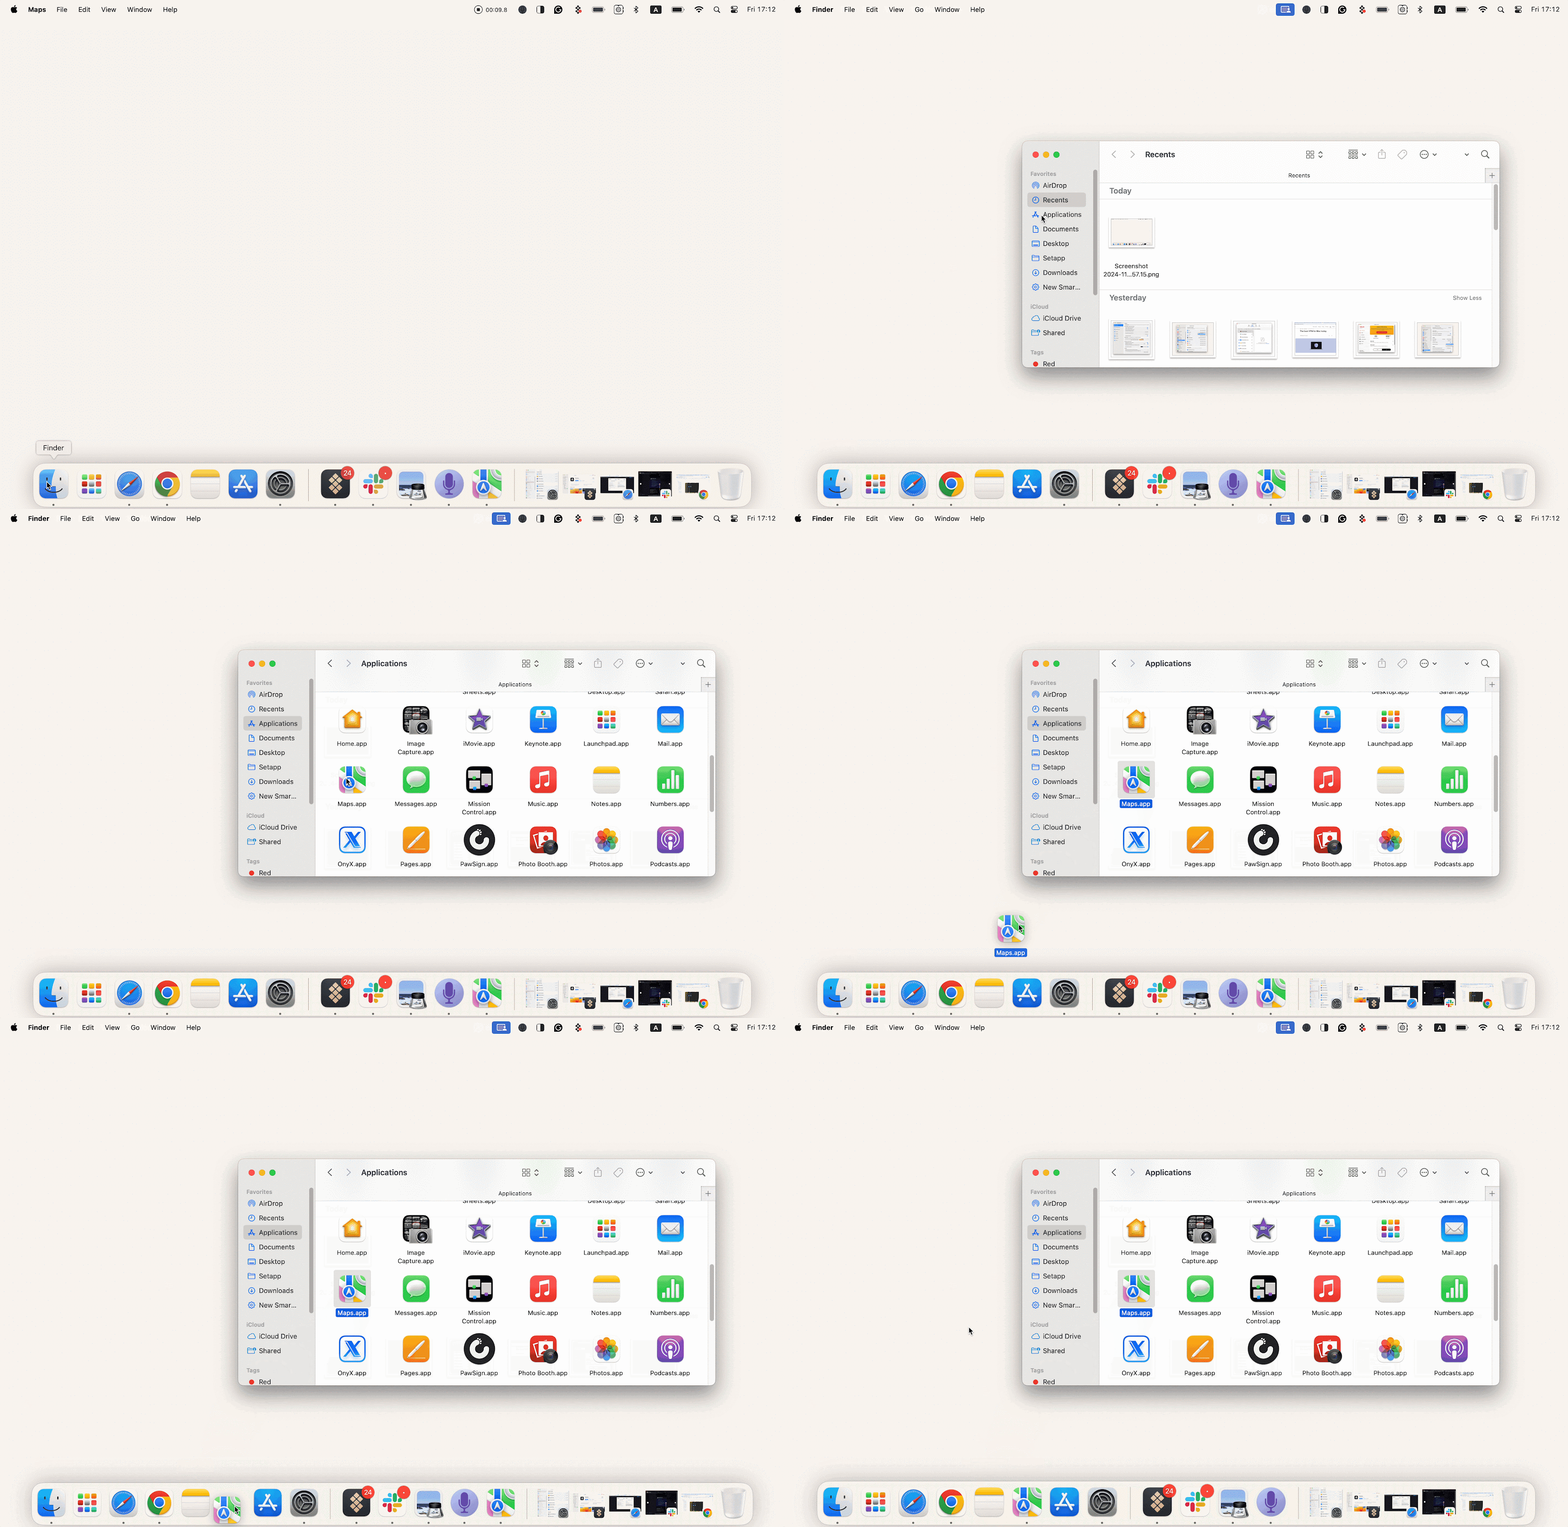
Other than apps, folders, downloads, and files can also be dragged into the Dock using the same method, except instead of navigating to Applications, choose the appropriate location, whether it be Documents, Recents, etc.
How to remove apps from Mac’s Dock
You’ve added an app, but how do you remove apps from Dock on Mac? To prevent cluttering your Dock, you’ll have to remove an app here and there.
This is how you do it:
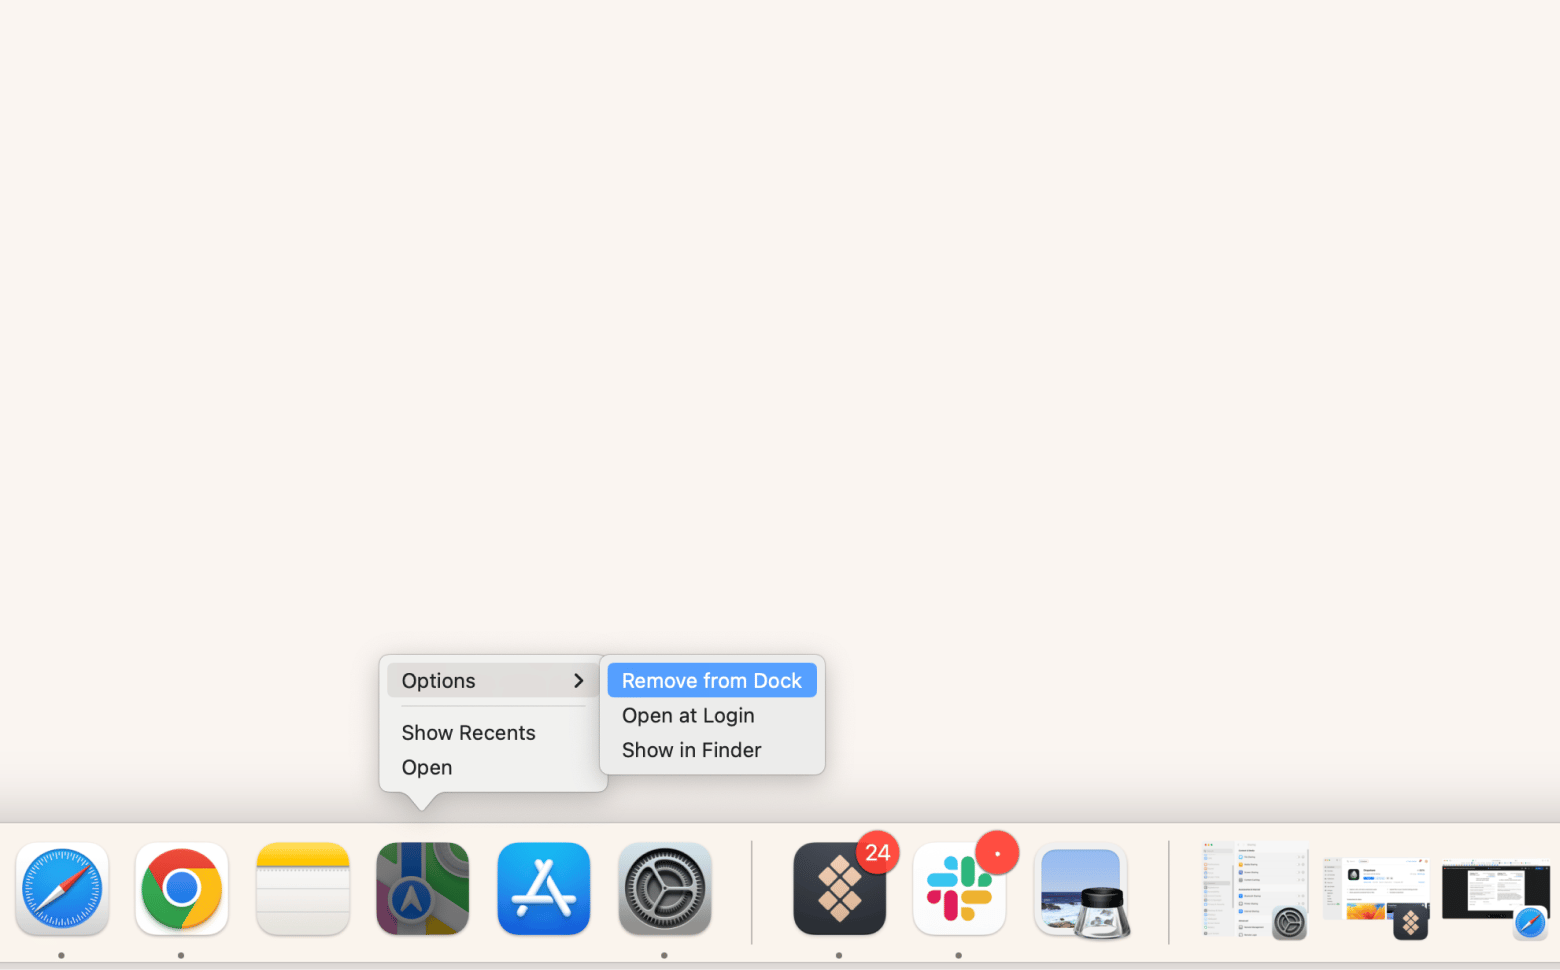
- Close the app you wish to remove by right-clicking on the app and choosing Quit.
- In the Dock, right-click on the app to remove.
- Click Options > Remove from Dock.
How to rearrange the icons in Dock
When you put the app in the macOS Dock, you can drag it left or right for a position that suits you best. The other apps will move to the sides and make room for the new addition, wherever it may be.
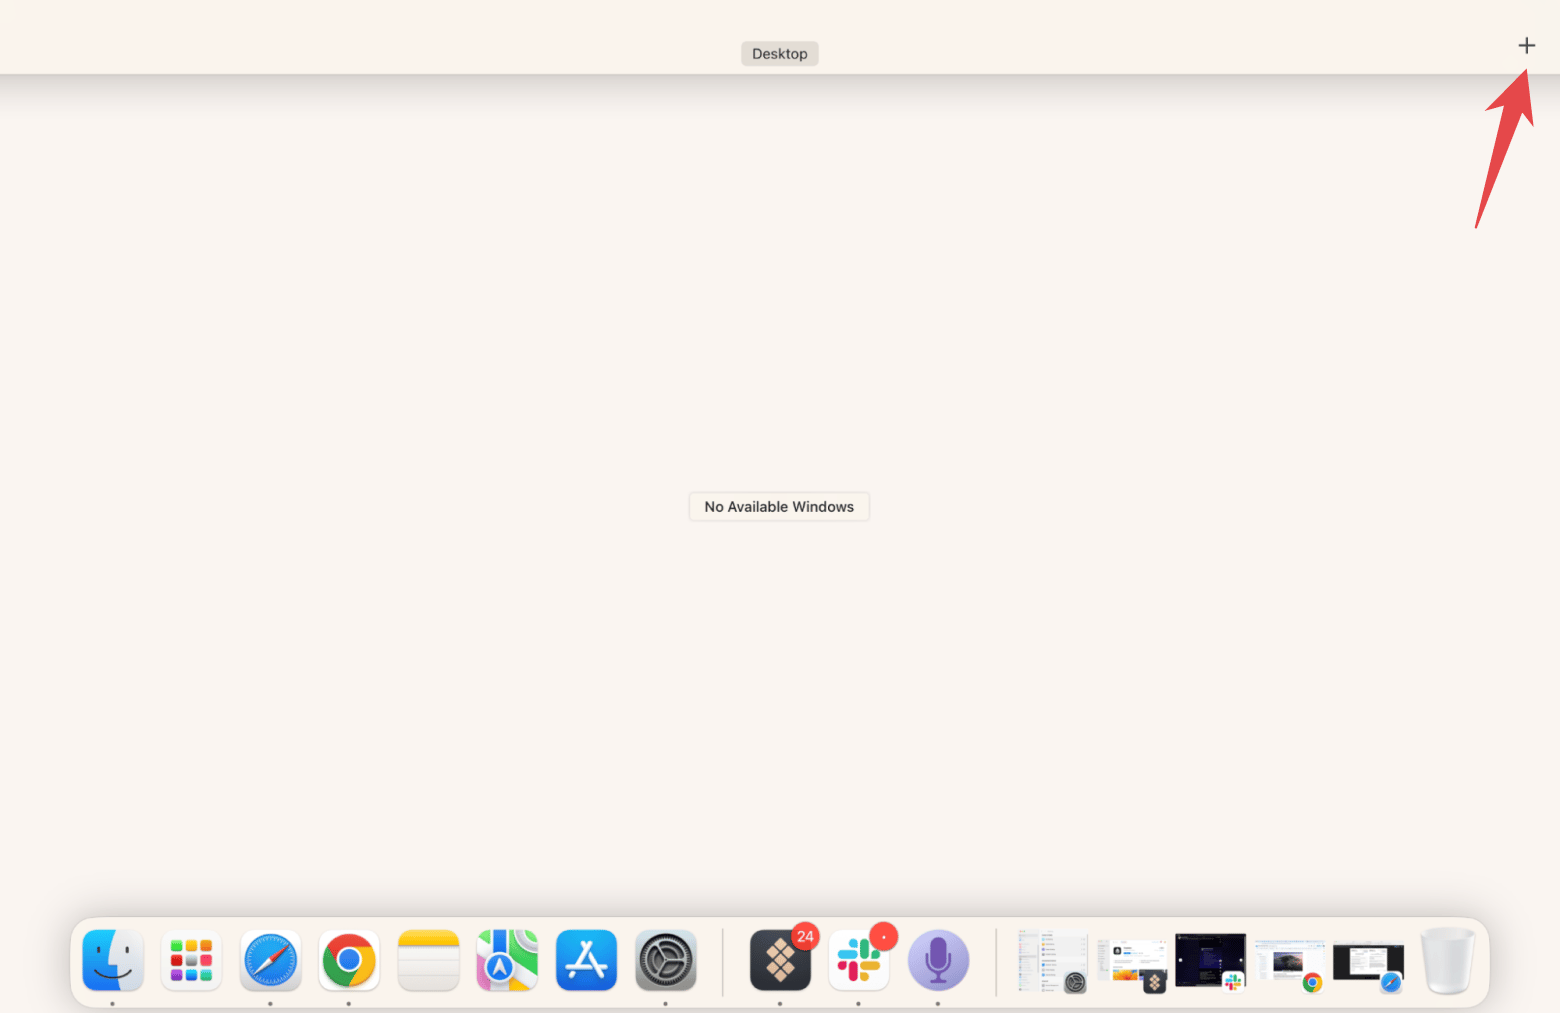
You can also lock the Dock to one screen and change how items appear in the Dock on each Mac desktop. For example, you may have a desktop strictly for work and prioritize productivity apps and work documents.
To create a new desktop, swipe up using three fingers and select the “+” plus icon on the top right corner of the screen.
Tips to organize Dock on Mac
The Dock is organized into sections to keep things in order.
- The left side is for applications you have added to the Dock.
- The middle is for what’s currently open.
- The right is saved for things such as files and minimizes the number of opened windows.
- Finally, the Bin is on the far right.
The Macbook Dock can feel quite limiting to some people, particularly those with a lot going on in terms of open windows, running applications, and documents that need frequent referencing.
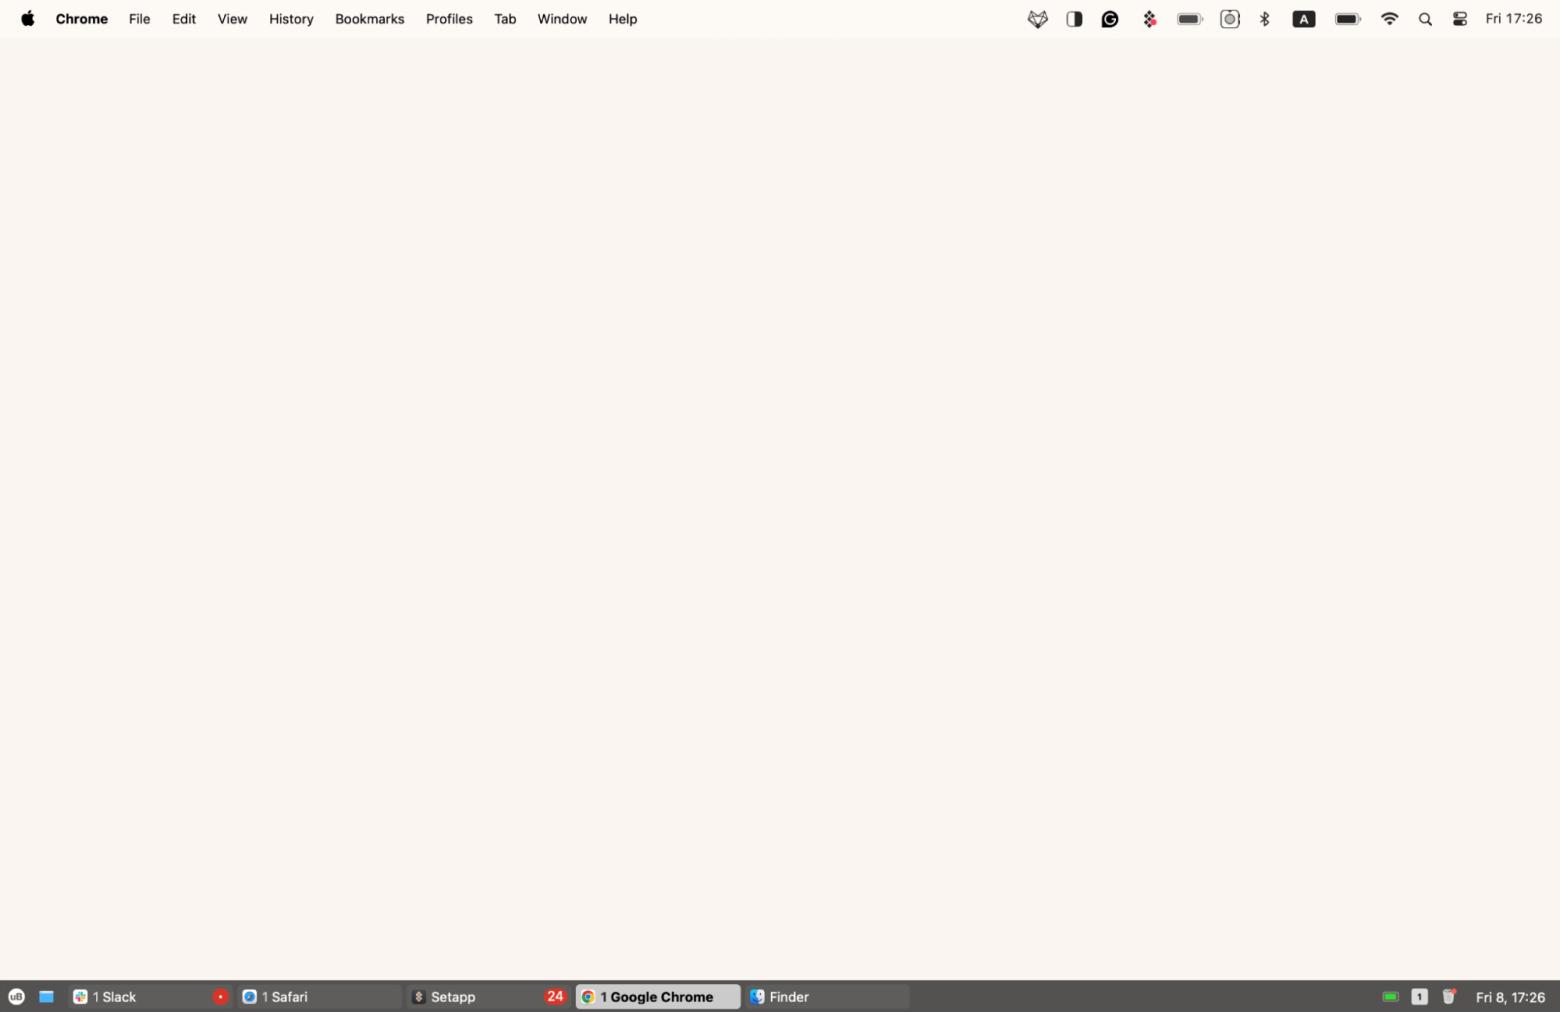
If you’re this kind of person, then you need to try uBar. The app makes the Dock sleek and intuitive like it’s never been before. You can see every app at a glance and even see tasks as they run, like download progress and song playback.
What makes uBar really stand out is its customization. You can create themes, change notification badge colors, create keyboard shortcuts, and a lot more. Like the Dock, uBar uses drag-and-drop functionality to keep it simple.
Experiment with its settings and see what works best for your workflow. uBar is powerful and can handle more apps and features than the Dock.
How to change the Dock bar position
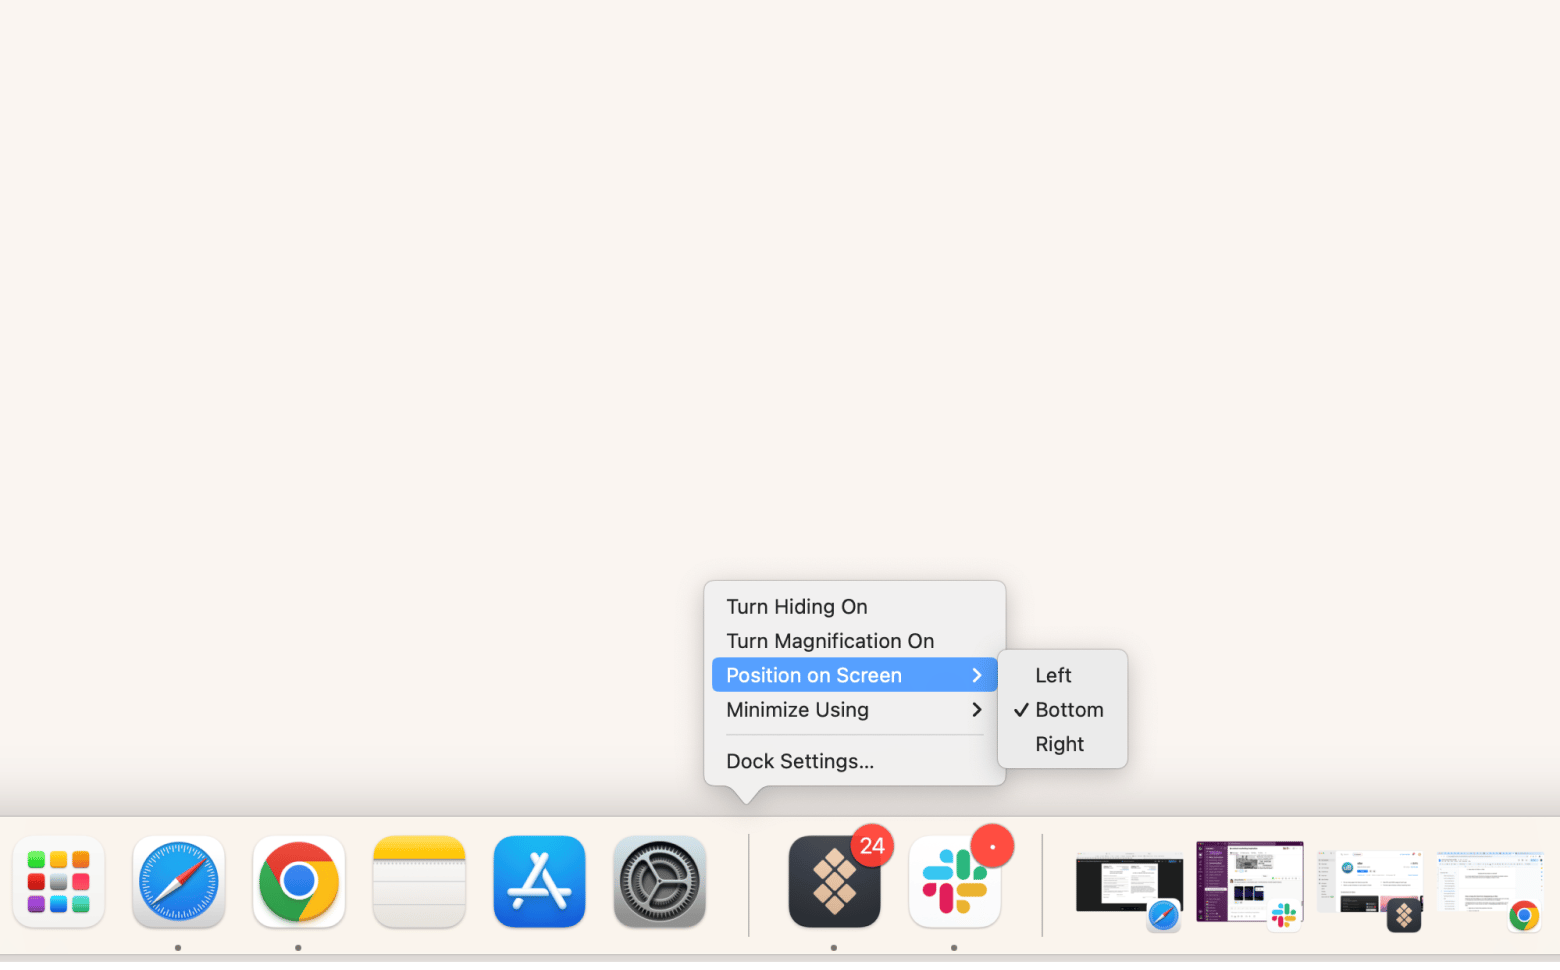
The Dock’s default position is at the bottom of the screen, but you can change the Dock position to be on the left or right instead in a few easy steps.
- Right-click anywhere on the Dock.
- Choose Position on Screen.
- Select either Left, Bottom or Right.
You can also adjust the size of the Dock by hovering over the transition line between sections until you see a double-sided white arrow and dragging to enlarge or shrink.
How to keep the Dock from disappearing on Mac
Among the many Dock settings, you can make it disappear (or minimize) when you’re not using it. This means you must hover the cursor in the Dock’s area for it to reappear.
A disappearing Dock can be ideal for some people, but for others, it’s counterintuitive, and you can’t always rely on it to pop up when you need it.
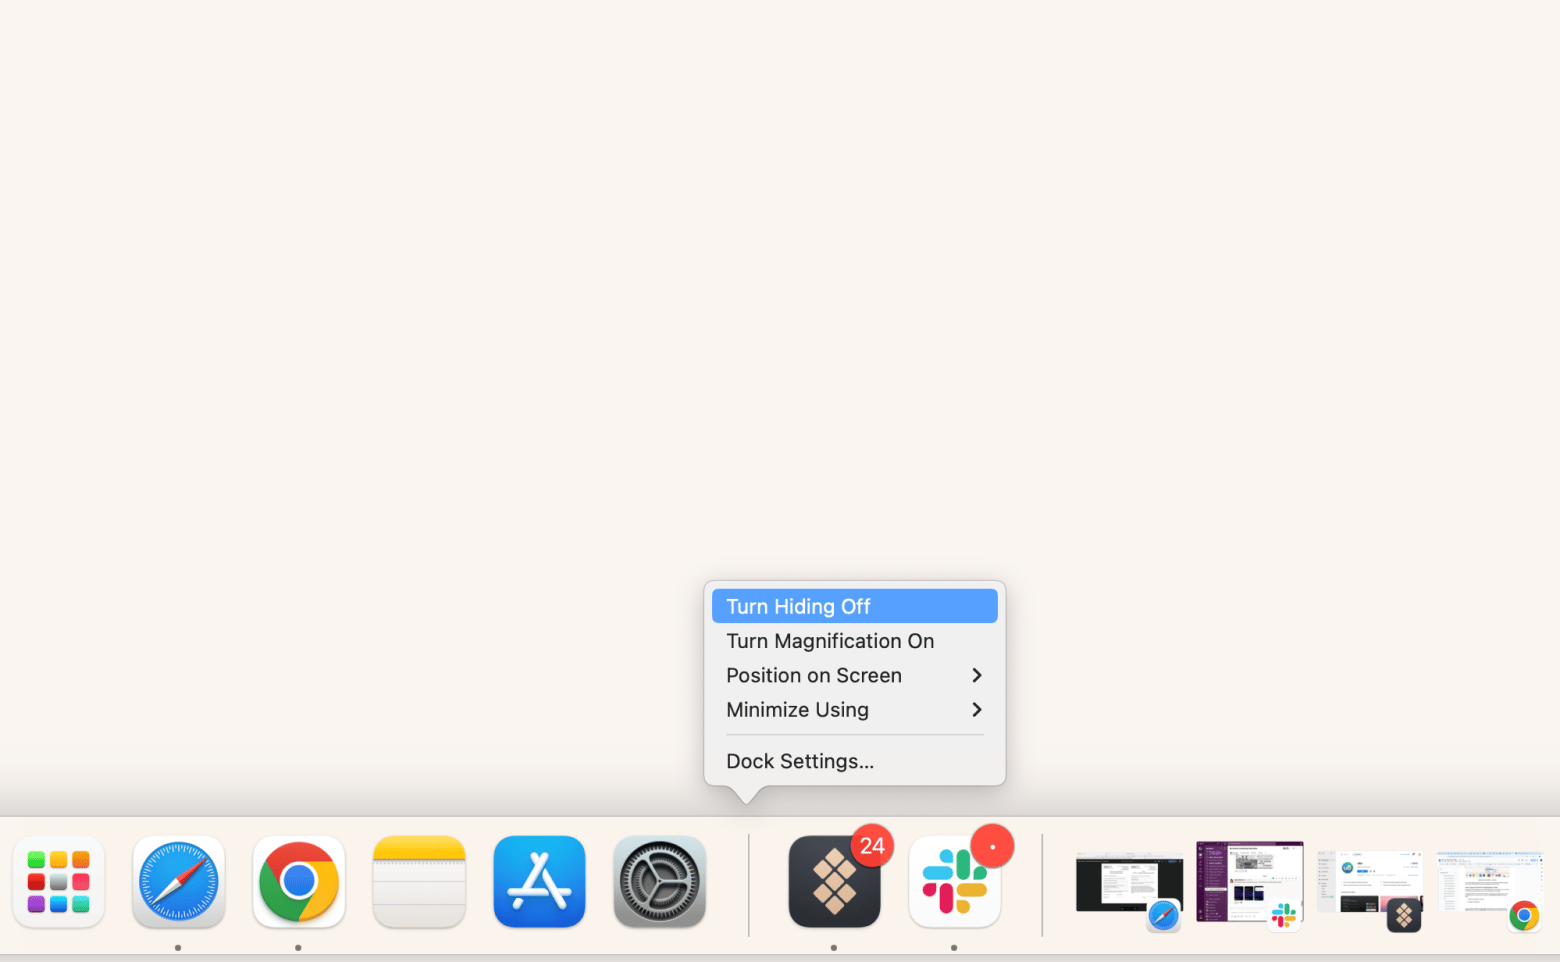
To fix the Dock bar on Mac, follow these steps:
- Right-click anywhere on the Dock.
- Disable Turn Hiding Off.
Know you know how to use the MacOS Dock
The macOS Dock has been part of our lives since it was launched. It has gone through numerous innovations since then, but at its heart has remained the same. Getting around your digital workspace feels second nature once you get to terms with how to manage the Mac Dock.
The Dock serves more than just a menu bar; it makes access to apps, files, and windows easy and intuitive. Customization comes easy regarding keyboard shortcuts and the Dock’s position.
As helpful as the Dock is, there are some areas for improvement. And you’ve covered with a selection of powerful alternatives, including uBar, Sidebar, and NotchNook. All these apps and 250 more, you cna get on Setapp. Try a 7-day free trial to acces all macOS and iOS apps and bypass the limitations of Apple’s operating system today!
FAQ
Is there Mac shortcut to to show Dock?
You can hide and show the Mac Dock with the keyboard shortcut Option + Command + D.
Is there any shortcuts to navigate to the Dock?
The keyboard shortcut Fn + Control + F3 (or Control + F3 on older Mac keyboards) makes the Mac focus on the Dock, where you can navigate between the apps using arrow keys and use Return to open it.
Can I move the Dock on my Mac?
Rick-click anywhere on the Dock to bring up the menu. Choose Position on Screen and select either Left, Bottom, or Right.
How to reset your Mac Dock to its default apps and settings?
Reset Mac Dock to default settings using the Mac’s Terminal:
- Open Terminal.
- Type defaults delete com.apple.dock; killall Dock and press Return.
- Wait for the Dock to restart.
- Exit Terminal.


