How to create slideshows on Mac
Slideshows are a great option when you want to review or showcase something, be it photos from your recent trip or appreciating all the coworkers at your company.
Macs provide us with a few user-friendly ways of creating slideshows and presentations. So even if you don’t know how to make a slideshow — getting started will take no longer than a few minutes.
Create stunning slideshows with music and pictures
Picture slideshows don’t have to be complicated. You don’t want to overwhelm the viewers. Focus on clarity, quality, and simplicity instead. A few high-quality pictures can tell a better story than a jumble of random ones.
That said, here are a few tips that would make any slideshow Mac can show interesting and informative:
- Reduce the size of photos. While using high-quality photos is a must, you don’t want every slide taking a few seconds to load. In an instant, you can run your batch of photos through Squash and considerably reduce the size without affecting quality.
- Use collages for small or low-quality images. Create collages out of any images that can’t be blown up without losing in quality.
- Add videos to make slideshows on Mac more interesting. Videos have the ability to tell stories much more vividly than images. Even better if you can stylize them in the same way as images, using CameraBag Pro, for example.
- Set the right mood with music. Just like a great movie, having a soundtrack in the slideshow's background helps inform the audience about what they are going to see even before they see it, adding to the success of your presentation.
How to create a photo and video slideshow
Before you put together a slideshow in the app of your choice (which is the easy part, discussed below), you should get all the ingredients to their best state possible.
Start with selecting images that tell a coherent story. Aim for the highest quality ones, as they are easier to edit later. Then pick the same ratio (e.g. 16:9) and format (e.g. JPEG), and run them all through Squash.
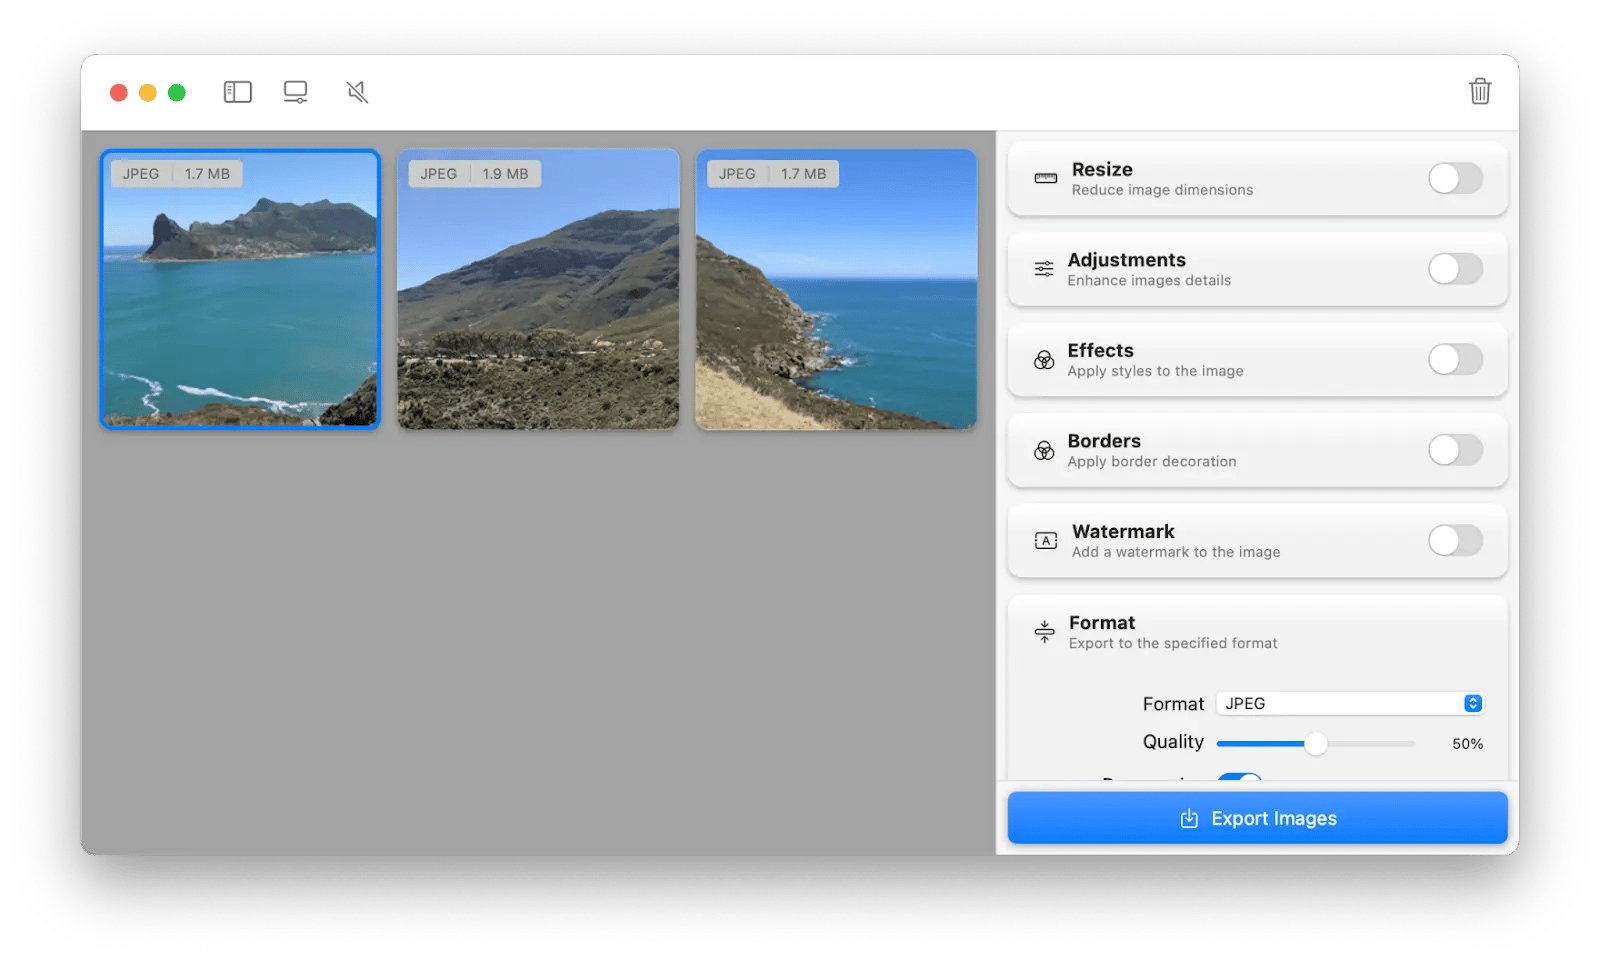
Squash is a lightning-fast batch image processing app. Just drag and drop as many images as you want, set parameters on format, size, compression, ratio, filters, and export the results in seconds.
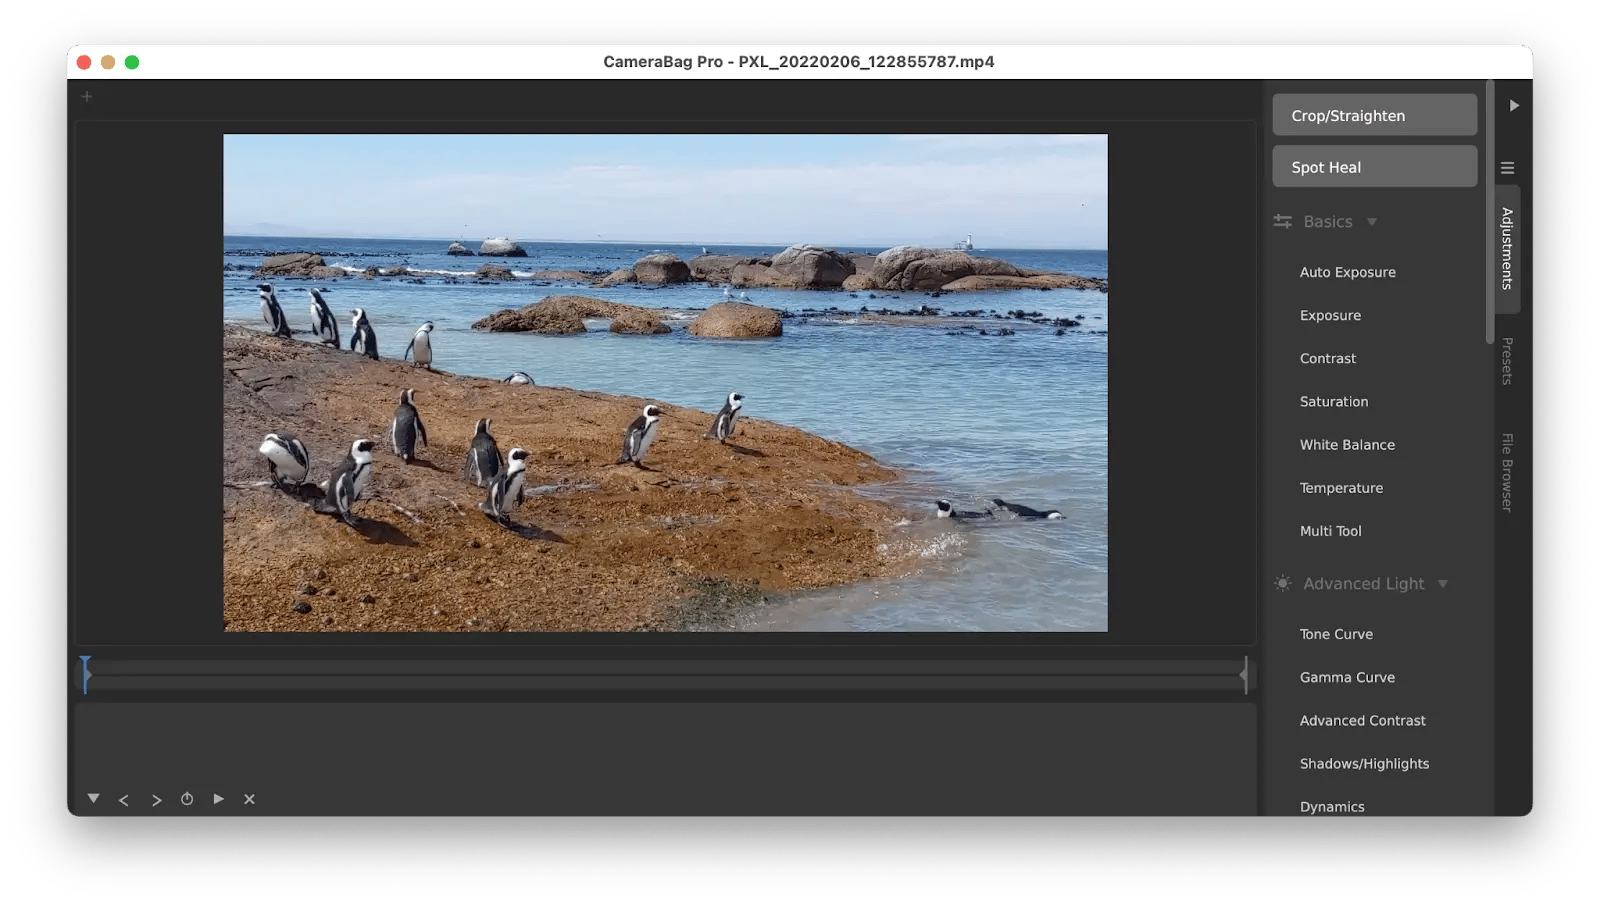
For quickly editing videos, use CameraBag Pro.
CameraBag Pro is a professional photo and video editing app that is much easier to use than its industry-standard enterprise equivalents. Just drag and drop a video and choose any effects or changes you want to apply from the sidebar. Export the results — done!
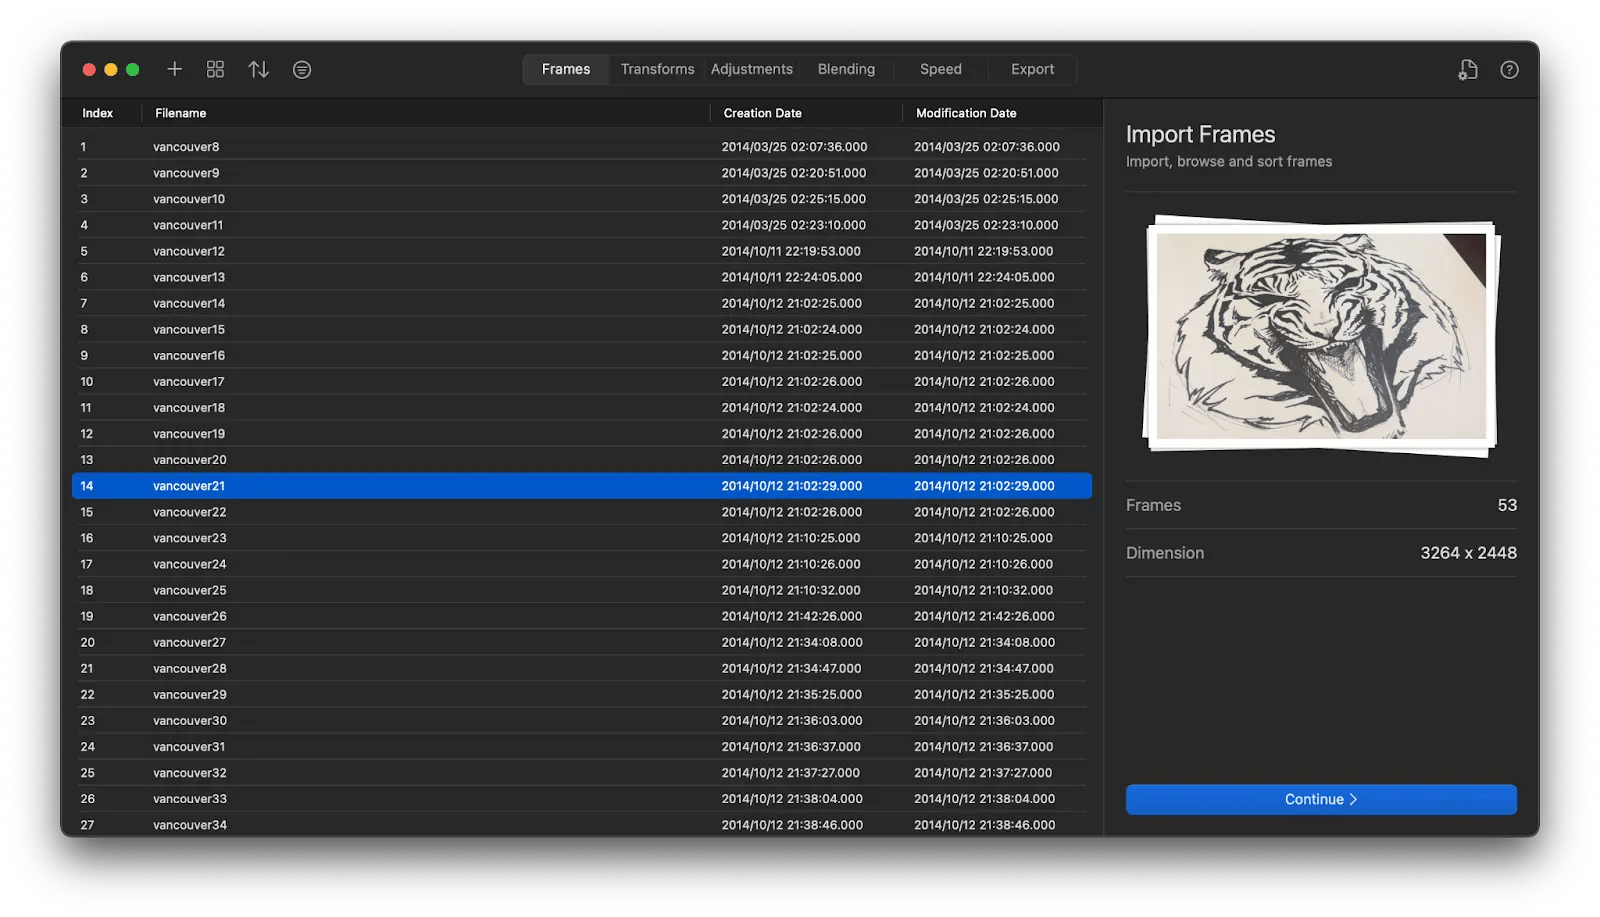
Finally, if you have lots of images of the same scene taken over time, you can combine them all into a time lapse. Time lapses are notoriously difficult to create due to the difference in lighting and uneven framing. The secret to easy time lapses, however, is GlueMotion.
GlueMotion makes the process of creating time lapses almost seamless, automatically taking care of image correction, lighting conditions, and more. Just open the folder with time lapse images in GlueMotion, and the app will take care of the process for you.
Now when you have all the ingredients ready to go, let’s see how we can create slideshows in Keynote, Photos, Preview, and online apps.
How to make a slideshow in Keynote
When you want to use a powerful slideshow maker, look no further than Keynote. This free app, part of the iWork suite, is a Mac staple, making it easy to create amazing presentations and slideshows in no time.
Here’s how to make a slideshow in Keynote:
- Start by adding new slides to your presentation
- Change background images (you can use photos too)
- Add text as required, selecting font size and color
- Insert any videos by clicking Media ➙ Movies
- Add any charts or tables if necessary from the top toolbar
- When ready, select Play ➙ Play Slideshow (Option + Command + P)
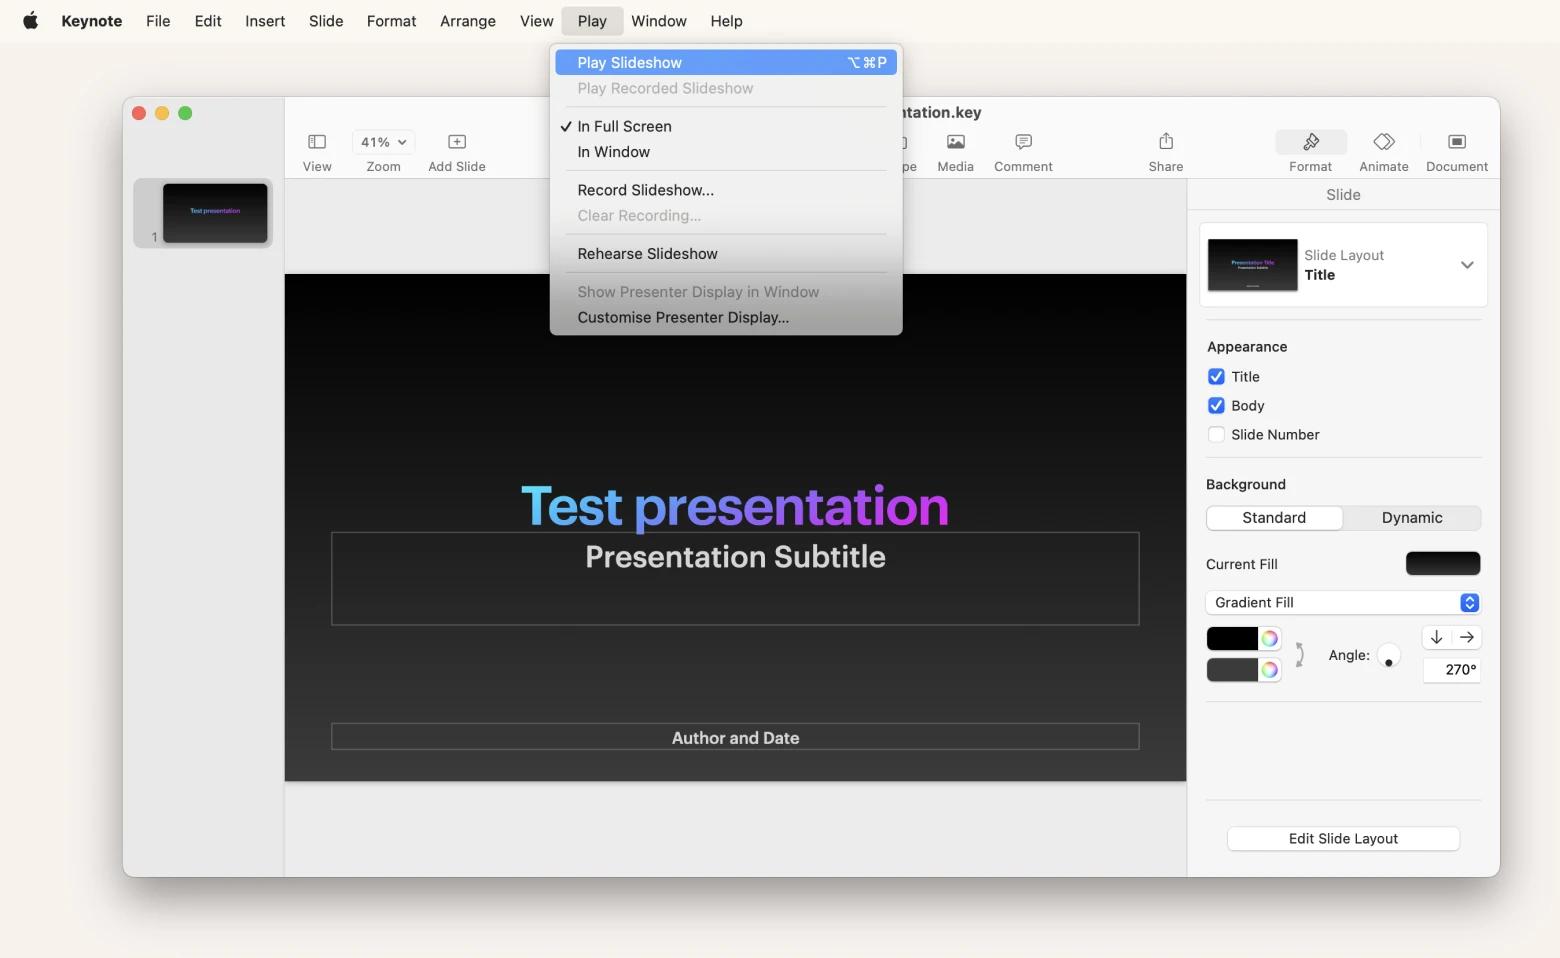
One quick tip to turn your Keynote into a slideshow video maker is to check the “Loop slideshow” box in Document settings.
How to create a slideshow with Photos
If your slideshow mostly consists of photos, why not make it in … the Photos app!
Photos can easily organize your whole photo library with albums, help you with retouching, and sync everything with iCloud to be accessible on all devices.
You can also create beautiful slideshows, which can be played on the spot or separated into special slideshow projects with specific custom configurations.
To create slideshows on the fly:
- Select multiple photos or albums
- Right-click and pick Play Slideshow
- Pick your theme and music
- Play Slideshow
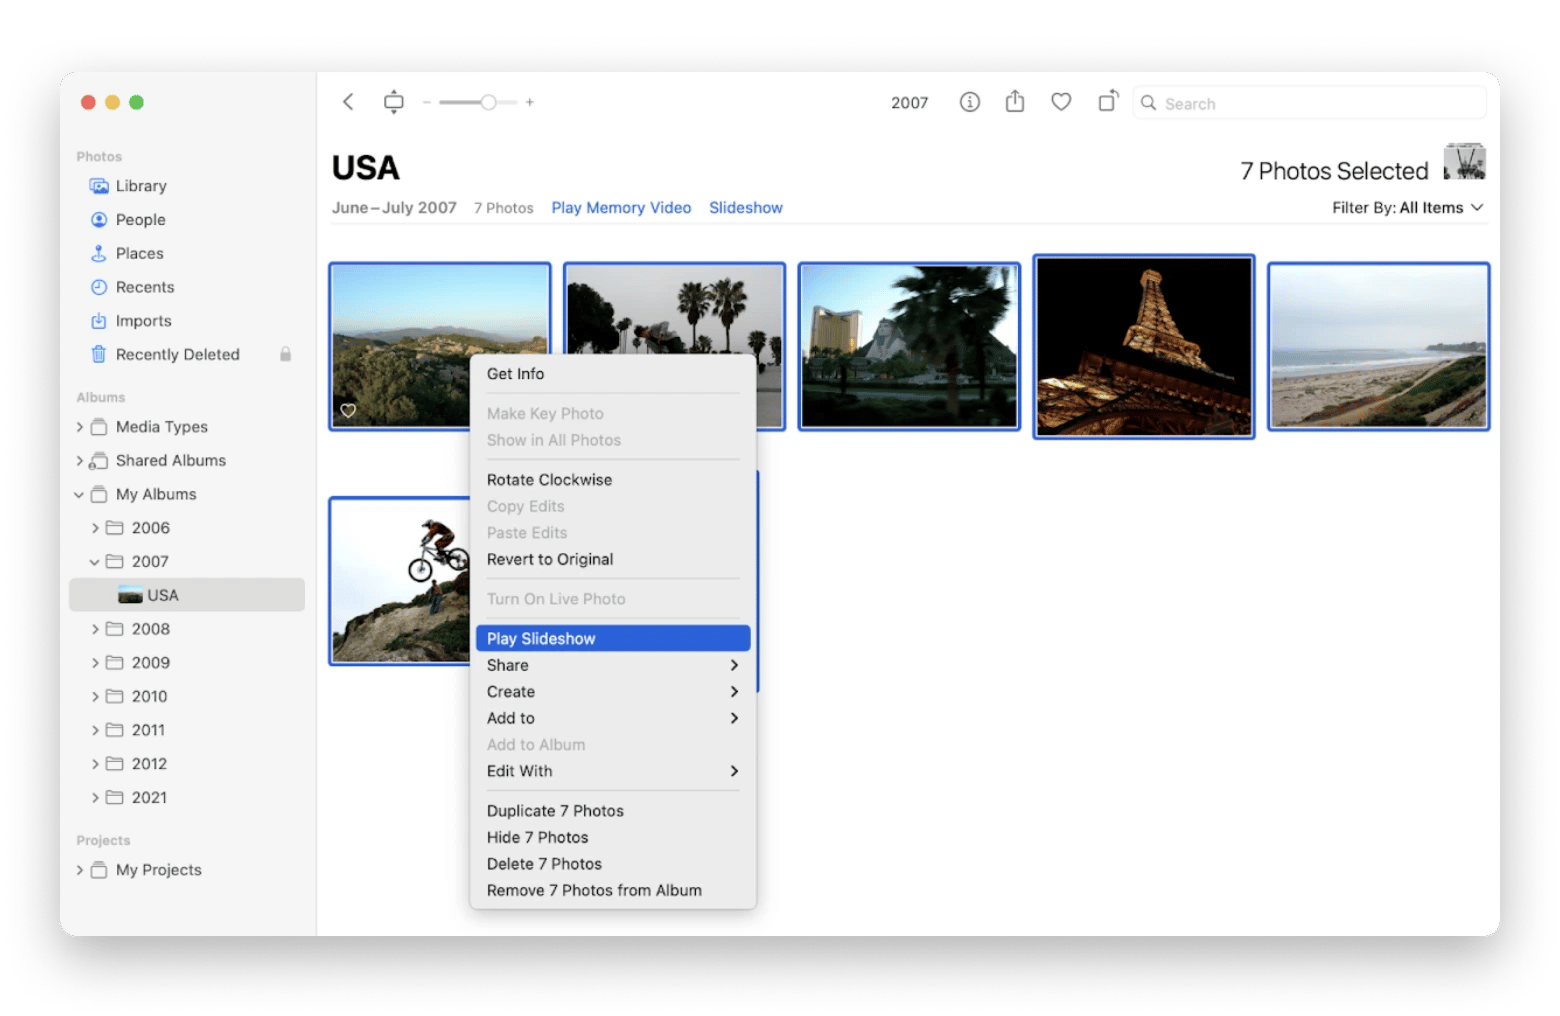
To create a custom slideshow:
- Select any photos or albums
- Go to File ➙ Create ➙ Slideshow ➙ Photos
- Organize the photos in the sequence you like
- Add Music, Theme, and Duration
- Click Play when ready
How to make a slideshow on Mac in Preview
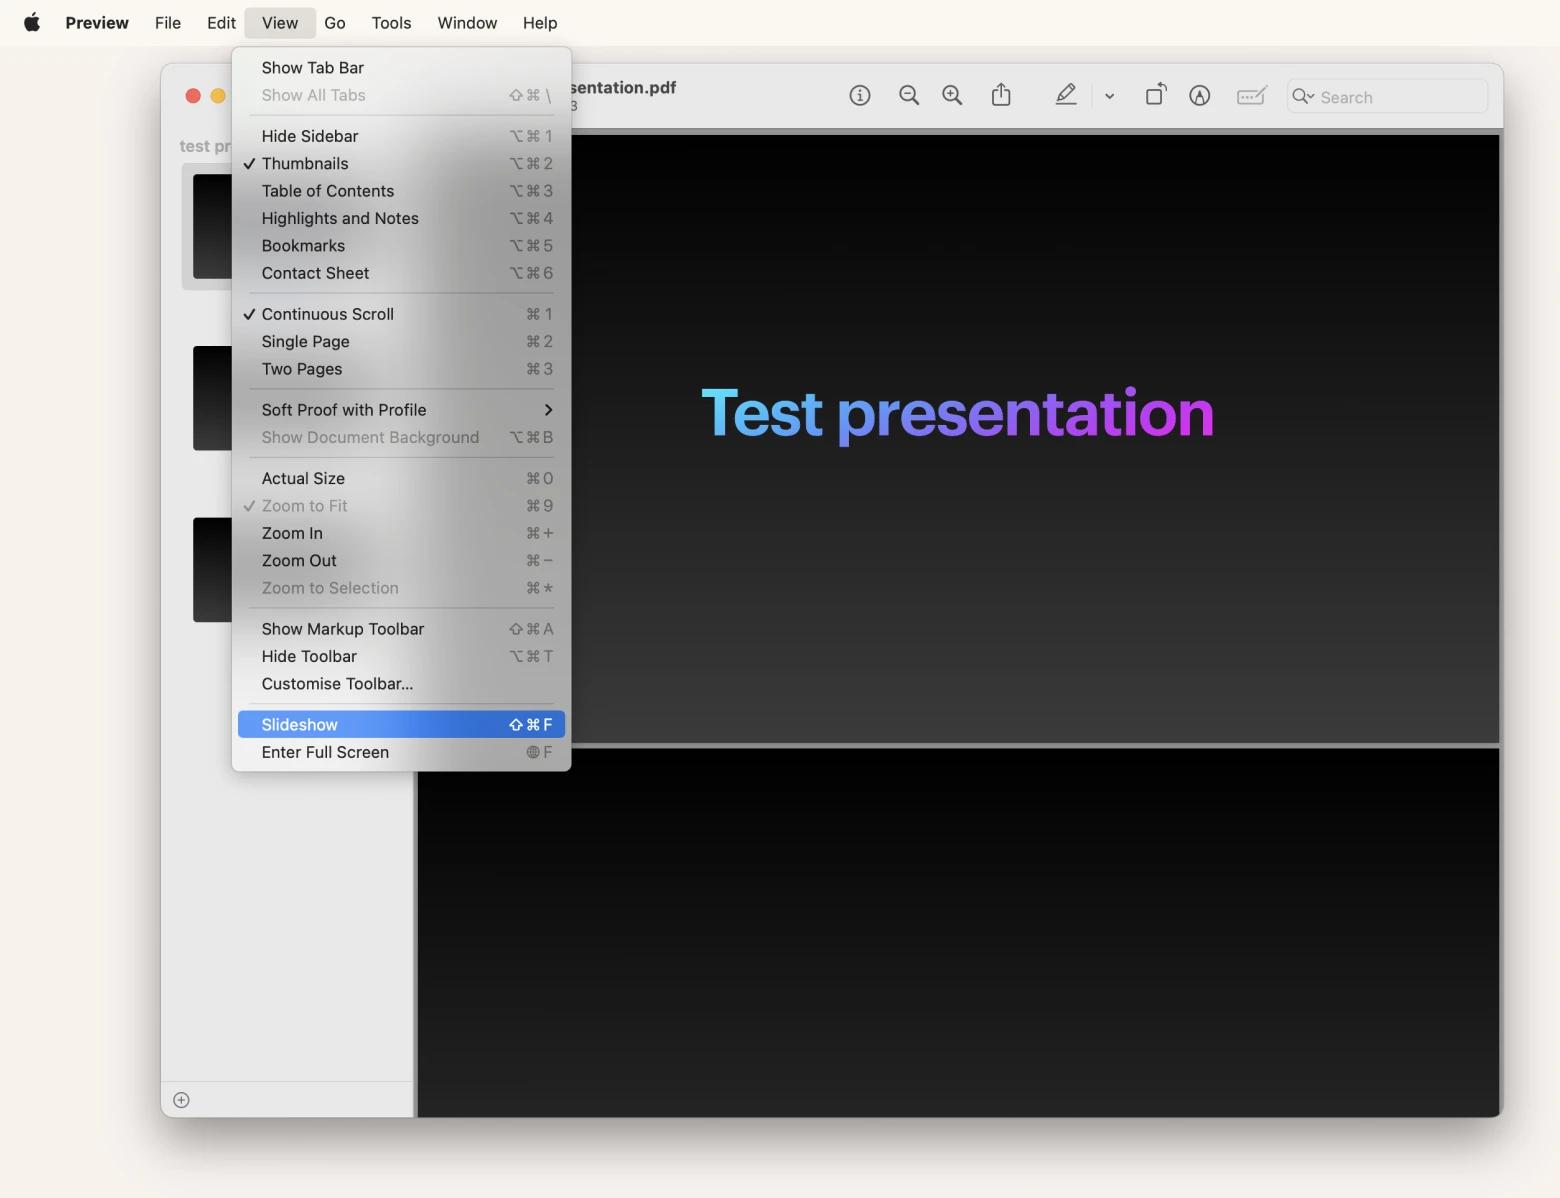
People who spontaneously play slideshows all the time know that to create one you don’t need Keynote or even Photos. You can create a slideshow out of any document right in Preview in just a few clicks.
Here’s how to make a slideshow on the go:
- Launch Preview
- Go to File ➙ Open and add your files
- Go to View ➙ Slideshow (Shift + Command + F)
Tips for creating slideshows online
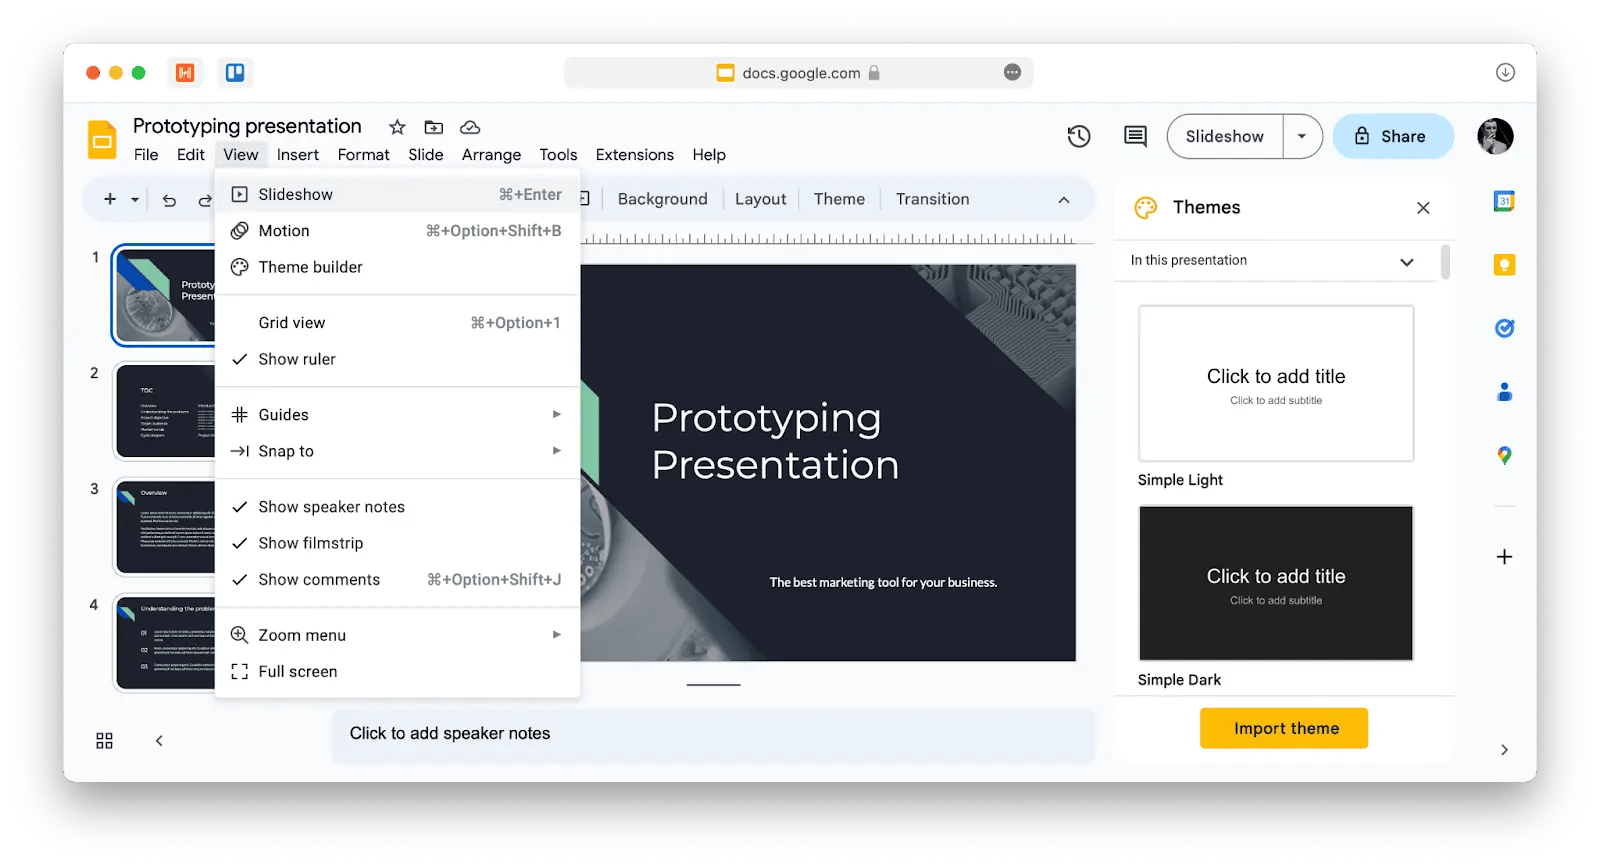
If you’re not working on Mac or need a slideshow maker that’s accessible online, try using Google Slides instead.
Google Slides is free and similar to Keynote in its interface design. You add photos or create slides with text or any other graphical elements. Then you can select View ➙ Slideshow (Command + Enter). That’s it! What’s more you can share the link online and others can see your slideshow at any time as well.
The best slideshow makers for Mac
We’ve covered quite a range of tools to create slideshows, where each is great for a particular task. If you need absolute control over your slideshows and want to save them with custom settings, look no further than Keynote. For picture slideshows, use Photos. To make slideshows on Mac out of any documents, try Preview. If you need to share your slideshow online, use Google Slides.
More importantly, you need great tools for your slideshows to look their best. Try Squash to compress images without losing quality and create lightweight presentations. CameraBag Pro will help you edit any videos. And GlueMotion is just about the easiest way of making time lapses.
All these apps — Squash, CameraBag Pro, and GlueMotion — are available to you for free through the seven-day trial of Setapp, a platform with more than 240 outstanding apps for Mac and iOS across every category you can think of. Try them all at no cost today and find your new favorites!
FAQ about slideshows on mac
Can I add videos to my slideshow?
Yes, if you create a slideshow in Photos, you can add videos — just select them from your Library. Note that Photos might cut your videos based on the selected theme, so make sure you cut and adjust your videos in advance so you get the right scene in the slideshow. CameraBag Pro is an excellent utility for video editing, which can help you prepare your videos.
Can I add text to my slides?
You can add text if you make a slideshow in the Preview app. Once you’ve selected the photo, click the Edit button > Text and you’ll see the text box pop up on the screen.
How can I delete slideshows?
If you export your slideshows, they will be saved in your export location on Mac. You can simply move them to the Bin from there. And if you create slideshows in Photos, they will be saved under Projects in the left sidebar — select the slideshow, right-click it, and choose Delete.


