How to use Incognito mode on iPhone, iPad, and Mac: Safety tips included
- Incognito mode keeps local browsing private.
Private Browsing (Safari) or Incognito (Chrome/Firefox) prevents your browser from saving history, cookies, and autofill data once you close the window. It’s useful on shared devices or for sensitive searches. - It does not hide your activity online.
Your ISP, employer, or Wi-Fi provider can still see your activity. To fully protect your data, pair Incognito mode with a VPN like ClearVPN. - Clear old browsing data for stronger privacy.
Use CleanMyMac to remove hidden history, cookies, and autofill details across all browsers. This ensures previous searches or visited sites don’t compromise privacy. - Enable extra protections on Apple devices.
On iPhone and iPad (iOS 17+), lock Private Browsing tabs with Face ID or Touch ID. Safari on Mac can also automatically block trackers and optionally start in Private Browsing by default. - Use a comprehensive privacy toolkit.
ClearVPN (and 260+ other apps) is available on Setapp, letting you secure browsing, connections, and communications under one subscription.
I've noticed how much personal data gets collected online these days, and honestly, it can feel overwhelming. Regulations like GDPR and CCPA offer some protection, but even with privacy laws in place, some websites still collect a lot of our information, so it’s worth taking some extra steps to protect yourself.
The good news is that there are simple ways to browse more privately. Here’s everything you need to know about browsing privately on your Apple devices with Incognito mode.
Need a quick fix before going into details? Check out this GPT tool to help you fix Mac issues quickly.
How to keep your web history private
When browsing history is enabled, your Mac saves every website you visit. These sites then appear as suggestions when you start typing in your address bar, which can compromise your privacy.
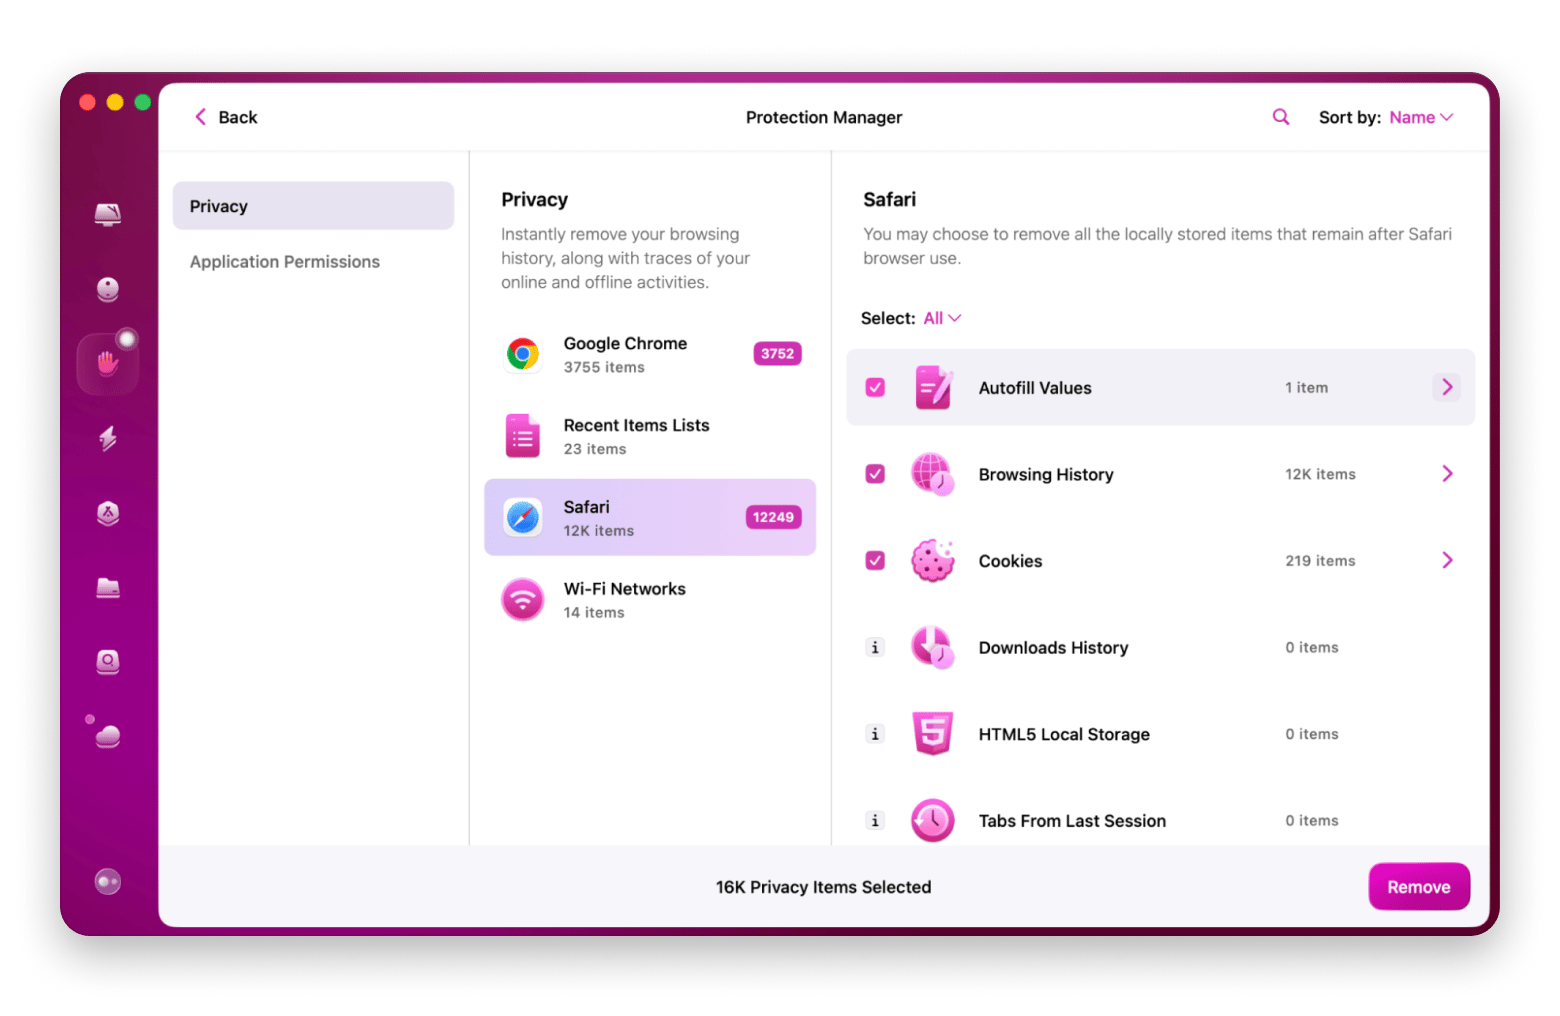
CleanMyMac solves your privacy cleanup problem. It finds and removes browsing data that’s hidden across your Mac’s system.
To delete browsing data with CleanMyMac:
- Install and open CleanMyMac
- Click Protection > Scan.
- After the scan is complete, click Manage Privacy Items.
- In the Privacy column, select your browsers (Safari, Chrome, Firefox, etc.).
- Choose the types of data you want to remove: history, cookies, autofill, etc.
- Click Remove.

Tip: Removing browsing data helps keep your searches and website visits private, especially on shared devices.
How to enable private browsing on iPhone and iPad
Your iPhone searches appear on your Mac when others use it. This happens because of iCloud syncing. To keep your mobile browsing private, use Safari’s Private Browsing mode.
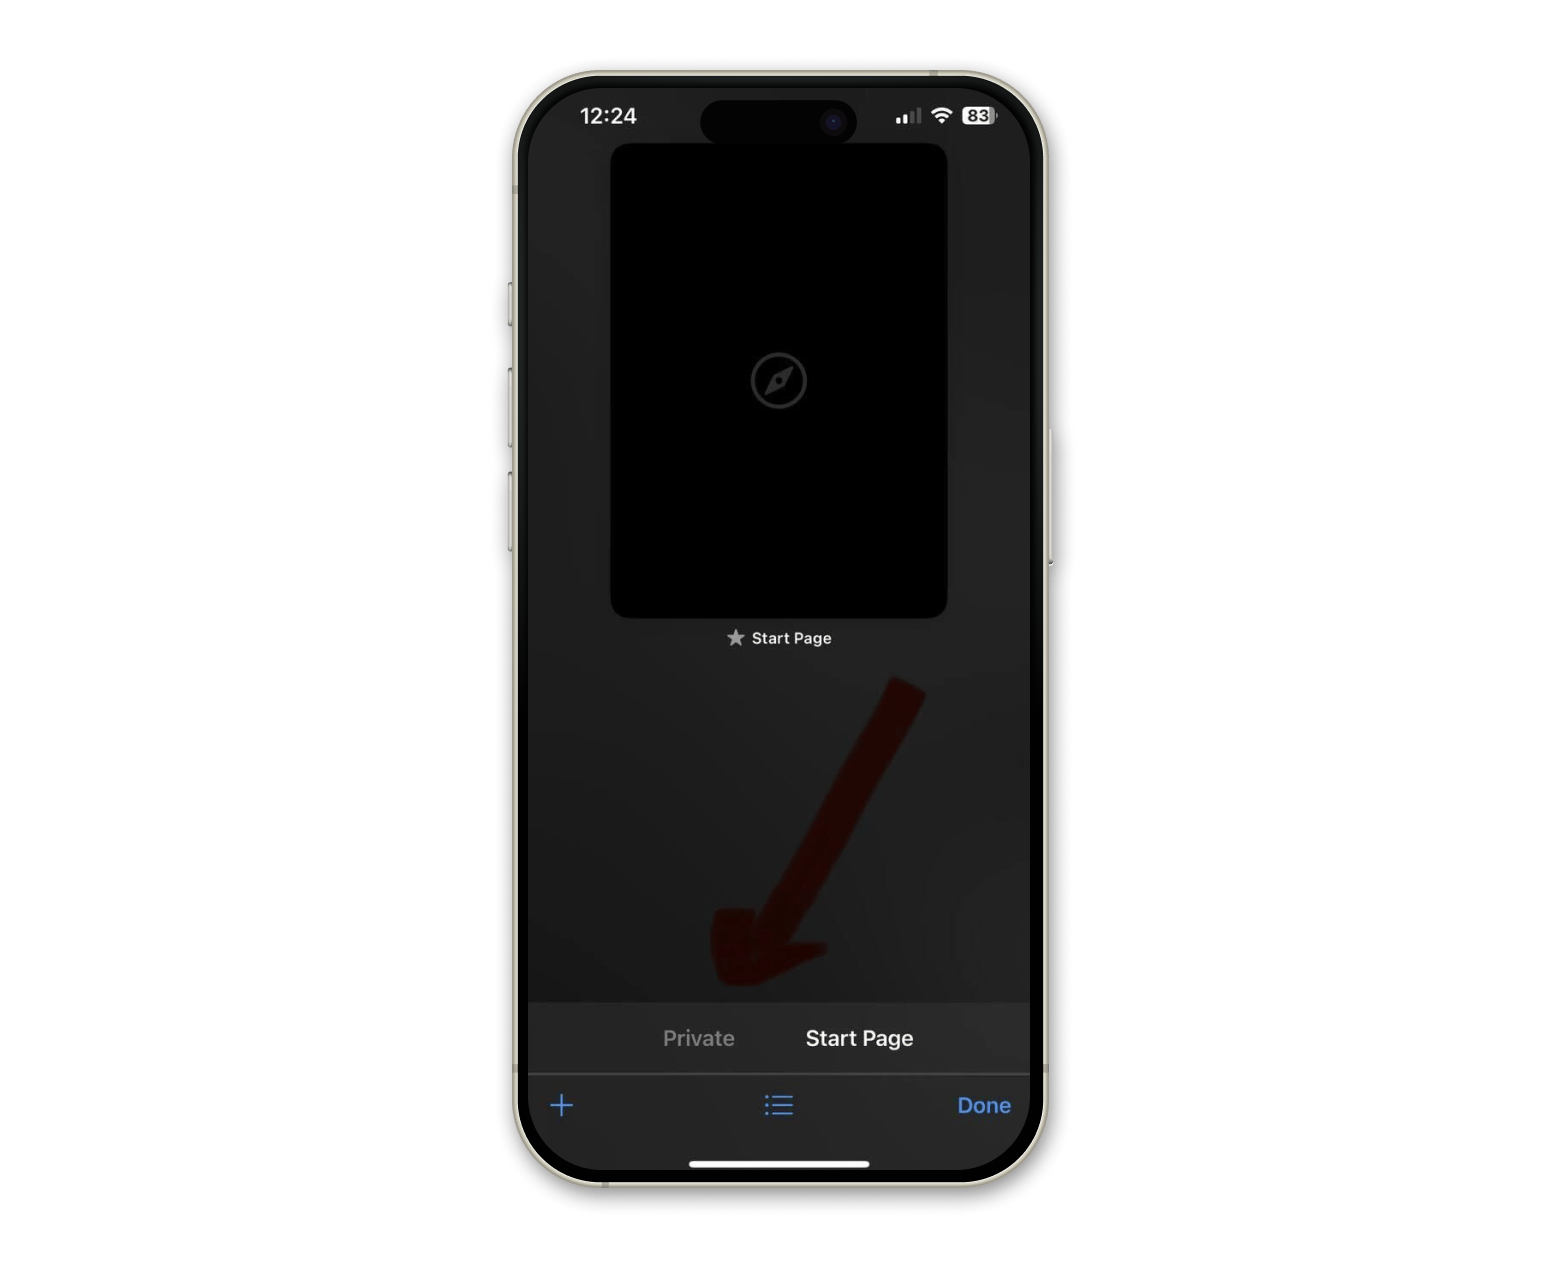
To use Private Browsing in Safari on iOS (iOS 17 and later):
- Open the Safari app.
- Tap the tabs icon (two overlapping squares) in the lower right.
- Tap Private.
- Tap the plus (+) icon to open a new private tab.

When you’re in Private mode, Safari’s address bar turns dark.
For extra privacy: In iOS 17 and later, you can lock your Private Browsing tabs with Face ID or Touch ID. Go to Settings > Apps > Safari > Turn on Require Face ID to Unlock Private Browsing.
How to activate Incognito mode on Mac using Safari, Chrome, or Firefox
Most Mac users rely on Safari, but Chrome and Firefox also offer private browsing. Here’s how to activate incognito mode on each browser.
Incognito mode in Safari
Safari now blocks cross-site tracking by default. This protects your privacy automatically. You can also set Safari to remove history items automatically after a day, week, month, or year.
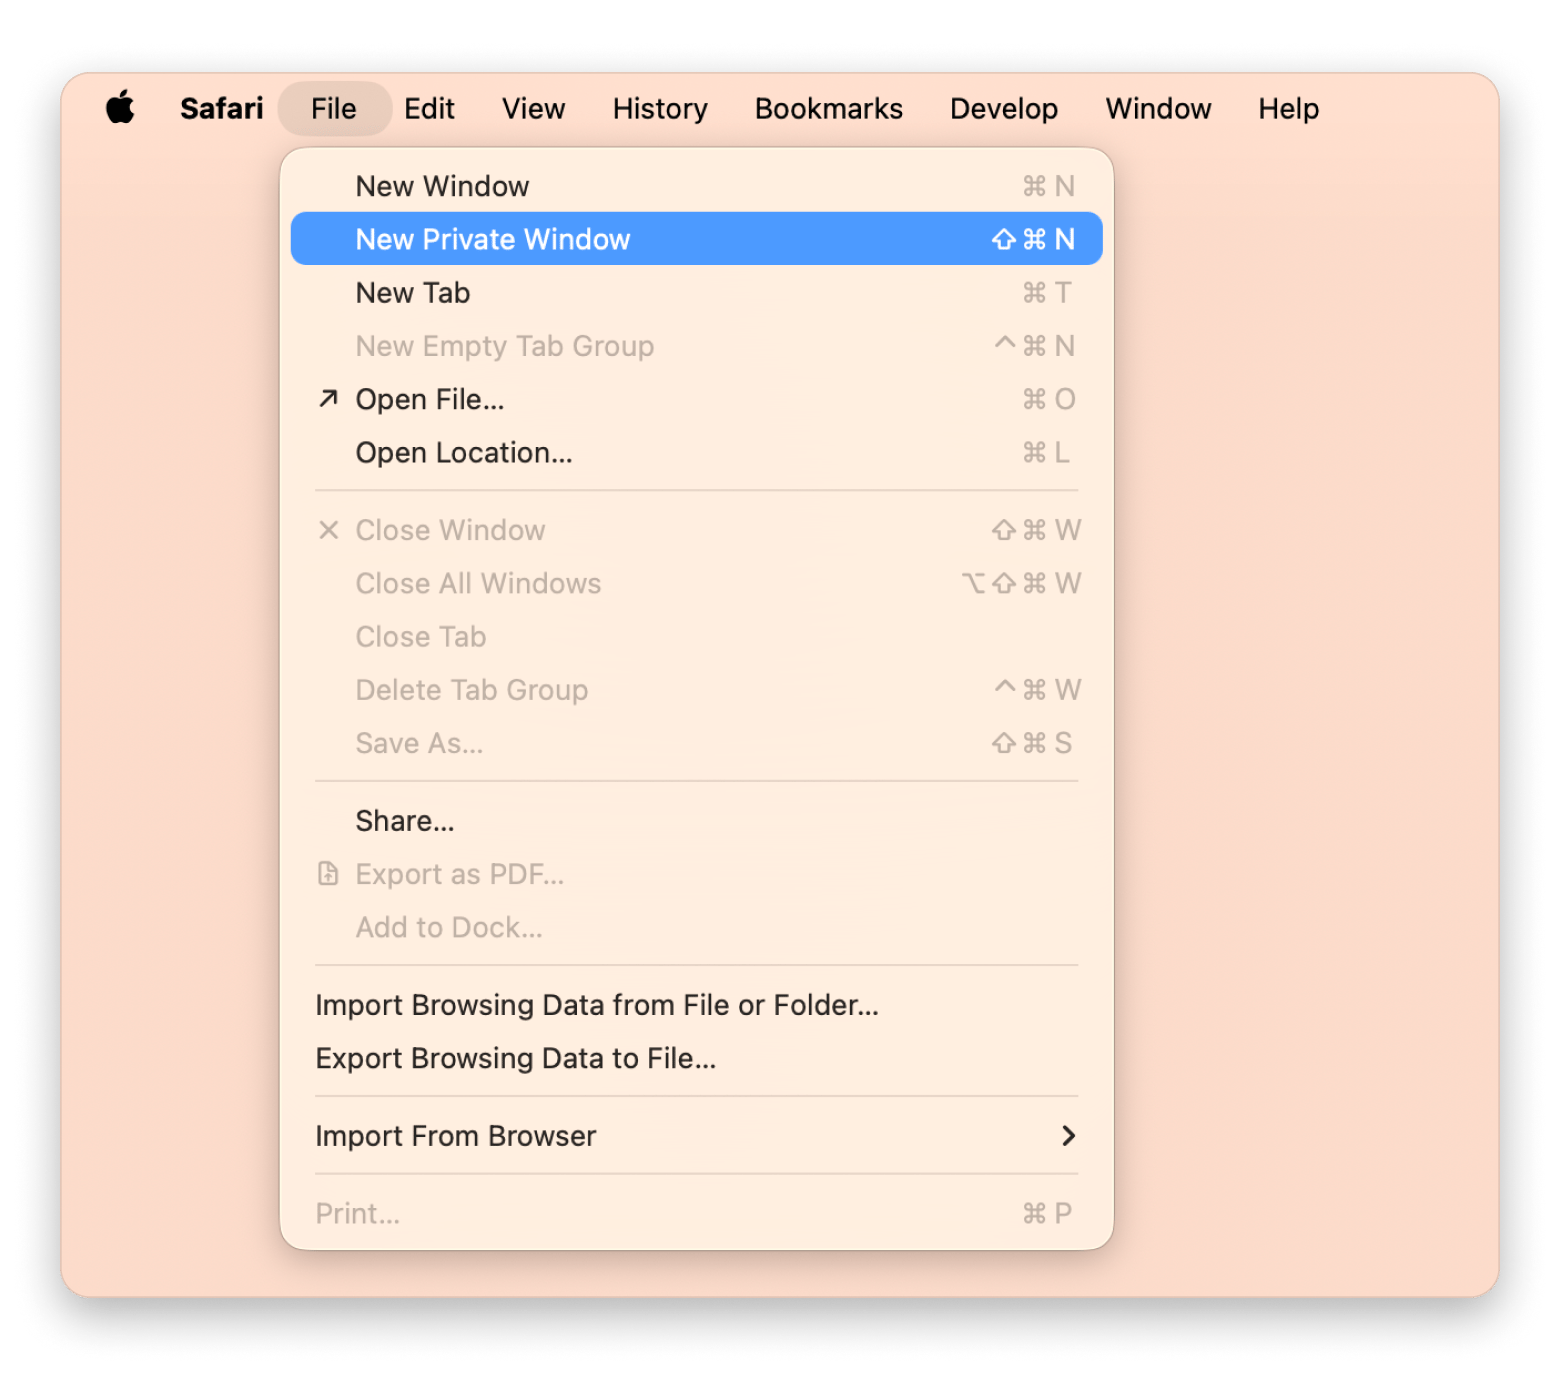
To open a Private window in Safari:
- Open Safari and click File in the menu bar.
- Select New Private Window.
Or use the shortcut: Command + Shift + N.

Incognito mode in Chrome
Chrome offers Incognito mode, but collects data for Google’s advertising business. Think about this when picking your browser.
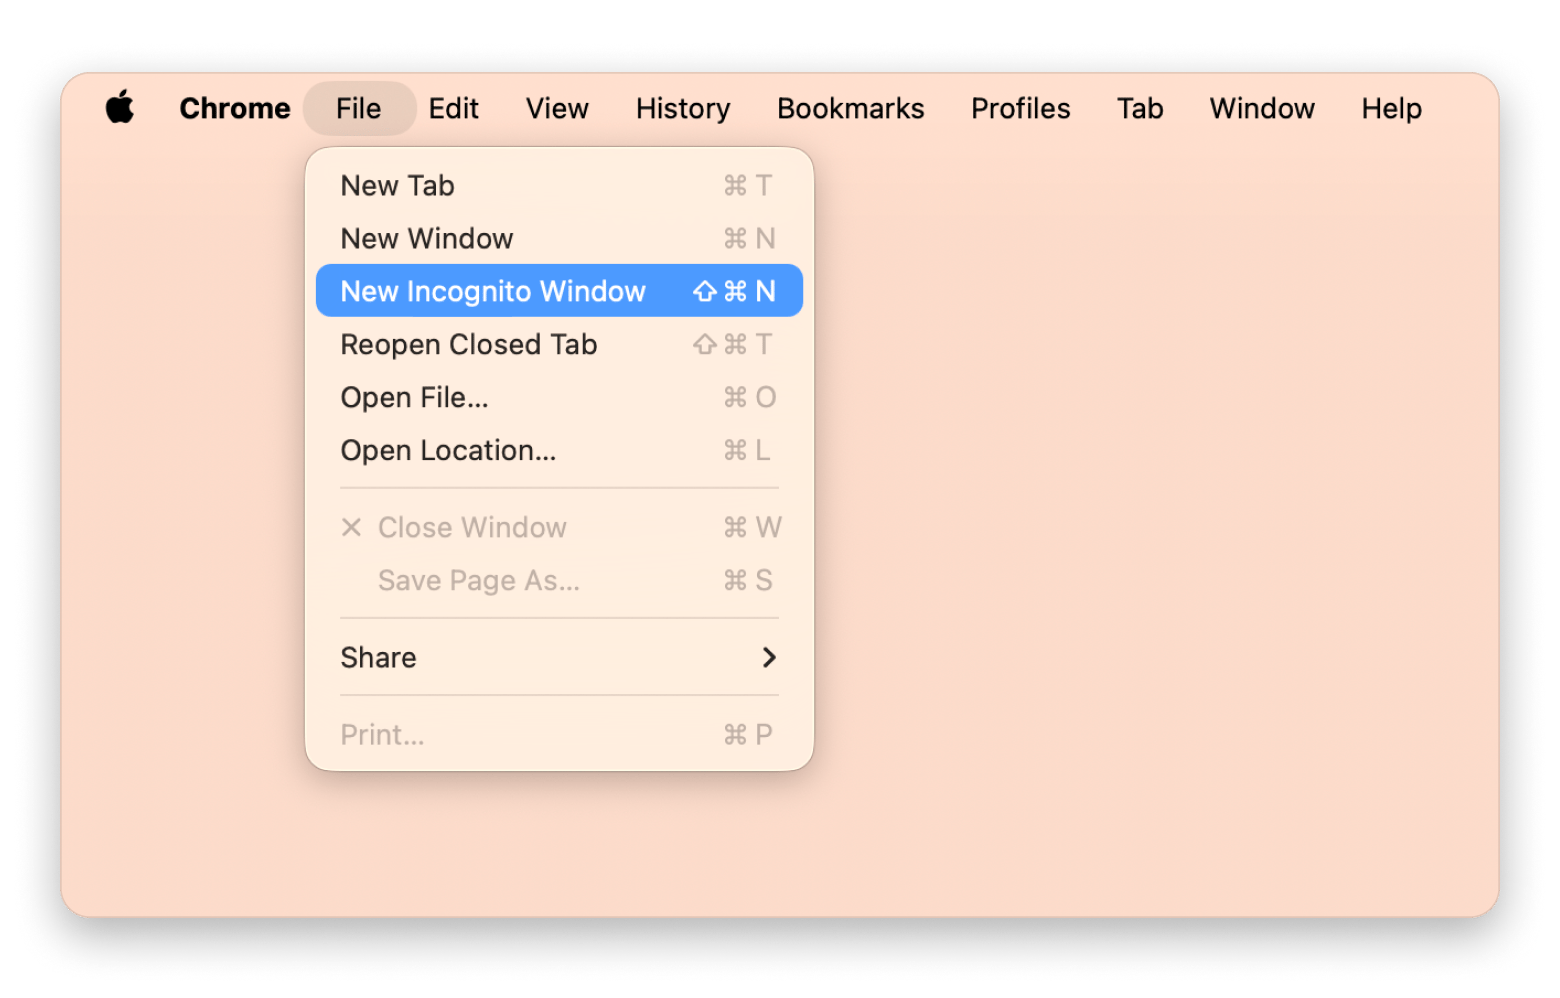
To open an Incognito window in Chrome:
- Open Chrome and click File in the menu bar.
- Select New Incognito Window.
- Or use Command + Shift + N.

Incognito mode in Firefox
Firefox is known for strong privacy features, like Enhanced Tracking Protection, which blocks social media trackers and cross-site cookies by default.
To open a Private window in Firefox:
- Open Firefox and click File in the menu bar.
- Select New Private Window.
- Or use Command + Shift + P.
Read also:
- Antivirus tips for Mac
- Is Siri always listening to my conversations?
- How iCloud Private Relay keeps your online activity secure
How to enhance privacy with a VPN
A VPN (Virtual Private Network) encrypts your internet connection, hiding your IP address and making your traffic unreadable to outsiders. This is especially important on unsecured networks.
ClearVPN is a macOS VPN client that uses AES-256 encryption, the industry standard for security. You can choose from servers in different countries and bypass geo-restrictions.
To use ClearVPN for enhanced privacy:
- Install and open ClearVPN.
- Choose your desired location or use Optimal Location to pick the best server for you.
- Click to connect. Your browsing is now encrypted.
FAQ
What is Incognito (or Private) mode, and when should I use it?
Incognito mode (Private Browsing in Safari) lets you open a browser window that forgets the pages you visit, items you download, and cookies you pick up once you close the window. It’s handy on shared Macs or whenever you don’t want your history or autofill data saved.
How do I turn off Incognito Mode on a Mac?
Just close every private window. In Safari, click the red close button or press Command + W until no Private windows remain. The same works in Chrome (Command + Shift + W) and Firefox (Command + W). Once all private windows are closed, you’re back to normal browsing.
What is the keyboard shortcut for a Private window in Safari on Mac?
Use the Command + Shift + N shortcut to open a Private window in Safari. It appears with a dark address bar so you know you are browsing privately.
Why can’t I find the Private Browsing option in Safari?
If “Private” is missing, Screen Time may be blocking it. On your Mac, go to System Settings > Screen Time > Content & Privacy, then set Web Content to Unrestricted Access. The Private option should reappear after you restart Safari.
Does Incognito Mode hide my activity from my ISP or employer?
No. Incognito Mode only stops your browser from storing data locally. Your ISP, school, or workplace can still log the sites you visit. To hide that information, use a VPN like ClearVPN, which encrypts your traffic and masks your IP address.
How to open incognito tabs on Mac?
Here’s how to open a private window in each browser:
- Safari: Click File > New Private Window (or use Command + Shift + N)
- Chrome: Click File > New Incognito Window (or use Command + Shift + N)
- Firefox: Click File > New Private Window (or use Command + Shift + P)
Can I make Safari open in Private Browsing by default?
Yes. In Safari, go to Safari > Settings > General. Under “Safari opens with,” select “A new private window”. Safari will now always start in Private Browsing mode.


