How to turn your Mac into DLNA media server: Expert configuration
By now, it’s not a surprise that every device around you is turning “smart” by having access to your Bluetooth or WiFi networks. This is especially true of TVs. In fact, it’s almost impossible to buy a TV today that doesn’t have some sort of smart functionality.
That’s good news for all the Mac owners since wireless streaming is one of the most common smart features, which means there’s now a possibility to watch (or listen to) your whole media collection without the need for HDMI cables, USB drives, or CDs.
But to share content to other devices, including smartphones, you first need a DLNA server and a compatible DLNA client (which are often the same thing). But what is a DLNA Mac player? And how do you configure DLNA streaming from Mac? Let’s find everything out step by step.
What Is A DLNA Media Server?
DLNA (Digital Living Network Alliance) is just what the organization created by Sony in 2003 that oversees the actual DLNA media standard is called. This standard ensures that all networked devices are able to communicate with each other and share all the necessary data so that you can stream media anywhere you want.
It’s possible to do DLNA streaming from Mac, but you do need to choose a good DLNA server. There are lots of options available, each offering some unique functionality, such as looking for proper cover art or transcoding videos on the fly, to tailor to a certain market.
It used to be that you had to match specific DLNA servers with DLNA Mac players, but now most leading ones work equally well with everything. And even if you encounter a glitch, it could often be resolved by tweaking a few settings.
The best DLNA Mac player in our opinion? Definitely Elmedia Player.
Elmedia Player is truly the only media-centric app you’ll ever need. It acts both as a DLNA server and player. It streams to any DLNA-enabled device in your home, including AirPlay, using the UPnP protocol. It supports all kinds of subtitles and plays any media format you can imagine. And it does it all right out of the box — just download the app and enjoy.
How to set up DLNA streaming from Mac
Once you have Elmedia Player on your Mac, it would automatically find all other devices with DLNA functionality, whether they are smart TVs, speakers, or smartphones, on the same WiFi network.
To stream to a DLNA client from Elmedia Player:
- Make sure your receiving device is turned on and connected to WiFi
- Launch Elmedia Player
- Drag-and-drop any media you want to play
- Click the “Stream to” icon in the bottom bar
- Select the device you want to play the media on
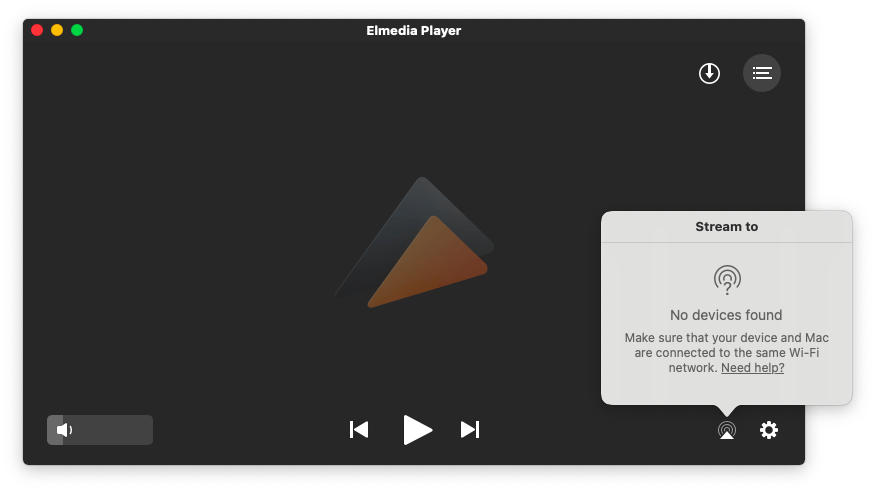
A popular option to make TVs smart nowadays is to connect them to a Google Chromecast device, which would then act as a DLNA client. The process of connecting Elmedia Player to Chromecast then is still exactly the same: turn on the Chromecast-enabled TV and connect via the “Stream to” icon in Elmedia Player.
Elmedia Player is an all-in-one solution combining both the DLNA server and the DLNA Mac player. But some people might want to use those separately, perhaps because they already have a media player they love, and they just need to make sure it’s easy to stream.
JustStream is the perfect solution for that and also a lightweight and intuitive DLNA client that lets you stream content from your Mac to any device. In addition, you can also simply mirror your Mac’s screen in case you need to show something to a wider group. The app doesn’t occupy any valuable space but remains always accessible through the menu bar.
Another great JustStream feature is instant transcoding so you can watch any video format that would play on your Mac, even if the receiving device doesn’t support it!
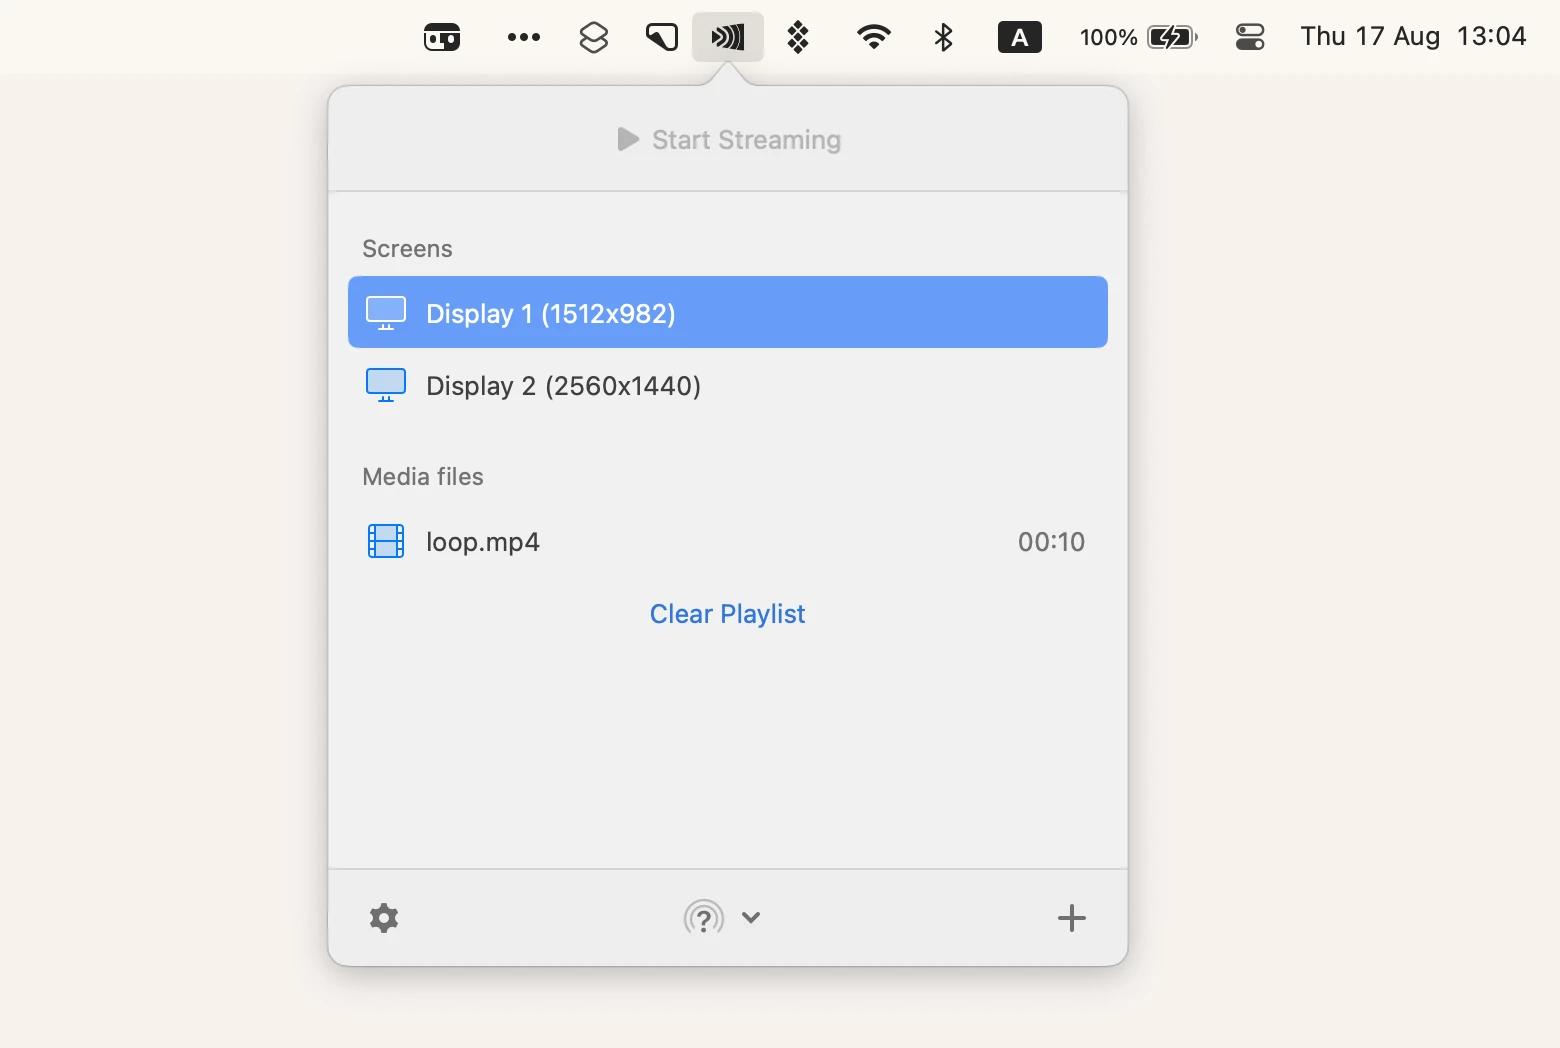
Here’s how to enable DLNA streaming from Mac with JustStream:
- Turn on your smart TV
- Launch JustStream
- Click the plus icon to add as many videos to a playlist as you like
- Select a screen you want to stream to
- Start Streaming
How to share your Mac media library
Most of us accumulate massive media libraries over the years. Think of all the photos, videos, and music you own. Surely you should be able to share all that with other computers on your network — and with a DLNA media server you can!
First, it’s possible to stream to any Mac at home directly, as described above, using either Elmedia Player or JustStream.
Second, if you want to give other people more control and just share your actual library, you can do so via Home Sharing:
- Open System Preferences ➙ Sharing
- Check Media Sharing
- Check Home Sharing
- Enter your password
- Click Turn On Home Sharing
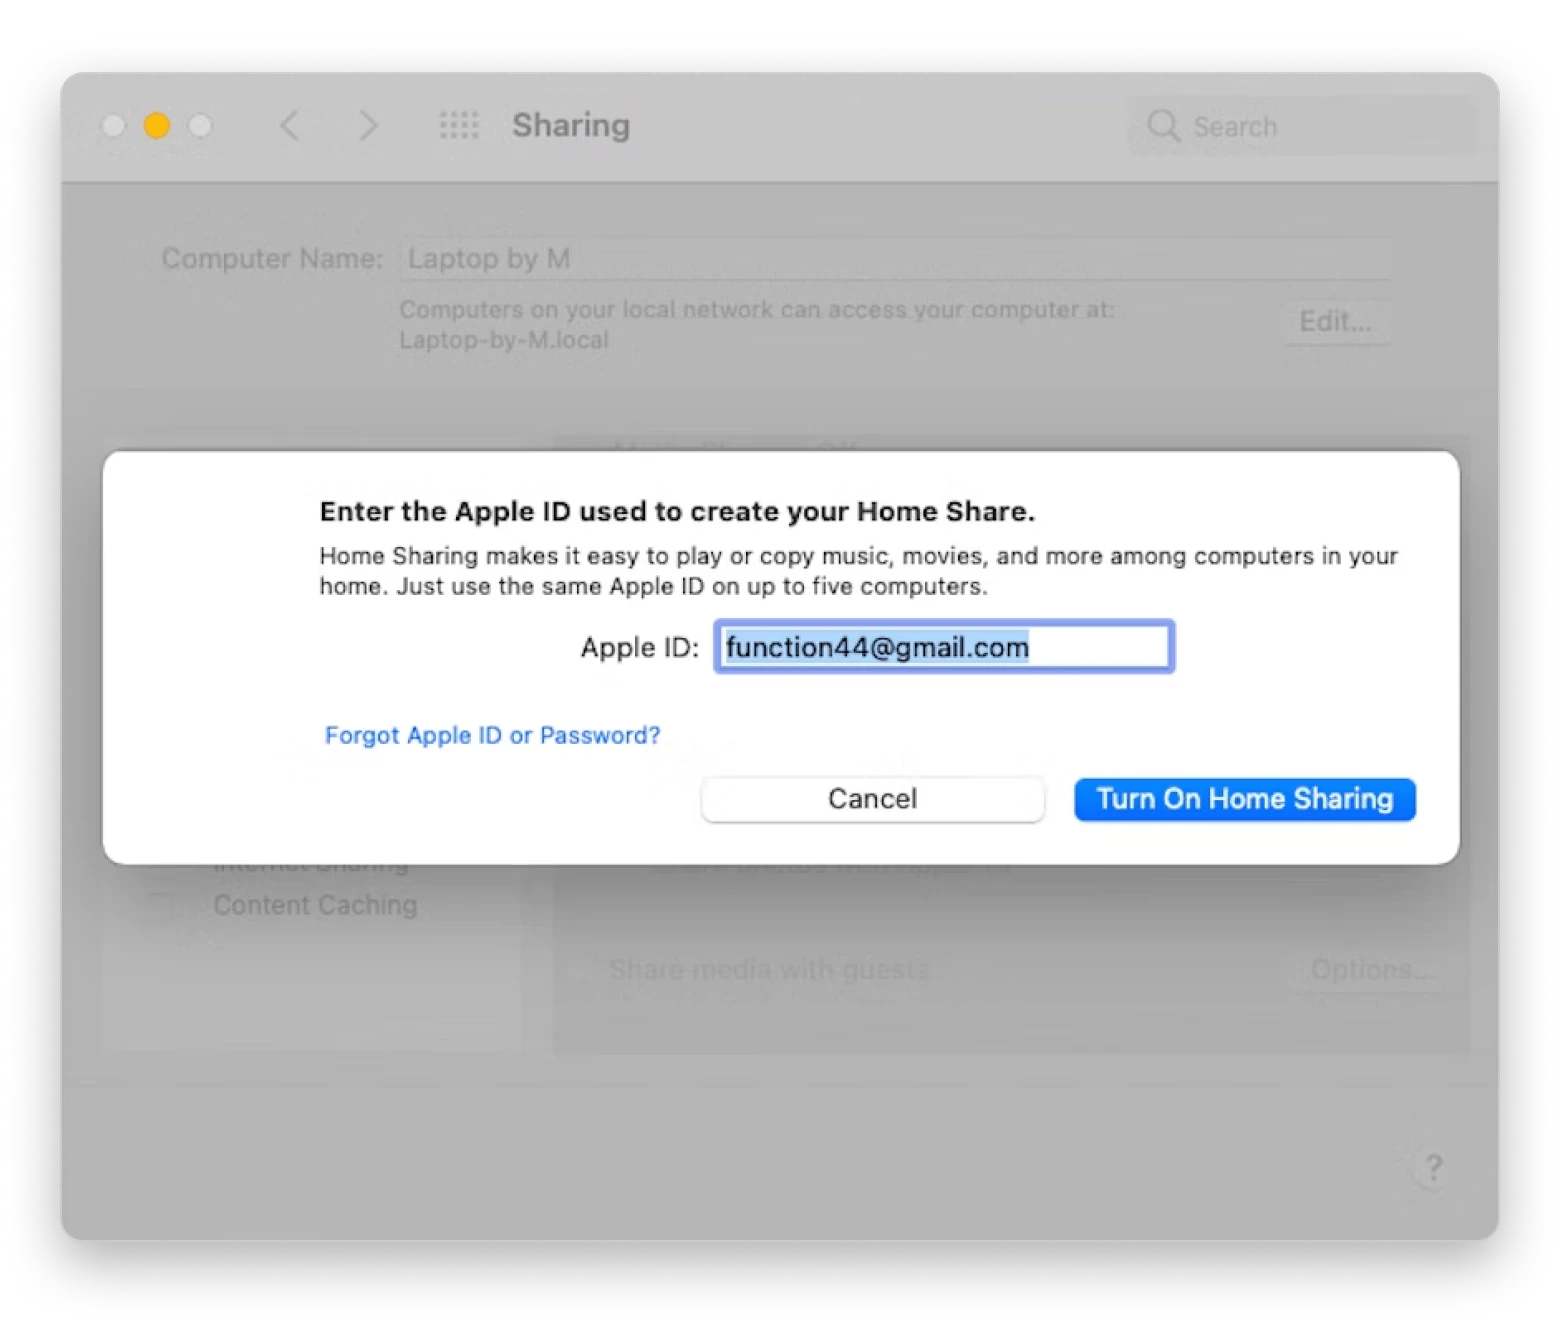
Now your media library is going to be available to all devices on the same network at the specified Library Name, including devices with the same Apple ID.
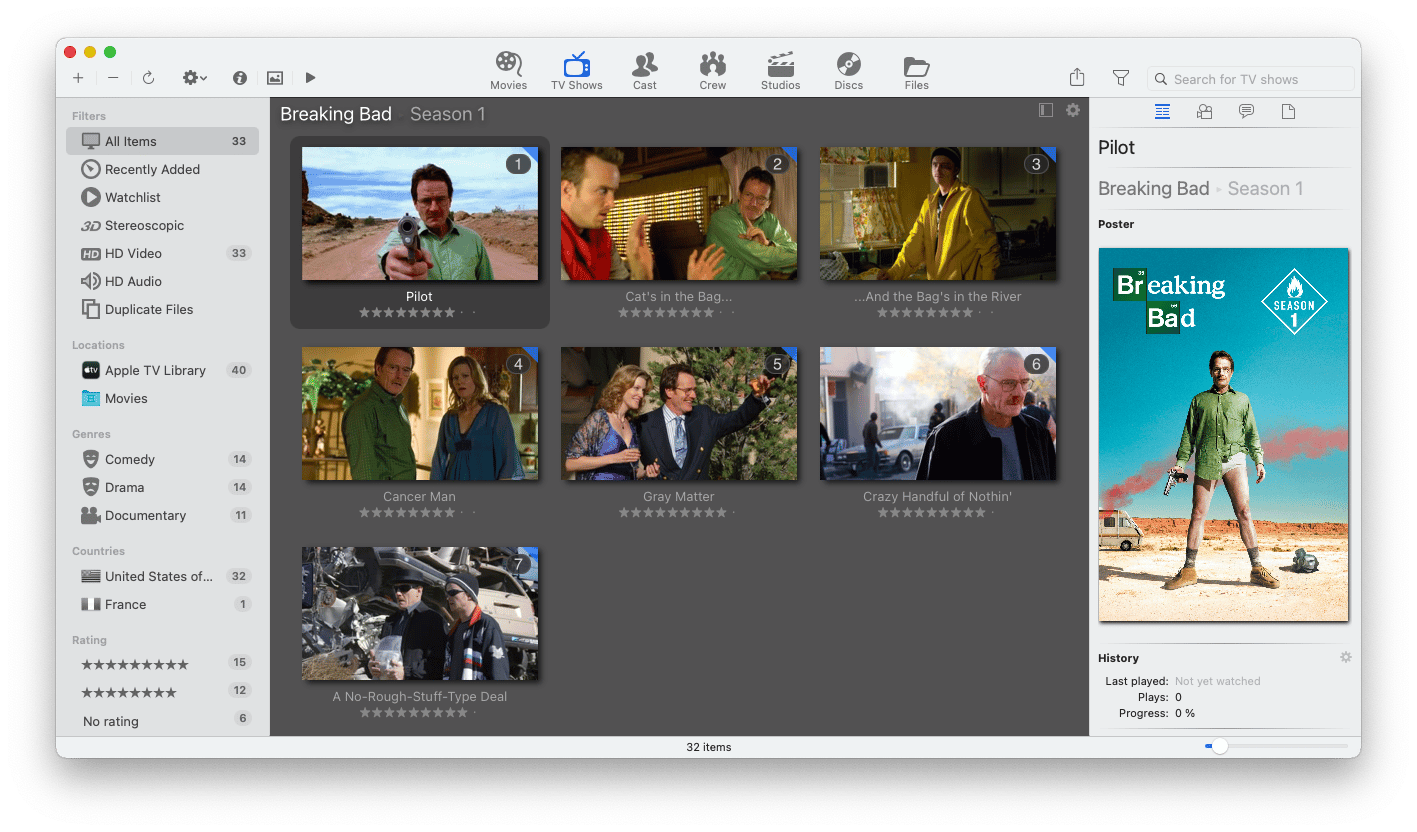
Before you share your movie and TV show collection though, it’s good to make sure it’s in proper shape and indexed correctly. To do that, you need to try Movie Explorer Pro.
Movie Explorer Pro is the perfect media organizer. It scans your whole Mac and indexes every movie you’ve downloaded, bought, or burned from a DVD to neatly arrange them all in a single library. You can add metadata, source cover art, and create watchlists. It’s also possible to share your specific movie collections with others via a PDF, HTML, or CSV.
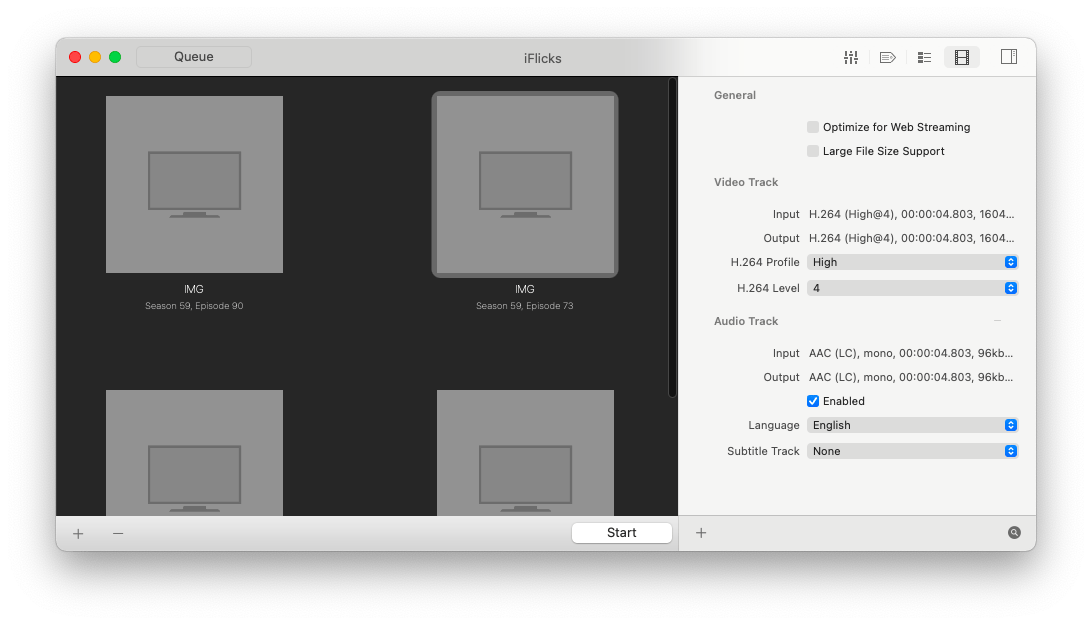
However, if you need to enrich existing videos or add them to Apple’s TV app, there’s no better tool than iFlicks.
iFlicks takes any movie or TV show already on your Mac and transforms it so it becomes 100% compatible with the TV app, whatever the original format, and without any loss in video quality. Additionally, you can edit any kind of metadata to make sure your media server always stays up to date. You can even automate these tasks if you notice you’re editing the same fields over and over again.
Why not just use Apple TV?
At some point, you might wonder whether an Apple TV does all the same things as a DLNA server, and whether you need a DLNA media server at all.
The answer is if you predominantly watch and listen to media coming from services supported by Apple TV, and you do it mostly on your Apple TV — maybe you don’t need a separate DLNA client.
However, if you’d like more flexibility in formats and sources for your media, and be able to play it everywhere — DLNA media server makes it much much easier.
As you can see, setting up DLNA streaming from Mac can be done in just a few minutes. Elmedia Player, for example, has everything you need to get started. Alternatively, you can use JustStream. And when your media library grows, keep it neat and tidy with Movie Explorer Pro and iFlicks.
Best of all, Elmedia Player, JustStream, Movie Explorer Pro, and iFlicks are available to you absolutely free for seven days through the trial of Setapp, a platform with more than 240+ best-in-class apps for Mac, to solve any task at hand. Try every Setapp app today at no cost and start a collection of your favorites!


