How to use hidden, time-saving macOS Multi-Touch gestures on Mac: My top 2026 methods
No matter what you think of the keyboards on Apple's laptops, their huge, luxurious, Multi-Touch, Force Touch trackpads can't be beat. And macOS includes tons of handy trackpad gestures that you might not have even tried yet: left-click, tap to click, select text, sweep every window out of the way to reveal your Desktop files, and so much more.
I’ll show you how to customize trackpad gestures on Mac with native tools as well as third-party apps. Let’s start!
| Quick problem | Fast fix |
|---|---|
| Want to set customized gestures | Use BetterTouchTool to create custom gestures for trackpad, mouse, Touch Bar, and more. |
| Want super simple, ready-made gestures | Try Swish for 28 intuitive actions. |
| Trackpad gestures feel basic | Customize them in System Settings > Trackpad. |
Create custom trackpad gestures to fully control your Mac
While System Settings controls trackpad gestures that work across macOS, you can also create custom trackpad gestures to control features in the apps you use the most. For this, you need BetterTouchTool.
The app lets you customize gestures for trackpad, mouse, keyboard, or other input devices, and even have your windows snap to specific areas of the screen, too.
Here are some of the cool hacks for customizing your trackpad.
Hack 1: How to customize gestures with BetterTouchTool
To customize gestures, you need to:
- Install and open BetterTouchTool on your Mac.
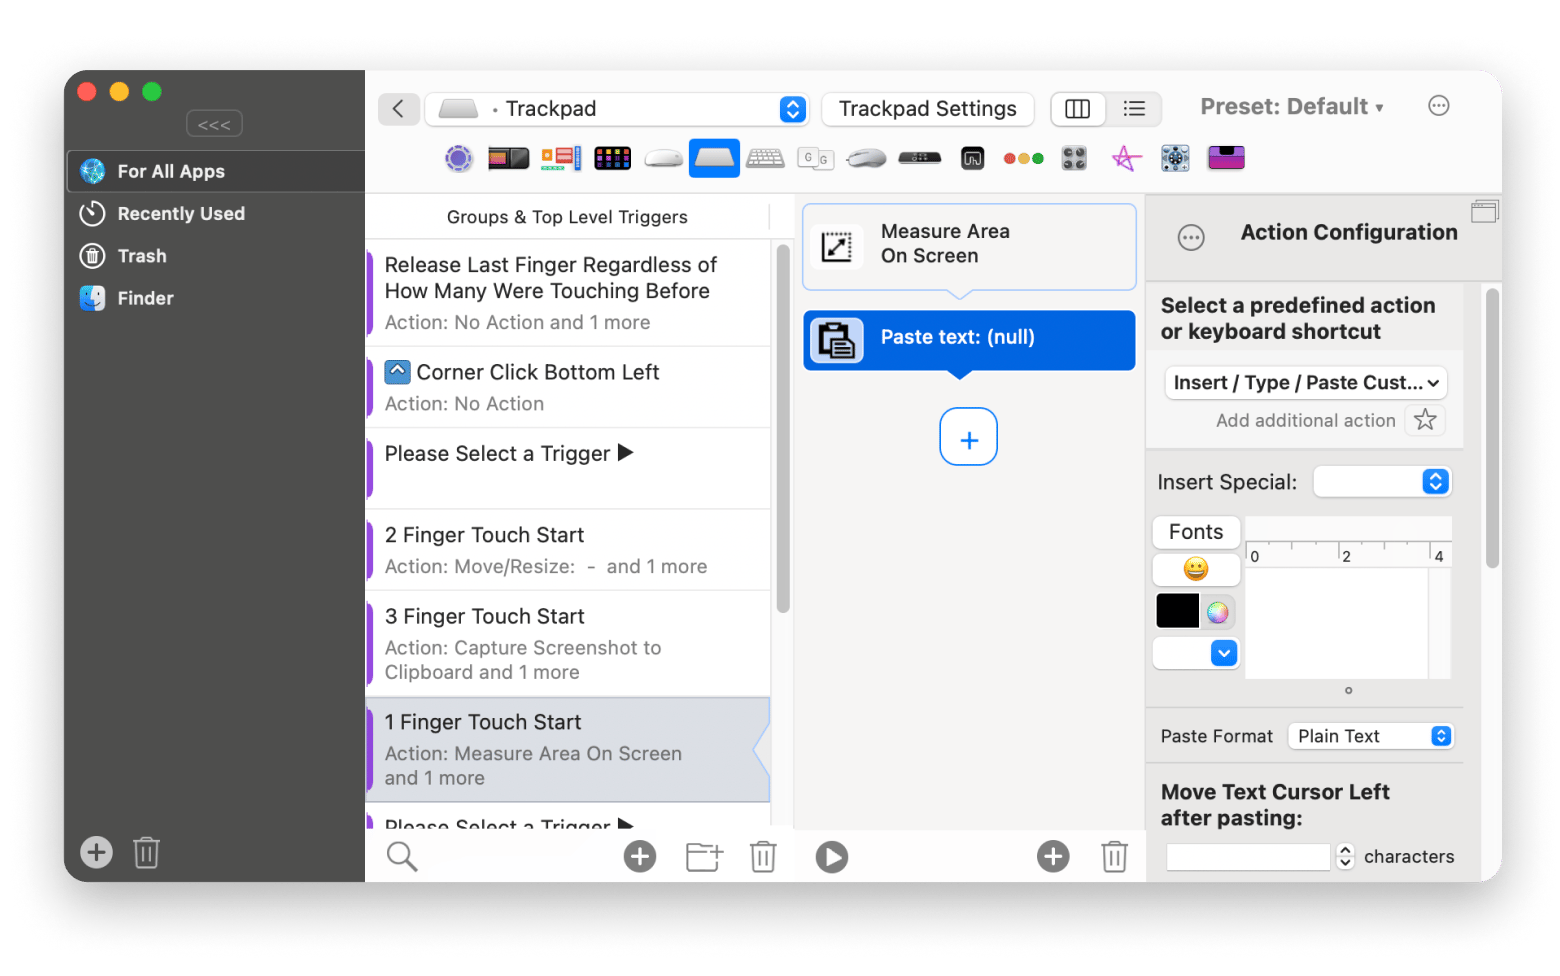
- Click the app’s icon in the menu bar > Configuration. In the drop-down menu at the top (or in the top toolbar with feature icons), you'll see all the input devices you can customize (trackpad, keyboard, Magic Mouse, BTT Remote, and more. For this example, I picked the Trackpad.
- In the left pane, choose which apps will support the new gestures. They can be For All Apps, Recently Used, Finder, or click “+” to add other specific apps.
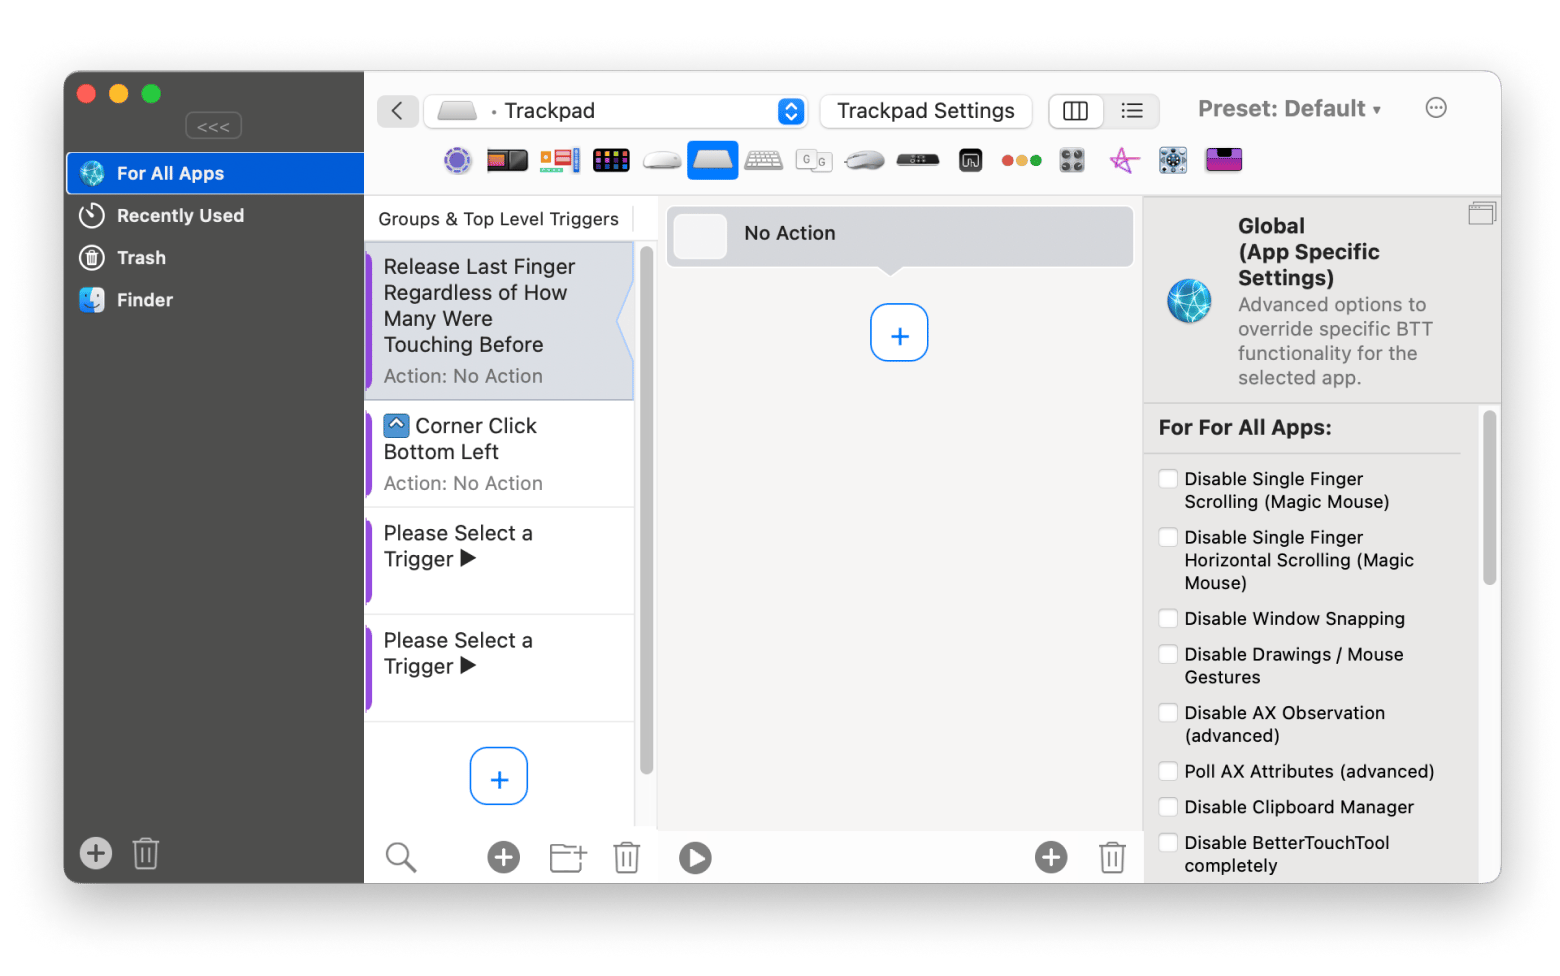
4. Once you've chosen the apps, click “+” in the Groups & Top Level Triggers to add a new gesture.
5. Click Select Trigger on the right > Pick from a huge number of one, two, three, four, and even five-finger gestures.
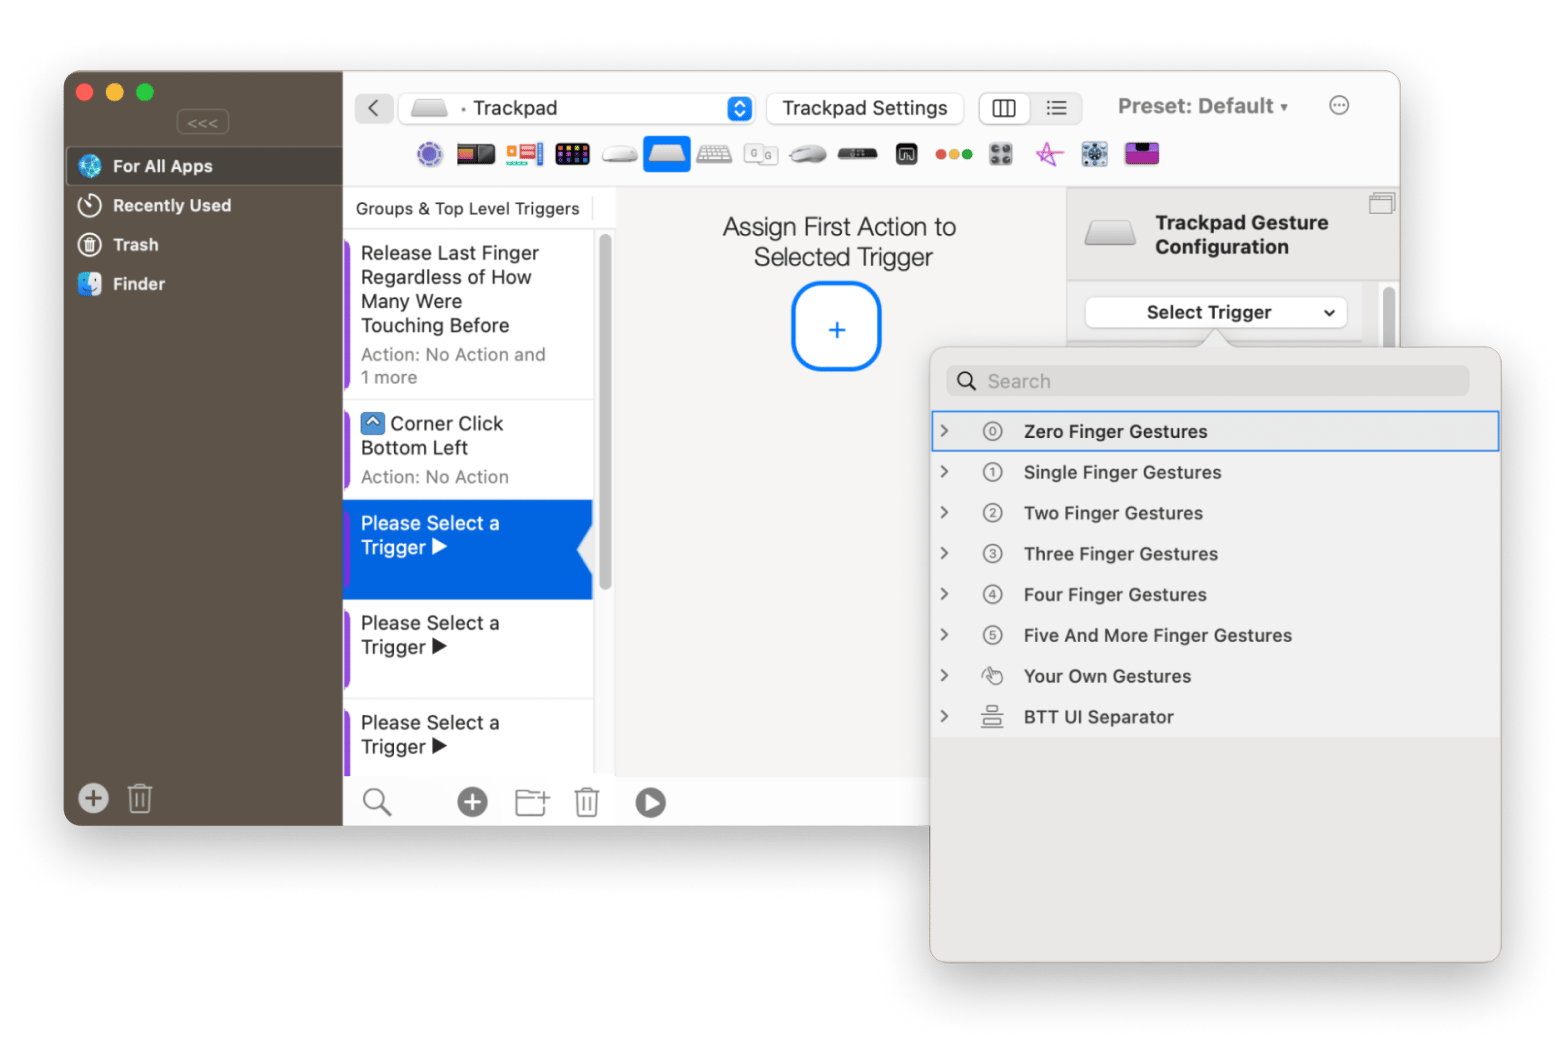
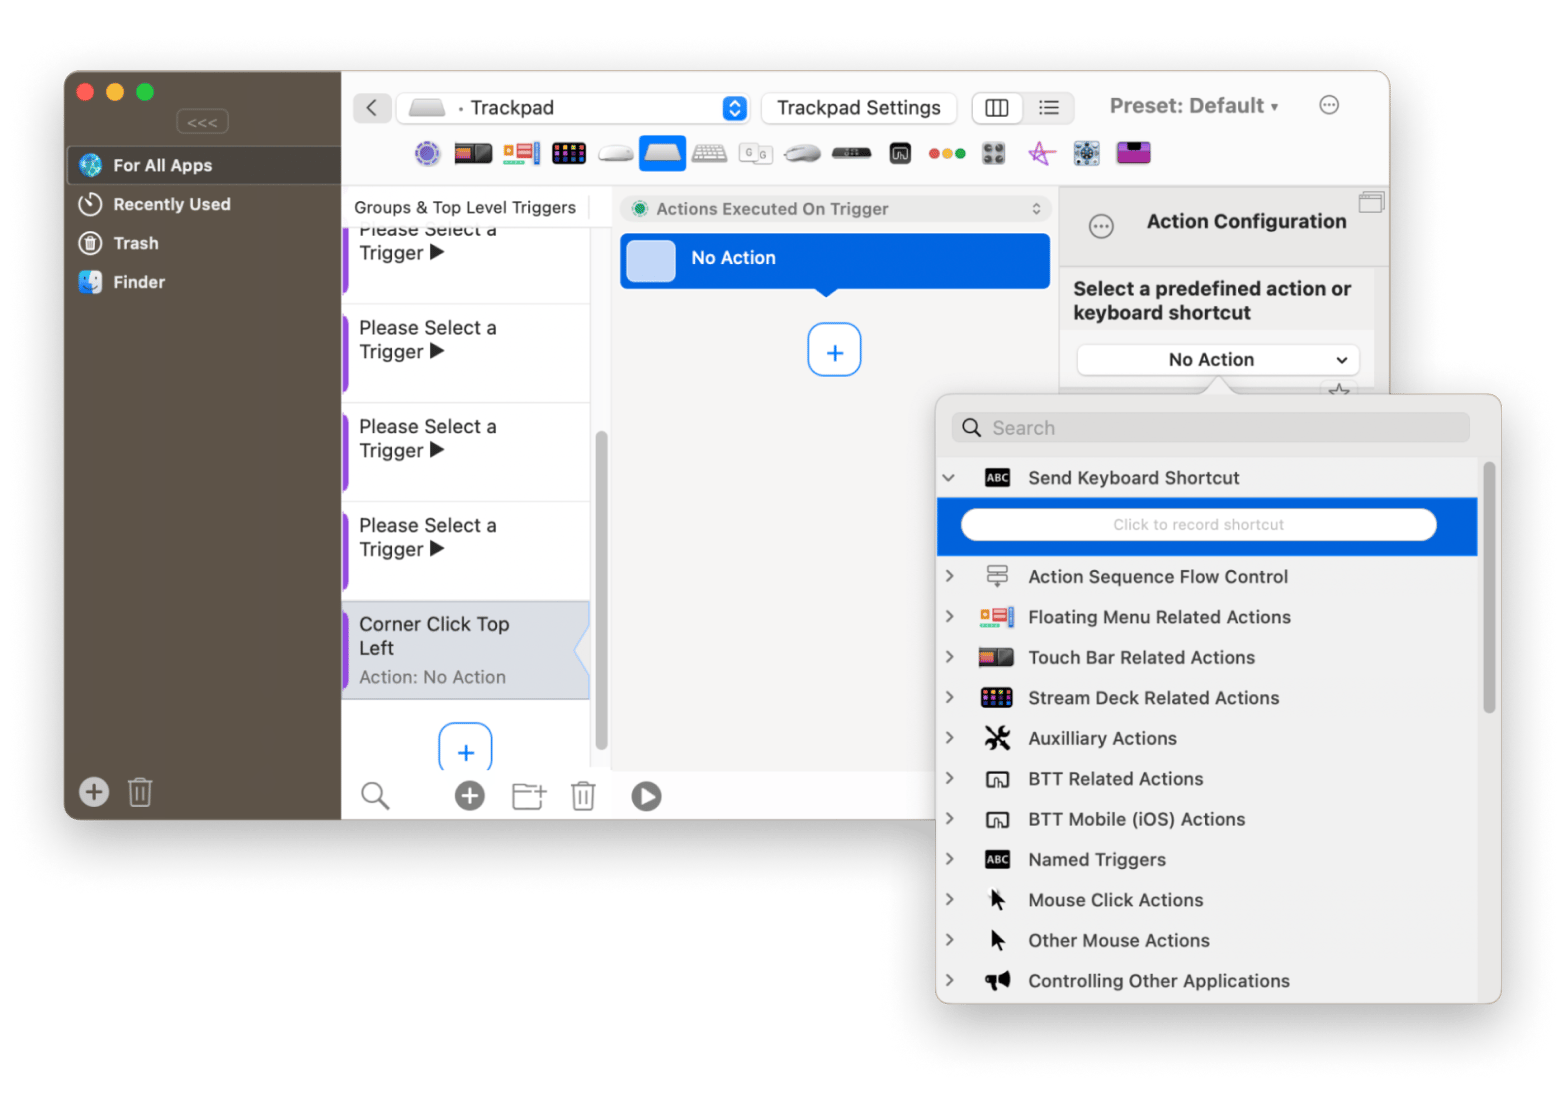
6. Click the Assign First Action to Selected Trigger “plus” icon in the center to assign a custom action.
Hack 2: How to use a custom drawing as a gesture
If you’re wondering how far trackpad gestures can go, just imagine that you can draw anything and turn it into an action.
This is how:
- Select Drawing / Mouse Gestures from the drop-down menu of input devices.
- Click Add First Drawing / Mouse Gesture for For All Apps.
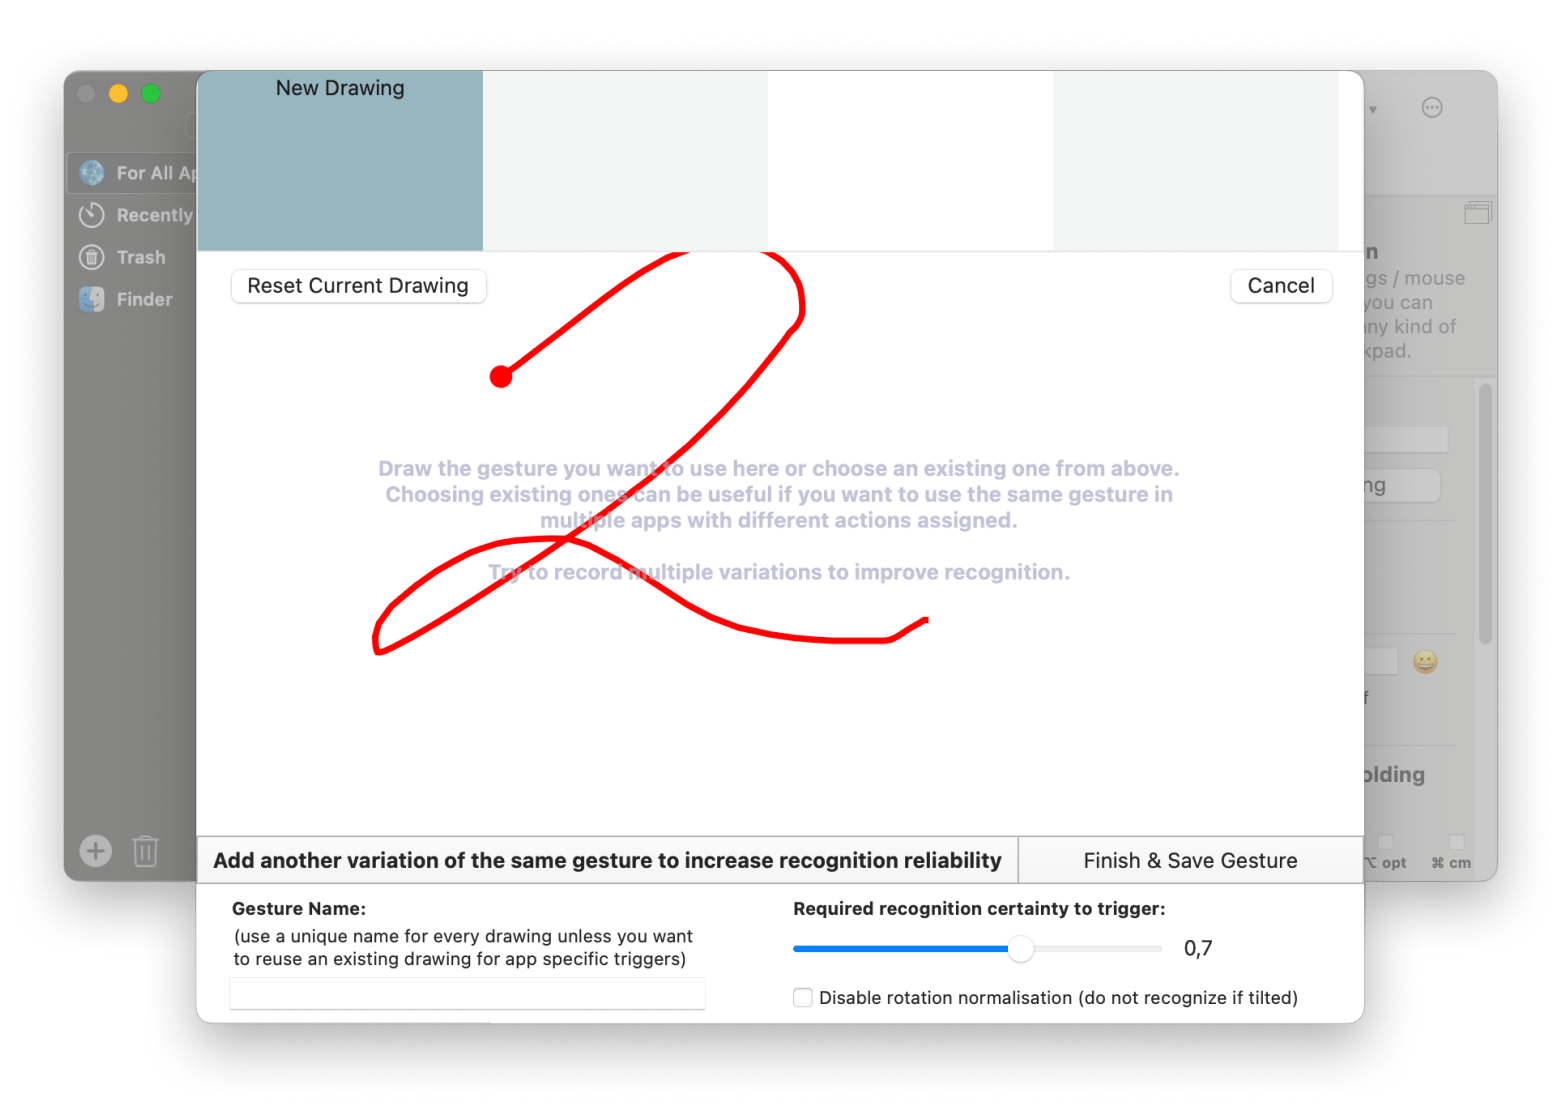
- Draw the gesture you want to use.
- Click Finish & Save Gesture.
- Click the Assign First Action to Selected Trigger “plus” icon in the center to assign a custom action.
Hack 3: How to trigger multiple actions with one gesture
Once you've gotten the hang of setting up gestures to perform one action, you can assign multiple actions to one gesture, which lets you shorten multi-step workflows you repeat every day.
Here's what you'd do:
- In the sidebar on the left, click For All Apps.
- Click “+” in the Groups & Top Level Triggers to add a new gesture.
- Click Select Trigger on the right and choose the one.
- Click the Assign First Action to Selected Trigger “plus” icon in the center to assign a custom action.
- Click the “plus” again to add multiple actions.
Hack 4: Control your Mac using BTT Remote for iOS
If you get the companion BetterTouchTool (BTT) Remote app for your iPhone or iPad, you can simply use your mobile device to execute BetterTouchTool gestures on your Mac, as long as they are both on the same WiFi network. These gestures should be set up in BetterTouchTool Preferences under the BTT Remote tab.
BTT Remote also lets you access your Mac's file browser and menu bar from your iPhone or iPad — plus, it can turn your device's screen into a trackpad. This effectively lets you control your Mac from across the room, which can come in extremely handy.
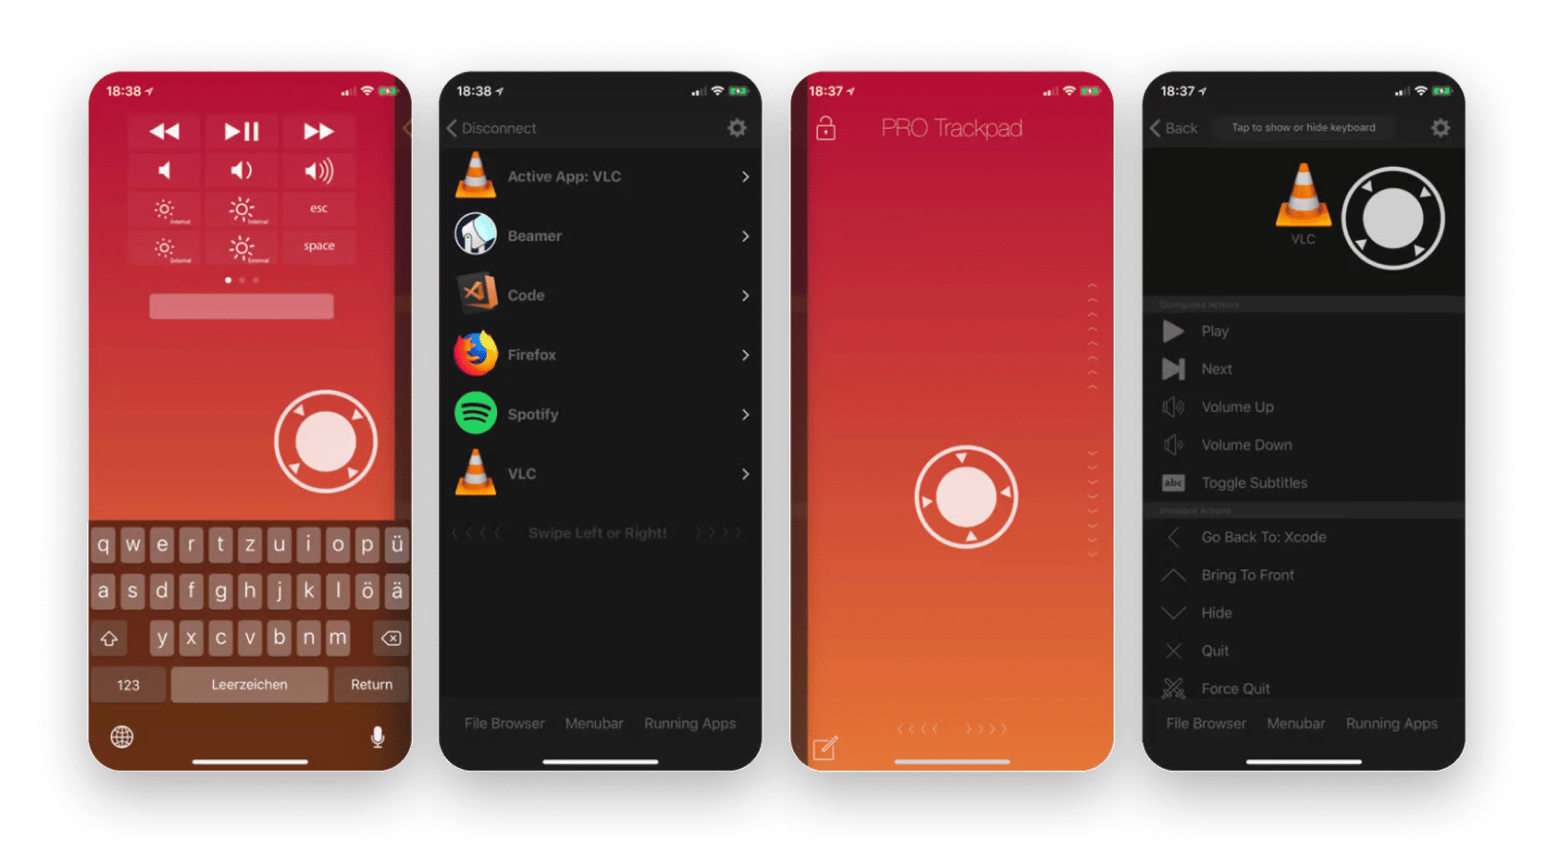
Remote-controlling with your smartphone is especially great if you use your Mac as a substitute for a TV. For example, you could set up a BetterTouchTool gesture for BTT Remote to launch Safari and open Netflix in a new tab. Then just switch to the trackpad and pick a movie.
Hack 5: Arrange app windows in one click
Another useful feature in BetterTouchTool is how it can snap your app windows into their preferred spots on the screen.
To do this:
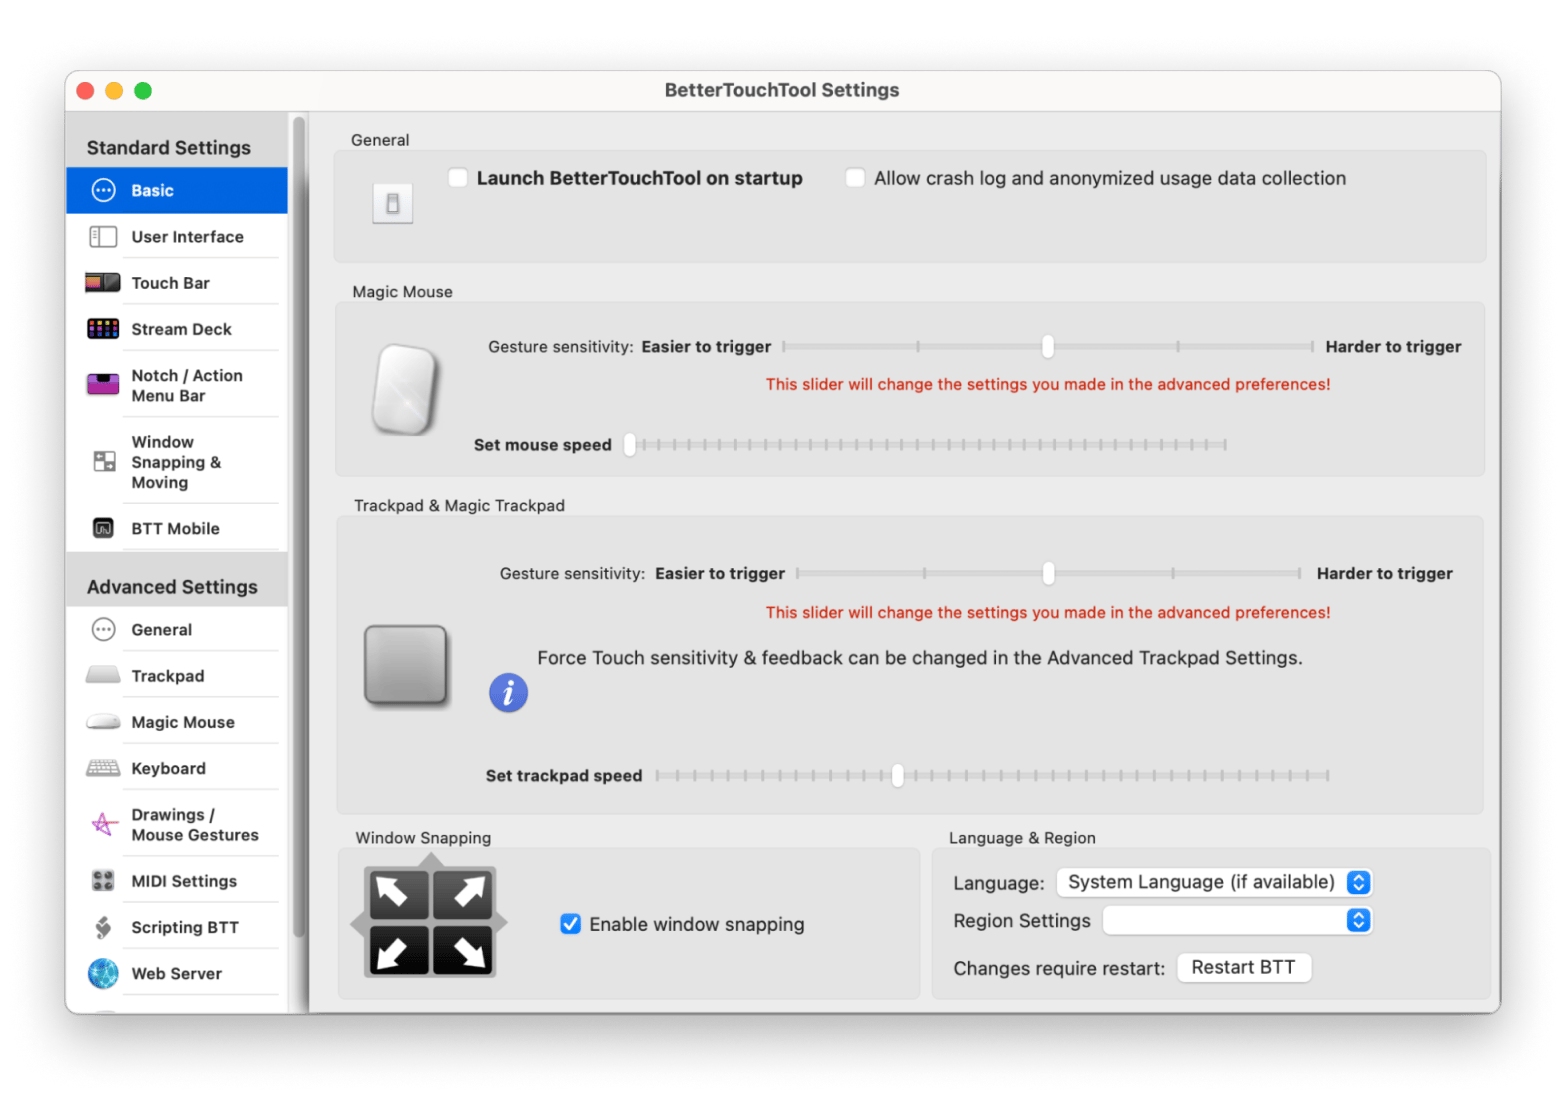
- Go to BetterTouchTool in the menu bar > Settings > Basic.
- Turn on Enable Window Snapping. Now, when you drag a window's title bar to a corner of your screen, a window outline will appear showing which corner or side of the screen the window will snap into.
- To maximize a window, drag it to the top edge of the screen.
Get automated gestures with Sqish
If customizing every gesture feels like too much work, you can get a tool that does it all for you. Swish is a newbie-friendly alternative to BetterTouchTool. It comes with 28 intuitive gestures that will speed up your workflow, organized by the type of task. While you can’t set custom gestures in Swish, you can turn on and off any of the options that are offered at any time.
Here’s how it works:
- Install and open Swish.
- Go through all the offered gestures to memorize them. They are all very intuitive and work like a charm.
- Adidiotnallu, you can set up which actions to use and which not.
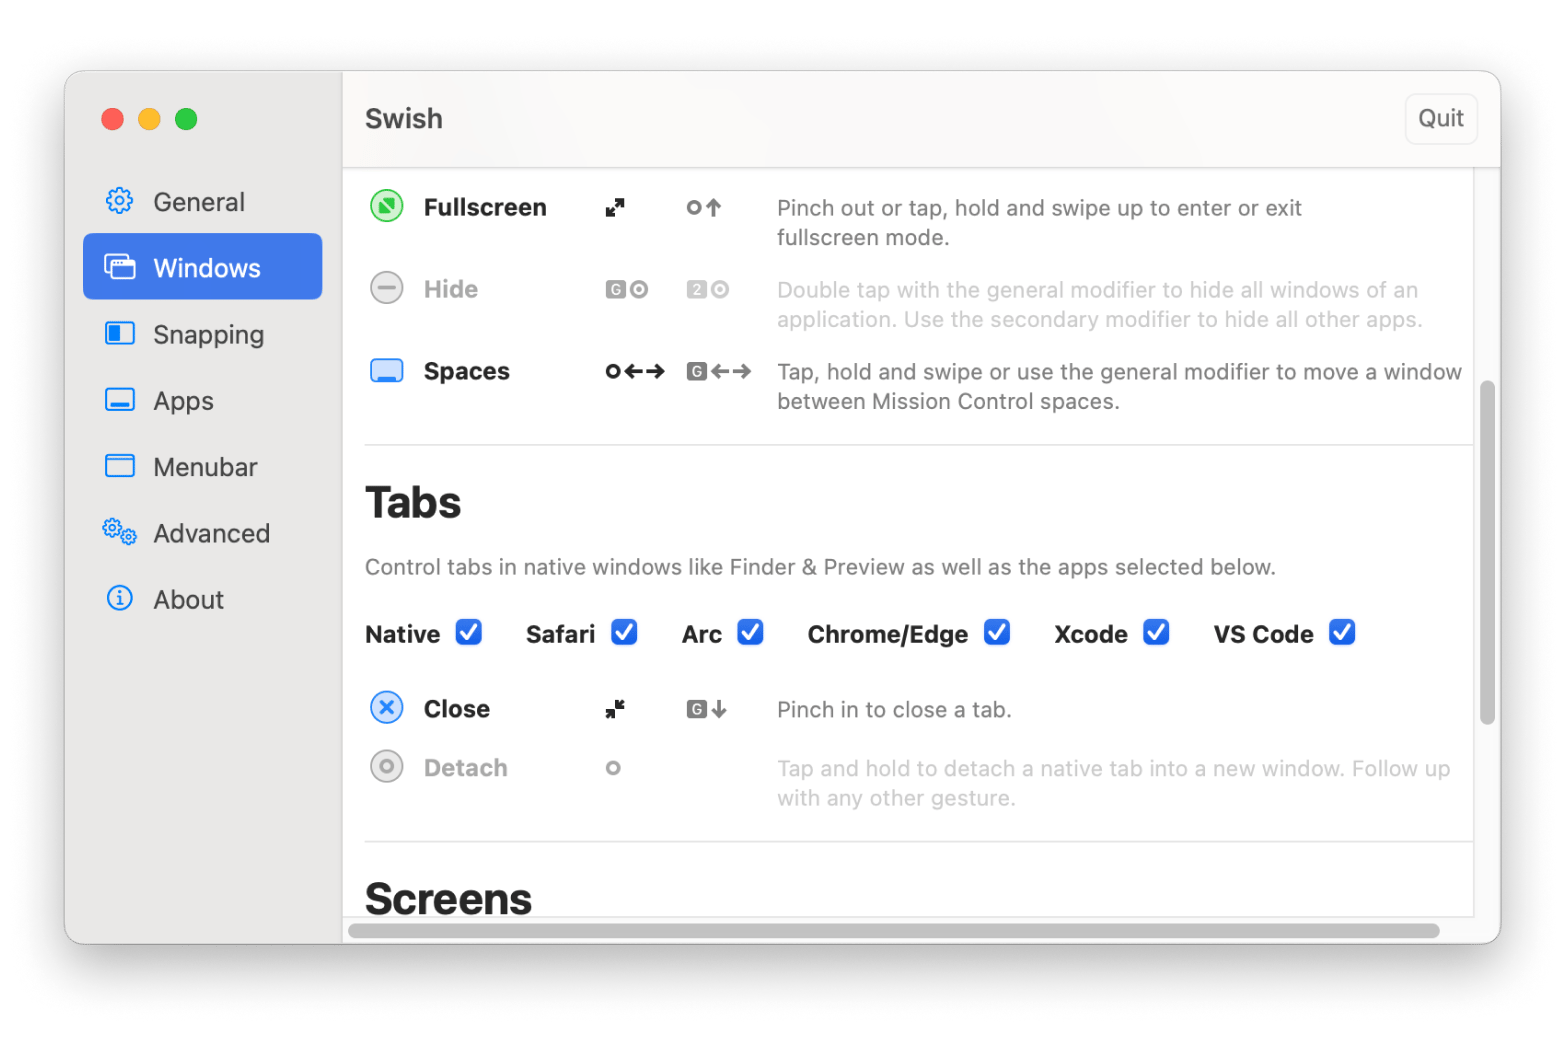
Try this: Let’s say you want to minimize your window. Just place your cursor on the title bar and swipe down. The window will be instantly minimized, and you will likely only have to try this once before you memorize it since the gesture is super intuitive.
Common mouse and trackpad gestures
If you've got a Mac laptop, you should go to System Settings and open the Trackpad pane. It's already packed with gestures you might not be using that can really speed up some tasks on your Mac.
There's no mystery to these options, either. As you mouse over or select each gesture, a video preview on the top will show exactly what will happen. It's definitely worth a few minutes to watch all the previews and decide which gestures could work for you.
The two main options are Point & Clicks and Scroll & Zoom:
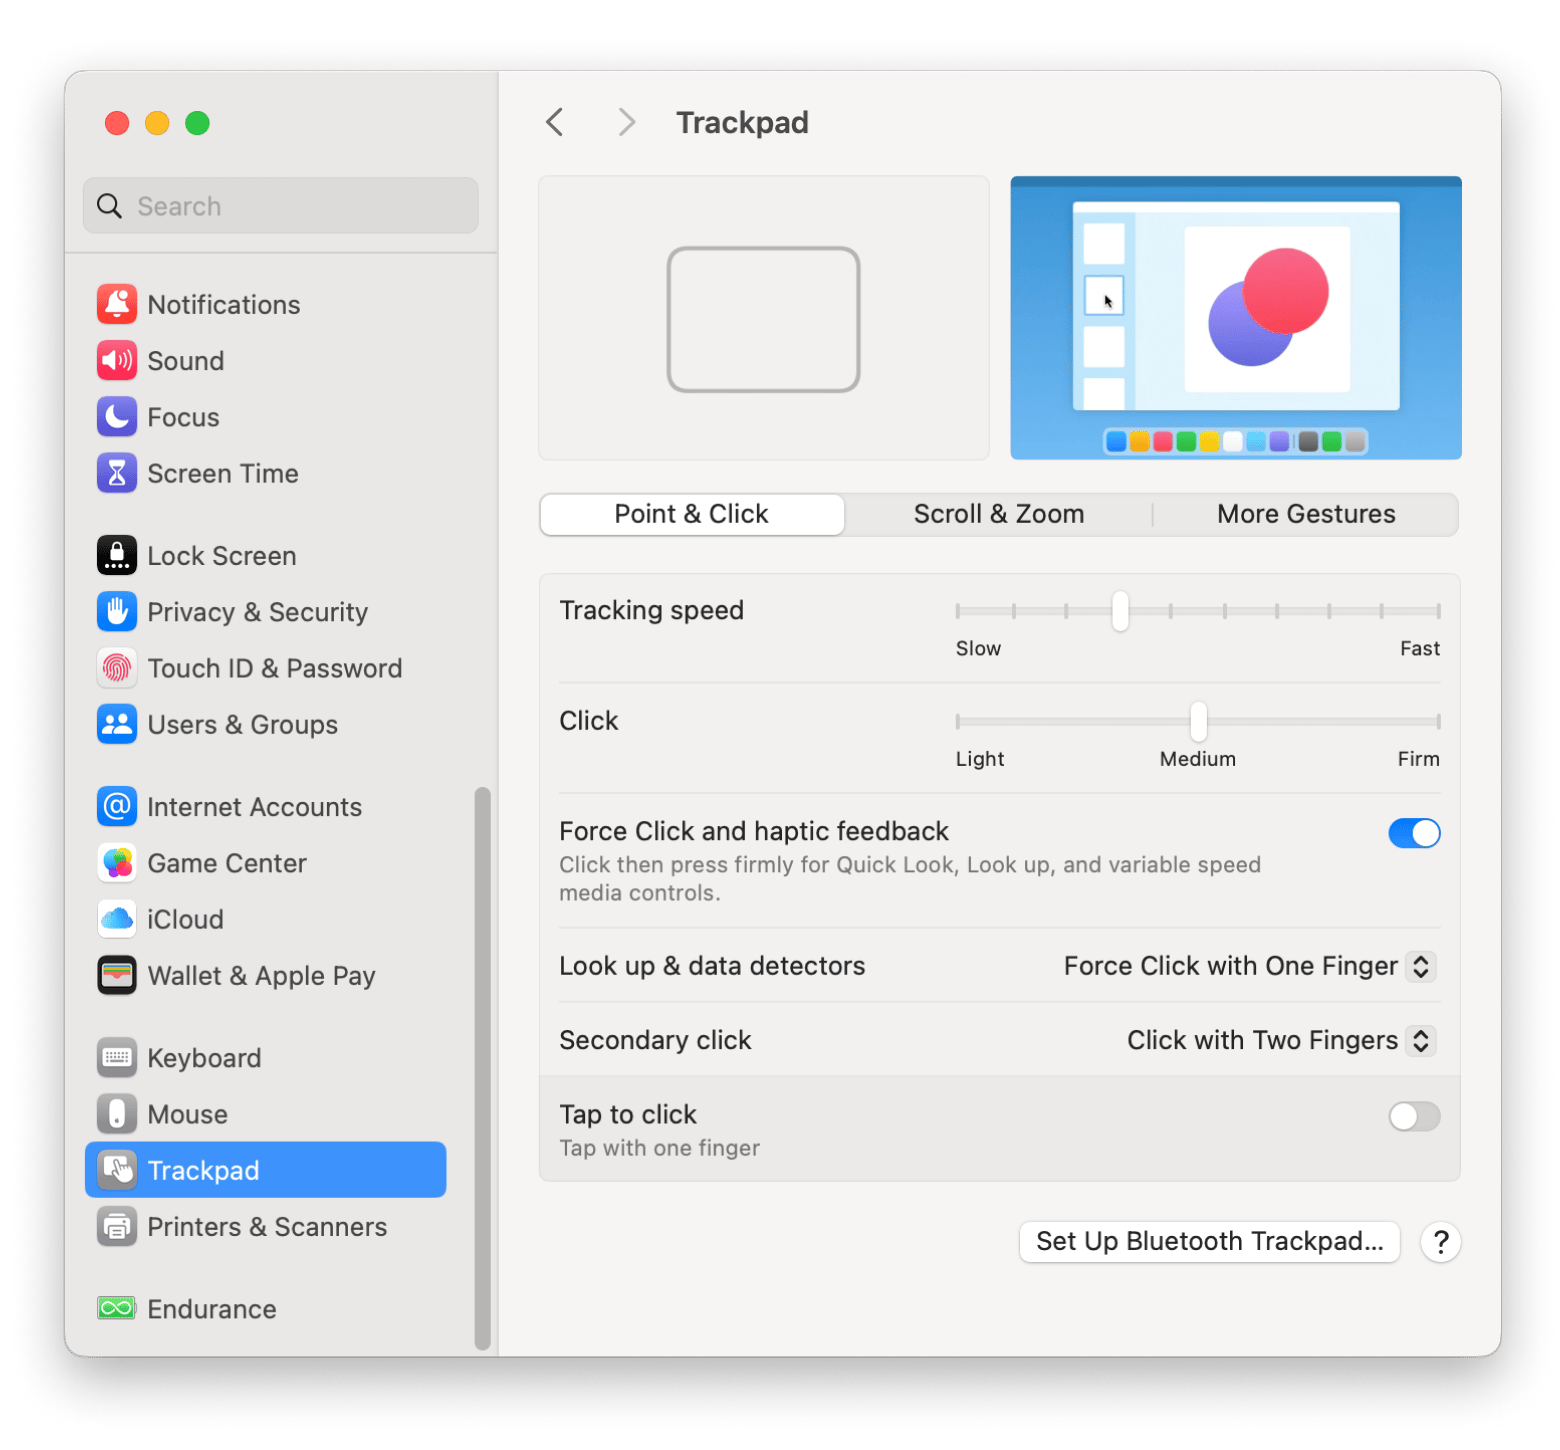
Also, you can click More Gestures to see and set the way you need them.
Useful trackpad gestures on Mac
Here is a list of some useful built-in gestures you might not have known about. You can enable and customize them in System Settings > Trackpad:
- Look up & data detectors: Select a word and then Force-click (or click with three fingers) to look it up in your Mac's dictionary and thesaurus. Find it in the Point & Click tab.
- Tap to click: Turn it on to click with just a tap of your finger, instead of needing to press down hard enough to hear the sound and feel the haptic feedback.
- Scroll direction > Natural scrolling: Turn it off in the Scroll & Zoom tab if you want scrolling on your trackpad to work the same as it does with a mouse — swipe up to scroll up, swipe down to scroll down.
- Rotate: When you edit a photo that needs to be rotated, this gesture in the Scroll & Zoom tab lets you just turn the photo by rotating two fingers on the trackpad. It snaps into alignment at 90, 180, and 270 degrees, but you can stop anywhere you like.
- Notification Center: In More Gestures, you can enable opening the Notification Center with a quick swipe of two fingers from the right edge of your trackpad, like you're pulling the Notification Center in from the side of the screen.
- Mission Control and App Exposé: If you tend to keep too many apps or windows open, you need these options turned on in More Gestures. Mission Control lets you swipe up with four fingers to see every window you have open across all apps. Swipe down with four fingers, and App Exposé displays the windows you have open in the current app.
- Zoom in or out: When using a browser, Preview, and other apps, you can just double-tap with two fingers on your trackpad to zoom in. It’s the quickest way to do so instead of dealing with keyboard shortcuts.
- Pinch: This one comes in handy when using apps like Maps, Photos, and PDFs, as they often require zooming in to a particular section. Just pinch two fingers together to zoom in, then spread them to zoom out – pretty much what you do on your iPhone or iPad.
- Swipe within a document: In apps like Excel and Numbers (those with wide layouts), you can scroll horizontally by swiping two fingers left or right on the trackpad. You might be familiar with this one as it’s used to switch between Launchpad windows.
- See inside the apps you are using: Swipe down with four fingers to activate App Exposé. It shows all the windows open in your current app, making it easy to switch between them. It’s like Mission Control, but for the app you are currently using. I find it quite handy when working with Word documents and browsers.
If your trackpad is acting up, take a look at the troubleshooting guide for getting your MacBook trackpad back on track.
More trackpad options in Accessibility
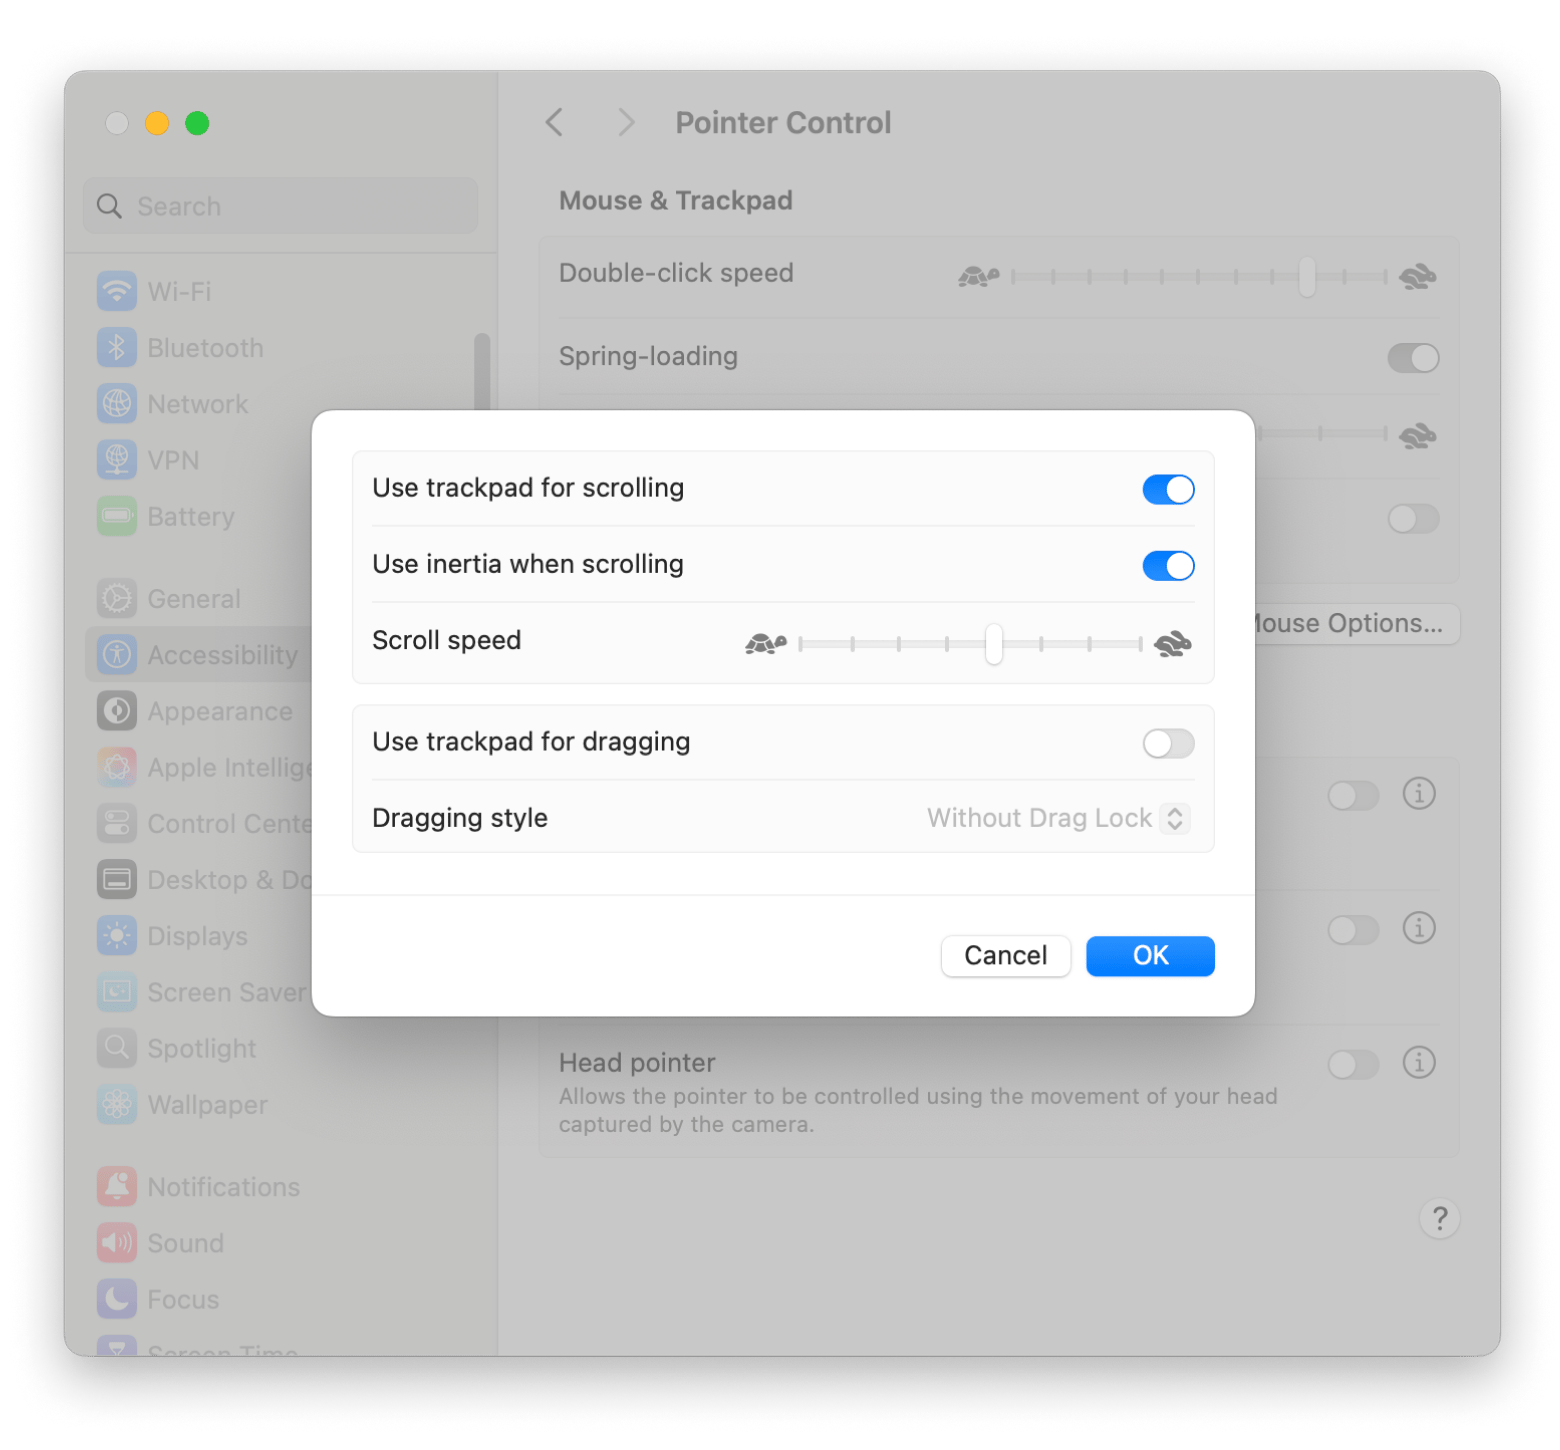
Some of the best trackpad gestures are surprisingly_job with a thumb while dragging an index finger across the text, which could cause hand cramps after a while.
Go to System Settings > Accessibility > Pointer Control. Here, you can adjust the double-click speed and specify a delay before folders spring-load when you hold a file over them.
Customize trackpad gestures on a Mac easily
Mac offers lots of gesture control features from which you can choose. But to take full control of your trackpad, third-party tools are a must. Once you get going with BetterTouchTool and Swish, you'll wonder how you ever lived without gesture control before.
Best of all, you can try both BetterTouchTool and Swish for free during a 7-day trial with Setapp, a subscription platform with more than 250 Mac and iOS apps. Time to challenge yourself to come up with a few time-saving shortcuts today!
FAQ
What are Multi-Touch gestures?
Multi-Touch gestures are the special movements you can do with your fingers on a MacBook’s trackpad to carry out specific actions faster (and more intuitively). For example, you can zoom in on a photo by simply pinching two fingers.
How do you use Multi-Touch gestures on a Mac?
To you use Multi-Touch gestures on a Mac, go to System Settings > Trackpad and turn on the gestures you’d like to use. From there, you only need to make the specific gestures on your Touchpad.
How do you customize gestures on a Mac?
To customize gestures on a Mac, use an app like BetterTouchTool. It will let you customize the gestures and even create new ones.
How do I turn on double touch on my Mac?
To turn on double touch on your Mac, go to System Settings > Trackpad > Scroll & Zoom. Try one of the two-finger gestures provided, or create your own with BetterTouchTool.


