Check Trackpad settings. Go to Apple menu > System Settings > Trackpad > verify Point & Click, Scroll & Zoom, and gestures are configured correctly. Toggle "Tap to Click" off and on.
Reset trackpad preference files. Open Finder > Go > Library > Preferences > delete com.apple.preference.trackpad.plist and com.apple.AppleMultitouchTrackpad.plist > restart.
Trackpad not working on your Mac? It's frustrating, particularly when you can't bring a spare mouse along.
Yet, fixing a failed Mac trackpad can be simple, depending on its cause. Sometimes, resetting your Mac can make the trackpad operational again. But often, you'll need to try other methods before you can start moving the mouse pointer again.
MacBook Pro trackpad not working: Quick troubleshooting checklist
Quick answer: Start with a simple restart, then check Trackpad settings in System Settings. If that doesn't work, try resetting your trackpad preferences. This table summarizes key solutions, but you'll find even more tips below.
How to fix trackpad?
What to do
Check system settings
Apple menu > System Settings > Trackpad. Verify all gestures are configured correctly.
Disable Force Click
System Settings > Trackpad > Turn off Force Click and haptic feedback
Reset trackpad
For Mac with M2 chip, go to the desktop menu > Library > Preferences > Search com.apple.preference.track.plist and com.apple.AppleMultitouchTrackpad.plist > Delete > Restart your MacBook.
For Macs with Apple chips, go to System Settings. (Trackpad > Select Point & Click tab > uncheck Tap to Click > Select Zoom & Scrolling Tab > check Natural Scrolling.
Reset NVRAM or PRAM (MacBook with an Intel chip)
Restart and immediately press Option + Command + P + R for 20 seconds.
Reset the SMC
For Intel-based Mac, shut down Mac > Press and hold Control + Option + Shift + Power buttons 10 seconds, and then turn it on. For T2 security chip Mac, shut down Mac > Press and hold right Shift + left Control + Option for 7 seconds. Release all keys and restart.
Run Apple Diagnostics (on Intel-based MacBook)
For Intel-based Mac, shut down Mac > Press and hold Option + D. Release after prompted to select a language. For Apple chip powered Mac, shut down Mac > Press and hold the power button > Release > Press and hold Command + D.
Update your MacBook
Go to Apple menu bar > System Settings > Software Update > Restart. Or install CleanMyMac and use its Updater tool.
Run maintenance scripts
Install and open CleanMyMac > Scan > View All Tasks > Maintenance Tasks > Run.
Tip: If the quick settings checks fail, use one toolkit to keep Mac issues from stacking up. Get CleanMyMac, iStat Menus, and Get Backup Pro in 250+ apps, Risk-free 7-day trial. Try Setapp free.
Why isn't my trackpad working?
Apple's built-in trackpad has advanced touch-sensing and haptic technologies, but it can still fail for several reasons.
Dirt and grime building up on the trackpad can cause it to behave erratically.
Buggy macOS version preventing the trackpad from functioning correctly.
A malware infection that stops the trackpad from sensing taps and clicks.
Compatibility issues with other apps and devices may interfere with the trackpad's operation.
The trackpad's electronic parts degrade, fail, or suffer from damage.
Also, watch for battery swelling – on many MacBook models (especially 2020–2023 M-series units that sat unused with low charge for long stretches), a swollen battery is still the most common hardware reason for a "dead" or stuck trackpad click. Gently press around the edges of your MacBook's bottom case or check if it rocks on a flat surface. The battery sits right under the trackpad, and swelling pushes upward, making clicks unresponsive or gestures erratic.
If you spot any bulging, stop using the Mac immediately, unplug it, and get it to an Apple Store or authorized service provider ASAP, or contact Apple Support for guidance Swollen batteries are a safety risk and usually covered under service programs if within limits.
How to fix the trackpad on your MacBook
Know that you're not alone in facing trackpad issues. Many Mac users have faced the same problem, and they've tried various ways to fix it. From updating macOS to resetting the memory chip that the Mac trackpad uses, one of the methods below might prove helpful for you, as they did for others.
1. Check System Settings
If you've misconfigured your Mac trackpad, it isn't surprising that it stopped working. Do a quick check of your Mac's System Settings. This way, you can rule out your carelessness.
Click the Apple Menu > System Settings > Trackpad to access the trackpad's settings. Check these specific settings:
Point & Click tab: Verify tracking speed and click pressure
Scroll & Zoom tab: Ensure Natural scrolling matches your preference. If gestures feel unusually heavy, sticky, or laggy (a quirk some users noticed in early Tahoe builds), head to System Settings > Accessibility > Pointer Control > Trackpad Options and slide the Scrolling speed control. Bumping it up a notch often smooths out two-finger scrolling without needing deeper resets.
More Gestures tab: Confirm all gestures are properly configured
Tap to Click: Try toggling this on and off
Click sensitivity: Adjust toward "Light" if clicks aren't registering
Sometimes, you can move the pointer with the trackpad but have difficulties clicking. To solve this problem, try adjusting the click sensitivity towards Light. This way, you don't need to apply much force to register a tap as a click.
2. Disable Force Click
While you're in the Trackpad settings, you'll notice that Force Click is turned on by default. Force Click lets you press and apply more pressure on the trackpad to trigger a click. It's Apple's ingenious way to let you preview information or access information in certain apps.
If you're experiencing the sensitivity issues reported with macOS 15.6.1, try reducing tracking speed to compensate for the increased responsiveness.
This resolves clicking issues for many users, especially on newer M3 MacBooks.
3. Reset trackpad preferences
Still facing problems after readjusting the trackpad's configuration? Perform a complete MacBook Pro trackpad reset. Sounds intimidating, but worry not. Resetting a Mac's trackpad simply means restoring the device's configuration to the factory defaults.
Depending on your Mac version, resetting the trackpad works differently.
Here's how to reset the trackpad on M-series Macs (M1, M2, M3):
Open Finder > Go menu > Library.
Navigate to the Preferences folder.
Find these files:
com.apple.preference.trackpad.plist
com.apple.AppleMultitouchTrackpad.plist
Delete both files.
Restart your Mac.
What you've done is removing the trackpad's property files that might have been corrupted. Upon restarting, your Mac will replace them with new files.
If your Mac runs on an Apple chip or T2, follow these steps to restore the trackpad's configuration to default.
System Settings > Trackpad.
Point & Click tab > Uncheck "Tap to Click".
Scroll & Zoom tab > Check "Natural scrolling".
Restart your Mac.
Your trackpad is now configured to its original settings and, hopefully, is functional again.
4. Reset NVRAM or PRAM (Intel-based MacBooks)
Despite restoring the trackpad's settings, it might still fail to function correctly. If that's the case, you can try resetting your Mac's NVRAM and PRAM. Both are temporary memory storage that the trackpad uses to operate. If the underlying data is corrupted, the trackpad cannot function.
Here's how to reset NVRAM and PRAM on a MacBook with an Intel chip.
Power off your MacBook.
Turn the MacBook on and immediately press Option + Command + P + R for 20 seconds.
Release the keys after hearing a startup sound or the Apple logo appears.
That's the sign that your Mac has reset the NVRAM and PRAM.
However, this method is limited to older MacBooks. The newer Apple chip-powered Mac automatically refreshes both memory chips when restarting.
5. Reset the SMC
Another way to resolve the MacBook trackpad not working issue is to reset your Mac's System Management Controller. Older Macs use the SMC for power management and battery charging. Somehow, the SMC can affect the trackpad's function.
Resetting the SMC on an Intel-powered Mac.
Turn off your MacBook.
Press and hold the Control + Option + Shift buttons on the left side of the keyboard.
Then, press the power button.
Hold all buttons for 10 seconds.
Release all buttons. Then, power up your Mac.
Resetting the SMC on a Mac with a T2 security chip.
Power down your Mac.
Press and hold the right Shift and the left Control + Option keys.
Hold all keys for 7 seconds.
Your Mac might power up but don't release those keys until it automatically powers down again.
Then, release all keys and restart your Mac.
You can't reset the SMC if you're using newer Macs powered by M1 or M2 chip because they don't have one.
6. Run Apple Diagnostics
Your trackpad can fail because of underlying hardware issues. If that's the case, you need to run Apple Diagnostics to discover the root causes.
Here's how to run Apple Diagnostics on an Intel-based MacBook.
Turn off your Mac and remove all connected devices.
Power on the machine and hold the D key (or Option + D if the previous one doesn't work).
Release the key after seeing the progress bar or when prompted to select a language.
On an Apple chip-powered Mac, follow these steps.
Shut down your Mac computer and disconnect all devices.
Press and hold the power button.
Release the power button when you see the startup options.
Press and hold Command + D to start the diagnostic.
If your trackpad has failed because of hardware issues, the diagnostic results will reflect that. Jot down the reference code so you can communicate the issue when you send your Mac for repair.
Apple Diagnostic works well in identifying hardware failure, but what if your trackpad is infected by malware?
Remove them with CleanMyMac's built-in protection tool, which helps keep your machine safe by finding and removing harmful files. CleanMyMac can also boost Mac performance by removing unnecessary files.
Here's how.
Install and launch CleanMyMac.
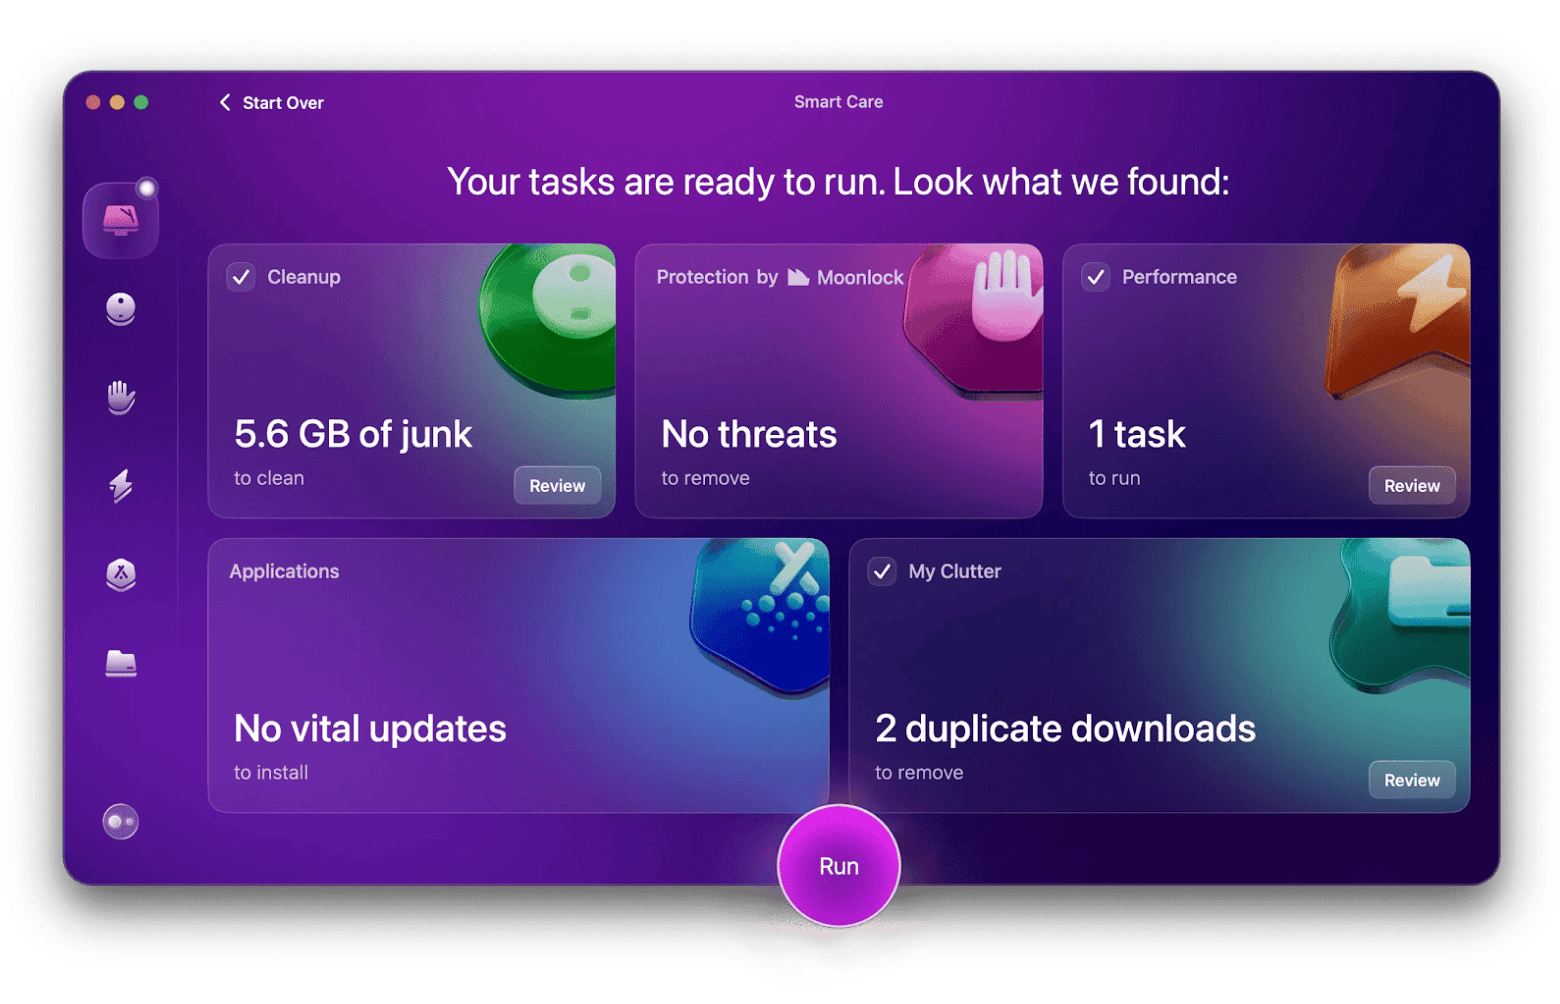
Select Smart Care from the left panel > Scan.
Review the junk found, select what you'd like to delete, and click Run.
Wait for the scan to complete. Then, review the results and delete junk files.
Rule out malware and junk before you book a repair appointment. CleanMyMac helps remove harmful files and clear clutter, Free for 7 days. Start CleanMyMac now.
7. Update your MacBook
Forgetting to update your Mac's operating system can invite all sorts of troubles, including Mac trackpad not clicking. To be sure, check if you're using the latest macOS. Go to Menu > System Settings > Software Update.
If you see the Update Now button, it means your Mac's OS is not up to date. Click the button and install the latest update. Then, restart your Mac and test if your trackpad is working.
8. Run maintenance scripts
A failing trackpad is also a sign that your Mac is littered with junk files and unnecessary apps. Freeing your Mac from files that affect Mac performance may also get your trackpad to work again.
To do that, run the maintenance tasks with CleanMyMac to restore your Mac to tip-top condition.
Here's how to do it.
Install and open CleanMyMac.
Select Performance on the left panel > Scan.
If you see a window saying "X Maintenance Tasks Recommended," click Run. Or, click View All Tasks > Maintenance Tasks. There, select the tasks and click Run.
Wait for CleanMyMac to complete the maintenance task. Then, try your trackpad again.
9. Check for software updates
If you suspect some apps are causing odd behaviors on your trackpad, try updating them. Click the Apple icon > App Store. You'll find a list of apps that require an update. Then update every outdated app.
Alternatively, go to Apple icon > System Settings > General > Software Update. Your Mac will automatically check for updates your apps require and apply them. Both steps require manual updating or navigating through several system settings.
If you want an easier way to update your apps, try CleanMyMac. Here's how it works.
Install and open CleanMyMac.
Click Applications on the left panel > Scan.
If you see a window saying "X Application Updates Available," click Update. To view all your apps, select Manage My Applications at the top of the CleanMyMac window.
Wait for all apps to be updated.
10. Disconnect peripherals and external devices
As innocent as they are, peripherals like a mouse, Bluetooth headphones, and mics sometimes take the blame when your MacBook trackpad is not clicking. Thankfully, the solution is simple. Just disconnect all devices, wired or wireless, and you can use the trackpad again.
11. Reset Bluetooth for intermittent issues
For random freezes, ghost touches, or lag that comes and goes, try a quick Bluetooth module reset:
Open Terminal (via Spotlight: Command + Space, type "Terminal").
Enter this command: sudo pkill bluetoothd.
Enter your admin password when prompted (it won't show as you type).
Press Return and restart your Mac afterward for best results.
This force-quits and restarts the Bluetooth background process (bluetoothd), mimicking the old reset. Your Mac may briefly lose Bluetooth connections — give it 30–60 seconds to recover, then test the trackpad.
Bonus tips for your Mac
In my experience, trackpad problems often indicate other potential hardware problems. Here are two habits that have saved me countless headaches:
Monitor system health regularly: I don't see why I should wait for the problems to arise, so monitor my Mac with iStat Menus. I like how the app runs silently in the background and provides critical real-time indicators, including CPU/GPU usage, disk usage, and machine temperature.
Back up essential files frequently. I make it a habit to back up all my work and personal files. Because if a trackpad could fail, what's stopping your Mac's hard drive from falling apart? As a precaution, I backed up my most important files with Get Backup Pro on an external drive. Unlike the built-in Time Machine, I don't have to back up my entire Mac or dig deep (really deep!) into the preferences to change this setup.
Here's how to back up your files with Get Backup Pro:
Connect a secondary drive to your Mac, such as an SD card.
Download and launch Get Backup Pro.
Choose Backup at the left panel.
Click the File+ button. Then, select the files you want to backup.
Click the blue button with the triangle icon to start the backup.
Wait for the backup to complete.
You can also use Get Backup Pro to archive selected folders or clone the entire system. The app lets you schedule the backups so you can automatically make copies of important files.
Try Spotlight privacy workaround for freezes: If your trackpad or cursor feels sluggish during heavy system activity (like Spotlight indexing after a big update), temporarily add your main drive to System Settings > Siri & Spotlight > Spotlight Privacy list. This pauses indexing interference — remove it later once things settle. It's a low-effort tweak that helps in Tahoe when background processes spike.
Finding a fix to the MacBook Pro trackpad not working problem
The truth is — it might take several tries before you can get your Mac's trackpad functioning again. As you can see, MacBook gives little hint of what causes your trackpad to fail. So, you'll have some investigation and problem-fixing to do.
Using apps like CleanMyMac and iStat Menus can make your task simpler. Instead of grasping in the dark, these apps give you a better idea of how your Mac is behaving. Also, don't wait for the worst to happen. Remember to back up your files with Get Backup Pro so you can recover them anytime.
Keep your Mac stable after the fix, so trackpad problems do not return. Use CleanMyMac for maintenance, then add iStat Menus and Get Backup Pro with Setapp, cancel anytime. Get the Mac toolkit.
FAQ
How do I reset the trackpad on my MacBook Pro?
The reset process depends on your Mac's processor:
For Apple Silicon Macs (M1/M2/M3):
Navigate to ~/Library/Preferences.
Delete com.apple.preference.trackpad.plist.
Delete com.apple.AppleMultitouchTrackpad.plist.
Restart your Mac.
For Intel Macs:
System Settings > Trackpad.
Uncheck "Tap to Click".
Enable "Natural scrolling".
Restart your Mac.
Always restart after making these changes to ensure the new settings take effect properly.
How to click on Mac without a trackpad?
You have several options when your trackpad fails:
Connect any USB or Bluetooth mouse
Enable Mouse Keys: System Settings > Accessibility > Pointer Control > Alternative Control Methods > Enable Mouse Keys
Use keyboard navigation: System Settings > Keyboard > Keyboard Navigation > Turn on
Mouse Keys lets you control the pointer using your numeric keypad – press 5 to click.
Why is my MacBook trackpad suddenly not working?
The most common causes include:
Recent macOS update (especially to 15.1 or later)
Accumulated system cache blocking input recognition
Bluetooth interference from nearby devices
Physical obstruction, such as dust or liquid damage
Corrupted preference files after system crashes
Start with a simple restart. If that doesn't work, check System Settings > Trackpad for misconfigurations. Then try deleting preference files as described above.
How do I unfreeze my Mac trackpad?
When your trackpad freezes but the system is still responsive, try these steps in order:
Force quit problem apps: Press Command + Option + Escape
Reset Bluetooth module: Hold Shift + Option, click Bluetooth menu > Debug > Reset Bluetooth module.
Kill the trackpad process: Open Activity Monitor > Search "trackpad" > Force quit any related processes.
Safe mode restart: Shut down > Start up while holding Shift key.
SMC reset: Follow the SMC reset instructions for your Mac model above.
If these don't work, the freeze might indicate hardware failure requiring professional repair.
Superpowers for your Mac
Tackle your tasks with dozens of helpful apps on Setapp.