How to delete files on Mac: The best methods I found
I love getting down to the nitty gritty and having a good old declutter on my Mac. Part of this is looking at how to delete documents and files to free up space so you can continue working efficiently.
So, I’ve put together some tips on how to permanently delete files on your Mac and troubleshoot issues, such as what to do if you can't delete files. I’ll also share some great apps and programs I found.
The common ways to delete files on Mac
I’ll start with a bit of an explainer on how to delete a file on a Mac, as there are a few common ways to do it. Here’s a simple rundown of the best ways to delete files on your Mac and toss them in the Trash:
- Drag it to the Trash in the Dock.
- Use the keyboard shortcut Command + Delete.
- Right-click or Control-click the file and choose Move to Trash.
How to delete Mac files without sending them to the Trash
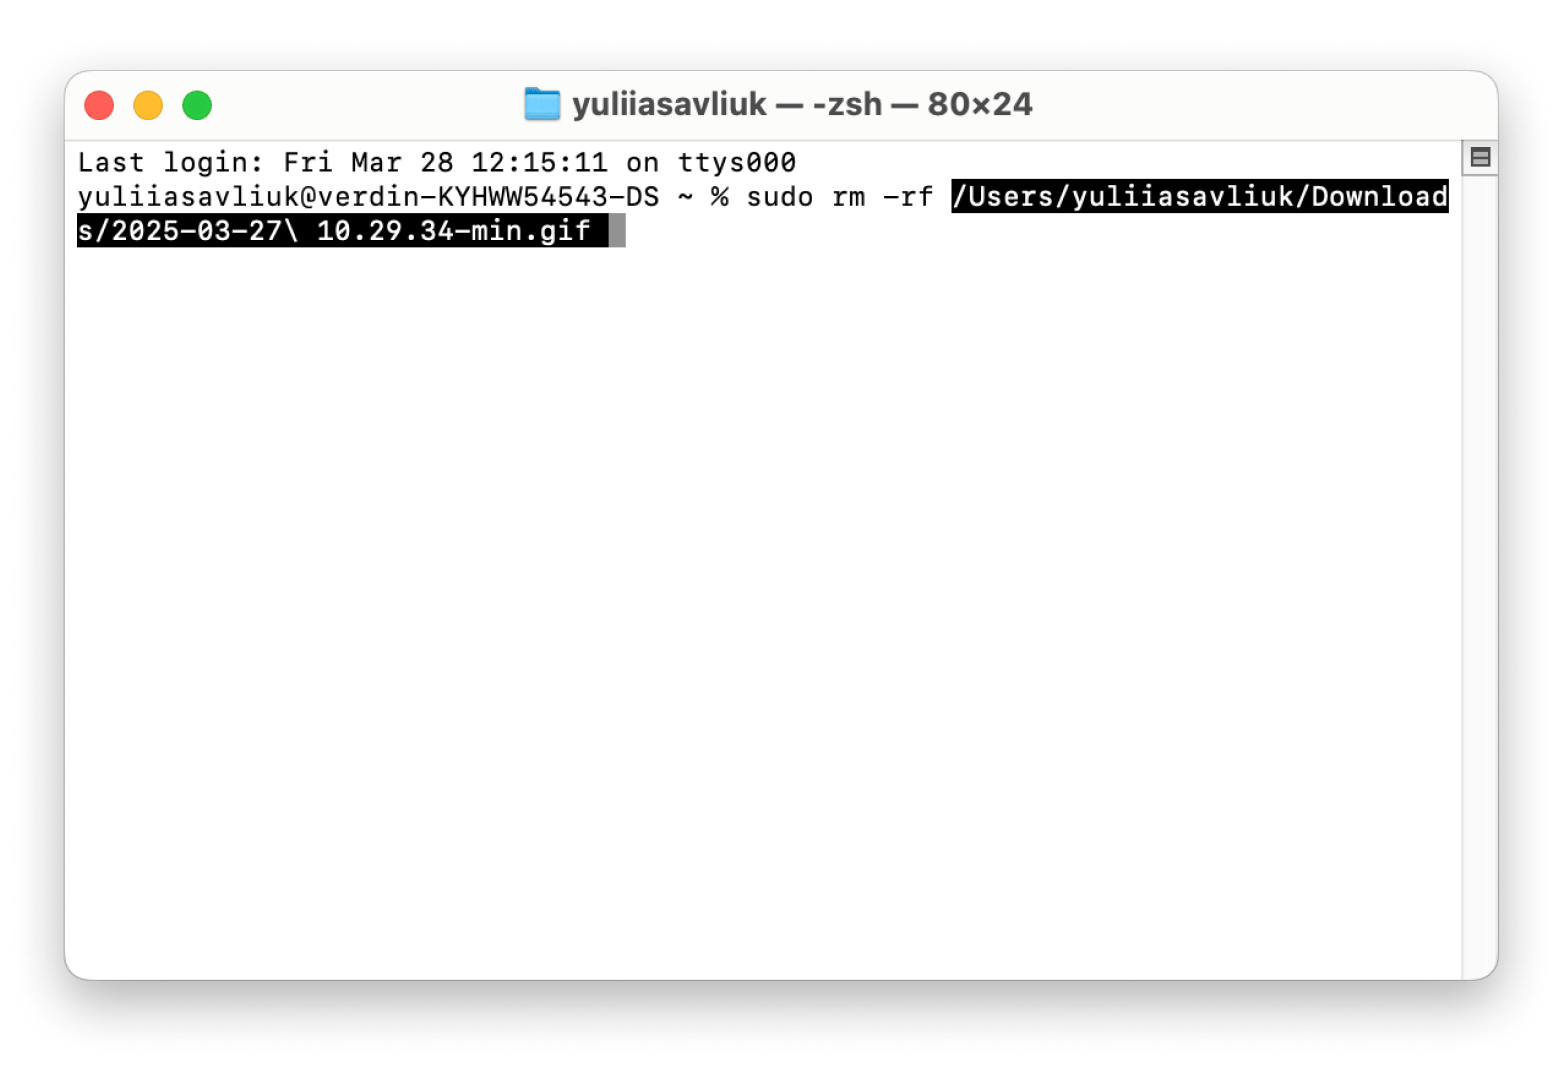
If you want to delete files without sending them to the Trash, just know that you won’t be able to get them back. You’d have to use the Terminal command sudo rm -rf, but I wouldn’t recommend it unless you’re totally sure you want to get rid of those files.Or you can use Option + Command + Delete to permanently delete files.
In most cases, it’s better to send them to the Trash first to avoid accidentally deleting something important. Then, you can empty the Trash when you’re ready.
Here’s how to clear the Trash on a Mac:
- Right-click on the Trash icon in the Dock.
- Choose Empty Trash.
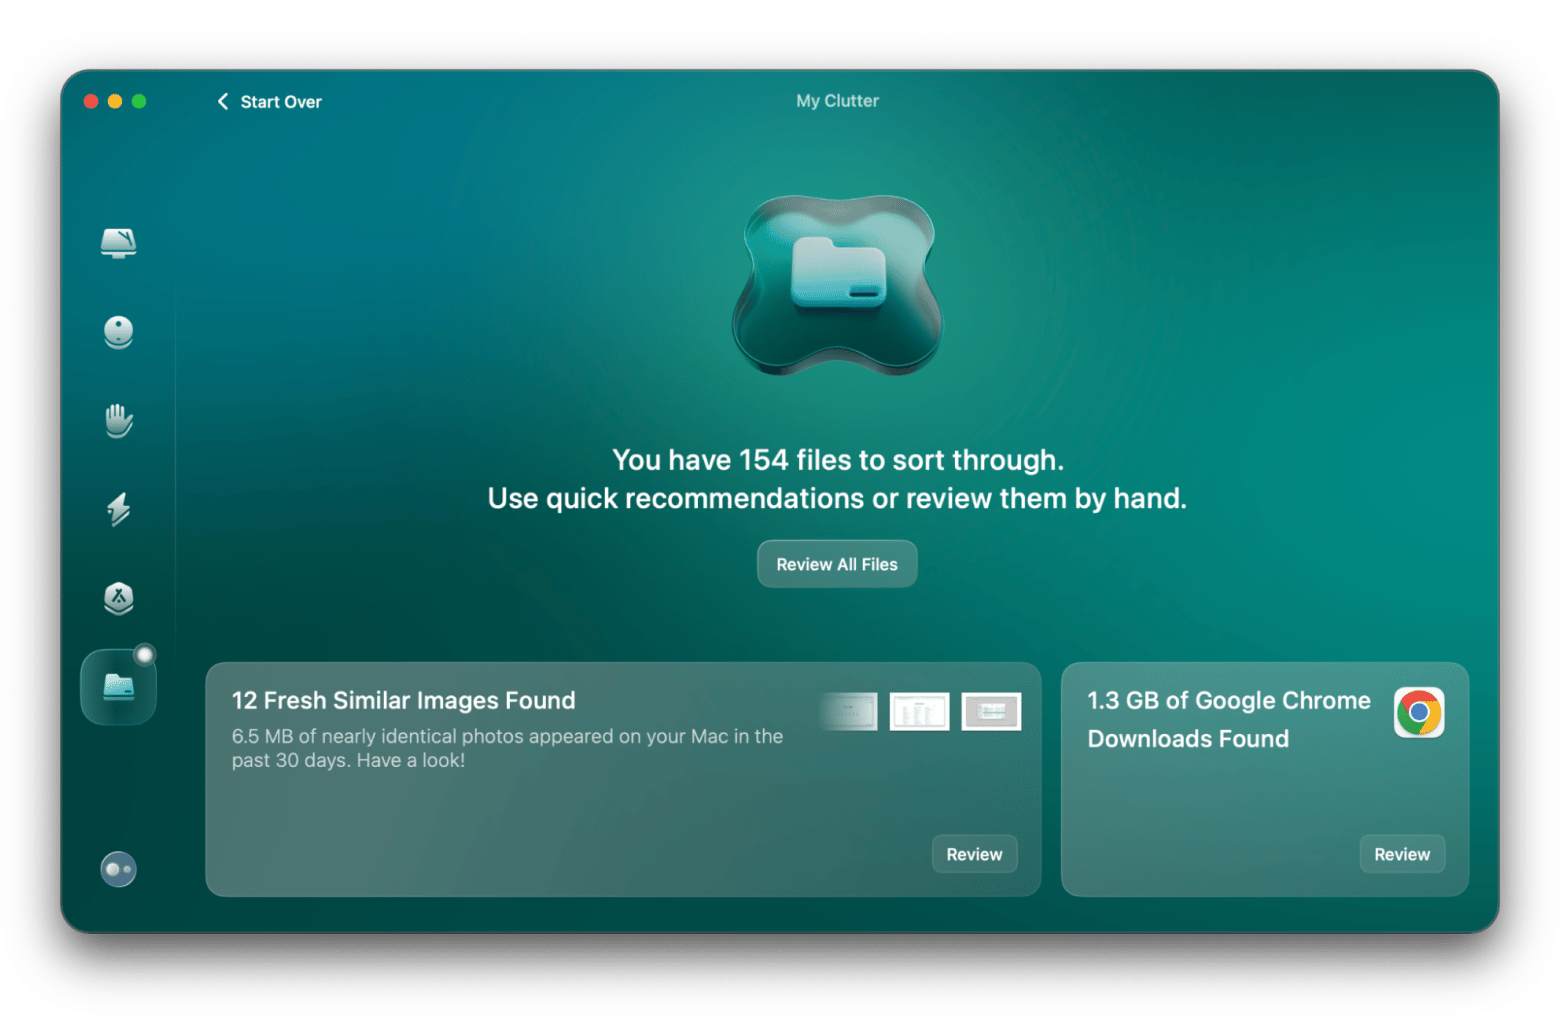
There’s another way to delete files that I use when I need to declutter my Mac storage in a few clicks without manually going through each folder — CleanMyMac. It’s a great app for thorough cleaning, as it scans through your storage to find the files you no longer need.
Simply install and open CleanMyMac, click My Clutter > Choose a folder >Scan. Once scanning is complete, you can review the results and click Remove.

How to delete large files on a Mac
Deleting large files on a Mac makes sense if you use your device a lot and have lots of data to keep track of.
To delete large files on a Mac:
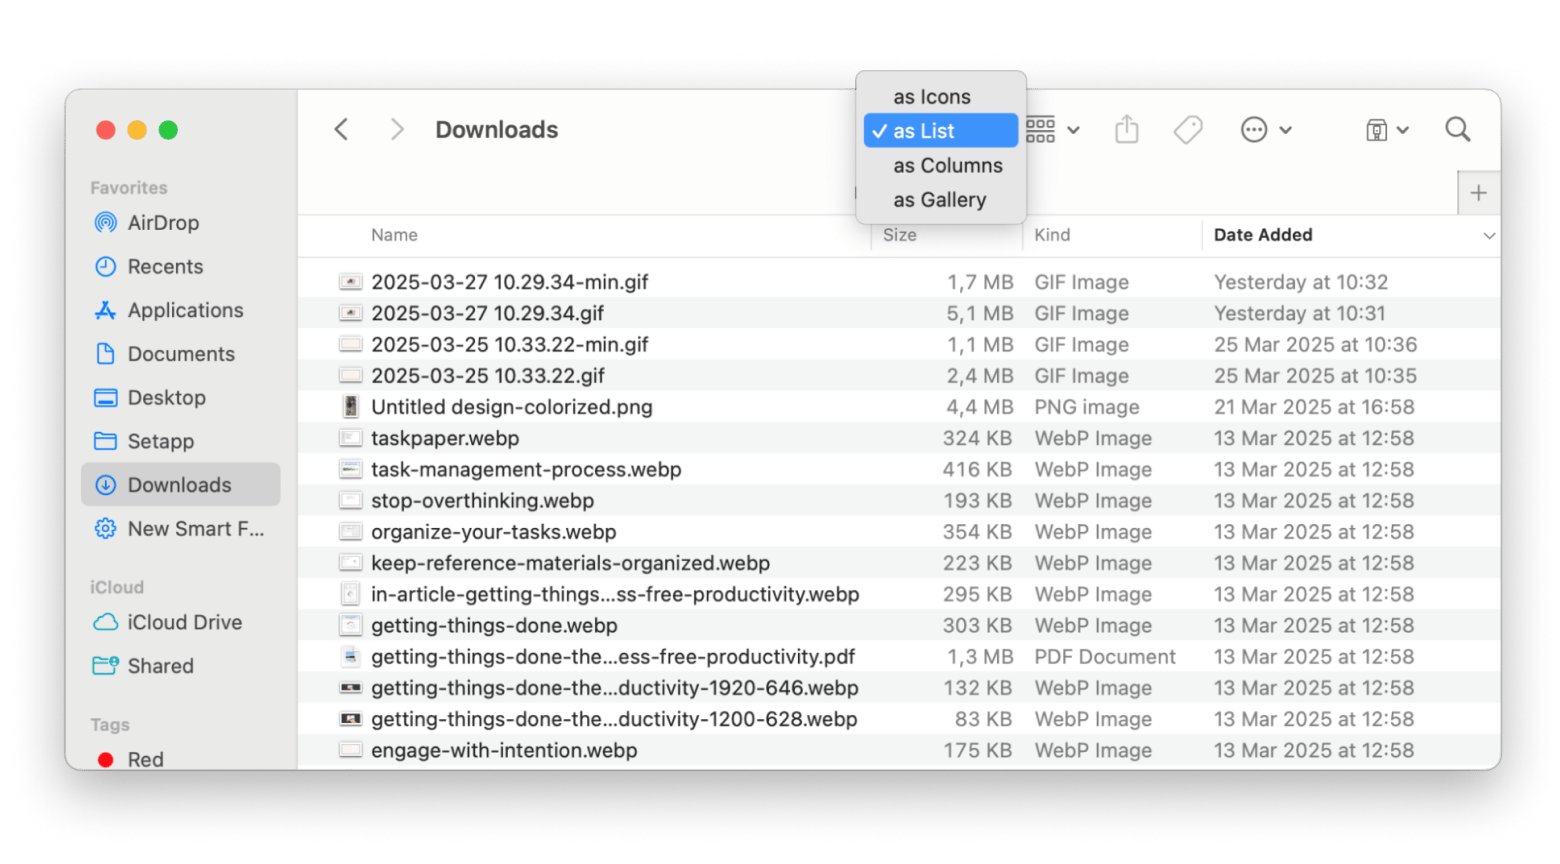
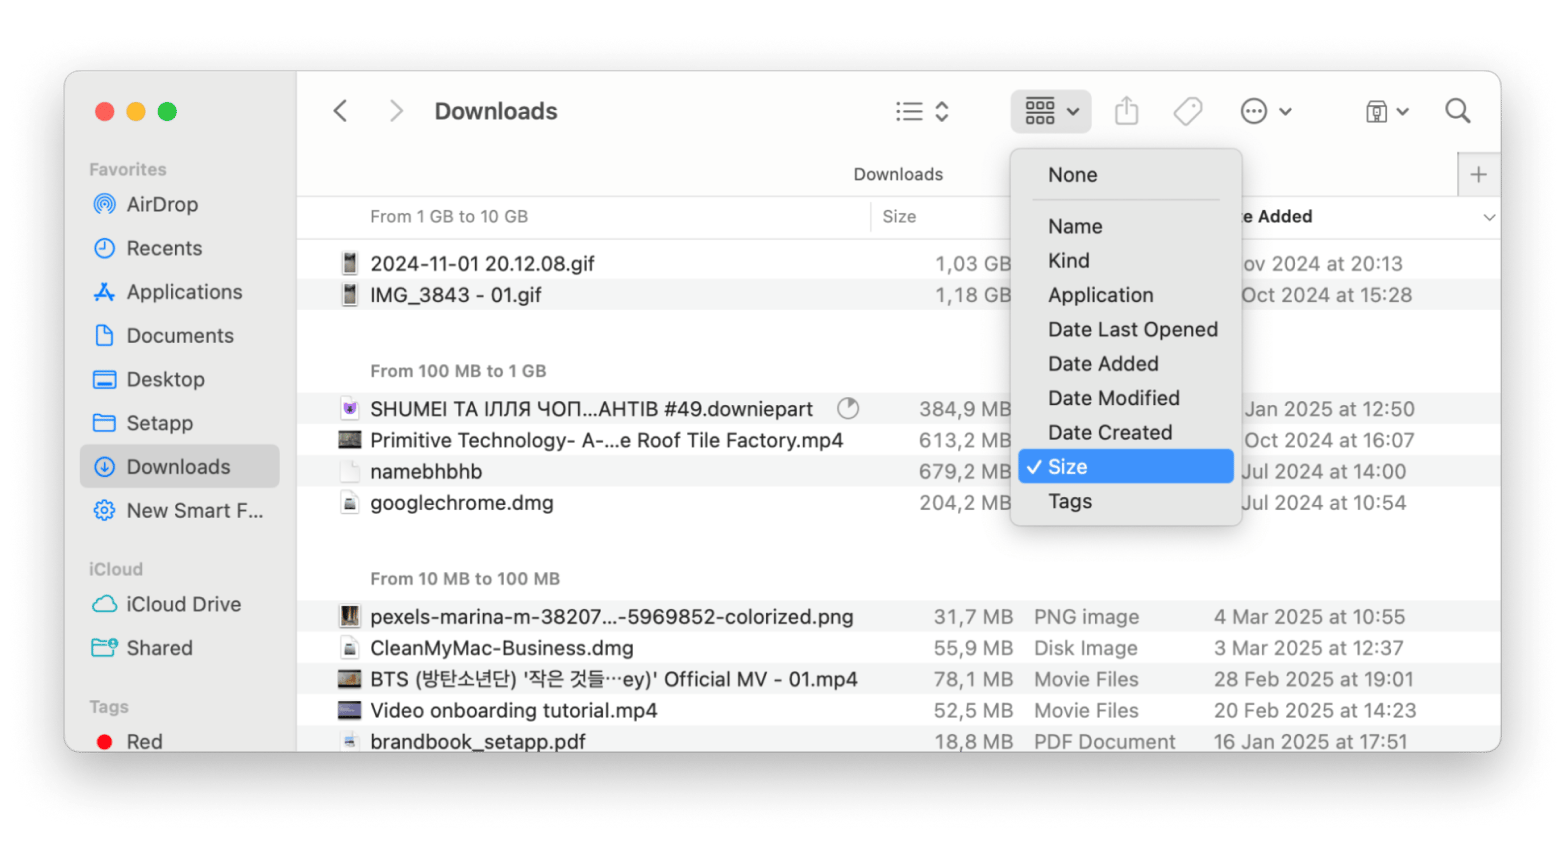
- Open Finder and choose a folder you want to clean.
- In the sorting icon, select as List.

- Then, in the filter icon, select Size. This will let you see the largest files first.
- Search manually through the files you want to delete.

How to delete thousands of files at once
If you have a large number of files and you know you won’t use them again, then it makes sense to delete them all in one go. It’ll save time and free up disk space quickly.
To delete thousands of files at once on a Mac, you can use keyboard shortcuts:
- Command-click: Select multiple files that are not adjacent
- Shift-click: Select multiple adjacent files
- Command + Delete: Move selected files to Trash
- Option + Command + Delete: Permanently delete selected files
How to delete files on Mac that won't delete
Why won't your Mac let you delete documents and files? A Mac might not let you delete files if:
- The file is in use: If a program is using the file, it must be closed before it’s deleted.
- The file is locked: Sometimes, files are intentionally locked, and you’ll need to unlock them before you can delete them.
- You have insufficient permissions: If you’re not the administrator, you may not have the correct privileges to delete files from the Trash.
- Network drive limitations: You may need higher permissions to delete files from them.
- There are system errors: System errors sometimes stop files from being deleted.
If a file won't delete on your Mac, here are some solutions to try:
- Try to close any apps that could be using the file. Reopen Trash and try to delete the file once more.
- Right-click > Get Info, and deselect the Locked box.
- Right-click the file > Get Info, and check if your user account has the necessary permissions to delete files.
- Restart your Mac.
- Open the built-in Disk Utility and run First Aid.
If you've tried everything else and nothing's worked, give the Terminal command sudo rm -rf a shot to delete the file. Just a heads-up, though: make sure you have a backup since this can't be undone.
Check the full guide on how to back up your Mac.
How to force delete a file
If files don’t want to move to the Trash, you can force delete them with the Terminal command. I mentioned this earlier, but it's the last resort when you’re really sure that you want to delete the file once and for all.
Here’s how:
- Open Terminal (Finder > Application > Utilities).
- Type sudo rm -rf (with a space at the end).
- Drag the file to Terminal to auto-fill the path and press Return.
- Enter your password when prompted.

This permanently removes the file from your device immediately and won’t be recoverable.
How to delete hidden files on a Mac
You can delete hidden files using Finder. Here’s how to do this:
- Open Finder.
- Press Command + Shift + Period (.). This will reveal hidden files.
- Delete files as usual.
The Trash won’t empty on my Mac
Sometimes, your Mac Trash won’t empty. Don’t panic! There’s often a simple explanation. There are a few reasons why it might not:
- The system might still be using a file in the Trash
- The file might be locked
- There may be a software glitch
- There might be a permissions issue
To fix this:
- Click the Apple menu > Restart.
- Check for locked files in the Trash.
- Press and hold the Option and click Empty Trash to force delete files.
Take it out with the Trash! Final thoughts on how to delete files on a Mac
I’ve shown you some of the best ways to delete files from your Mac. Once you get the hang of it, it’s really simple, and you’ll find decluttering your device a pleasure.
Why not try out CleanMyMac and Gemini? I think you’ll find them all really useful as ways to help you keep your Mac free from clutter. All these apps you can try on Setapp, a platform with over 250 Mac apps for everyday use. Join Setapp and take a free 7-day trial to learn about all the apps.
FAQ
How do I delete unwanted files on my Mac?
To delete unwanted files on your Mac, select the file you want to get rid of. Right-click and choose Move to Trash.
How do I permanently delete files from my Mac?
To permanently delete files from your Mac, press Option + Command + Delete.
Why can't I delete files on Mac?
You may be unable to delete files from your Mac’s Trash if they are open or in use. Another reason for this issue could be that the file is corrupted. A good way to resolve the problem is to restart your Mac and then try deleting the file again.
Which is the delete key on a Mac?
The delete key on a Mac keyboard is labeled Delete. It’s an X within an arrow that points left. It’s located in the top right corner of the keyboard.


