How to fix USB devices disconnecting on macOS Ventura
macOS 13 Ventura officially arrived on October 24, 2022 — but not without issues. If you face USB devices disconnecting on Ventura, don’t panic. To help you resolve this annoying issue, we’ve put together some troubleshooting tips.
Why are USB accessories disabled on Ventura?
Just like with the initial release of Big Sur and Monterey, many Mac users have reported issues with USB devices disconnecting on Ventura after the upgrade. If you depend on external devices, such as a hard drive, printer, or iPhone, it can be annoying; therefore, let's take a look at how to fix the problem.
Solutions to USB device disconnecting on Ventura
Reboot your Mac
Occasionally, a tiny glitch can cause the Mac's USB port to misbehave. And it's always best to try the easiest method to resolve the issue first. If you haven't yet done so, restart your Mac. Choose the Apple Menu > Restart.
Check the hardware connection
Verify that the USB device is turned on and that the connections are attached correctly. Also, try using a different USB port on your computer (if it has more than one port). If you can use the device after switching ports, try connecting another device to the first port.
Also, clean your Mac's USB ports thoroughly with a soft dry brush or cloth. Make sure the device's port is clean as well.
Keep in mind that the problem might be due to a malfunctioning USB device, not a USB port itself.
Quit and relaunch apps that are using the USB device
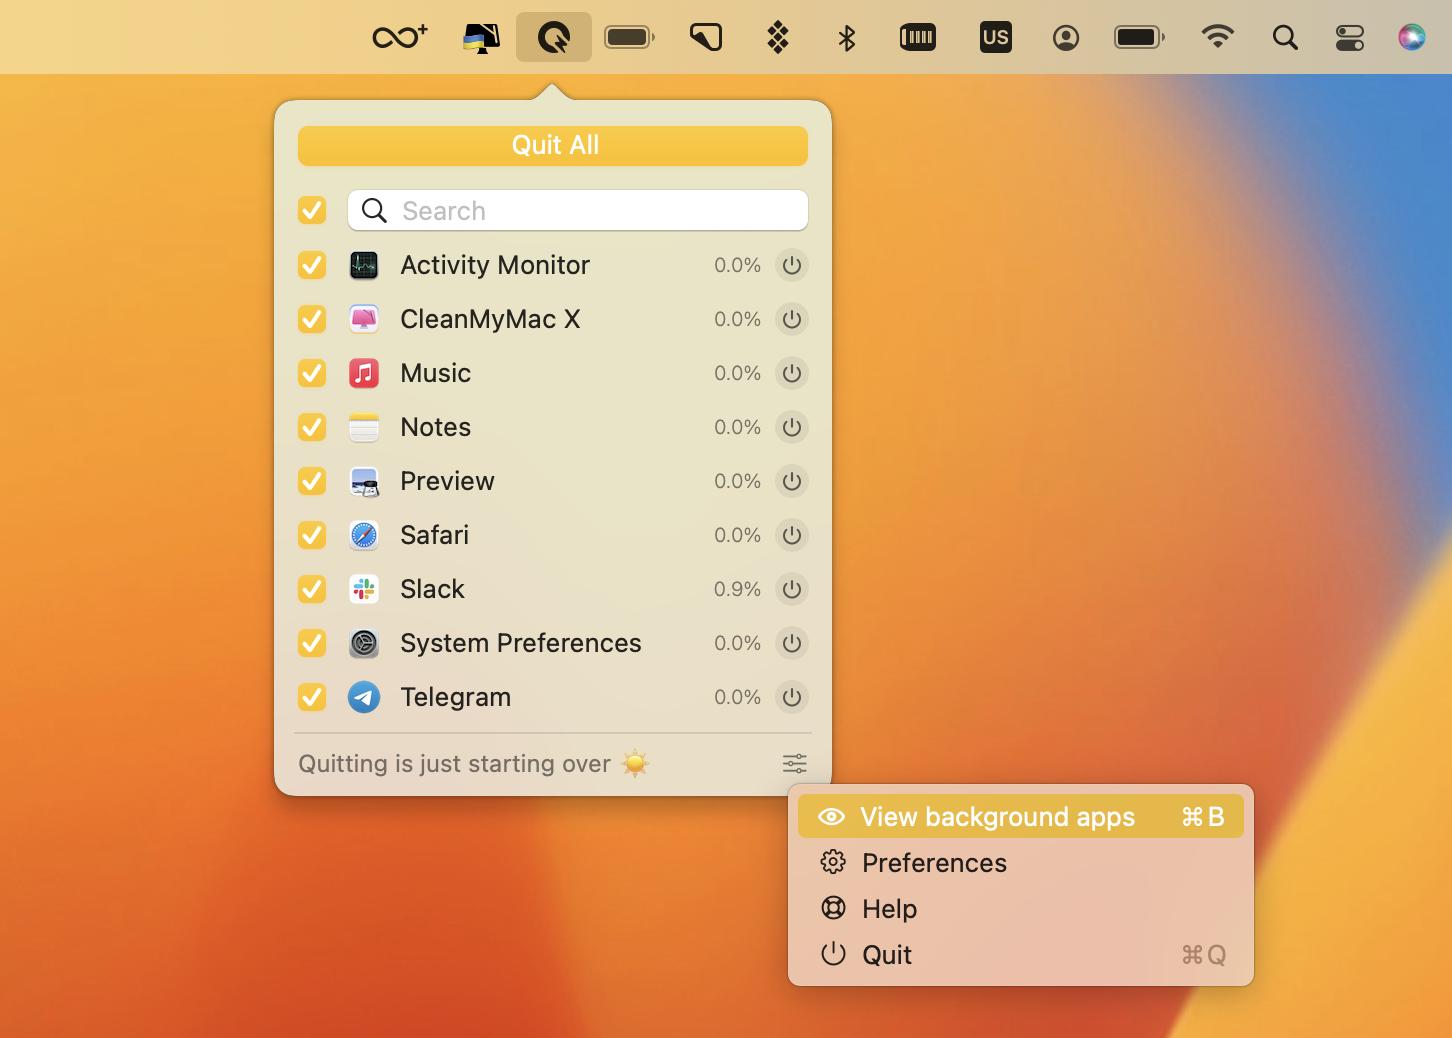
In case you're using an editing/media app trying to read/write the drive, you need to quit such apps. To do so, right-click the app icon from the Dock and choose Quit. If you can't figure out which apps you need to quit, there's an option to quit all apps. We recommend using QuitAll, the tool that can quit all the apps (including the background ones) with just one click. No worries, you don't lose any data or work progress. The app will ask if you wish to save your work.

Get rid of conflicting apps
It's possible that the USB ports were functional earlier. But because you downloaded one or more conflicting apps, the USB port isn't working properly. In this situation, delete one (or more) of the most recent apps you downloaded and check to see if the issue has been finally resolved.
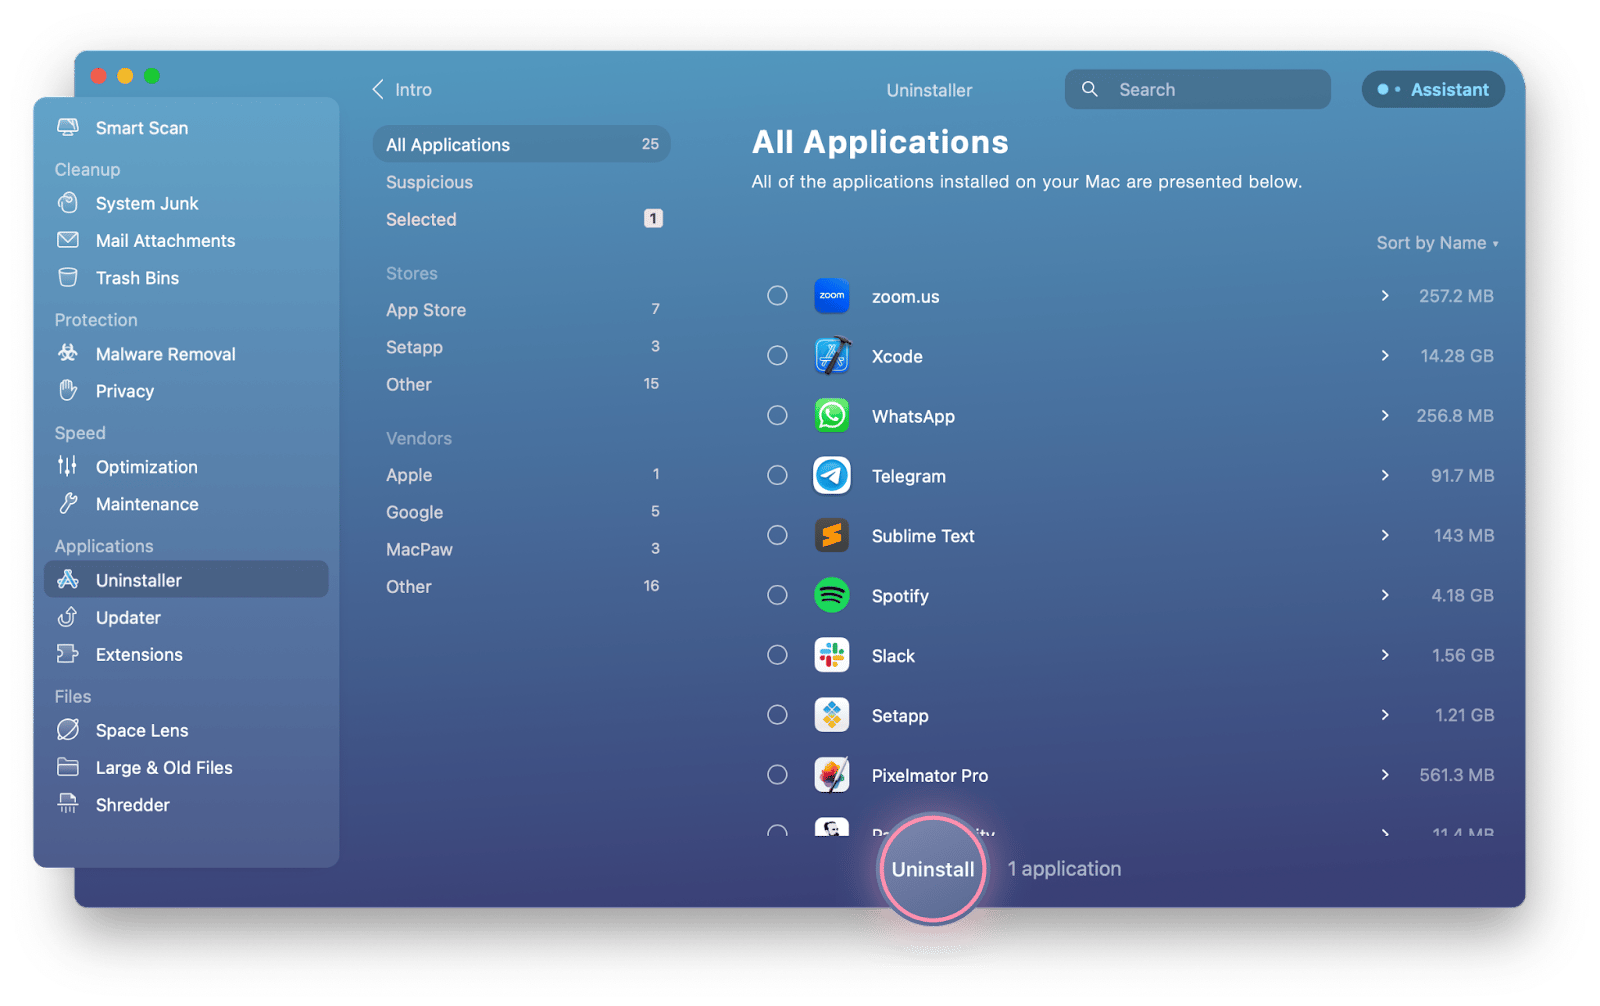
Tip: If you want to uninstall redundant apps, the quickest way to do that is by using CleanMyMac X. Instead of deleting apps one by one, you can select multiple items and remove them at once. Here's how:
- Open Setapp and type "CleanMyMacX" or "uninstall" in the search bar
- Find CleanMyMac X in the search results and click Install
- Once the app is installed, open it, click Uninstaller in the sidebar
- Select the apps you want to delete and click Uninstall.

Run some maintenance
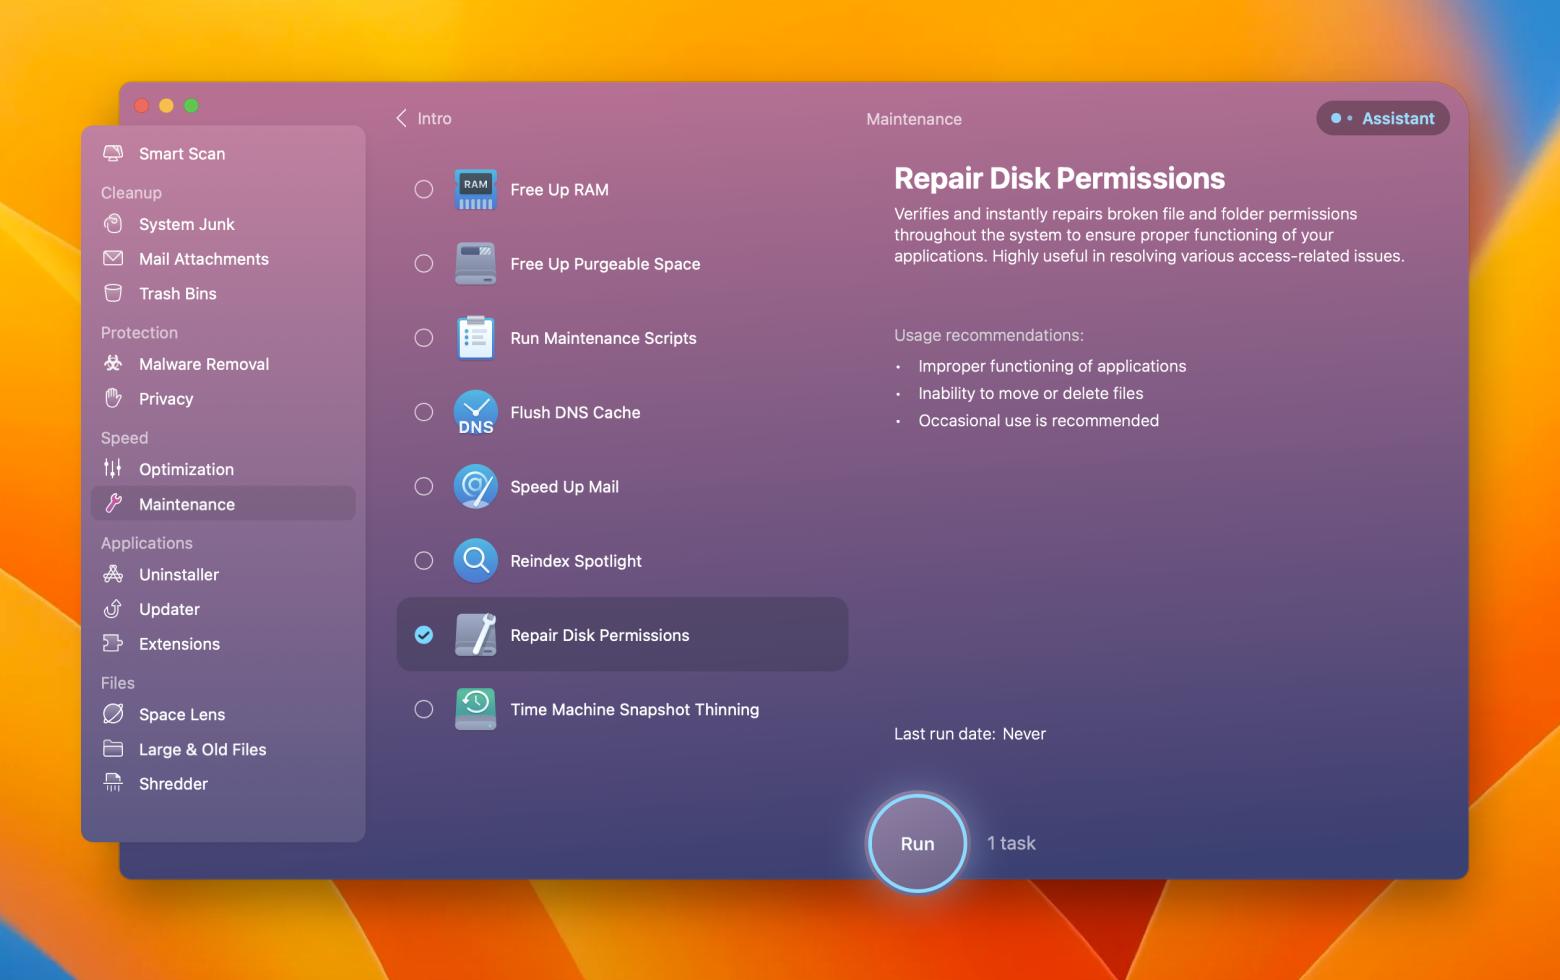
External drive keeps disconnecting? Occasionally, your macOS executes maintenance scripts to find and correct frequent issues. You may speed up the process of fixing those errors (perhaps even the USB problems) by forcing the procedure with CleanMyMac X. This is how you do it:
- Open Setapp and type "CleanMyMacX" or "maintenance" in the search bar
- Find CleanMyMac X in the search results and click Install
- Once the app is installed, open it, click Maintenance in the sidebar
- Select Run Maintenance Scripts and Repair Disk Permissions
- Click Run.

Reset NVRAM and PRAM
Resetting the NVRAM/PRAM is a quick and simple way to fix a Mac that is acting weird; it doesn't erase any data from your storage drive and doesn't call for special tools or repair knowledge. Use the instructions below to reset your NVRAM on your own if you're having issues with your speakers, display, or other devices.
For Intel Macs:
- Power off your Mac
- Then turn it on and immediately press and hold the following 4 keys: Command, Option, P, and R. Hold the keys for 20 seconds. Release.
For M1 Macs:
No specific key combination is required to perform the reset. On M1 Macs, the NVRAM is examined at system startup and reset if necessary. To allow the OS to check the NVRAM, simply turn off the computer, wait a little bit, and then restart it.
Reset SMC
SMC, or System Management Controller, is responsible for controlling a number of hardware components, including battery life, keyboard lighting, temperature control, etc. A reset can solve lots of issues, including USB ports not working after the Ventura update. Here's how you do the reset:
For Intel Macs:
- Power off your Mac
- Press and hold the following 3 keys: Shift, Control, and Option.
- Then Press and hold the power button. Make sure not to release the other 3 keys
- Hold all the above-mentioned keys for 10 seconds. Release
- Power on your Mac.
For M1 Macs:
M1 Macs don't have the System Management Controller. The duties that the SMC performed earlier are now undertaken by the M1. All you need to do to reset the SMC of an M1 Mac is to completely shut down the Mac and leave it off for at least 30 seconds. Switch on the Mac.
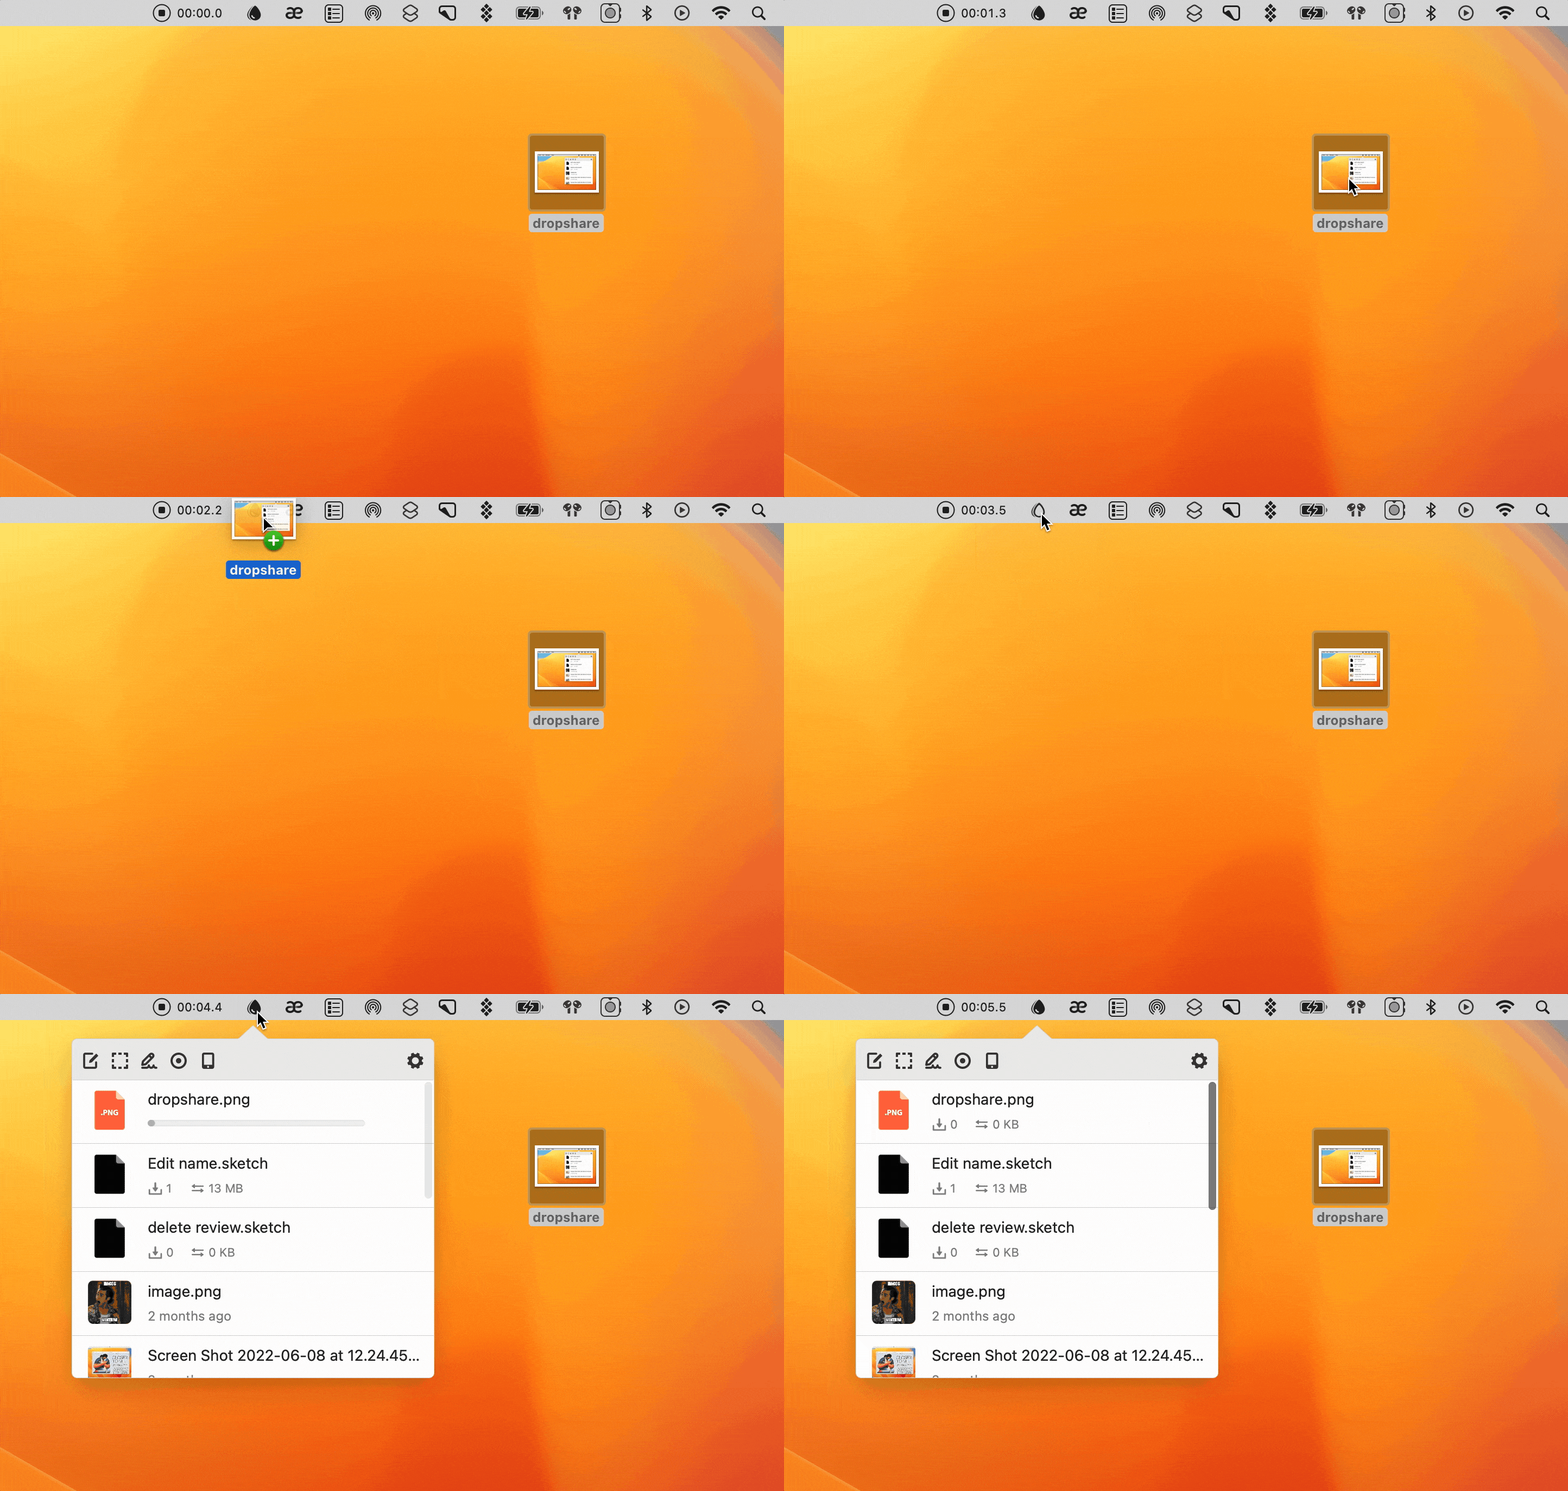
If you've accumulated some files on Ventura and want to take them with you to your older system, keep in mind that you can just drop them into the cloud with Dropshare. By the way,
all Setapp users get 10GB of cloud storage from Dropshare for free!

Fix USB device disconnecting on Ventura
Today, we use wireless things more and more, but at the same time, not everyone can give up USB devices. Both types, however, can have issues when you try to connect them to your Mac. In this article, we've covered the "USB device disconnecting on Ventura" topic. Hopefully, the tips will help you solve the problem.
Setapp provides you with a comprehensive toolkit to fix Ventura USB-related and other issues:
- QuitAll: quit all active apps in batch
- CleanMyMac X: uninstall apps and run maintenance scripts
- Dropshare: backup accumulated files if you decide to downgrade.
All these apps are a part of Setapp, a platform that offers 260+ apps to solve any task on your Mac. For those upgrading to Ventura or fixing its issues, Setapp is a huge help. Try it for 7 days free, then $9.99 + tax per month.
FAQs
Why iPhone keeps disconnecting from Mac Ventura
macOS Ventura users also reported the "iPhone keeps disconnecting from Mac Ventura" issue. Basically, any underlying problem, from a faulty cable to software issues, could be the cause here. Follow the steps below to fix the issue:
- Check cables and ports (as we described in this guide)
- Change Finder Preferences. Here's how:
- Open Finder on your Mac
- Then click Finder at the top left menu bar and choose Preferences
- Navigate to the General tab
- Then check the External disks box.
- Reset iPhone Location & Privacy Settings. Here's how:
- Go to iPhone Settings > General
- Scroll down and tap Transfer or Reset iPhone. Then tap Reset
- Choose Reset Location & Privacy (enter your passcode if required). Next, confirm by tapping Reset Settings.
- Reset SMC/NVRAM on your Mac (as we described in this guide)
- Create a new admin account on Mac (Go to the Apple menu > System Settings > Users & Groups > Add Account).
Ventura requires you to give permission to USB-C. What to do?
Thunderbolt and USB-C peripherals on Macs with macOS Ventura installed and running on Apple silicon ask the user's permission before communicating with the device. The new function is referred to by Apple as "accessory security," and the name seems appropriate considering that it will stop unauthorized accessories from connecting to the Mac without the explicit consent of the user. Pay attention that the devices can still charge even if not given permission.


