Do Not Disturb on Mac: How it works
- How to turn on Do Not Disturb (DND) mode
- Enable DND mode using a keyboard shortcut
- Turn on DND on Mac from the Control Center
- How to turn off DND
- Set keyboard shortcuts for DND mode
- How to schedule Do Not Disturb on Mac
- Limit interruptions with DND feature
- One-click solutions: turn on Do Not Disturb temporarily
Back in 2017 a group of researchers failed to recruit participants for an experiment which entailed turning off all phone notifications for a week. People simply didn’t like the idea of missing something important.
More current reports show that an average user gets 46 push notifications per day and while we can all agree those dings on our phones and laptops are distracting, we don’t usually realize how much. According to the University of California Irvine study, it takes about 23 minutes to get back on track after being distracted!
Whether it’s a popup, a red number signifying unread messages, a vibration, or a sound — notifications can compromise your focus for quite some time. So why wait for that to happen when the latest technology offers features to minimize distractions while you work or relax?
Let’s look at how to put MacBook on Do Not Disturb and find out ways to customize the DND macOS mode for your needs.
How to turn on Do Not Disturb on Mac
The Do Not Disturb MacBook feature minimizes the urge to check every message or alert as they appear on your device, allowing you to work uninterrupted. And yet, enabling DND on Mac won’t make you miss any important notifications, as they’ll all be automatically routed to the Notification Center for you to view later.
If the constant alerts have become too much to handle, turn on the Focus mode temporarily using a keyboard shortcut or through the Control Center on your Mac. The Focus mode is an expansion of Do Not Disturb on macOS Ventura.
One Switch lets you replace numerous apps and settings with one program which instantly makes your desktop cleaner, controls your Mac activity and weeds out distractions, leaving you to do what you love. One Switch also has the capability to beautify your UI experience, and that’s always a nice bonus!
Macs are great for how easily you can customize them to your needs, but it can become a hassle to turn various modes on and off in different places. One Switch lets you control all the common features on Mac with a simple toggle from your menu bar.
It’s one thing to see alerts pop up on screen, but when they do so with a sound, that’s a whole other level of a disturbance. A noisy environment can often cause stress and fatigue, so it’s a good idea to bring some calm and quiet with the Serenity app.
Serenity lets you selectively mute notification sounds with a click, rather than going the long route and trying to configure settings in System Preferences. Try Serenity and enjoy a noise pollution-free work environment!
To make your workflow even more efficient, try using Be Focused, an app designed to help you stay on track with your current and future tasks.
Be Focused is a powerful planner which lets you easily determine the scope of work, create tasks, and track your progress. All while keeping you accountable with a focused timer, which also enables you to seamlessly integrate the Pomodoro technique in your work. This app works perfectly across all macOS and iOS devices setting you up for success in all your goals.
How to enable Do Not Disturb using a keyboard shortcut
A new Mac comes with over 100 default shortcut keys for all kinds of actions, from common document shortcuts to Finder, system, and accessibility keys set to speed up your workflow.
One of the quickest ways to enable Do Not Disturb feature, like doing anything else on a Mac, is by using a keyboard shortcut.
Press and hold the Option key while you click the date and time in the menu bar to turn Do Not Disturb Focus on or off. Alternatively, you can press a F6 button with the moon (if available in the row of function keys on the keyboard).
How to turn on Do Not Disturb on Mac from the Control Center
Notifications often play a critical role in our daily life keeping us up to date with calendar events, emails, messages, and many other things that often escape our memory. But as much as notifications can be helpful, they can also be distracting, when you’re trying to work on one specific task and that’s when DND on Mac will come in handy.
Here’s how to put MacBook on Do Not Disturb:
- Open Control Center by clicking its icon in the upper-right corner of the menu bar
- Then click the Focus section (look for the moon icon)
- From there, you can turn on the Do Not Disturb option, choose the duration of the Do Not Disturb time, and even customize your focus by clicking Focus Settings.
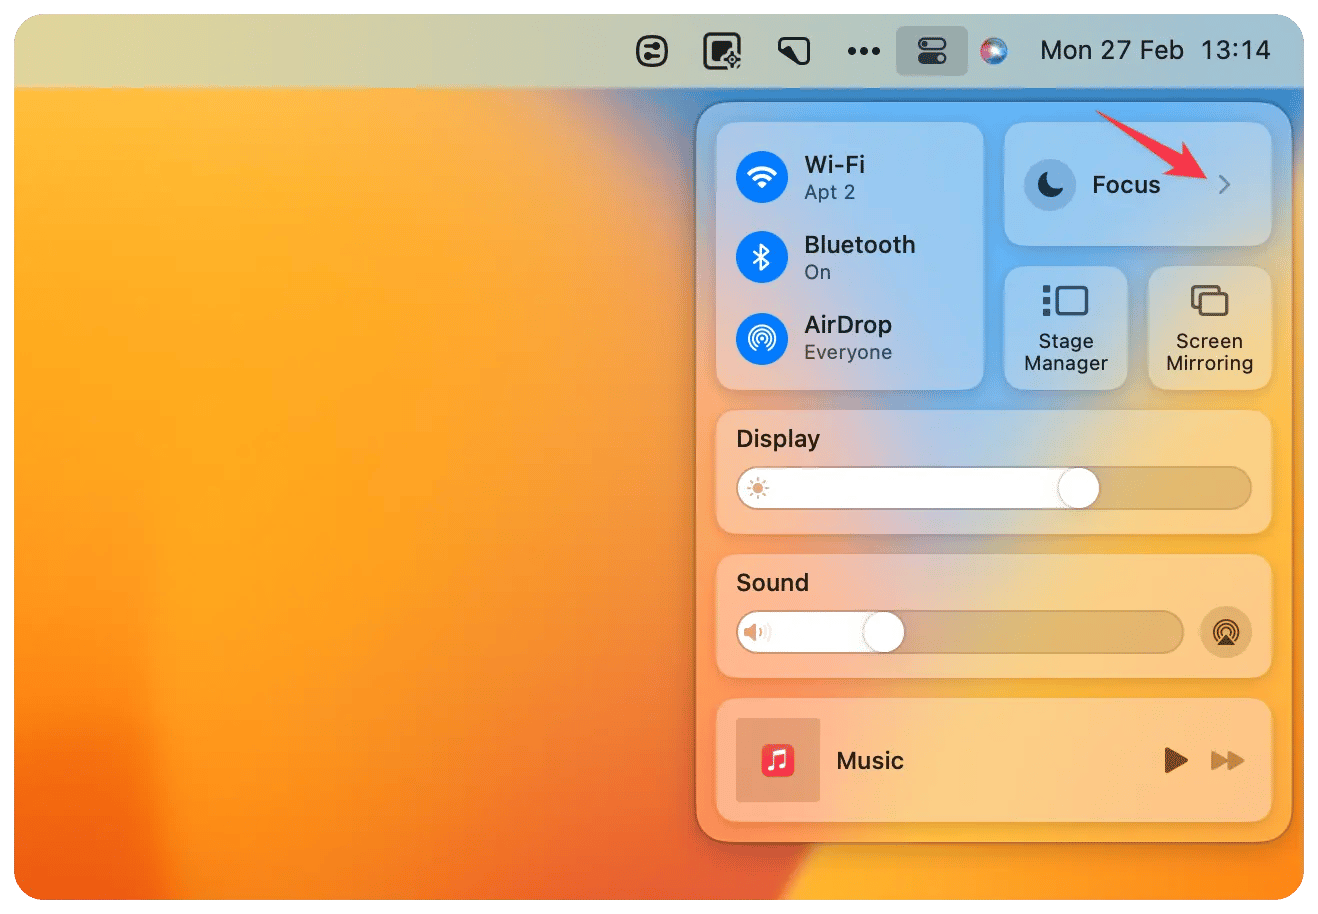
How to turn off Do Not Disturb:
- Open Control Center by clicking its icon in the upper-right corner of the menu bar
- Then click the Do Not Disturb section (look for the moon icon)
- From there, you can turn off Do Not Disturb by simply clicking on it. The moon is highlighted when the Do Not Disturb option is on. And it’s gray if Do Not Disturb is off.
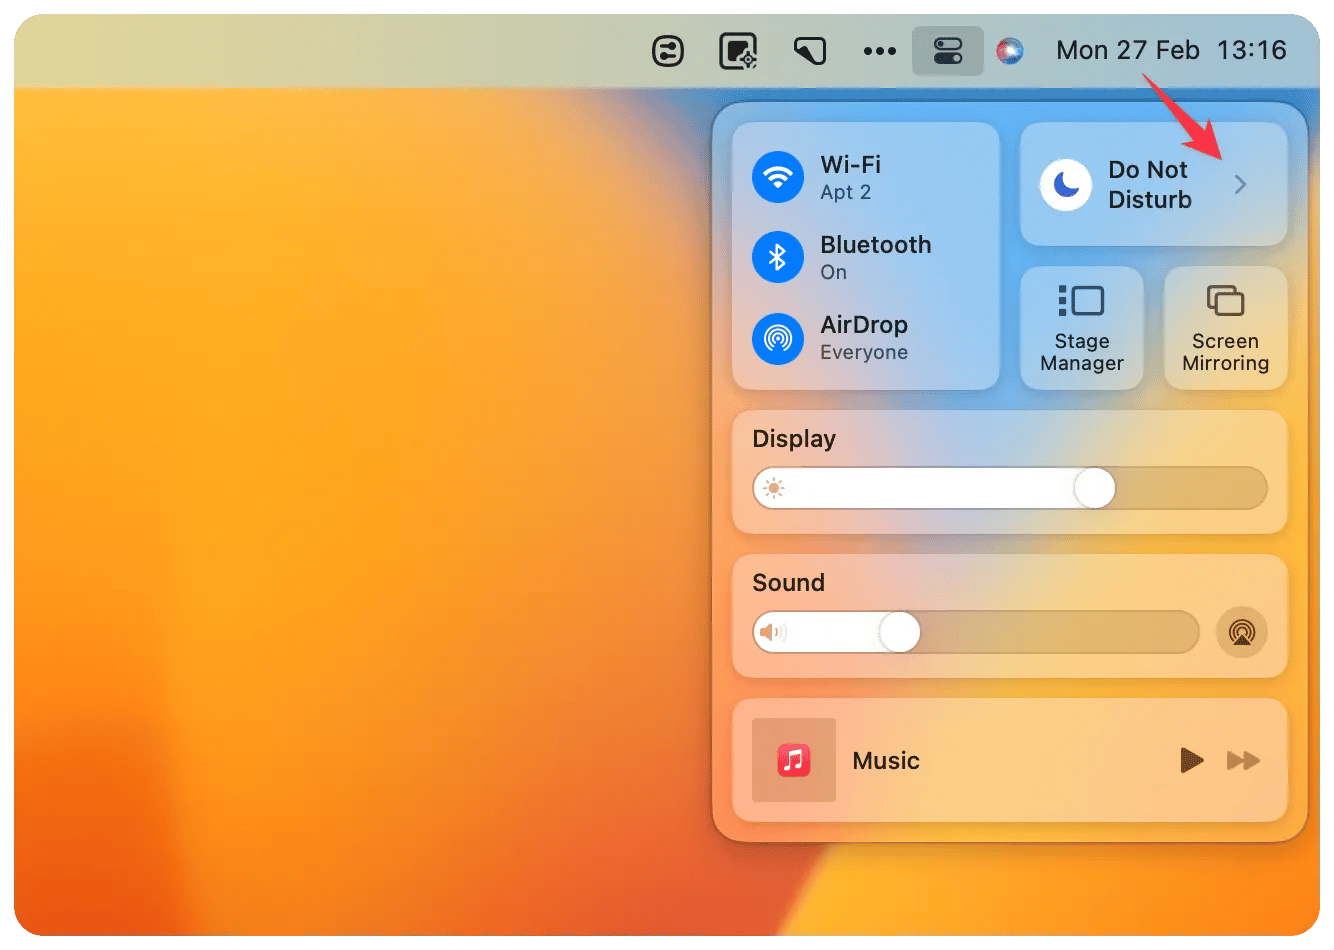
How to create keyboard shortcuts for Do Not Disturb on Mac
Keyboard shortcuts are perhaps the most effective and efficient way to do anything on a Mac. And personalized ones are even better!
To create a keyboard shortcut for enabling and disabling Do Not Disturb, follow these steps:
- Click on the Apple logo from the top left
- Choose System Settings
- Then Click Keyboard in the left sidebar, click the Keyboard Shortcuts… button
- From the left sidebar, choose Mission Control
- Then check the box for Turn Do Not Disturb On/Off if it’s not checked already
- Double click on None or the key next to that box
- Press the keys you want to use as your Do Not Disturb shortcut
- Click Done.
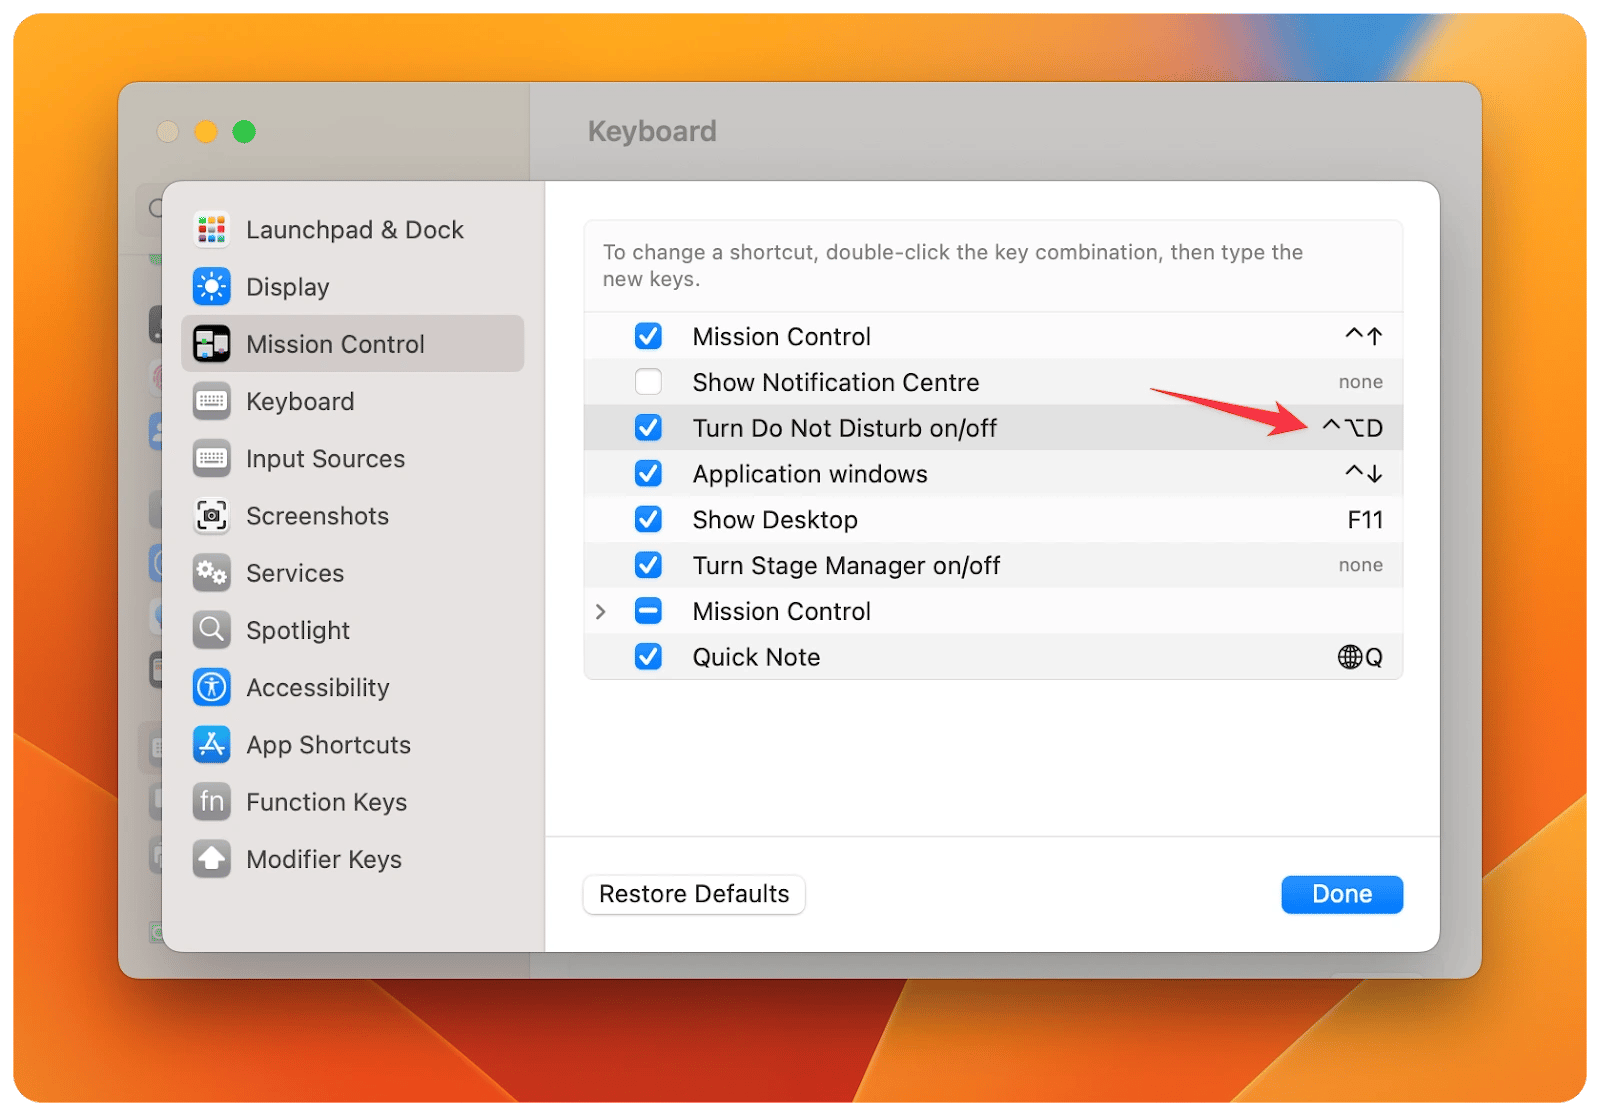
Perhaps you’re a Mac power user and this is by far not the only keyboard shortcut you wish to create or customize. In this case, using Keysmith will help you save a lot of time in the process. What makes this app stand out is its ability to record your workflow and suggest effective macros to help increase your productivity. Keysmith also has a Spotlight-like search feature, so you don’t have to memorize dozens of new hotkeys.
To quickly create any keyboard shortcut using Keysmith, simply:
- Launch the app
- Click on New Shortcut
- Click on the red Record button to start recording
- Perform the action you’re making this shortcut for, then click Stop Recording
- Look through the recorded steps and alter them if you need to
- Hit the Run button to view the running sequence
- Click Untitled to name your shortcut
- Click Set HotKey to bind a shortcut key
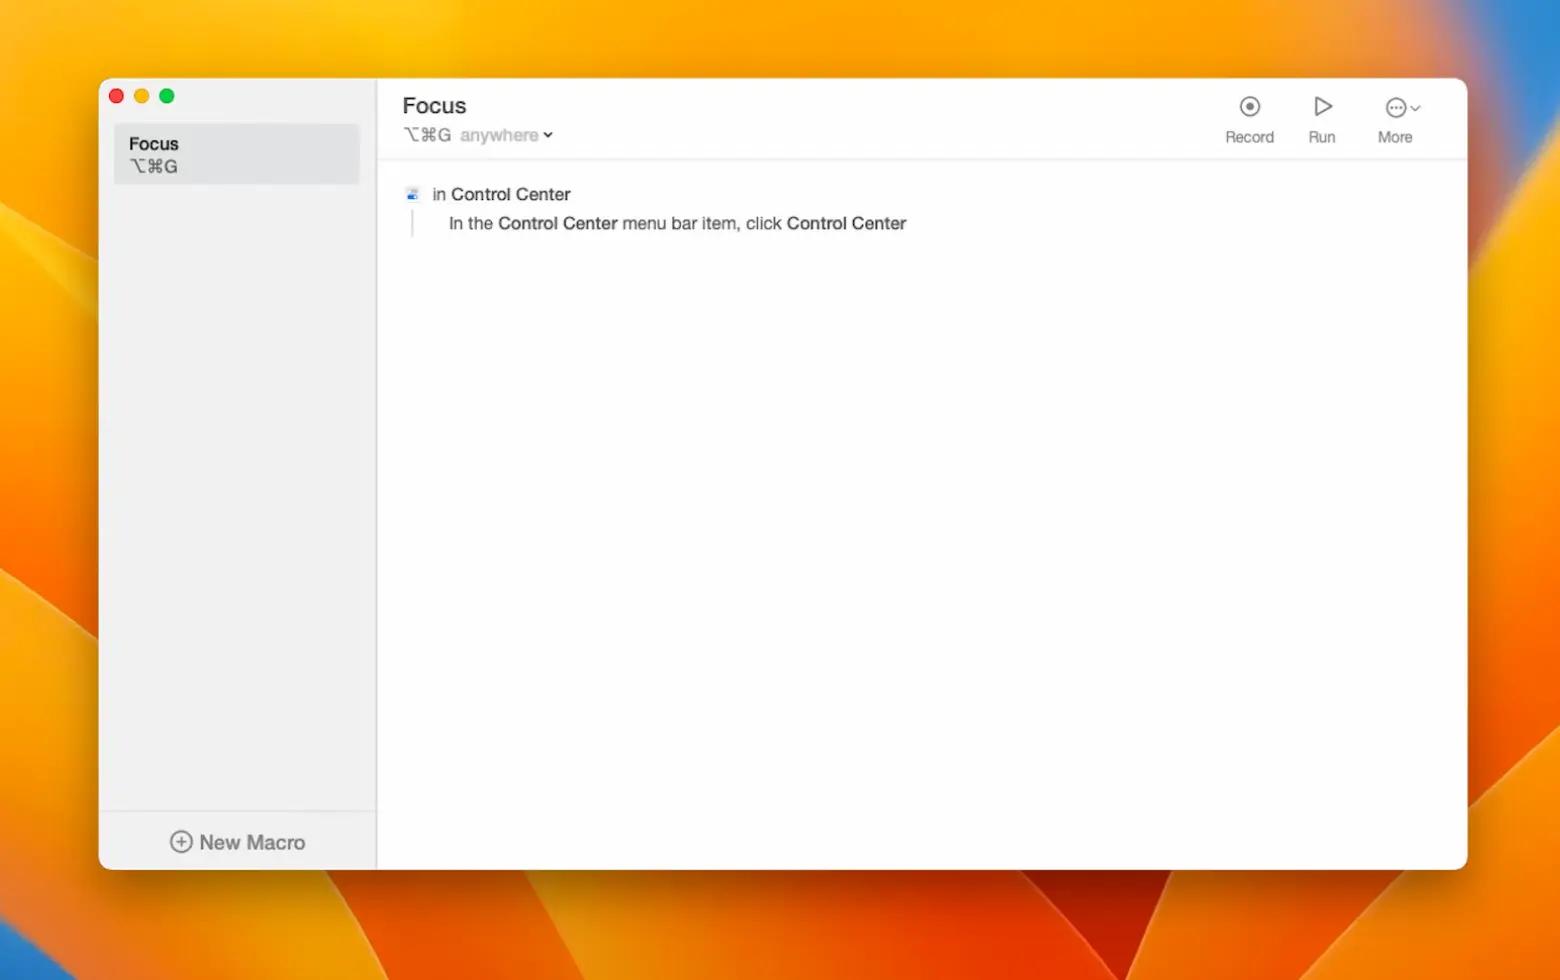
How to schedule Do Not Disturb on Mac
Being able to simply enable Do Not Disturb mode just won’t do the trick for some users, who want more precise control over what gets to bother them and when. If this is the case for you, you’ll need to take a slightly deeper dive into the settings of the DND macOS feature.
To turn on Do Not Disturb temporarily or create a specific time frame, follow these steps:
- Click on the Apple logo from the top left
- Choose System Settings
- Then Click Focus in the left sidebar and set your preferred schedule in the Set a Schedule section.
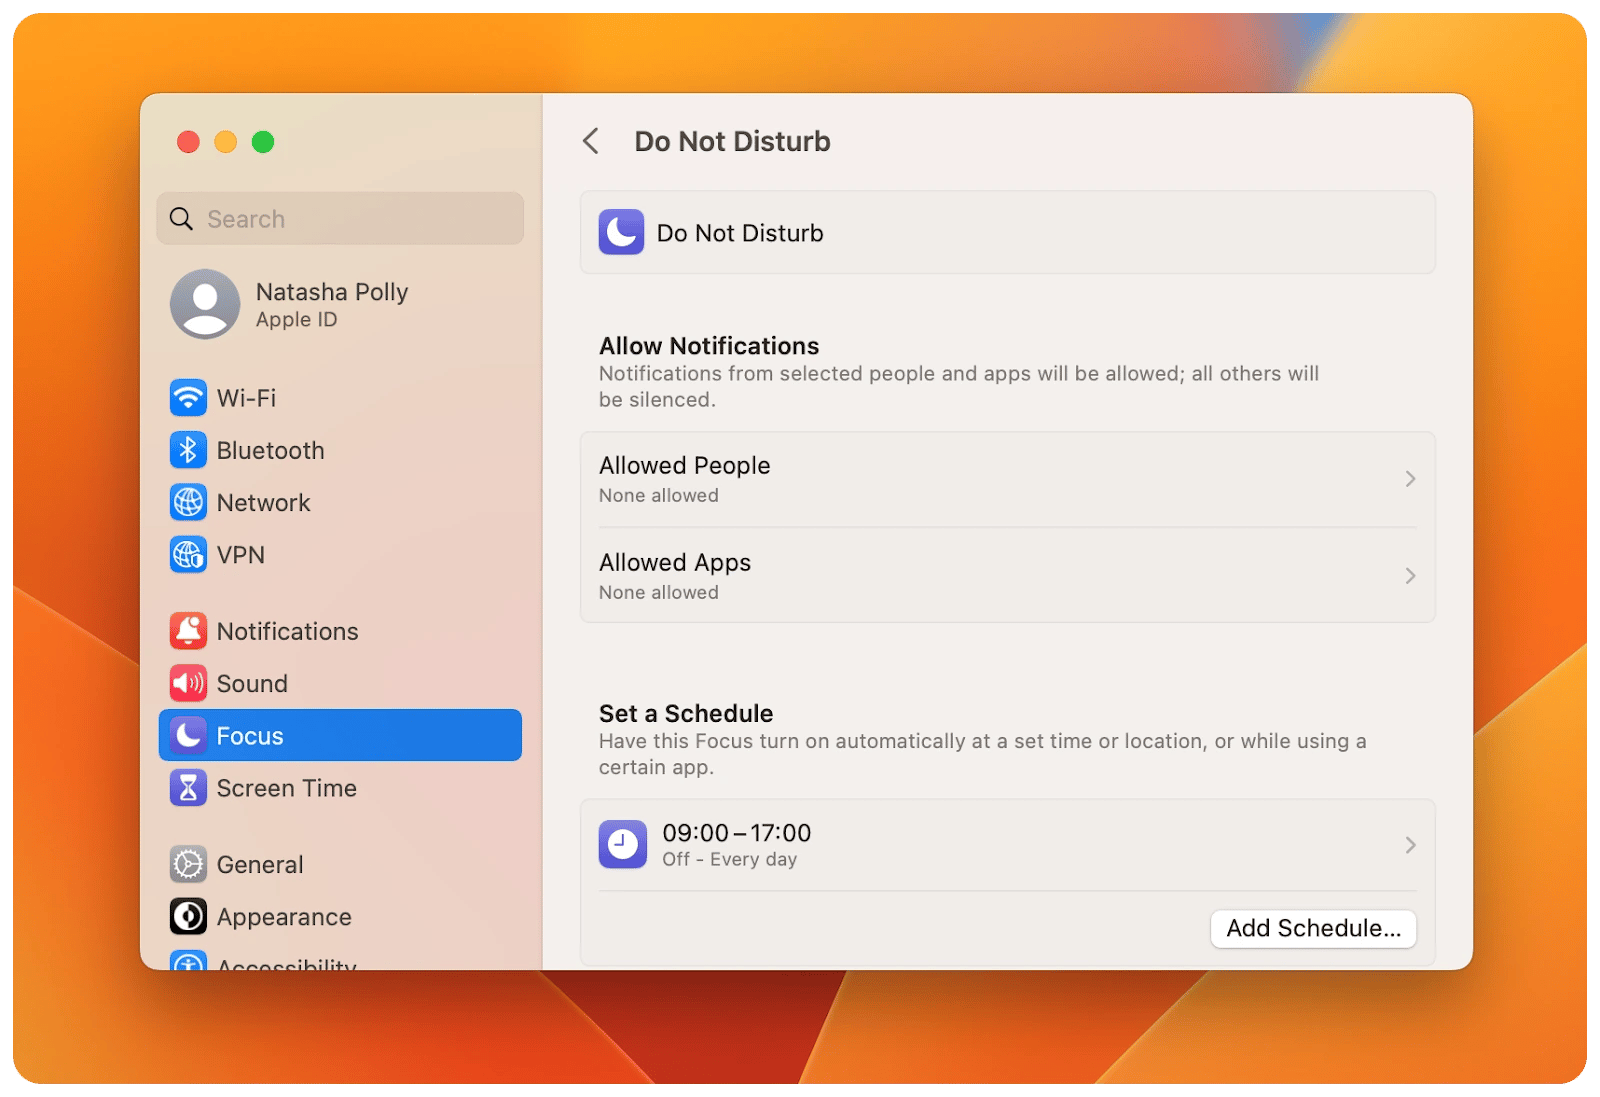
In addition to setting a Do Not Disturb MacBook schedule, you can choose the apps and people you want to receive notifications from.
How to customize Do Not Disturb MacBook feature
Beginning with macOS Monterey, Apple introduced Focus, an updated version of the Do Not Disturb feature. While DND on Mac remains available, many users have turned to Focus for the ability to fine-tune it to their needs.
Focus feature offers multiple modes and allows you to get specific, setting up notifications for when you're working, driving, exercising, sleeping, or enjoying personal time.
To enable Do Not Disturb and customize it with Focus, simply:
- Go to the Apple menu > System Settings
- Click Focus in the left sidebar
- Click Add Focus… for customization options.
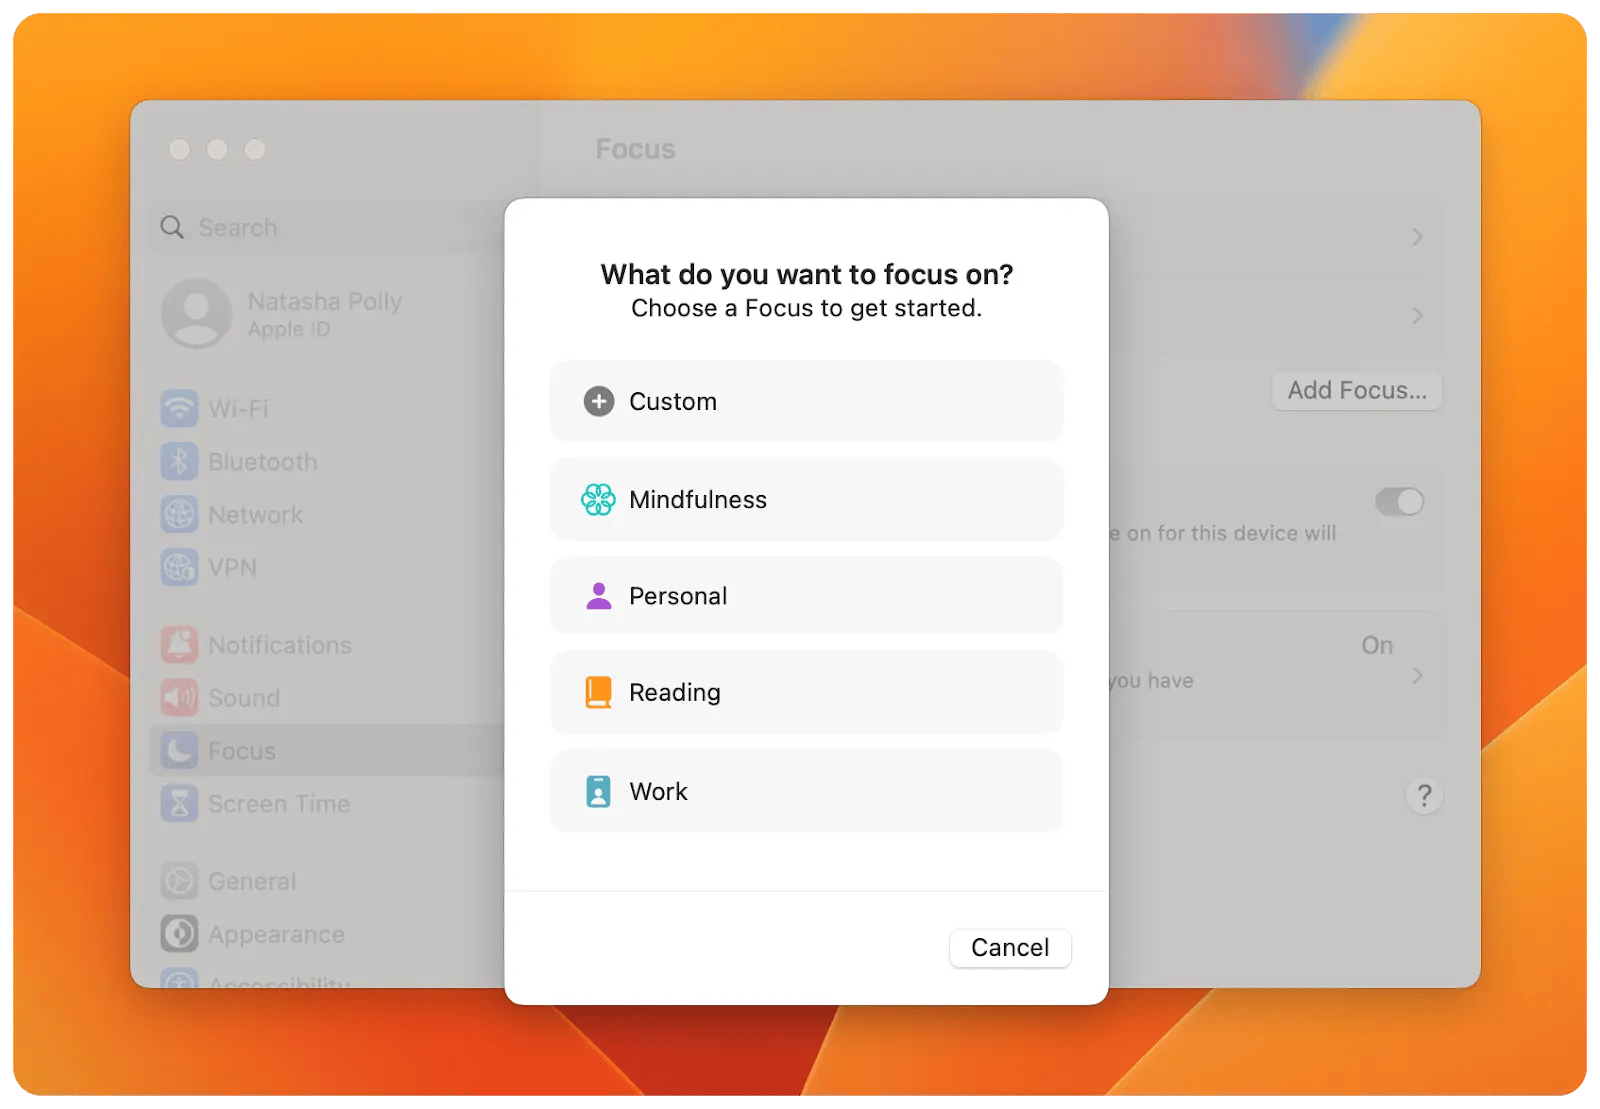
A nice bonus is that Focus settings sync across your Apple devices by default, so if you enable Do Not Disturb on your Mac, it’ll also kick in on your iPhone and the other way around.
How to turn on Do Not Disturb temporarily
Seems like you’re all set for productive work or uninterrupted quiet time! Now you can easily streamline your workflow with One Switch, automate routine tasks using Keysmith, improve concentration with Be Focused, and let Serenity mute all distracting notification sounds!
Best of all — One Switch, Keysmith, Be Focused, Serenity, and 240 more high-performance apps are available to you for free through a seven-day trial of Setapp. Try every Setapp app today at no cost and release both your and your device’s full potential!


