Reinstall macOS: Back up your data first, as reinstalling may erase it.
If you see a flashing folder with a question mark when starting your Mac, it usually means your Mac can’t locate its startup disk or macOS isn’t installed. Sometimes, the folder flashes briefly before your Mac boots up normally, but other times, it just sits there, leaving you stuck.
If this sounds familiar, don’t worry. It’s often a simple issue with your Mac’s startup settings, and I’ve got a few quick fixes to help you get things working again. Let’s sort it out.
Tip: Move fast to protect files before you troubleshoot the startup disk. For a safer next step, start a Setapp trial and use iBoysoft Data Recovery first.
Quick fixes for folders with flashing question mark
Here, I’ve gathered fixes that should help you, described in a simple and concise way. If you’re fairly tech-savvy, these instructions should do the trick. If you need a more detailed guide, just scroll down — I’ve explained everything below.
Recover lost data before fixing the Mac folder with a question mark
Before trying any fixes that might put your data at risk, I'd absolutely recommend you try recovering your files using iBoysoft Data Recovery for Mac. This tool can recover data from formatted disks, APFS-encrypted drives, unbootable Mac in recovery mode, and corrupted storage.
It’s just three quick steps:
Install and open iBoysoft Data Recovery on a Mac.
Look for any lost files on the affected drive.
Click Search for Lost Data.
Preview and back up the documents to a secure place.
6 fixes for a Mac folder with a question mark
Now, let's dive into a more detailed explanation.
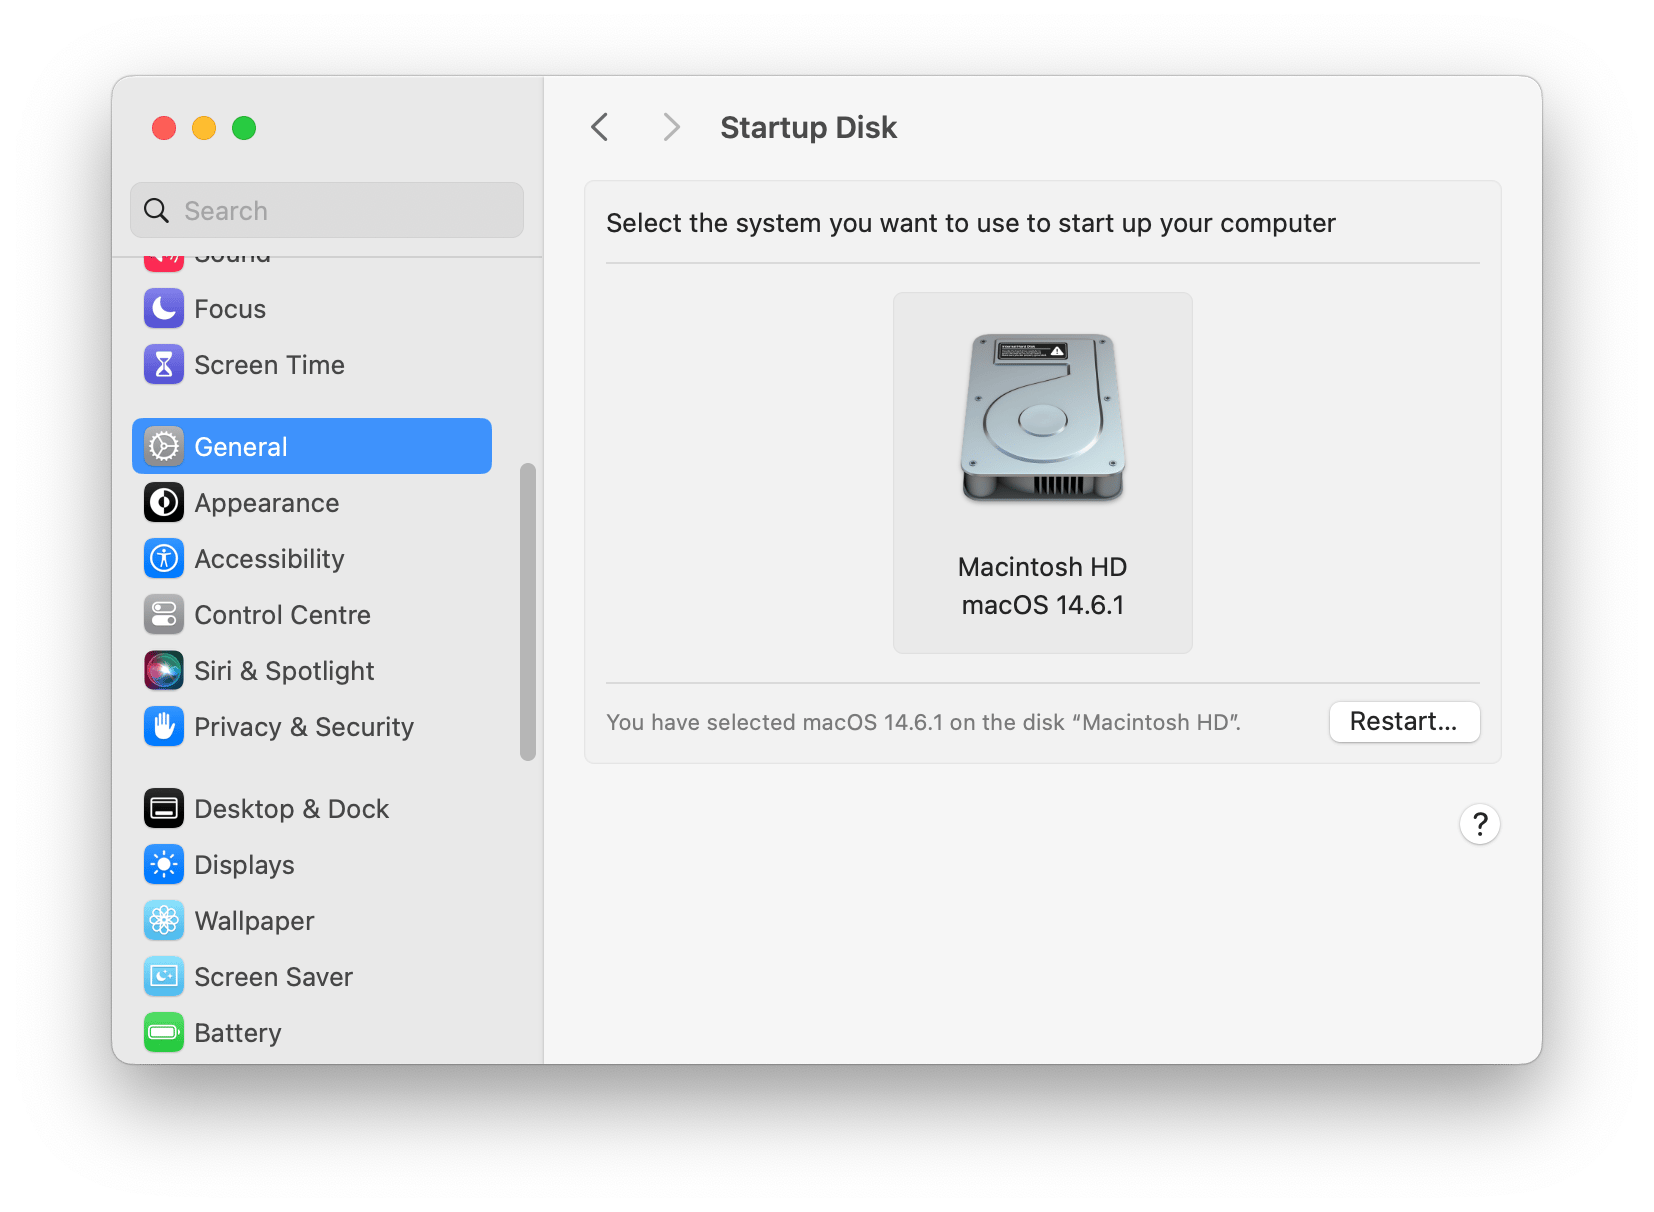
Fix 1: Check startup system settings
Make sure your Mac is using the right startup disk:
Go to System Settings via the Apple menu.
Click General > Startup Disk.
You’ll see available disks to use for startup.
Make sure the right one is selected (usually, it’s Macintosh HD) and if any changes need to be made, select the right disk and click Restart.
Fix 2: Reset NVRAM
NVRAM is a type of memory that retains data without power supply. That includes basic booting info, so resetting it can help solve the flashing question mark folder issue if it appears for a brief moment and your Mac proceeds to boot.
To reset NVRAM:
Turn off the MacBook by clicking the Apple menu and selecting Shut Down.
Power your Mac back up and immediately press Option + Command + P + R.
Release the keys after about 20 seconds.
On newer Apple silicon Macs, NVRAM resets automatically when needed, so you don’t have to perform this step manually.
If you want to try and fix the question mark folder on your own, let’s look at a few more of the available solutions.
Fix 3: Diagnose in Recovery mode
If your screen is stuck on the question mark folder, try to diagnose and fix the issue with the built-in Mac app Disk Utility. For this, you need to load your laptop in recovery mode and run the app.
Here’s how to do that on Intel Macs:
Press and hold the power button until your device shuts down.
Turn your Mac back on and press and hold Command + R. This should take you to Mac recovery mode.
Select Disk Utility in the pop-up window on your screen.
Click First Aid and select your startup disk to check for errors.
On Apple silicon Macs, you need to:
Press and hold the power button until you see Loading startup options.
Select Options, then click Continue.
Choose Disk Utility when Recovery loads.
Fix 4: Format Startup disk & reinstall macOS
If Disk Utility is unable to resolve the issue with the disk, you might need to format it and install macOS from scratch.
This process will erase all data on the disk, so take your Mac to service if you need the data restored and don’t have backups.
To start the formatting, load your Mac in Recovery mode and open Disk Utility as guided in the previous section.
Select Macintosh HD and click Erase.
In the pop-up window you’ll see an option to change the disk name and format.
Confirm the action by pressing Erase Volume Group (or Erase). This will remove all data from your hard drive.
Now, to use this disk as a startup disk for your Mac, you need to reinstall macOS on it.
To do that:
Open your Utilities window in recovery mode and select Reinstall macOS (by default, the OS is set to the one you had previously installed).
Don't close the lid of your Mac or put it to sleep during the installation.
Fix 5: Backup your data
As you can see, an unexpected error can lead to data loss that can be tricky to recover and sometimes even impossible. To back up your data, you can store important files in cloud storage or back up your Mac on external storage using the built-in app Time Machine.
To use Time Machine:
Go to Apple menu > System Settings > General > Time Machine.
Once in the app, select your external storage disk.
How much disk space do you need for backups? Generally, it’s 2-3 times the storage capacity of your Mac. For instance, my Mac has 245GB of storage, and even though I don’t use all of it, I should have at least 500GB for backups. To be safe, I use a 1TB drive. If you want to reduce the size of your Time Machine image, clean up unnecessary files using CleanMyMac, a Mac care app. CleanMyMac will optimize your Mac by cleaning cache and unnecessary files, locating old large files for you to review, removing local copies of email attachments, and even thinning your Time Machine snapshot.
Get Backup Pro allows you to handpick the files to back up, compress your backup, sync folders, and even schedule your backups.
Keep Time Machine backups lean by clearing clutter before you archive. Get CleanMyMac, iBoysoft Data Recovery, and Get Backup Pro from one curated library. Cancel anytime. Open 250+ apps.
Quick recap: How to fix a Mac folder with a question mark
Now you know that when a Mac shows a folder with a question mark, it means your computer can’t find a bootable disk. Sometimes it’s a minor error that can be easily fixed with an NVRAM reset or a Disk Utility First Aid scan. Other times, the problem will require disk formatting and a macOS reinstall.
To prevent data loss in the future, choose a backup option that works best for you, such as Get Backup Pro, and make copies of your important files and documents, as well as system settings. If you’ve already lost data, tools like iBoysoft Data Recovery can help you retrieve it before you proceed with formatting. A cleanup tool like CleanMyMac can clear out unnecessary files so your backups take up less space and run more efficiently.
Turn today’s fix into protection, recover data, back up, and keep your Mac ready. Keep iBoysoft Data Recovery, Get Backup Pro, and CleanMyMac on hand with 250+ apps. Cancel before Day 7 = $0 charged. Claim full access.
FAQs
Can I recover data if my Mac shows a flashing folder with a question mark?
Yes, you can recover data even when your Mac displays a flashing folder with a question mark. Tools like iBoysoft Data Recovery can retrieve files from your unbootable Mac before attempting any repairs that might result in data loss.
Is it possible to recover data from an encrypted APFS disk after seeing the question mark folder?
Yes, you can recover data from an encrypted APFS disk after seeing the question mark folder. iBoysoft Data Recovery supports APFS-encrypted drives and can recover data from encrypted volumes even when your Mac fails to boot.
Do I need a bootable drive to use iBoysoft Data Recovery on an unbootable Mac?
No, you don’t need a bootable drive to use iBoysoft Data Recovery on an unbootable Mac. You can launch the app directly from macOS recovery mode, which saves time and eliminates the complexity of creating bootable media.
Will formatting my Mac erase all my data?
Yes, formatting your Mac's startup disk will completely erase all data stored on it. This is why it's important to attempt data recovery using tools like iBoysoft Data Recovery before proceeding with disk formatting and macOS reinstallation. Once you format the drive, the data becomes more difficult or impossible to recover.