How to recover deleted files on Mac: Simple fixes that actually work in 2026
▼ Key takeaways
- Yes, it’s possible to recover deleted files on a Mac: Whether you’ve just deleted a file or emptied the Trash, macOS offers several ways to get your data back. Begin with simple fixes, such as Undo or Trash, before proceeding to backup or recovery tools.
- Check the Trash first: Open the Trash icon in your Dock, find the deleted file, right-click it, and choose Put Back. This restores it to its original folder instantly.
- Use Time Machine for backup recovery: If you have Time Machine enabled, connect your backup drive, open Time Machine, browse to the date before deletion, and click Restore. This works best for recovering files deleted permanently.
- Recover files that are permanently deleted or from unbootable Macs with iBoysoft Data Recovery: Install iBoysoft Data Recovery, choose the lost drive, click Scan, and then preview and recover your files. It supports SSDs, HDDs, USB drives, SD cards, and APFS-encrypted disks.
- Prevent future data loss with Setapp tools: Keep your data safe and your Mac healthy using Setapp apps like Get Backup Pro for scheduled backups, ChronoSync Express for syncing folders, and CleanMyMac for regular cleanup. These apps help you avoid losing important files again. Try them all and 250 more with a 7-day free trial.
A while back, I accidentally deleted an important file, which nearly gave me a heart attack. To make things worse, I soon realized I had also deleted several other documents that were crucial for a meeting the next day.
Here’s my story on how I recovered deleted files on my Mac.
Is it possible to recover deleted files on a Mac?
After the initial "I'm doomed" moment passed, I calmed down and figured there had to be a way to recover deleted files on a Mac, and I was right.
You can find a brief explanation of all the solutions in the table below. For more step-by-step instructions, read the detailed walkthroughs in the sections that follow.
| What’s the problem? | Try this |
| I need to quickly recover a file I just deleted | Press Command + Z to undo the action if just deleted. |
| I accidentally deleted a file | Open the Trash icon in the Dock. Right-click the file and choose Put Back. |
| I permanently deleted my file | Try recovery from macOS Time Machine. |
| I want my photos deleted less than 30 days old | Go to the Recently Deleted folder in the Photos app, select and recover the photos. |
| Emails deleted less than 30 days ago | Open the Mail app or email browser. Select Trash from the sidebar. Find the email and move it back to your inbox. |
| I often lose important files | Back up using Time Machine or Get Backup Pro. |
| I need to recover files from unbootable Mac or an encrypted drive | Use iBoysoft Data Recovery to scan the startup disk or APFS-encrypted drive and restore lost files. |
| I want to prevent losing files due to sync issues | Use ChronoSync Express to synchronize folders and keep updated copies across devices. |
| I want to protect files by cleaning up storage regularly | Use CleanMyMac and CleanMy®Phone to free up space, remove clutter, and reduce the risk of data loss. |
Recover deleted files on Mac from Trash
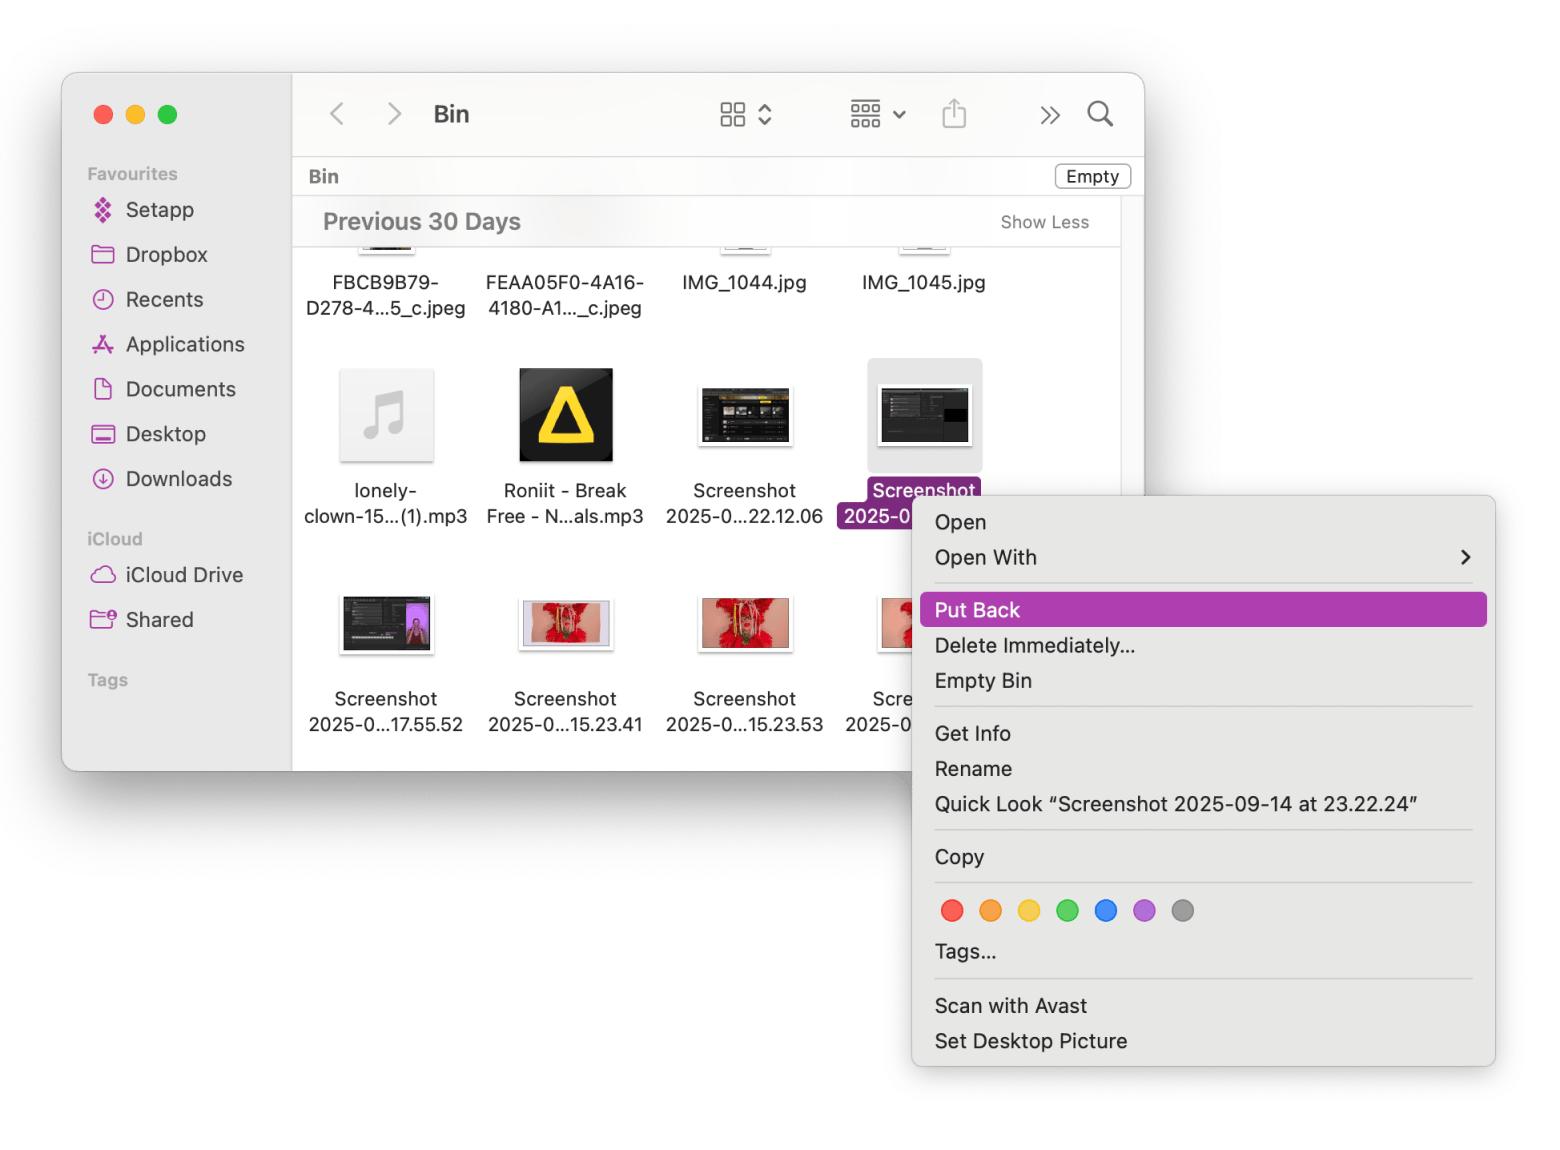
Before you panic or try more advanced solutions, check your Trash folder to see if the deleted files are still there:
- Simply click the Trash icon in your Dock and browse through the files.
- If you find your file, right-click it, choose Put Back, and it'll be restored to its original location.
How to recover deleted files on Mac using Undo?
If you’ve just deleted your file and haven’t performed any other actions on your Mac, here’s how to recover the file from Trash on Mac almost instantly:
- Press Command + Z without exiting the folder.
- Your deleted file will return to its original location.
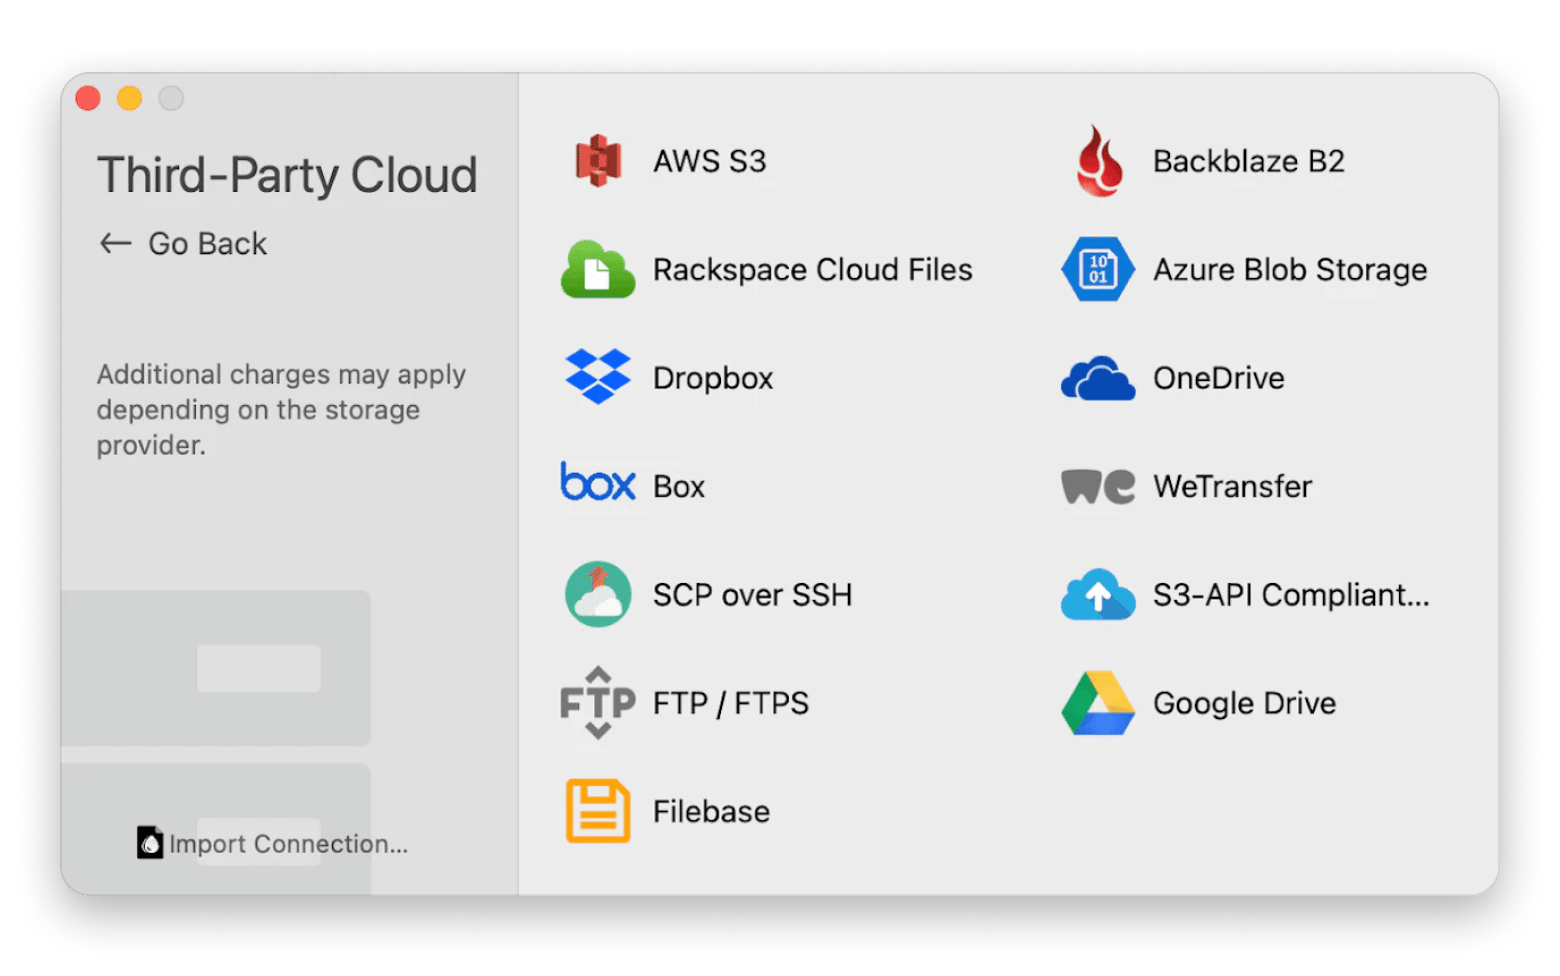
You can also use tools like Dropshare to easily move any important files to an online storage. The app is as simple as setting up the drive you want to sync with and then dragging and dropping any file or item you need synced onto the app’s icon in the menu bar.
Retrieve deleted Mac files using Time Machine
If you have a backup of your Mac, then you can try to retrieve your files using Time Machine. It's a free backup tool included with your macOS.
Just a reminder that you should always have a regular incremental backup plan in place. Ideally, it should include two separate backups to two different destinations in different physical locations.
Here’s how to recover your deleted files using Time Machine:
- Connect the storage device that contains the Time Machine backup to your Mac.
- Open Time Machine (click the Time Machine icon in the top-right corner of your menu bar or go to Finder > Applications).
- Use the timeline on the right side of the screen to navigate to the date you think the file was last present.
- Scroll through the Finder window to find the folder and file you want to recover. You can use the search bar to find the file. There may be multiple versions of a modified file, and you can choose the version you want.
- Select an item to restore and press the spacebar to preview it.
- Click Restore to recover the selected file or folder.
Do you ever face issues with Time Machine? Fix Time Machine stuck on preparing backup.
Recover permanently deleted files on Mac with iBoysoft Data Recovery
Even if you think your files are gone forever, there's a way to get them, whether or not your Mac boots. All you need to do is install iBoysoft Data Recovery, which is a reliable and easy-to-use solution for recovering permanently deleted files on Mac.
The process is super simple and involves only a few steps:
- Install and open iBoysoft Data Recovery.
- Choose the drive where your files were lost and click Scan.
- Preview the files once the scan finishes to confirm they’re the ones you need.
- Recover the selected files and save them to a safe location.
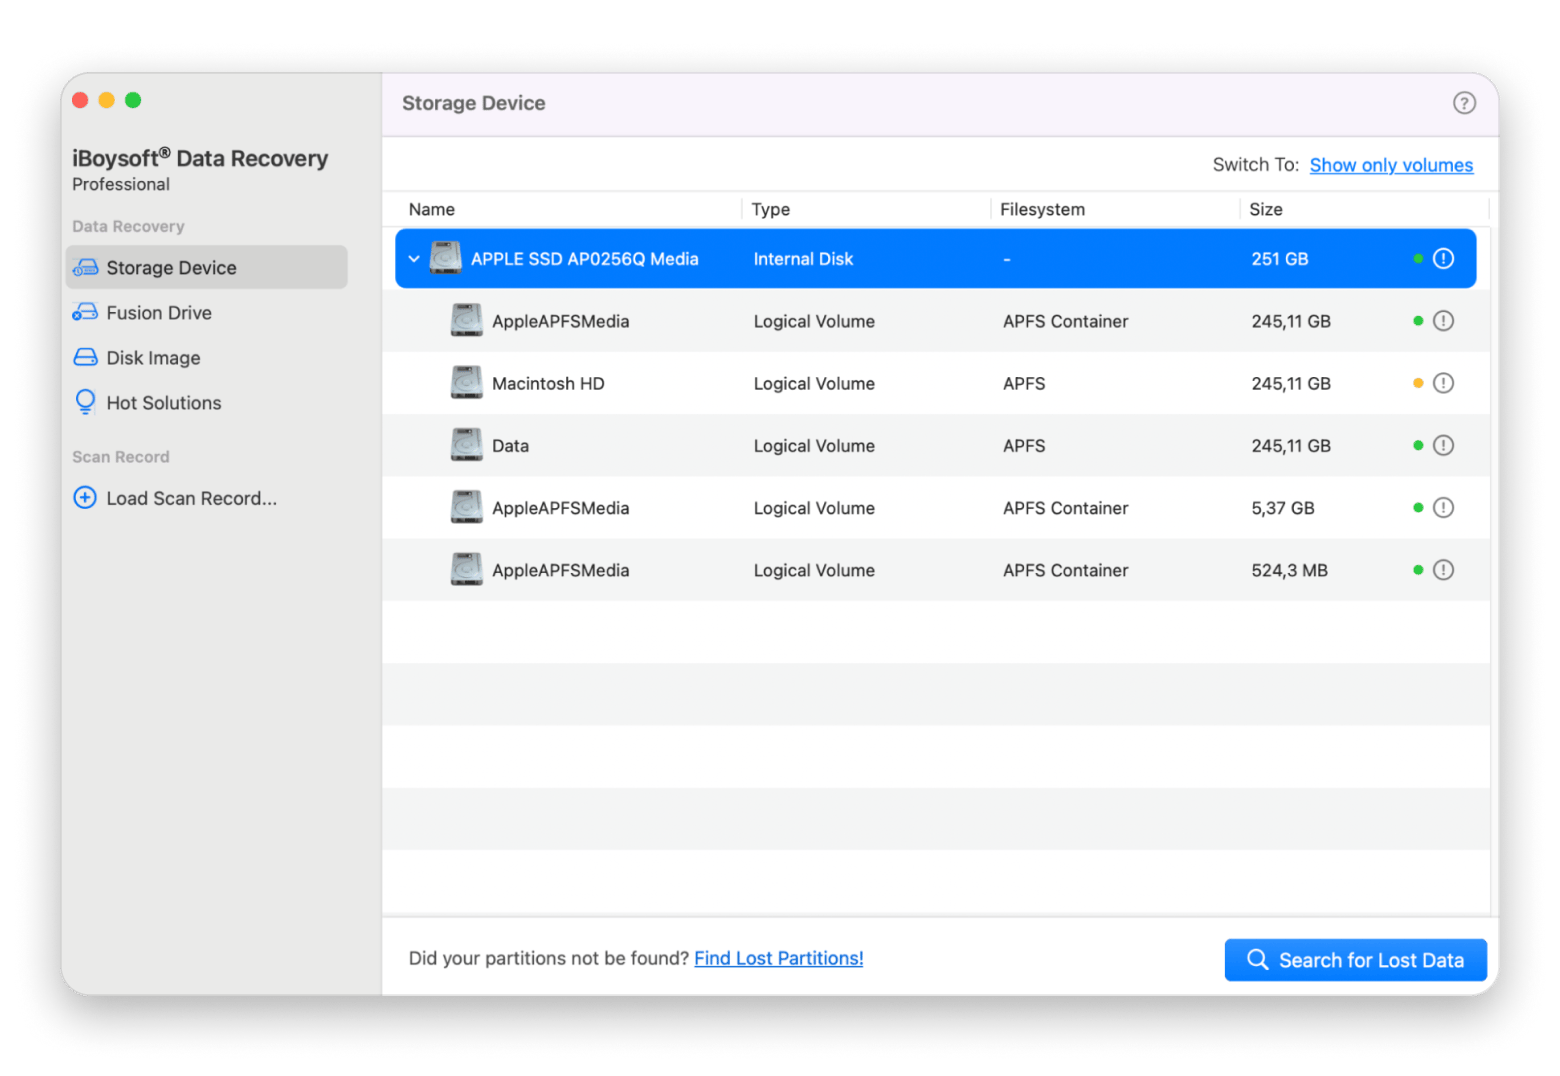
You don’t need to be tech-savvy to use the app. It works with your Mac’s SSD or HDD, as well as USB drives, SD cards, and even startup disks.
Real-world use cases of iBoysoft Data Recovery
iBoysoft Data Recovery has a rating of 4.8 stars and recommendations from users worldwide. The app can be a lifesaver in many everyday situations. Here’s how it can help you too:
- Recover work documents before a deadline: You've probably deleted an important file by mistake at least once in your life, so you know the panic. With iBoysoft, you can scan your drive and recover your data in minutes.
- Restore family photos from an SD card: Losing a work file is stressful, but losing precious family photos is devastating. You can always redo the work file, but you can never recapture those family moments. You just need to insert your SD card and click Scan. Once the scan is complete, you can preview the photos, select the ones you want, and click Recover to save them safely back to your Mac.
- Retrieve data from an unbootable Mac: If your Mac suddenly crashes and refuses to start, you can still use iBoysoft to recover files directly from the startup disk and avoid losing everything.
No wonder iBoysoft Data Recovery is one of the best data recovery tools for Mac. If you’ve ever wondered how to retrieve data from a hard drive on a Mac, this app makes the process quick and straightforward.
Recover deleted files using Terminal
Moving on, the next method you can use to recover deleted files is through Terminal. This approach works mostly on older versions of macOS, and you'll need to enter a few commands, but don’t worry, I’ll walk you through the steps.
Here's what to do:
- Open the Terminal app on your Mac (go to Applications > Utilities > Terminal, or search for it with Spotlight by pressing Command + Space and typing Terminal).
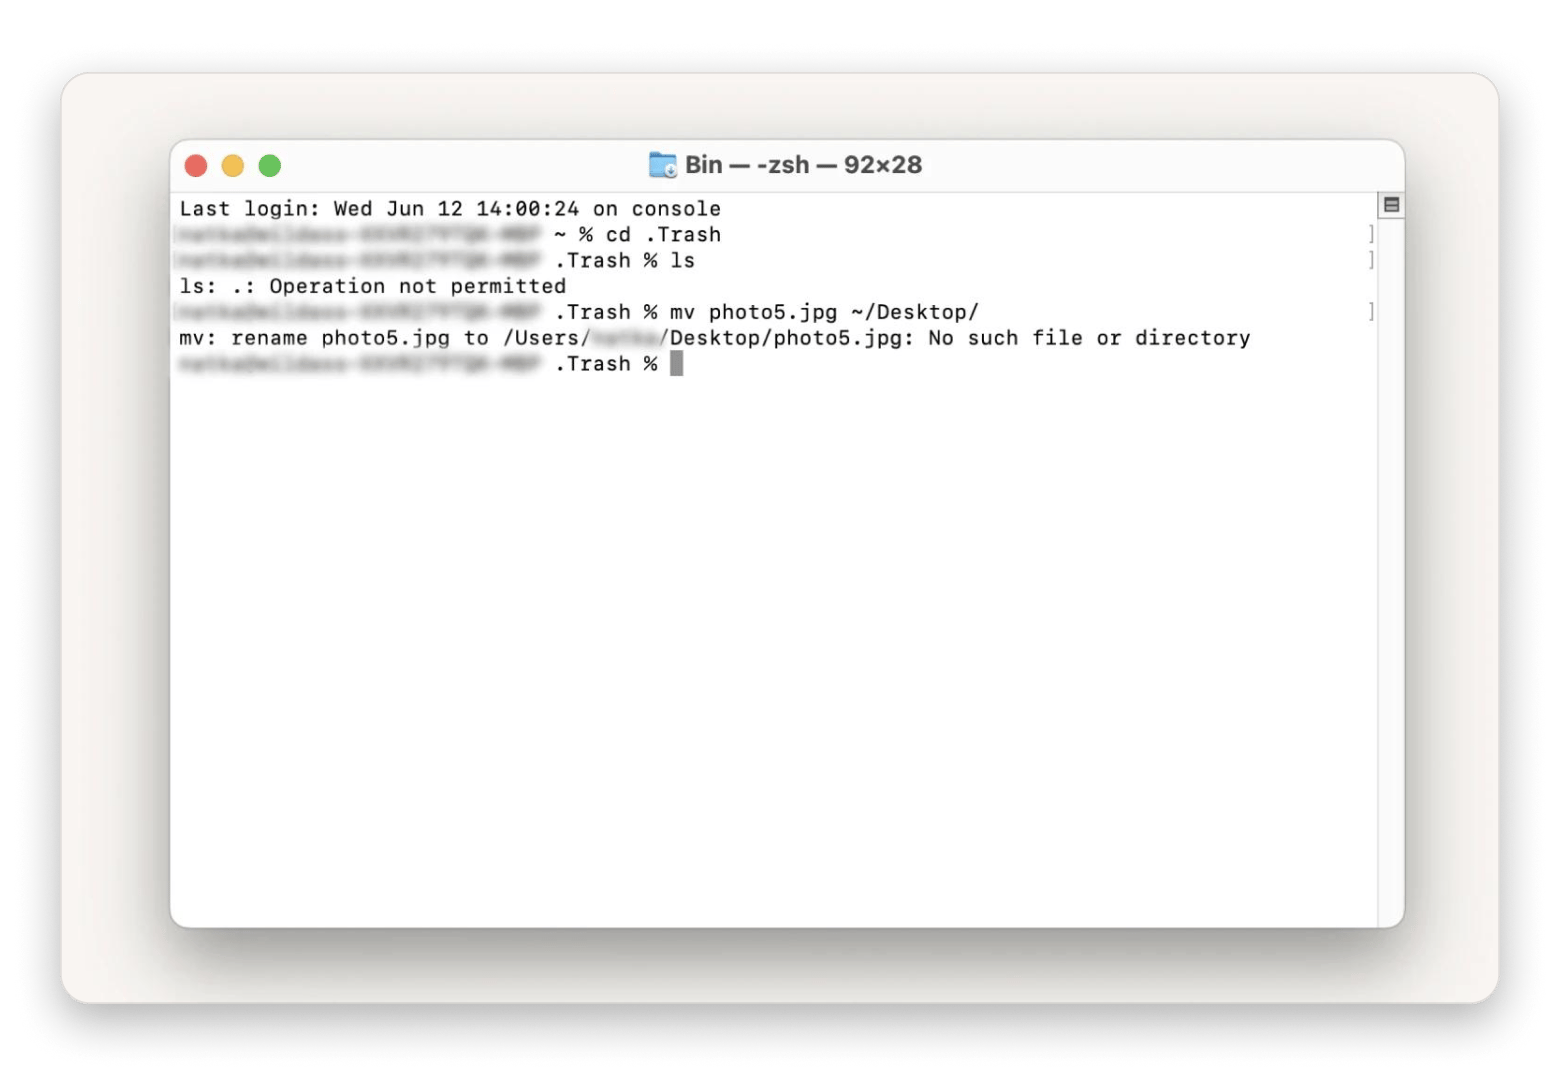
- Enter the command cd. Trash and press Return to go to the Trash folder.
- Type ls and press Return. This command will display the contents of the Trash bin. You'll see all the deleted files that are currently stored there.
- Use the mv command to recover your file by typing it in this format: mv [filename].[extension] [destination] and press Return. For example: mv photo5.jpg ~/Desktop/
- Type Quit to close Terminal.
- Open Finder and navigate to the destination folder.
Restore deleted emails from the Mail
If the lost file you want to restore is an email, the first place to check is the Trash folder in your email account.
Note that deleted emails are only stored in the Trash folder for a limited time, typically around thirty days, depending on your email service provider.
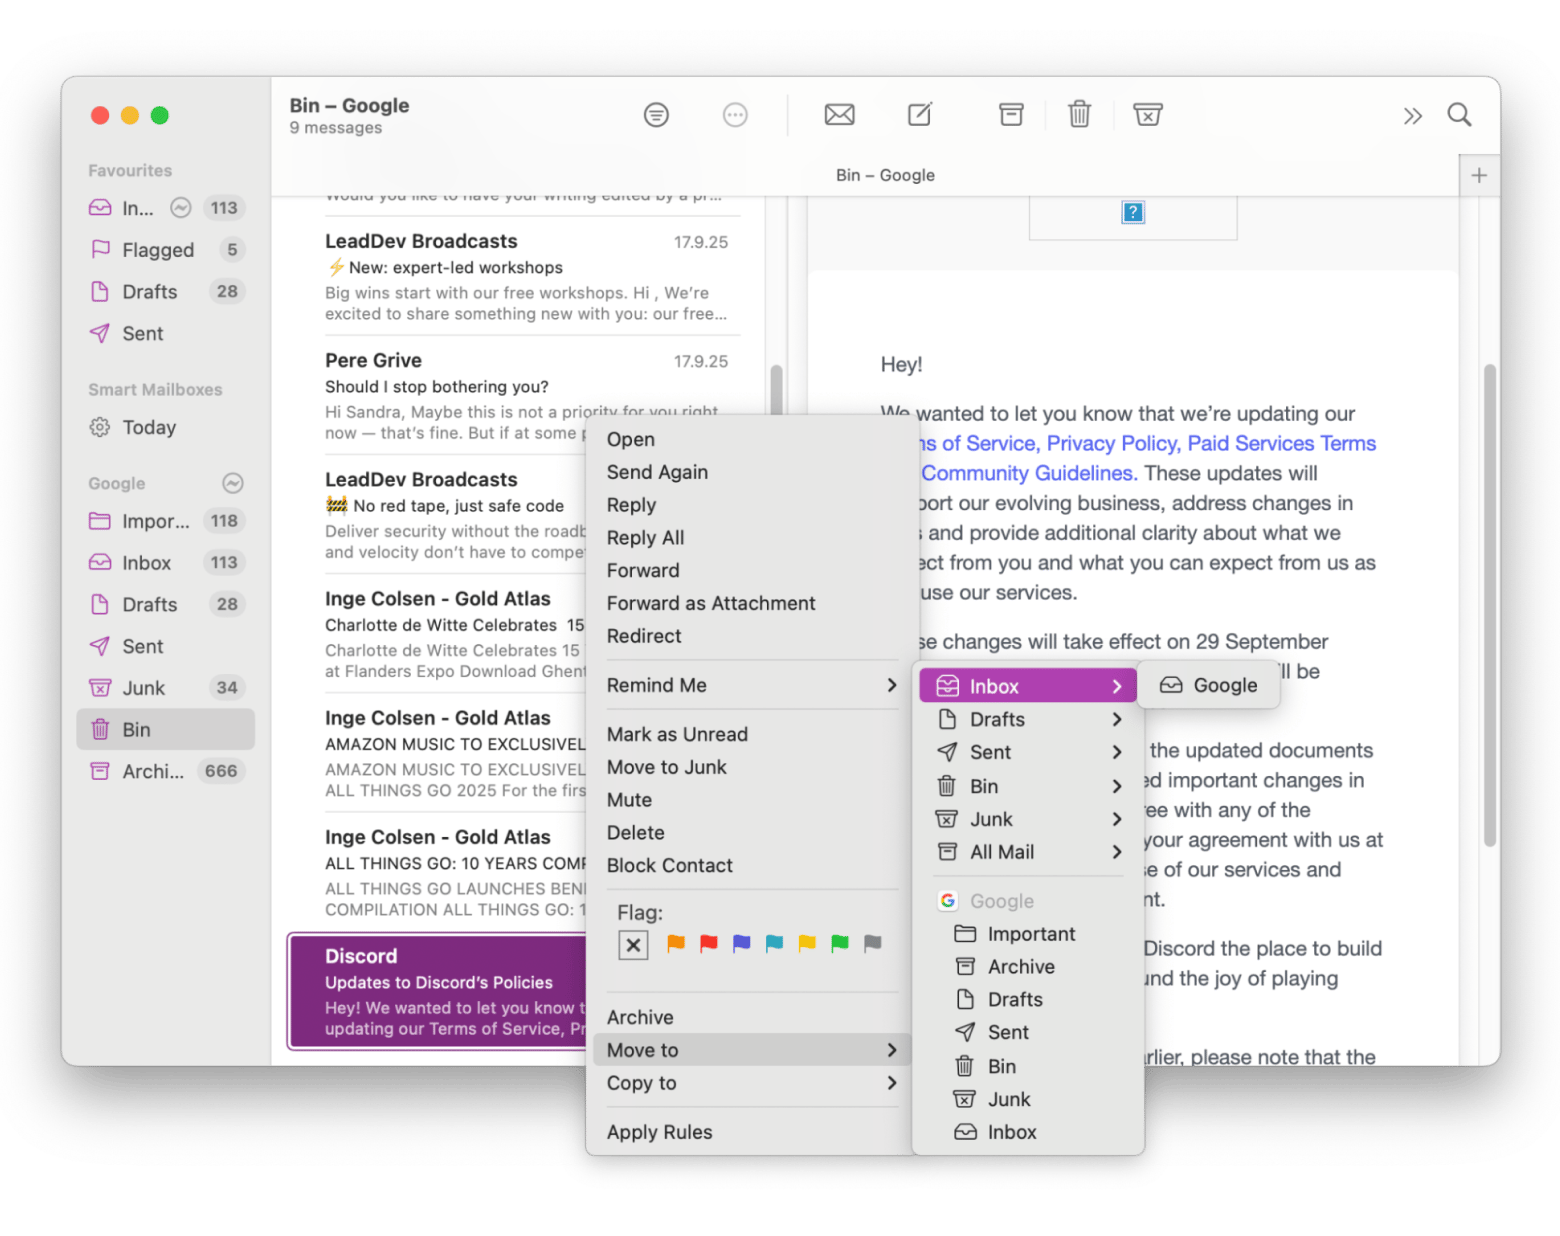
Here’s how to recover deleted emails on a Mac from the Trash folder:
- Open the Mail app.
- Select Trash from the sidebar on the left.
- Browse the deleted emails to find the one you need.
- Right-click the email you want to recover and choose Move to from the drop-down menu.
- Choose the preferred location for the email (for example, Inbox).
This method also works if you access your email account via a browser. Just find the Trash folder in the sidebar and recover the email you need.
Read also:
Explore AutoSave and similar built-in backups
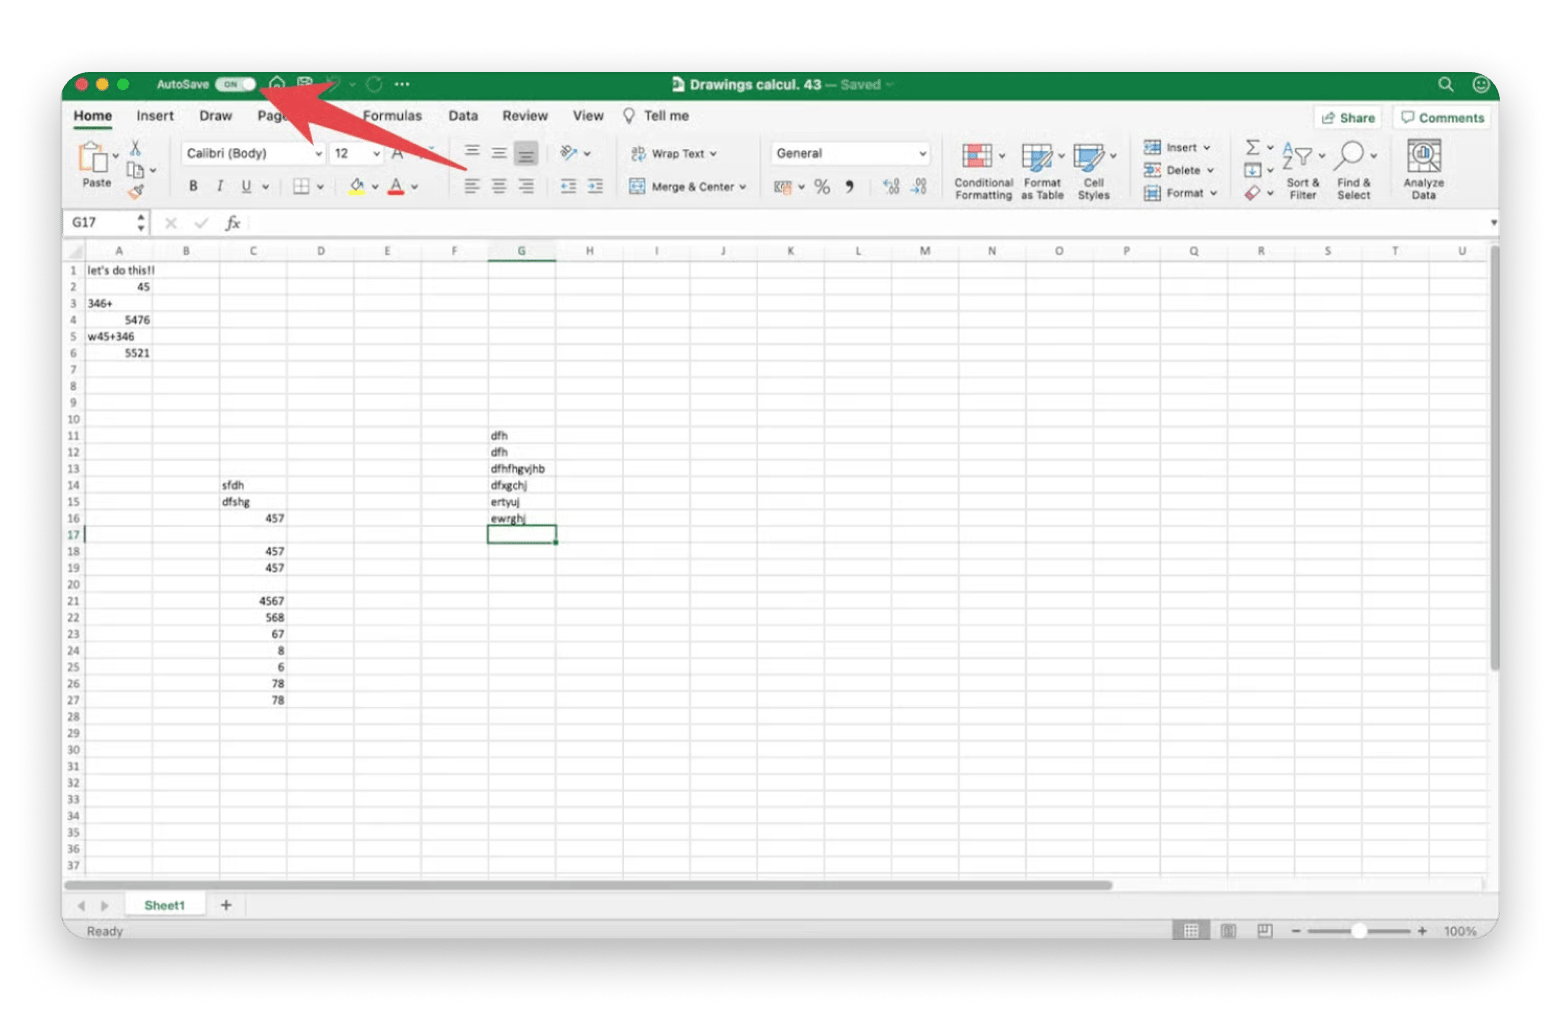
If you’ve lost data while working with popular heavy-duty apps like Photoshop, Word, or Excel, you might be able to use the AutoSave feature. This built-in tool usually creates a copy of your file automatically, so that you always have the freshest version of your file, even if you didn't manually save it.
Here's what AutoSave looks like in Excel:
Apps like OneDrive, Dropbox, and Google Drive have version history for their files, so if you’ve lost some data, you can try to browse your file versions to see if there’s something you can save.
Final thoughts on how to recover deleted files on Mac
Now you know that you don't have to panic every time you delete an important file. There are plenty of retrieval options, like checking the Trash folder or creating Time Machine backups.
Another option is to download iBoysoft Data Recovery, which can bring back permanently deleted files and even recover data from unbootable Macs. For extra protection, consider using Get Backup Pro, ChronoSync Express for scheduled backups, and Dropshare to save space while sharing files. And to keep your Mac running smoothly while managing backups, apps like CleanMyMac and CleanMy®Phone from Setapp come in handy.
All of these tools are part of Setapp, a platform with over 250 premium macOS and iOS apps. Setapp includes tools for work, life, and everything in between, all ad-free and without any in-app purchases. There's a free seven-day trial, so give these apps a try before deciding if they're the right pick for you.
FAQ
Where do deleted files go in Mac?
When you delete a file on a Mac, it is moved to the Trash folder. The file remains in the Trash until you empty it, so you can restore it if necessary. To restore a file from the Trash, simply open the Trash folder, right-click the file, and choose Put Back.
Can you recover deleted files on a Mac without Time Machine?
Yes, you can recover deleted files on a Mac without using Time Machine. If the files are still in the Trash, you can restore them directly from there. If they are not in the Trash, you can use the Undo command if you just deleted them.
Can permanently deleted photos be recovered?
Recovering permanently deleted photos can be a challenge. If you have emptied the Trash bin or deleted photos from the Recently Deleted album, your best chance is to use data recovery software.
Are there any built-in Mac features for recovering deleted files?
macOS has several built-in features for recovering deleted files. These include:
- Trash folder
- Recently Deleted folder in applications such as Photos and Notes
- Undo (Command + Z) command for instant deletions.
In addition, Time Machine is a powerful built-in backup solution that can help you recover older versions of files or files that have been permanently deleted.
Can I recover files without using third-party software?
Yes, you can often recover files without using third-party software. Start by checking the Recycle Bin and Recently Deleted folders in various applications. If you just deleted the file, use the Undo command. If you have a Time Machine backup, you can recover files from it. However, files that cannot be recovered using these methods may require third-party data recovery software.
Can I recover files from an unbootable Mac without creating a bootable drive?
Yes, you can recover files from an unbootable Mac without creating a bootable drive. With iBoysoft Data Recovery, you can open the tool in macOS recovery mode and scan your startup disk. After the scan, just preview the files you want and recover them quickly to a safe location.
Does iBoysoft support APFS-encrypted drives?
Yes, iBoysoft Data Recovery supports APFS-encrypted drives and allows you to recover files even if your disk is encrypted. All you need to do is enter your password when prompted, and the software will scan the drive, preview recoverable files, and restore them securely.


