What is Error 43, and how to fix it [Without losing files]
- Quick fixes to try first
Start with easy fixes like force-quitting Finder (Command + Option + Escape > Finder > Relaunch) or stopping apps that use the file through Terminal (lsof | grep [file path]). These often resolve the issue instantly. - Check drives and system settings
Reconnect your external drive if the file is stored there, or reset NVRAM (Option + Command + P + R during restart) to fix system-level glitches that trigger Error 43. - Repair or recover damaged files
If Disk Utility’s First Aid can’t fix the issue, recover your files with iBoysoft Data Recovery before trying advanced solutions like Safe Mode or macOS reinstallation. - Prevent future Error 43 issues
Keep your macOS updated, clean your system regularly with CleanMyMac, and back up data using Get Backup Pro. All these tools are available together in Setapp, so you can fix and prevent errors easily without losing files. Try them and over 250 more apps with a 7-day free trial.
Error 43 typically pops up when you try to rename, delete, or move a file that’s non-existent, corrupt, or locked. The good news is that it's completely fixable! From my experience, it’s more common on pre-Sonoma versions of macOS, but the troubleshooting process remains the same regardless of the macOS version you're using.
How to fix Error code 43: Quick solutions
To save you time, I’ve listed the quick solutions in the table below. Scroll down for more details on each one.
| Your solution | Steps to do |
| Force quit Finder | Press Command + Option + Escape, select Finder, and click Relaunch. |
| Stop apps from using the file | Use Terminal: type lsof grep [file path], stop listed apps in Activity Monitor, and retry the operation. |
| Reconnect external drive | Eject and reconnect the drive; try a different port if necessary. |
| Reset NVRAM | Restart Mac holding Option + Command + P + R keys for 20 seconds. |
| Run Disk Utility check | Open Disk Utility, select the drive, and run First Aid. Recover important files with iBoysoft Data Recovery if Disk Utility can't fix the issue. |
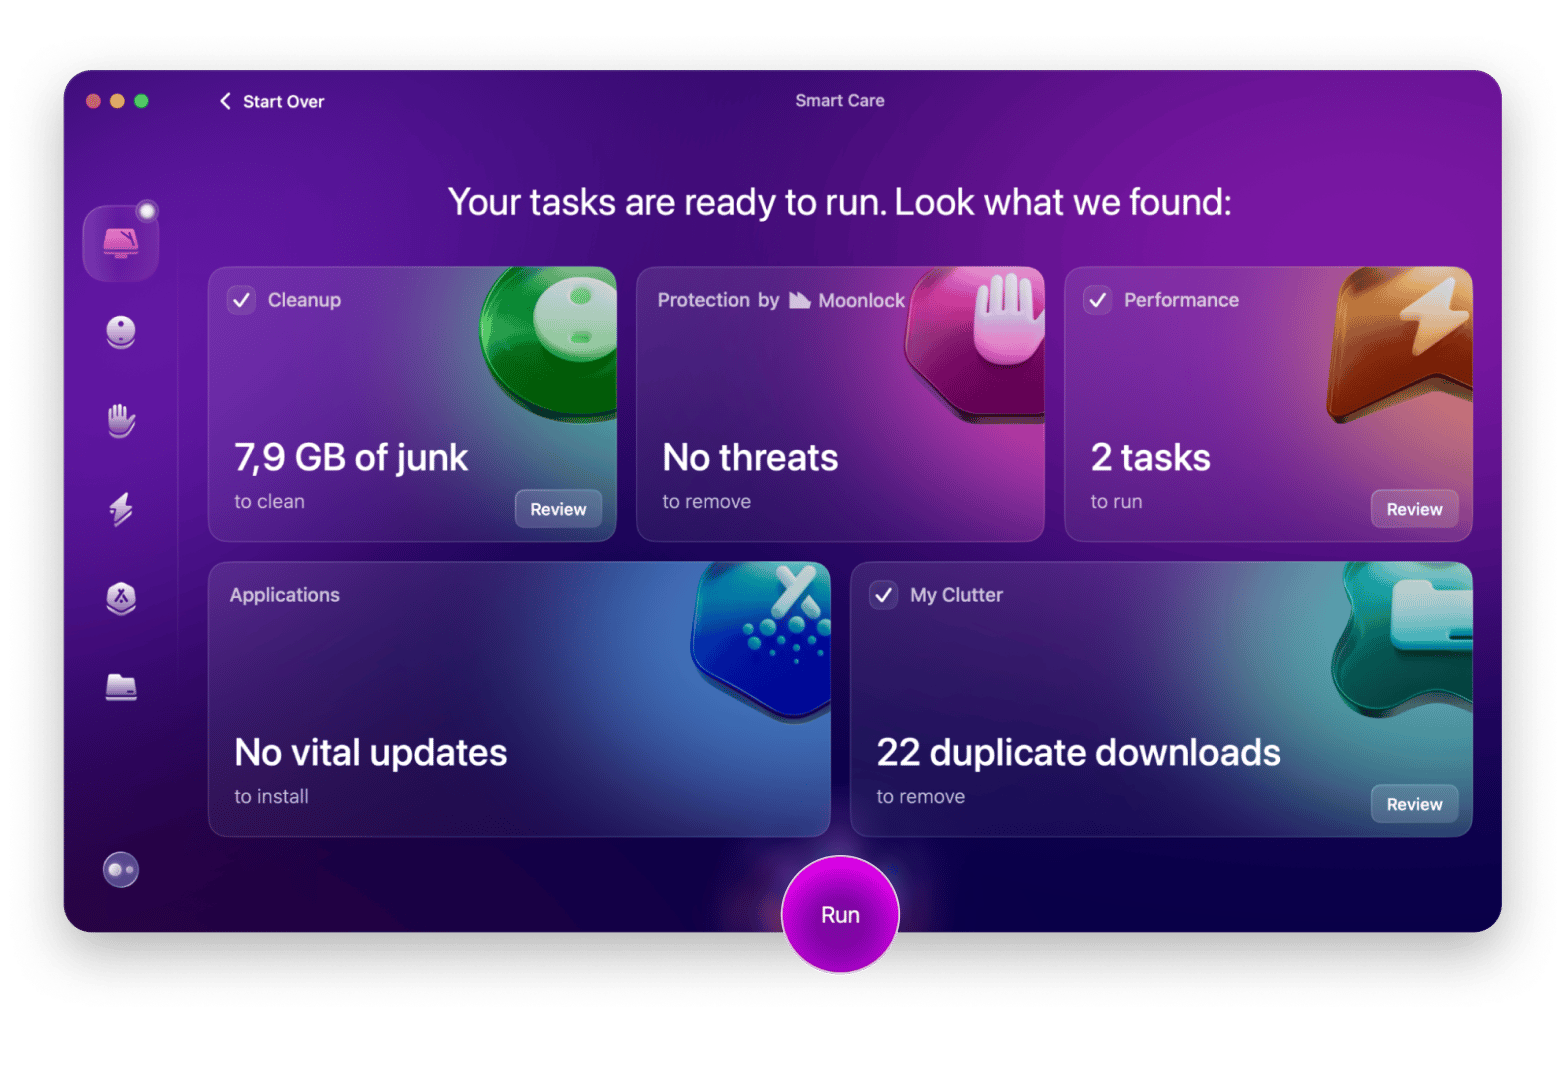
| Clean your Mac | Install CleanMyMac and run Smart Care to remove system junk, old app remnants, and other clutter. |
| Modify in Safe Mode | Boot in Safe Mode (Shift key during startup), modify the file, and restart in normal mode. |
| Remove via Terminal | Use Terminal: rm [file path] for files or rm -r [folder path] for folders. |
| Reinstall macOS | Back up data with Get Backup Pro, boot into recovery mode, and select Reinstall macOS. |
How to fix error code 43 on MacBook
I’ve listed the fixes from easiest to most difficult, just as I would try them myself. You can start wherever makes the most sense if you think you know what’s causing the issue.
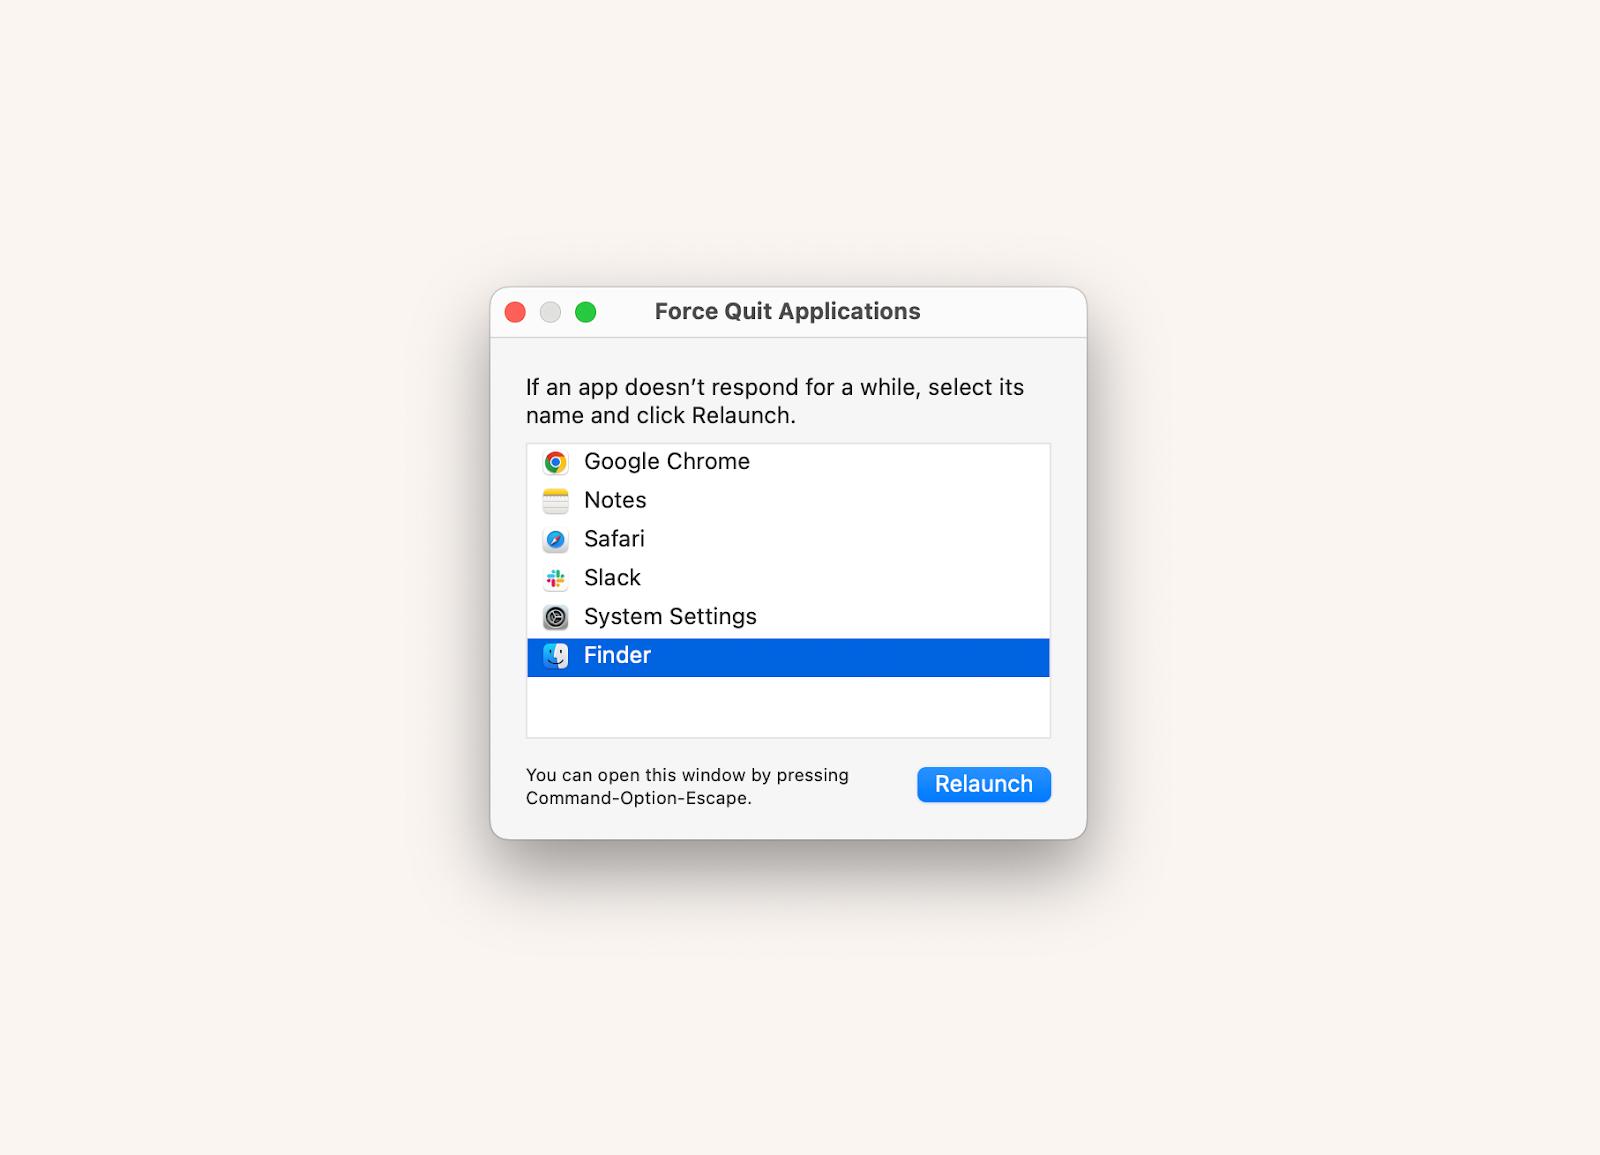
#1. Force Quit Finder
When you force quit Finder, you restart its processes, clear its cache, and free it from glitches.
Here's what to do:
- Press Command + Option + Escape.
- Click Finder.
- Click Relaunch.
Also, check out how to fix a MacBook stuck loading Finder.
#2. Stop the apps that use the file
If an app is using the file and crashes or freezes, your Mac won’t let you make changes. Closing the app can fix the issue.
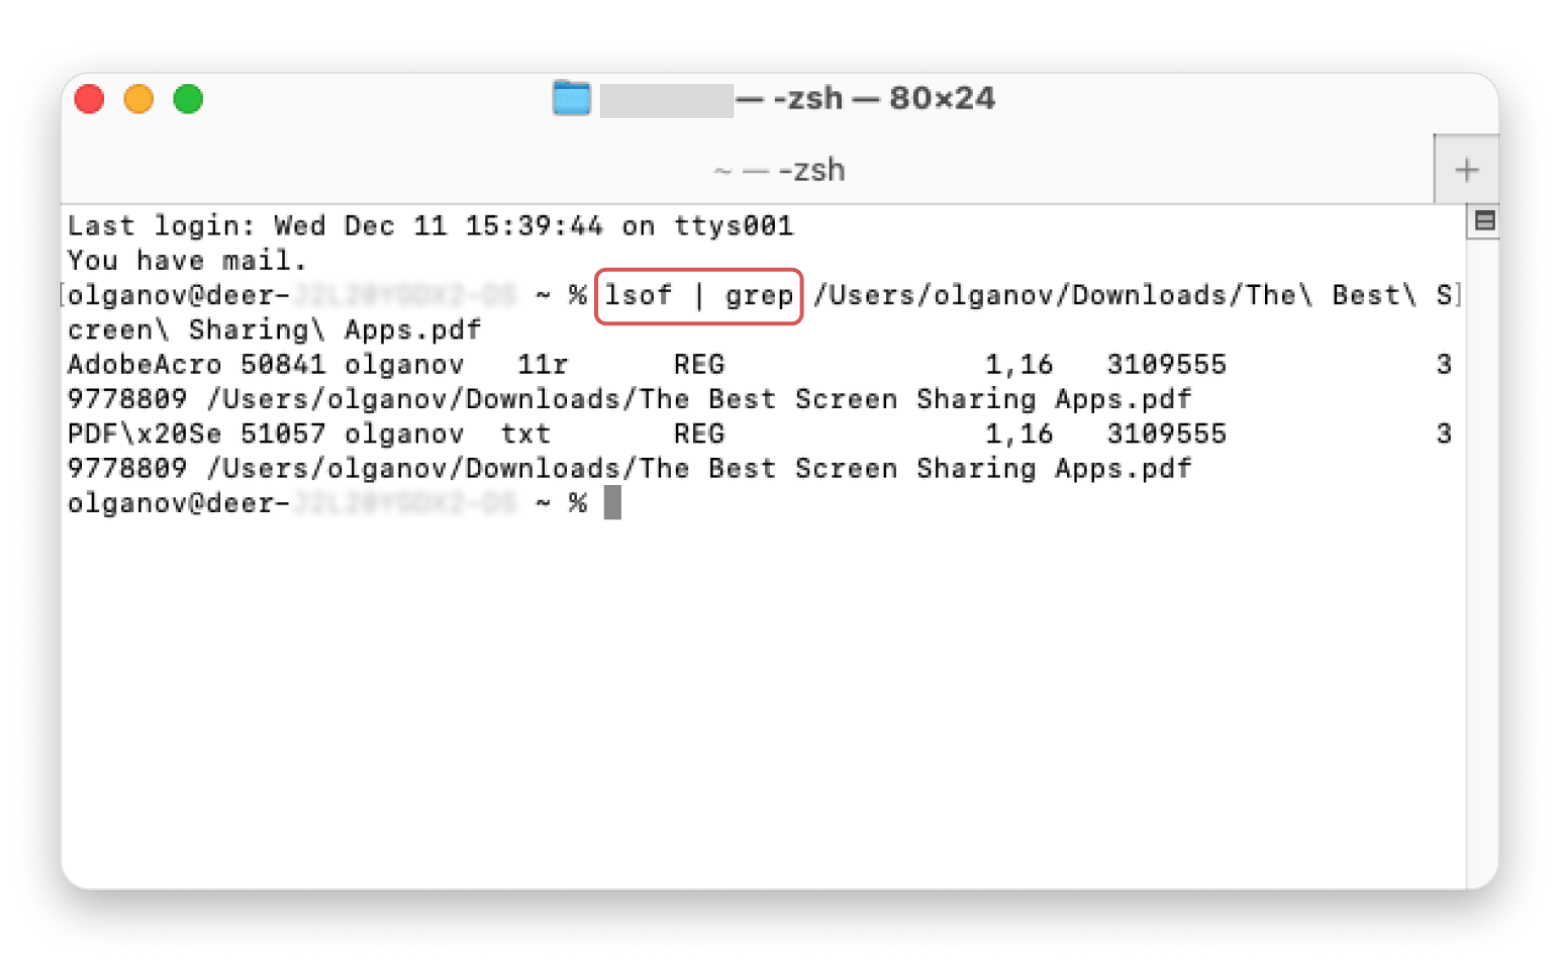
First, check which apps are using your file:
- Open Terminal (go to Applications > Utilities > Terminal, or search for it with Spotlight by pressing Command + Space and typing Terminal).
- Type lsof | grep (with space at the end).
- Drag your file into the Terminal window, and press Return.
You can see which apps were using the file I needed in the screenshot below:
Next, you need to stop these apps from using the file:
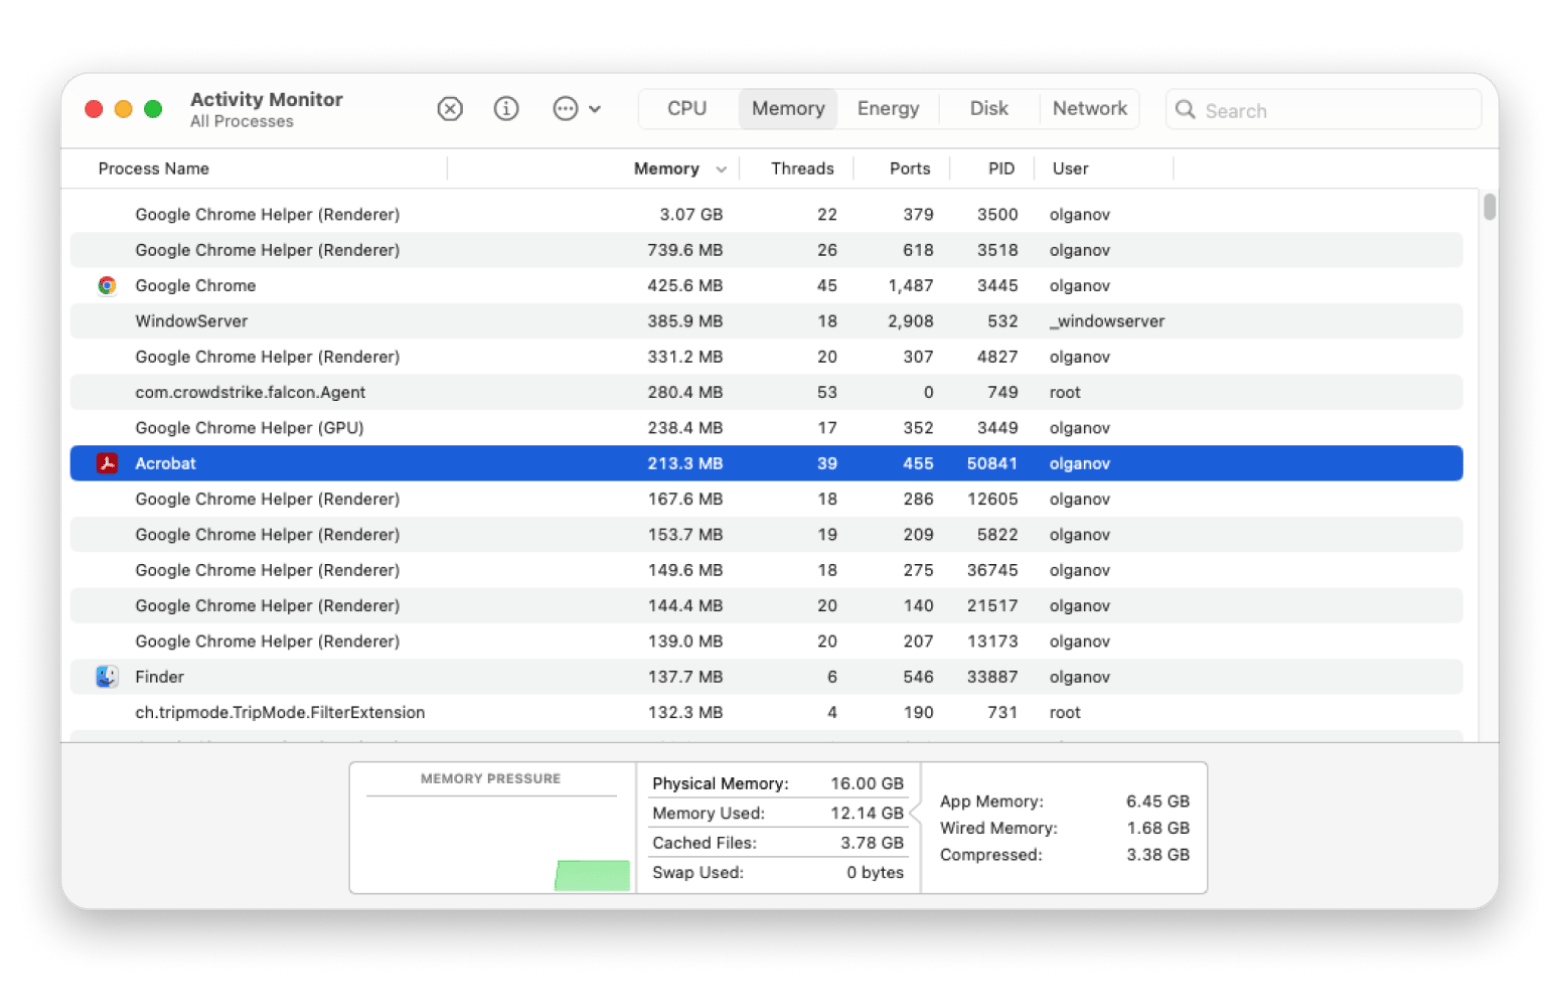
- Open Activity Monitor (find it in Applications > Utilities > Activity Monitor, or search for it with Spotlight by pressing Command + Space and typing Activity Monitor).
- Choose each app that's listed.
- Click the cross in the left corner.
The last step is to try modifying the file again.
My experienceMany Mac crashes happen when the system is clogged with system junk, old program remnants, uncleared cache, and other clutter. That's why whenever my Mac acts up, I run CleanMyMac. Its Smart Care feature often resolves errors within minutes, and my Mac performs better after a cleanup.
|
#3. Reconnect the external drive
Error 43 can occur if your Mac loses connection to an external drive while it's running. This can happen due to a power failure, a glitch, a loose cable, or a port problem. Reconnecting the drive often resolves some of these problems.
Here's how to reconnect it:
- Right-click the external hard drive in Finder and choose Eject.
- Remove the drive when prompted.
- Reconnect the drive.
Now check if the problem has been resolved.
#4. Reset NVRAM/PRAM
NVRAM/PRAM stores information about file paths and cache data for system processes. Glitches or failures in these settings can sometimes cause Mac error code 43.
To reset PRAM/NVRAM on an Intel Mac:
- Shut down your Mac.
- Press the power button.
- Immediately press and hold Option + Command + P + R.
- Hold for 20 seconds.
- Release the keys.
There’s no manual way to reset NVRAM/PRAM on Apple silicon Macs. It resets automatically when your Mac restarts. If you're unsure about your Mac model, navigate to Apple Menu > About This Mac and check the Chip line for details.
Here’s a more detailed guide on how to reset PRAM/NVRAM and SMC on a Mac.
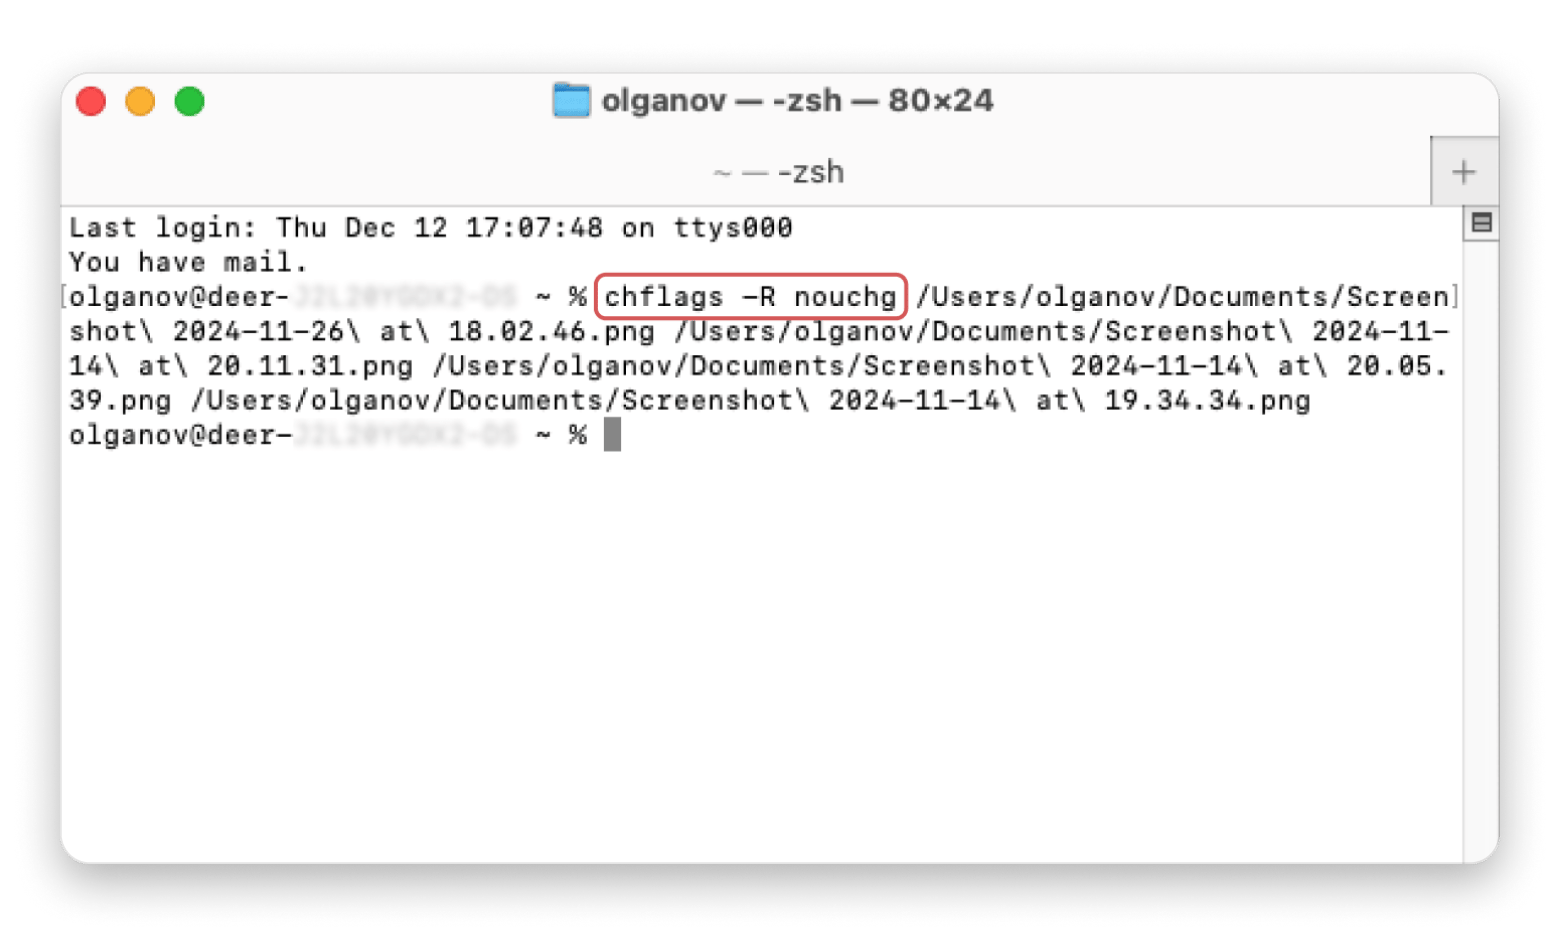
Locked files on Mac?On older Macs, a locked file could show up and throw error 43. If this happens to you, try to unlock it. The traditional method would be to select the file, press Command + I, and then deselect the Locked box. If you have multiple locked files, do yourself a favor and unlock them through Terminal:
|
#5. Run Disk Utility check
Error 43 can be caused by file system problems, such as permission conflicts, corrupted metadata, errors (e.g., due to improperly ejected external drives), logical errors, and so on.
Many of these problems can be fixed by running a Disk Utility check.
Here's how:
- Open Disk Utility (go to Applications > Utilities > Disk Utility, or press Command + Space and search Disk Utility with Spotlight).
- Select the drive or volume. For internal issues, you can check Macintosh HD.
- Click the First Aid button.
- Review the results. Disk Utility will either fix the issues or provide additional solutions.
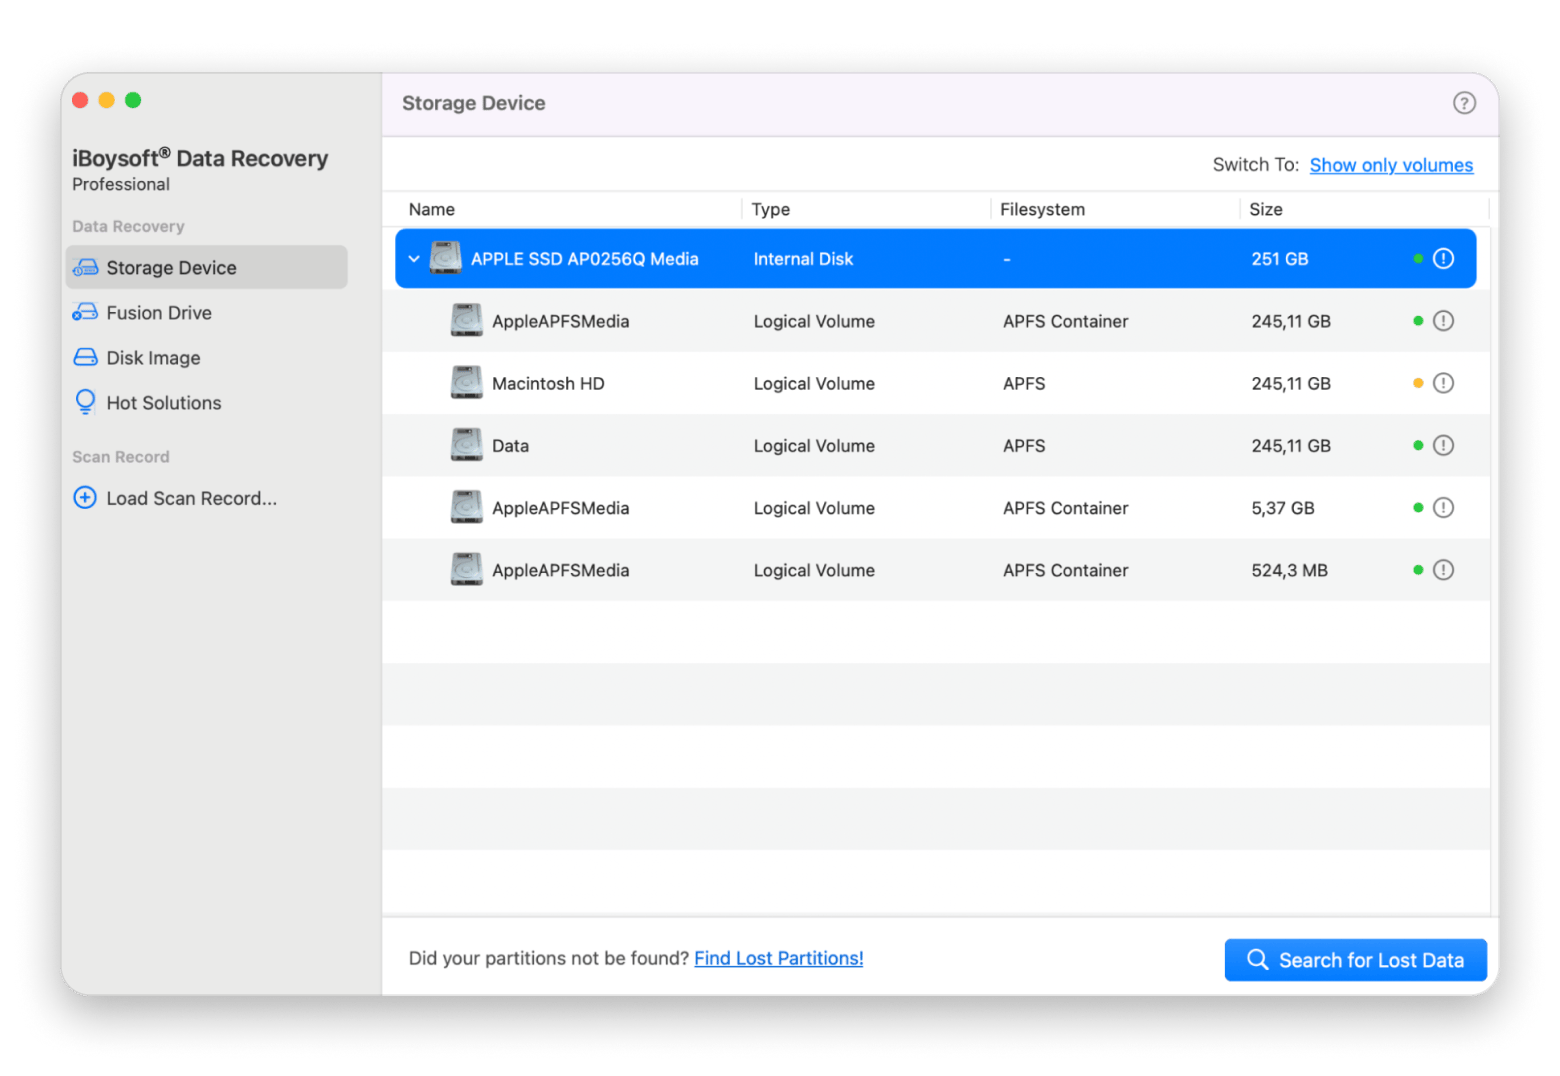
If Disk Utility can’t repair the drive, consider using iBoysoft Data Recovery for Mac to recover your files before proceeding to more advanced fixes:
- Install and open the app.
- Choose the drive.
- Click Search for Lost Data.
#6. Modify the file in safe mode
Sometimes, you can't modify or delete a file because of an app conflict. Safe mode disables most apps, making your file "untethered" from them, allowing you to modify it.
Follow this step-by-step process:
- Turn off your Mac and enter safe mode.
- For Intel-based Macs: Turn on your Mac and immediately press and hold the Shift key. Release it when you see the login screen with the words Safe Boot in the menu bar.
- For Apple silicon Macs: Press and hold the power button until you see the startup options screen. Select your startup disk (typically, Macintosh HD), then hold Shift and click Continue in safe mode.
- Wait for the system to load. Don't panic if your Mac takes longer than usual to load; this is normal in safe mode.
- Modify the file you need.
If it works, simply restart your Mac to return to normal mode.
#7. Force delete files or folders with Error 43
If your goal is to get rid of a file rather than rename or move it, there are several ways to force delete it. If the usual "Move to Trash" doesn't work, there are two methods that can work magic.
The first method is the force deletion shortcut. Just click on the file and press Command + Option + Delete.
The second option is using a Terminal command. To delete a file:
- Open Terminal (go to Applications > Utilities > Terminal, or search for it with Spotlight by pressing Command + Space and typing Terminal).
- Type rm (with a space at the end).
- Drag the file you want to delete into Terminal, then press Enter.
- Type the password if Mac asks for it.
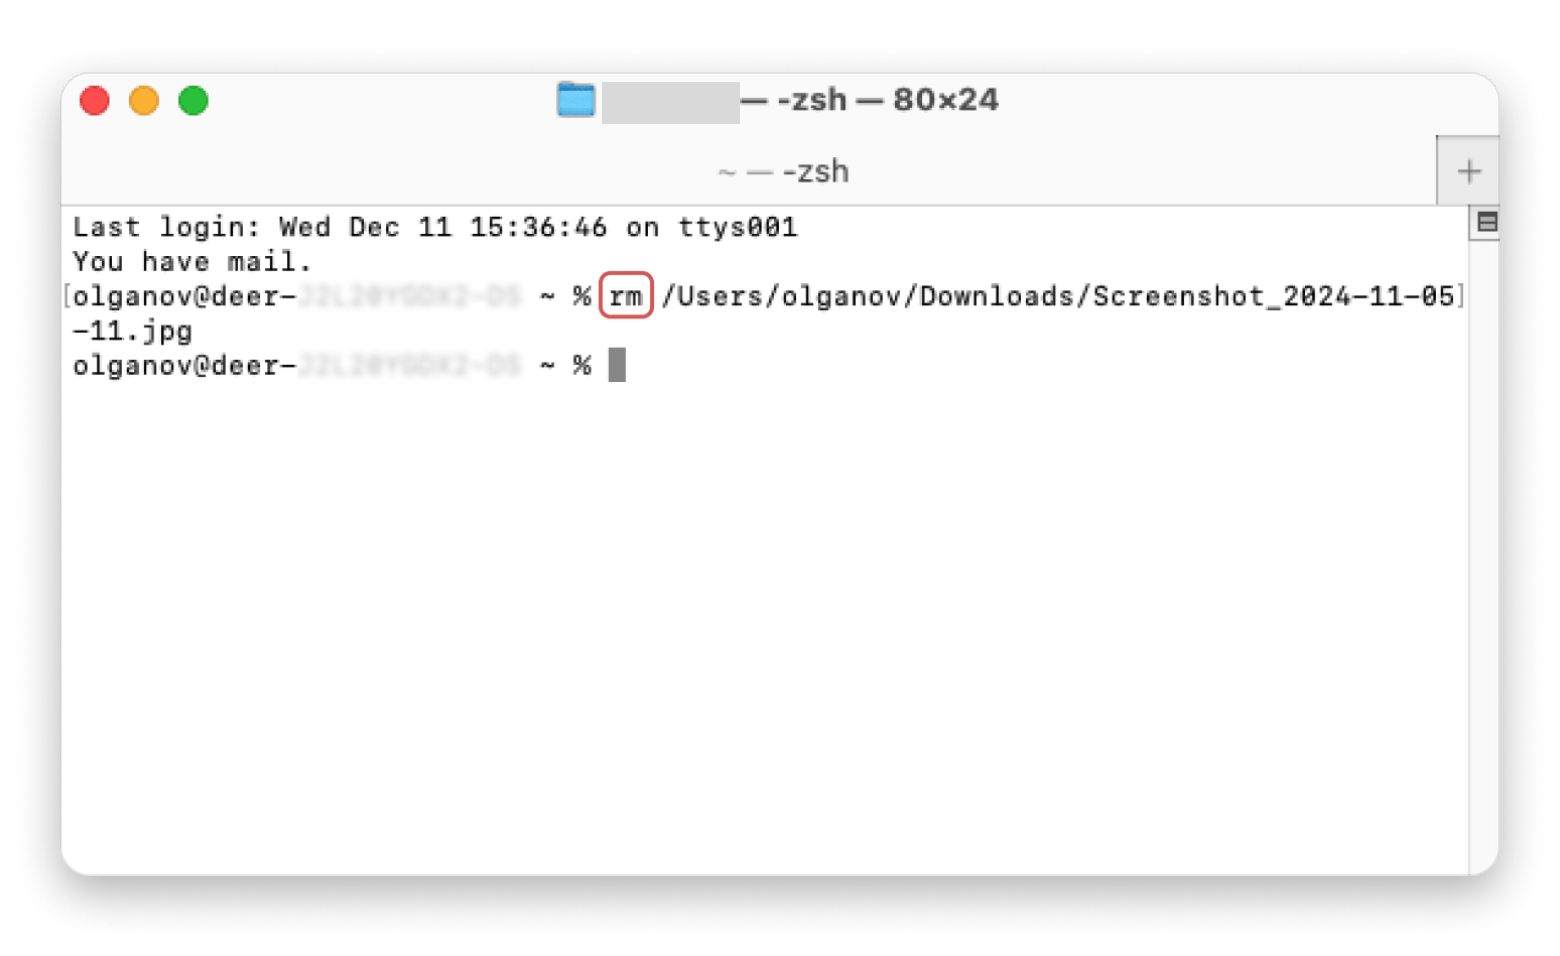
To delete a folder, use the same process but a different Terminal command: rm -r (with a space at the end).
#8. Reinstall macOS
If none of the solutions so far worked to fix Error 43, then the last step is to reinstall macOS. I'll briefly describe the main steps, but I recommend reading the detailed instructions on how to reinstall macOS without messing up your data.
Follow this process:
- Back up your data: Although in most cases, macOS reinstallation doesn't damage your files, you should always have a backup. I use Get Backup Pro, mainly because it allows me to back up the entire Mac, as well as individual files. Plus, its archives are up to 60% more compact than Time Machine.
- Boot into recovery mode:
- On Intel-based Macs: Restart your Mac, then hold Command + R while pressing the power button.
- On Apple silicon Macs: Shut down your Mac, then press and hold the power button until the startup options screen appears.
- For more details, read the guide How to use Recovery Mode on Mac.
- Choose Reinstall macOS: In the macOS Utilities window, follow the on-screen instructions.
- Wait for the process to complete.
My advice: If you need a quick Mac fix, just tell the ChatGPT assistant what's going on. It can help you figure out any Mac problem (like when a MacBook won’t start up) by describing it in your own words.
What is Error 43, and why does it occur?
When you get Error 43, it means your Mac can't find the file you need to perform your desired action. In most cases, this is because you've moved the file to a different folder, renamed it, or deleted it. Sometimes, files affected by Error 43 get stuck in the Trash and can’t be deleted.
Here are the main reasons why Error 43 happens:
- Cache problems or a Finder glitch.
- The file or its metadata is damaged. This may occur if a file wasn’t fully downloaded from the internet or if a cloud sync error occurred.
- The file name contains special characters, such as <, >, or |.
- You have no permission to modify the file. To check, right-click the file and select Get Info > Sharing & Permissions. If you see Read & Write next to your name, you have full access.
- The file is locked or in use.
- The external drive containing the file is either damaged or has a formatting problem.
- NVRAM or PRAM is corrupted.
Error 43 can occur on your Mac directly or when working with an external hard drive. In either case, the problem is usually solvable.
How to prevent Error 43 in the future
I wish I had a magic fix, but the truth is, there isn’t one. The best way to avoid Error 43 is to stick to good Mac habits, like:
- Keeping your macOS and apps up to date.
- Regularly cleaning your Mac of system junk. I recommend CleanMyMac.
- Making backups. You might never need them, but they’ll save you a lot of stress if something goes wrong. I use Get Backup Pro since it makes backups smaller and faster, and it’s easy to restore just what I need.
- If you find that some files are already missing, you can try iBoysoft Data Recovery to get them back.
All of these tools are part of Setapp, a platform with over 250 premium macOS and iOS apps. Setapp includes tools for work, life, and everything in between, all ad-free and without any in-app purchases. There's a free seven-day trial, so give these apps a try before deciding if they're the right pick for you.
FAQ
Can Error 43 cause permanent data loss on a Mac?
Error 43 doesn’t necessarily cause permanent data loss. The error usually means your Mac can’t locate a file, but in some cases, the data may be corrupted or lost. Regular backups with tools like Get Backup Pro help minimize the risk.
Can I recover files stuck in Trash with Error 43?
Yes, you can recover files stuck in Trash with Error 43. Try resetting the NVRAM, deleting them using Terminal commands, or employing third-party tools like iBoysoft Data Recovery.
Is iBoysoft safe to use for Mac data recovery?
Yes, iBoysoft Data Recovery is safe to use for Mac data recovery. The app is a trusted software that follows Mac’s safety standards and works with APFS, HFS+, and encrypted drives.
