How to create a bootable USB on a Mac: Detailed step guide
- Quick start: Download the macOS installer from the App Store > Format USB as Mac OS Extended (Journaled) with GUID Partition Map > Use Terminal to run createinstallmedia or Etcher for one-click creation.
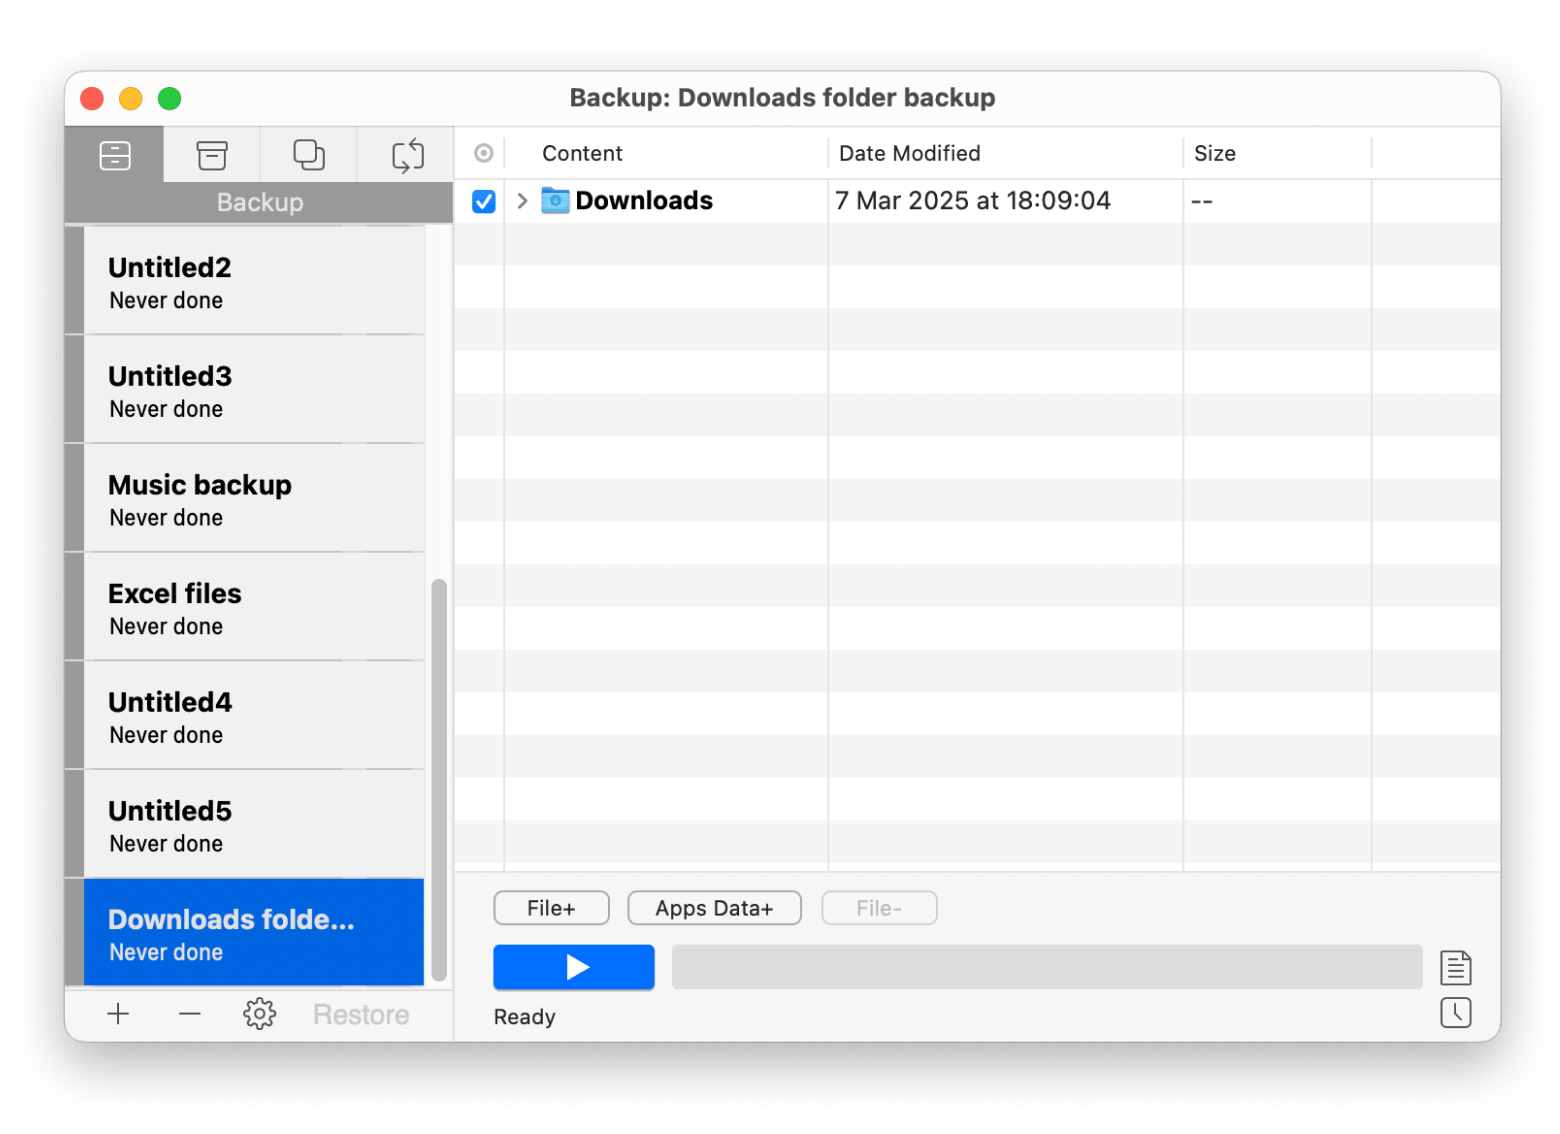
- Tips: Clean your Mac with CleanMyMac before starting. Back up the entire Mac with or specific folders using Get Backup Pro before booting the USB drive.
So you want to back up or format your system but are scared you might fry it? Making a bootable USB on a Mac is exactly the same as creating a bootable external hard drive. Each option works best in certain situations.
A USB drive is super handy for portability and great for quick file transfers between different systems. It's time to fix up that bootable USB on your Mac and arm yourself for repairs and updates. This quick guide equips you to battle it out like a pro.
Let’s go!
What you need to create a bootable USB for Mac
Before diving into the process, let’s make sure you’ve lined up the essentials. You need:
- A USB drive with at least 16 GB of storage: Having enough space ensures the process runs smoothly without hiccups.
- A compatible macOS installer downloaded from the App Store: Ensure it’s the correct version for your Mac.
- Access to macOS Terminal: To run the command that transforms your USB into a bootable drive (it’s easier than you think).
- Third-party tools like Etcher (optional): For a friendlier user interface to create bootable USB drives compared to Terminal.
How to get macOS installer files
Let’s start with the easier part. It can be pretty tricky to find installation files for older versions of macOS, especially if they’re quite a bit behind what you’re currently using. For instance, if you have the latest versions like Sequoia, Sonoma, or Ventura, you might struggle to find installation files for older ones like Catalina, Mojave, or High Sierra.
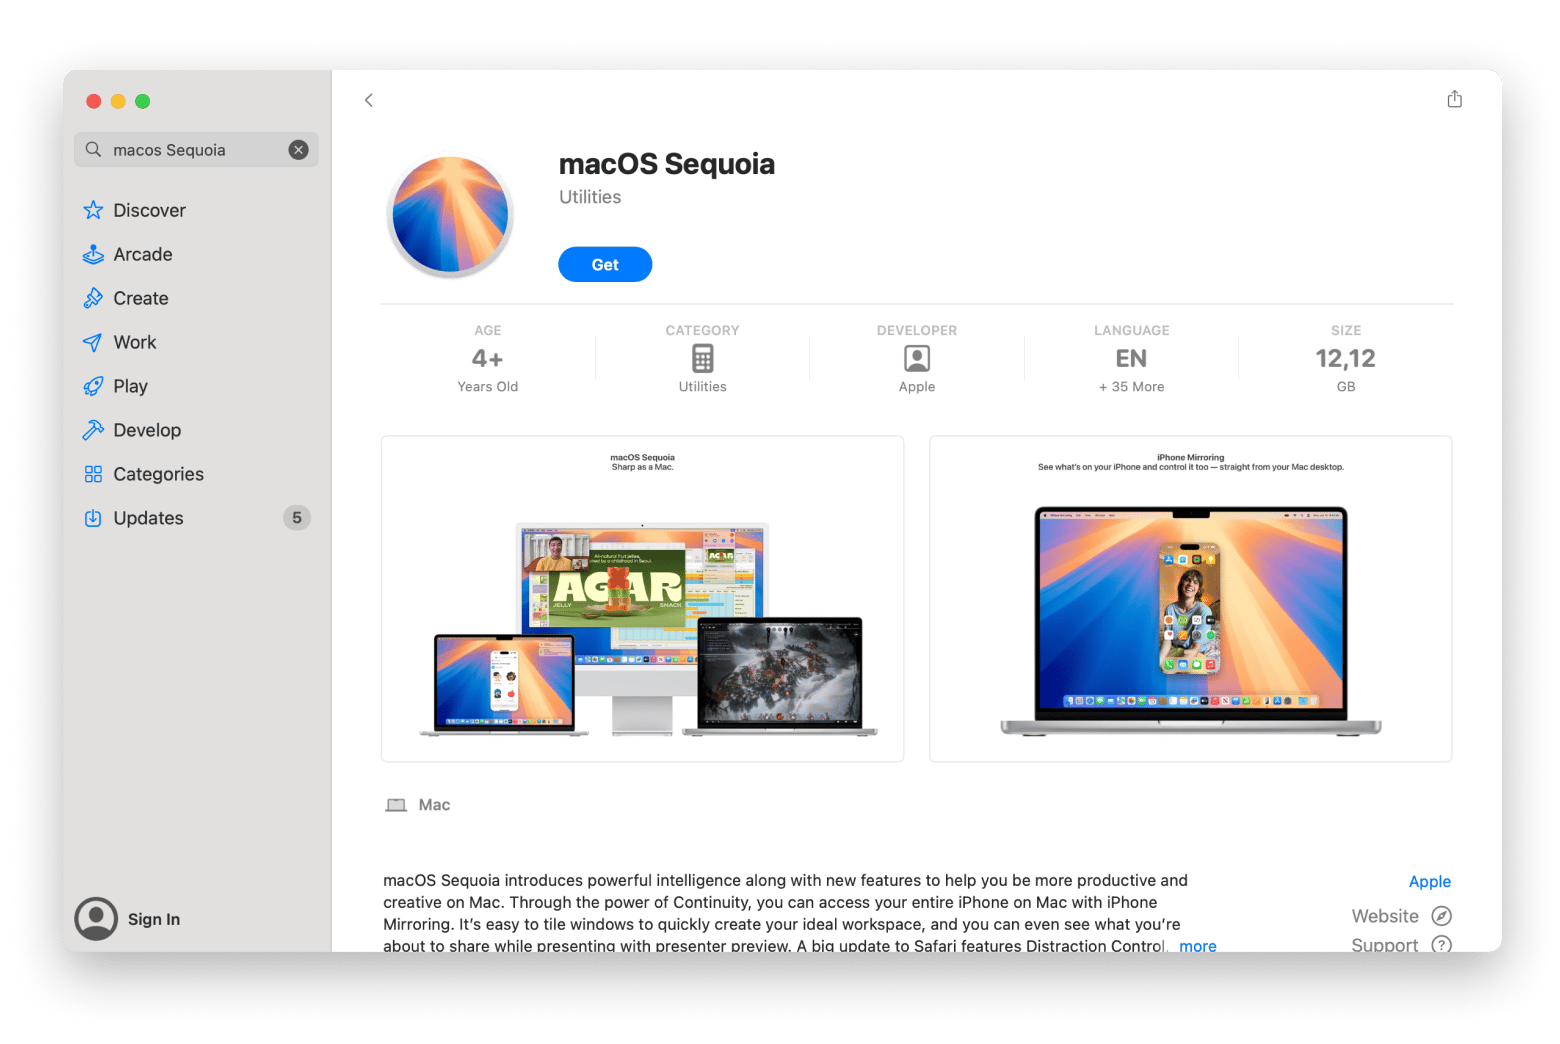
To get the installation files from the Mac App Store for newer macOS versions (Sequoia, Sonoma, Ventura, etc.):
- Go to App Store > Search the name of the macOS version you want — say macOS Sequoia.
- Click Get > Download.
- When the download is complete, the installer will open instantly. But don’t proceed with the installation just yet. Simply quit the installer for now.
For older macOS versions, visit the macOS download page, where you can find the version you need.
Before creating a bootable USB
Don’t let junk files and caches pile up while you’re transferring bootable files to your USB. All that clutter can slow down the process of creating a bootable USB. Before you start cloning your system files, it's smart to clean your Mac properly using a tool like CleanMyMac. It’ll scan your system, find unnecessary files, and free up some space, making the whole cloning process much smoother.
To clean your Mac:
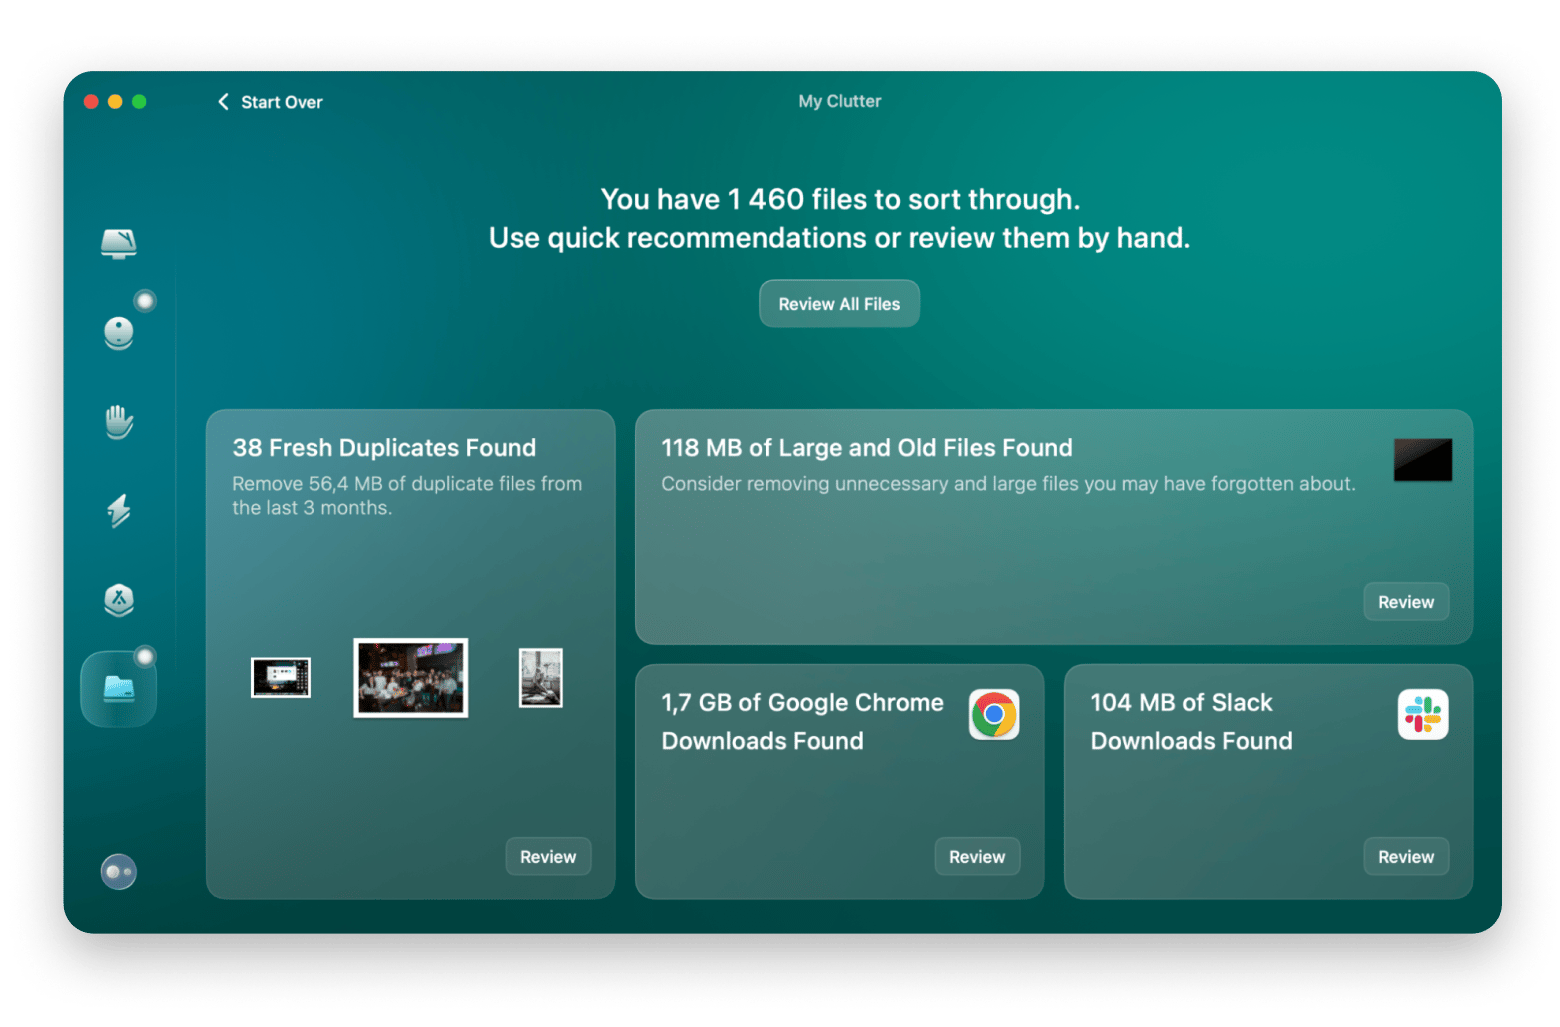
- Install and open CleanMyMac.
- Click My Clutter > Select a folder to scan > Click Scan.
- Click Review All Files > Remove unnecessary ones.
How to create a bootable USB on Mac: Step-by-step
Now, you’ve got everything in place. Let’s get down to brass tacks to learn how to make USB bootable.
Step 1: Download the macOS installer
As I mentioned, you need to either grab the macOS installer from the App Store for the newer versions or check out Apple’s macOS download page for the older ones. Have you done that? Let’s move on to the next step.
Step 2: Format the USB Drive
Let’s prepare your USB drive for booting. You’ll need to format it so it’s completely dedicated to your bootable files. Before doing so, make sure to back up any important stuff on it. (If you need help with backing up, check out the complete guide on how to back up your Mac.)
To format your drive correctly:
- Go to Finder > Applications > Utilities > Disk Utility.
- Scroll over to the Disk Utility sidebar, find your USB drive, and click on it. Make sure you choose the correct drive!
- Click the Erase button at the top.
- When a dialog box appears, apply the following:
- Format: Choose Mac OS Extended (Journaled) (this ensures compatibility with macOS installations).
- Scheme: Choose GUID Partition Map (essential for booting the drive on modern Macs).
5. Click Erase after applying the settings to begin the formatting.
6. When prompted, rename your USB drive to something recognizable—like MyBootableUSB. This will help you identify the drive when using Terminal commands later.
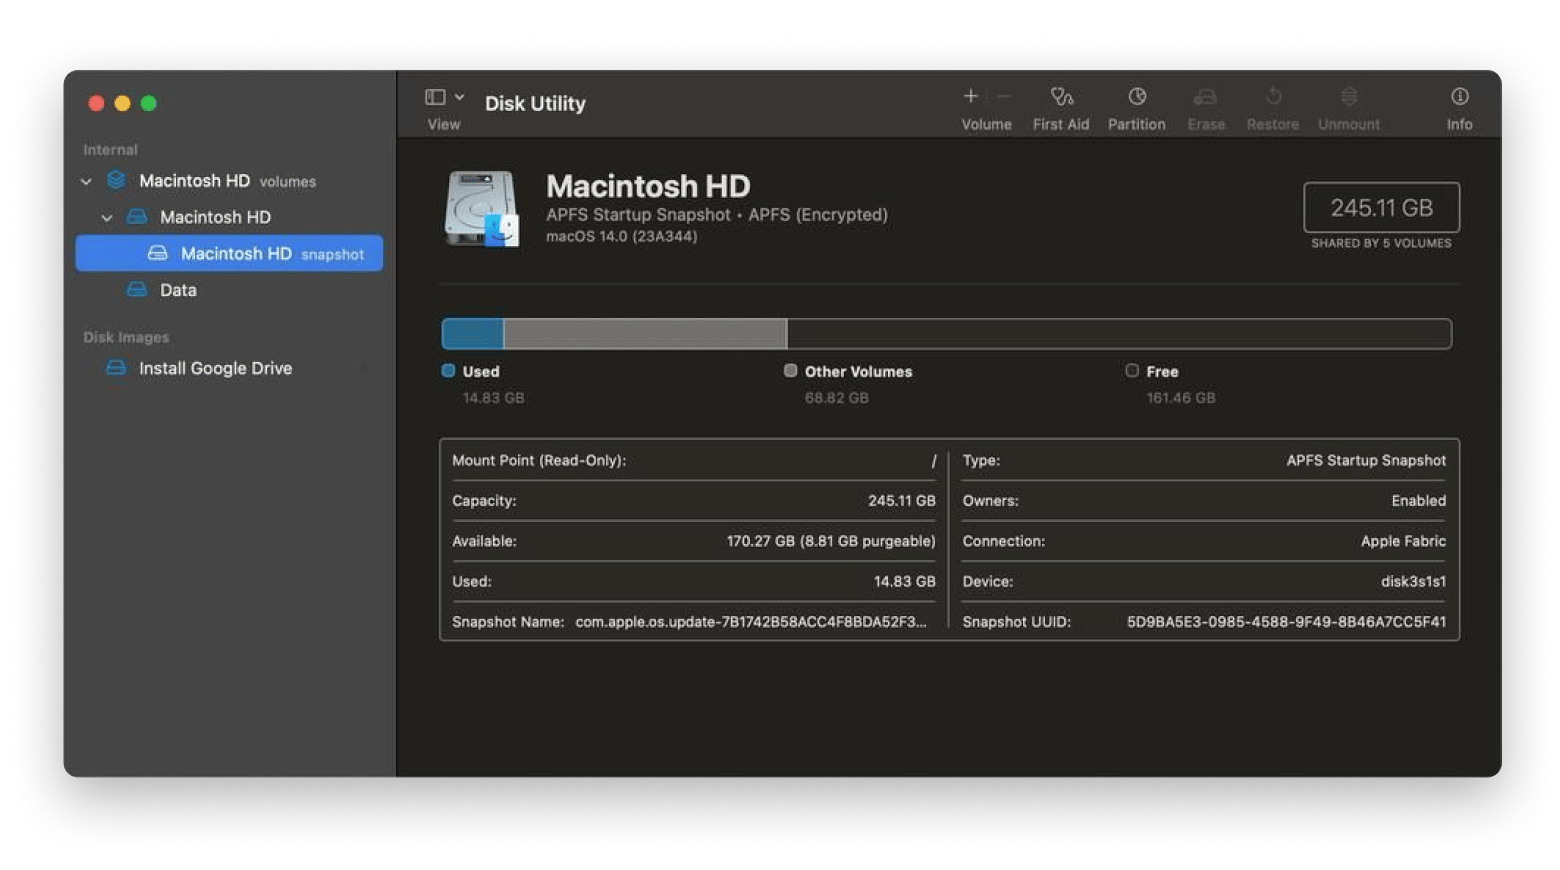
After Disk Utility completes the formatting, your USB drive is ready to receive the macOS installer.
Step 3: Create the bootable USB using Terminal
Now that your USB drive is good to go and your macOS installer is safely stored in your system, it’s time to transfer the installer to your USB drive using Terminal.
To do so:
- Go to Finder > Applications > Utilities > Terminal.
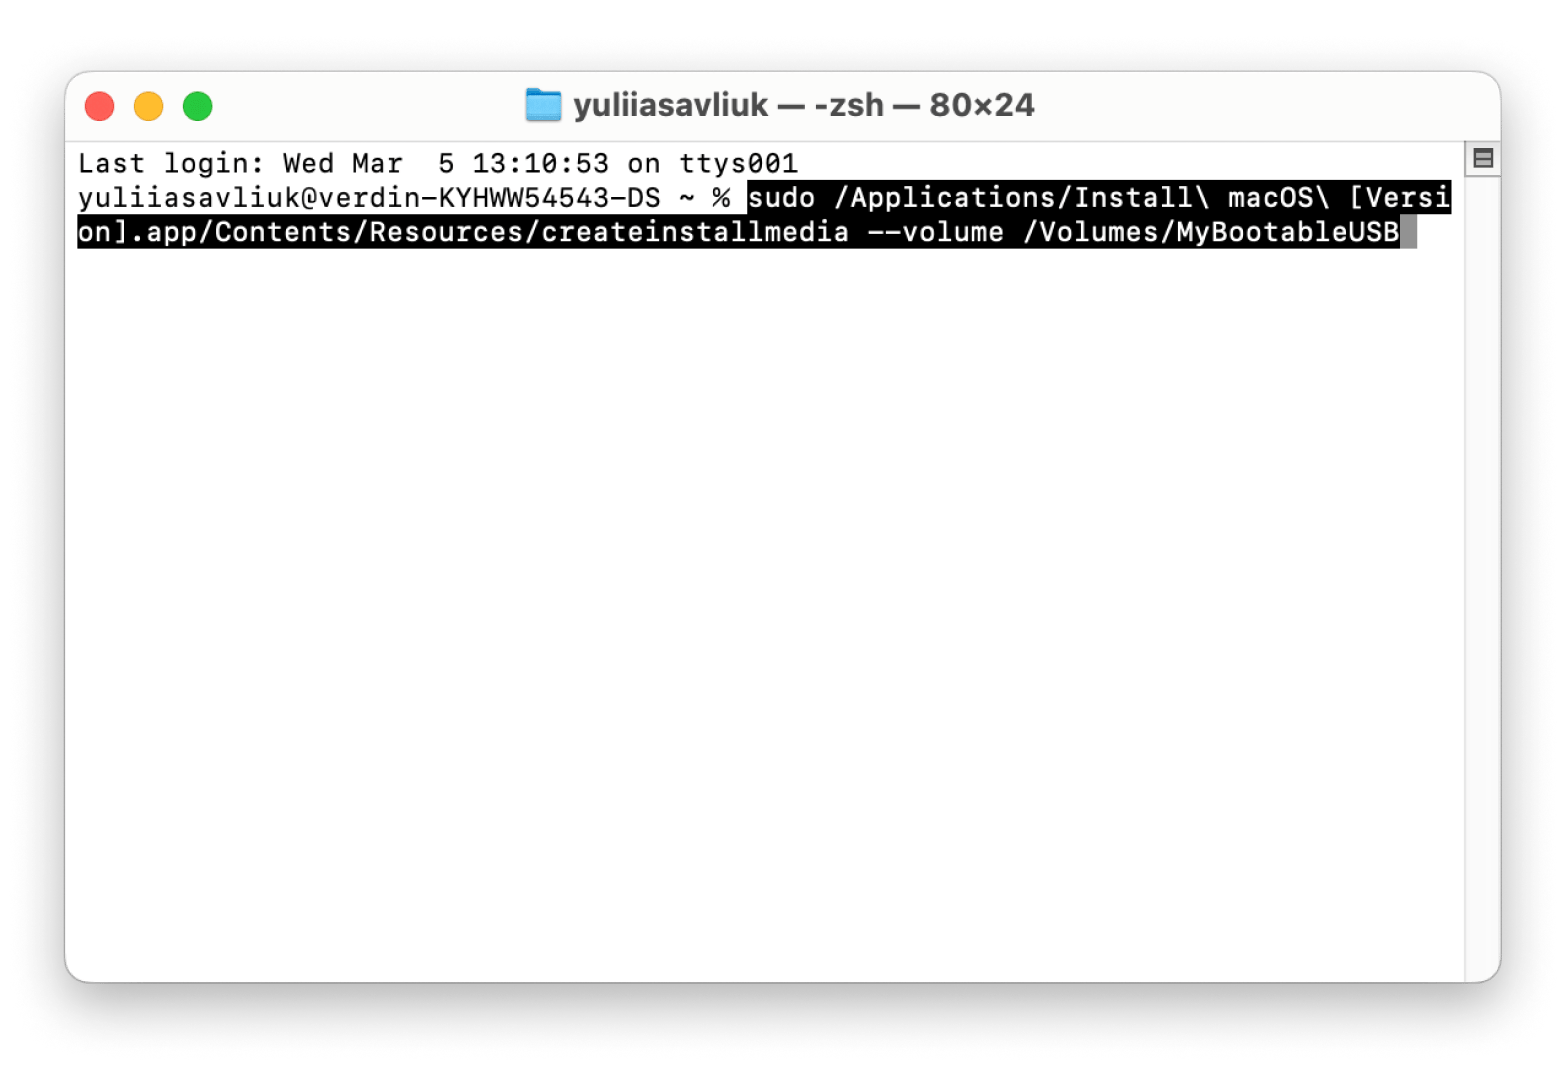
- Type sudo /Applications/Install\ macOS\ [Version].app/Contents/Resources/createinstallmedia --volume /Volumes/[YourUSBDriveName] > Press Return.
- Replace [Version] with the exact macOS version name, and replace MyBootableUSB" with the actual name of your USB drive. It should look like this: sudo /Applications/Install\ macOS\ Monterey.app/Contents/Resources/createinstallmedia --volume /Volumes/MyBootableUSB.
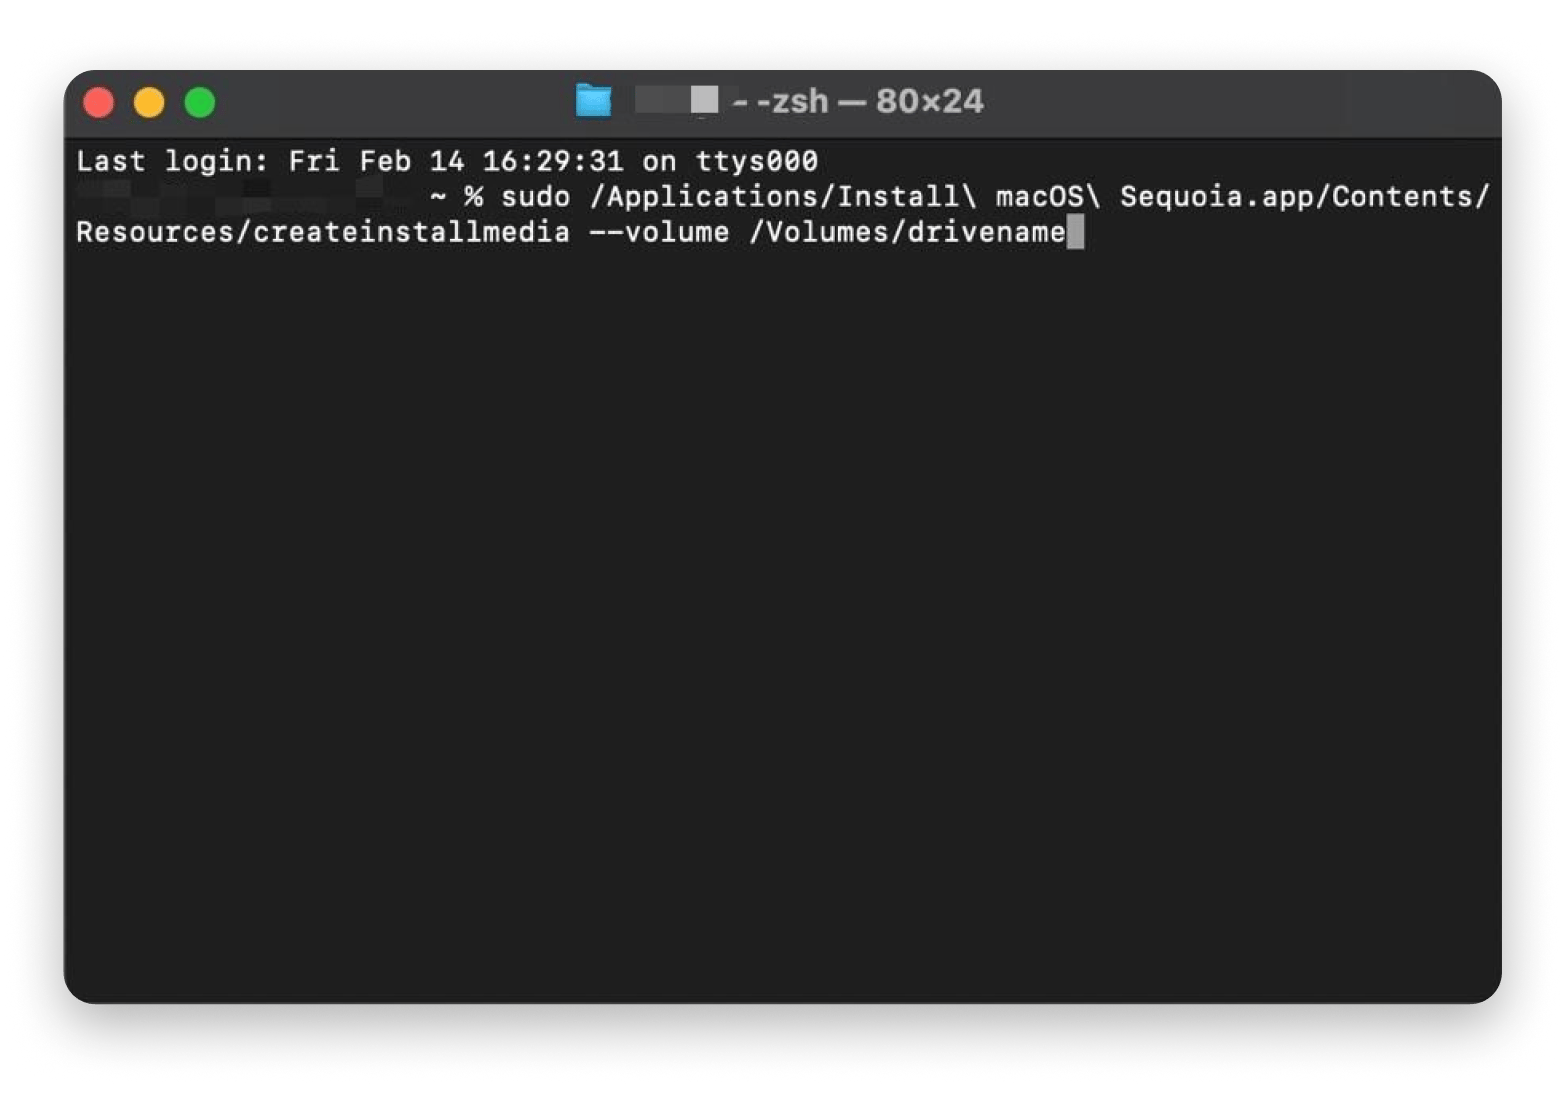
Your USB drive is all set to boot macOS. Just plug it into a Mac, restart it while holding down the Option key, and then pick your bootable USB drive from the startup options.
How to use a bootable USB on Mac
When you boot from a USB drive, your Mac skips its usual processes and any problems that might come up. Here’s what you need to run macOS from your bootable USB.
Boot Mac from the USB drive
Armed with a bootable drive that’s loaded with your desired version of macOS, you need to:
- Plug your bootable USB directly on your Mac. Note that connecting through a hub may cause connection issues.
- Click the Apple menu > Restart your Mac.
- As soon as the Mac begins to reboot, press the Option key on your keyboard and keep holding until you see the Startup Manager screen. This is where you’ll find all available bootable volumes connected to your Mac.
- Use the arrow keys (or your mouse) to locate the bootable USB drive from the list. It may be labeled as “Install macOS [Version]” or simply as the name you assigned (e.g., “MyBootableUSB”). Once selected, press Return to boot from the USB drive.
Your Mac will now start up from the USB drive and launch the macOS installer.
Install or run macOS from the USB drive
From here, follow the on-screen instructions to install macOS from USB:
- Install macOS: Install macOS from the USB drive onto your system.
- Use Recovery Options: Select the appropriate recovery options if you're troubleshooting or repairing your existing OS.
In a couple of steps, your system will begin running your desired macOS or troubleshooting for problems with your pre-existing OS.
Troubleshooting bootable USB creation issues
You might run into a few bumps down the road. Here are common issues you may have with a bootable drive and how to fix them.
USB not recognized by Disk Utility or Terminal
If your USB drive isn’t showing up in Disk Utility or Terminal, first check its compatibility. Your drive should be large enough (at least 16GB recommended) and properly connected to a working USB port. Avoid using hubs if possible.
Do the following if the drive isn’t detected:
- Unplug the USB drive, wait a few seconds, then plug it back in. Try another USB port or test it on a different Mac.
- Perhaps your drive has not been properly formatted. To reformat properly, open Disk Utility > Choose your USB drive.
- Click Erase.
- Select the format Mac OS Extended (Journaled) from the pop-up menu and choose GUID Partition Map as the scheme.
- Click Erase to initiate the process.
- Rename the drive (e.g., “MyBootableUSB”) when prompted.
This process helps ensure that the drive is formatted so macOS can recognize it.
Read also:
- Rufus Alternatives for Mac
- How to Get Out Of Recovery Mode on Mac
- What to Do If Macbook Wont Boot Past Apple Logo
- Create Bootable Ventura Installer
Permission denied errors in Terminal
You might come across Permission denied errors when running the Terminal command to create your bootable installer. This is probably an issue with having sufficient privileges to execute the command. To fix this,
Open Terminal and type sudo /Applications/Install\ macOS\ [Version].app/Contents/Resources/createinstallmedia --volume /Volumes/MyBootableUSB > Press Return. Always start your command with “sudo” so that you’re running it as a superuser.
2. Enter your Admin Credentials when prompted.
3. Verify that no other application (like Finder) is locking the USB drive; if so, close those apps.
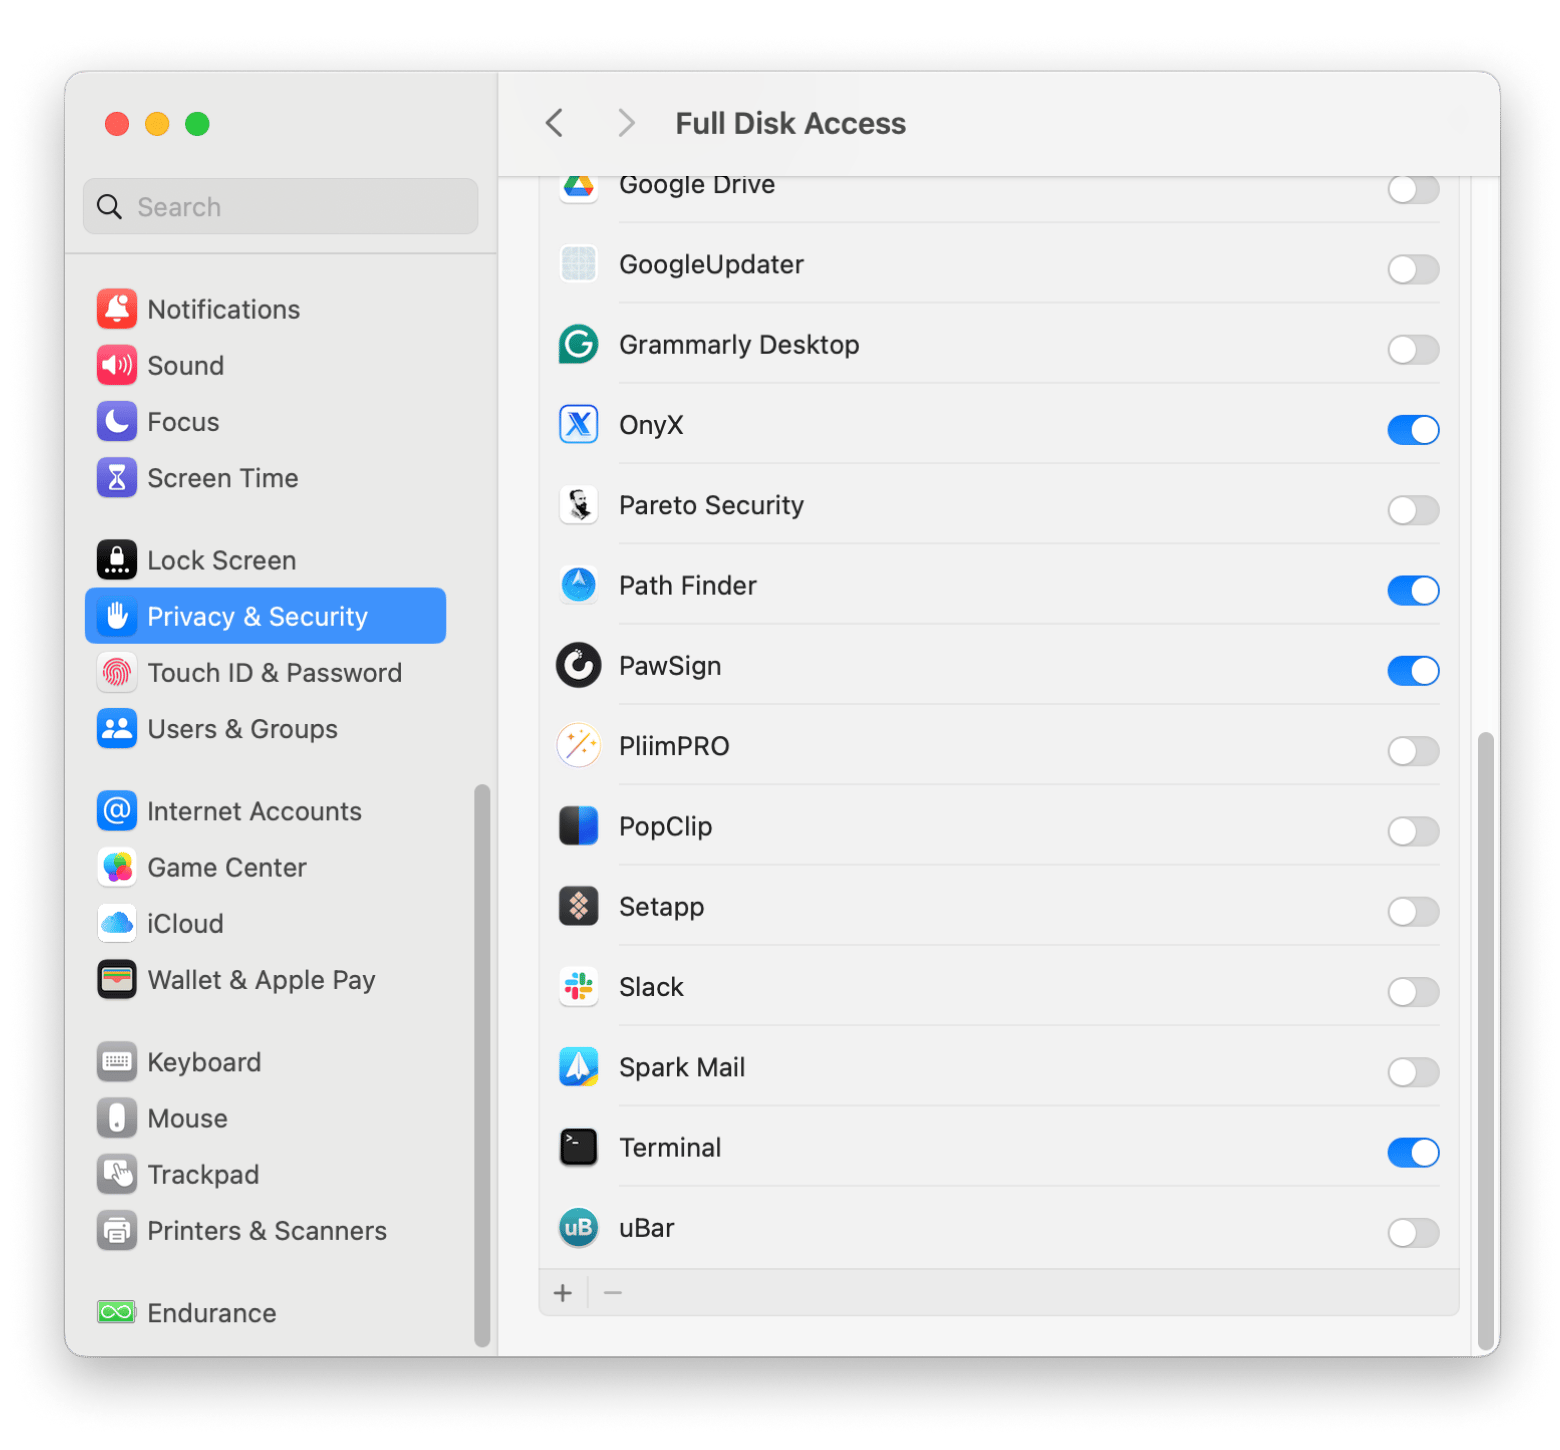
4. Click the Apple menu > System Settings > Privacy & Security.
5. If the issue persists, click Full Disk Access > Turn on Terminal
Installer won’t boot
If you’ve created the bootable drive but can’t get your Mac to boot from the USB drive, the installer might be corrupted or incomplete.
Here’s how to resolve the issue:
- Redownload the macOS installer from the App Store to ensure you have a complete, uncorrupted file. Make sure it’s the full installer (usually saved in the Applications folder).
- Reformat the USB drive and rerun the Terminal command createinstallmedia.
- When restarting, hold down the Option key to access Startup Manager and select the correct USB drive.
Setting up a bootable drive can come with its fair share of headaches, but don’t worry — these troubleshooting steps should help you get things sorted out.
Common use cases for bootable USBs on Mac
A bootable USB drive is a vital utility. It saves the day when things go south with your Mac.
Here’s when you might need one:
- Reinstall macOS after a crash or corruption: Simply whip out your bootable USB and reinstall macOS in no time.
- Install macOS on multiple devices: Setting up a new office? Or want to help a friend? A bootable USB drive speeds up the process and ensures consistency.
- Troubleshoot and recover from macOS issues: Boot into a recovery environment and fix problems without internet-based recovery tools.
- Experiment with your Mac’s setup: Run a different OS, like Windows or Linux, on your Mac.
A bootable USB drive gives your Mac a new lease of life
To create a bootable USB, simply download the macOS Installer, format your USB drive with Disk Utility, and use Terminal to run the createinstallmedia command. After that, simply plug in the bootable drive, reboot your Mac in safe mode, and then run the drive from the Startup Menu.
Additionally, you can use tools like Get Backup Pro to back up certain files. Remember to tidy up your storage with CleanMyMac, so your computer doesn't take forever to boot or get loaded up with files you don't really need. You can try all these apps via Setapp. It’s a cool platform with more than 250 macOS and iOS for almost any task. The good news is that you cantest all apps with a 7-day trial. So, don’t hesitate to give it a try.
FAQs
What format does a USB need to be bootable for Mac?
To create a bootable USB for Mac, the drive should be formatted as Mac OS Extended (Journaled) with the GUID Partition Map scheme. This format allows for compatibility with macOS installation tools and helps ensure the USB boots properly on Intel and Apple Silicon Macs.
How do I make USB bootable from an ISO file on a Mac?
To make a USB bootable from an ISO file on a Mac, you can use Terminal:
- First, format your USB drive using Disk Utility.
- Then, use the dd command in Terminal to copy the ISO to the USB. For example, sudo dd if=/path/to/your.iso of=/dev/disk2 bs=1m.
- Replace /path/to/your.iso with the ISO’s file path and /dev/disk2 with your USB’s identifier (in Disk Utility).
Once done, eject the drive by typing diskutil eject /dev/diskX.
How to create a macOS bootable USB without a Mac?
To create a macOS bootable USB without a Mac, use tools like TransMac (Windows) or Etcher (cross-platform) to create macOS bootable USBs. You’ll need a macOS DMG or ISO file and a USB drive with at least 16GB of space.
How to create a bootable USB on Mac with one click?
To create a bootable USB on Mac with one click, use Etcher:
- Install Etcher from the official website.
- Open the tool > Select the macOS DMG or ISO file.
- Choose your USB drive and click Flash! to create the bootable USB.
How to create a bootable USB on a Mac from DMG?
To create a bootable macOS USB from a DMG file, convert the DMG to an ISO format using Terminal. Type hdiutil convert /path/to/file.dmg -format UDRW -o /path/to/output.iso. Replace /path/to/output.iso with your converted ISO path and /dev/diskX with your USB's disk identifier (you can find this in Disk Utility).


