How to delete other volumes in container on Mac?
We all hate it when a Mac starts degrading with time. Whenever you try to save a file, it flashes an error message — your memory is full!
I am sure you must have tried peeking into your system to see what is hogging up all the memory and come across the mysterious “Other Volumes in Container.” What does it even mean?
I'm going to save you hours of head-scratching and explain exactly what these other volumes in container in Mac are and how to handle them like a pro.
Simple steps to manage other volumes effortlessly
Before diving into the methods one by one, here’s a handy table that summarizes all the steps for you:
| How to manage other volumes | How to do it |
|---|---|
| Create a new user account | Go to System Settings > Users & Groups > Add User. |
| Disable content caching | Go to System Settings > General > Sharing > Turn off Content Caching. |
| Delete unnecessary files | Use Gemini to find duplicates and remove them with one click. |
| Delete an extra volume from a Mac container | Open Disk Utility > Click View > Show All Devices > Right-click and click Delete APFS Volume. |
| Find and remove questionable programs | Open Finder > Applications. Right-click > Click Move to Trash. Alternatively, use CleanMyMac’s Uninstaller feature to remove all app’s data. |
| Run First Aid in Disk Utility | Open Finder > Applications > Utility > Disk Utility. Click View > Show All Devices. Right-click on your main drive (Macintosh HD) > Click First Aid. |
| Clean the system storage | Install and open CleanMyMac > Click Cleanup > Scan > Review the scan results > Click Clean. |
| Erase and reinstall macOS (Last resort) | Put your Mac into recovery mode. Open Disk Utility > View > Show All Devices > Choose the main drive (Macintosh HD) > Erase. |
| View and manage each volume in a Mac container using Terminal | Run diskutil list > Check volume sizes > Unmount the volume by typing sudo diskutil unmount |
What is other volumes in container?
In Mac, other volumes in container refer to system-managed APFS volumes that dynamically share storage. These include:
- Preboot: Helps macOS start up
- Recovery: Stores macOS recovery tools
- VM (Virtual Memory): Manages swap files when RAM is low
These are essential and usually don’t require action. However, if they take up too much space, checking for unnecessary partitions or system mismanagement might help.
How to remove other volumes in the container?
So now, with all the basics out of the way, it’s time to learn how you can reclaim precious disk space for yourself.
Create a new user account
Sometimes, glitches cause other volumes in container in Mac to take excessive space. Using the same user account over a long period of time begins adding up all these glitches until, one day, you are staring at a big pile of unresolved issues you never took the time to go through. And now it’s too late.
To create a new user account to help reset things:
- Go to the Apple menu > System Settings > Users & Groups.
- Click Add User.
- Fill in all the necessary details.
- Enter the old system password (If your system prompts it).
- Log in to the new account > Set it as the administrator.
- Check if the other volumes in container size has decreased.
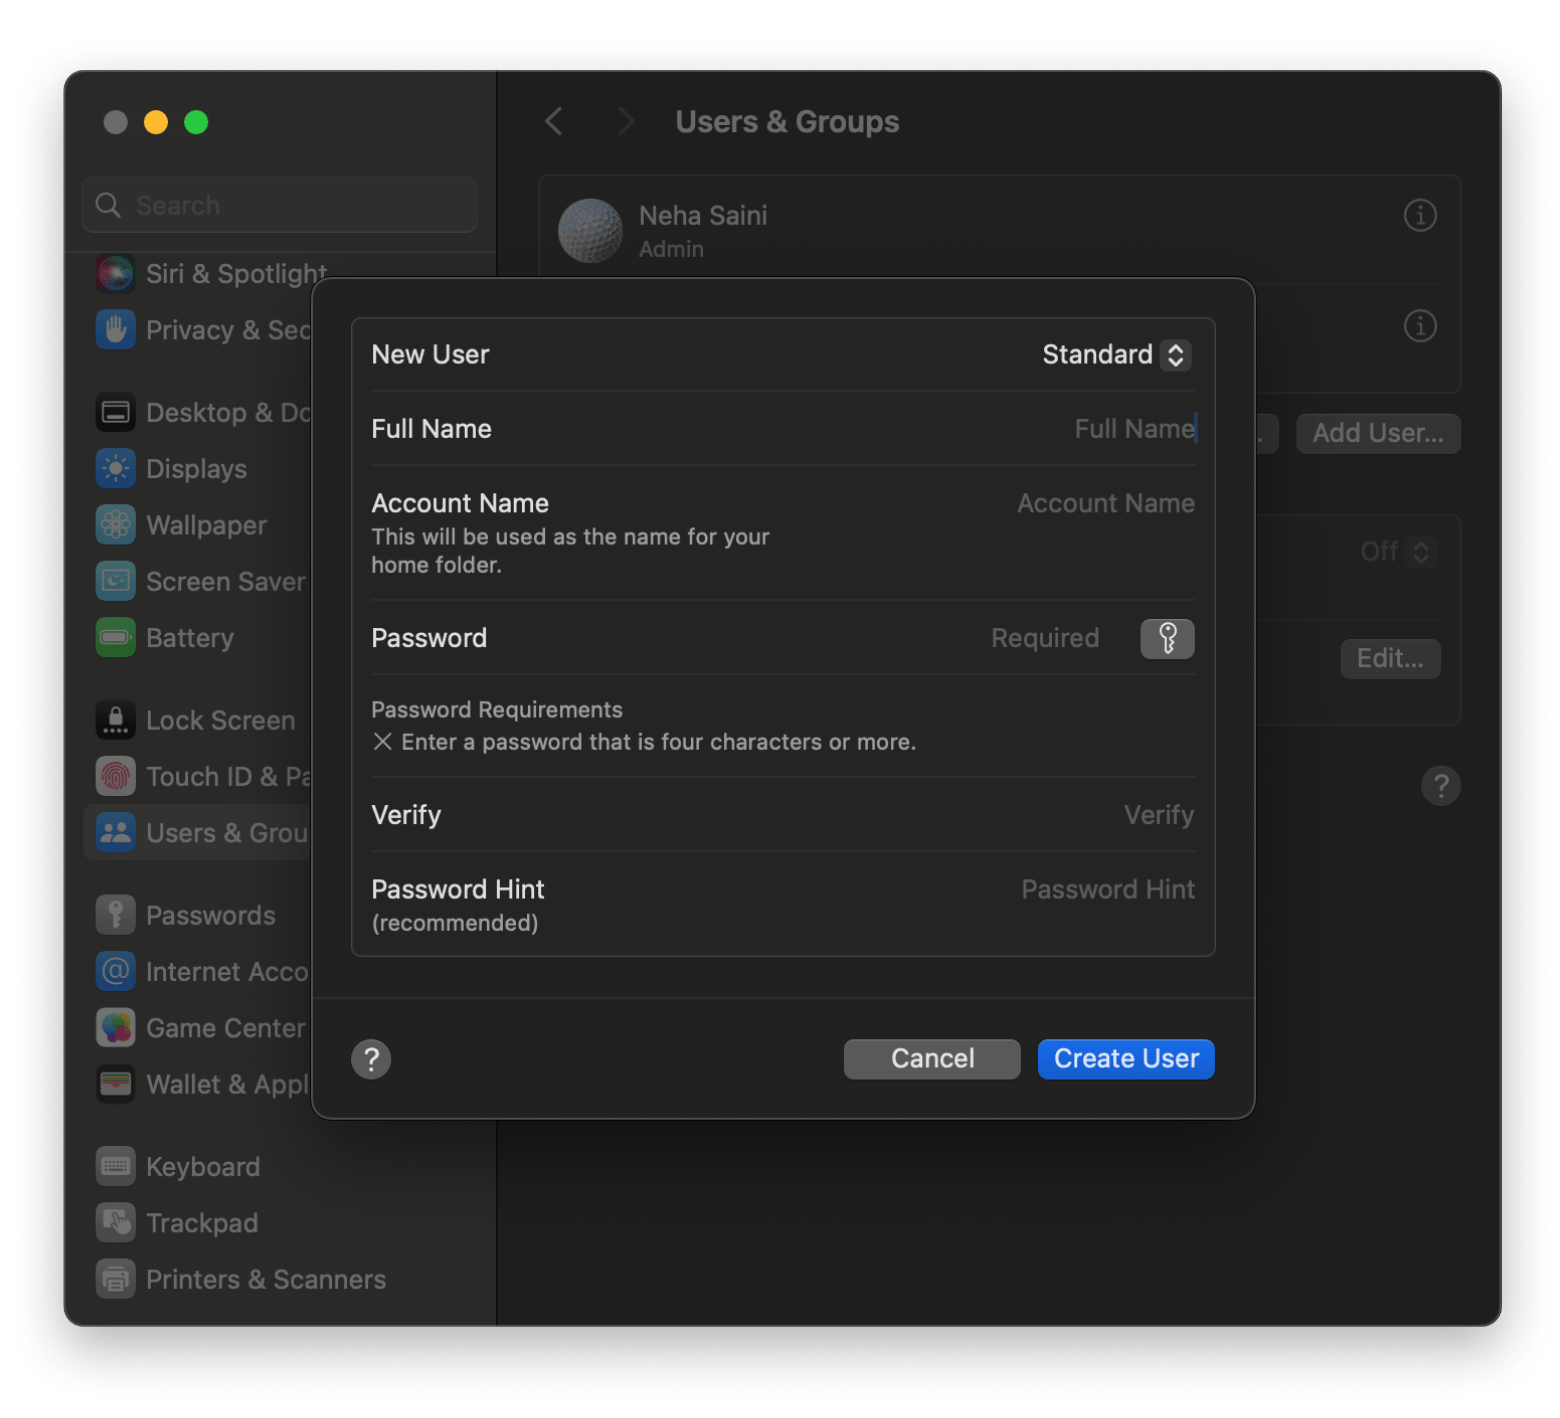
This should get rid of all the old configuration files and other unnecessary junk that has been holding your Mac back.
Disable content caching
Content caching stores updates and iCloud data for other devices, which can eat up space.
To fix it:
- Go to the Apple menu > System Settings > General > Sharing.
- Turn off Content Caching.
- Find and clear all the pre-existing cache.
- Restart your Mac and check the storage again.
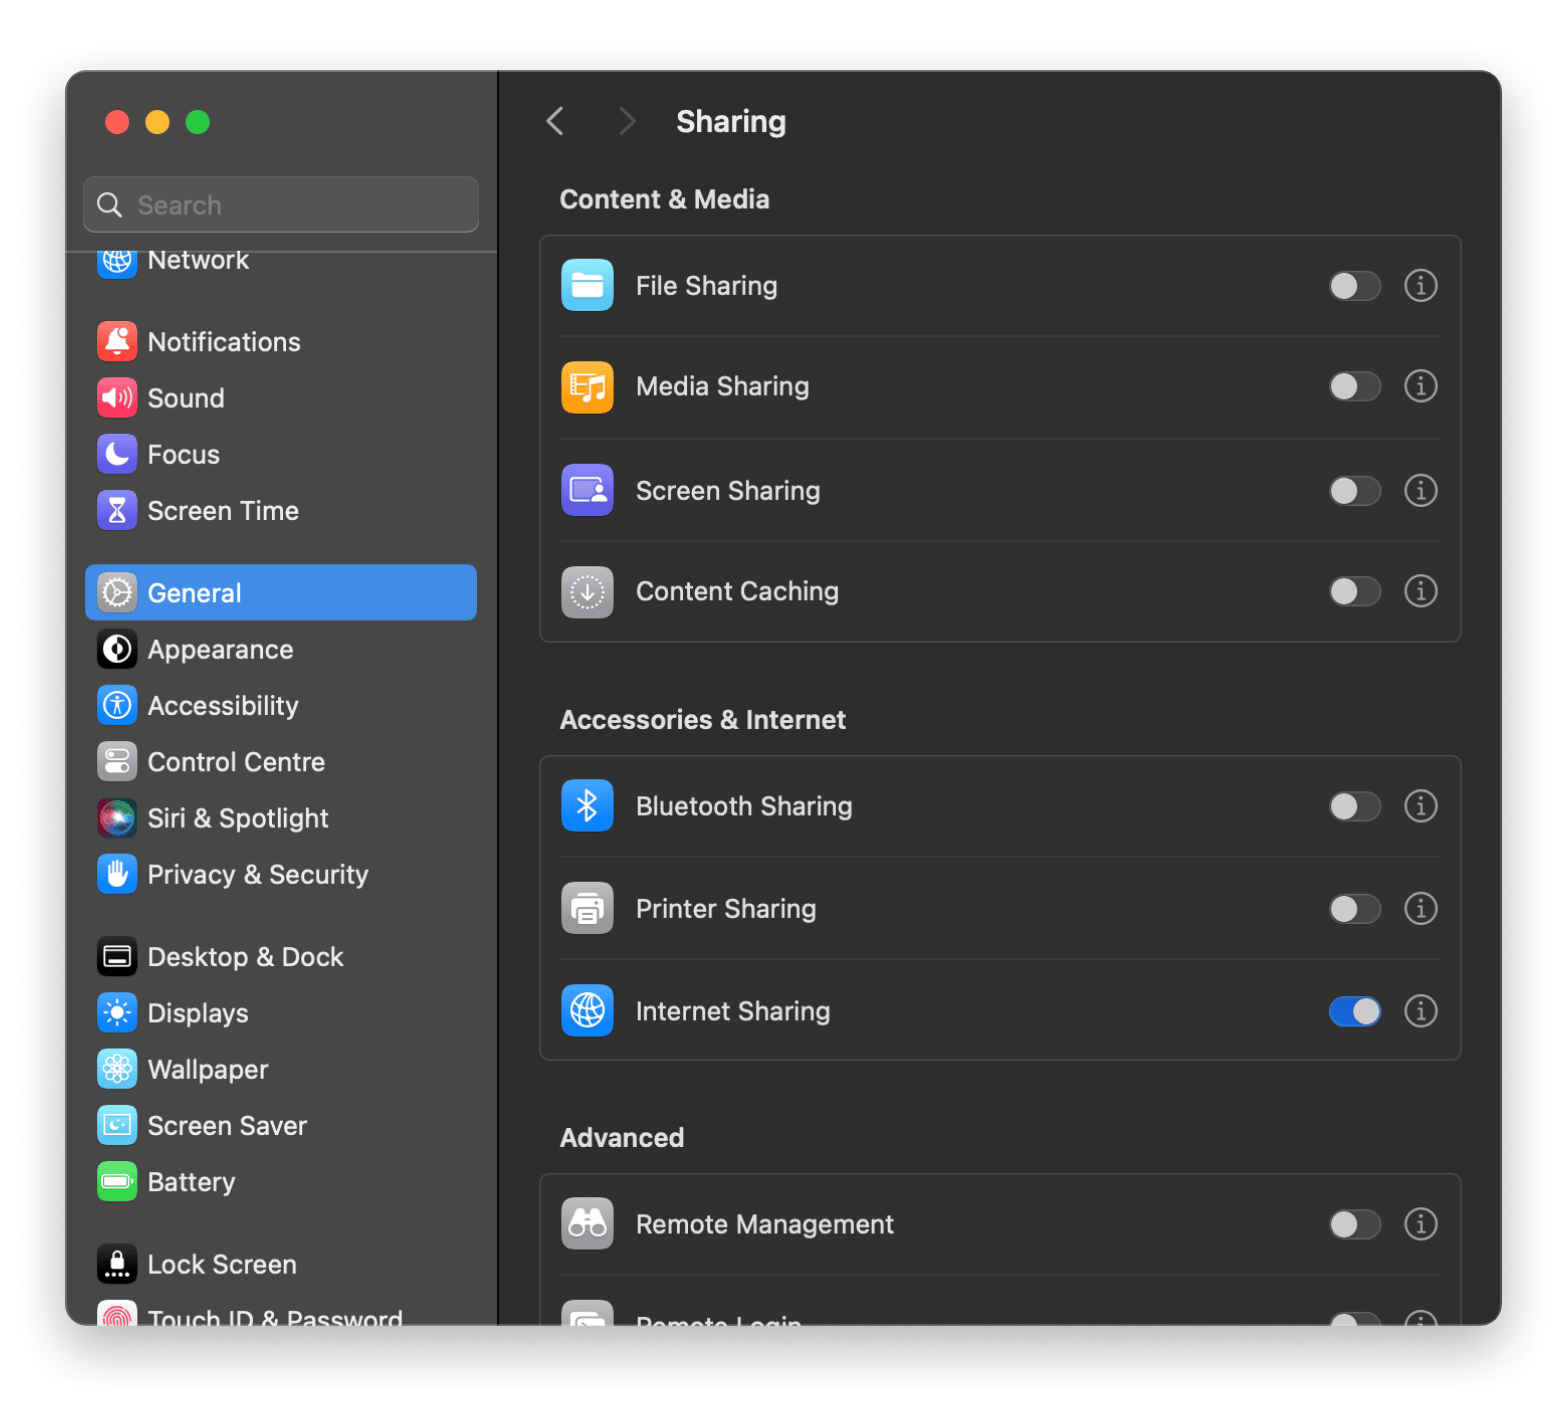
Caching is a luxury that comes in handy when you have plenty of free space. But when your device is being suffocated with useless junk? Not so much.
Delete any unnecessary files using Gemini
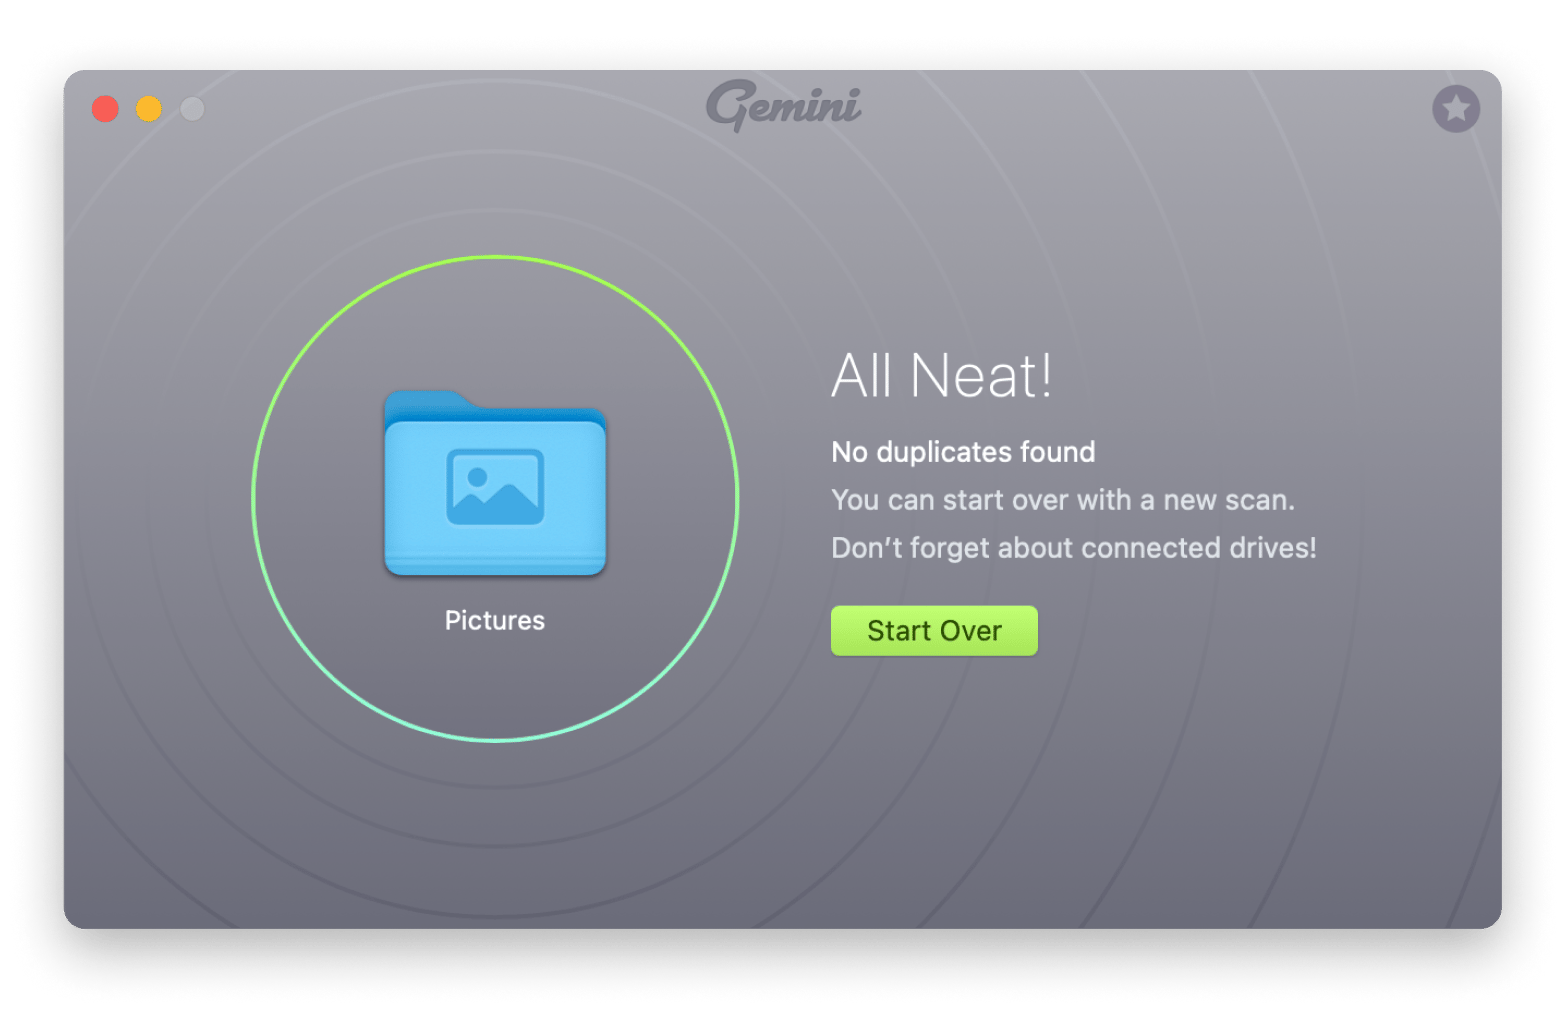
If your system is piling up with a lot of unnecessary files, your Mac volumes can quickly overfill. It used to take me hours to manually recognize every duplicated file on my Mac, until I found Gemini. This tool can scan your system and list all the unnecessary files for your review, and delete them with just one click.
Here’s how to use it:
- Install and open the Gemini app.
- Click the large add “+” icon.
- Select which folders or sections you want to check for duplicates.
- Click Choose > Scan for Duplicates.
- Click Smart Cleanup. This will clean all duplicate files on your system.
Delete an extra volume from a Mac container
The Mac has its own volumes, and then there are the ones we create as users. Sometimes, we create a volume, use it for a bit, and then totally forget about it like it doesn’t even exist. But the device? It remembers. With time, these volumes start eating up space and making your Mac slow.
If you’ve identified a disused volume, here’s how to delete Other Volumes in Container in Mac using Disk Utility:
- Open Finder > Applications > Utilities > Disk Utility.
- Click View in the menu bar > Show All Devices. The list of volumes will be visible on the left side.
- Right-click on the volume you want to delete and click Delete APFS Volume.
- Confirm the deletion.
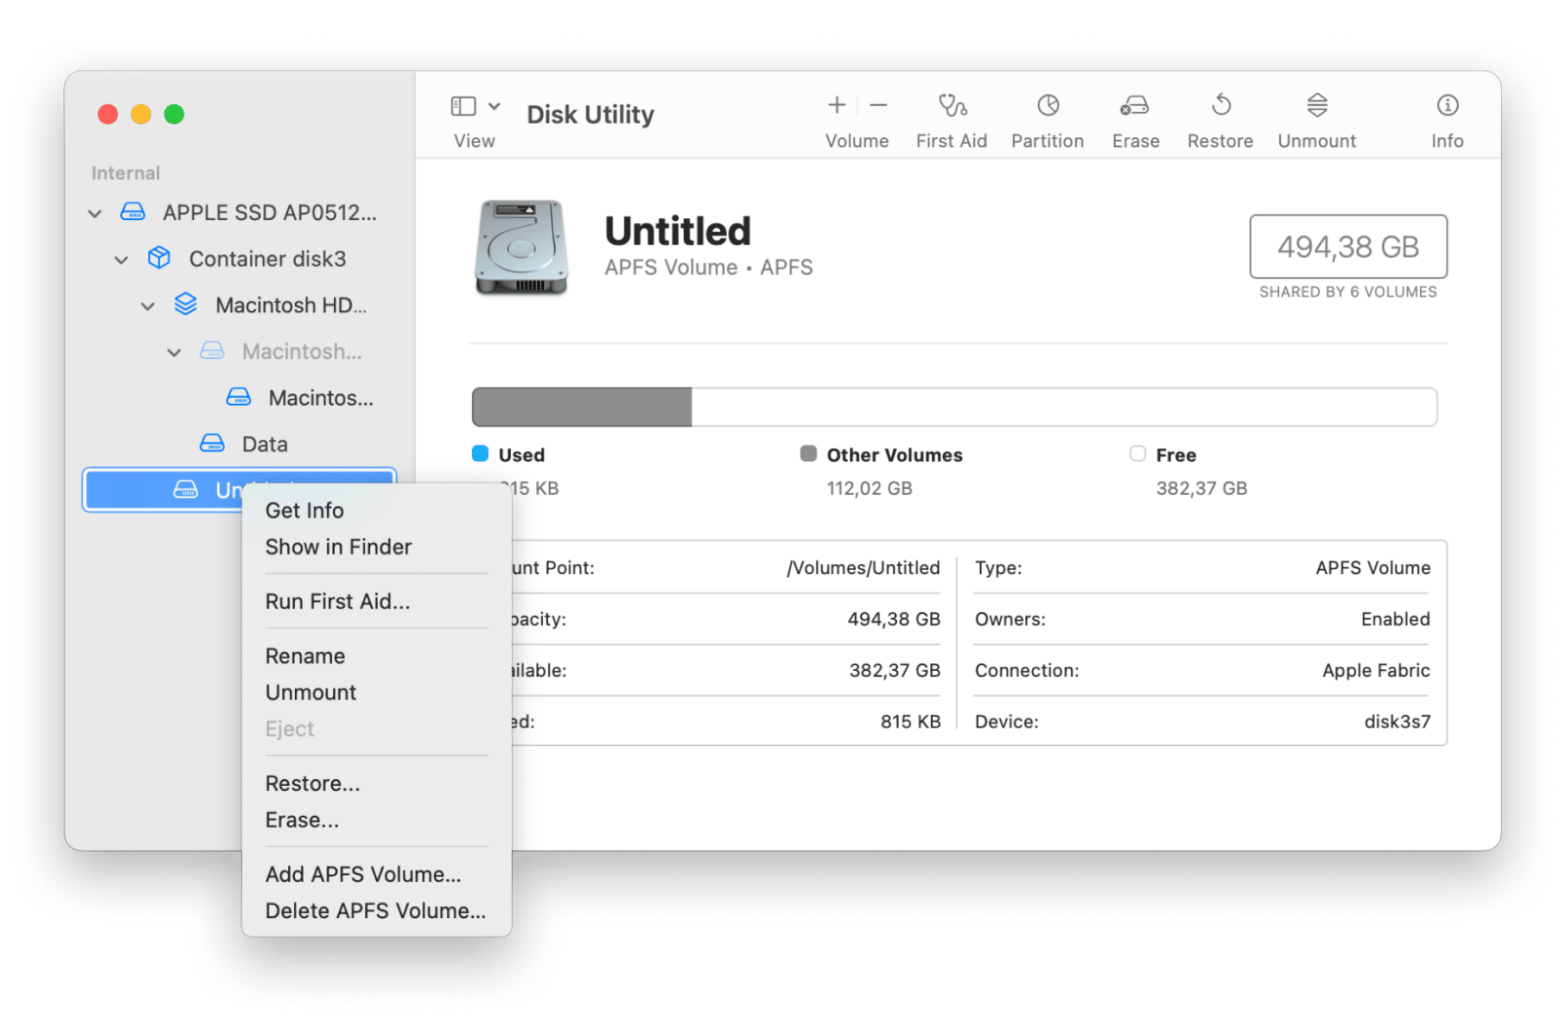
With these volumes gone, your machine will breathe a little easier.
Find and remove questionable programs
We all love trying out new apps. Some of them turn out to be useful, but some of them — let’s be honest — might be malware. Rogue or poorly coded apps can hog space, use up all your RAM, and make your Mac as slow as a turtle.
To delete them:
- Open Finder > Applications.
- Right-click on the app you want to delete > Click Move to Trash.
- Right-click on the Trash icon > Click Empty Trash.
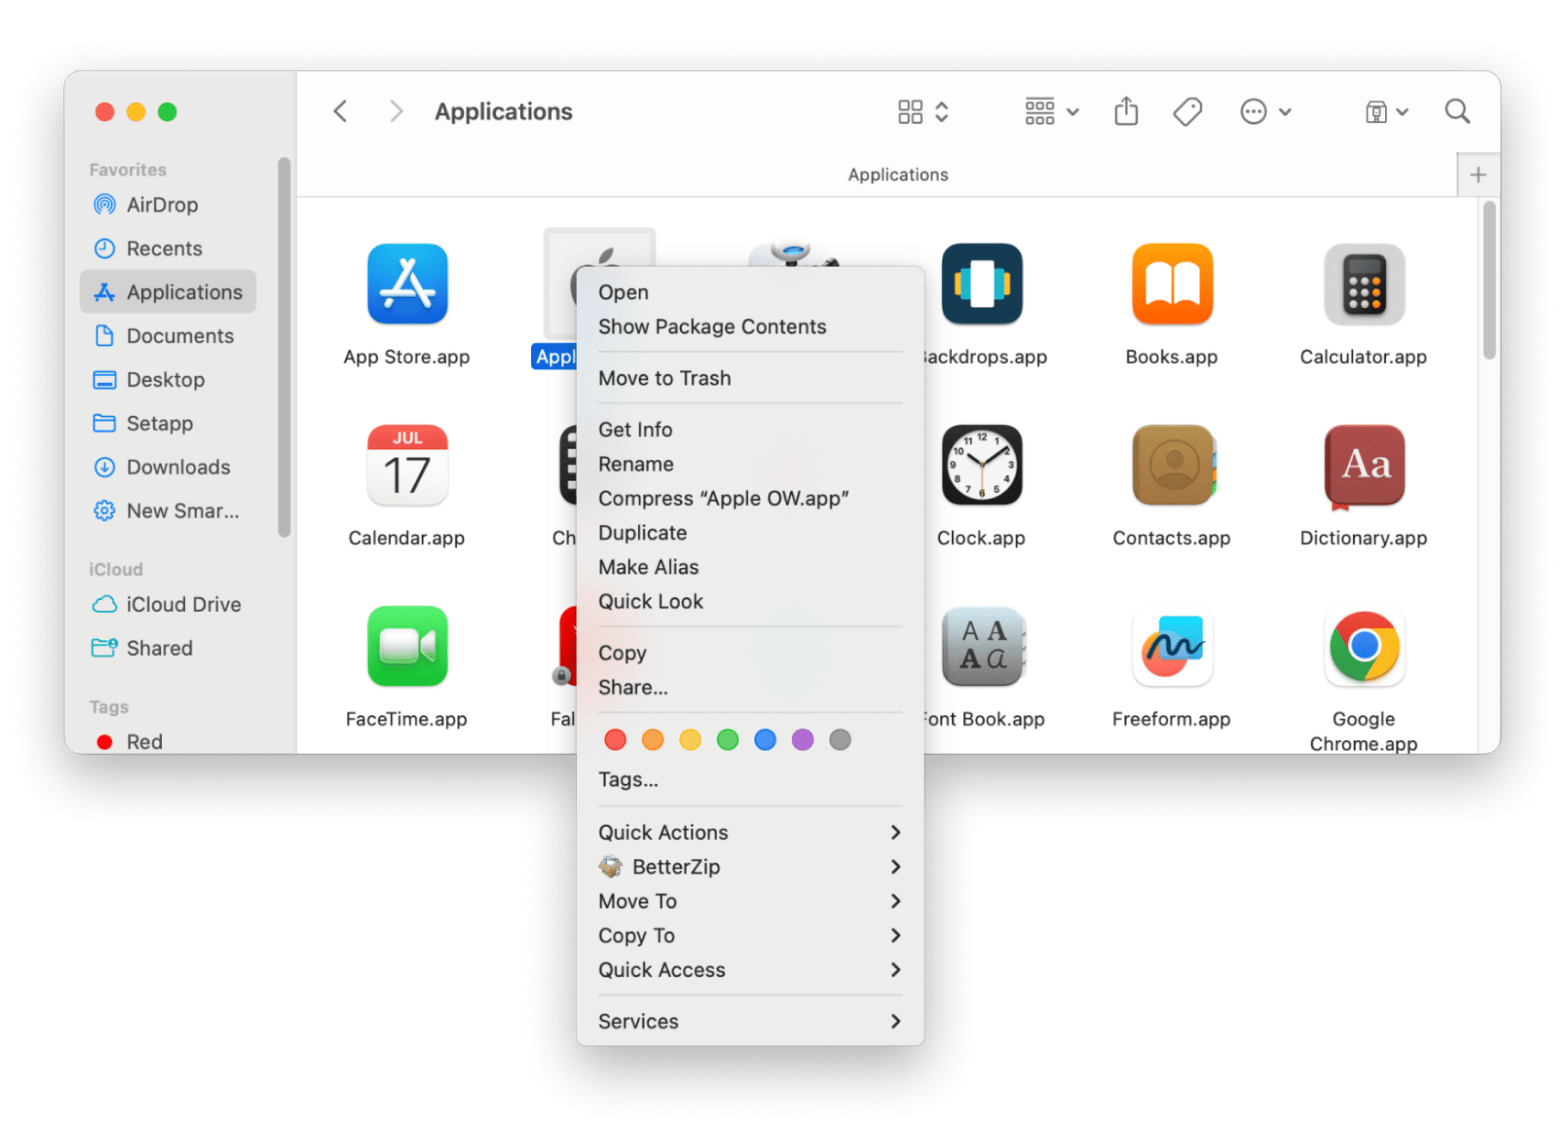
Before installing any app, properly background-check it to ensure it will not harm your machine.
Run First Aid in Disk Utility
After saving and deleting multiple files over and over again, your Mac fills up with corrupted data. This data can inflate the other volumes in the container in Mac.
Use First Aid to fix it:
- Open Finder > Applications > Utility > Disk Utility.
- Click View > Show All Devices.
- Right-click on your main drive (Macintosh HD) > Choose First Aid.
- Click Run and wait for the scan to complete.
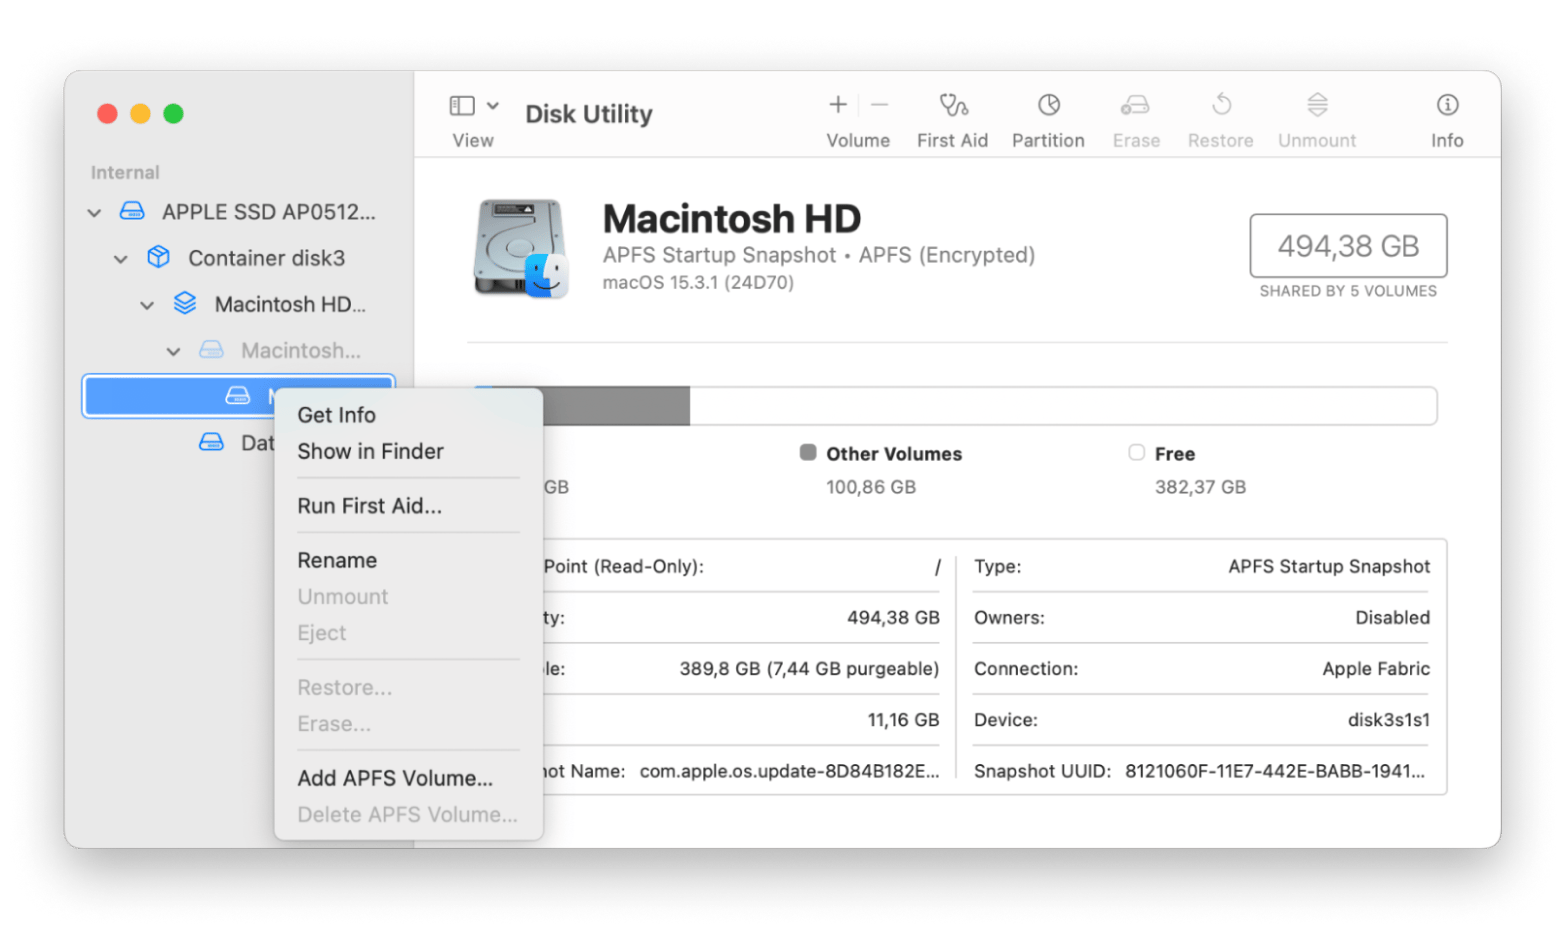
This will help spot any problems with your hard drive and fix them right away. Just be patient because it might take a little while, and try not to mess with it while it’s running.
Clean the system using CleanMyMac
If you still find it troublesome to delete other volumes, CleanMyMac can be a handy tool. It lets you find unnecessary or legacy files taking up SSD space and purge them all with the simple click of a button.
Also, the app can speed up your Mac like it was bought just yesterday, stave off any malware threats, and find duplicate files that have stayed too long on your device.
To clean the system:
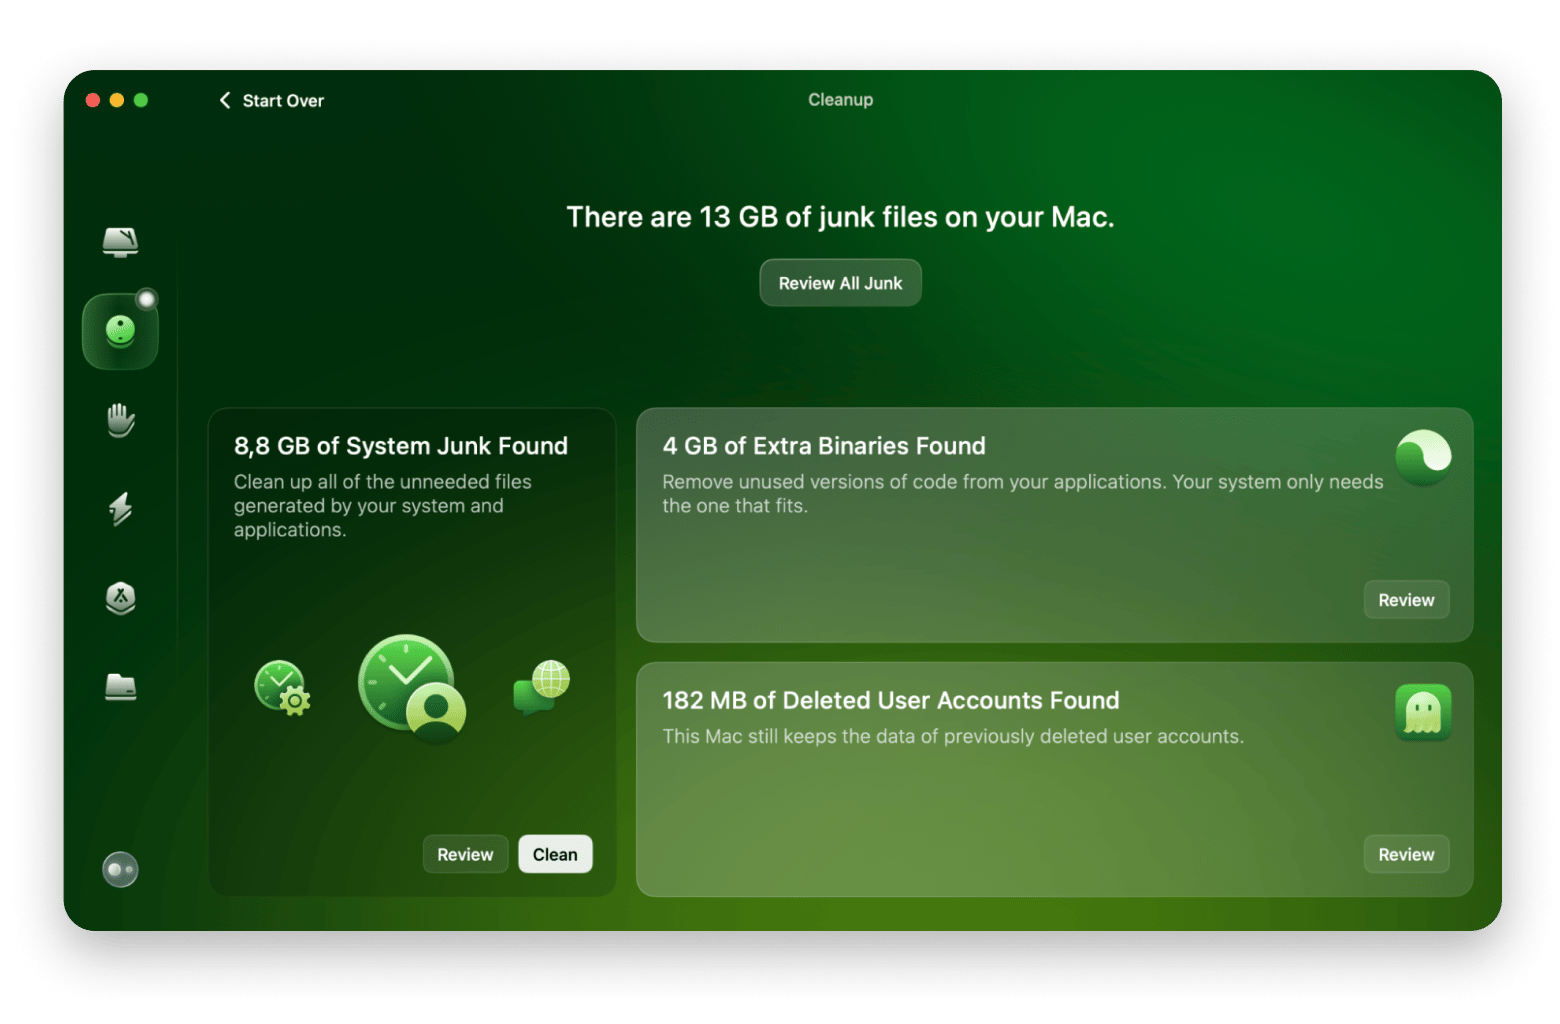
- Install and open the CleanMyMac app.
- Go to the app dashboard and click Cleanup > Scan.
- Click Review in the System Junk window or simply click Clean.
Last resort: erase and reinstall macOS
If all else fails, a clean install might be necessary. But before you do, make sure to back up your Mac. I am pretty sure you wouldn’t want to see all of your hard work evaporate without a trace (unless that’s what you are going for). Here’s how to erase and reinstall macOS.
For Apple silicon Macs:
- Shut down your Mac.
- Hold the power button until you see the Loading Startup Options screen.
- Click Options > Continue to enter macOS Recovery.
For Intel-based Macs:
- Shut down your machine > then turn it on.
- Immediately press Command + R and hold until you see the Apple logo or spinning globe.
Following the instructions will put your Mac in recovery mode. After this, follow the below instructions to erase and reinstall macOS:
- In macOS Utilities, open Disk Utility.
- Click View > Show All Devices.
- Choose the main drive (Macintosh HD) > Click Erase from the top toolbar.
- Set Format to APFS and set Scheme to GUID > Erase. Wait for the process to complete.
- Go back to macOS Utilities and click Reinstall macOS > Continue. Set the install location to Macintosh HD.
- Wait for macOS to download and install.
Again, I must emphasize that this process is permanent and cannot be reversed, so you should be certain that all the other options are not working.
Bonus tip: Backup your Mac files securely
Before deleting other volumes or resetting your Mac, I strongly recommend that you back up your sensitive data first. One of the best ways to do this is through Get Backup Pro.
The process is a simple one:
- Install and open the Get Backup Pro app.
- Click the “+” button at the bottom to add a project.
- Fill in your project details and click OK.
- Add files and folders to the backup using the File+ button or drag and drop them.
- Select a source volume that needs backup and a destination volume where the backup will be saved.
- A dialogue box will appear; choose when you want the backup to start.
- Click Start.
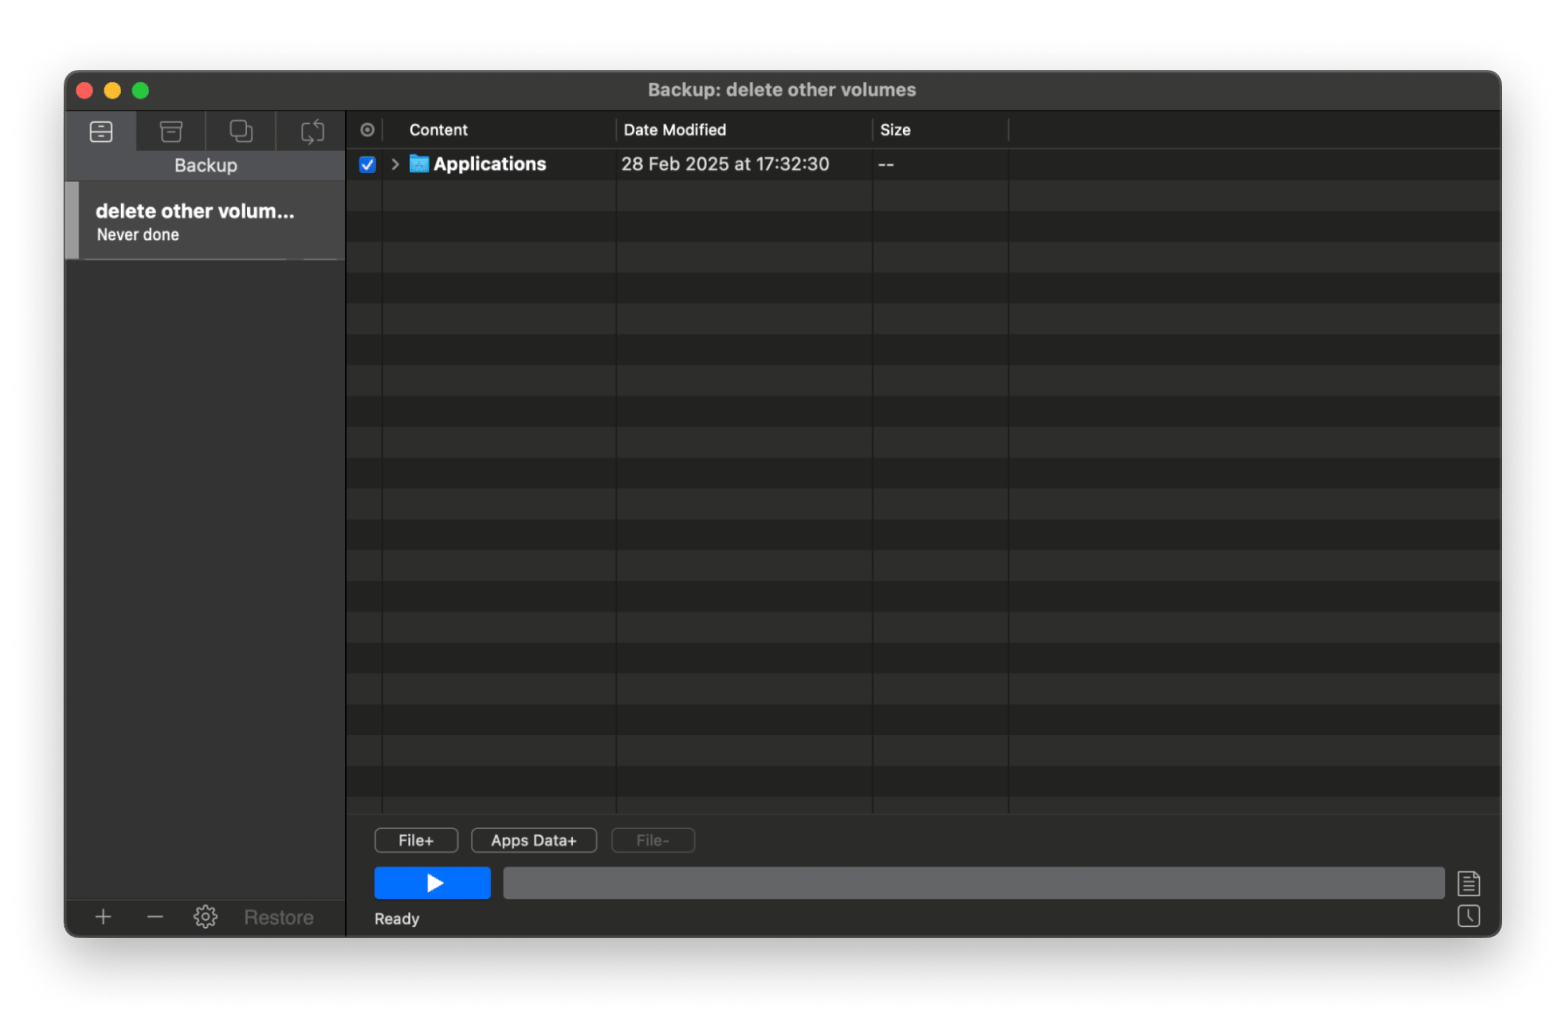
You can even schedule regular backups so that nothing is ever lost again.
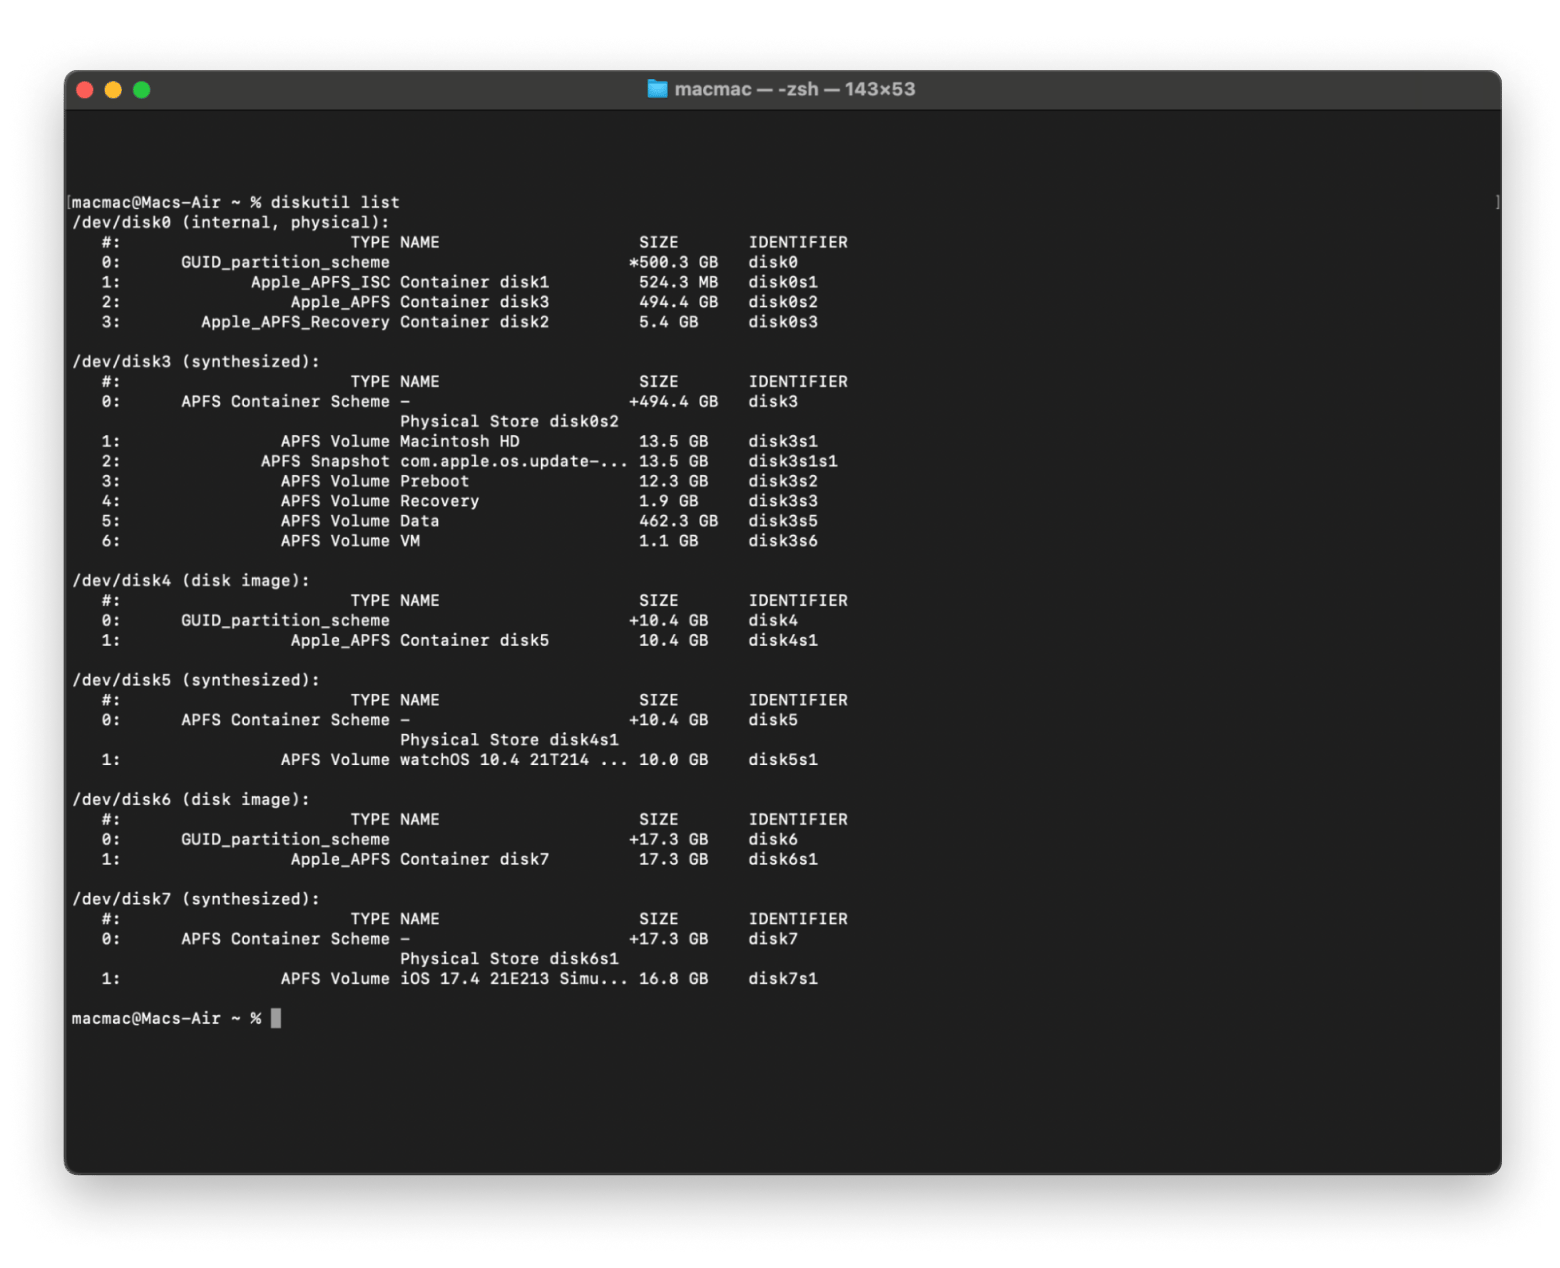
How to view and manage each volume in a Mac container using Terminal?
If you are tech-savvy, you can even list all the volumes using the Terminal — you can basically operate your computer with just a keyboard and a terminal window (if you know how).
To check all the volumes and the space they occupy:
- Go to Finder > Applications > Utilities > Terminal.
- Type diskutil list. This will list all volumes and their details.
- Check their sizes and decide if you want to get rid of other volumes in container.
- Unmount the volume by typing sudo diskutil unmount
. Replace with the actual volume identifier you want to unmount. - Delete the volume by typing sudo diskutil apfs deleteVolume
. Again, replace with the volume's identifier. - The Terminal will ask for confirmation. Type Y and then press Return.
Going beyond other volumes in container
Other Volumes in container in Mac isn't always a problem, but when it is, it's usually due to unnecessary system files, rogue apps, or extra volumes. These volumes aren't bugs stealing your space — they're integral parts of a sophisticated storage system that's actually far superior to the old ways once you understand how it works.
If you find yourself overwhelmed when dealing with these volumes, I’d recommend you try out apps by Setapp. For power Mac users, Setapp provides a highly useful suite of apps that can take your machine to the next level. All the apps, like CleanMyMac, Gemini, and Get Backup Pro, can be found under a single subscription. But you can also use them on a 7-day trial before you commit fully.
FAQs
Why is my Mac storage full of "Other Volumes"?
Your Mac is full of Other Volumes because it needs these volumes for proper functioning. These volumes may include:
- System files (like recovery partitions, snapshots, and virtual memory)
- Caches (temporary files that apps and macOS use to speed things up)
- Miscellaneous data (logs, plugins, and other bits that don’t belong elsewhere)
Can I clear APFS containers on my Mac?
You can clear APFS containers. However, you should be extremely careful; deleting an APFS container wipes out everything inside, including volumes, snapshots, and all associated data. Use Get Backup Pro to back up your files first.
Can I delete Other Volumes within a container on my Mac?
You can delete Other Volumes through Disk Utility. Before deleting, make sure that you don’t have anything important stored in that volume, and back up your files with Get Backup Pro.
To delete volumes through Disk Utility:
- Open Finder > Applications > Utilities > Disk Utility.
- Click View > Show All Devices.
- Right-click on the volume you want to delete and click Delete APFS Volume.
- Confirm the deletion.
How to free up space on Mac?
To free up space on your Mac, use CleanMyMac to find system caches and duplicate data and clean them with just one click.


