How to add a printer to a Mac: Ultimate guide
My husband is the unpaid CEO of the house — every time I need to fix something, he’s right here. Once, I decided we needed a printer so I didn’t have to spend money and go to the local printing center whenever I needed something on paper, like rickets, forms, or photos. Little did I know that setting up a printer can be challenging. Luckily, my husband was right here and helped me add a printer to a Mac, and now I can share my insights with you.
5 Methods to add printer on Mac
Last Friday, we finally welcomed our new friend into our home. Naturally, we wanted to connect it asap. Now, I want to show you how to add a printer to a Mac:
| Method | What to do |
| Wi-Fi |
|
| USB |
|
| Bluetooth |
|
| IP address |
|
| Remove printer |
|
The methods are briefly described in the table above. For more detailed instructions, keep reading.
How to connect a printer to your Mac
Can't wait to print? Here's a quick guide to adding a printer on a Mac. Let me show you four ways, and you'll be printing documents, photos, or anything you need in no time.
How to connect a printer to Mac via Wi-Fi
Many wireless printers are equipped with AirPrint technology. What does this mean if your printer also has this technology? It will be displayed in the print dialog on your Mac if the Mac and the printer are on the same Wi-Fi network. But first, you need to connect your printer to Wi-Fi. Here's how.
First, plug in your printer. Turn it on. If it has a WPS button, simply press it. Next, press the same button on your router to connect. Your printer doesn't have a WPS button? Not a problem at all. Find your printer's manual. There, you can see the instructions on how to join the network. It must be easy.
If your printer is AirPrint-capable, congrats! You're all set! In case your printer isn't AirPrint-ready, this instruction is for you:
- Go to the Apple menu > System Settings.
- Click on Printers & Scanners.
- Look for your printer on the list. If it doesn't show up, click Add Printer, wait until it appears, and then select it.
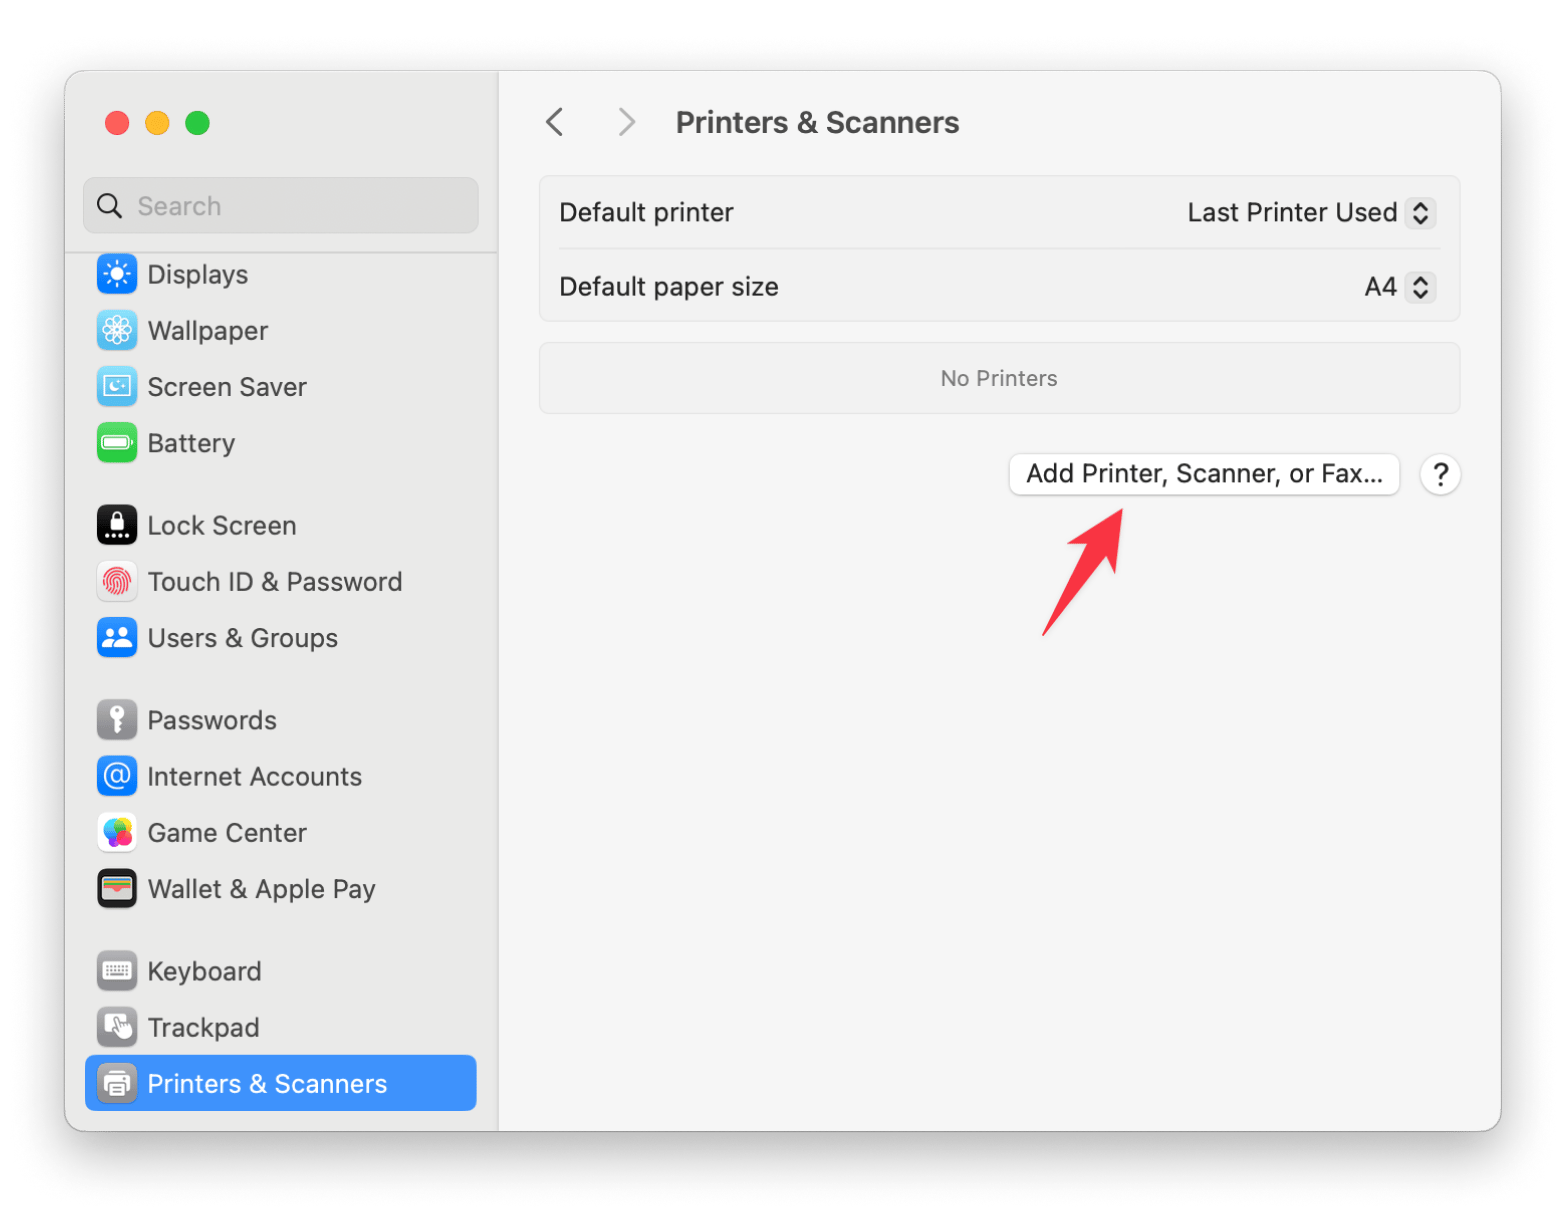
That's how you add a printer to a Mac via Wi-Fi.
Add a USB printer to a Mac
You can also use a USB to connect your printer. Here's how:
- Ensure your Mac is up to date.
- Plug in and turn on your printer.
- Connect the USB cable to the printer.
- Next, connect the same USB cable to your Mac. If your Mac has USB-C ports, try a hub or dock if the printer doesn't have a USB-C connection.
- Allow the permission prompt for the printer to connect to your Mac.
- Open System Settings and go to Printers & Scanners. If the printer is listed, select it. If not, click Add Printer, wait for it to appear, then select it and click Add.
- Your Mac might need to download and install printer drivers. Wait.
- To set your printer as your default, choose it in Printers & Scanners and click Set Default Printer.
Add a Bluetooth printer to a Mac
Certain printers can get connected to your Mac using Bluetooth. To set them up, you'll need to pair them with your Mac. In this section, we'll talk about setting up a wireless printer on a Mac.
Here’s how to add a wireless printer to Mac:
- Put your printer into pairing mode. (You may need to check your printer's manual).
- Then, Click the Control Center icon in the menu bar of your Mac
- Click Bluetooth > Bluetooth Settings.
- You will see your printer listed at the bottom. Click Connect next to it.
- Once connected, the printer will appear in the print dialog within any application, allowing you to select it for printing.
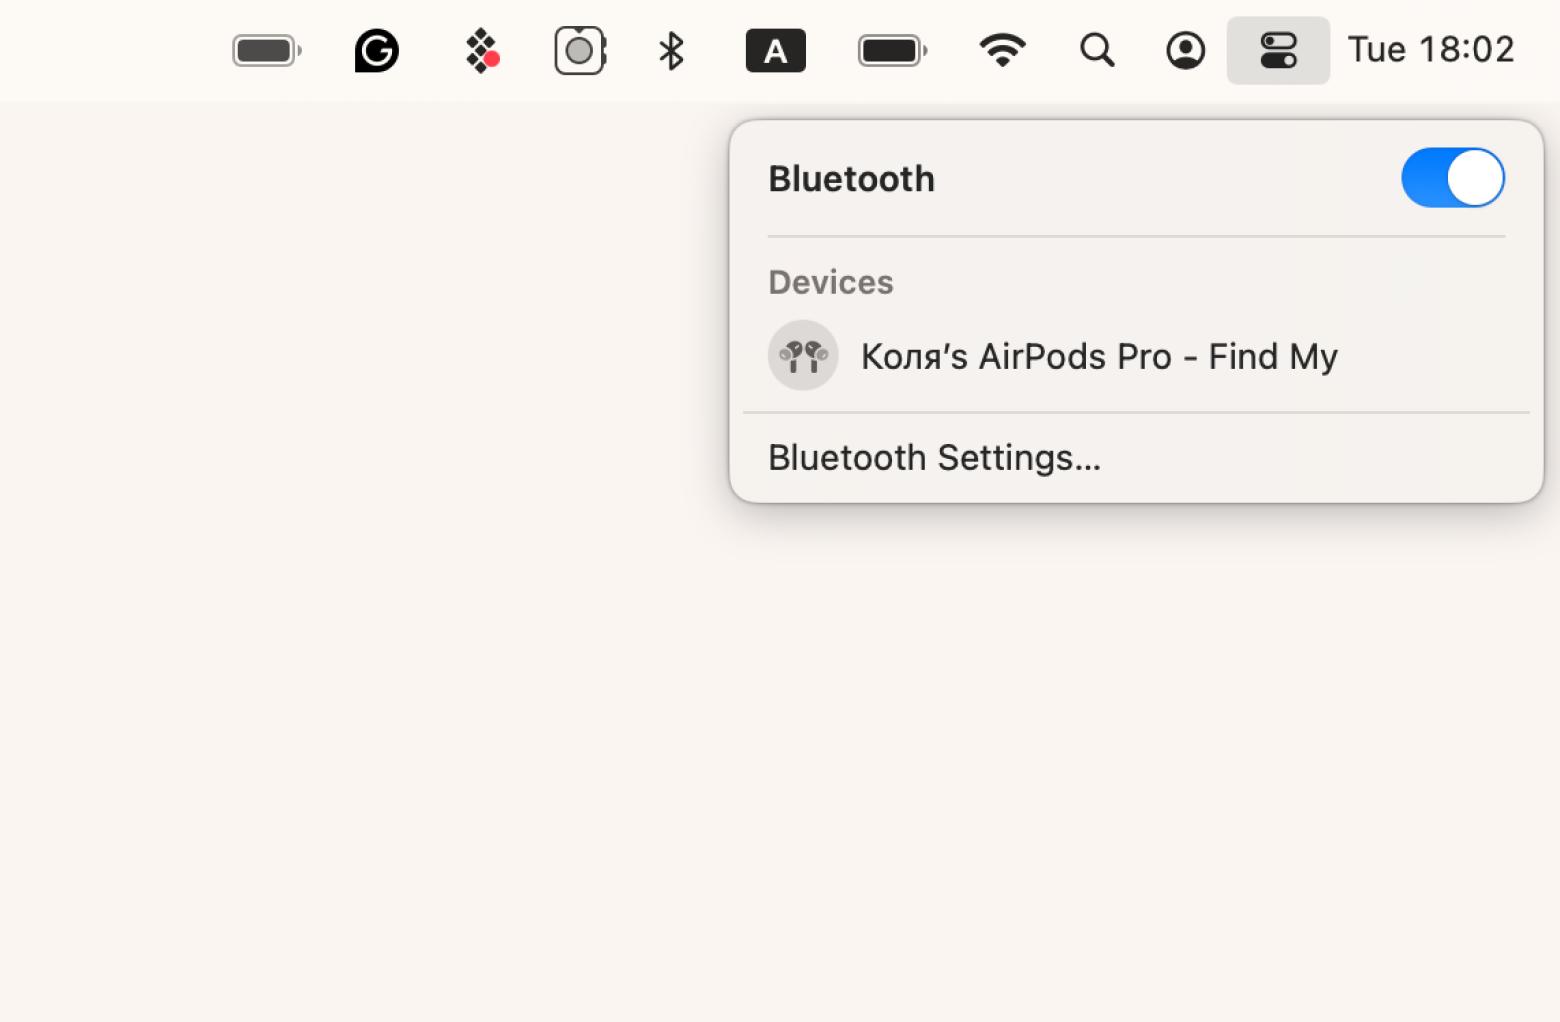
That's how to connect the printer to Mac via Bluetooth.
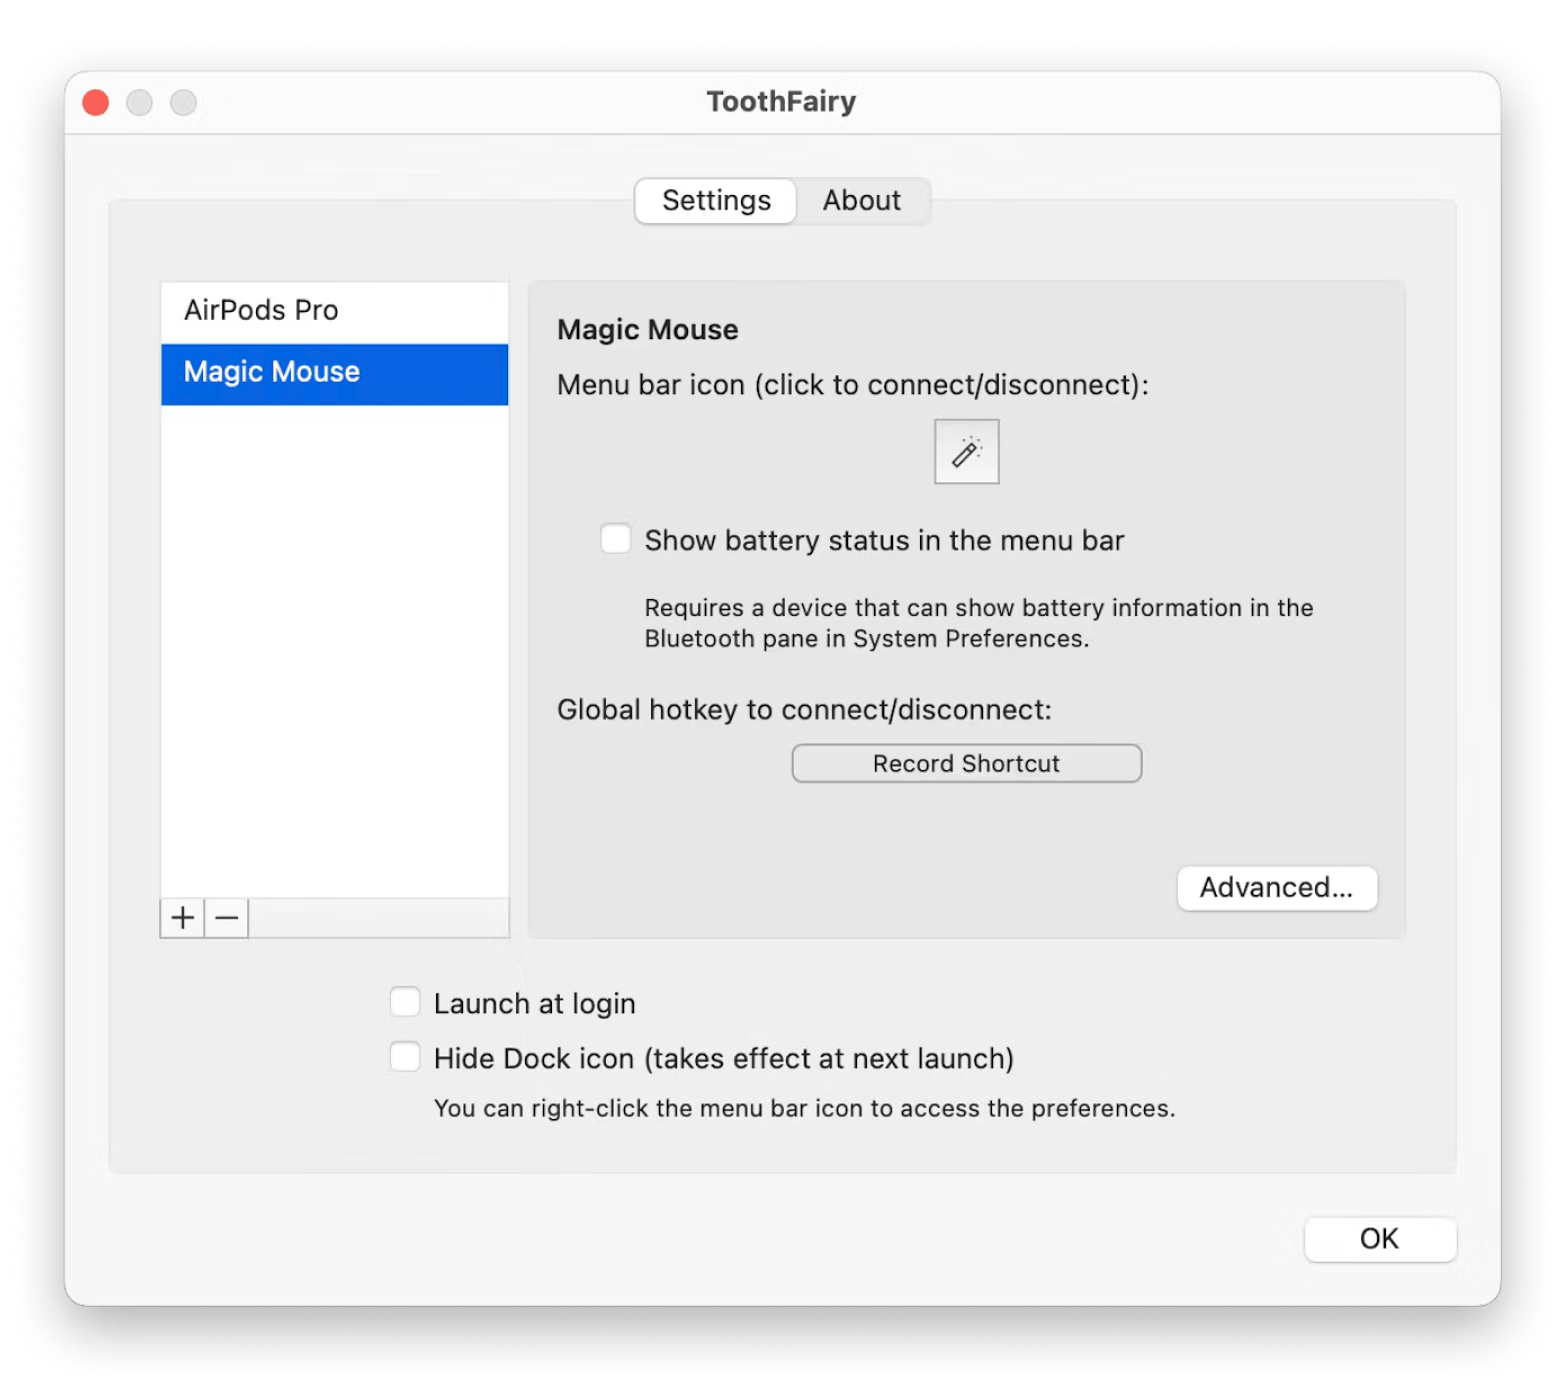
I recently found a handy utility called ToothFairy. It makes managing Bluetooth devices on your Mac much easier. Instead of manually pairing your printer through Bluetooth Settings, you can use ToothFairy to simplify the process.
This app is especially useful for devices like AirPods and Magic Mouse. With ToothFairy, you can quickly connect and switch between your Bluetooth devices using custom keyboard shortcuts. You can also see battery levels at a glance. For me, it removes the hassle of searching through Bluetooth settings every time I want to connect a device.
How to add a printer via IP address
Your Mac doesn't find a printer on the network automatically. What to do? Fortunately, you can add it manually using the printer's IP address:
- Get the IP address from a network administrator. If you connect the printer at home, log into your router's admin page and check the list of connected devices. There, you will find the IP address. Done?
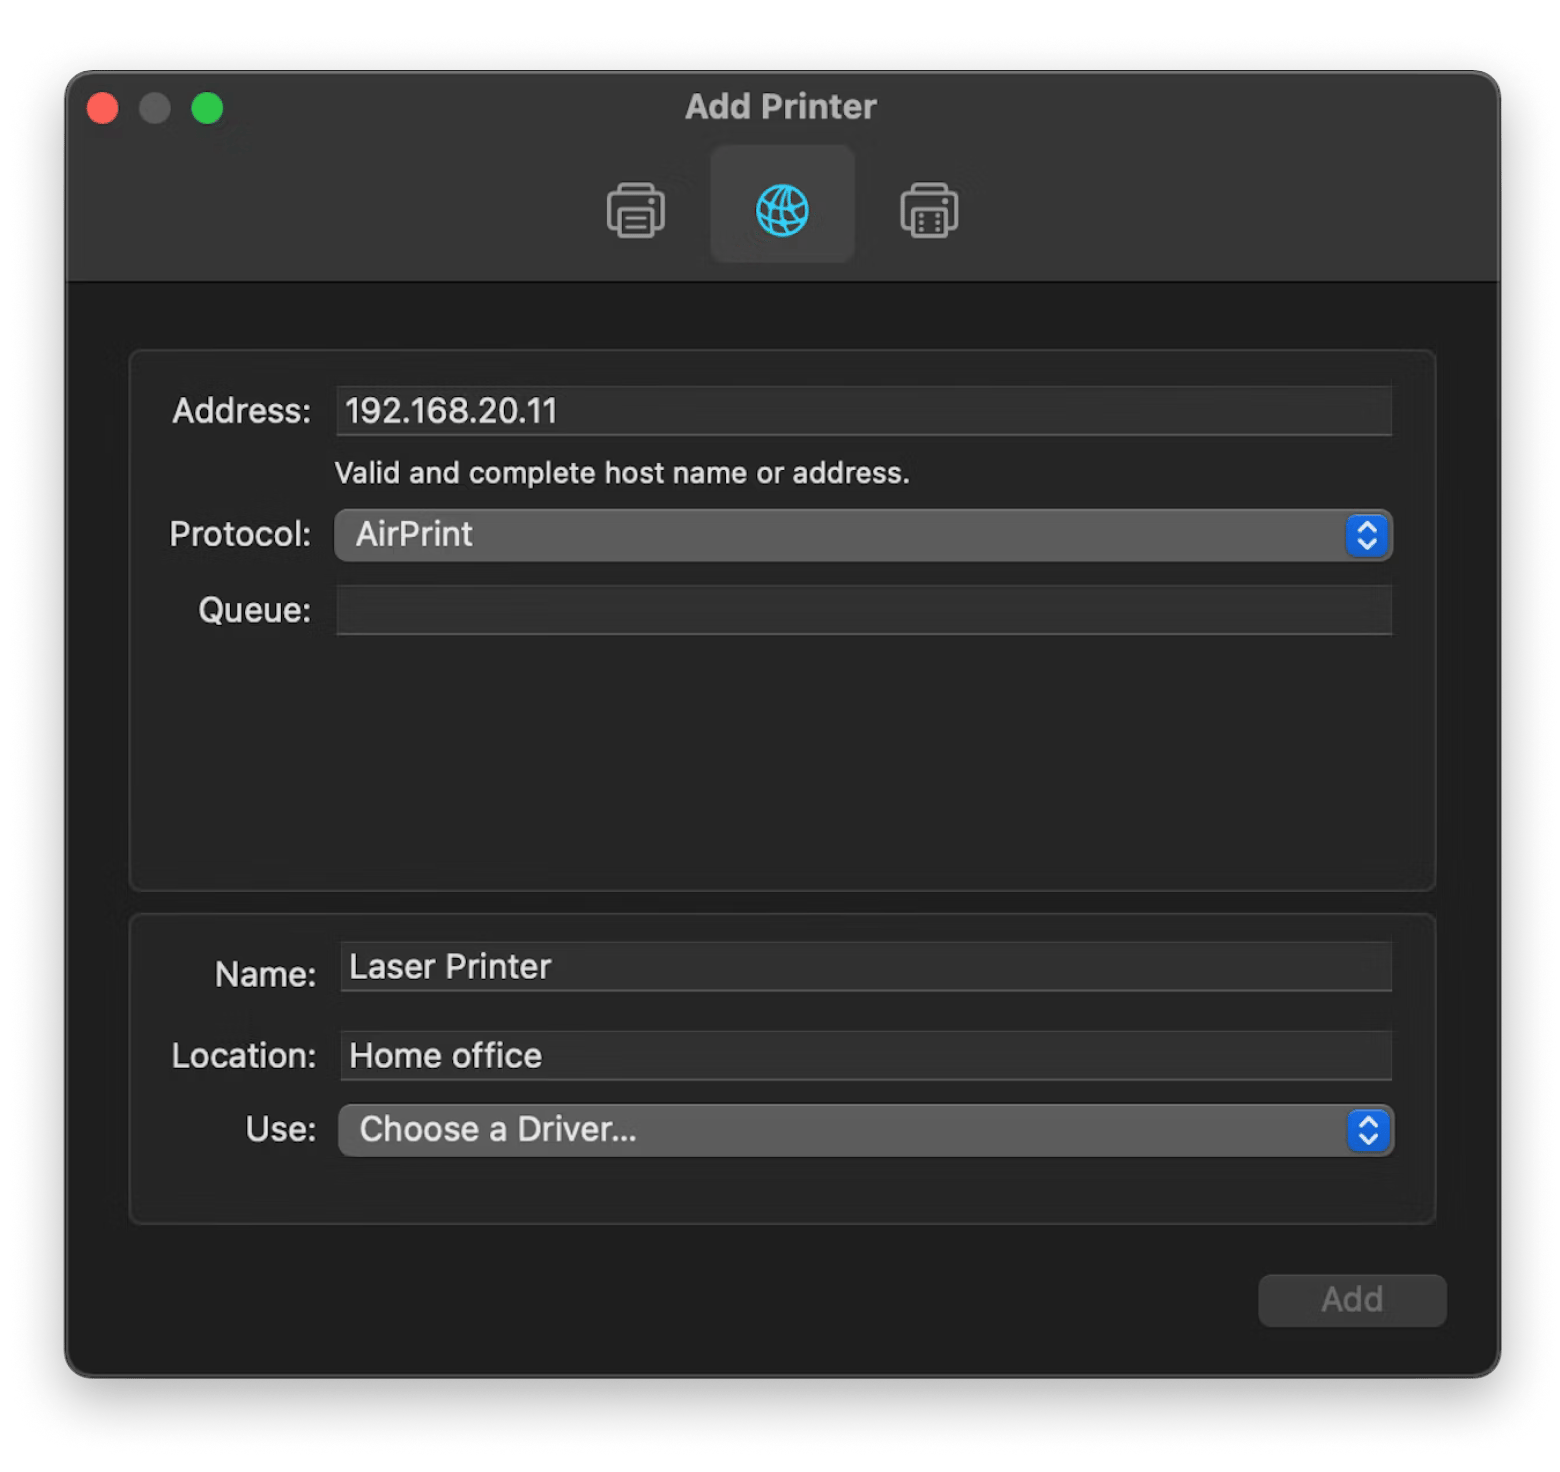
- Open System Settings and go to Printers & Scanners. Click Add Printer, Scanner, or Fax.
- Click the Globe icon at the top of the window and enter the printer’s IP address in the Address box.
- Choose a protocol: choose AirPrint if the printer supports it; otherwise, select Internet Printing Protocol.
- Wait for the printer to show up, click the Use menu, and choose the appropriate driver.
- Finally, click Add to complete the setup.
Removing an unused printer
Now you know everything about setting up a printer on a Mac. But what if you want to disconnect a printer that you don't use?
Here’s how to remove unused printers:
- Open System Settings > Printers & Scanners
- Find the printer that you want to get rid of. Click on it. Then click on the minus button.
- Confirm you want to remove the printer.
When you disconnect an unused printer from your Mac, keep in mind that leftover files still stay on your disk. These files can take up valuable space and slow down your Mac. If you want your Mac to run smoothly (I know you do), it's crucial to remove these remnants. I use CleanMyMac to tackle this.
Follow the steps below:
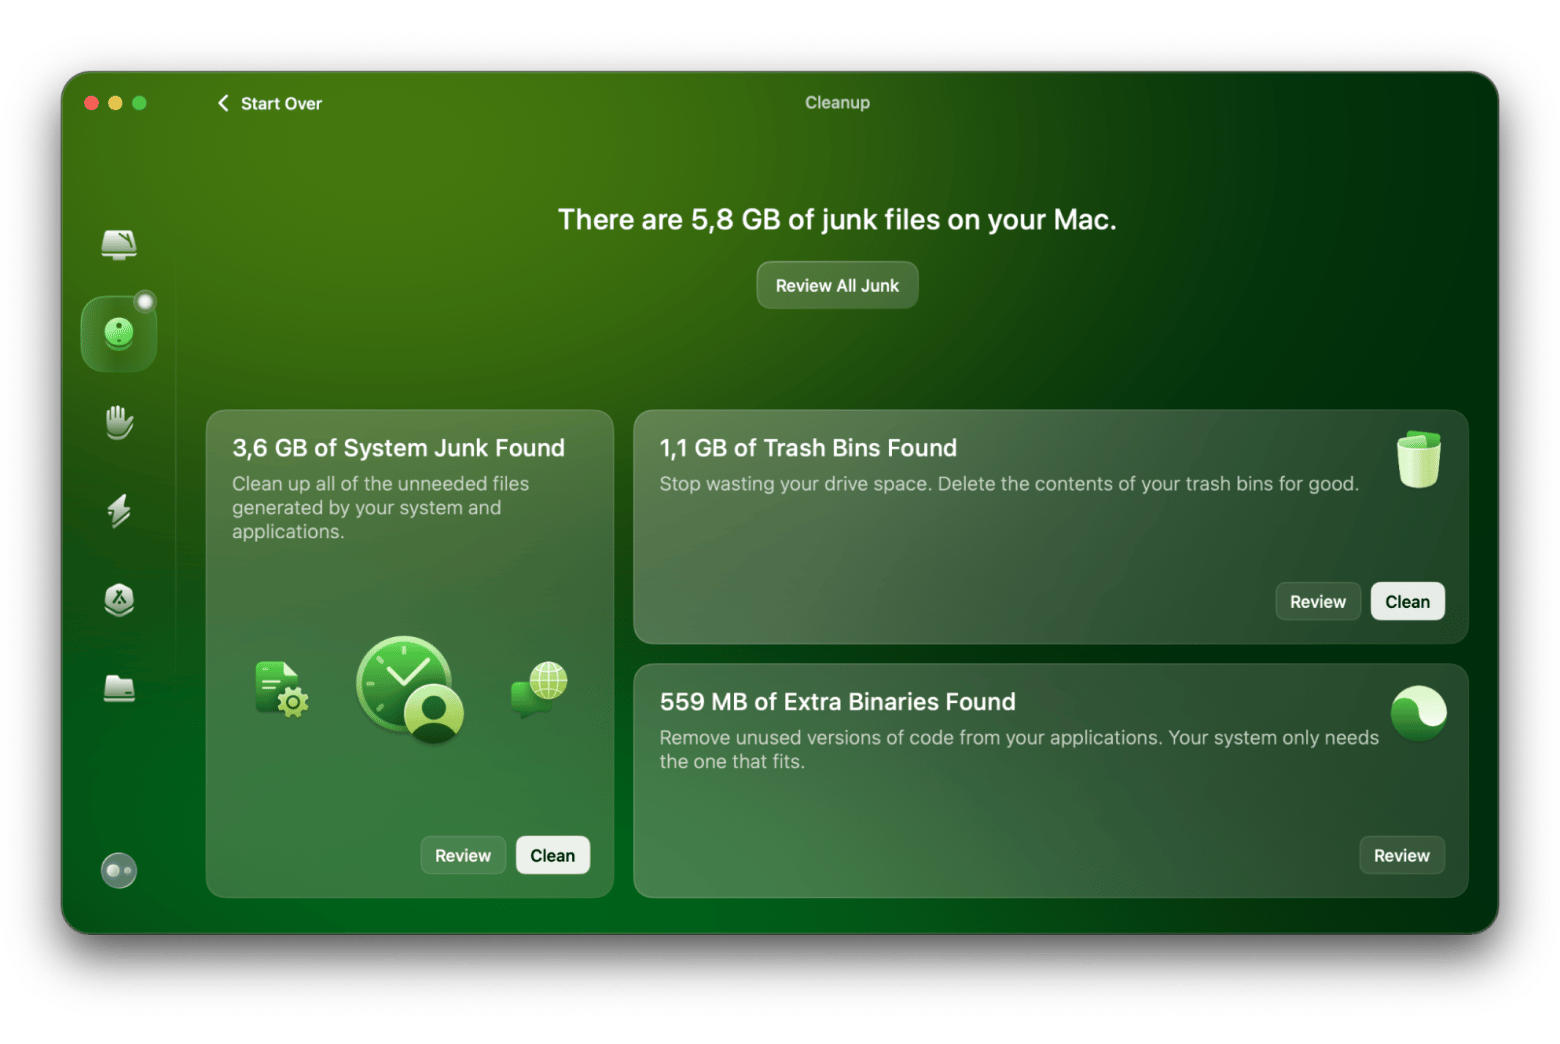
- Open CleanMyMac and go to Cleanup > System Junk.
- Click Scan to find unneeded printer files on your Mac.
- When the scan is complete.
- In the System Junk Food window, click Clean to remove those unnecessary files.
How to add printer to Mac: Final thoughts
In this article, we looked at how to add printer to a Mac in four simple ways. Namely, we learned how to install a printer on Mac wirelessly via Bluetooth, USB, and IP address. Most MacBook users find the Wi-Fi method the easiest and most convenient. However, not all printers support Wi-Fi. And sometimes, Wi-Fi connection doesn't work as it has to. In such a situation, you can try one of the four methods I described above.
With wireless printers, I recommend you try NetSpot to choose the right location for your printer. For Bluetooth printers, you may like ToothFairy as a handy connection toggle. And, of course, whenever you disconnect an old printer, don't forget to remove system junk with CleanMyMac. It will keep your Mac clean and in top shape. The best part? You can install all these apps from Setapp, a platform that offers 250+ Mac, iOS, and web apps for almost any task you can imagine. Try every app at no cost with a seven-day trial.
FAQs about Printers on Mac
Why can't I add my printer to my Mac?
You can’t add your printer to Mac because of possible connectivity issues. For example, when the printer is not on the same Wi-Fi network as your Mac. Also, the printer might be turned off. Or maybe you did not update your Mac to the latest macOS.
How do I get my Mac to recognize my printer?
To help your Mac recognize your printer, check if the printer is turned on and connected to the same network as your Mac. For USB printers, see if the cable is securely connected. We also recommend you restart both your Mac and printer. Also, go to the Apple menu > System Settings > Printers & Scanners and see if your printer appears there. If not, you may need to add it manually.
How do I find printer settings on Mac?
To find printer settings on your Mac, go to the Apple menu > System Settings and select Printers & Scanners. From there, you can check all the printers that are connected. Select the printer you want to configure. You'll find options to change settings, such as paper size, print quality, and other preferences. You can also access the printer's specific settings by clicking on Options & Supplies.


