How to check and clean up Other storage on Mac
The only time you have the option to upgrade Mac’s storage is when you’re buying it. While older Macs allowed you to swap storage later on, new Macs don’t.
Buying storage is expensive. Moving from 256 GB in the base model to 512 GB will cost your $200. Moving to 1 TB is $400. Moving to 2 TB is $800 — nothing to sneeze at.
That’s why when your storage runs low, instead of buying a new Mac, consider freeing up space by deleting files you don’t need. If you look at what occupies your storage on Mac, you’ll see that the Other category takes up a lot of space.
What is “Other” in storage? And how to get rid of Other storage on Mac?
What is Other storage on Mac?
When you check storage on Mac, you’ll see a breakdown of everything that takes up space on your hard drive.
All the files on your Mac are grouped into categories, such as iCloud Drive, iOS Files, Apps, Documents, Photos, Mail, and more. Then, you might see a large category, taking up gigabytes, called Other.
MacBook storage Other contains everything that didn’t fit into any of the categories above. It’s mainly composed of system data, temporary files, DMG installers, caches, app plugins and extensions, and obscure document formats.
If you use macOS Monterey or later, you won’t see the Other storage label anymore. Instead, it’s been broken up into macOS, System Data, and Other Users categories. But earlier macOS releases do have Other storage as illustrated above.
How to check storage on macOS Ventura and later
The way you check storage on Mac differs slightly between macOS Venture and later releases and macOS Monterey and earlier ones.
To see your storage breakdown on macOS Ventura or later:
- Go to System Settings
- Navigate to General ➙ Storage
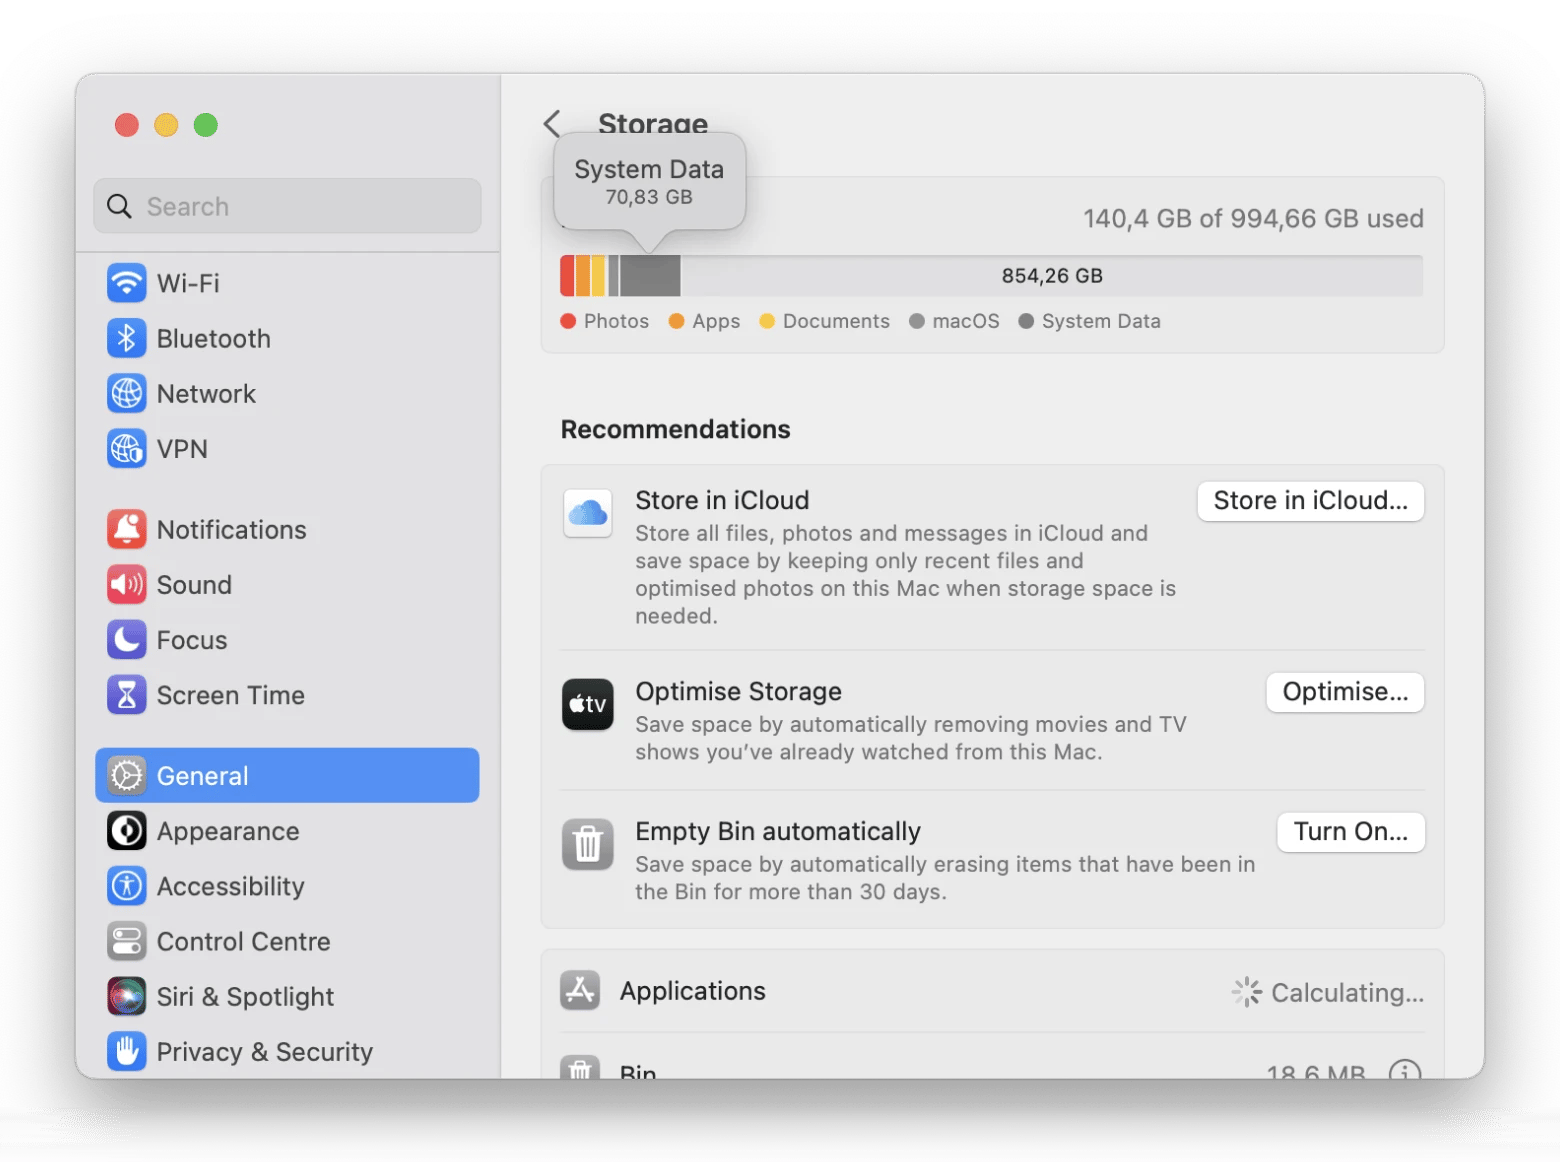
How to check storage on macOS Monterey and earlier
The easiest way to see Other storage in macOS Monterey and earlier is through the About This Mac menu:
- Click the Apple logo in the menu bar
- Select About This Mac
- Switch to Storage
How to access Other storage on Mac
Now that you know what and where Other storage is, you might be wondering how to clear “Other” storage on Mac.
While you can see Other storage in Settings, where are the files that you can delete located?
You can find most of the temporary files in the Library folder on your Mac:
- Select Go ➙ Go to Folder… (Shift + Command + G) from the menu bar
- Type ~/Library/Caches
- Press Return
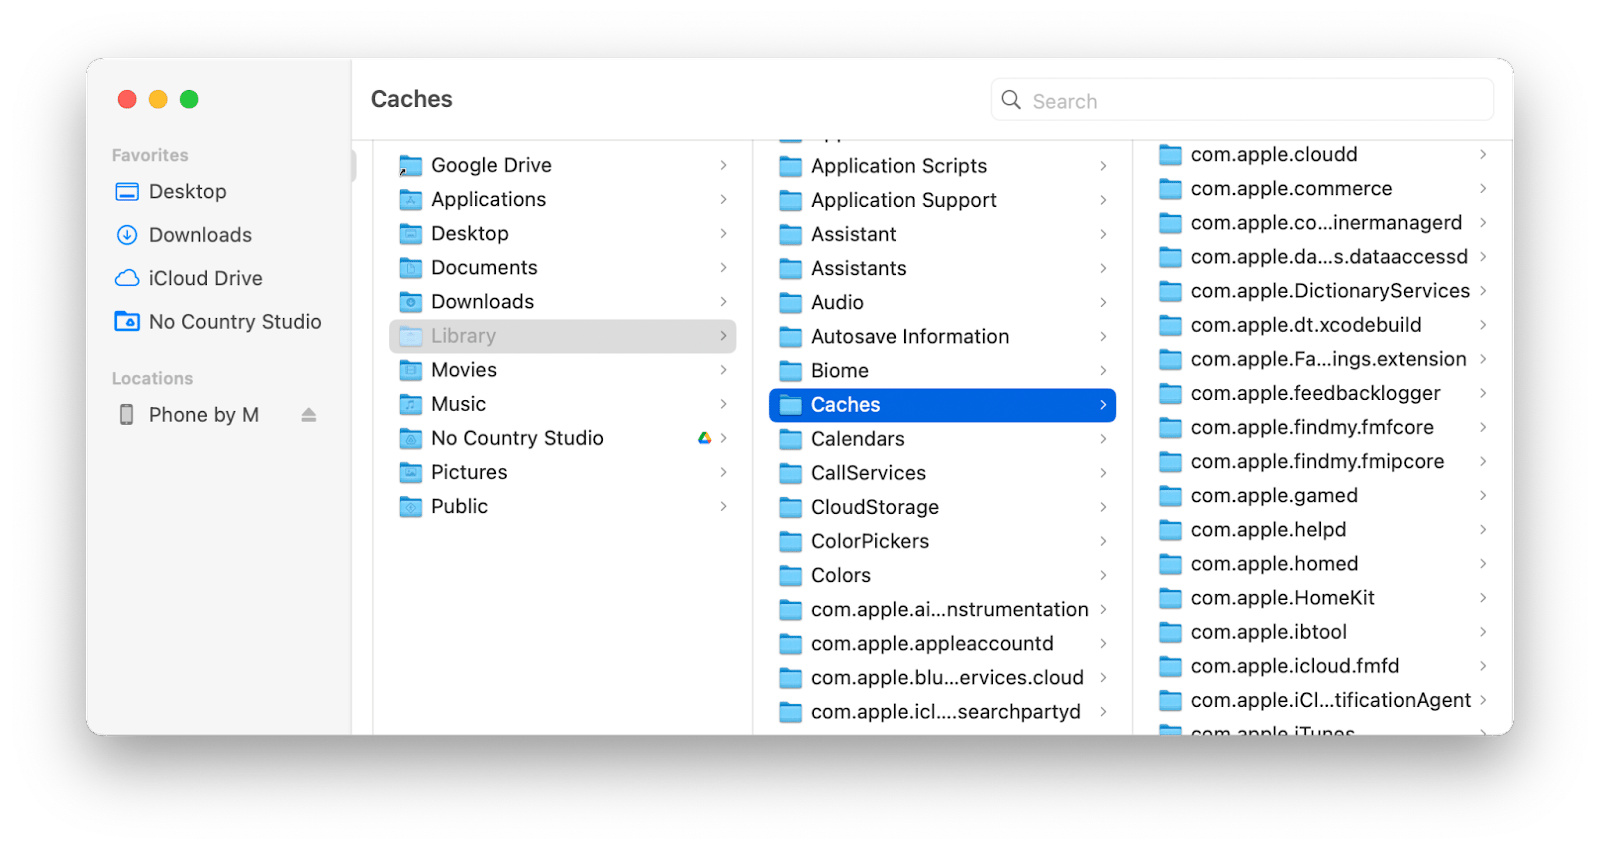
Caches is one of the largest folders in your Mac’s Library. These are temporary files created by various apps to load their data faster. While this is not the only Other storage folder available on your Mac, it’s one of the most representative ones.
The best way to reduce Other storage on Mac
If you wonder how to delete Other on Mac storage, there are a few ways to do it. The most efficient one is to use an automated cleaner like CleanMyMac X.
CleanMyMac X is the world’s most advanced Mac optimization app, taking care of anything from deleting unneeded cache files, clearing logs, optimizing system processes, freeing up RAM, deleting apps, removing malware, and much more.
With CleanMyMac X, you don’t have to know all the complexities of your macOS. Just go through its predefined scans once in a while to keep your Mac in top shape.
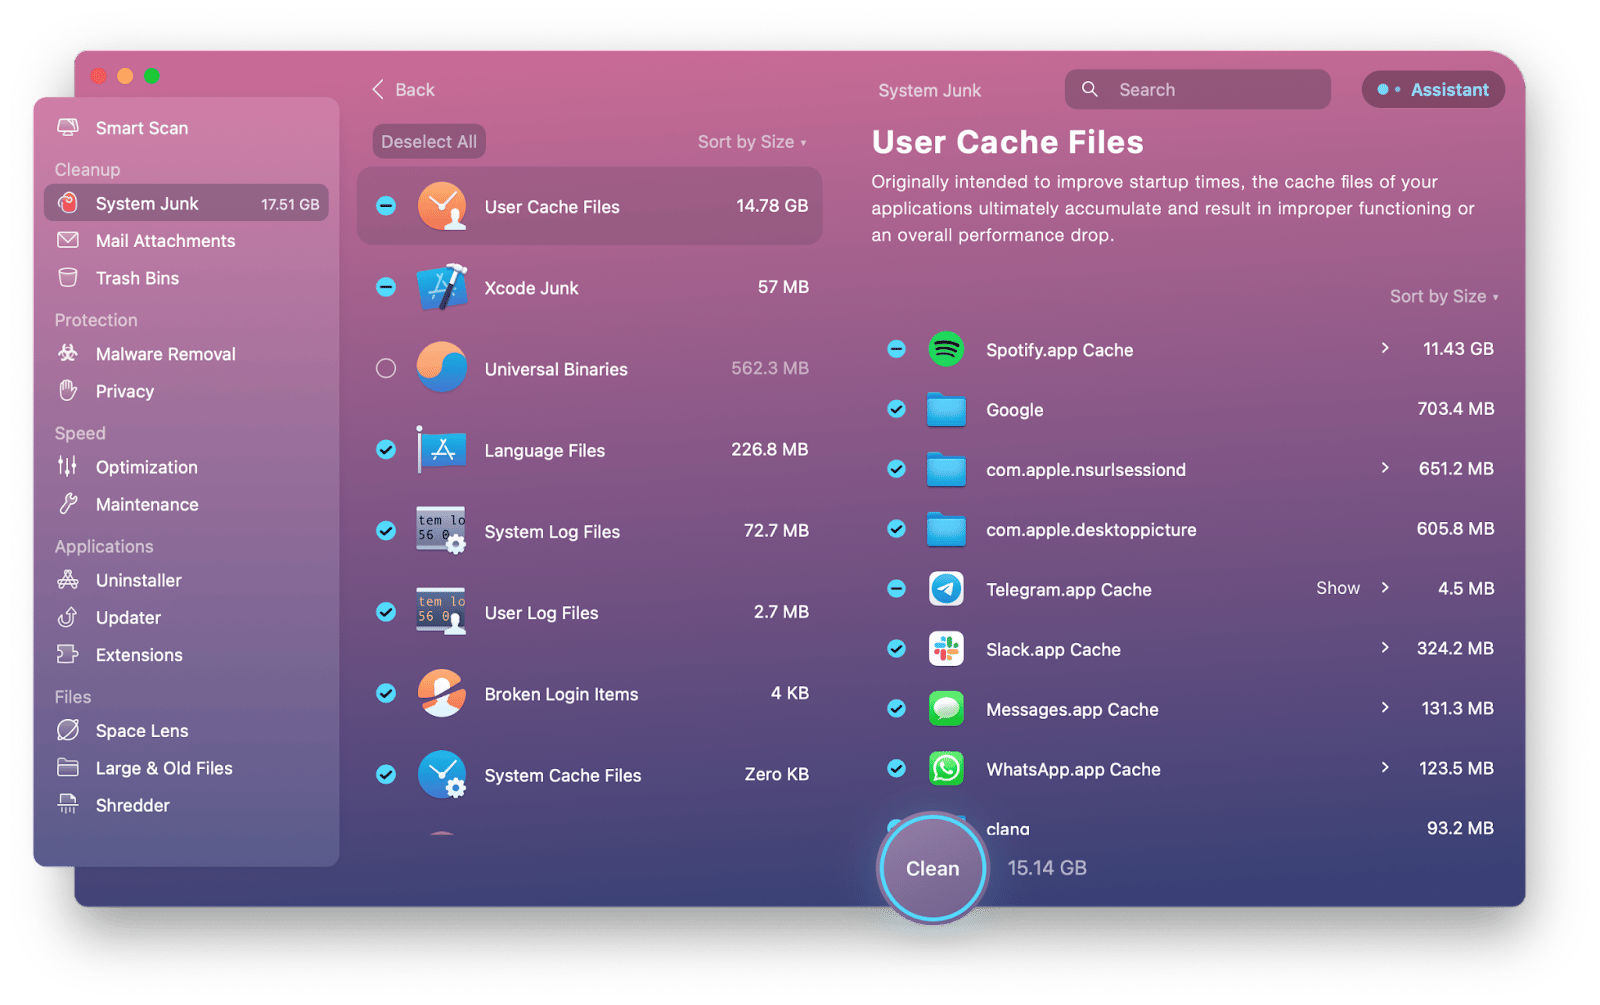
Here’s how to clear “Other” storage on Mac:
- Launch CleanMyMac X
- Go to System Junk
- Scan
- Once the scan is complete, Review Details and then Clean
How to delete Other storage on Mac manually
It’s possible to find and delete some of the files that comprise Other storage manually as well. However, it’s not a recommended option as it’s easy to delete wrong files, takes too much time, and doesn’t remove as much junk as an automated tool like CleanMyMac X would.
Clear the cache
The first step to deleting unneeded files in Other storage on Mac is going through caches. Cached files are there to speed up apps and make sure they don’t load the same data multiple times.
Even though caches are temporary files, some of them stay on your Mac long after you’ve stopped using certain apps. As a result, you might have a bloated folder of caches you no longer need.
To clear the cache on your Mac:
- Select Go ➙ Go to Folder… (Shift + Command + G) from the menu bar
- Type ~/Library/Caches
- Press Return
- Delete any cached folders that you can clearly identify as no longer relevant
Note: If you delete cached files from the apps you currently use, your preferences and settings might be lost.
Remove application support and log files
Other library folders that are part of the Other storage that you might want to go through and delete are Application Support and Logs.
You can access Application Support and Logs in the same Library folder as Caches:
- Select Go ➙ Go to Folder… (Shift + Command + G) from the menu bar
- Type ~/Library
- Press Return
- Go through Application Support files and delete the ones you don’t need
- Repeat the steps for Logs
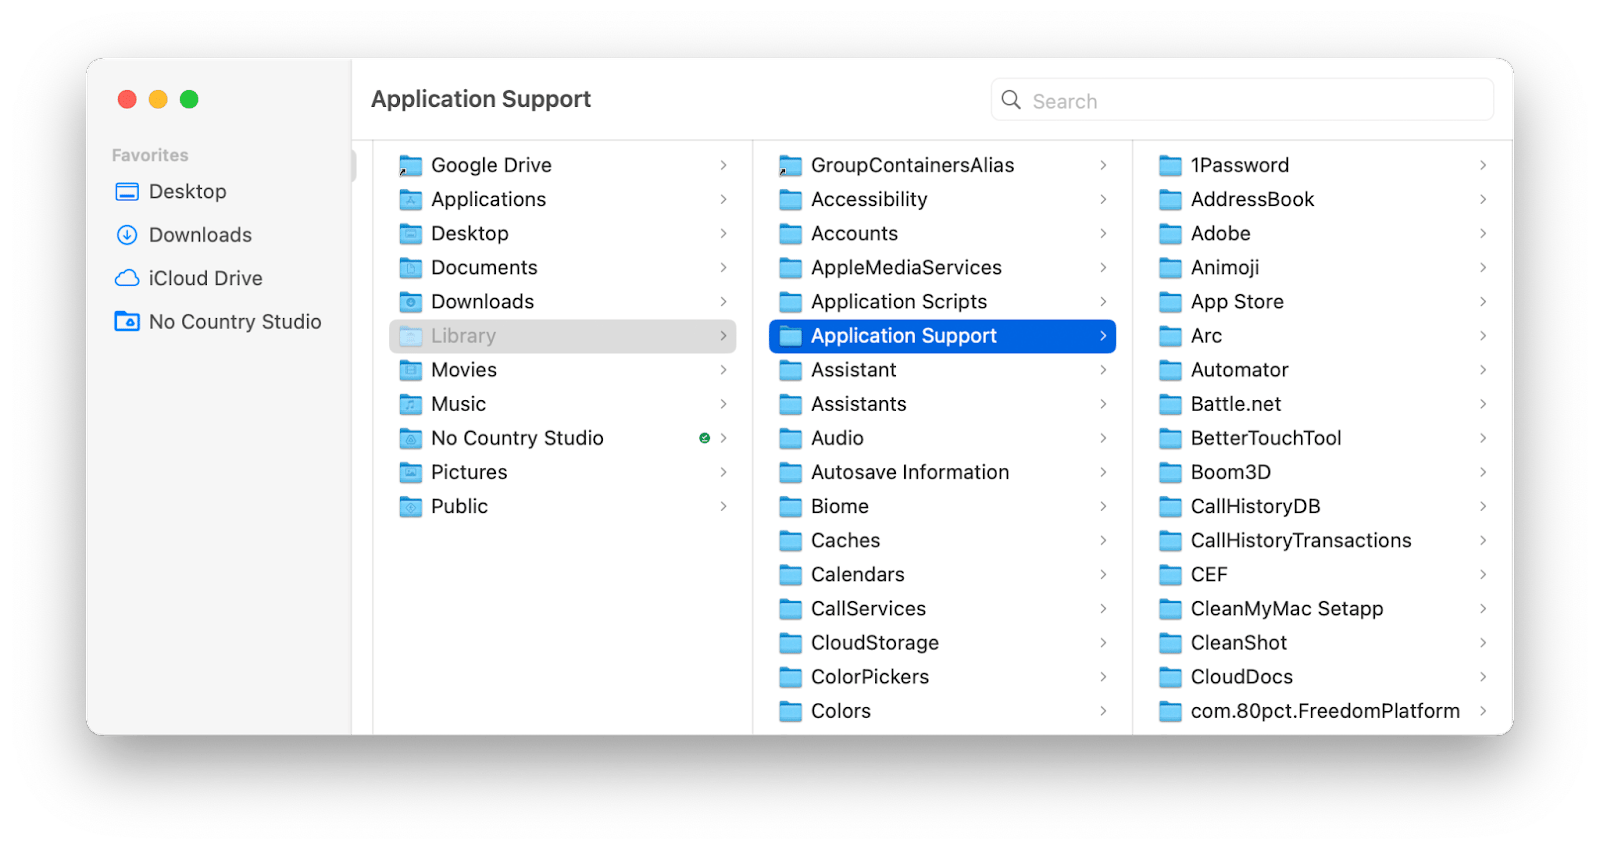
Note: Find the MobileSync folder inside Application Support for old iPhone backups that you might no longer need.
Delete DMG installers and ZIP archives
When you download apps from the internet, you can get a DMG installer that you need to unpack. Some apps ask you if you want to delete installers after the app is unpacked on your Mac, but some don’t.
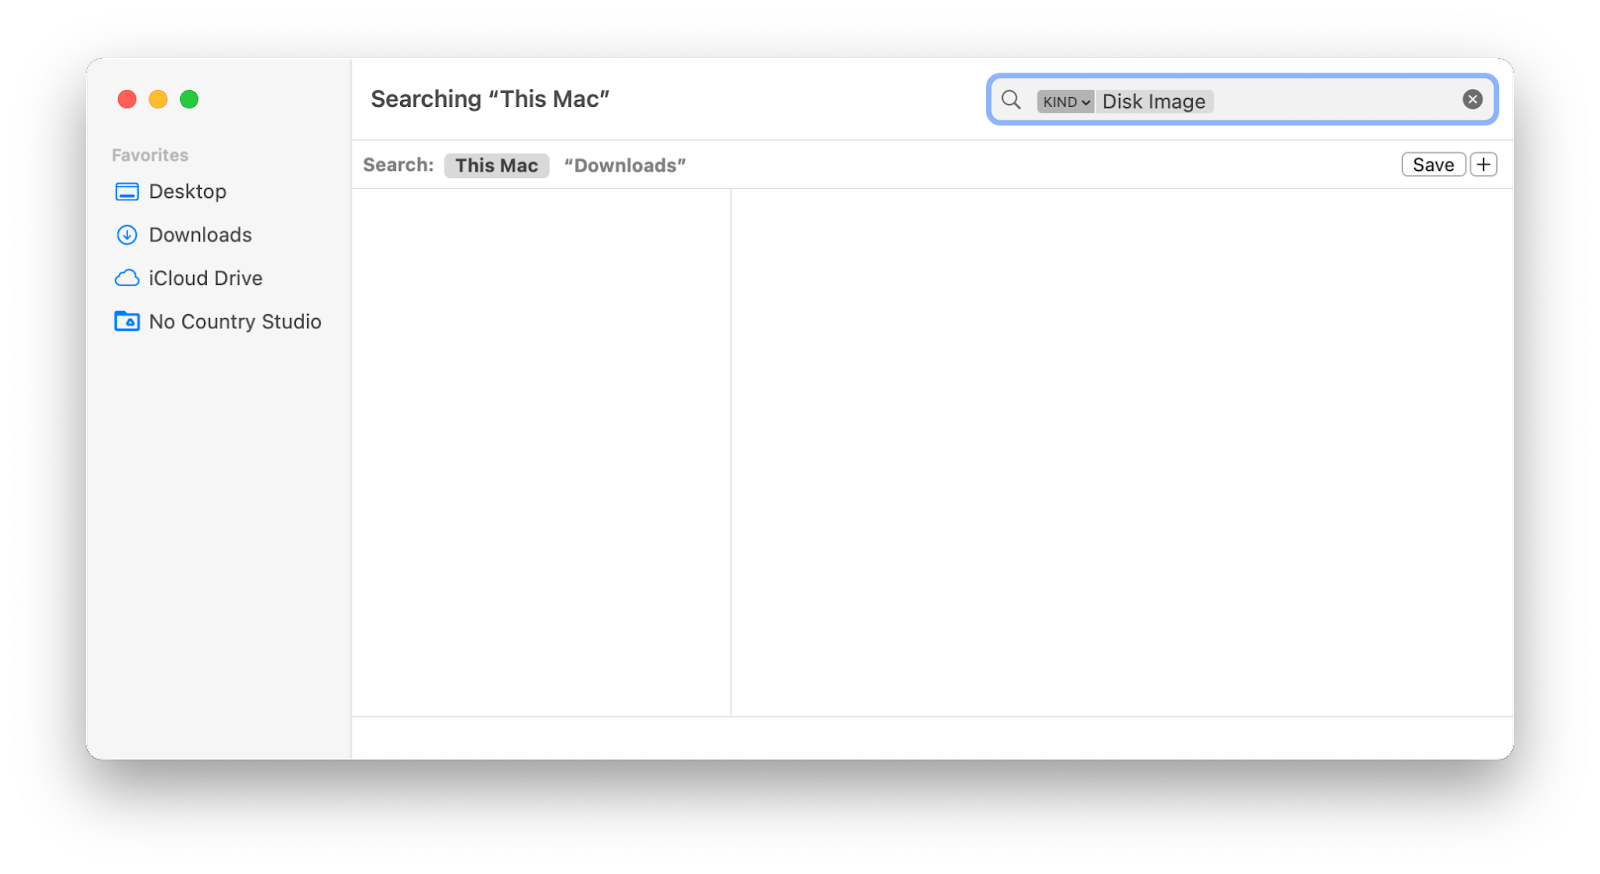
DMG installers do nothing but hog space. To find and delete them:
- Open Finder
- Type DMG in the search field
- Select Kind: Disk Image
- Click on This Mac
- Review and delete any installers you don’t need
Repeat the process with ZIP archives. Often you get archives by email and downloading files from the web. But after unarchiving, you likely don’t need them, so Move to Trash all the ones that are taking up space without purpose.
Delete old Time Machine backups
If you use Time Machine for backing up your Mac, it will continue to save backups until the drive runs out of space, and start rewriting the oldest backups after that.
In case you don’t want to wait until your hard drive is full, you can delete old Time Machine backups manually, thus getting rid of the Other storage on your Mac.
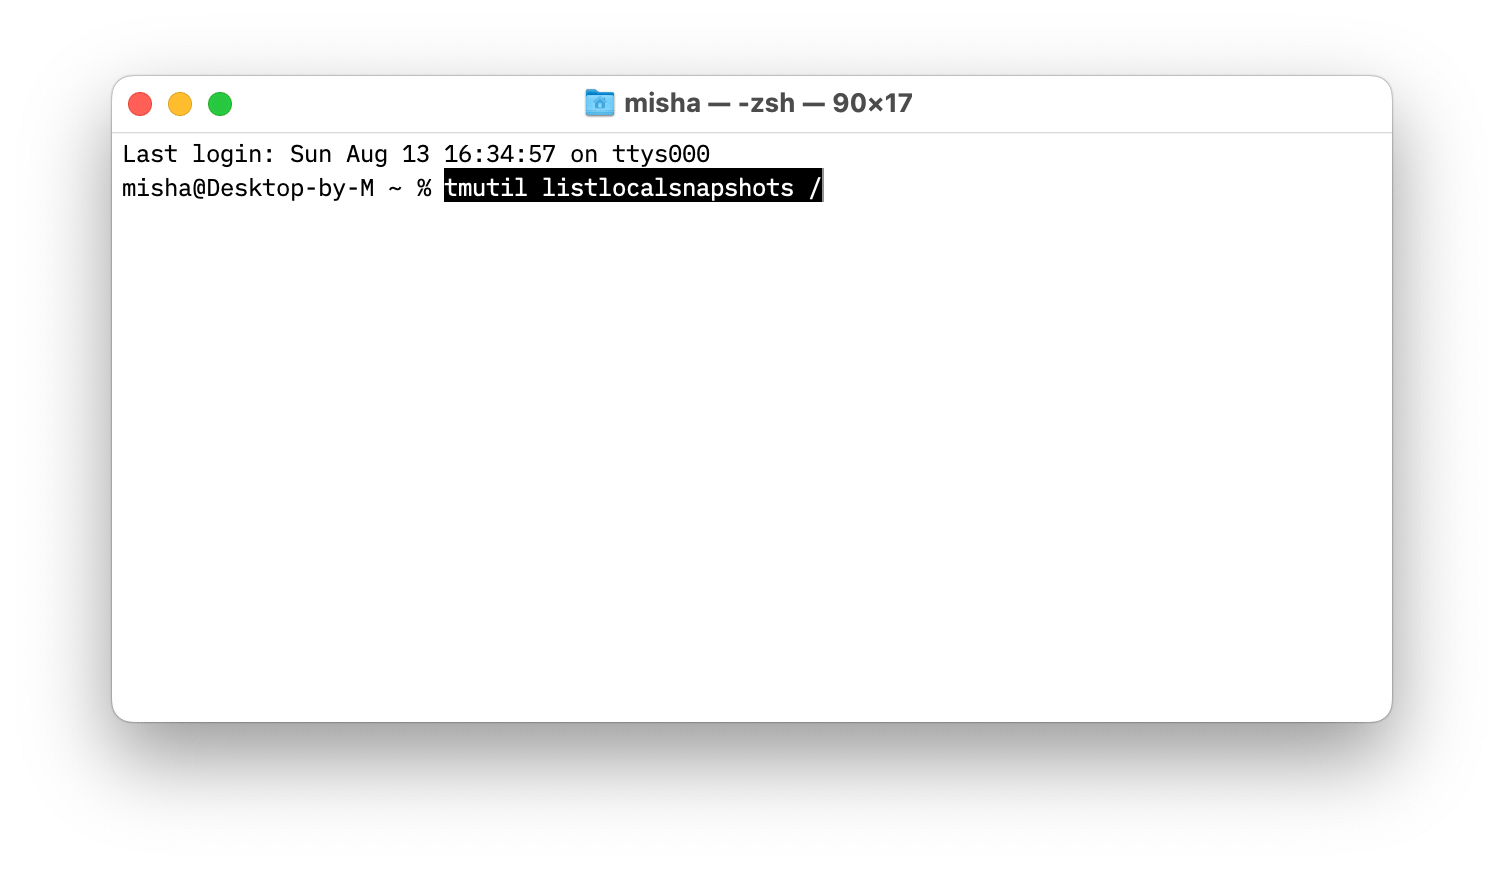
To delete Time Machine backups, you need to use Terminal:
- Launch Terminal from Utilities
- Type and Enter this command: tmutil listlocalsnapshots /
- Type and add a timestamp to delete a particular backup: sudo tmutil deletelocalsnapshots 2023-08-14-112730 (for example)
- Enter your password if required
- Repeat the process to delete as many old backups as you need
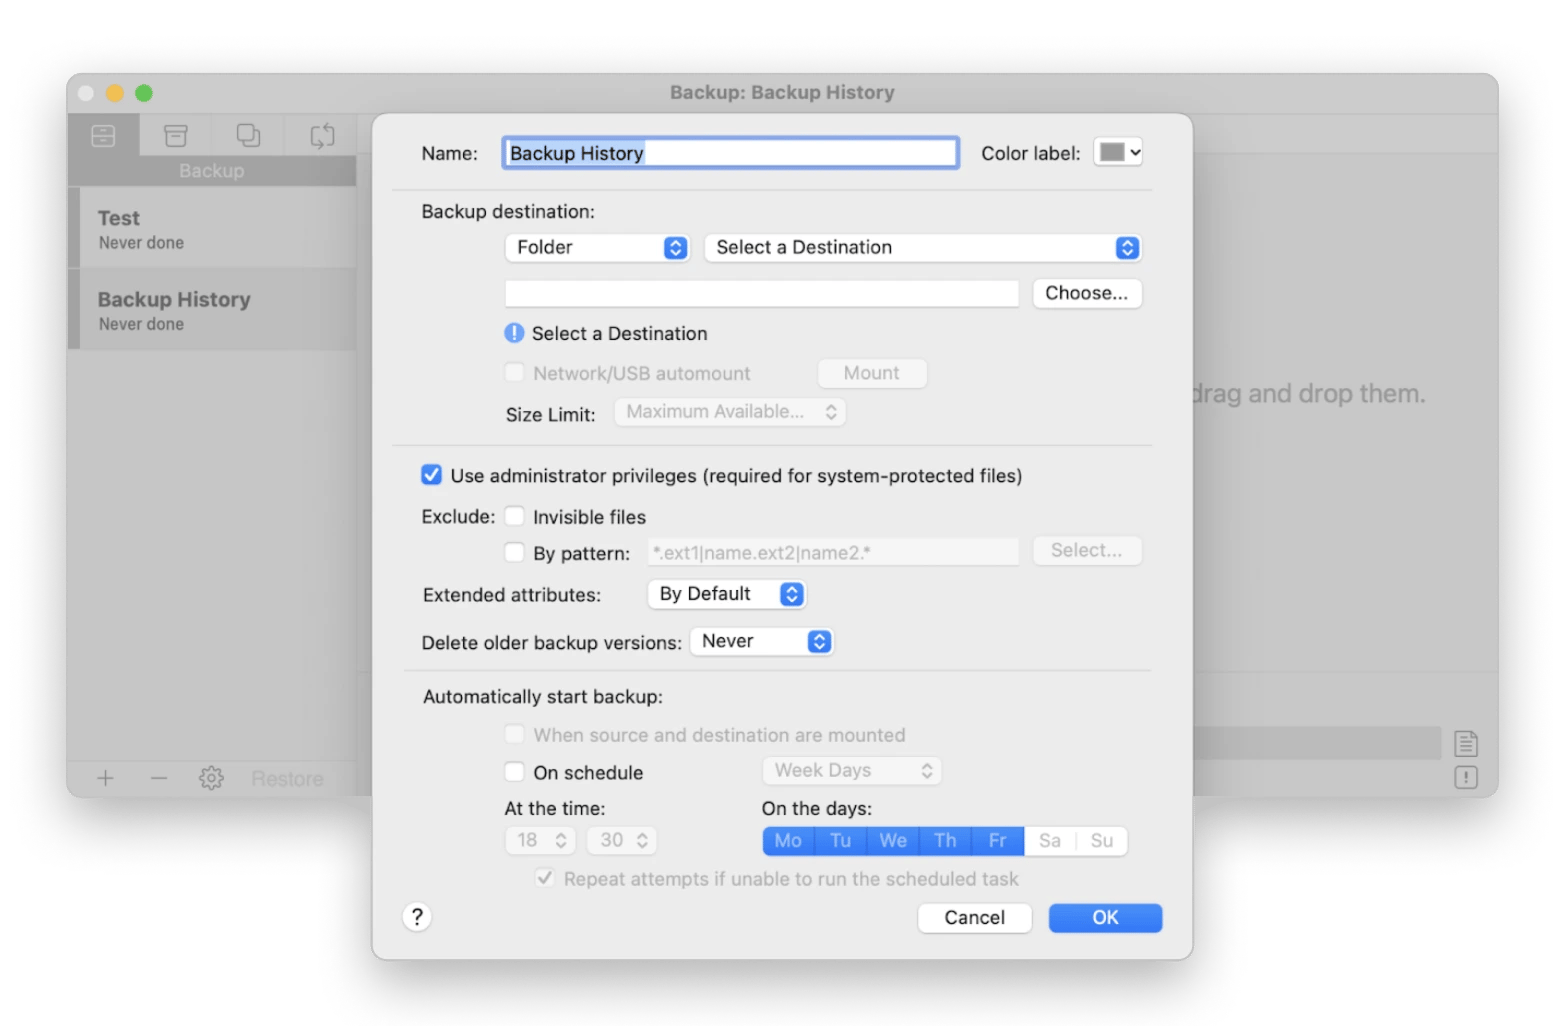
Those who are looking for an easier and better way to manage their backups, should try Get Backup Pro.
Get Backup Pro is one of the most advanced backup solutions for Macs today. You can do overall backup, back up selected files and folders, synchronize folders between Macs, clone drives for bootable backups, and more.
Backup management via a user-friendly interface is where Get Backup Pro really shines. You can see all types of backups instantly in one place and delete anything you don’t need, freeing up space on your drive.
Remove browser extensions from Other storage
Any browser extensions you use end up contributing to the Other storage on your Mac. While most extensions don’t take that much space, there are some heavy-hitters and they tend to accumulate over time.
So it might be a good time to go through your browsers and delete the extensions you don’t use.
Start with Safari:
- Open Safari and go to Preferences (Command + ,)
- Switch to the Extensions tab
- Click on any extension and delete it

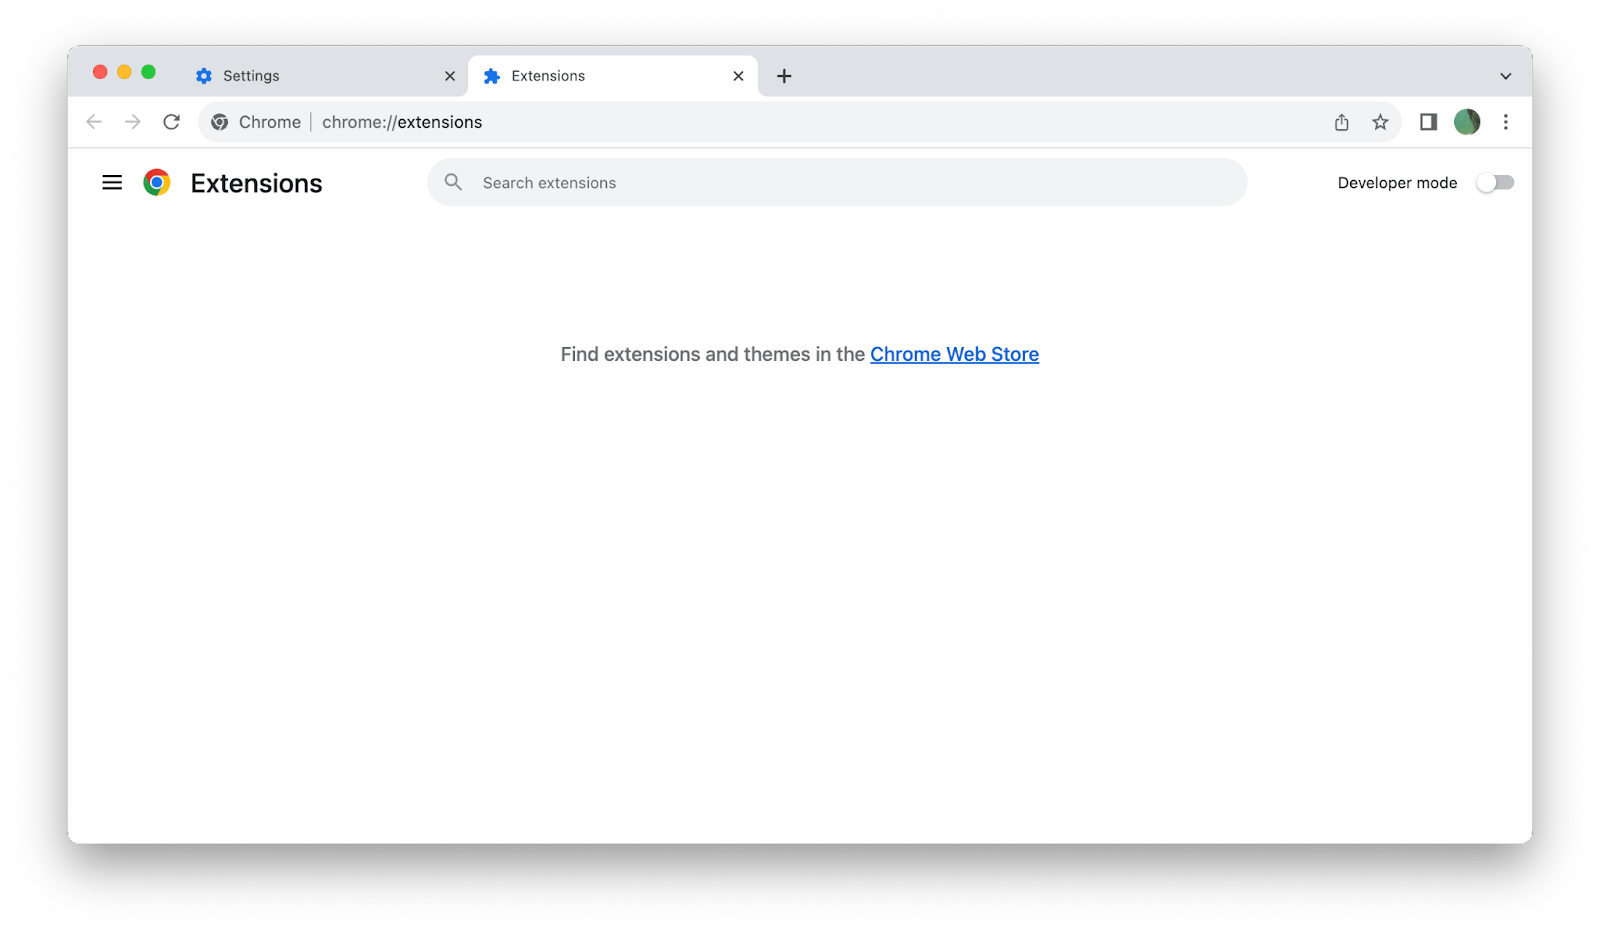
Move over to Google Chrome:
- Launch Chrome from the Applications folder
- Open Preferences (Command + ,) and click Extensions
- Go through the list and remove the ones you don’t need
Finally, finish with Firefox:
Open Firefox and click the menu icon
Select Add-ons and themes ➙ Extensions
Go through extensions and click the three-dot icon ➙ Remove
As you can see, knowing how to clear “Other” storage on Mac can help you free up space on your hard drive in minutes. The key is to know which files you can delete and which apps you can use to help you out. Plus, make sure you always know what’s going on with your Mac with iStat Menus monitoring solution and keep files safe with Get Backup Pro.
You can use all the apps mentioned above for free during the seven-day trial of Setapp. Setapp is a platform of more than 240 curated apps for Mac and iOS, covering everything from creativity to productivity, to finance. Try them all at no cost and see all kinds of features you’ve been missing.
FAQ
Why is Other storage on the MacBook so high?
After asking “what is the Other storage on my MacBook?” you might also wonder why it is so high. The Other storage contains system files, temporary data, installers, cache files, plugins, and other files that don’t fit into other categories.
Why does my Mac say there is not enough disk space but there is?
When you’re trying to install something (e.g. a new macOS), you might get a notification saying there’s not enough space even though there is. This is because some apps and utilities need extra space during the installation process.
To solve this problem, run a quick junk scan with CleanMyMac X, and you’d be ready to go.
Is it safe to delete Other files on Mac?
If you know the nature of all the files you’re deleting (e.g. cache files, DMG installers), the process could be safe. However, never delete anything you’re not sure about, since it can affect your system performance and create all kinds of unforeseen problems.
Better delegate file deletion to professional apps like CleanMyMac X.


