Enable text to speech in three steps. Open System Settings > Accessibility > Read & Speak, turn on Speak Selection, then highlight any text and press Option + Esc to have your Mac read it aloud.
Customize the experience to fit your needs. You can change the keyboard shortcut, pick a different system voice, highlight words or sentences as they're spoken, and control playback speed — all from the Read & Speak settings.
macOS offers several ways to work with text and voice. Beyond Speak Selection, you can use Dictation to convert speech to text, Voice Control for hands-free Mac navigation, or Siri for quick voice commands.
Pair text to speech with the right Mac apps to get more done. A sound enhancer like Boom 3D improves audio quality when listening, while writing tools like Ulysses and TextSoap make it easier to create and clean up the text you want to read.
Get all these apps and 270+ more with Setapp. Boom 3D, Ulysses, and TextSoap are all available through Setapp — one subscription, free 7-day trial, no upfront commitment. Start your free trial.
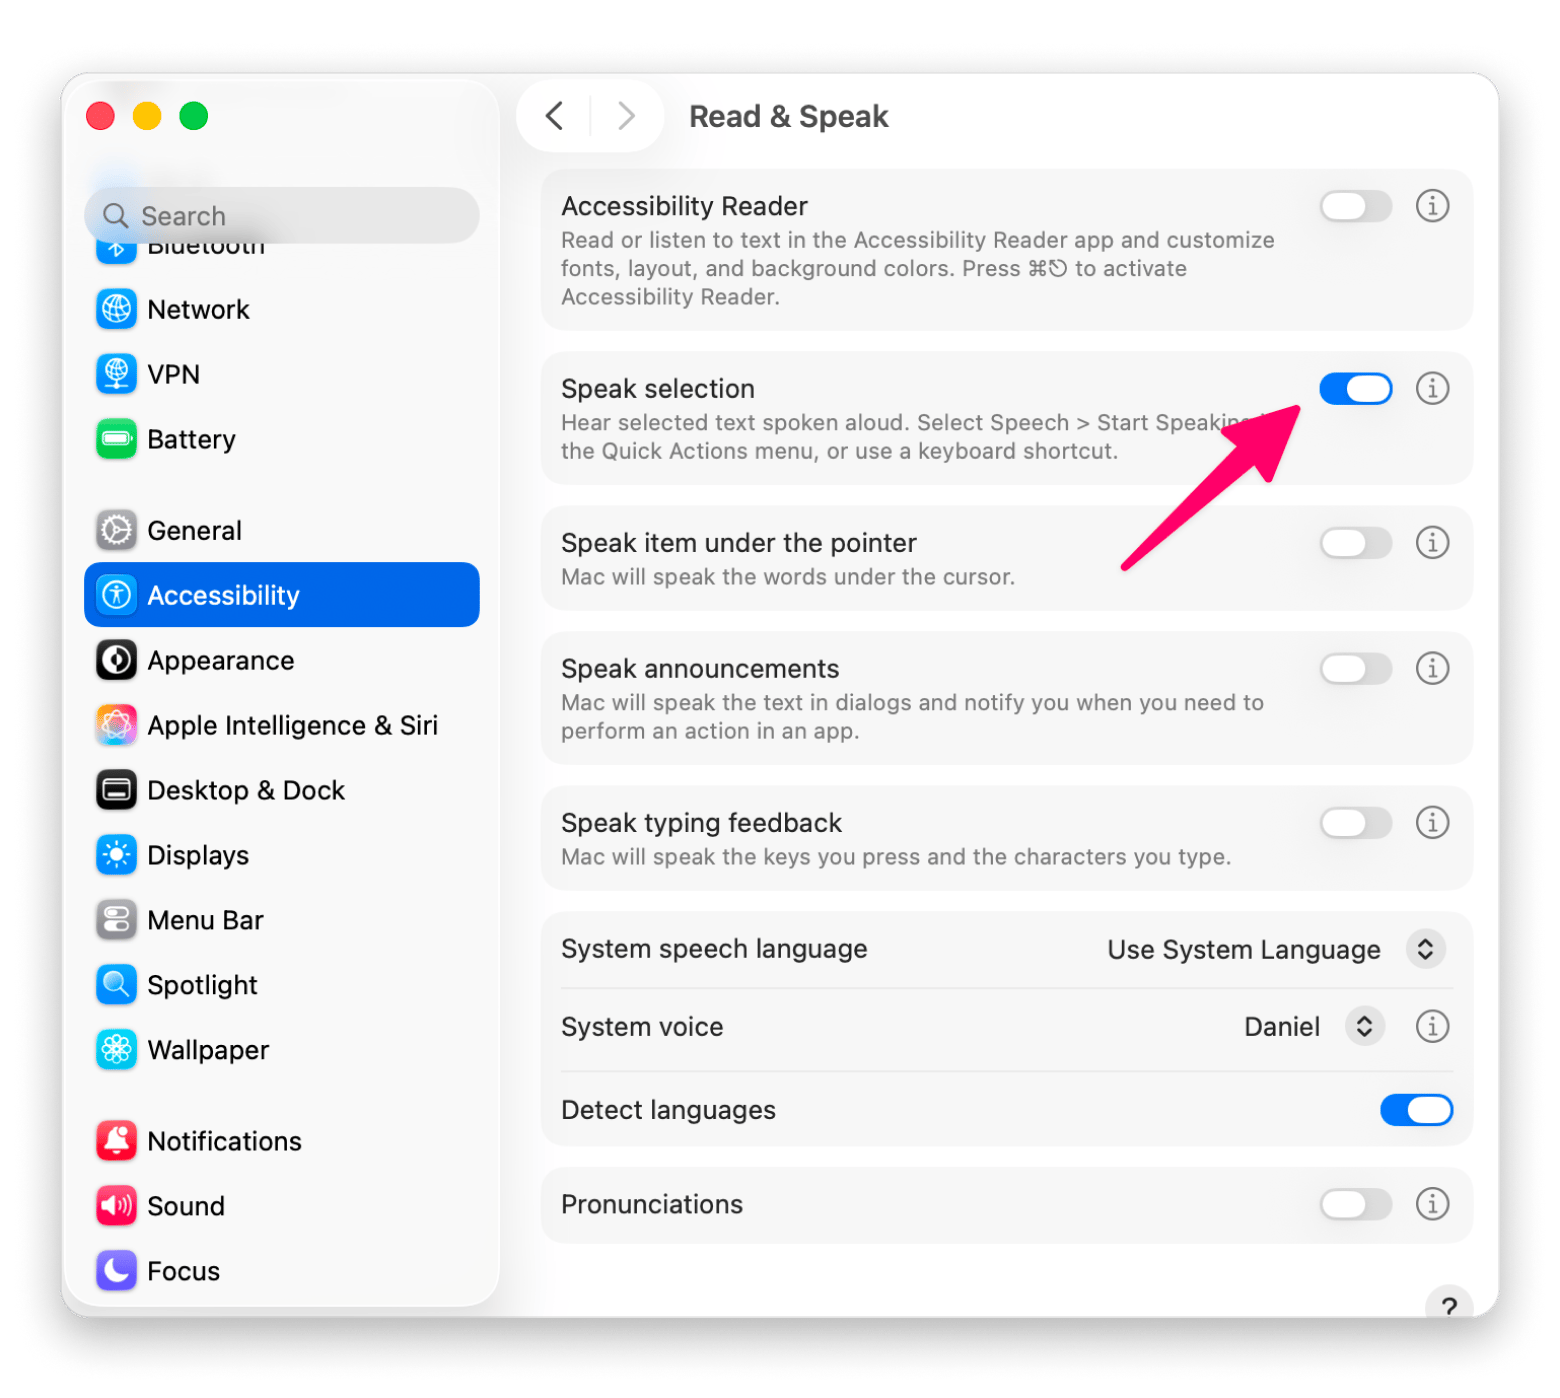
Turn on text to speech in the Accessibility section of System Settings. Open Read & Speak (formerly Spoken Content) and then enable Speak Selection. This way, you can have your Mac read text for you when your eyes get tired after another day in front of the screen.
It is one of Apple’s many accessibility features, which make their devices more inclusive for people with visual, hearing, physical, and literacy impairments. But these device interaction options benefit all kinds of users.
Here's a list of Read & Speak settings you can adjust to make text to speech on Mac work exactly the way you want:
Setting
Where to find it
What it does
Speak Selection
Accessibility > Read & Speak
Reads highlighted text aloud
Keyboard shortcut
Read & Speak > i button
Replaces default Option + Esc
Sentence highlight
Read & Speak > i button
Underlines or colors spoken sentences
Word highlight
Read & Speak > i button
Colors each word as it's spoken
System Voice
Read & Speak > System Voice
Changes the voice and accent
Playback controller
Read & Speak > i button
Pause, resume, adjust speed on screen
How to make your Mac read text aloud
macOS has a built-in text-to-speech (TTS) feature to help you read text on your Mac.
Here's how to do it:
1. Open System Settings > Accessibility.
2. Choose Read & Speak from the menu on the right.
3. Turn on Speak Selection.
4. Highlight the content you want to listen to and press Option + Esc.
The feature works on all content, including Safari, Chrome, or Firefox web pages. To stop the text-to-speech function, simply press the keyboard command again, or press the black square on the controller that appears on your screen.
Customize how your Mac reads text
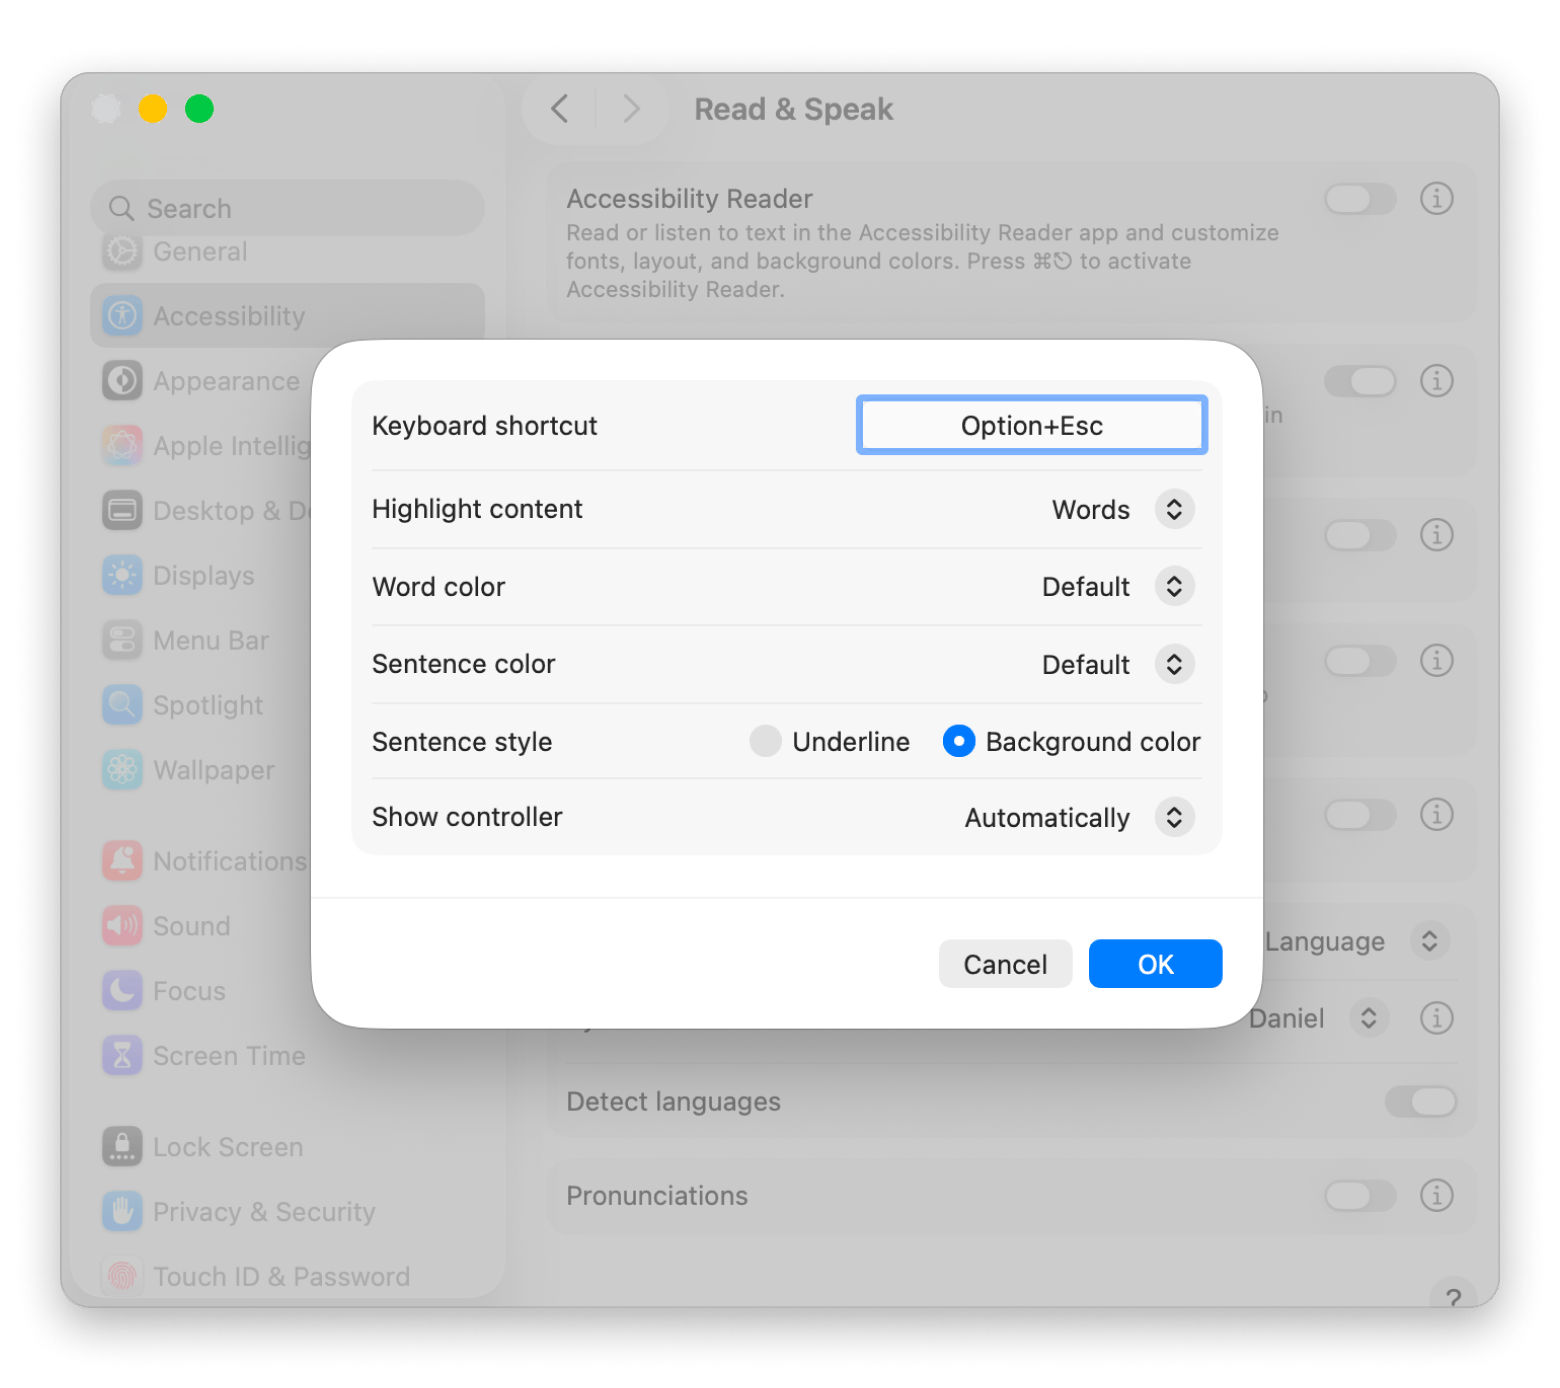
Now that you've set up the basics, here are a few ways to personalize the experience. If you click the “i” button in the Read & Speak section, you’ll be able to adjust:
Keyboard Shortcut. Enter the key combination you want to use for activating the TTS feature instead of the default Option + Esc. If you’re not sure which key combination to pick, check a full breakdown of Mac keyboard shortcuts.
Sentence style. Have spoken sentences indicated by an underline or with a background color.
Highlight content. Make words or sentences highlight as your Mac speaks. Set the sentence and word colors.
Show controller. Choose whether you want a controller to always or never pop up on screen when TTS is on. It's useful for pausing, resuming, or stopping the feature. You can also change the rate and skip ahead or backward in the text.
Bonus tip: Great text editors for Mac
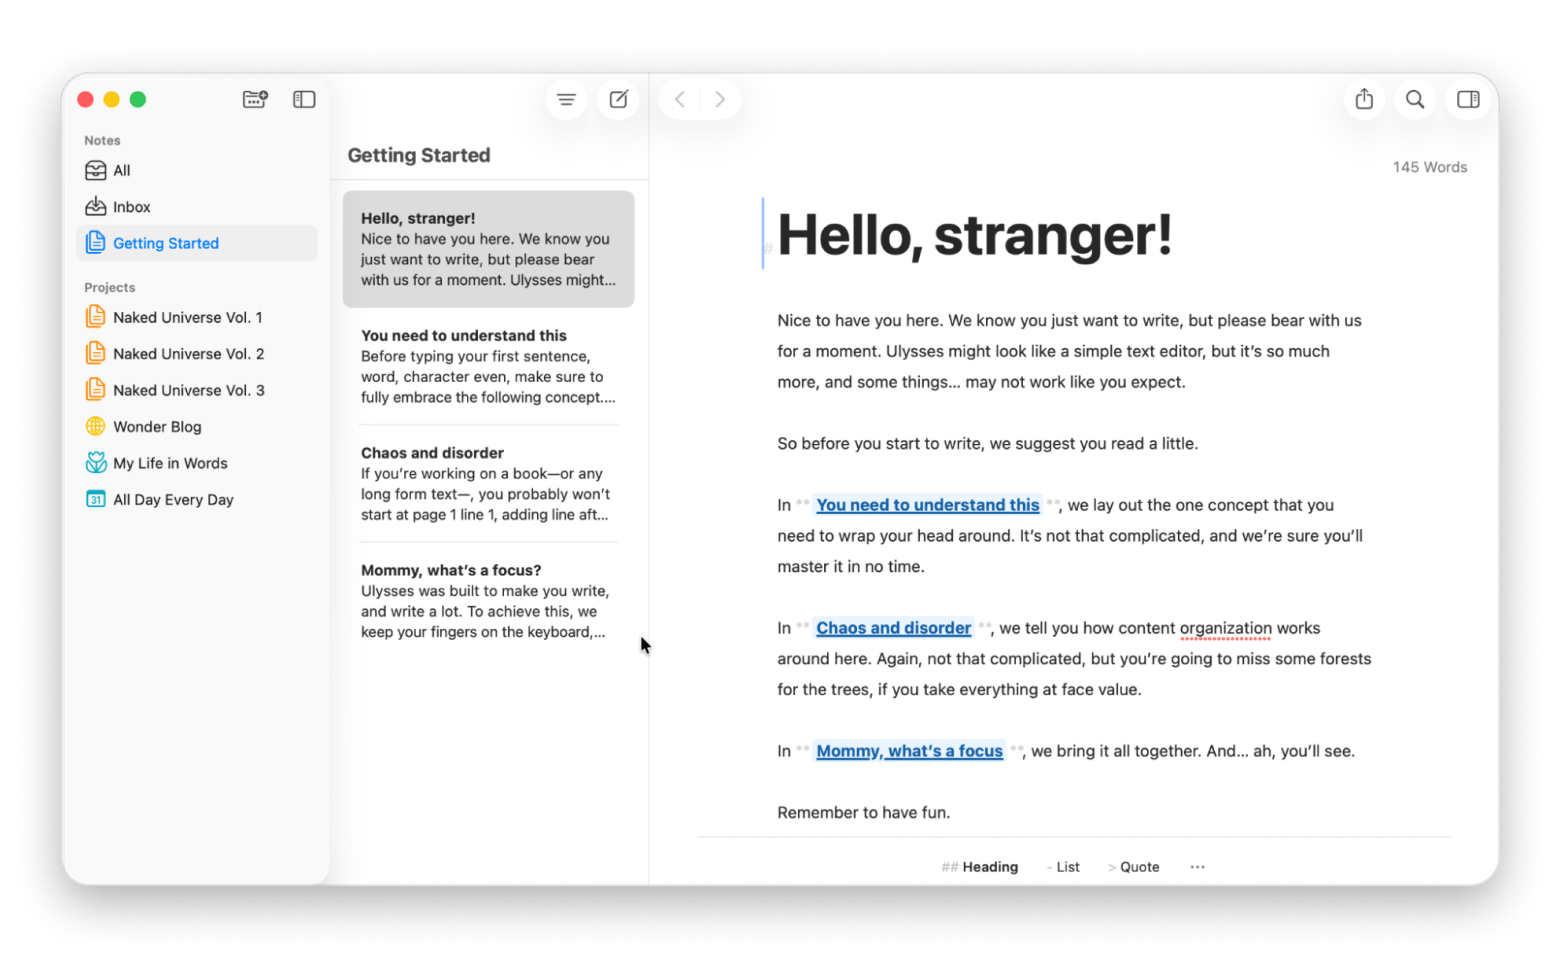
If you work with text every day, you know how much a cluttered writing environment can slow you down. The solution that I have found is Ulysses — an app built around the idea that your workspace should get out of your way. You can focus entirely on the writing itself.
Ulysses is a writing app with a clean workspace, free of formatting and editing options until you choose to make them visible. You can write undistracted, format with a few keystrokes using MarkdownXL, and publish to WordPress and Medium without leaving the app.
Another feature I find really handy is that Ulysses automatically saves everything and organizes your notes and manuscripts into one structured library. You can also export your work as an ebook or PDF when you're ready to share it.
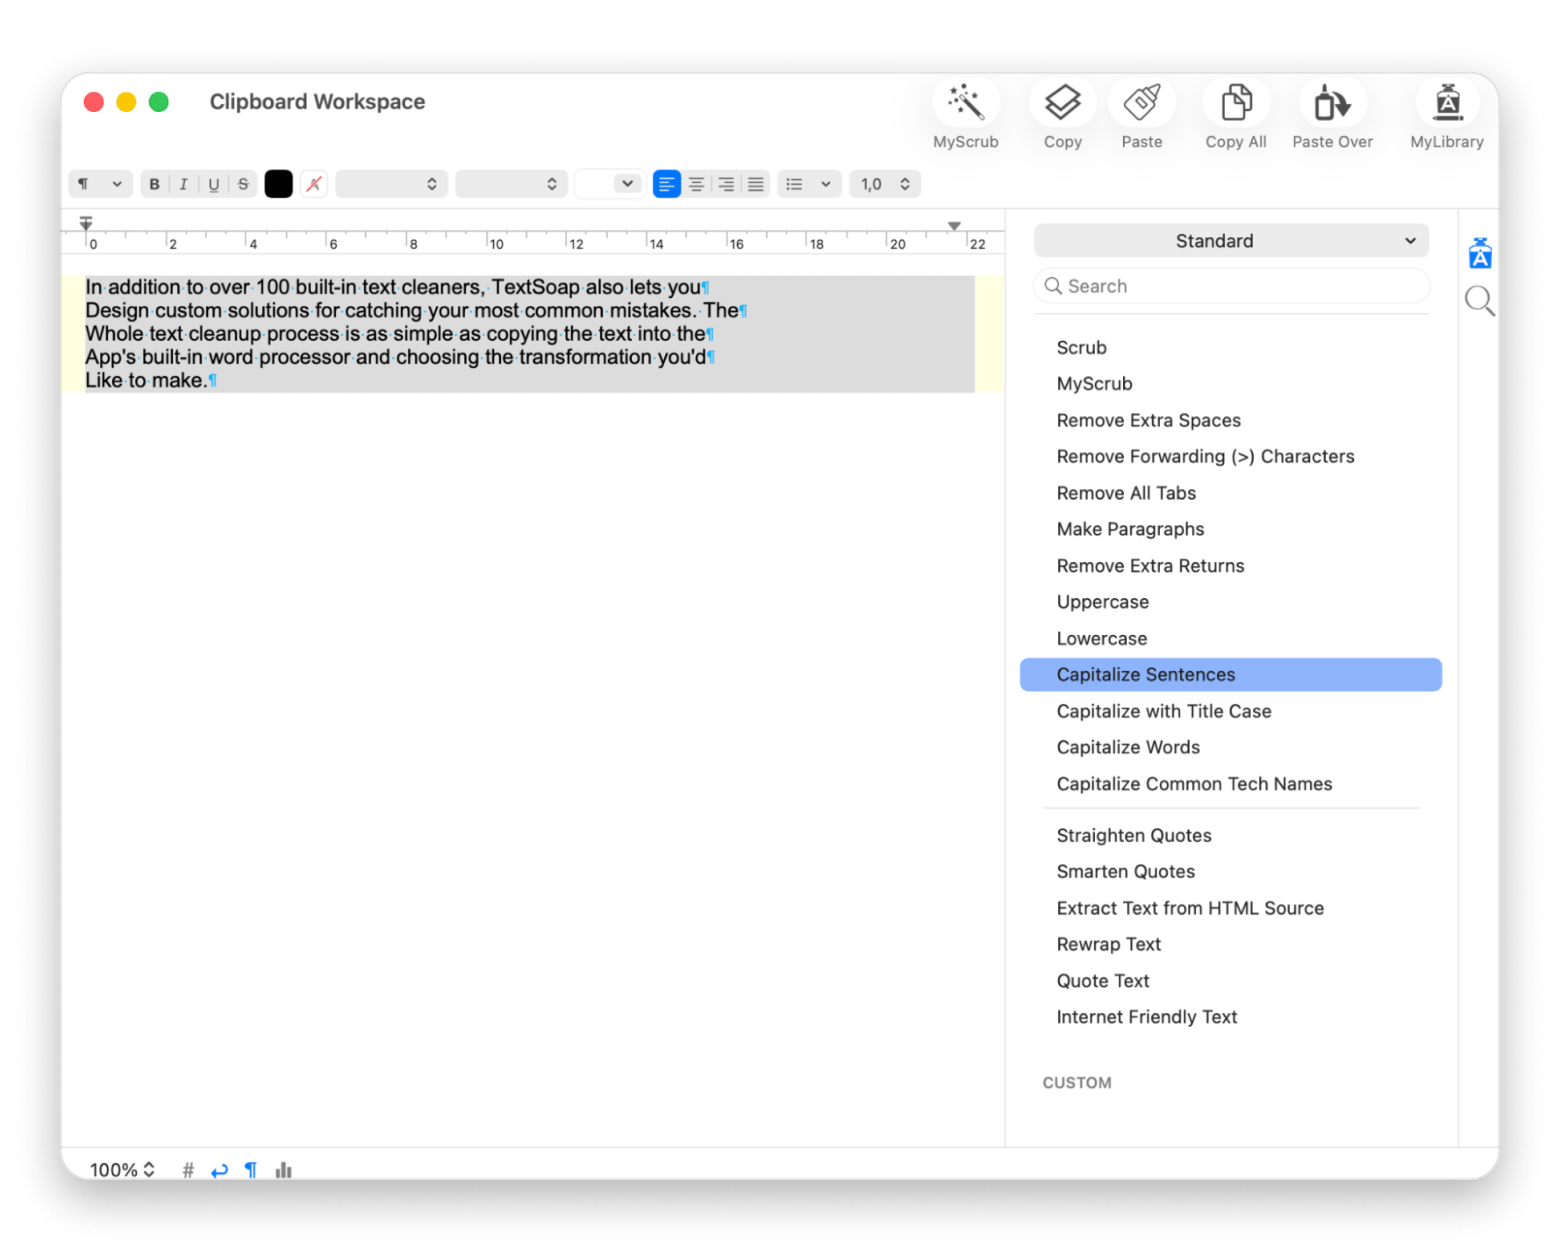
If you need an app that cleans up formatting without the manual back-and-forth, try TextSoap. It’s a comprehensive text cleaner that fixes formatting, capitalization, spacing, and punctuation in one click. All you need to do is copy the text into the app's built-in word processor and choose the transformation you want.
There are built-in text cleaners, and my favorites are to get rid of unnecessary capitalization, remove extra spaces, or replace some punctuation signs with other ones (like three dots with an ellipsis). You can also design custom solutions to catch your most common mistakes.
If you work with text every day, check out the best text editors for Mac — there's something for writers, editors, and developers alike.
How to use Mac text to speech every day
Once you've set up text to speech on your Mac, it's easy to build it into your daily routine. Use it for catching up on articles during a break or proofreading your own writing by ear. And if you want to get even more out of your Mac setup, Setapp is worth exploring.
The apps mentioned in this article make the experience even better. Boom 3D sharpens your audio, Ulysses gives you a distraction-free place to write, and TextSoap keeps your text clean before you hit play. All three are available on Setapp — a single subscription with 270+ Mac and iOS apps and a free 7-day trial to get started. Start your trial now.
FAQ
Can Macs read text out loud?
Yes. Every Mac has a built-in text to speech tool called Read & Speak (Spoken Content for older versions of macOS). Turn it on in System Settings > Accessibility > Read & Speak > Enable Speak Selection. After that, highlight any text and press Option + Esc to have your Mac read it aloud.
Why isn't text to speech working on my Mac?
Check three things. First, ensure Read & Speak is on: System Settings > Accessibility > Read & Speak > Speak Selection. Second, verify your volume isn't muted, and a voice is selected under System Voice. Third, confirm you're using the right shortcut — Option + Esc by default (change it with the "i" button). If everything looks correct, restart your Mac and install the latest macOS Tahoe update. Both fix most audio glitches.
How do I change the voice or speaking rate for text to speech on Mac?
Go to System Settings > Accessibility > Read & Speak. Pick a different System Voice, or click Manage Voices to download more. Press Option + Esc to preview the new voice.
Can I use dictation to convert speech to text on Mac?
Yes. Go to System Settings > Keyboard > Dictation and turn it on. Press the microphone key (F5) to start dictating. Speak naturally — you can say punctuation like "period" or "new line."
Superpowers for your Mac
Tackle your tasks with dozens of helpful apps on Setapp.






 Best solution
 Best solution