Mac Trash won't empty for a handful of common reasons. Files that are locked, currently in use, lacking the right permissions, or caught in a disk error will all block Trash from clearing — each has a specific fix.
The fastest first steps are also the simplest. Close any open apps, unlock files via right-click > Get Info, or simply restart your Mac — this alone resolves most Trash issues in under two minutes.
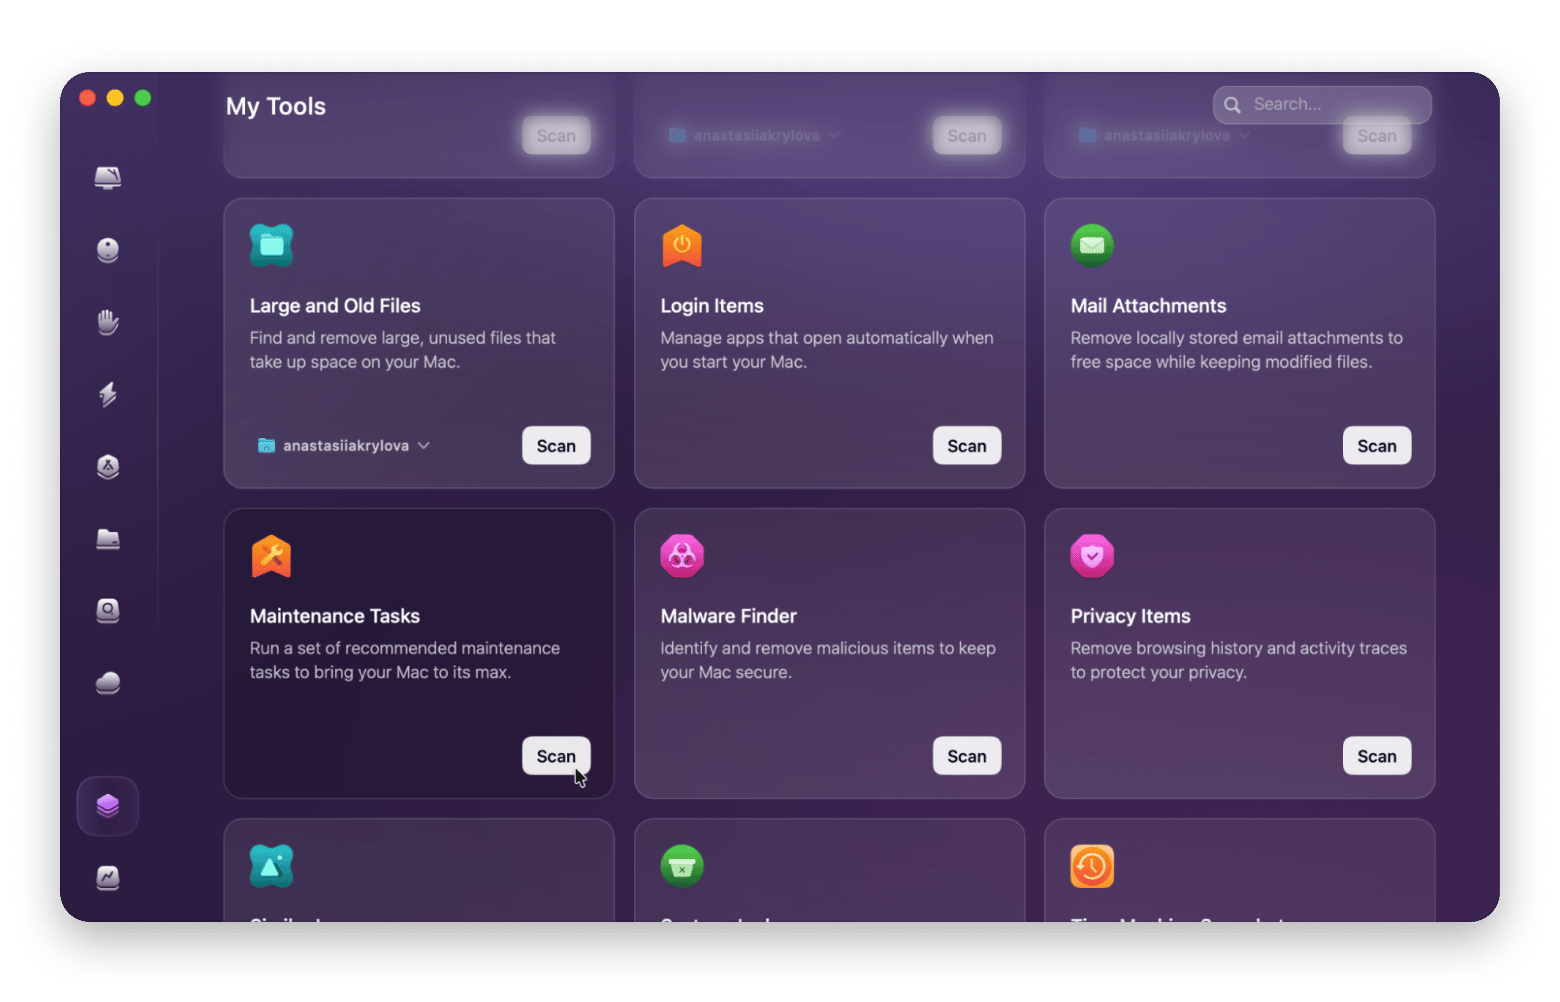
For permission and disk errors, run a repair. In Disk Utility, run First Aid on each volume, or use CleanMyMac to repair disk permissions and deep-clean hidden junk files in one go.
Force-empty Trash when nothing else works. Hold Option and right-click the Trash icon to bypass most locks — or use Terminal's sudo rm -R command for the most stubborn cases (double-check before you hit Return).
CleanMyMacandQuitAllmake the whole process faster — and both are available on Setapp, which gives you 270+ Mac apps for one subscription. Try it free for 7 days.
If you can’t empty your Trash, it may be a simple permissions issue; other times, it's something more complex, like a corrupted file or a process holding onto your files.
Here's a quick overview of the solutions for each scenario. I'll explain each method in detail in the sections that follow:
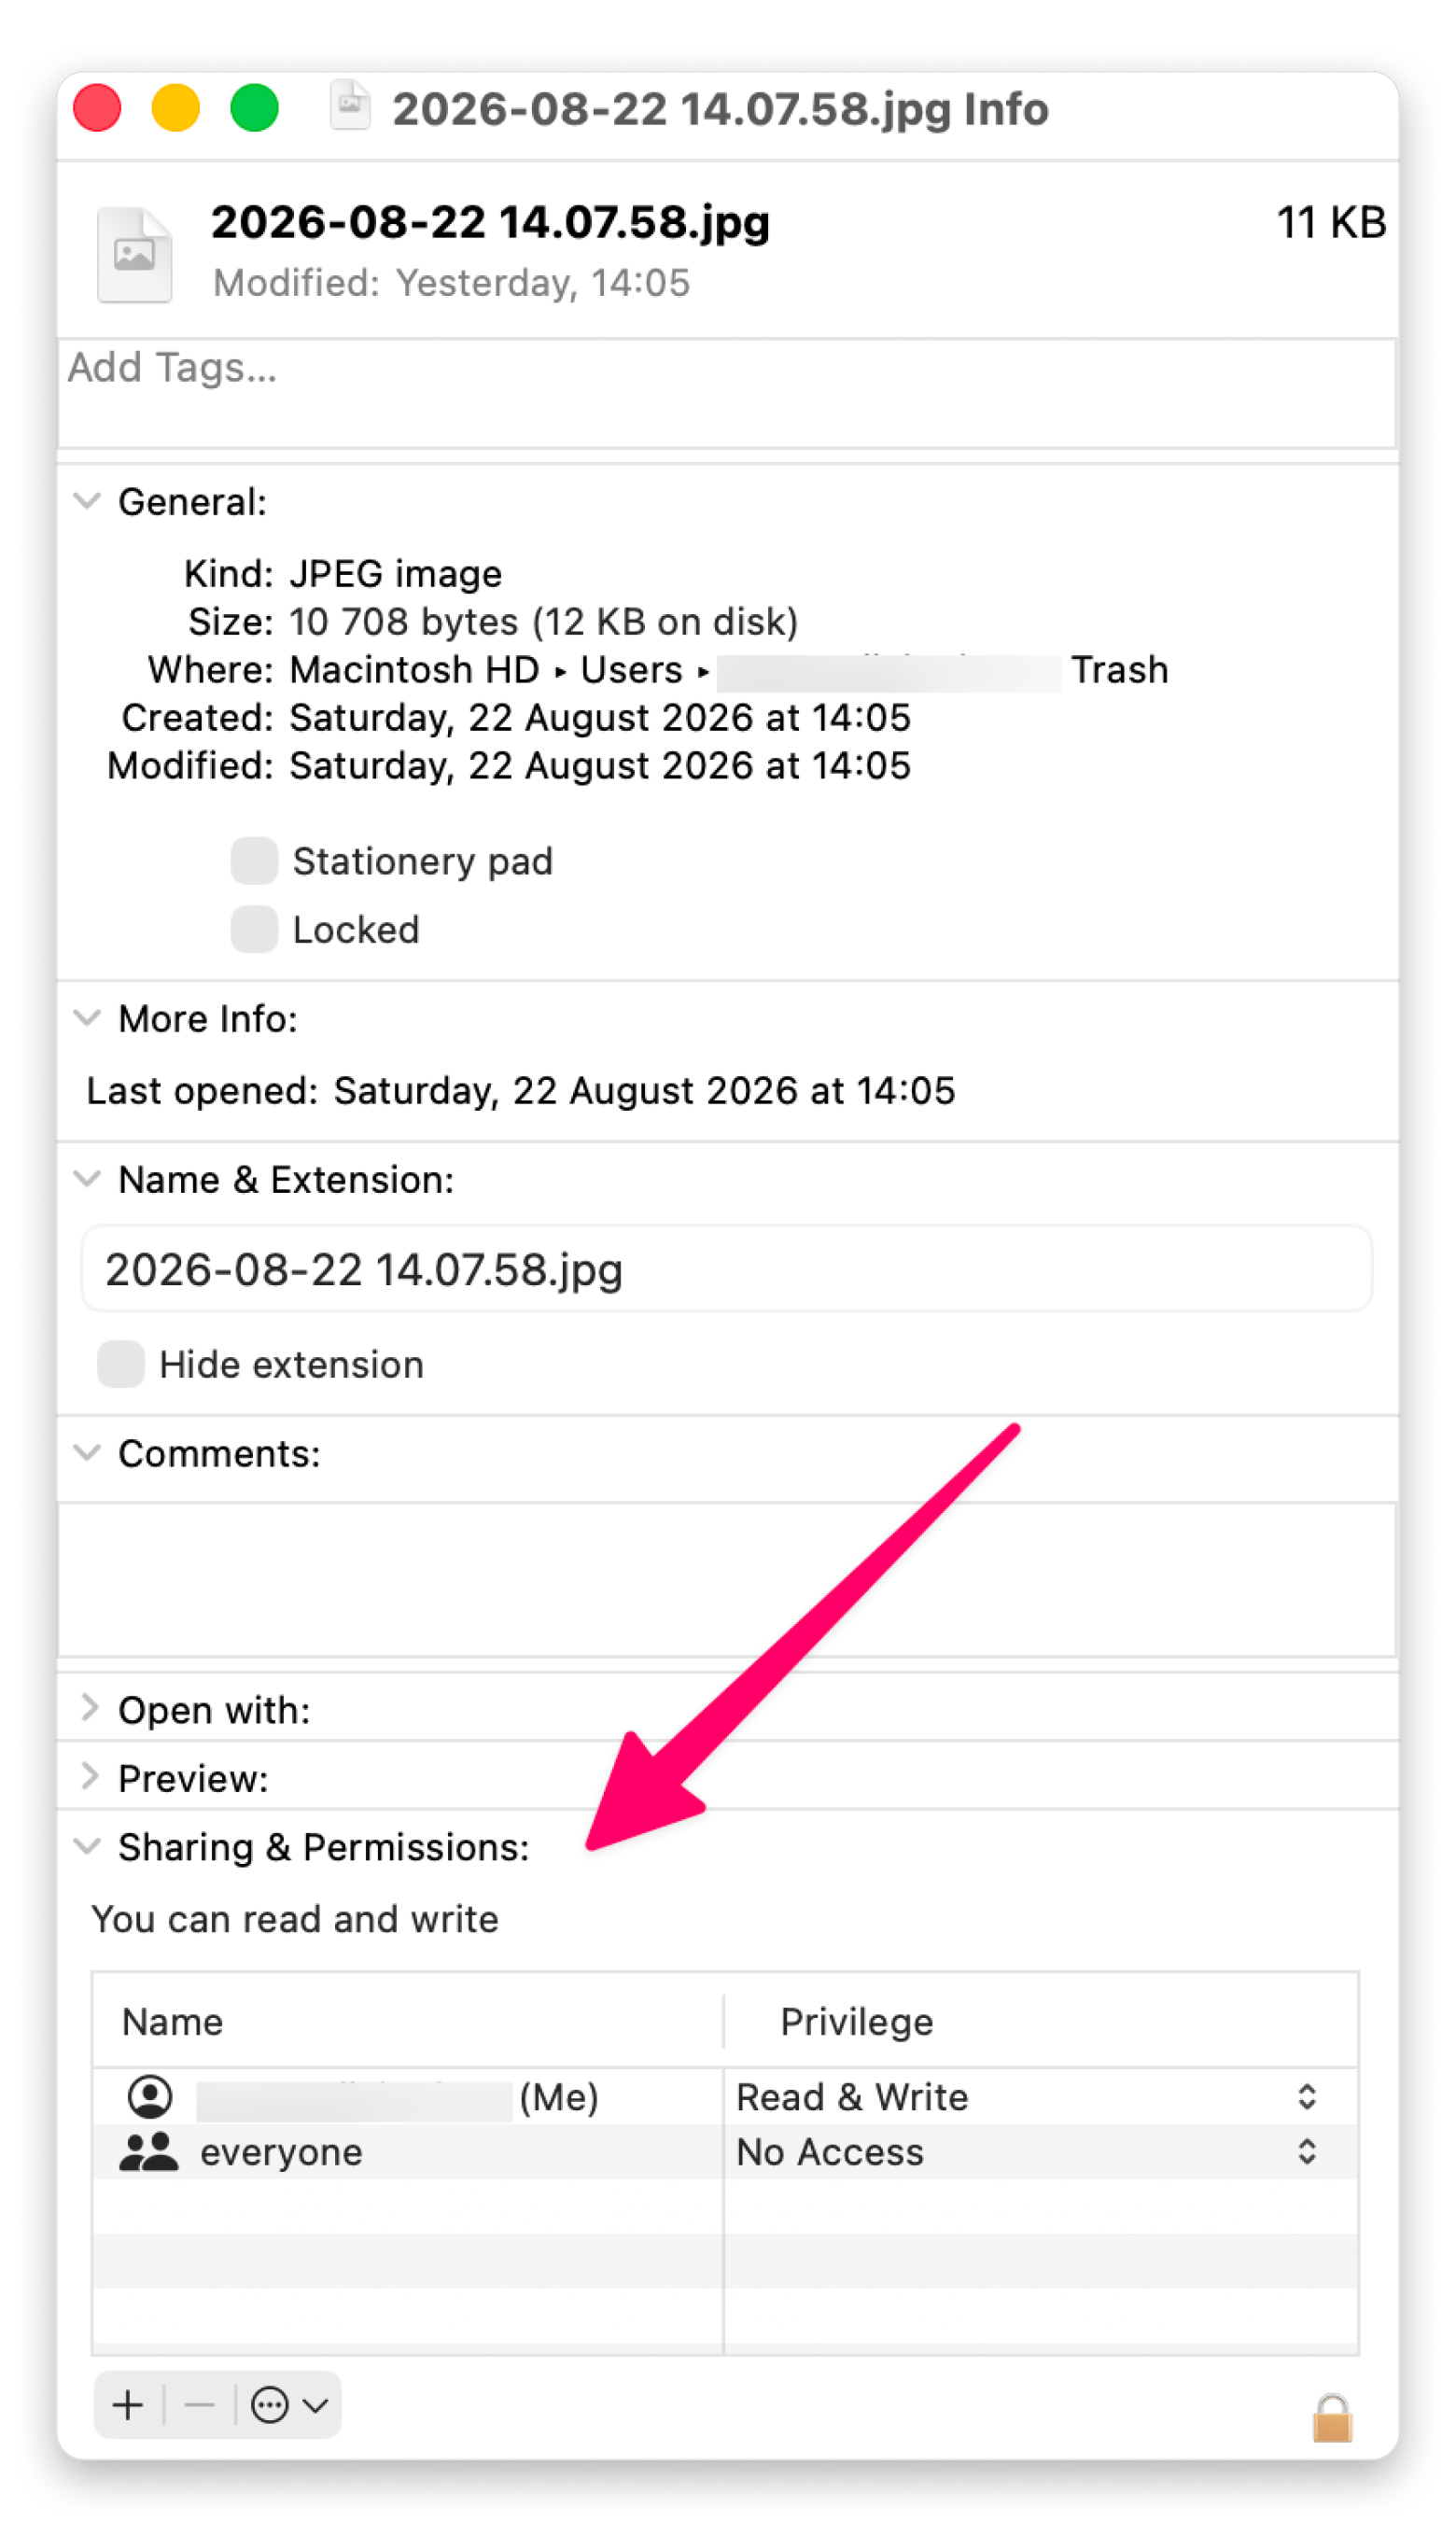
Change file permissions or repair disk permissions
2-5 minutes
Force empty needed
Hold Option while emptying or use Terminal command
1 minute
Disk errors
Run First Aid in Disk Utility
10-30 minutes
Why won't your Mac empty the Trash?
Your Mac typically won't empty the Trash for a few specific reasons:
The file is still open somewhere. Your Mac protects you from accidentally deleting active documents by blocking the deletion.
The file might be locked. macOS lets you lock files to prevent accidental deletion. If you've locked a file and forgotten about it, Trash won't empty until you unlock it.
The file is protected by permissions you don’t have. Permission issues prevent you from deleting files you don't own or have rights to modify. This often happens with files created by other users or system files.
The disk is too full to complete the operation. Your Mac needs free space to perform system operations, including emptying the Trash. When your disk is nearly full, the system can't complete the deletion process.
The disk itself needs repair. Disk errors can prevent normal file operations, including emptying the Trash.
How to empty Trash when files are in use
To fix this, you need to close the file first:
1. Save and close any open documents.
2. Check if the file appears in any recently used lists in your apps.
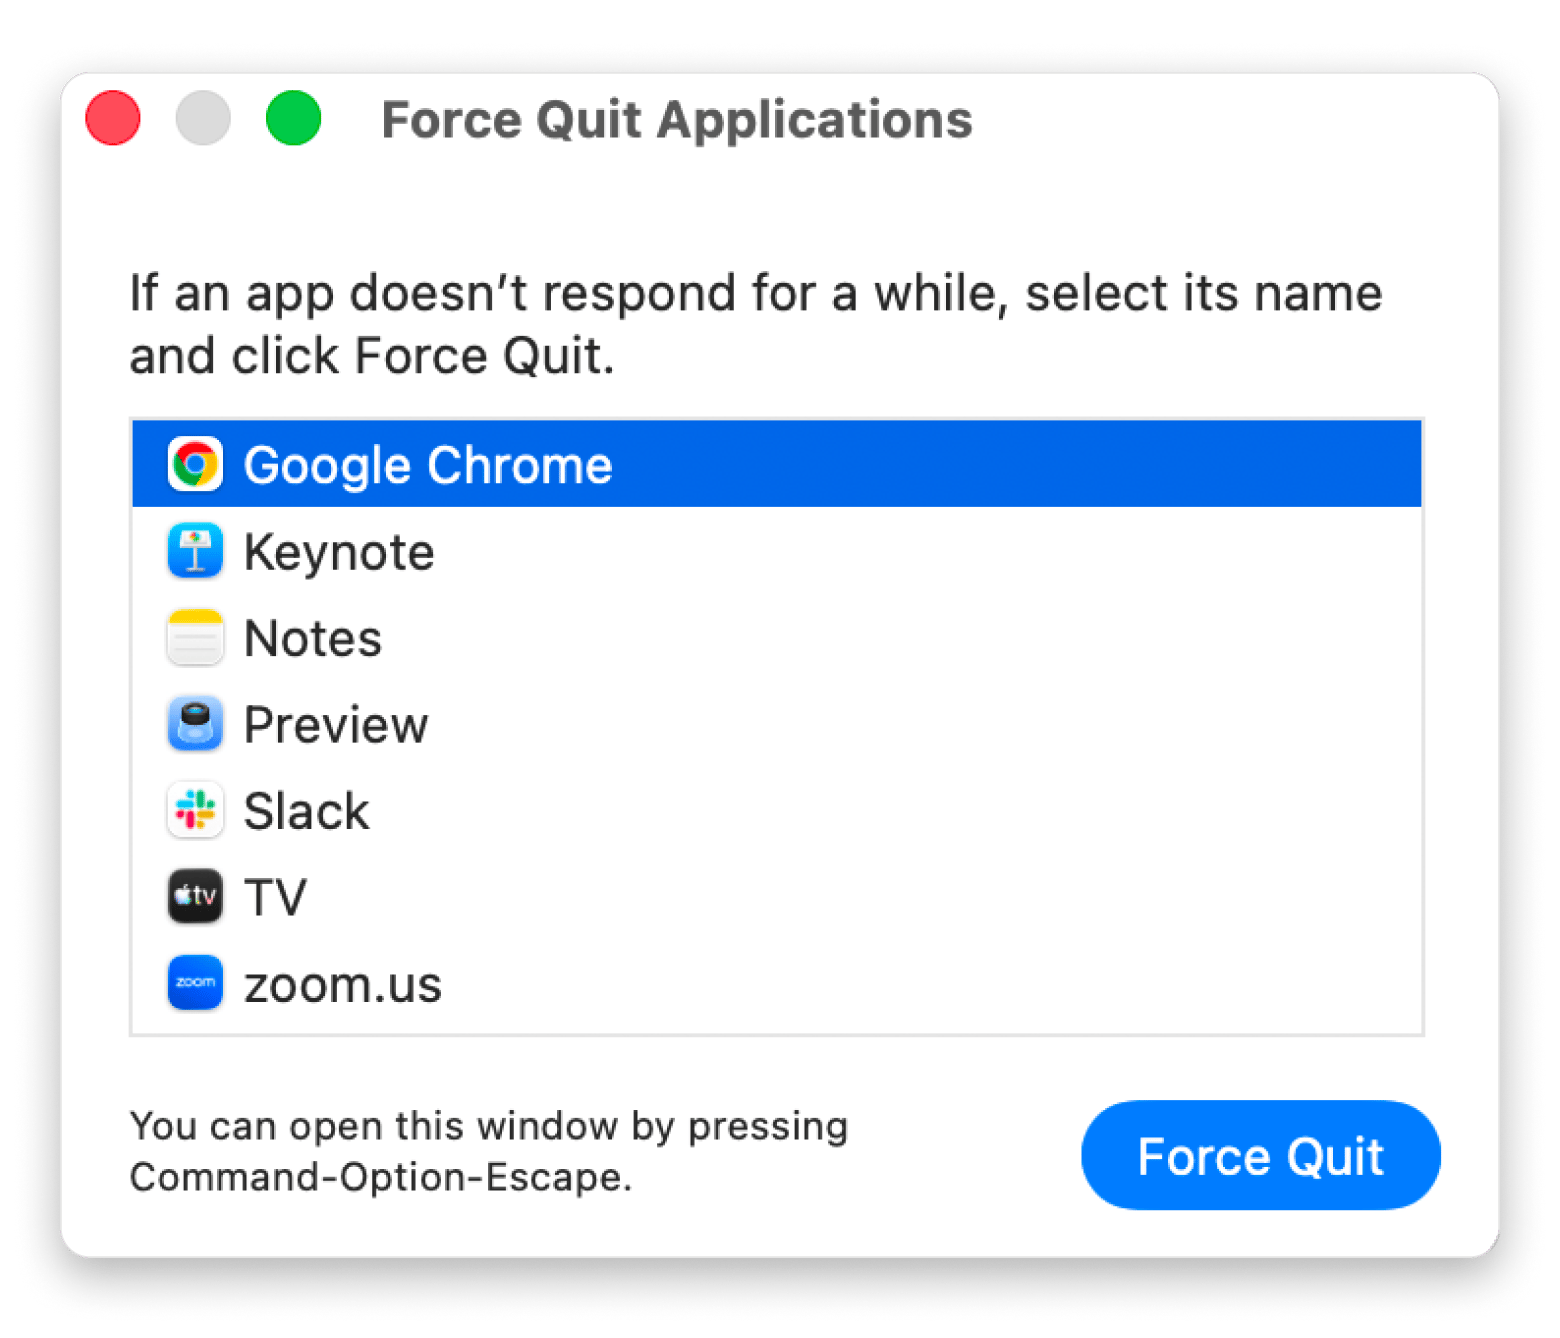
3. If you can't find which app is using the file, press Command + Option + Esc to open Force Quit.
4. Close any apps that might be using the file.
5. Try emptying Trash again.
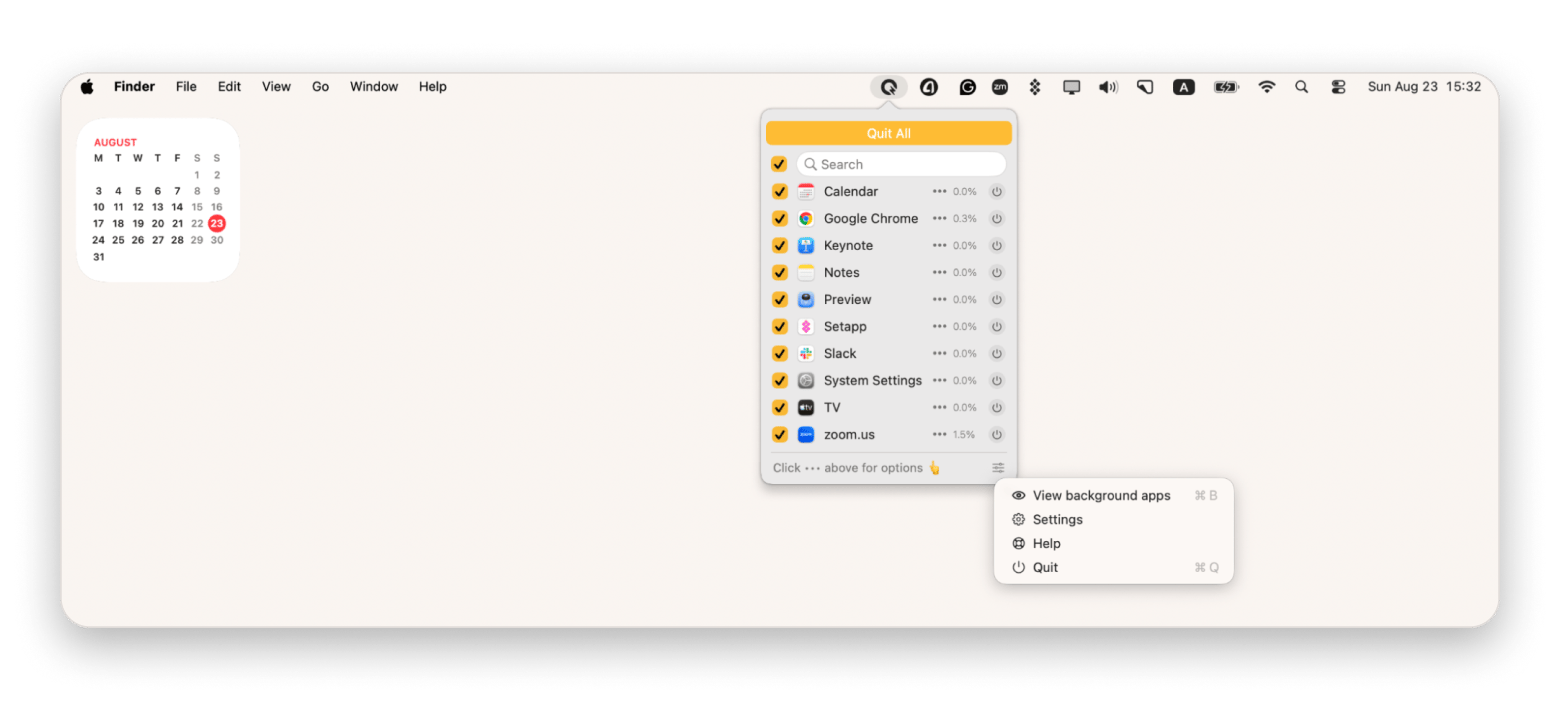
Still stuck? One trick I've found helpful is using QuitAll to shut down all background apps at once. It's faster than hunting down each app individually, and it catches those sneaky background processes you might not even know are running.
How to empty Trash when files are locked
Here's how to check and unlock files:
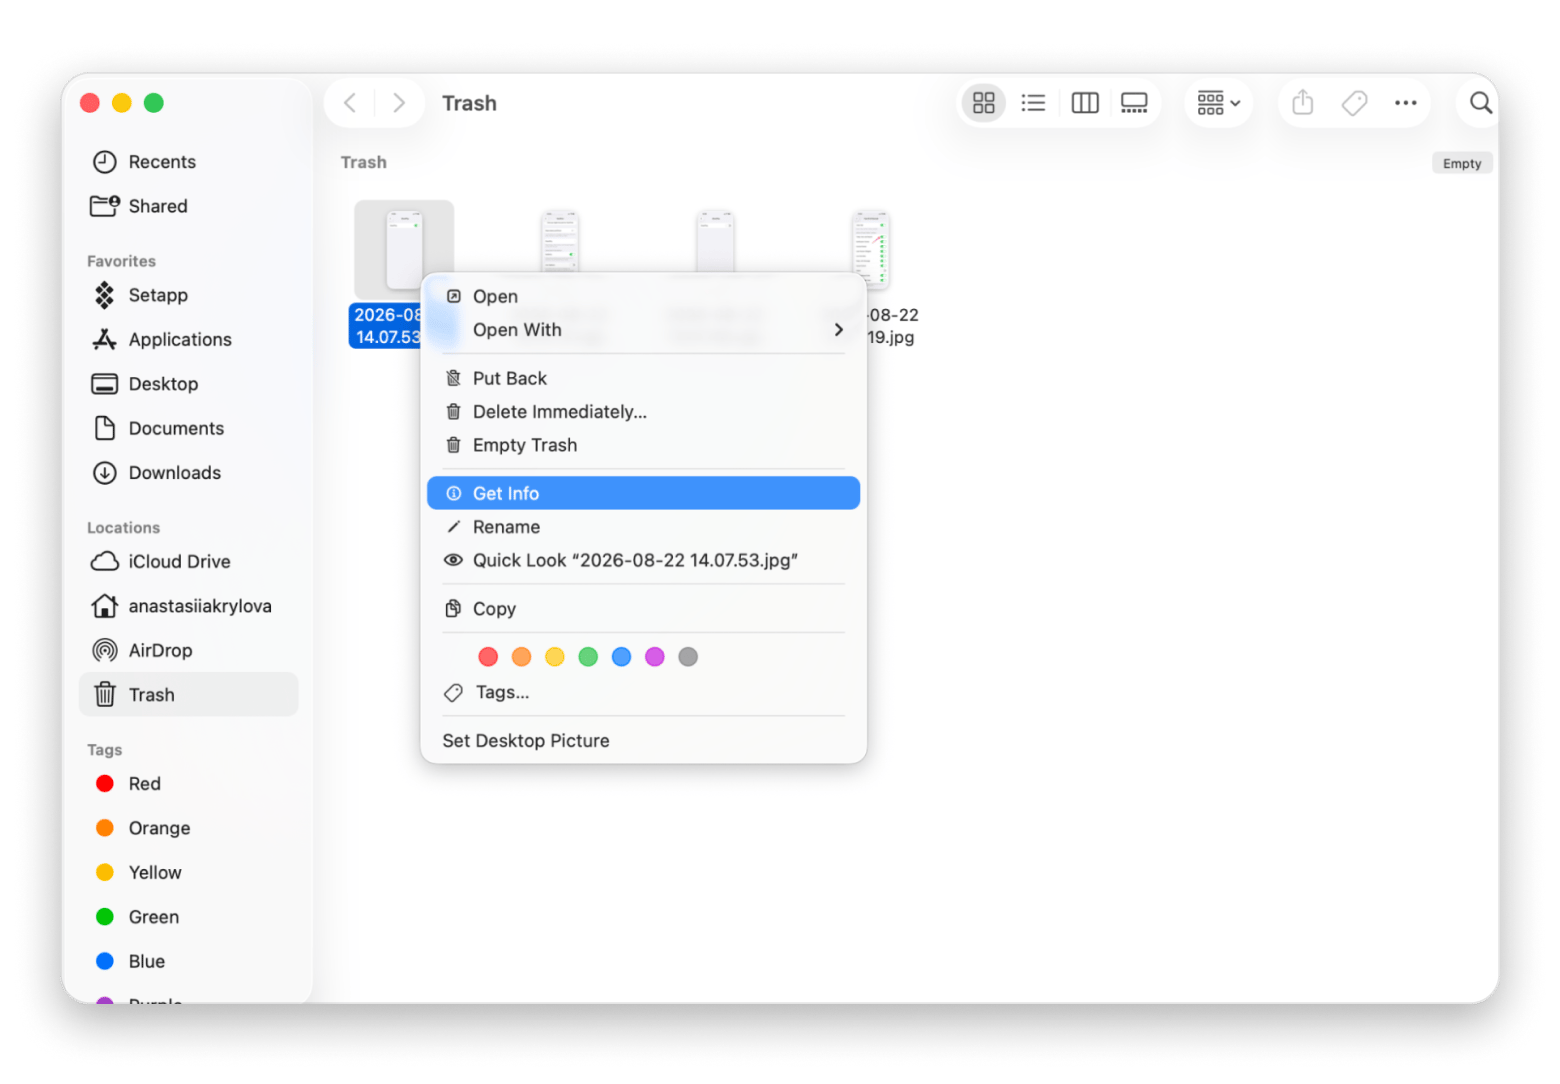
1. Open Trash from your Dock.
2. Right-click the stubborn file and choose Get Info.
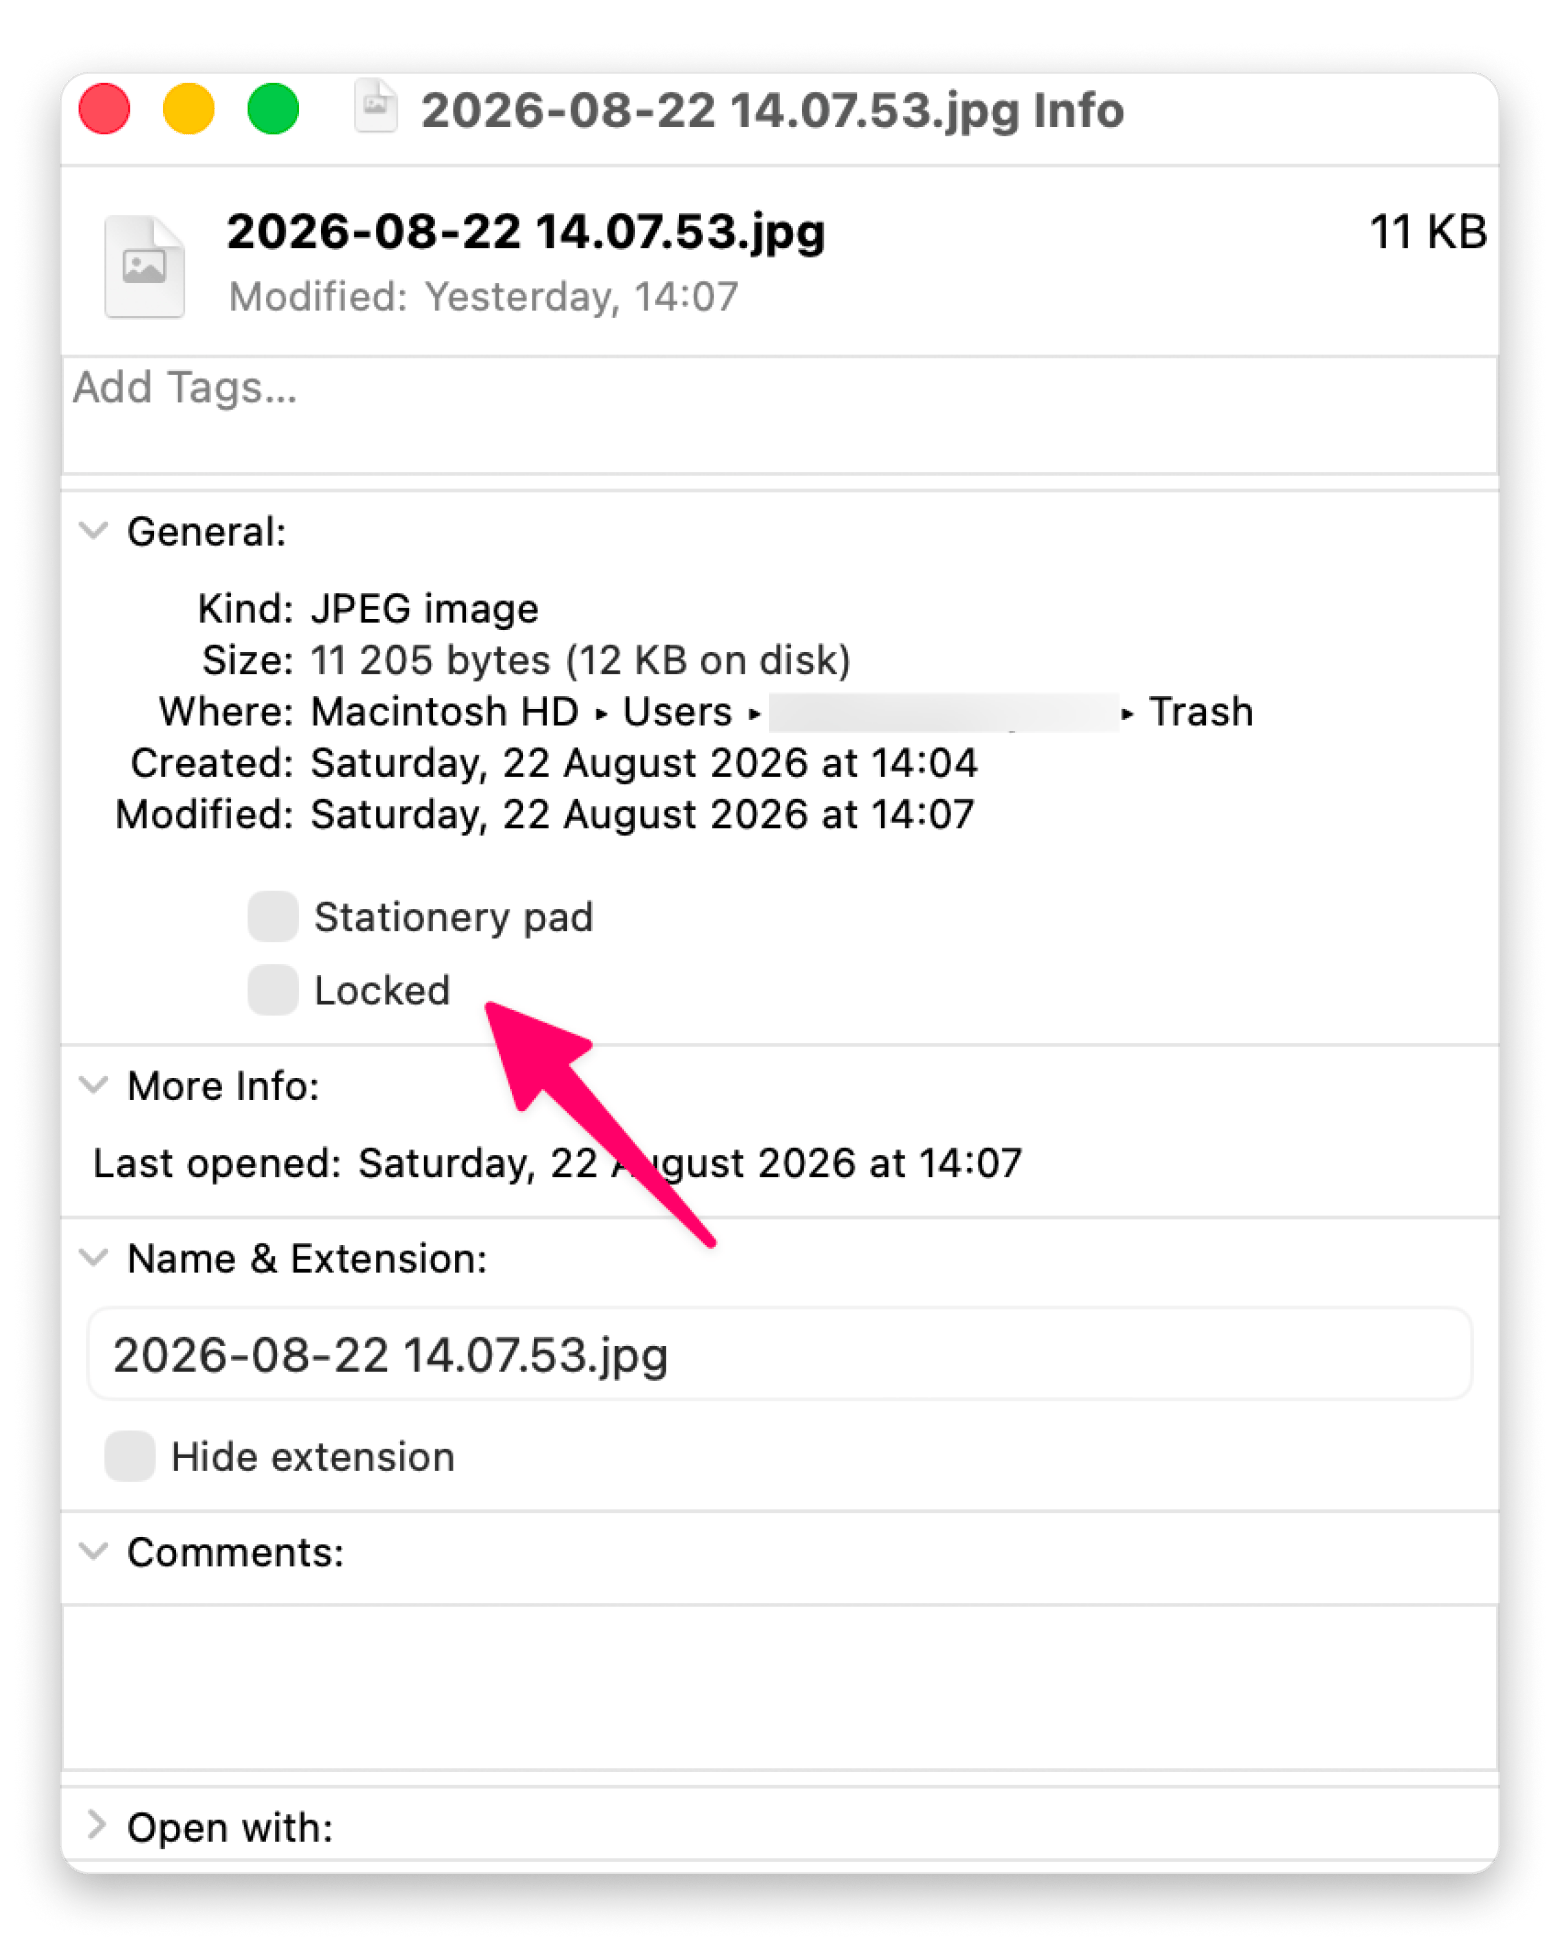
3. Look for the Locked checkbox under General.
4. Uncheck the box if it's selected.
5. Close the Info window and try emptying Trash again.
You can select multiple files and unlock them all at once using the same method.
How to empty Trash when your disk is full
The quickest way to free up space is to target the biggest space hogs:
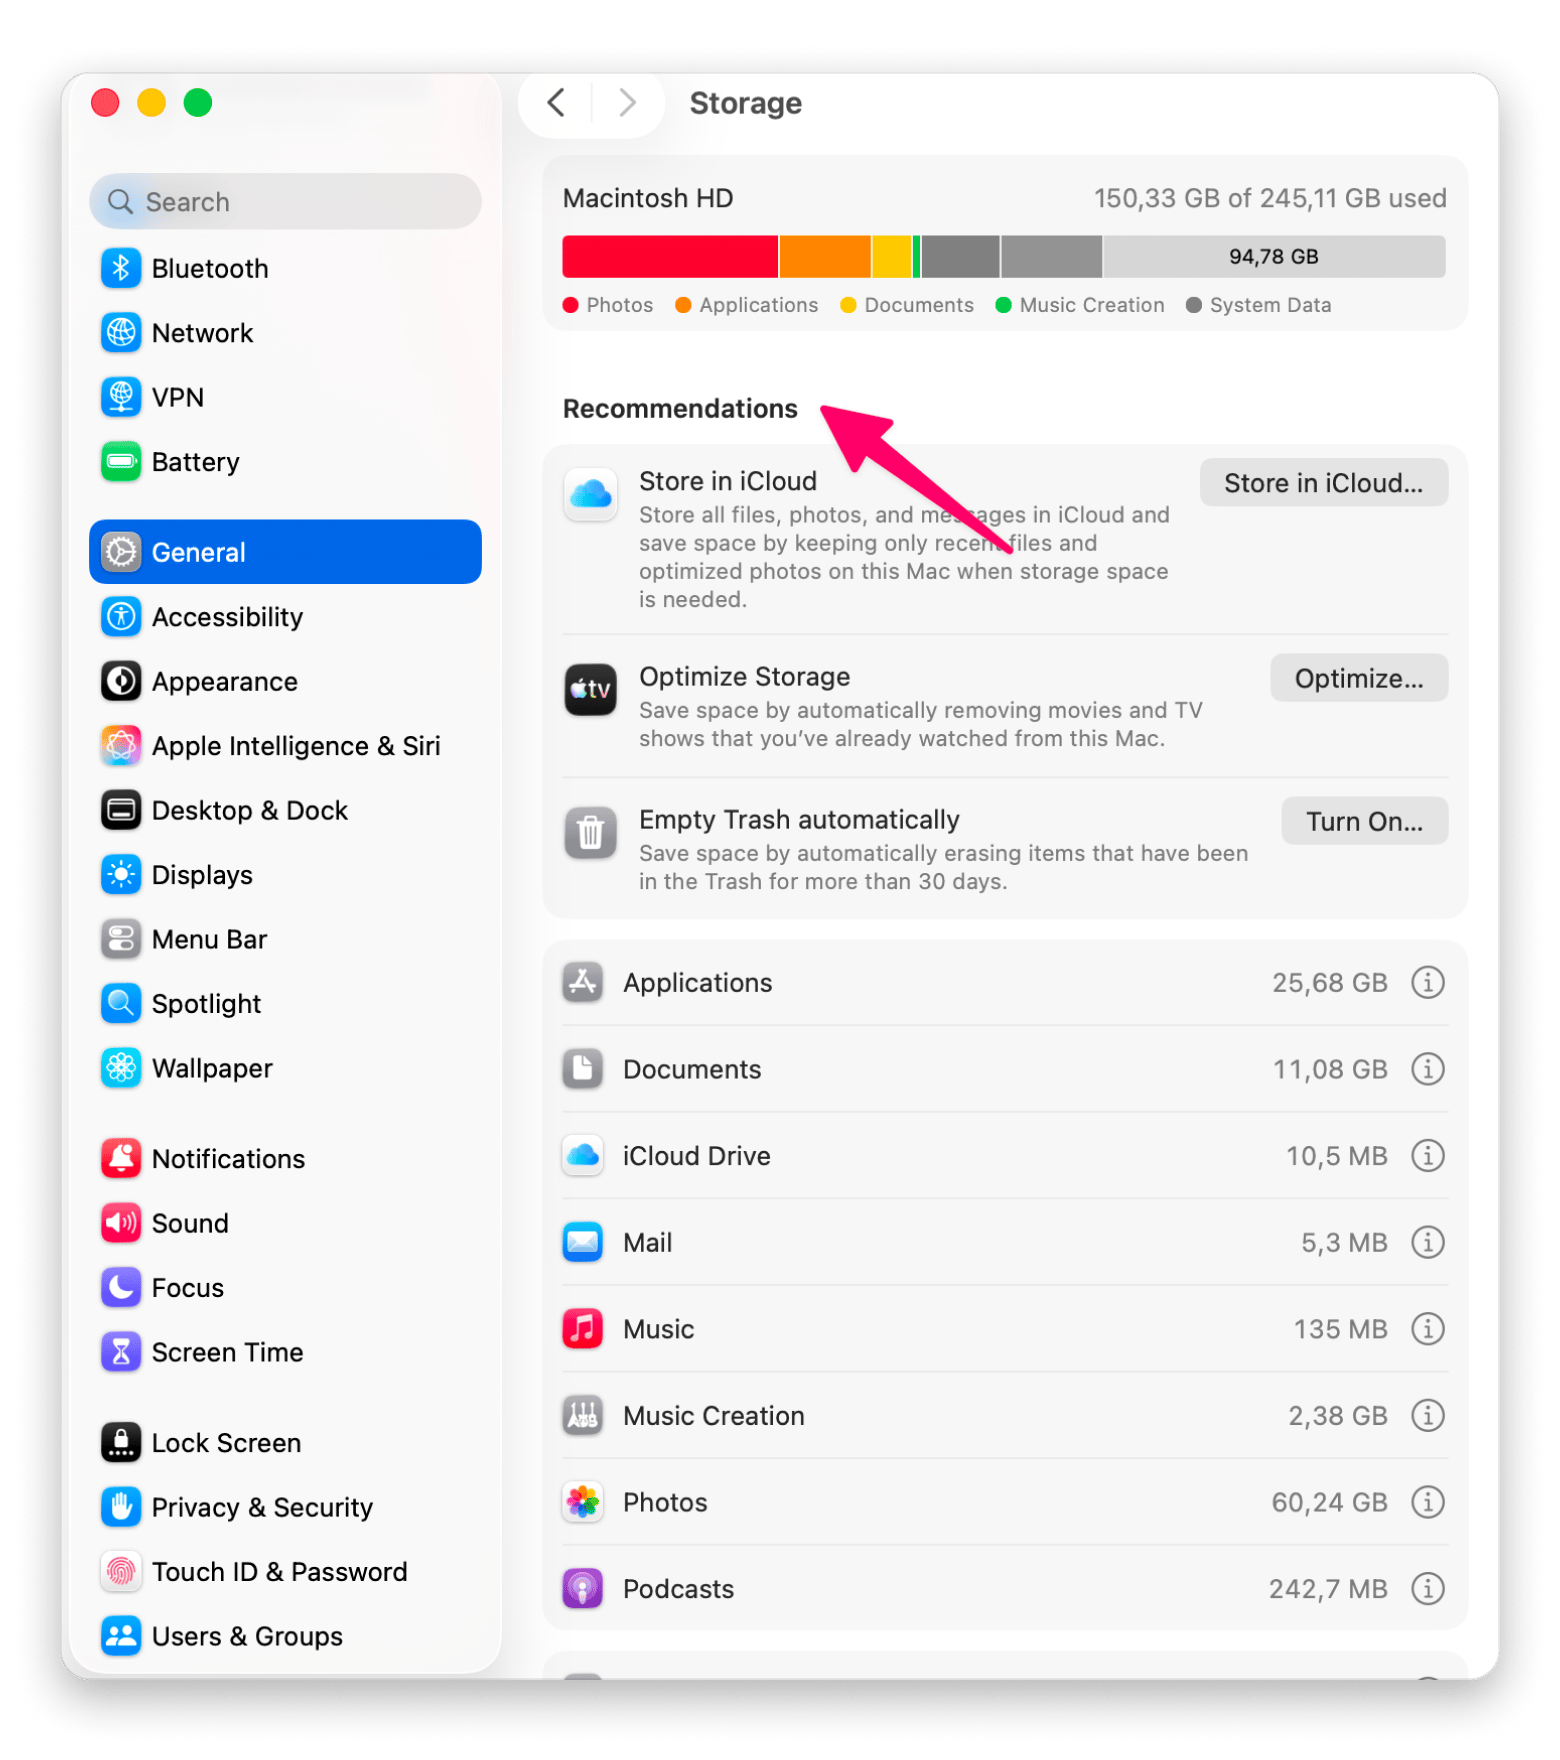
1. Open System Settings > General > Storage.
2. Review what's taking up space on your drive.
3. Check Recommendations for quick wins like emptying caches.
4. Delete old Time Machine snapshots if present.
5. Clear browser caches and downloads folder.
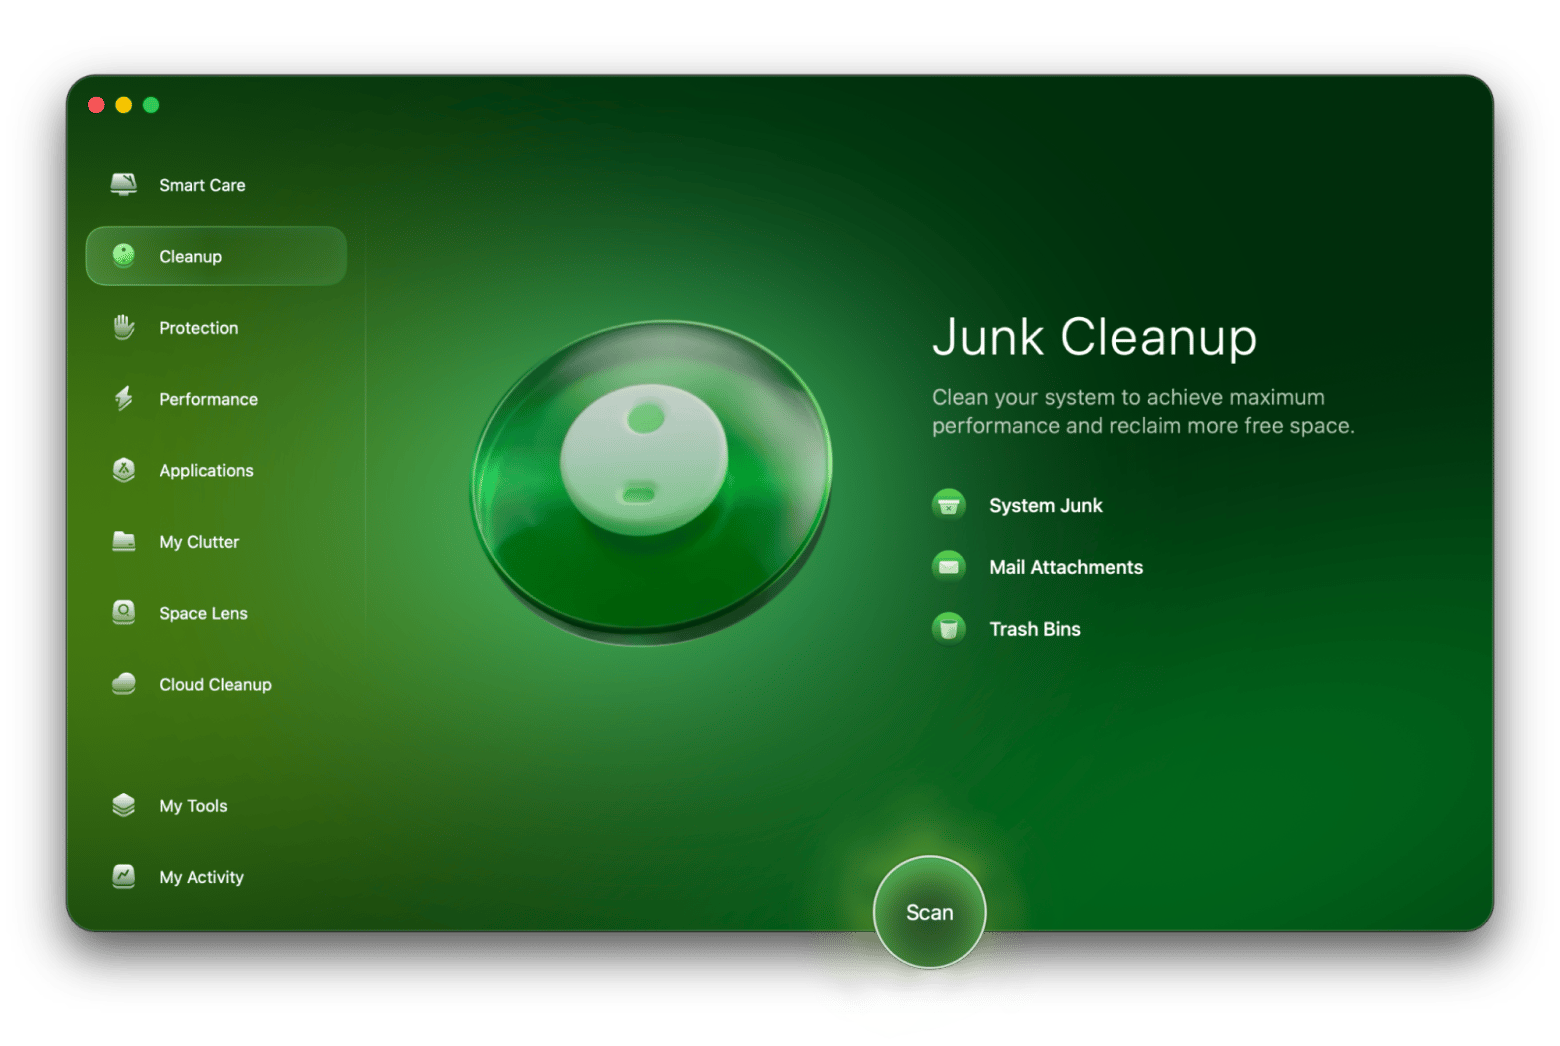
For a more thorough cleanup, I use CleanMyMac. It finds gigabytes of hidden junk files, old caches, and email attachments you've forgotten about. The app also empties all trash bins on your Mac — not just the main one, but also Mail Trash, Photos Trash, and others you might not know exist.
Remove 5.5 GB of hidden junk
with
CleanMyMac via Setapp
97%
18K ratings
Clean free
I use CleanMyMac not only to clean up junk files, but also for general maintenance and protection. It’s the best solution I’ve ever used to optimize my Mac.
Disk too full to empty Trash? CleanMyMac finds hidden gigabytes in minutes. Junk files, old caches, Mail Trash, Photos Trash — CleanMyMac clears them all, including the bins you didn't know existed. Free for 7 days. Try CleanMyMac Free. Or get CleanMyMac as a standalone app from $9.95 USD/mo.
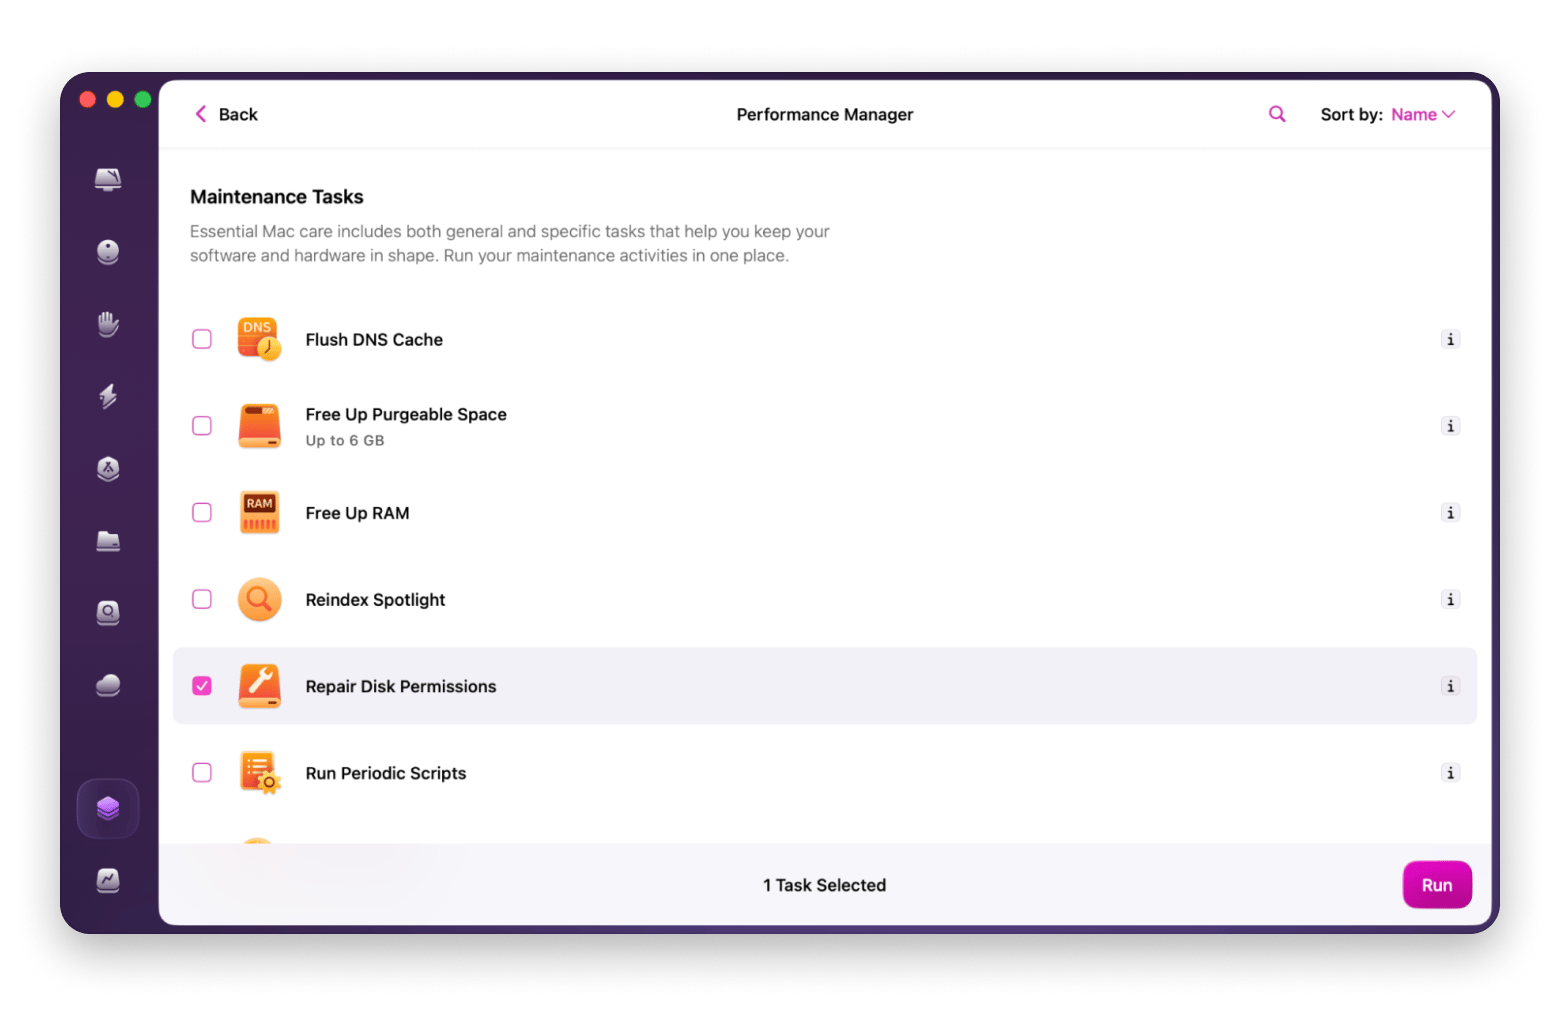
4. After the scan, select Repair Disk Permissions and click Run.
This process fixes system-wide permission problems that might be blocking Trash from emptying.
Persistent permission errors on drives and volumes are a separate issue — here's how to fix read-only disk permissions on Mac if the Trash fix doesn't clear it up.
How to force empty Trash on Mac
When normal methods fail, you can force Mac to empty Trash. I recommend trying the safer Option-key method first before using Terminal.
Option-key method
Hold down the Option key on your keyboard.
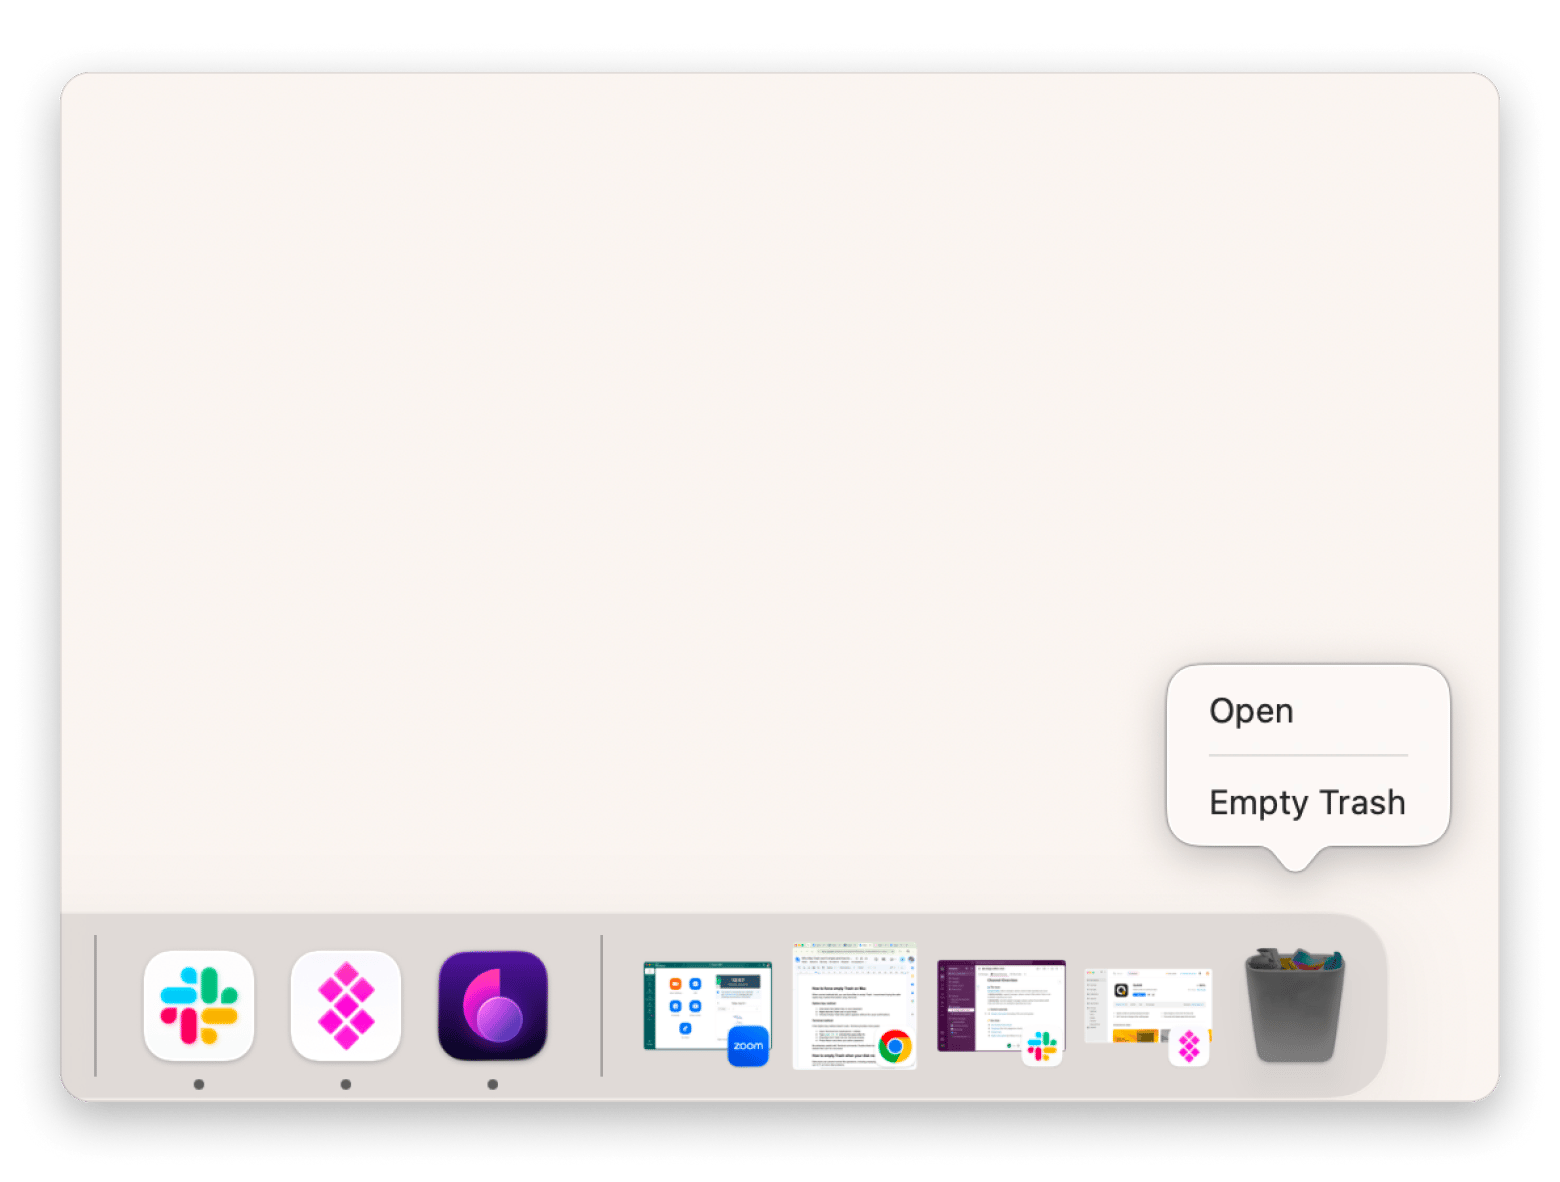
Right-click the Trash icon in your Dock.
Choose Empty Trash (the option appears without the usual confirmation).
Terminal method
If the Option-key method doesn't work, Terminal provides more power:
Open Terminal from Applications > Utilities.
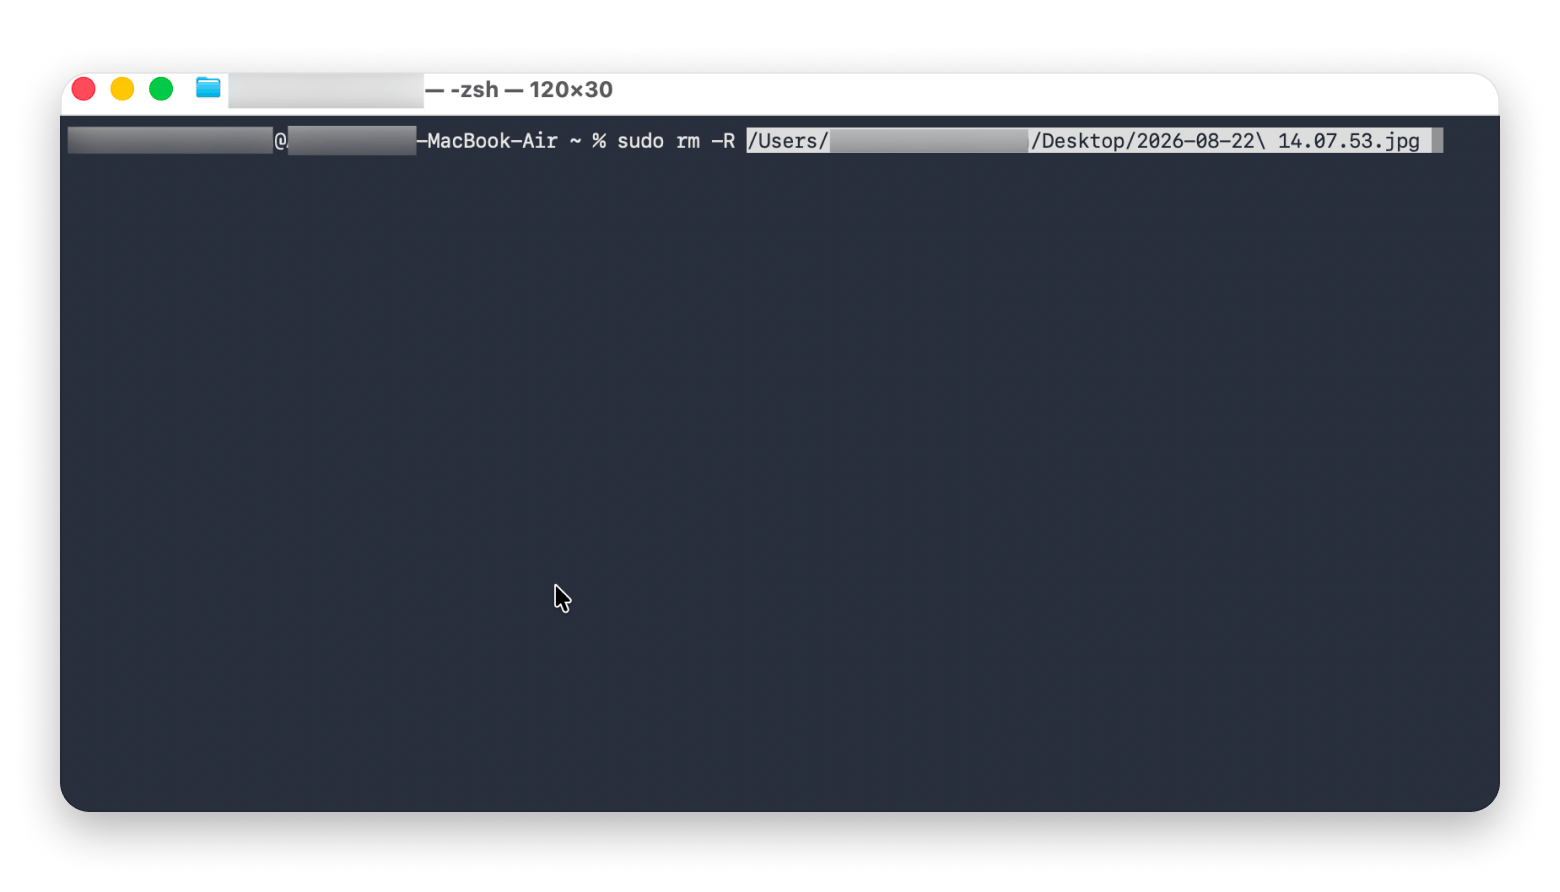
Type sudo rm -R (include the space after R).
Drag files from Trash into the Terminal window.
Press Return and enter your admin password.
This tells macOS to forcefully remove the files you specify. Be extremely careful with Terminal commands. Double-check before pressing Return, as deleted files can't be recovered.
How to empty Trash when your disk needs repair
First Aid in Disk Utility can fix most minor disk problems.
To run First Aid:
1. Open Applications > Utilities > Disk Utility.
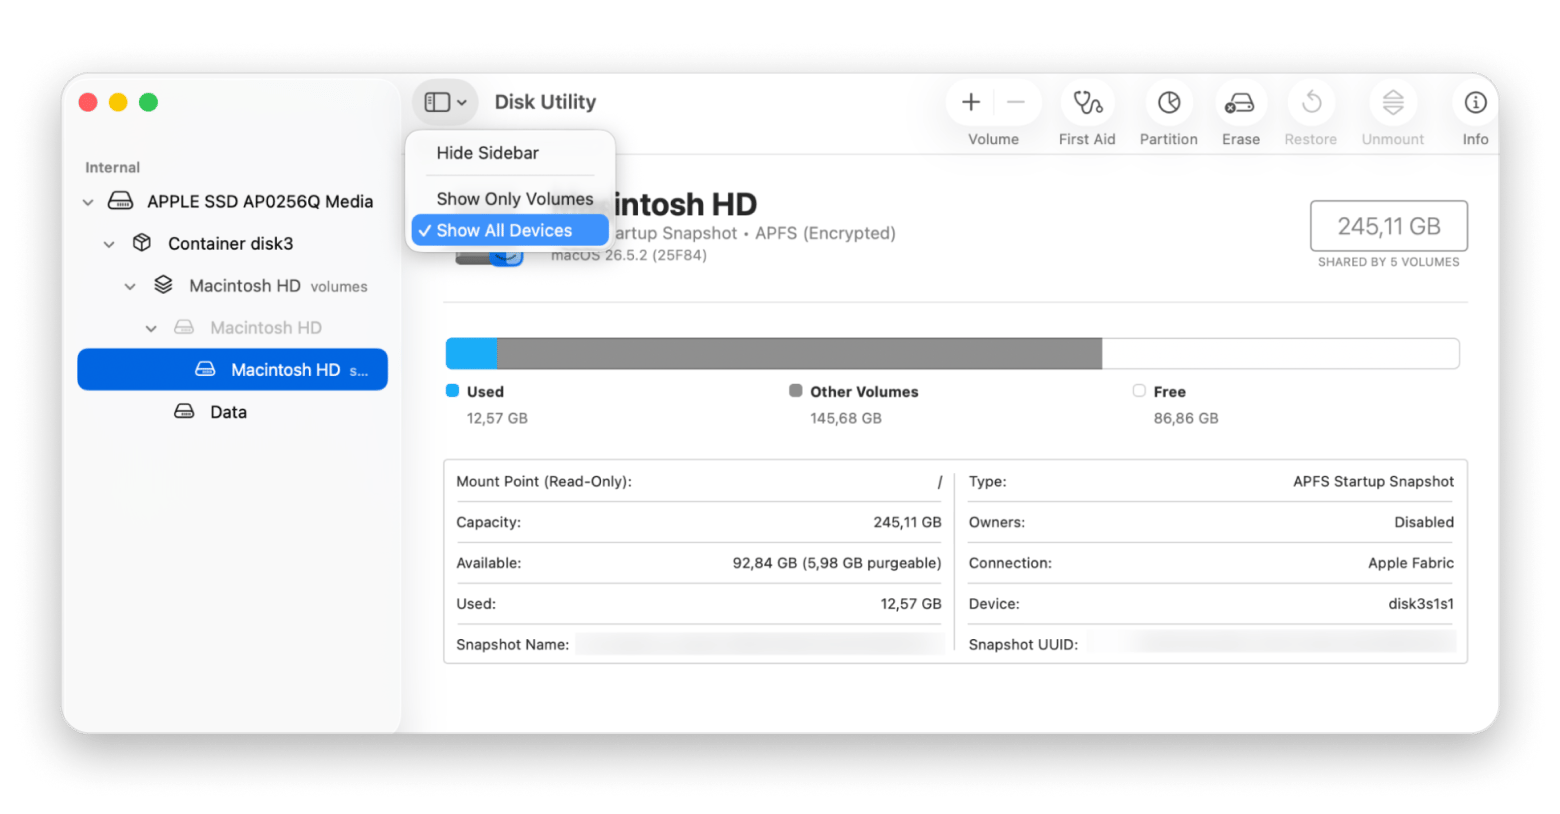
2. Choose View > Show All Devices from the menu bar.
3. Select the last volume on your disk.
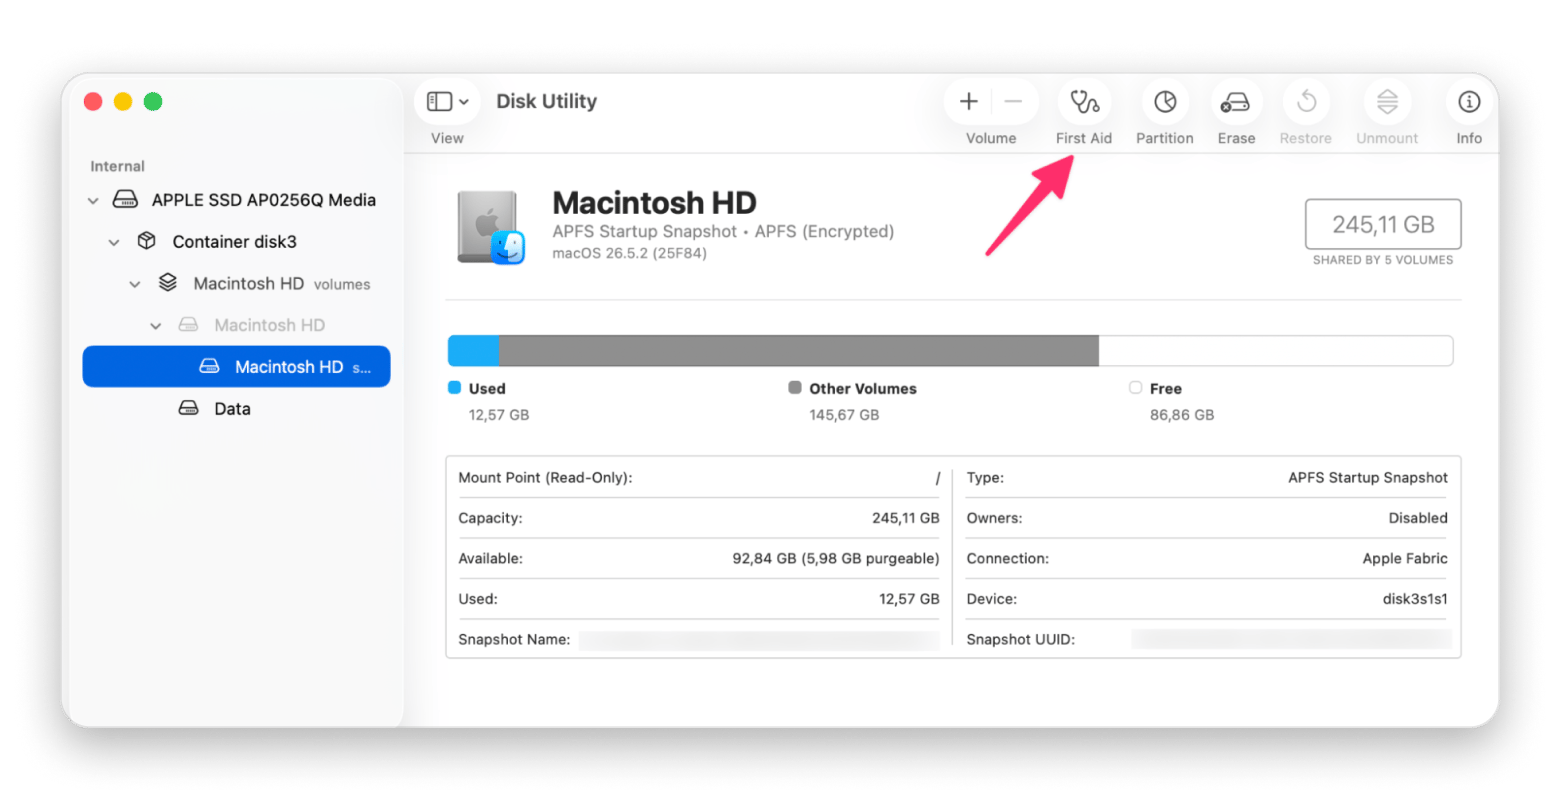
4. Click First Aid and then Run.
5. Repeat for each volume, then each container, then the disk itself.
First Aid takes several minutes to complete. If it finds and fixes errors, try emptying Trash again afterward.
If First Aid flags deeper errors it can't fix, the broader macOS troubleshooting guide covers what to do next.
How to empty Trash in safe mode
Safe Mode loads only essential macOS components, bypassing third-party extensions that might interfere with Trash. I've found this particularly useful when dealing with stubborn antivirus or backup software conflicts.
To boot into Safe Mode on Intel Macs:
Shut down your Mac completely.
Press the power button, then immediately hold Shift.
Release Shift when you see the login window.
Log in (you'll see "Safe Boot" in the menu bar).
Open Trash and click Empty.
Restart normally to exit safe mode.
For Apple Silicon Macs, the process differs slightly:
Shut down your Mac.
Press and hold the power button until you see startup options.
Select your startup disk while holding Shift.
Click Continue in safe mode.
If Trash empties successfully in safe mode, a third-party app was likely blocking it.
Can your Mac empty Trash automatically?
Yes, macOS includes a built-in feature that automatically deletes old Trash items. This prevents Trash from filling up with forgotten files.
To enable automatic emptying:
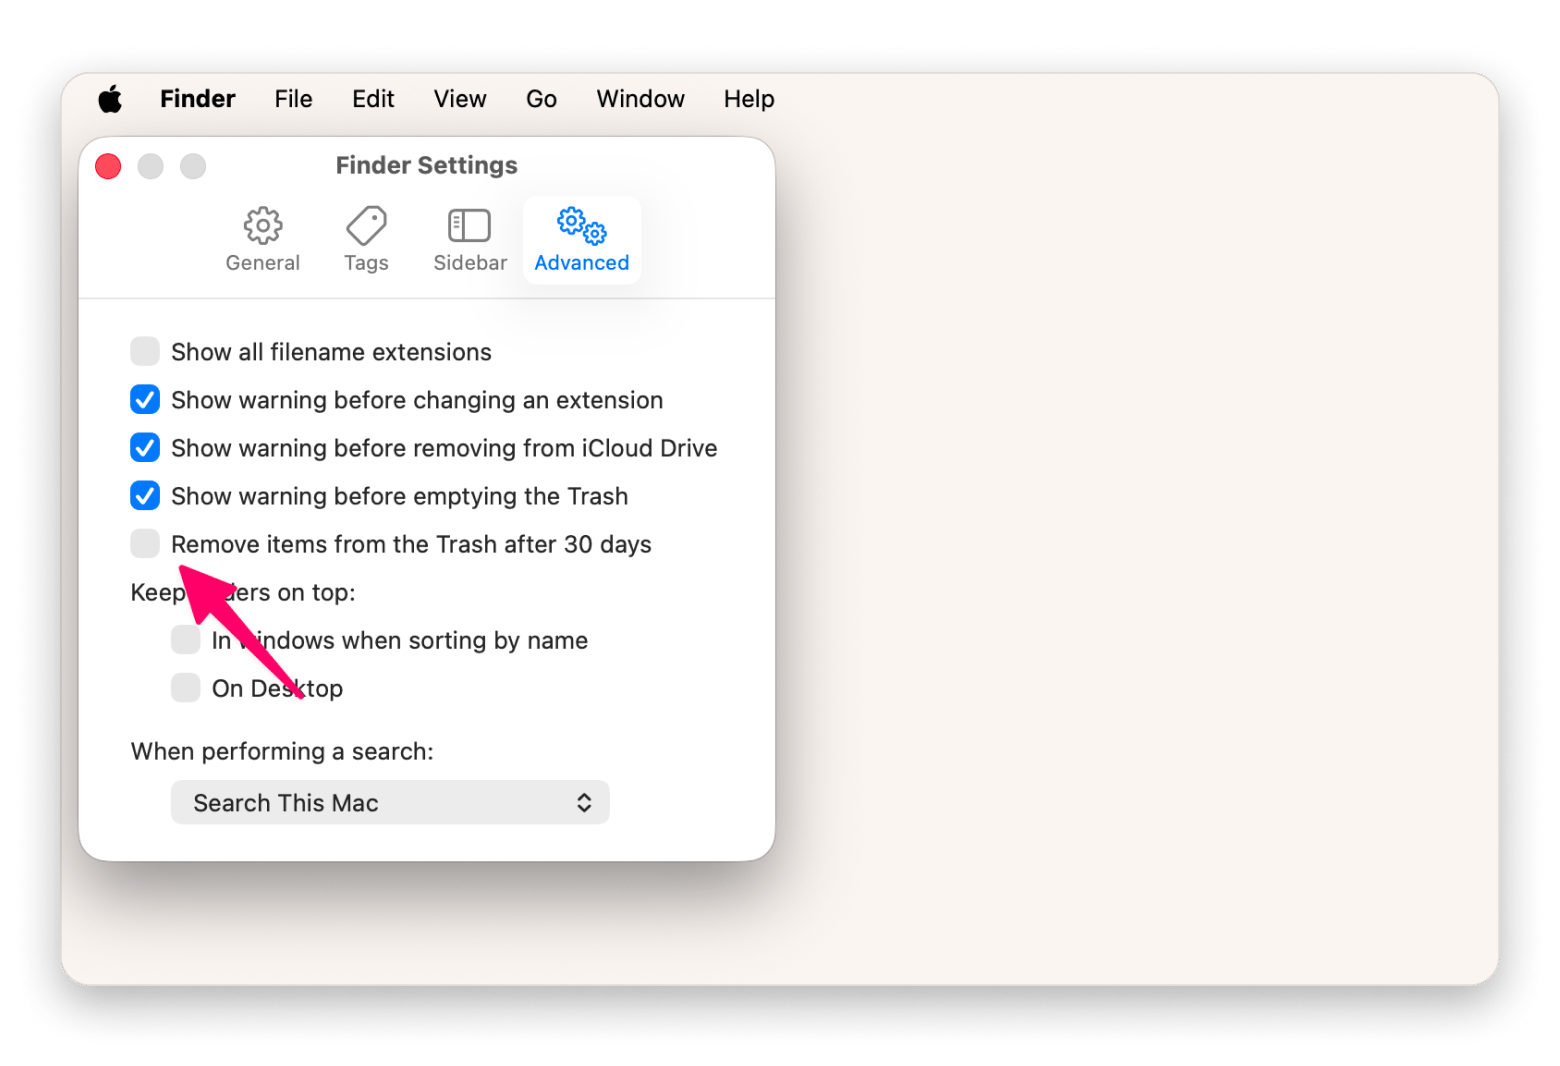
Open Finder and choose Finder > Settings from the menu bar.
Click the Advanced tab.
Check Remove items from the Trash after 30 days.
Your Mac will now delete files that have been in Trash for more than 30 days. This happens quietly in the background without any notifications.
Fix Trash that won't empty in a few clicks
Mac Trash problems almost always come down to one of a handful of causes — a file that's still open, a lock you forgot about, permissions that need adjusting, or a disk that needs a cleanup. Work through the fixes in order, and you'll usually have it sorted in a few minutes.
For the quickest path: use QuitAll to clear file locks without hunting through every open app, and CleanMyMac to free up disk space, repair permissions, and empty every hidden Trash folder on your Mac in one go. Both are available on Setapp — a platform that gives you access to 270+ macOS and iOS apps under one subscription. Try them free for 7 days and see how much easier Mac maintenance gets.
FAQ
How do I empty Trash when files are in use?
If a "File in use" alert stops you from emptying Trash, release the file first. Quit the app using the file, then choose Finder > Empty Trash. Can't identify which app? Press Command + Option + Esc and Force Quit any suspects. Still stuck? Restart your Mac to clear all file locks, then empty Trash again.
How do I force empty Trash on Mac?
Try these two force-delete options — use the safer one first. Option-key method: Hold Option, then choose Finder > Empty Trash to bypass most file locks. Terminal method: Open Terminal, type sudo rm -R (note the space), drag items from Trash into the window, press Return, and enter your admin password. Both methods delete items permanently.
How do I empty Trash on Mac in Safe Mode?
Safe Mode loads only essential macOS items, so nothing should keep files "in use." Shut down your Mac. Turn it on and immediately hold the Shift key until the login window appears. Log in (you'll see "Safe Boot" in the menu bar). Open Trash and click Empty. Restart normally to leave Safe Mode. If Trash empties here, a third-party app was blocking it.
Can my Mac empty Trash automatically?
Yes. Finder can delete trashed items after 30 days. Open Finder and choose Finder > Settings. Click the Advanced tab. Check Remove items from the Trash after 30 days. macOS will now clear old files on its own, so you rarely need to empty the Trash manually.
Superpowers for your Mac
Tackle your tasks with dozens of helpful apps on Setapp.






 Best solution
 Best solution

 CleanMyMac via Setapp
 Disk too full to empty Trash? CleanMyMac finds hidden gigabytes in minutes. Junk files, old caches, Mail Trash, Photos Trash — CleanMyMac clears them all, including the bins you didn't know existed. Free for 7 days.