How to show the ~/Library folder on Mac
Got a glitchy app and need to diagnose the issue? Or need to configure your system? Or just want to clear app cache? Well, The Library folder exists to support your Mac in a variety of ways, and going into that folder could be the key to resolution. I’m going to show you how to get to your Library folder on Mac through Finder, Terminal and three additional apps.
Let's start with a quick overview of the key ways to access ~/Library/. For more details, insights, and tips, just scroll down.
| Way to access ~/Library/ | Steps |
| Using Go to Folder command | Open Finder, press Shift + Command + G, and type ~/Library/, then click Go. |
| Using Finder | Open Finder, click Go in the menu bar, and select Library. |
| Using the Terminal | Open Terminal, type open ~/Library, press Return. For hidden folders, use this command: chflags nohidden ~/Library/. |
What is a Library folder on a Mac?
The ~/Library folder on your Mac pretty much functions as it says — like a library. It’s full of a range of system and user-specific files that help your macOS function like a well-oiled machine.
Any files and logs generated by apps or the built-in system on your Mac are usually stored here. They help your apps and other components interact, stay supported, and function properly. While they act primarily as a place for safekeeping, the items within them help optimize your Mac’s usability.
Why is the Library folder hidden?
The Library folder is tucked away from plain view to make sure those important files won’t be accidentally messed with. It’s just an extra security measure to safeguard the average user from causing a domino effect of unintentional changes.
How to find the Library folder on Mac
Although the Library folder is hidden, there are many ways to find it without spending too much time hunting around.
#1. Use Go to Folder
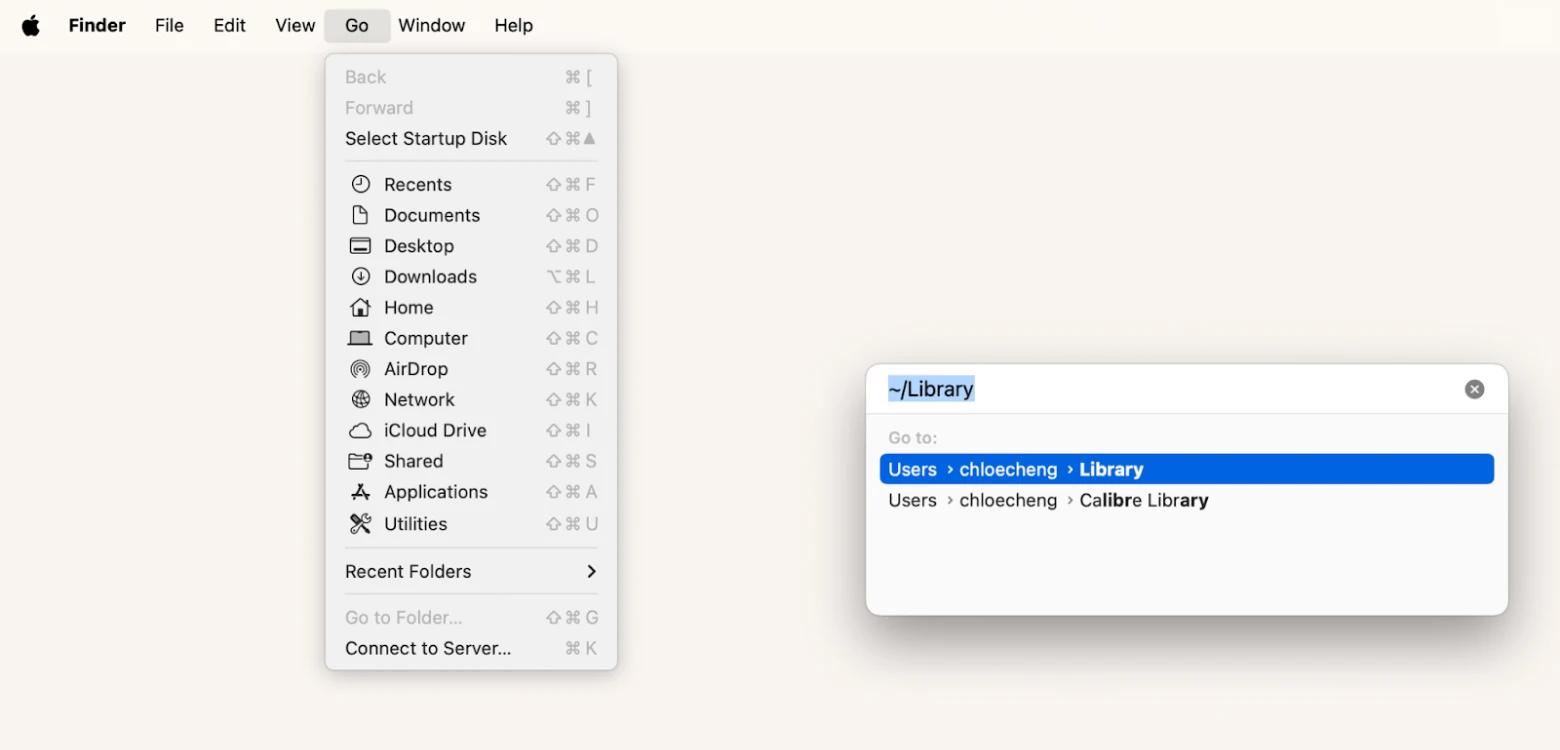
The first method to get to the Library is to use the Go to Folder feature in Finder:
- Go to Finder.
- Click on Go in the menu bar and select Go to Folder. Alternatively, you can press Shift + Command + G.
- Type in ~/Library and hit Return.
If you're someone who travels a lot across folders on your Mac, you might find Default Folder X to be an ideal solution for better organization. Rather than struggle to find your most accessed folders, the app lets you create customizable keyboard shortcuts, navigate your folders faster, and streamline your file workflow.
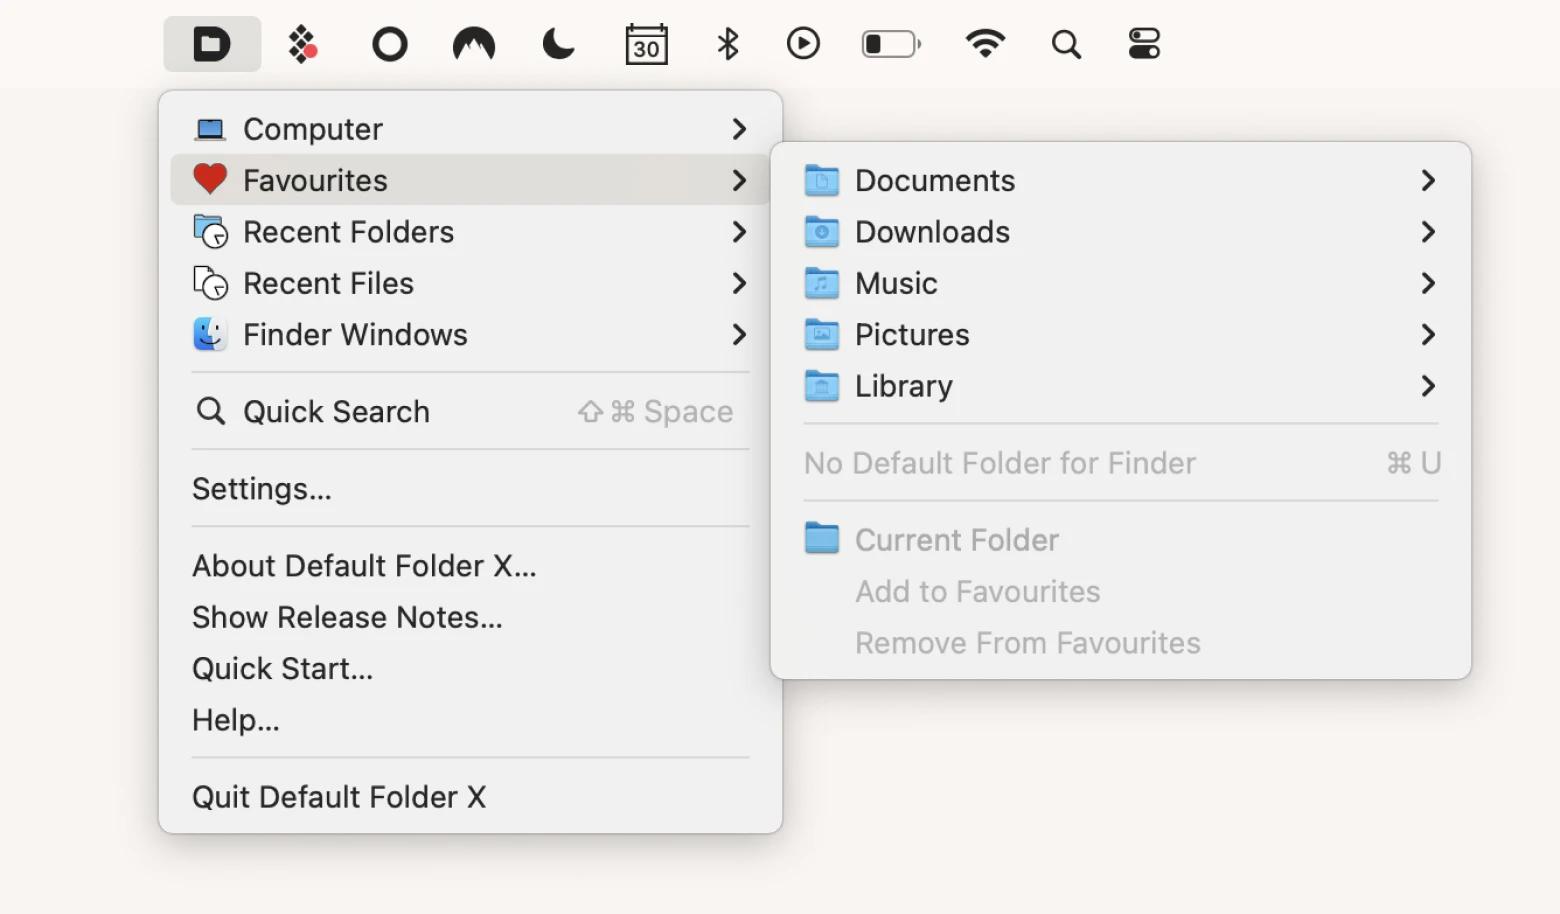
That means after you’ve delved your Library folder once, you’d be able to make it a Favorite in your Default Folder X menu bar icon and easily access it whenever needed.
#2. Use the Finder Go menu
The second method also involves using the capabilities of Finder. This route requires you to have recently accessed the Library folder. Here’s how to use the Finder Go menu:
- Open Finder.
- Click Go in the menu bar.
- Scroll over Recent Folders and click on Library.
If you don’t see the Library folder, you’ll need to open it using the first Finder method before using this one. Using the Go to Folder offers more granular control over your navigation, while the Go menu would only be a useful, shortened method if you frequently access the Library folder.
In cases where you feel like Finder doesn’t have enough capabilities or isn’t structured to your liking, Path Finder can step in with its full-featured interface with a modular system for all your commands, a Drop Stack for temporary storage, and dual-pane functionality to showcase file locations you use most often.
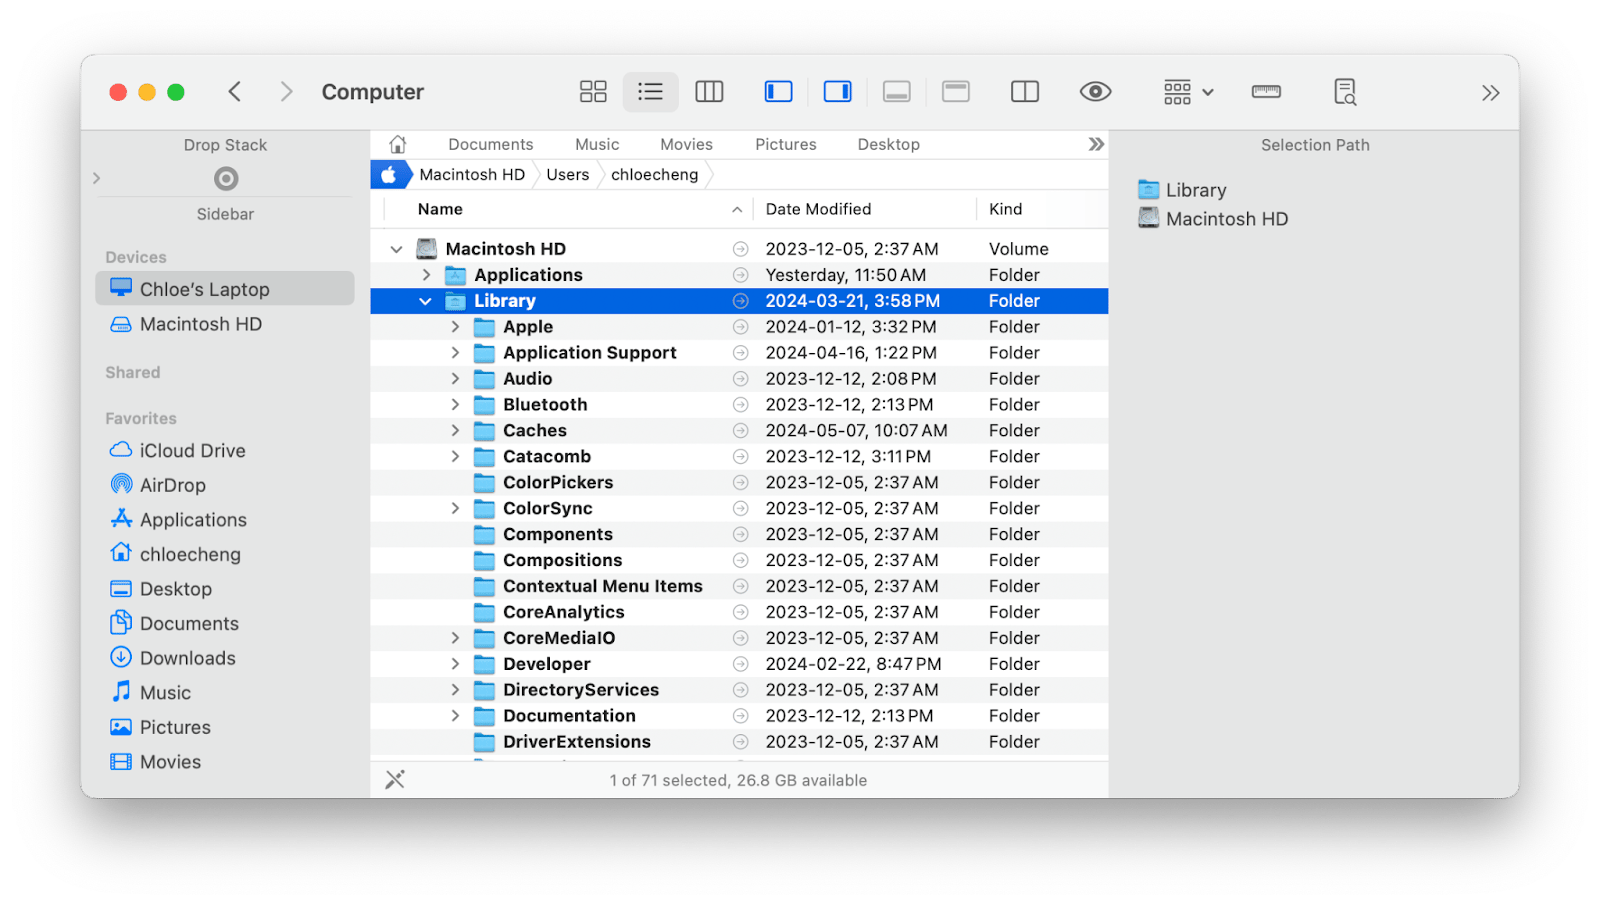
Want to get a file path? Path Finder uses the familiar Finder-style interface with the bells and whistles you actually need to make search easier. Using the Selection Path module, you can see your exact file path in full view.
#3. Show the hidden Library folder on Mac using Terminal
The final method to show the Library folder on Mac is to use Terminal. The process is easy even if you are not comfortable with command-line interfaces. To open the Mac Library folder in Terminal:
- Open Terminal through Spotlight Search or by opening Finder and going to Applications > Utilities.
- Type the command open ~/Library and press Return.
Your Library folder should automatically appear.
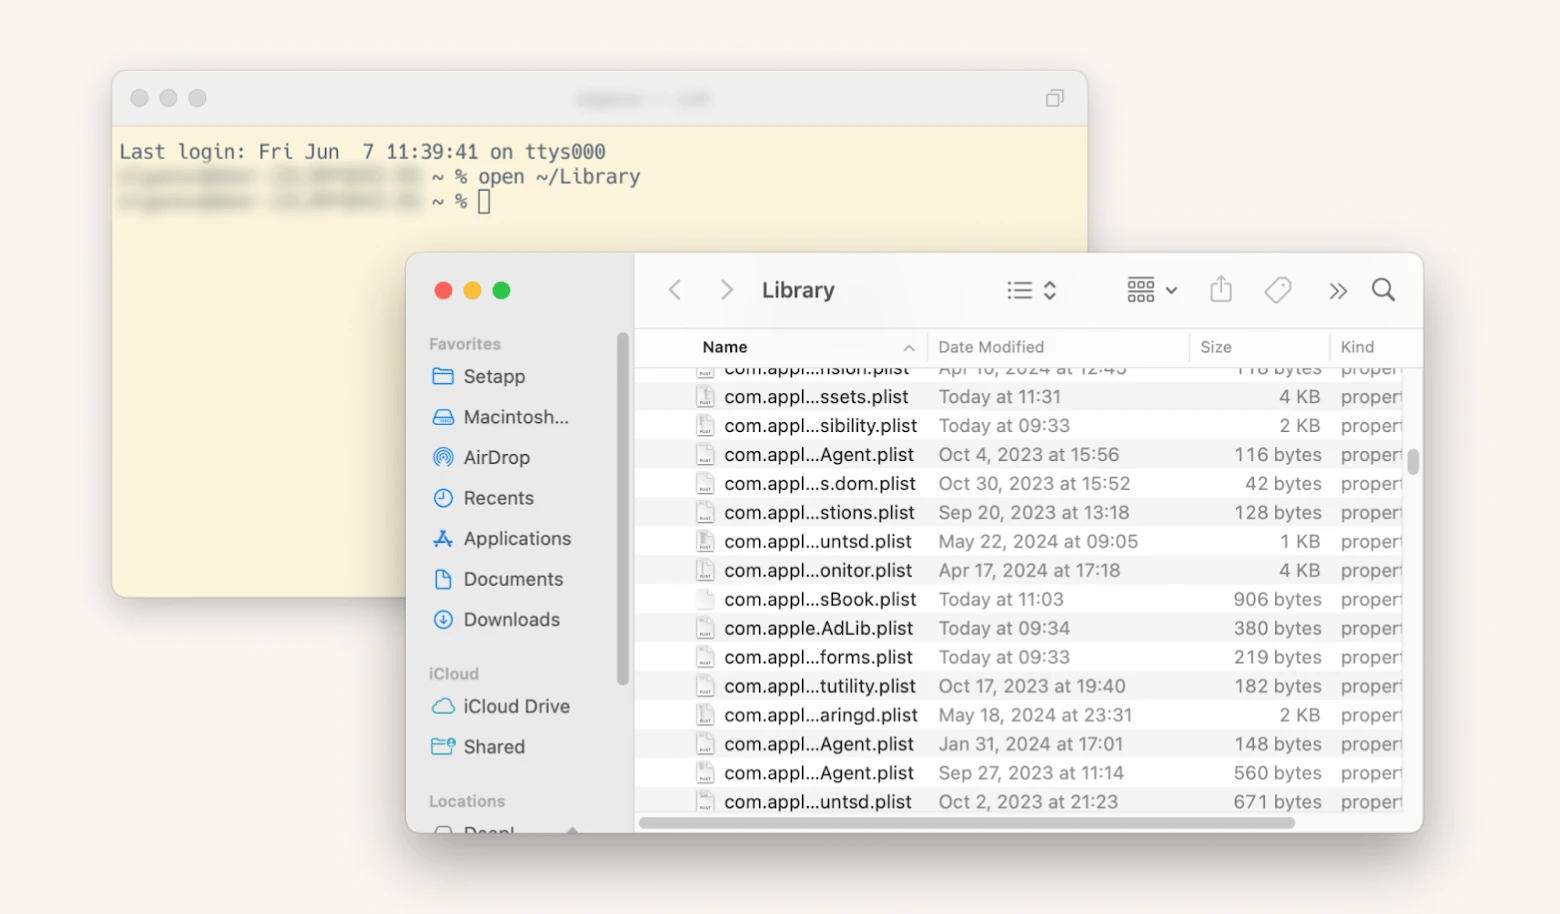
If you’re a big fan of Terminal, you may have noticed that the screenshot above is actually not from a built-in Terminal. It’s from Core Shell — a full-featured SSH terminal that I strongly recommend to anyone who wants to take Terminal capabilities to the next level. With Core Shell, you can switch between multiple hosts, customize your terminal with custom color schemes and tags, and integrate with your Keychain. Advanced features like agent forwarding and proxy jump make sure you’re able to get the most out of your command line experience.
How to add a Library folder in Finder
For some of us, life would be much easier if the Library folder was visible on Finder. Luckily, you can use the Favorites section to do so. Here’s how:
- Open Finder.
- Click on your main disk in the left-hand sidebar.
- Drag the Library folder to your Favorites section in the sidebar.
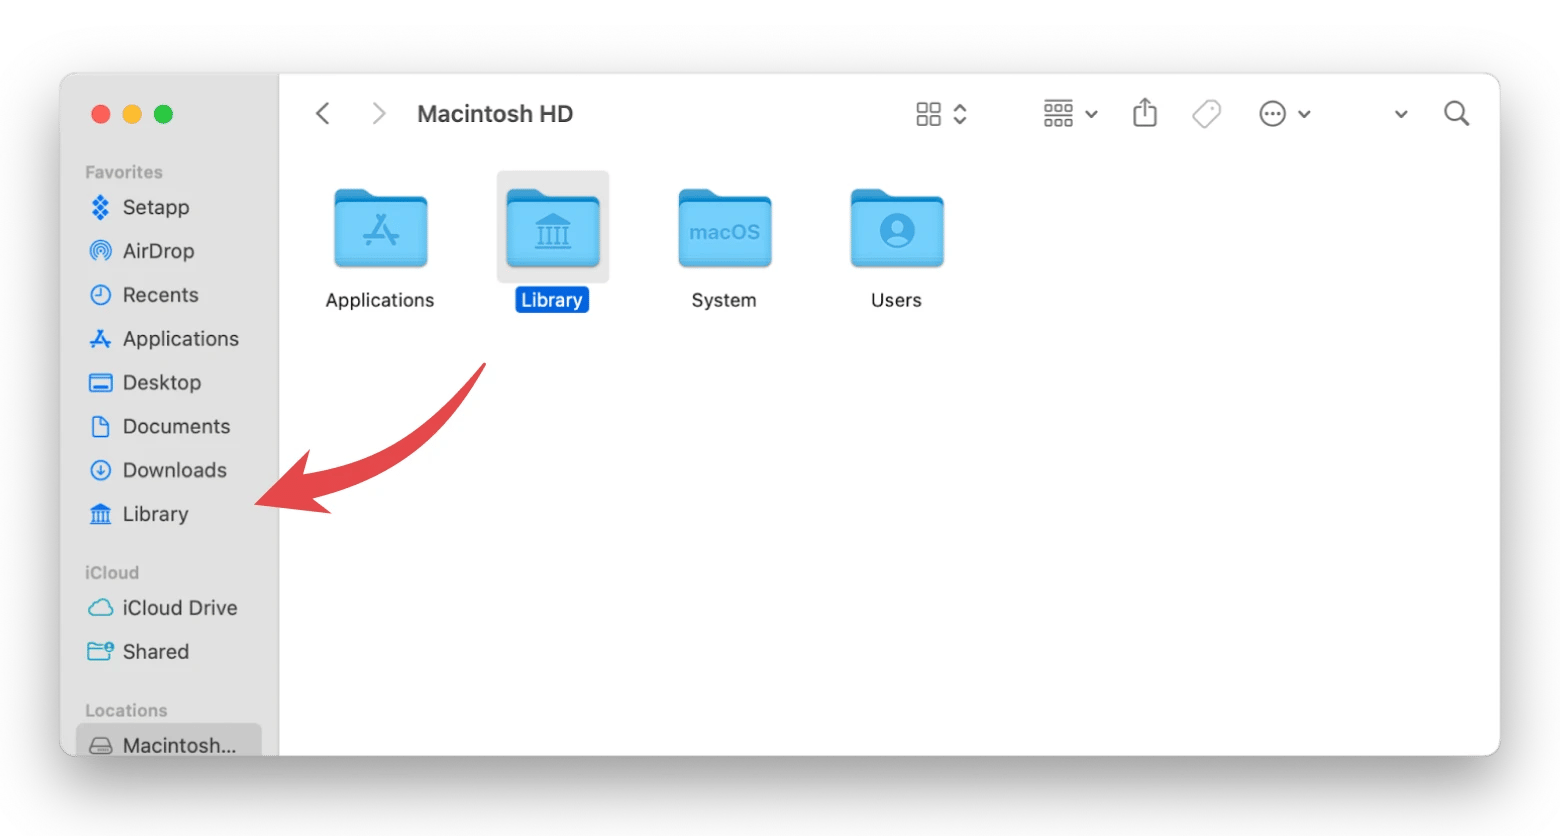
This will keep your Library folder in your favorites every time you open Finder.
How to keep the Library folder visible
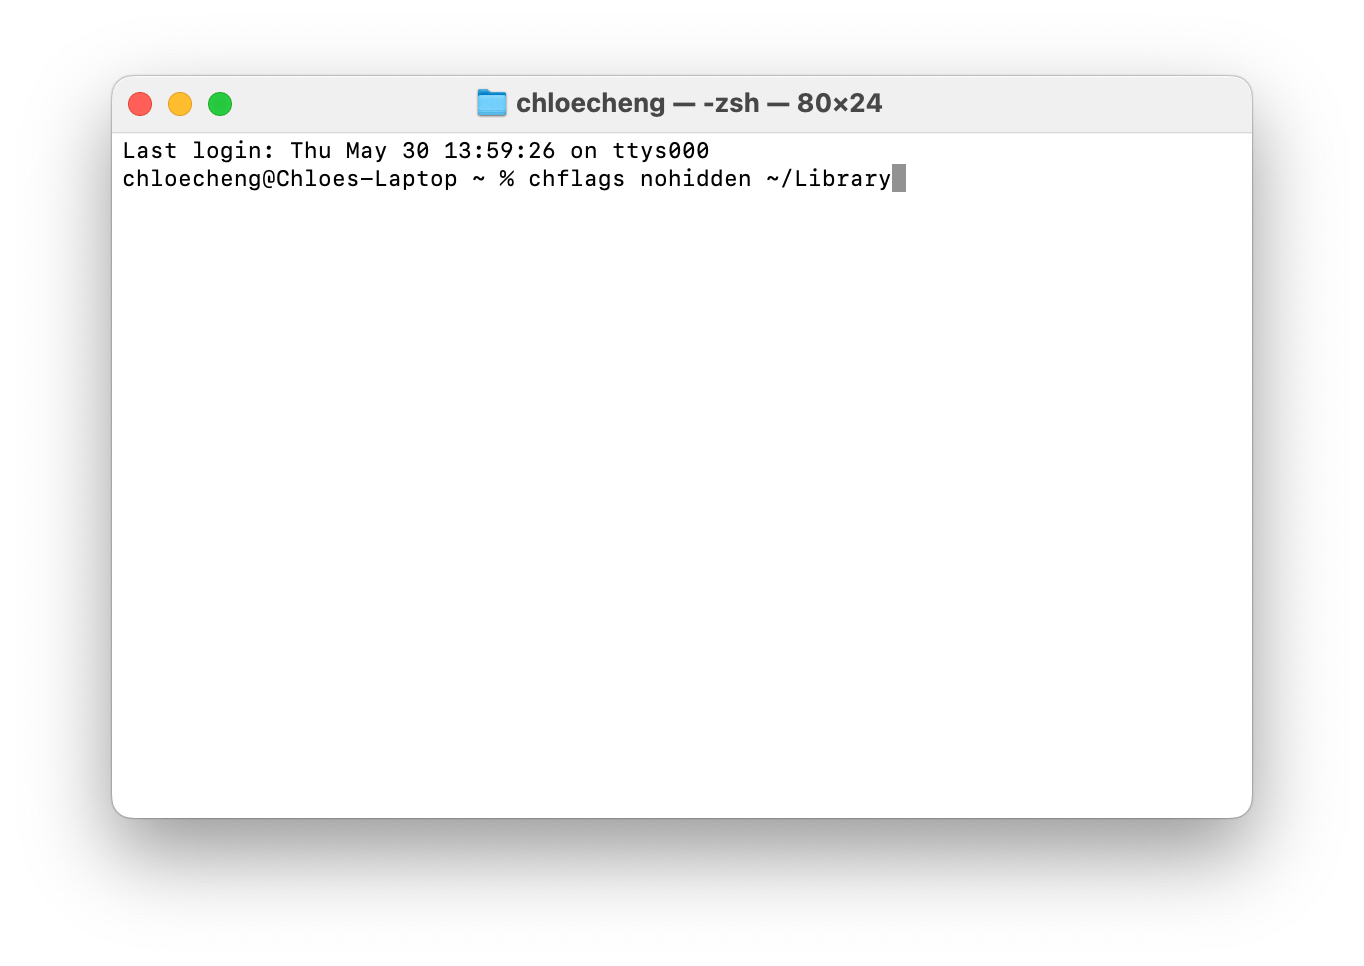
If, for some reason, your Library folder is hidden away and unsearchable from the home directory, you can use Terminal to unhide it. Here’s how to do it:
- Open Terminal either through Applications > Utilities or search for it in Spotlight Search.
- Type in the command chflags nohidden ~/Library/ and press Return.
- Restart Finder (Option + Command + Esc) and check to see that the Library folder is visible in your home directory.
The benefits of accessing the Mac Library folder
After reading this guide, you’ve hopefully gone from wondering, “Where is the Library on Mac?” to permanently being able to access it through the Finder, Terminal, Core Shell, Path Finder, or Default Folder X. The Library might be an elusive hidden folder for most of us, but with its wealth of important files, it can be a useful one to have at your fingertips.
These three apps and 250+ more are all available on Setapp — a subscription platform to a variety of useful macOS apps that help with organization, optimization, planning, and fixing, among other tasks. Sign up for a 7-day free trial today and see what Setapp can offer.
FAQ
How do I clean up the Library folder on my Mac?
To clean up your Library folder, go to Finder > press Shift + Command + G > type in ~/Library > hit Return. There, clear up those large folders like your Caches, Application Support files for those you don’t use anymore, and unnecessary log files and preference files. Note that the Library folder is a massive hub of files and scripts that keep your Mac functioning at its best. If you need to clean it up but don't feel comfortable doing so, back up your data with Time Machine so you can undo your changes if necessary.
What Library files are safe to delete on a Mac?
Some components in the Library folder are better left untouched, while others are safe to delete and can even help clear up your laptop. The files that are safe to delete include cache files (temporary files to speed up apps), log files (which simply record events), application support files and preferences for applications you don’t use, and any autosave or saved application states.
Is it safe to delete Library caches on a Mac?
Just like you’d delete a cache on a web browser, you can do the same for cache files in the Library folder. These cache files are temporary files that are created by the Mac system and its applications to speed up processes. While they’re incredibly useful, they can add up and take up tons of memory on your laptop and aren’t essential for your apps to function.


