How to hide private files and folders on Mac
If you share your Mac with somebody, often cast your screen for presentations, or just want to be extra safe when your Mac is left unattended, it’s important for you to know how to hide folders on Mac or make invisible folders that others simply won’t be able to spot.
In this article, we’ll show you how to hide a folder from another user on Mac, how to hide a folder on Mac desktop when you are showing something on your screen to others, and where to hide a file to make sure it won’t get deleted by accident.
You’ll be able to try different ways to make a folder private, from instantly hiding everything on your desktop to saving your data under a different username on your Mac — all to make sure you find a solution that works best for your needs.
How to hide folders on Mac
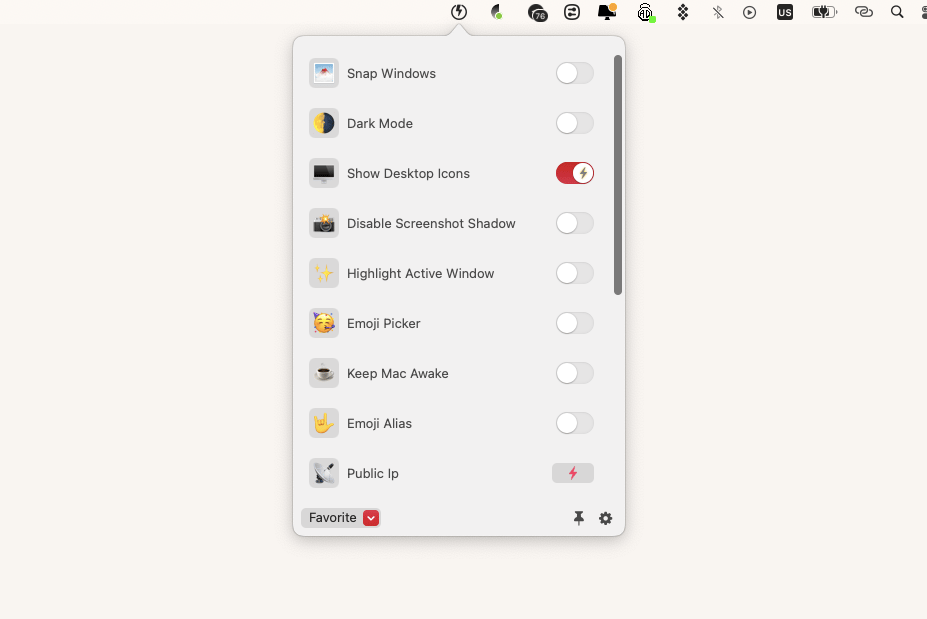
If you’re sharing your screen with others in a Zoom meeting or mirroring your Mac’s desktop to a big-screen TV for presentation, the easiest way to hide a file or a folder from view is by moving a single toggle in Almighty’s bar menu.
Almighty is a collection of powerful macOS controls that can be added to the app’s menu bar or configured as custom keyboard shortcuts. You’ll be able to instantly hide any file on Mac desktop, as well as auto-hide your Dock icons in seconds.
Keyboard shortcut to hide files
On macOS Ventura or later you can use a shortcut to hide and unhide your files:
- Select the file you’d like to hide by clicking on its icon
- Press Shift + Command + . (period) keys simultaneously
- Repeat the steps above for each file or folder you want to keep out of sight
Learning this shortcut will make your life much easier if you need to hide any file on Mac because it’s quick and efficient (you can use the same keys to unhide your files). On the other hand, anyone who knows about this shortcut can use it to look up all your hidden folders. So if you really want to make a folder private, consider encrypting it using FileVault.
How to make invisible folders using FileVault
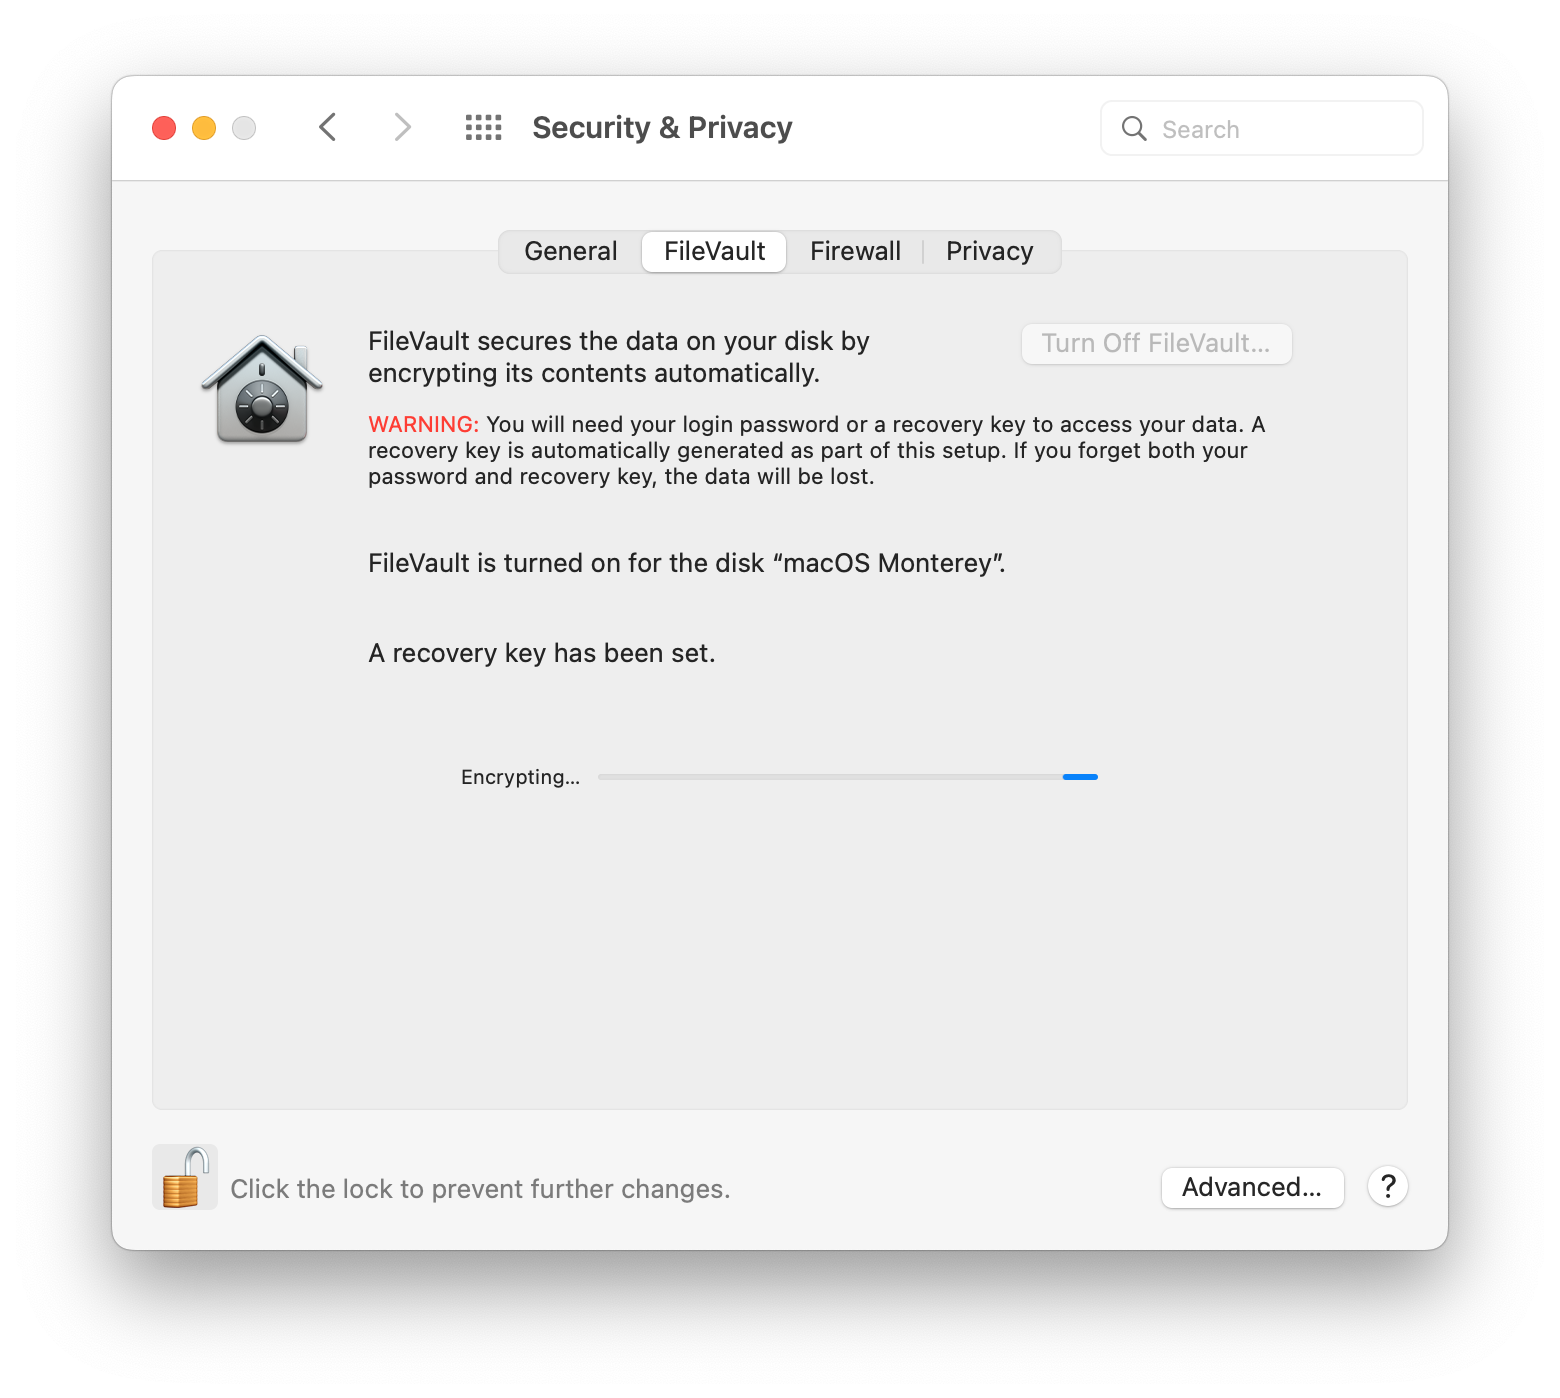
FileVault is Apple’s native security feature that can encrypt all the data on your drive (including the files and folders you want to hide) — making it invisible to anyone without a password.
This is how to hide folders on Mac with FileVault:
- Go to System Settings in the Apple menu ➙ Privacy & Security
- Choose the FileVault tab and click on the lock icon to allow changes
- Click on Turn On FileVault
- Choose the recovery method ➙ Continue
Note: If there are other user accounts on your Mac, their login passwords will also be able to unlock your hidden folders, since FileVault encrypts your entire hard drive and doesn’t discriminate between users.
How to hide folders on Mac using Terminal
Terminal is another native macOS utility that can help you completely hide a folder on Mac.
Here’s how to hide files/folders using Terminal:
- Open Terminal from Finder (Finder ➙ Applications ➙ Utilities ➙ Terminal)
- Type the chflags hidden command
- Find the file or the folder you’d like to become invisible to others (if you have several items to hide the easiest way to proceed would be to create a new folder and dump everything there)
- Drag your secret folder or file onto the Terminal window and copy the full folder path that appears next to your command ➙ Enter
Note: Knowing the full file or folder path that points to its original location is important for accessing (press Shift + Command + G and enter the path to the folder or file you’re looking for) or unhiding (type chflags nohidden followed by the full file or folder path in the Terminal window and hit Enter) your files.
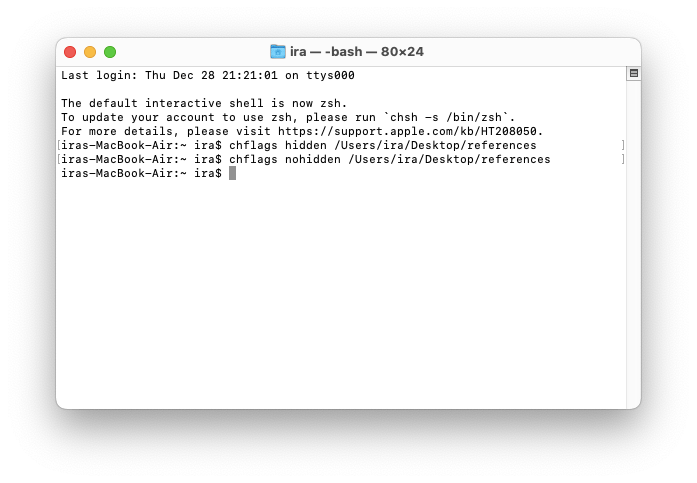
You can also create “showFiles” and “hideFiles” Terminal aliases to hide any file on Mac without having to remember complicated command lines.
To set up aliases in Terminal to hide and unhide your files:
- Open Terminal
- Type sudo nano ~/.bash_profile ➙ Enter
- Enter your password when prompted ➙ Enter
- Type alias showFiles='defaults write com.apple.finder AppleShowAllFiles TRUE; killall Finder /System/Library/CoreServices/Finder.app' ➙ Enter
- In the next line type alias hideFiles='defaults write com.apple.finder AppleShowAllFiles FALSE; killall Finder /System/Library/CoreServices/Finder.app' ➙ Enter
- To make created aliases available, type source ~/.bash_profile ➙ Enter
How to hide all files and folders on your desktop
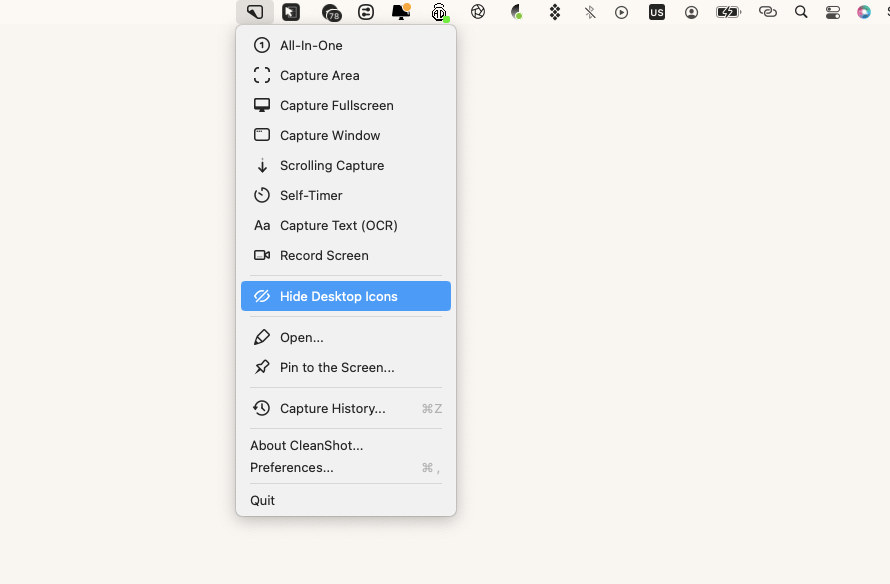
Sometimes it’s not a specific folder or file you’d like to get out of sight from the desktop of your Mac. One Switch or CleanShot X can help you make all desktop files and folders invisible in one click.
One Switch helps you save time and quickly access macOS features important for you from a convenient menu bar dropdown switchboard: to instantly hide desktop icons, turn the Dark Mode on, connect your AirPods to Mac, and much more.

You can also easily take care of hiding desktop clutter away with CleanShot X. It has a built-in feature that instantly clears everything from view on your desktop and will be especially helpful if you regularly need to capture your Mac’s screen, creating GIFs, screenshots, or MP4 recordings. In addition to helping you record, CleanShot X also lets you trim video, annotate, and store your files on the app’s cloud for free.
Another useful app that can help you out with how to hide a folder on Mac desktop questions is iBoysoft MagicMenu. It lets you fully customize your Mac’s right-click menu and instantly hide all visible icons as well as individual files or folders in a few easy clicks.
How to hide folders in a “secret location”
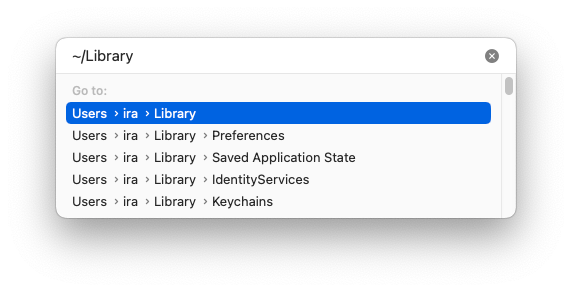
Not everybody knows that macOS has a folder that is hidden by default and is meant to keep system files safe from accidental alterations. It’s called Library and you can easily use it as a location for your own secret folder.
To hide any file on Mac in the Library:
- Go to the top Finder menu and click on Go
- Choose Go to Folder
- Enter ~/Library and hit Enter
- Create a new folder for the files you’d like to keep hidden away and drop it into the Library folder
How to hide files from other users using Apple developer tools
Another thing you can do to make a folder private is to set its visibility attribute to invisible.
To make invisible folder:
- Download Apple’s Dev Tools
- Open Terminal
- Type setfile -a V followed by the name of the file or folder you wish to hide ➙ Enter

How to hide a file by adding a dot before its file name
Your macOS automatically treats any file or folder names that start with a period as hidden folders or files.
This is how you hide a file by renaming it:
- Right-click on the file ➙ Rename
- Add a dot in front of the current name of the file
- Click OK in the pop-up system prompt and watch the file’s icon become translucent
- Use the Shift + Command + . (period) shortcut to make your file invisible in Finder
How to hide files and folders by moving them to another account
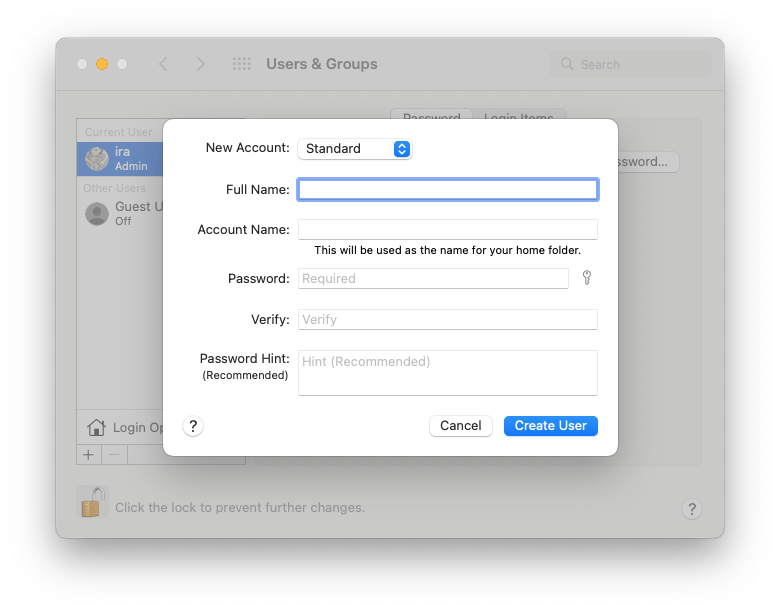
A slightly different approach you can take to make a folder private is when you create a separate user account on your Mac for all the documents you’d like to keep out of reach. This might prove more convenient than having to remember file paths to invisible folders you can create with Terminal or trying to unhide a file or a folder you’ve hidden some other way.
Of course, you will still have to log in and out to switch between the accounts, but it’s a good way to hide a folder from another user on Mac:
- Open System Settings from the Apple menu ➙ Users & Groups
- Click on the lock icon and enter your password to allow the changes
- Click on the "+" sign
- Fill in the fields required for creating a new user account ➙ Create User
- Click the Apple logo ➙ Log Out [your current username] ➙ Log Out
- Choose your newly created user account and log in
- Place your secret folder files under your new username
How to permanently show hidden folders and files
You can use Shift + Command + . (period) shortcut or Terminal commands to unhide a file or a folder on Mac.
To permanently show hidden folders on Mac, including all the files you or the system have tucked away on your Mac:
- Open Terminal
- Enter defaults write com.apple.Finder AppleShowAllFiles true ➙ Enter
- Enter killall Finder ➙ Enter
To unhide a specific file or a hidden folder you’ve made invisible with the help of Apple’s Dev Tools:
- Open Terminal
- Type setfile -a v followed by the name of the file or folder you’ve hidden ➙ Enter
To permanently show hidden folders on Mac you’ve made secret with the help of the chflags hidden Terminal command:
- Open Terminal
- Type chflags nohidden followed by the full file or folder path ➙ Enter
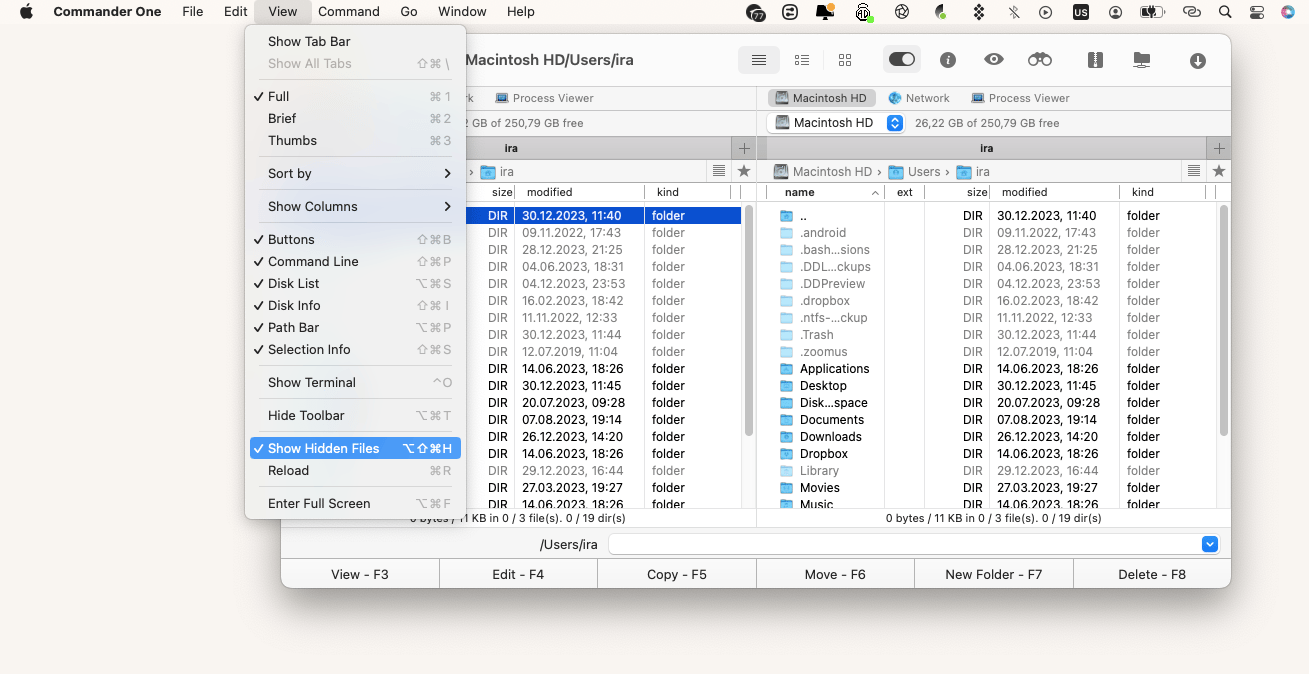
If you’re uncertain about the exact name of the file or its correct path, it’s easier to unhide a file using file management apps like Commander One or Forklift
They act as powered-up Finder alternatives for Mac and can help you conveniently manage files across all your different cloud storages, servers, and devices. As well as make invisible folders visible again with a single click in the app’s menu.
You can learn more about how to permanently show hidden folders on Mac in our dedicated article on how to access system and user files that have been hidden.
FAQ
What is the easiest way to permanently hide a folder on Mac?
The easiest way to completely hide a folder on Mac is to use a Sift + Command + . (period) shortcut. But since anyone can use the same short to unhide a file or a folder you’d like to keep private, it’s safer to use Terminal commands or move your files to the Library folder or a different user account on your Mac.
Why did my hidden files on Mac disappear?
To always know where to look for your hidden folders, make sure you remember the path to your file and its name correctly. If you know exactly where to look but your secret folders are still missing, they may have been lost by accident, because of a virus attack, or due to a hardware issue.
What makes folders on Mac invisible to prying eyes
You can go different ways about creating hidden folders on Mac, depending on your situation:
- If you're mainly concerned about how to hide a folder from another user on Mac, a good strategy would be tucking away your private information into a secret folder in the Library or using Terminal commands to create an invisible folder.
- Use a keyboard shortcut to hide and unhide your files when sharing your screen for presentations (or automatically hide everything from your desktop with Almighty or One Switch in a single click.) Another option here would be to keep everything you wouldn’t want others to see under a separate private user account on your Mac.
- To securely hide a specific file or folder Terminal commands or go for the iBoysoft MagicMenu right-click menu command.
Additionally, don’t forget that Commander One and Forklift are always ready to come to your rescue in case you want to permanently show hidden folders on Mac.
Don’t pass on a chance to test Almighty, One Switch, CleanShot X, iBoysoft MagicMenu, Commander One, and Forklift for free with the seven-day trial of Setapp, a platform of best-in-class iOS and macOS productivity apps. Learn how to hide folders on Mac and check out more than 240 other options to boost your performance.


