How to show hidden files on Mac: I use these easy methods
- Use Finder’s shortcut (Command + Shift + Period) to unhide files
Hidden files will appear as semi-transparent icons. - Use Terminal commands
Typedefaults write com.apple.finder AppleShowAllFiles -boolean true; killall Finderin Terminal to reveal hidden files. - Third-party apps simplify file visibility.
Tools like One Switch hide or show desktop icons instantly, while ForkLift and Commander One make hidden files easily accessible and manageable. HoudahSpot helps locate hidden files and folders without modifying macOS settings — and lets you save search templates for future use. All these apps, along with 250+ other tools, are available with a 7-day free Setapp trial.
The macOS automatically hides some files to protect critical system functions. It can sound tricky, but don't worry; I’ll show you the right method to show hidden files on Mac.
There are various approaches to viewing hidden files on Mac, such as Terminal commands, Finder keyboard shortcuts, and third-party software. Let’s explore my tried and tested options in detail.
How to show hidden files on Mac?
If you want to see the hidden files you can use both Finder or Terminal. Each method brings you success and you can stick to it for the future reference. Let’s explore both methods in detail.
Method 1: Use Finder to view hidden files
Let me show you my most used method to unhide files on Mac:
- Open Finder window.
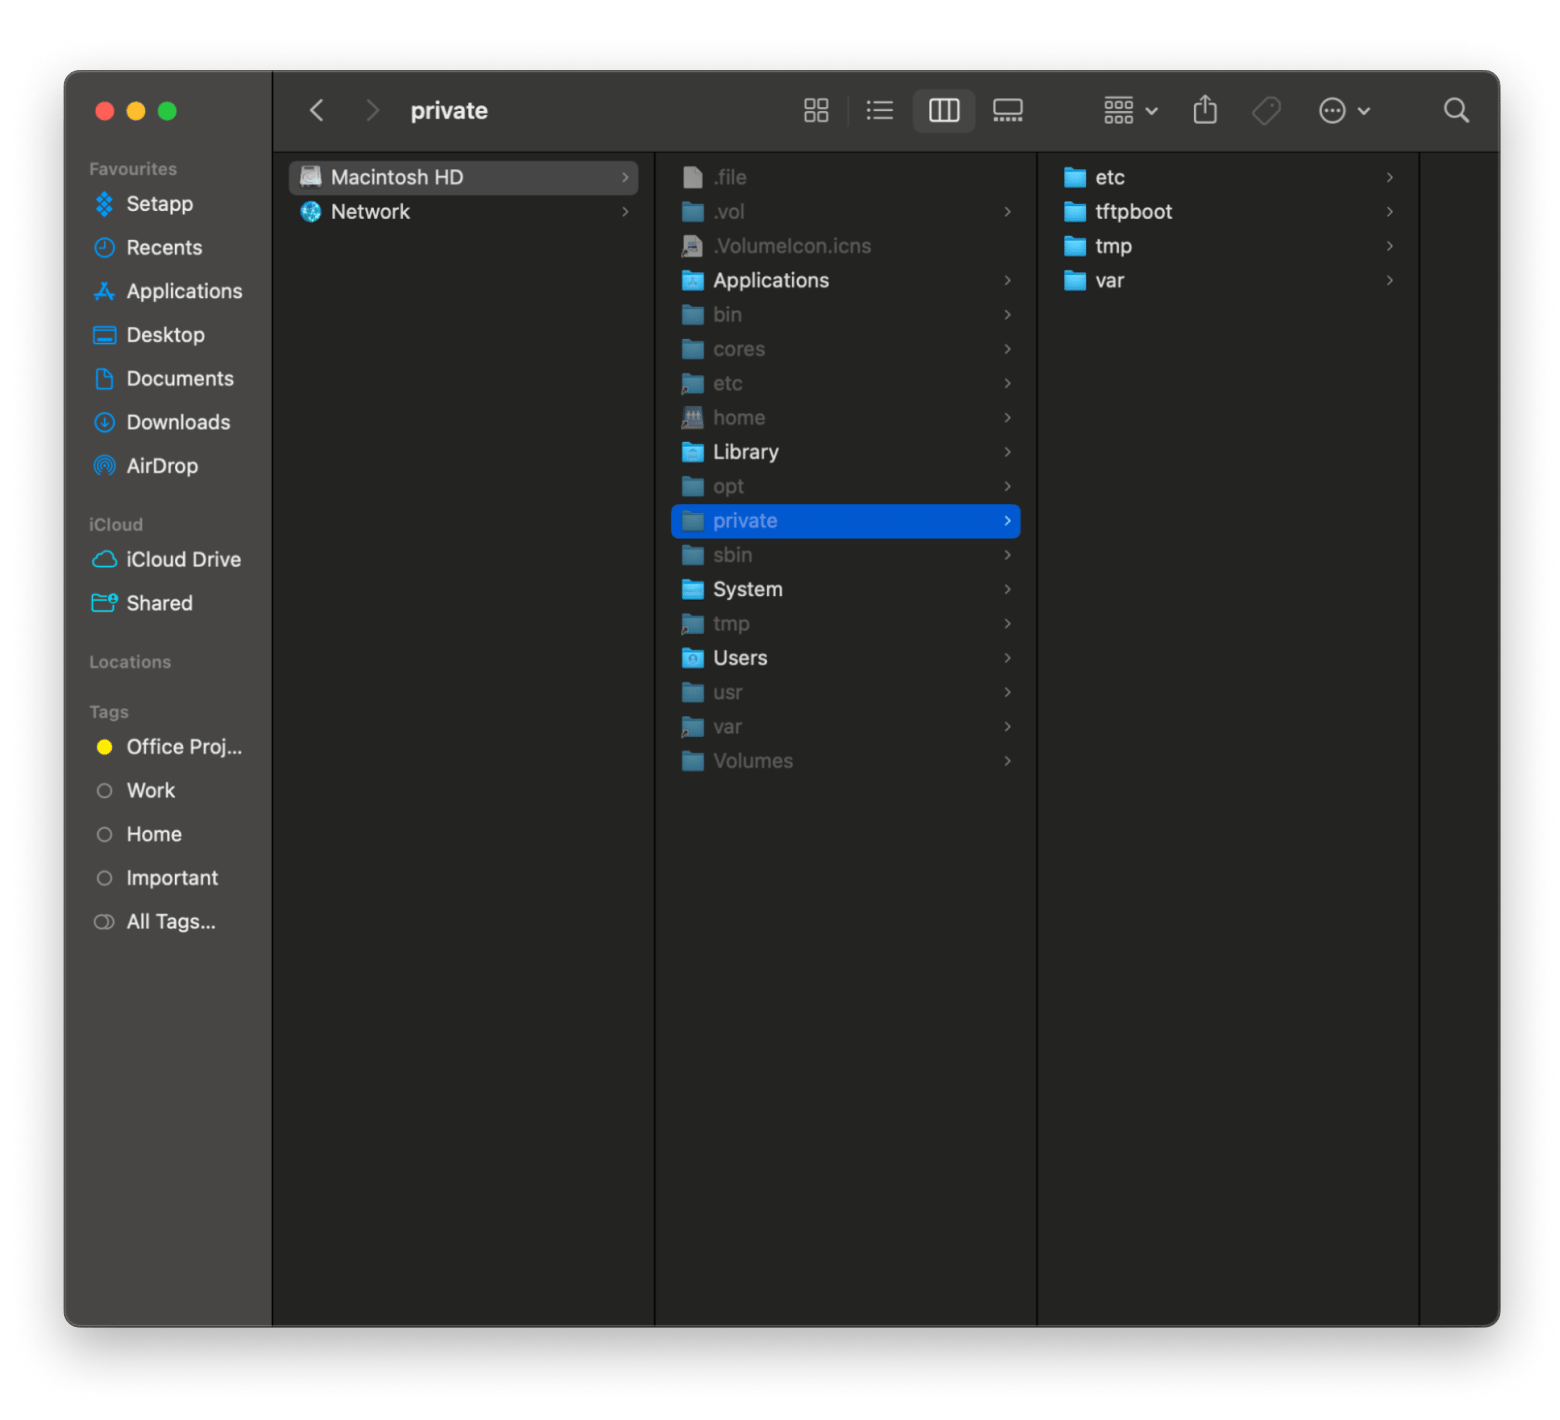
- To view hidden files, use the key combination to show hidden files on Mac: Command + Shift + Period (.). Hidden files will appear as semi-transparent icons.
Method 2: Use Terminal commands to unhide files
For those of you who are more advanced or curious about learning this method, give the Terminal app a try:
- Open Terminal window (via Spotlight or Applications > Utilities).
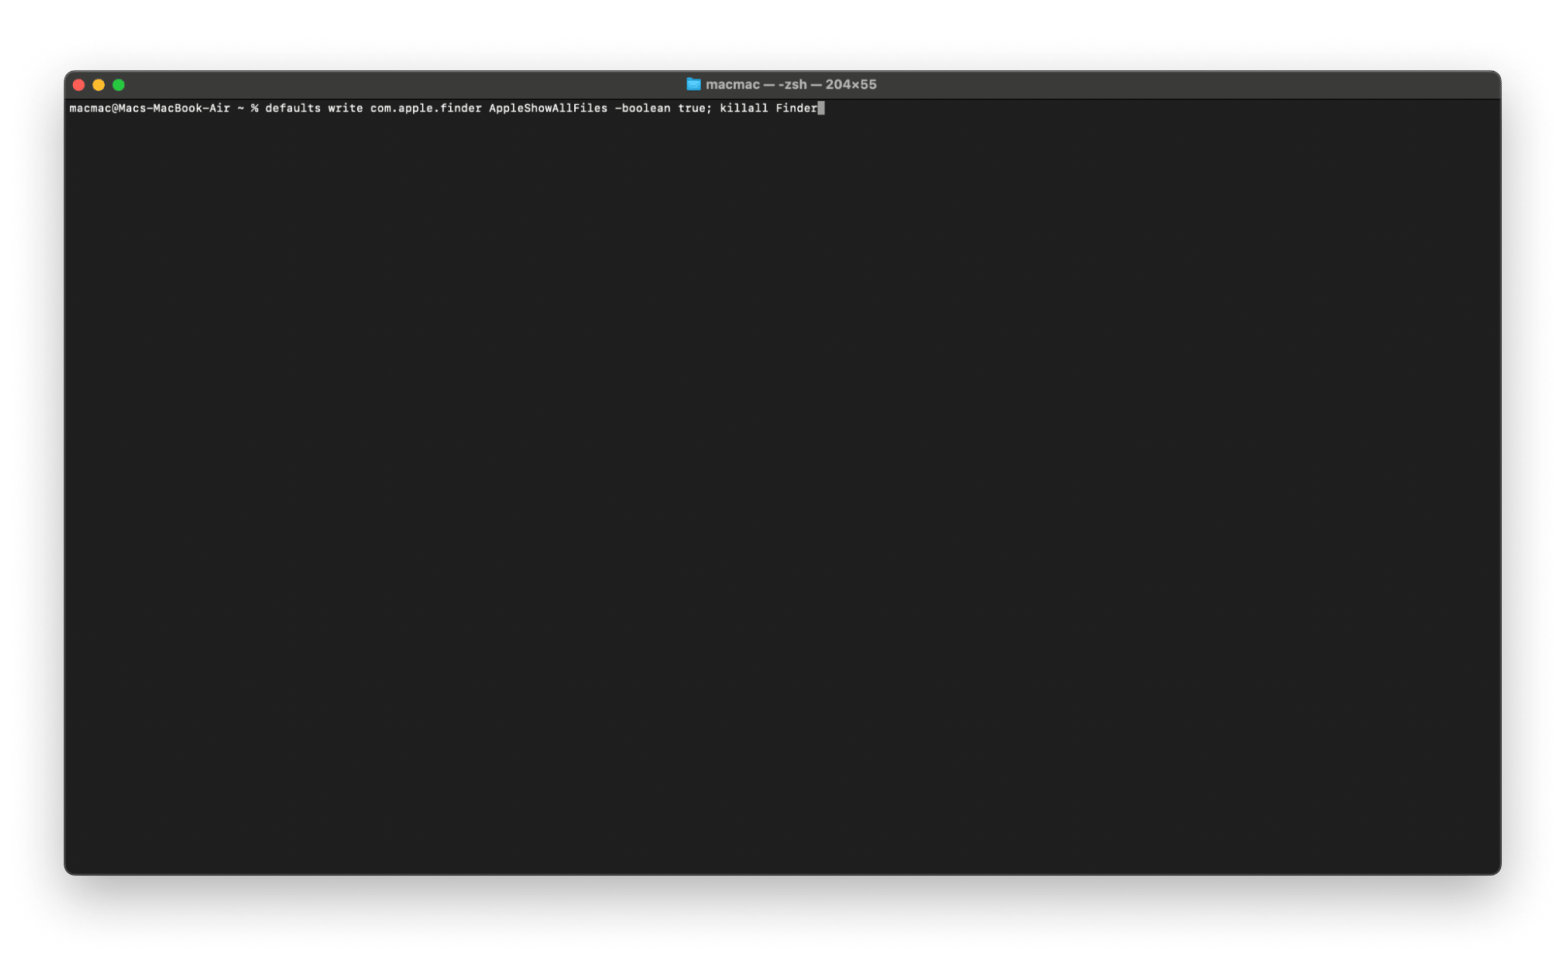
- Type the command: defaults write com.apple.finder AppleShowAllFiles -boolean true; killall Finder > Press Enter.
- To hide files again, replace true with false in the command.
In case the tool doesn't work, check out how to open Terminal on your Mac.
And of course, how to hide files on a Mac?
Need to hide files on your Mac? macOS gives you multiple ways to do it. You can use Mac’s built-in Finder tools via the powerful Terminal. I’ve listed both of the methods; take your pick according to your needs:
Hide file extension using Finder’s info menu
- Go to Finder > Right-click the file or folder.
- Choose Get Info from the context menu.
- In the Name & Extension section, select the Hide Extension box.
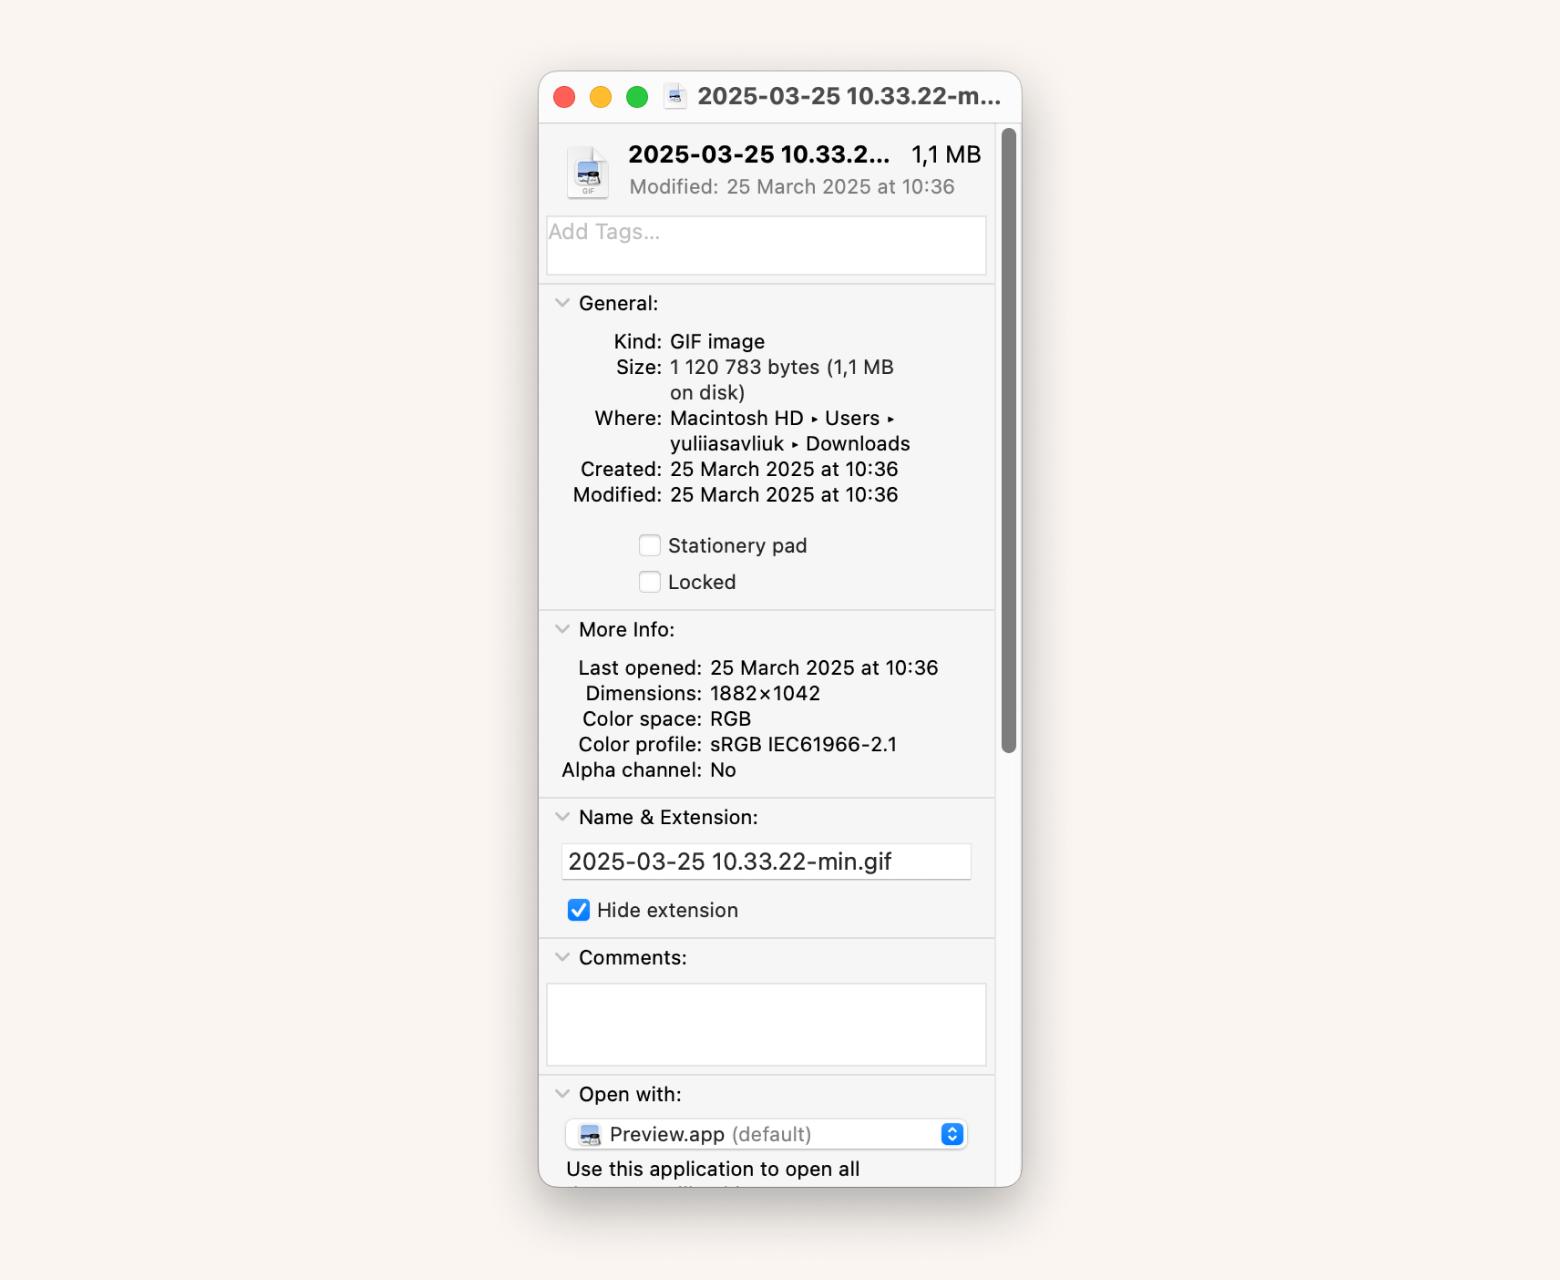
This will hide the file extension.
Find files at lightning-fast speed with HoudaSpot
HoudaSpot is a tool for cataloging and searching for files across your system. It combines powerful filtering to find the exact document you want. I used HoudahSpot to locate hidden files across the system without needing to modify settings directly. Also, if you want, you can save your searches as templates for when you look something up a lot.
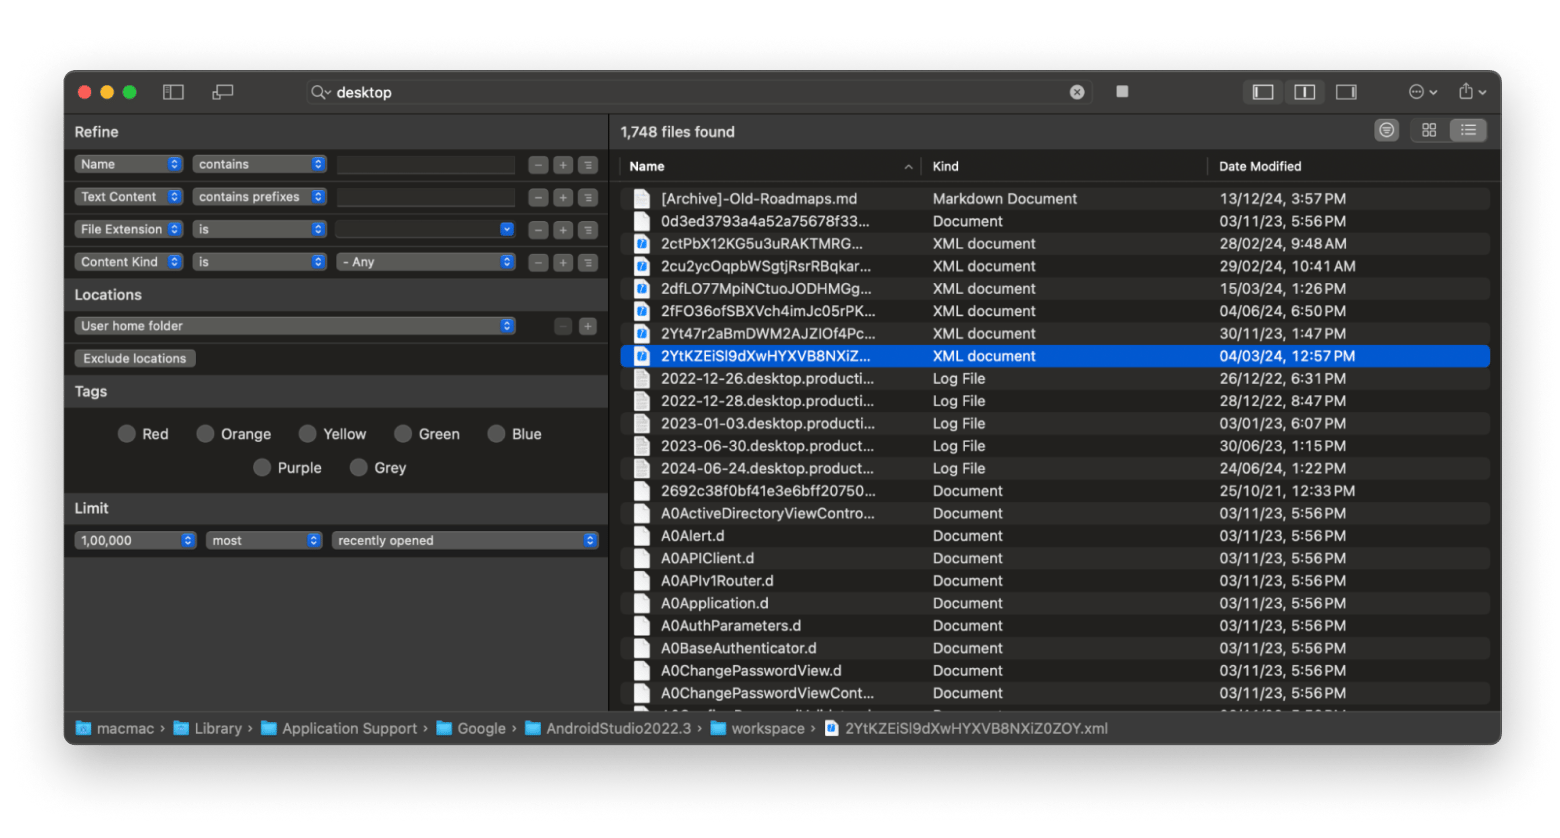
Here is how it works:
- Install and open the HoudahSpot app.
- Use the app search functionality to locate the file or folder you want to search for.
- Search by name, type, or any other criteria.
- Choose the file from the search results if it is located.
Hide files via Terminal commands
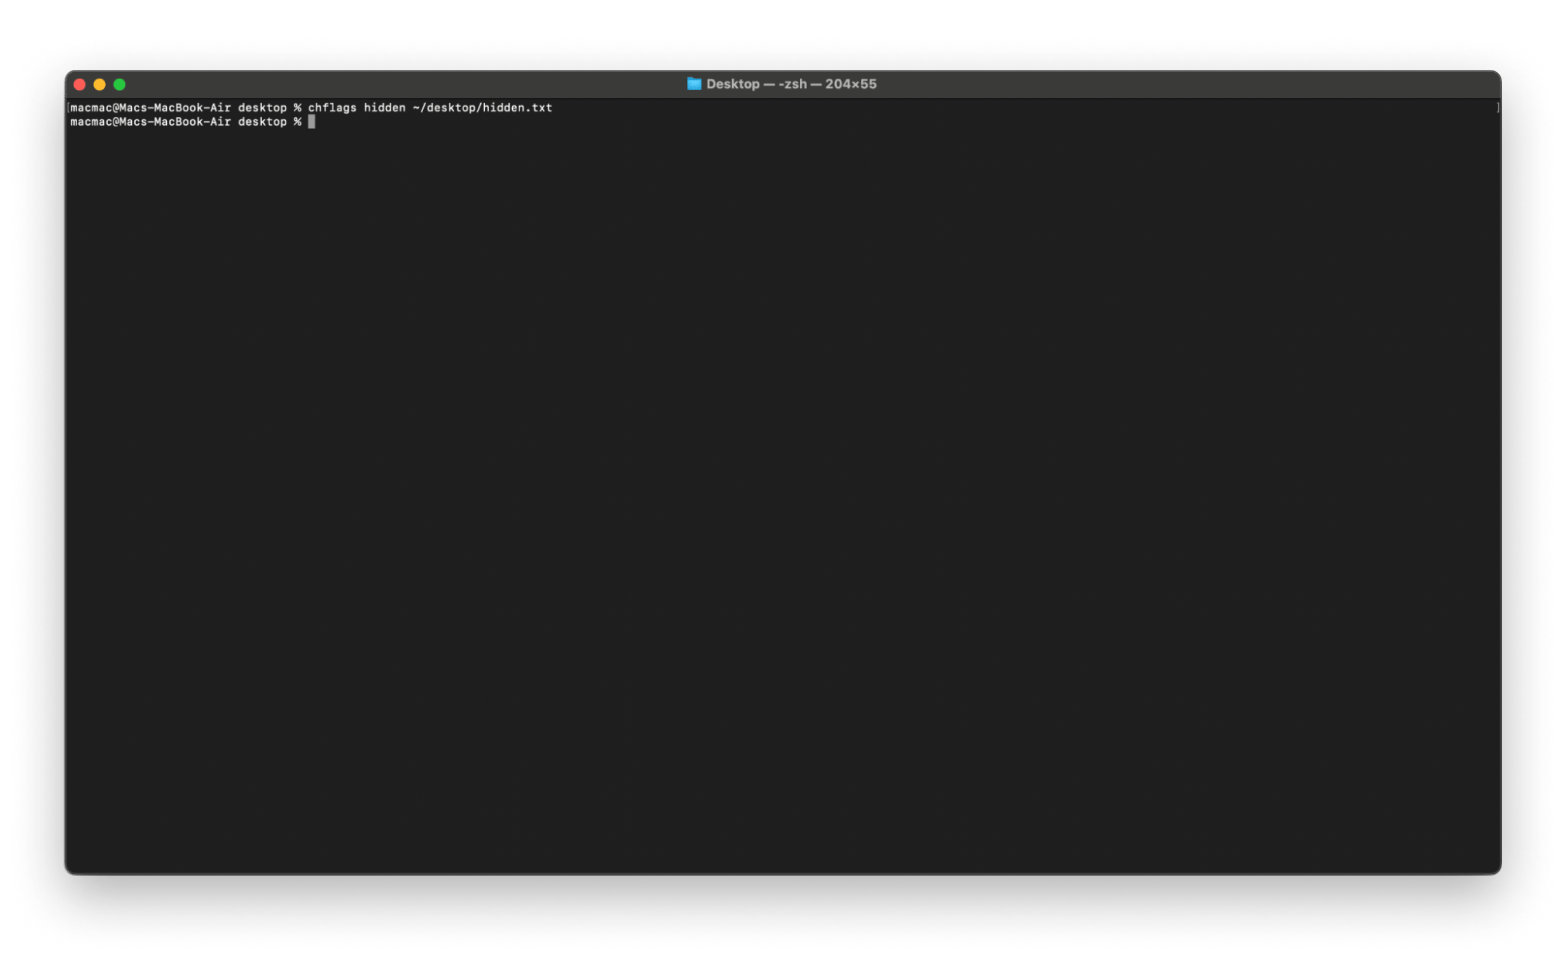
I used the chflags command to hide multiple files at once on the Terminal. Here are the steps that I followed:
- Open Terminal window.
- Type the command: chflags hidden /path/to/file > Press Return.
- Replace path/to/file with the file’s actual path you want to hide. Suppose you want to hide a file”hide.txt” located on your desktop, type: chflags hidden ~/Desktop/hide.txt.
Why are some files hidden on a Mac?
Apple hides certain files and folders for good — to keep your system running smoothly and securely. While some users choose to hide files for privacy, others are tucked away by macOS itself to prevent accidental changes or security risks.
Here are the main reasons:
- Providing access or messing with hidden files could cause chaos in your system. Think of it like a “Do Not Touch” sign for your Mac’s stability and security.
- Hackers love easy targets; exposed system files are like an open invitation. Keeping them hidden helps keep your Mac safe.
- Tech experts sometimes need access to hidden files to troubleshoot issues, but for most Mac users, it’s best to leave them alone. Deleting or messing with them could cause more harm than good!
You might also like the following: “How to move files on Mac.”
Want some extra fun facts about hidden files? Here they are:
- Hidden files on macOS usually start with a dot (.), for example,
.bash_profileor.Trash. - You can safely (more or less) explore some hidden folders, like ~/Library/Application Support/ or /usr/local/bin. macOS hides these files — such as app data, settings, caches, and logs — to keep your display uncluttered and prevent Mac users from accidentally deleting important system items.
- Being invisible doesn’t mean these files take up no space. They’re still counted in Finder’s storage graph and included in Spotlight indexing.
Show hidden files on Mac the right way
Showing, hiding, and managing hidden files on Mac can be done with several methods, from in-built tools like Finder and Terminal commands to third-party apps or tools. I ran simple commands on the Terminal to show hidden files across the Mac. Moreover, I also used an intuitive way to locate and manage hidden files without modifying system settings using tools like HoudahSpot, One Switch, ForkLift and Commander One.
All these apps are available to you on Setapp, a collection of handy and powerful apps for Mac, iPhone, and web. On Setapp, you can find every app that you need to take your Mac to the next level, solving problems even before they arise. Get a 7-day free trial and access to 250+ apps.
FAQ
How to show hidden files on Mac permanently?
To show hidden files permanently on Mac:
- Go to Finder > Applications > Utilities > Open Terminal.
- Type defaults write com.apple.Finder AppleShowAllFiles true > Press Return.
- Also, use the Command + Shift + Period (.) command to display all the hidden files on your Mac.
Moreover, the advanced search utility HoudahSpot also offers solutions for providing access to hidden files on Mac.
How to show hidden files on Mac without a shortcut?
To show hidden files on Mac without using the keyboard shortcut, open Terminal (found in Applications > Utilities) and enter the command: defaults write com.apple.finder AppleShowAllFiles -boolean true; killall Finder. Press Return to execute the command, and Finder will restart with hidden files visible. To hide files again, run the same command but replace "true" with "false". This method permanently shows hidden files until you reverse it, unlike the keyboard shortcut which only works temporarily.
How do I show the hidden library folder on my Mac?
The Library folder can be revealed using the same methods for showing hidden files. Press Command + Shift + Period (.) while in Finder to temporarily view all hidden files, including the Library folder. Alternatively, you can access it directly by opening Finder, clicking Go in the menu bar, then holding the Option key to reveal Library in the dropdown menu. For permanent access, use the Terminal command defaults write com.apple.finder AppleShowAllFiles -boolean true; killall Finder to make all hidden files, including the Library folder, visible.
How to show hidden files on an external hard drive Mac?
To show hidden files on an external hard drive Mac:
- Go to Finder > Applications > Utilities > Open Terminal.
- Type defaults write com.apple.Finder AppleShowAllFiles true > Press Return.
It will display hidden files on the external hard drive connected to your Mac.
How to not show hidden files?
To not show hidden files on Mac:
- Go to Finder > Applications > Utilities > Open Terminal.
- Type defaults write com.apple.Finder AppleShowAllFiles false > Press Return.
- Also, use the Command + Shift + Period (.) command to view hidden files.
Can hidden files be deleted?
Yes, hidden files can be deleted on your Mac. Be cautious when deleting hidden files, as some might be system-related or might be critical for macOS, making the system function correctly.


