How to strikethrough on Mac
Hitting delete is not always a great idea, particularly when you’re editing copies, ticking off to-do lists, and managing data. Often, crossing text out with a strikethrough is more helpful because it lets you view the original text before you’ve made the changes. The problem is that Mac doesn’t have a default strikethrough shortcut. So, I don’t blame you for wondering how to cross out text on Mac without going through extreme hassle.
I’ll share what I learned and how you can apply strikethrough in popular apps, including Word, Notes, Pages, and Excel.
Strikethrough text on Mac using keyboard shortcuts
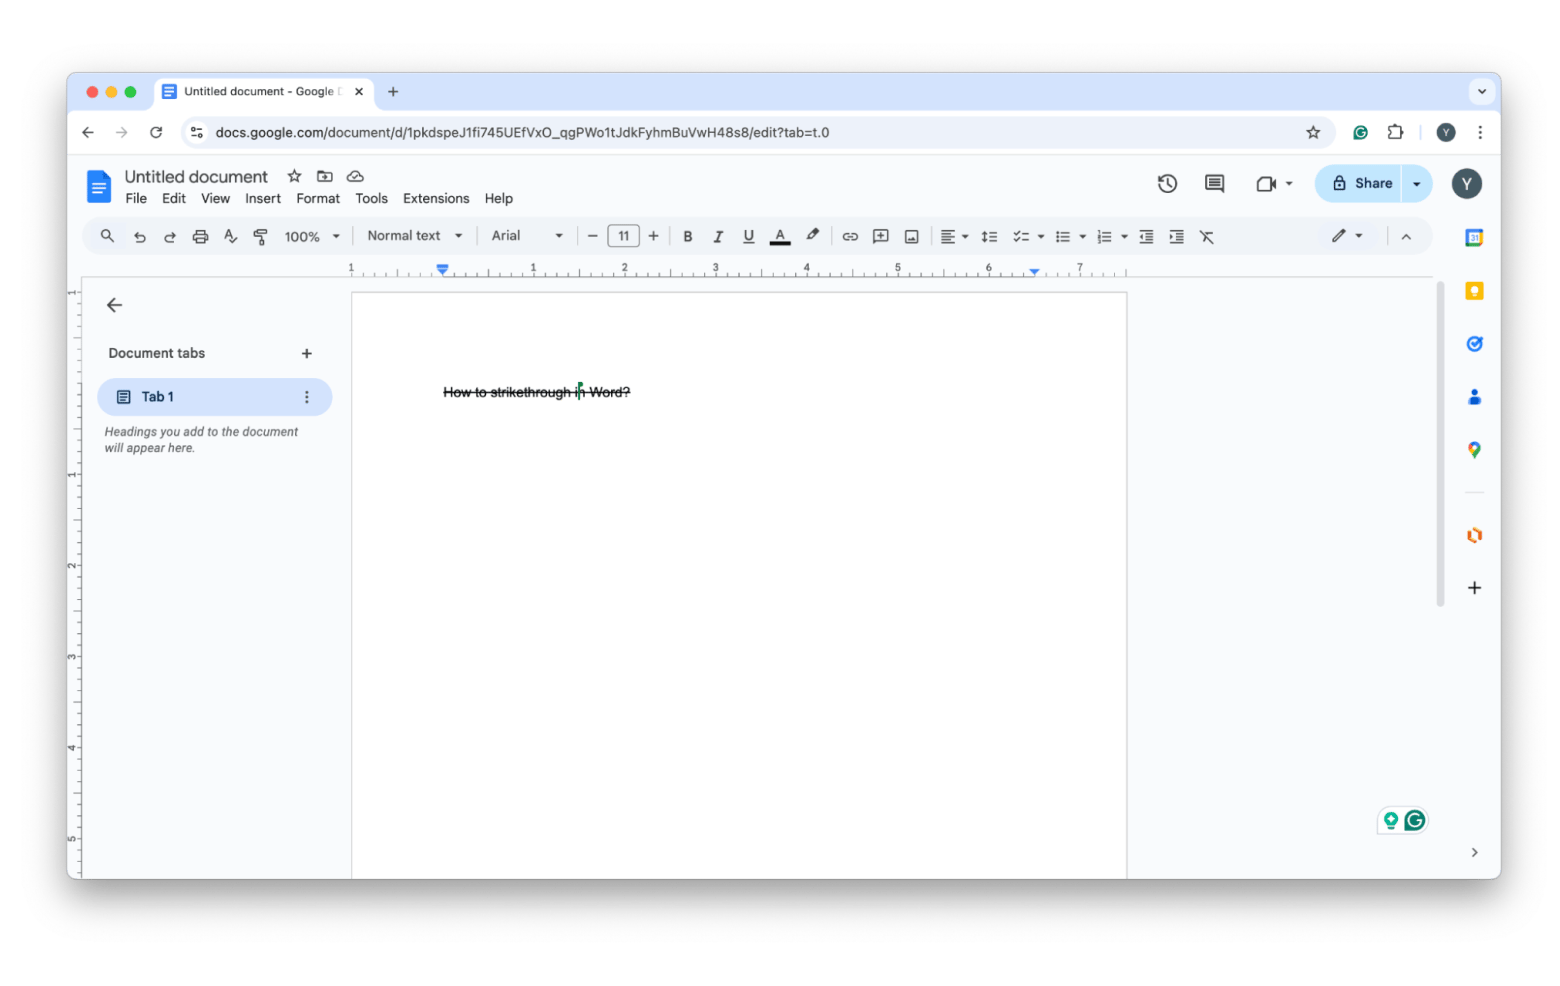
I know I mentioned that there’s no default strikethrough shortcut on Mac that you can use on all apps. That said, some macOS apps use the same shortcut to strike out text. For example, if you’re writing with Microsoft Word or Google Docs, you can cross out the text by selecting them and pressing Command + Shift + X. However, some apps might use different strikethrough methods:
- You’ll need to press Command + Shift + X to cross out texts on Microsoft Excel.
- Meanwhile, strikethough on Notes is done manually.
Below, you’ll find several macOS apps and their strikethrough shortcuts:
Apps | Strikethrough shortcut |
Word, Google Docs | Command + Shift + X |
Excel | Command + Shift + X |
Evernote | Control + Command + K |
Notes | No default set shortcut |
OneNote | Control + Command + - |
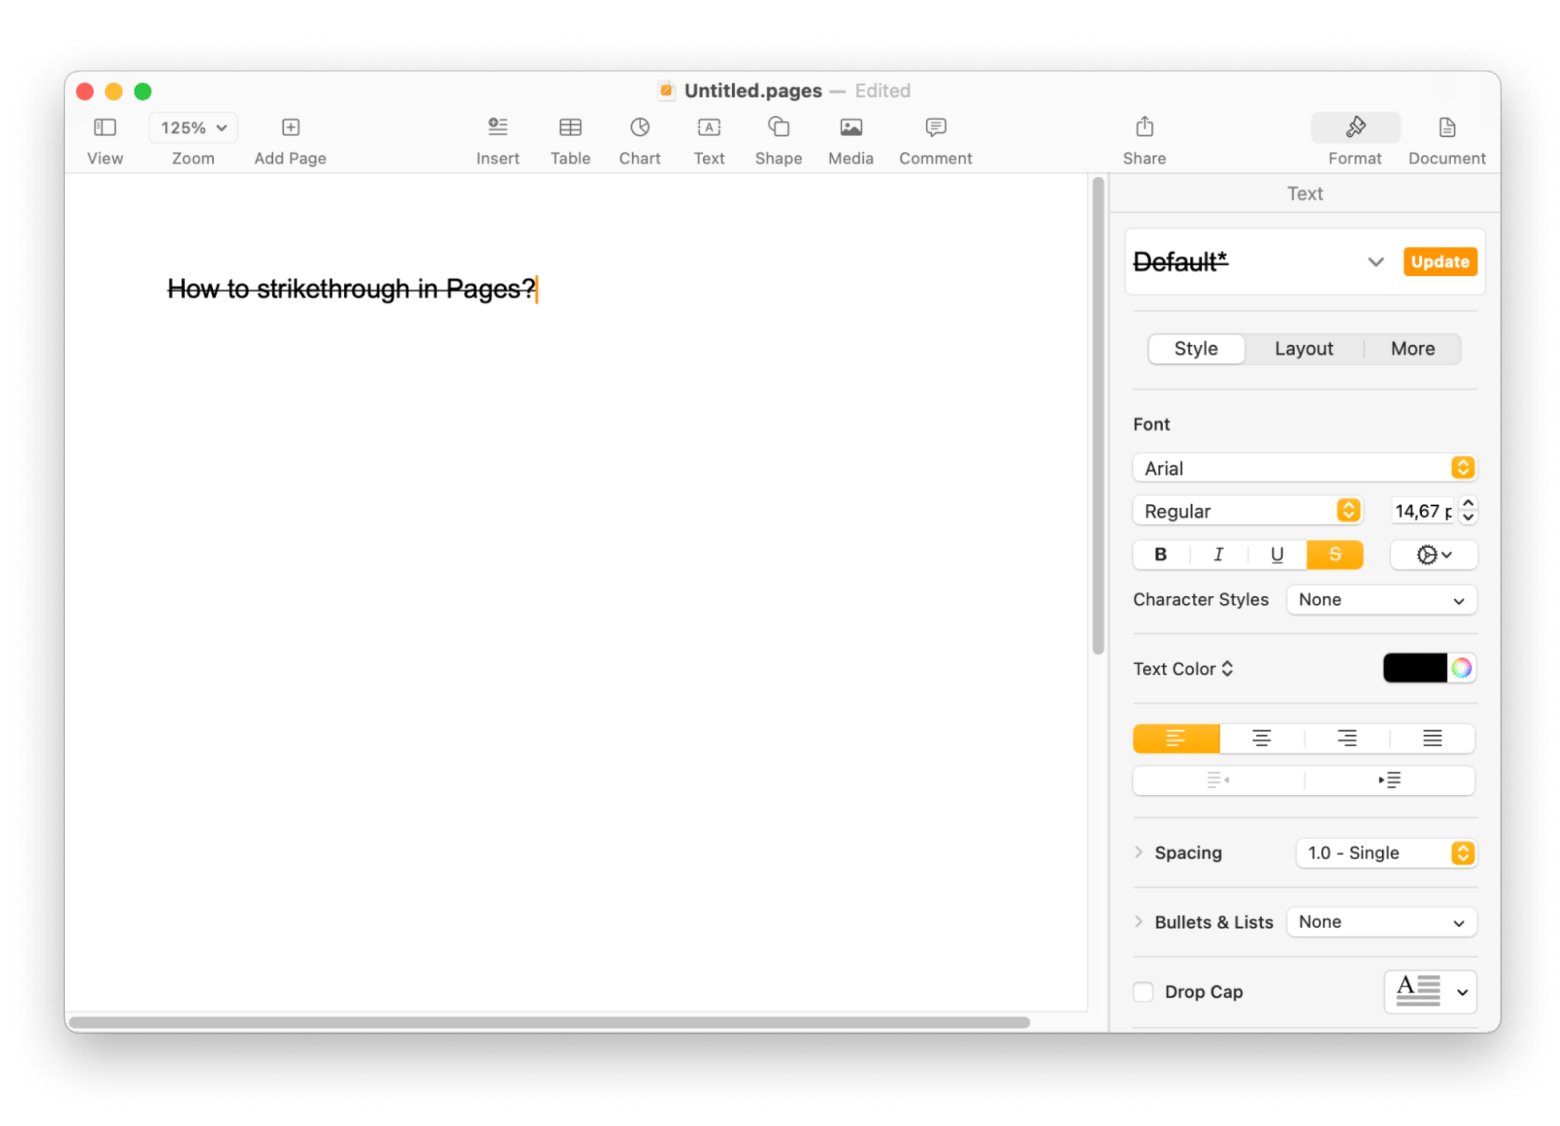
Pages | No default set shortcut |
While some apps let you use shortcuts to cross out text, others don’t. If you’re writing on Notes or Pages, you’ll have to manually apply the strikethrough effect. Understandably, trying to remember different shortcuts can be confusing. Likewise, trying to find advanced formatting options on different apps is taxing.
For that, try Ulysses. It’s a minimalist text editing tool that lets you write without worrying about formatting. Whether you’re writing a blog, eBook, or a personal idea bank, Ulysses lets you pen your thoughts and save them in one place. Then, you can use its Markup editor to structure and format your draft.
Personally, I find Ulysses helpful in drafting and publishing blogs for my websites. Not only because it lets me structure my draft with subheadings, but also because it integrates with WordPress, where I host my websites. The moment I’m done with a blog, I’ll just hit publish and hey, voila, it goes live on my website.

Creating a custom keyboard shortcut for strikethrough
Many apps don’t have a strikesthrough shortcut on a Mac, including Notes, Pages, and Text Edit. Compared to bold, italics, and underline formatting options, people use strikethrough less frequently. And if you want my honest opinions, not having a strikesthrough shortcut isn’t always a deal breaker. Plus, you can create one if you need to. Here’s how to create a customer strikethrough shortcut on your Mac:
- In the Apple menu, open System Settings.
- Scroll down and click Keyboard at the sidebar > Keyboard Shortcuts.
- Select App Shortcuts at the new window.
- Then, click the add “+” button. You will see a dialog that lets you specify the keyboard shortcut.
- Fill in the menu title with the strikethrough option you see in the app. For example, on Notes, strikethrough appears as Strikethrough on the menu. Write it down exactly.
- Then, click the empty field at Keyboard shortcut and press the shortcut you want.
- Click Done to save the strikethrough shortcut.
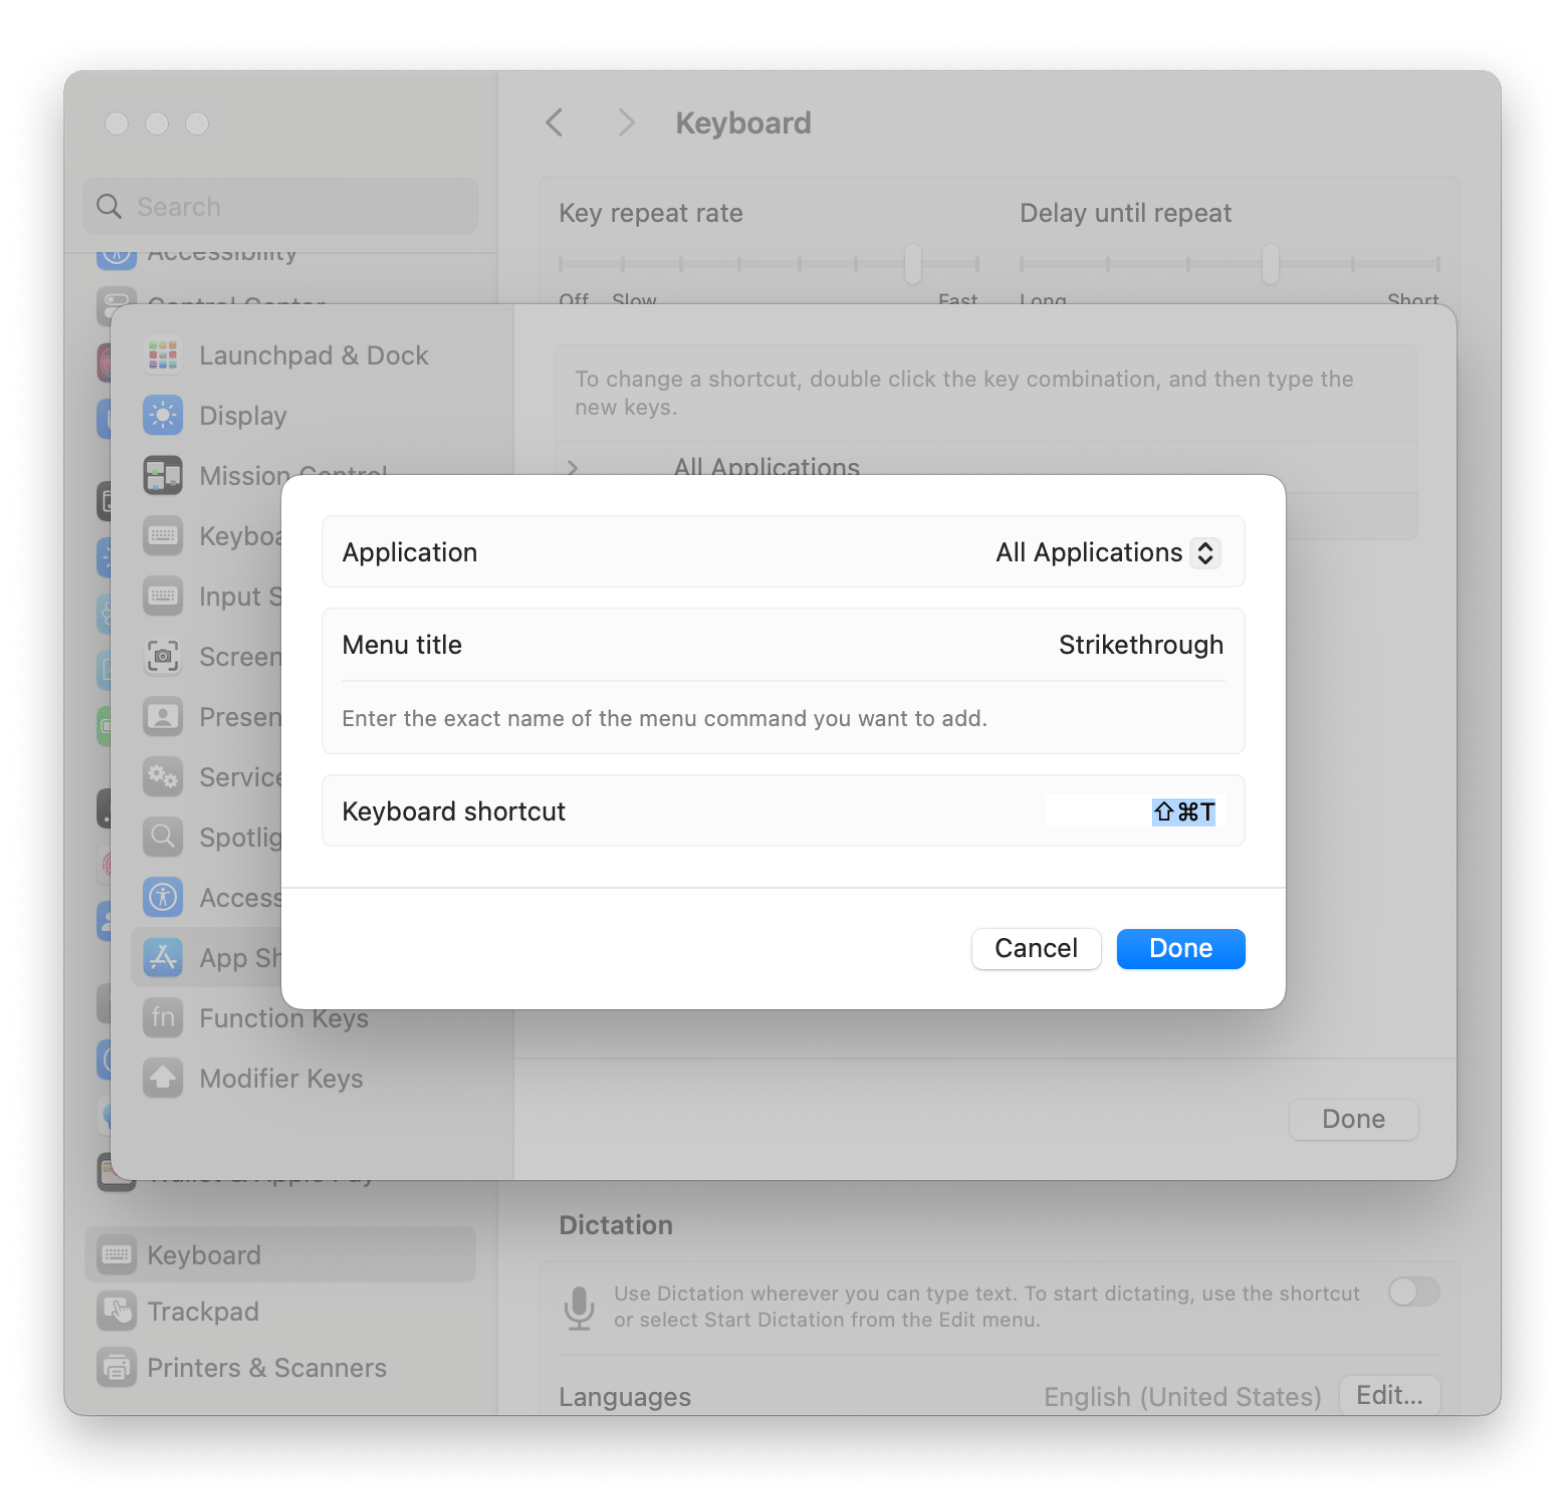
Now, you can use the custom shortcut at the app you just registered it with.
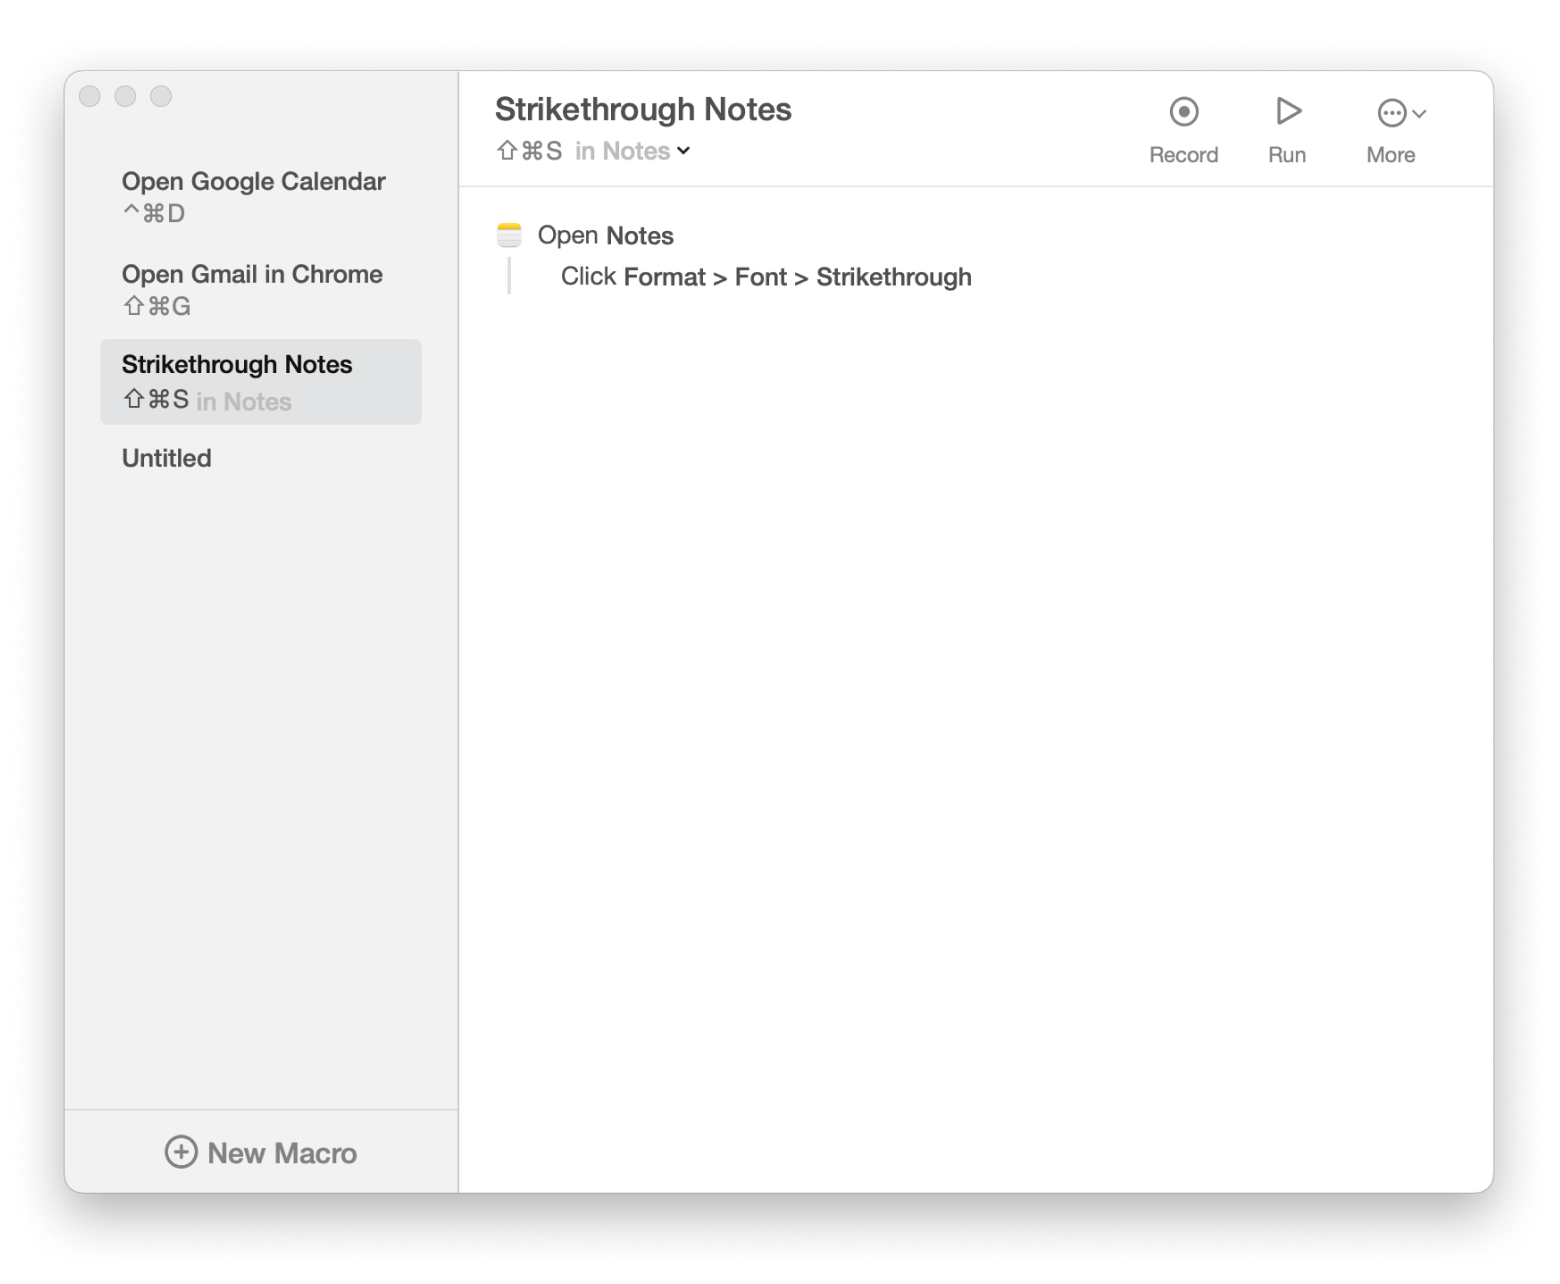
If you find creating strikethrough shortcuts via Mac’s keyboard settings a hassle, try Keysmith. Rather than clicking through several dialogs, Keysmith lets you record on-screen actions and trigger them with a hotkey. For example, if I want to create a strikethrough command for Notes with Keysmith, I’ll do these:
- Open Notes.
- Install and open Keysmith.
- Click New Macro at the bottom left.
- Give the macro a name. Then, click Set Hotkey and press the desired shortcut.
- Click Record to start recording the sequences.
- Go to Notes > Format > Font and click Strikethrough.
- Then, click Stop Recording.
- Click the drop-down menu beside the hotkey and select Notes.
Now, whenever you’re writing in Notes, you can press the hotkey to cross out the selected text.
Strikethrough on Mac in Word, Pages, and other apps
Even without a shortcut, you can still apply strikethrough as long as the app supports it. Moreover, some of us don’t fancy remembering dozens of strikethrough shortcuts, particularly if we don’t use them frequently.
Here’s how to do strikethrough on Mac for popular apps.
Word
In Microsoft Word, you can cross out text by clicking the strikethrough icon in the Home tab. Alternatively, you can also apply a strikethrough by selecting the text and pressing Command + Shift + X. As you do so, a dialog box will pop up, which lets you choose the text effect to apply. From there, click the strikethrough option.
Pages
Notes
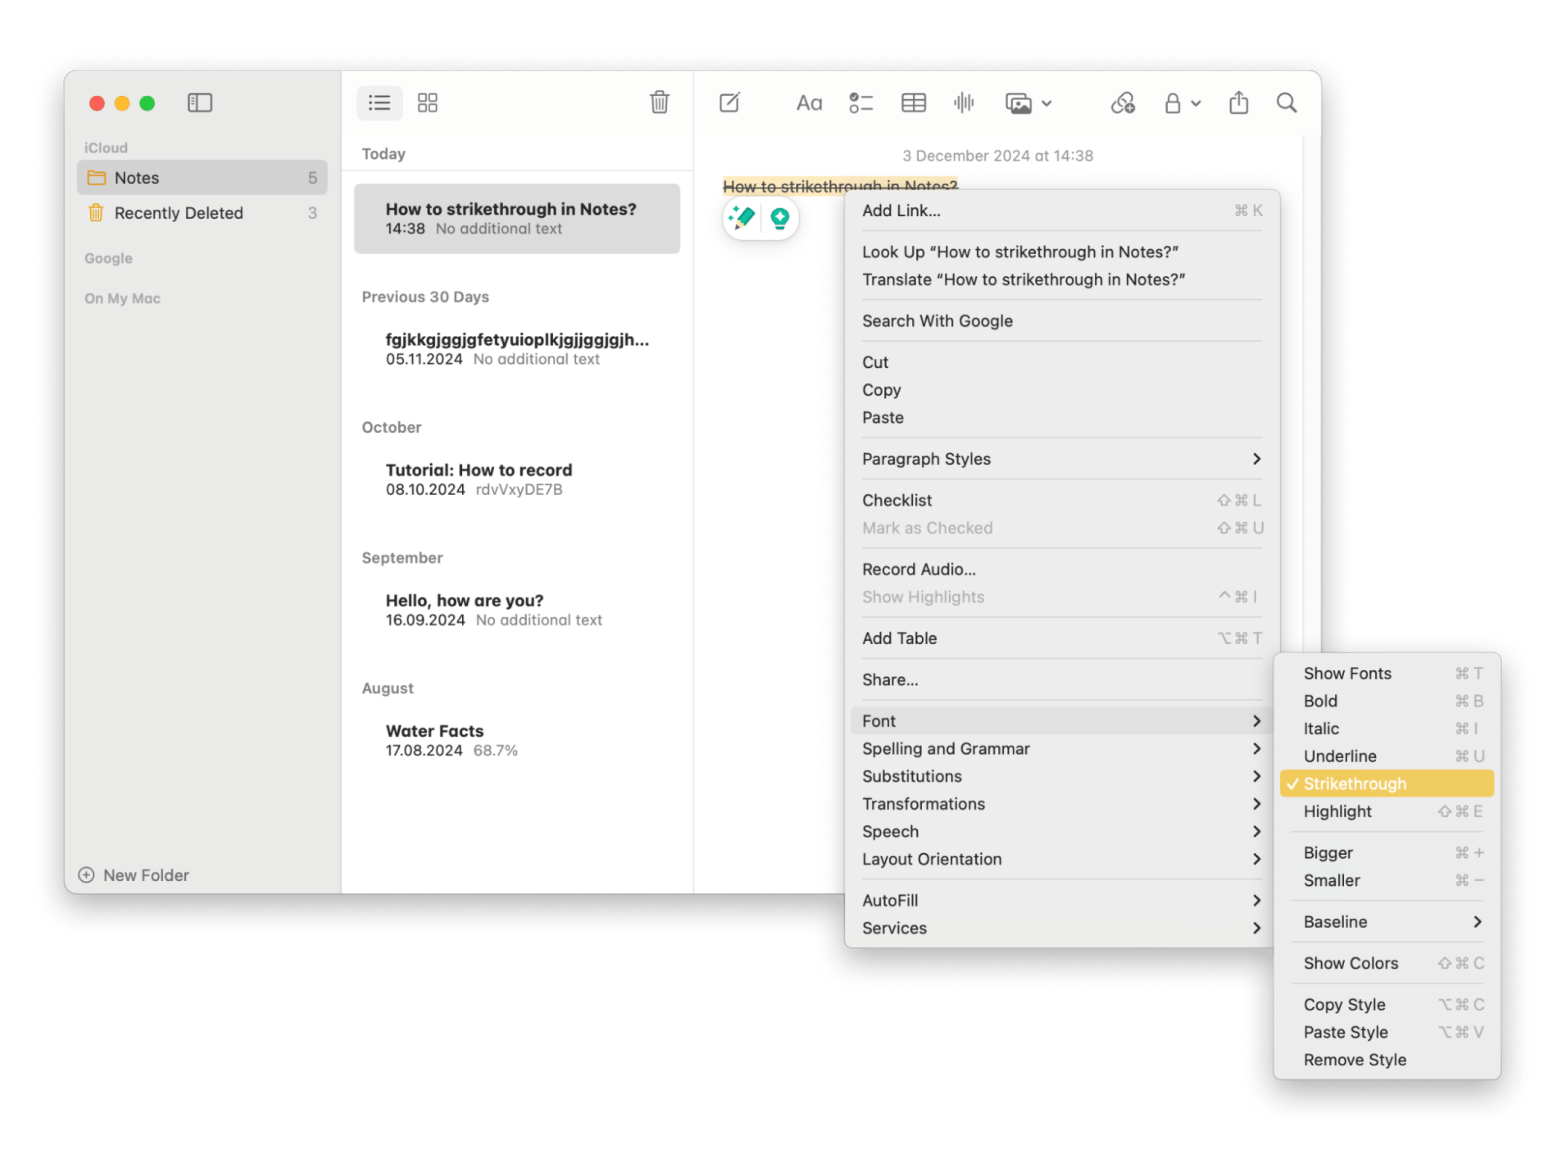
When you write on Notes, you can make a strikethrough by clicking Format > Font > Strikethrough from the top menu bar. Likewise, you can apply the same effect by doing the following:
- Select text to cross out.
- Right-click on your Mac.
- Select Font > Strikethrough.
Both ways let you cross out the text you’ve selected.
Excel
For Excel users on Mac, there are ways to strikethrough text in cells, but not as many as you’ll find in a Windows version.
On a Mac, click Command + Shift + X to strikethough the selected cell.

So far, I’ve covered a range of apps that have a strikethough feature. But not all apps support strikethrough on a Mac, and that’s perfectly fine. For example, if you need an editing tool for academic writing, MonsterWriter is worth a shot despite missing the strikethrough feature. That’s because the app saves you precious time by letting you organize your text into chapters, insert citations, and format your writing in simple steps.

Now, you know how to cross out text on Mac
Crossing out text on Mac can be tricky because not all apps share the same shortcut. Plus, some apps don’t have a strikethrough shortcut, which leaves you having to search for it in the app. Hopefully, I’ve covered enough ground so you can use strikethough on your Mac without difficulties. On that note, you might want to try the apps I mentioned to further uplift your productivity.
- Keysmith lets you record a sequence of actions on Mac and turn it into a shortcut.
- Ulysses is a text editor that goes well for writing and publishing blogs without distraction.
- MonsterWriter is designed for academic writing and is equipped with formatting options like APA citation.
Try the apps on Setapp, along with dozens of others that make writing on Mac a breeze. Test them out at zero costs for 7 days now.
FAQ
How to strikethrough on MacBook Notes?
To strikethrough text on MacBook Notes, select the text, then Control + click and choose Font > Strikethrough. Alternatively, you can automate the process using an app like Keysmith to create a custom shortcut, saving time for future use.
How do you strike through a word on a Mac?
To strike through a word on a Mac depends on the app you're using:
- Microsoft Word and Google Docs: Use the Command + Shift + X shortcut.
- Excel, Notion, Pages: Each has its own respective shortcut or menu option.
- Notes: Requires manually selecting the strikethrough action as described above.
Can you do strikethrough on Mac Stickies?
Yes, you can strikethrough text on Mac Stickies by selecting the text and navigating to Font > Strikethrough in the top menu. Alternatively, you can use the Shift + Command + T shortcut.


